Posts tagged: bash

All posts with the tag "bash"

32 posts latest post 2026-05-24
Publishing rhythm
May 2026 | 1 posts
Reading eventbridge rules from the command line can be a total drag, pipe it into visidata to make it a breeze. I just love when I start thinking through how to parse a bunch of json at the command line, maybe building out my own custom cli, then the solution is as simple as piping it into visidata. Which is a fantastic tui application that had a ton of vim-like keybindings and data features. alias awsevents = aws events list-rules | visidata -f json
A super useful tool when doing PR’s or checking your own work during a big refactor is the silver searcher. Its a super fast command line based searching tool. You just run ag "<search term>" to search for your search term. This will list out every line of every file in any directory under your current working directory that contains a match. Ahead/Behind # [1] It’s often useful to need some extra context around the change. I recently reviewed a bunch of PR’s that moved schema from save_args to the root of the dataset in all yaml configs. To ensure they all made it to the top level DataSet configuraion, and not underneath save_args. I can do a search for all the schemas, and ensure that none of them are under save_args anymore. ag "schema: " -A 12 -B 12 References: [1]: #aheadbehind
Creating a minimal config specifically for git [1] commits has made running git commit much more pleasant. It starts up Much faster, and has all of the parts of my config that I use while making a git commit. The one thing that I often use is autocomplete, for things coming from elsewhere in the tmux session. For this cmpe-tmux specifically is super helpful. The other thing that is engrained into my muscle memory is jj for escape. For that I went agead and added my settings and keymap with no noticable performance hit. Here is the config that has taken ~/.config/nvim/init-git.vim source ~/.config/nvim/settings.vim source ~/.config/nvim/keymap.vim source ~/.config/nvim/git-plugins.vim lua require'waylonwalker.cmp' ~/.config/nvim/git-plugins.vim call plug#begin('~/.local/share/nvim/plugged') " cmp Plug 'hrsh7th/nvim-cmp' Plug 'hrsh7th/cmp-nvim-lsp' Plug 'hrsh7th/cmp-buffer' Plug 'hrsh7th/cmp-path' Plug 'hrsh7th/cmp-calc' Plug 'andersevenrud/compe-tmux', { 'branch': 'cmp' } call plug#end() ~/.gitconfig [core] editor = nvim -u ~/.config/nvim/init-git.vim References: [1]: /glossary/git/
I really appreciate that in linux anything can be scripted, including setting the wallpaper. So everytime I disconnect a monitor I can just rerun my script and fix my wallpaper without digging deep into the ui and fussing through a bunch of settings. feh --bg-scale ~/.config/awesome/wallpaper/my_wallpaper.png I set my default wallpaper with feh using the command above. Leaning in on feh, we can use fzf to pick a wallpaper from a directory full of wallpapers with very few keystrokes. alias wallpaper='ls ~/.config/awesome/wallpaper | fzf --preview="feh --bg-scale ~/.config/awesome/wallpaper/{}" | xargs -I {} feh --bg-scale ~/.config/awesome/wallpaper/{}' I have mine alias’d to wallpaper so that I can quickly run it from my terminal.
Stow is an incredible way to manage your dotfiles. It works by managing symlinks between your dotfiles directory and the rest of the system. You can then make your dotfiles directory a git [1] repo and have it version controlled. In my honest opinion, when I was trying to get started the docs straight into deep detail of things I frankly don’t really care about and jumped right over how to use it. When using stow its easiest to keep your dotfiles directory (you may name it what you want) in your home directory, with application directories inside of it. Then each application directory should reflet the same diretory structure as you want in your home directory. zsh # [2] Here is a simple example with my zshrc. mkdir ~/dotfiles cd ~/dotfiles mkdir zsh mv ~/.zshrc zsh stow --simulate zsh You can pass in the –simulate if you wish, it will tell you if there are going to be any more errors or not, but it wont give much more than that. WARNING: in simulation mode so not modifying filesystem. Once your ready you can stow your zsh application. stow zsh nvim # [3] A slightly more complicated example is neovim since its diretory structure does not put configuration files directl...
tmux popups can be sized how you like based on the % width of the terminal on creation by using the flags (h, w, x, y) for height, width, and position. # normal popup tmux popup figlet "Hello" # fullscreen popup tmux popup -h 100% -w 100% figlet "Hello" # 75% centered popup tmux popup -h 100% -w 75% figlet "Hello" # 75% popup on left side tmux popup -h 100% -w 75% -x 0% figlet "Hello" Sorry, your browser doesn't support embedded videos. example running these commands
I was completely stuck for awhile. copier was not replacing my template variables. I found out that adding all these _endops fixed it. Now It will support all of these types of variable wrappers # copier.yml _templates_suffix: .jinja _envops: block_end_string: "%}" block_start_string: "{%" comment_end_string: "#}" comment_start_string: "{#" keep_trailing_newline: true variable_end_string: "}}" variable_start_string: "{{" !RTFM: Later I read the docs and realized that copier defaults to using [[ and ]] for its templates unlike other tools like cookiecutter.
I’ve been looking for a templating tool for awhile that works well with single files. My go to templating tool cookiecutter does not work for single files, it needs to put files into a directory underneath of it. template variables # [1] By default copier uses double square brackets for its variables. variables in files, directory_names, or file_names will be substituted for their value once you render them. # hello-py/hello.py.tmpl print('hello-[[name]]') note! by default copier will not inject variables into your template-strings unless you use a .tmpl suffix. Before running copier we need to tell copier what variables to ask for, we do this with a copier.yml file. # copier.yml name: default: my_name type: str help: What is your name installing copier # [2] I prefer to install cli tools that I need globally with pipx, this always gives me access to the tool without worrying about dependency conflicts, bloating my system site-packages, or managing a separate virtual environment [3] for it myself. pipx install copier running copier # [4] When running copier copy we pass in the directory of the template, and the directory that we want to render the template into. cop...
One of the most useful skills you can acquire to make you faster at almost any job that uses a computer is getting good at finding text in your current working diretory and identifying the files that its in. I often use the silver searcher ag or ripgrep rg to find files in large directories quickly. Both have a sane set of defaults that ignore hidden and gitignored files, but getting them to list only the filenames and not the matched was not trivial to me. I’ve searched throught he help/man pages many times looking for these flags and they always seem to evade me. ag # [1] Passing the flag -l to ag will get it to list only the filepath, and not the match. Here I gave it a --md as well to only return markdown filetypes. ag supports a number of filetypes in a very similar way. ag nvim --md -l rg # [2] Giving rg the --files-with-matches flag will yield you a similar set of results, giving only the filepaths themselves and not the match statement. Also passing in the -g "*.md" will similarly yield only results from markdown files. rg --files-with-matches you -g "*.md" References: [1]: #ag [2]: #rg
pyenv provides an easy way to install almost any version of python from a large list of distributions. I have simply been using the version of python from the os package manager for awhile, but recently I bumped my home system to Ubuntu 21.10 impish, and it is only 3.9+ while the libraries I needed were only compatable with up to 3.8. I needed to install an older version of python on ubuntu I’ve been wanting to check out pyenv for awhile now, but without a burning need to do so. installing # [1] Based on the Readme it looked like I needed to install using homebrew,so this is what I did, but I later realized that there is a pyenv-installer repo that may have saved me this need. Installing Homebrew on Linux [2] List out install candidates # [3] You can list all of the available versions to install with pyenv install --list. It does reccomend updating pyenv if you suspect that it is missing one. At the time of writing this comes out to 532 different versions! pyenv install --list Let’s install the latest 3.8 patch # [4] Installing a version is as easy as pyenv install 3.8.12. This will install it, but not make it active anywhere. pyenv install 3.8.12 let’s use python 3.8...
Installing brew on linux proved quite easy and got pyenv running for me within 4 commands. I had never used homebrew before, honestly I thought it was a mac only thing for years. Today I wanted to try out pyenv, and the reccommended way to install was using homebrew. I am not yet sure if I want either in my normal workflow, so for now I am just going to pop open a new terminal and install homebrew and see how it goes. /bin/bash -c "$(curl -fsSL https://raw.githubusercontent.com/Homebrew/install/HEAD/install.sh)" echo 'eval "$(/home/linuxbrew/.linuxbrew/bin/brew shellenv)"' >> /home/walkers/.zprofile eval "$(/home/linuxbrew/.linuxbrew/bin/brew shellenv)" That was it, now homebrew is working. Starting a new shell and running the command to install pyenv worked. brew install pyenv Links # [1] - homebrew [2] References: [1]: #links [2]: https://brew.sh/
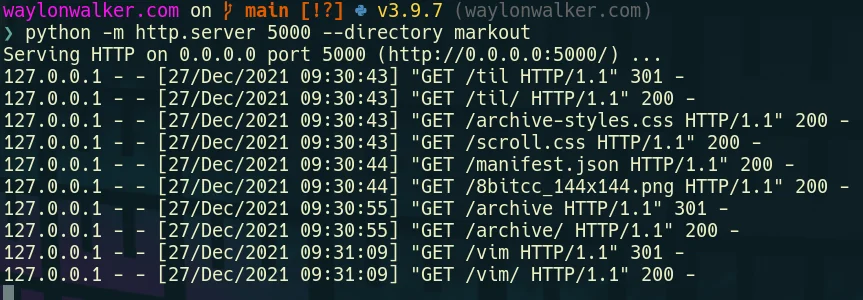
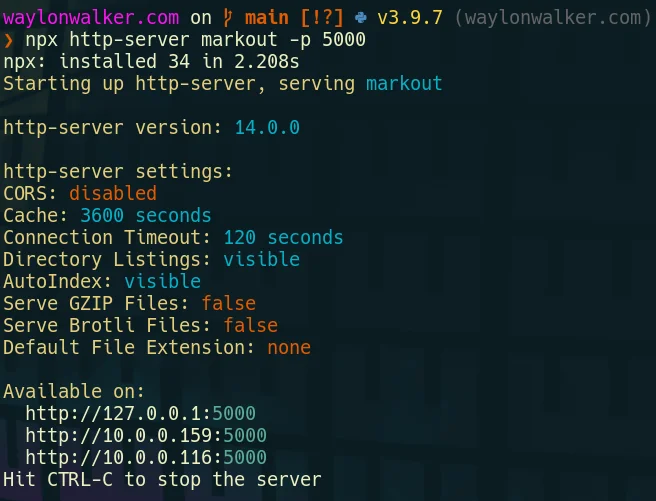
When I first moved to vim from and ide like vscode or sublime text one of my very first issues was trying to preview my website at localhost:8000. There had always just been a button there to do it in all of my other editors, not vim. There are not many buttons for anything in vim. While there is probably a plugin that can run a webserver for me in vim, it’s not necessary, we just need the command line we are already in. running a separate process # [1] You will need a way to run another process alongside vim, here are a couple ideas to get you going that are not the focus here.style - use background jobs - c-z to send a job to the background - fg to bring it back - use a second terminal - use a second tab - use tmux and run it in a separate split/window - use an embeded nvim terminal running a development webserver from the command line # [2] Python already exists on most linux systems by default, and most are now on python3. If you are on windows typing python will take you directly to the windows store to install it, or you can also use wsl. # python3 python -m http.server # running on port 5000 python -m http.server --directory markout 5000 # for the low chance ...

Code Review from the comfort of vim | Diffurcate

I often review Pull requests from the browser as it just makes it so easy to see the diffs and navigate through them, but there comes a time when the diffs get really big and hard to follow. That’s when its time to bring in the comforts of vim. https://youtu.be/5NKaZFavM0E Plugins needed # [1] This all stems from the great plugin by AndrewRadev [2]. It breaks a down into a project. So rather than poping into a pager from git [3] diff, you can pipe to diffurcate and it will setup a project in a tmp directory for you and you can browse this project just like any other except it’s just a diff. Plug 'AndrewRadev/diffurcate.vim' My aliases # [4] First to quickly checkout PR’s from azure devops I have setup an alias to fuzzy select a pr and let the az command do the checkout. alias azcheckout='az repos pr checkout --id $(az repos pr list --output table | tail -n -2 | fzf | cut -d " " -f1)' Next I have a few aliases setup for checking diffs. The first one checks what is staged vs the...

Open files FAST from zsh | or bash if thats your thing

https://youtu.be/PQw_is7rQSw I am often in a set of tmux splits flying back and forth, accidentally close my editor, so when I come back to that split and hit my keybinds to edit files I enter them into zsh rather than into nvim like I intended. Today I am going to sand off that rough edge and get as similar behavior to nvim as I can with a couple of aliases. Make sure you check out the YouTube video to see all of my improvements. what’s an alias # [1] If you have never heard of an alias before it’s essentially a shortcut to a given command. You can pass additional flags to the underlying command and they will get passed in. Most of the time they are just shorter versions of commands that you run often or even like in this case a common muscle memory typo that occurs for you. My new alias’s for fuzzy editing files from zsh # [2] Here are the new aliases that I came up with to smooth out my workflow. These give me a similar feel to how these keys work in neovim but from zsh. #...

30 days dotfile ricing

https://youtu.be/Jq1Y48F_rOU I am challenging myself to 30 days of dotfile ricing. I have been on linux desktop for a few months now and have a pretty good workflow going, I have the coarse edits done to my workflow, but it has some rough edges that need sanded down. It’s time to squash some of those little annoyances that still exist in my setup. This is primarily going to be focused on productivity, but may have a few things to just look better. This will comprise heavily of aliases, zsh, and nvim config. Follow the YouTube channel [1] or the rss feed [2] to stay up to date. References: [1]: https://youtube.com/waylonwalker [2]: https://waylonwalker/rss/

Update Alternatives in Linux

update-alternatives --query python update-alternatives: error: no alternatives for python sudo update-alternatives --install /usr/local/bin/python python `which python3.8` 2 # update-alternatives: using /usr/bin/python3.8 to provide /usr/local/bin/python (python) in auto mode sudo update-alternatives --install /usr/local/bin/python python `which python2.7` 5 # update-alternatives: using /usr/bin/python2.7 to provide /usr/local/bin/python (python) in auto mode update-alternatives --query python # Name: python # Link: /usr/local/bin/python # Status: auto # Best: /usr/bin/python2.7 # Value: /usr/bin/python2.7 # # Alternative: /usr/bin/python2.7 # Priority: 5 # # Alternative: /usr/bin/python3.8 # Priority: 2 sudo update-alternatives --install /usr/local/bin/python python `which python3.8` 20 # update-alternatives: using /usr/bin/python3.8 to provide /usr/local/bin/python (python) in auto mode

JUT | Read Notebooks in the Terminal

Trying to read a .ipynb file without starting a jupyter server? jut has you covered. https://youtu.be/t8AvImnwor0 watch the video version of this post on YouTube [1] install # [2] jut is packaged and available on pypi so installing is as easy as pip installing it. pip install jut [3] ! This is my first time including snippets of the video in the article like this, let me know what you think! examples # [4] jut https://cantera.org/examples/jupyter/thermo/flame_temperature.ipynb jut https://cantera.org/examples/jupyter/thermo/flame_temperature.ipynb --head 3 jut https://cantera.org/examples/jupyter/thermo/flame_temperature.ipynb --tail 2 [5] what are all the commands available for jut? # [6] Take a look at the help of the jut cli to explore all the options that it offers. jut --help There is some good information on the projects readme [7] as well. [8] without installing # [9] using pipx Don’t want jut cluttering up your venv, or want to save yourself from making a ...

Trim unused git branches

Trim branches no longer on origin # [1] git remote prune origin --dry-run git remote prune origin Find branches already merged # [2] git checkout main # list remote branches that have already been merged into main git branch -r --merged # list local branches that have already been merged into main git branch --merged References: [1]: #trim-branches-no-longer-on-origin [2]: #find-branches-already-merged

Create a Virtual File Gallery with Symlinks

Creating a directory that is a union of several directories can be achieved with a few symlinks at the command line. Creating a Virtual File Gallery # [1] Here is how I am creating a virtual directory of all my projects that is a combination of both work and not-work projects. I am creating symlinks for every directory under ~/work and ~/git. rm -rf ~/projects mkdir ~/projects ln -sf ~/work/* ~/projects ln -sf ~/git/* ~/projects ⚠ Notice that first I am recreating the directory each time. This will ensure that any project that is deleted from their actual directory is removed from the virtual gallery. Updating the gallery # [2] Since links are always kept up to date without any extra work, all the data is still in the same place it started. But as new directories are added to any project directory they will not be automatically added to the virtual gallery. - cron - bashrc/zshrc If you’re concerned about system resources, you can add it to a cron job to run at a regular sch...

How to Install micromamba on linux (from the comamnd line only)

I really like using conda (miniconda) as my python virtual environment [1] manager of choice. It’s simple and it includes its own python interpreter using the version that I specify at creation. Mamba # [2] from their readme [3] --- Mamba is a reimplementation of the conda package manager in C++. - parallel downloading of repository data and package files using multi-threading - libsolv for much faster dependency solving, a state of the art library used in the RPM package manager of Red Hat, Fedora and OpenSUSE - core parts of mamba are implemented in C++ for maximum efficiency At the same time, mamba utilize the same command line parser, package installation and deinstallation code and transaction verification routines as conda to stay as compatible as possible. --- Installing Micromamba # [4] Similar to miniconda micromamba can be installed with a few lines of bash wget -qO- https://micromamba.snakepit.net/api/micromamba/linux-64/latest | tar -xvj bin/micromamba ./bin/...