Posts tagged: python

All posts with the tag "python"

310 posts latest post 2026-05-06
Publishing rhythm
Jan 2026 | 3 posts

Pycon 2023

Keynote Speaker - James Powell # [1] I don’t want to be an expert python developer. https://www.youtube.com/watch?v=iKzOBWOHGFE [2] usage of keyword only arguments to prevent pain for users of libraries # [3] # Version 1 def newton(f, x0, fprime, maxiter=100): ... # Version 2 def newton(f, x0, fprime, tol=1e-6, maxiter=100): ... # 🔴 Broke in Version 2 newton(f, x0, fprime, 100) In an alternate timeline the maintainer of newton could have chose to use keyword only arguments to prevent pain for users of libraries, or poor api design due to fear of changing api on users. # Version 1 def newton(f, x0, fprime, *, maxiter=100): ... # Version 2 def newton(f, x0, fprime, *, tol=1e-6, maxiter=100): ... # 🟢 user forced to use keyword only arguments never notices change newton(f, x0, fprime, maxiter=100) References: [1]: #keynote-speaker---james-powell [2]: https://dropper.waylonwalker.com/api/file/8275d2a5-72da-470c-a71d-86019415b303.webp [3]: #usage-of-keyword-only-arguments-...
1 min read
global Field
global BaseModel
from pydantic import BaseModel
from pydantic import Field

Pydantic is a Python library for serializing data into models that can be validated with a deep set of built in valitators or your own custom validators, and deserialize back to JSON or dictionary.

Installation #

To install pydantic you will first need python and pip. Once you have pip installed you can install pydantic with pip.

pip install pydantic

Always install in a virtual environment

Creating a Pydantic model #

To get started with pydantic you will first need to create a Pydantic model. This is a python class that inherits from pydantic.BaseModel.

from pydantic import BaseModel
from pydantic import Field
from typing import Optional

class Person(BaseModel):
    name: str = Field(...)
    age: int

parsing an object #

person = Person(name="John Doe", age=30)
print(person)
name='John Doe' age=30

data serialization #

Pydantic has some very robust serialization methods that will automatically coherse your data into the type specified by the type-hint in the model if it can.

person = Person(name=12, age="30")
print(f'name: {person.name}, type: {type(person.name)}')
print(f'age: {person.age}, type: {type(person.age)}')
1 validation error for Person
name
  Input should be a valid string [type=string_type, input_value=12, input_type=int]
    For further information visit https://errors.pydantic.dev/2.3/v/string_type
person = Person(name="John Doe", age='thirty')
print(f'name: {person.name}, type: {type(person.name)}')
print(f'age: {person.age}, type: {type(person.age)}')
1 validation error for Person
age
  Input should be a valid integer, unable to parse string as an integer [type=int_parsing, input_value='thirty', input_type=str]
    For further information visit https://errors.pydantic.dev/2.3/v/int_parsing

loading from json #

serializing to json #

validation #

Playing Star Wars Text Adventure with a 10 yr old

article.blog-post { max-width: 1200px; } The following is a playthrough of Star Wars Text Adventure with a 10 yr old.The following is a playthrough of StarThe following is a playthrough of Star ❯ sw-adventure game run [05/15/23 18:47:42] INFO marvin.marvin: Using OpenAI model "gpt-3.5-turbo" logging.py:50 18:47:42.699 | INFO | marvin.marvin - [default on default]Using OpenAI model "gpt-3.5-turbo"[/] [18:47:42] Starting game game.py:30 generating your character ╭─ Zorin Kreez's Mission Card ─────────────────────────────────────────────────────────────────────────────────────╮ │ Zorin Kreez │ Zorin Kreez was born on Tatooine and grew up in a small farming community. He │ │ health │ 100 │ always dreamed of adventure and excitement. As soon as he was old enough, he │ │ imperial credits │ 5000 │ joined the Imperial Navy and quickly rose through the ranks. He is now a skilled │ │ fuel level │ 100 │ pilot and loyal member of the Empire. │ │ │ │ │ Imperial │ A nimble and deadly starfight...
1 min read

Pydantic and singledispatch

I was reading about pydantic-singledispatch [1] from Giddeon’s blog and found it very intersting. I’m getting ready to implement pydantic on my static site generator markata [2], and I think there are so uses for this idea, so I want to try it out. The Idea # [3] Let’s set up some pydantic settings. We will need separate Models for each environment that we want to support for this to work. The whole idea is to use functools.singledispatch and type hints to provide unique execution for each environment. We might want something like a path_prefix in prod for environments like GithubPages that deploy to /<name-of-repo> while keeping the root at / in dev. Settings Model # [4] Here is our model for our settings. We will create a CommonSettings model that will be used by all environments. We will also create a DevSettings model that will be used in dev and ProdSettings that will be used in prod. We will use env as the discriminator so pydantic knows which model to use. from typing im...
2 min read

I really like having global cli command installed with pipx. Since textual 0.2.x (the css release) is out I want to be able to pop into textual devtools easily from anywhere.

“rusting tape machine robot, cinematic lighting, detailed, cell shaded, 4 k, warm colours, concept art, by wlop, ilya kuvshinov, artgerm, krenz cushart, greg rutkowski, pixiv. cinematic dramatic atmosphere, sharp focus, volumetric lighting, cinematic lighting, studio quality” -s50 -W832 -H416 -C12.0 -Ak_lms -S2404332231

Pipx Install #

You can pipx install textual.

pipx install textual

But if you try to run any textual cli commands you will run into a ModuleNotFoundError, because you need to install the optional dev dependencies.

Traceback (most recent call last):
  File "/home/u_walkews/.local/bin/textual", line 5, in <module>
    from textual.cli.cli import run
  File "/home/u_walkews/.local/pipx/venvs/textual/lib/python3.10/site-packages/textual/cli/cli.py", line 4, in <module>
    import click
ModuleNotFoundError: No module named 'click'

Pipx Inject #

In order to install optional dependencies with pipx you need to first install the library, then inject in the optional dependencies using the square bracket syntax.

pipx install textual
pipx inject textual 'textual[dev]'

I am working through the textual tutorial, and I want to put it in a proper cli that I can pip install and run the command without textual run --dev app.py. This is a fine pattern, but I also want this to work when I don’t have a file to run.

“An astronaut working in a lab, hacking on a computer terminal, htop is running, shallow depth of field beakers, test tubes, volumetric lighting, pink lighting, by victo ngai, killian eng vibrant colours, dynamic lighting, digital art” -s50 -W768 -H448 -C7.5 -Ak_lms -S3617210203

pyproject.toml entrypoints #

I set up a new project running hatch new, and added the following entrypoint, giving me a tutorial cli command to run.

...

[project.scripts]
tutorial = 'textual_tutorial.tui:tui'

https://waylonwalker.com/hatch-new-cli/

setup.py entrypoints #

If you are using setup.py, you can set up entrypoints in the setup command.

from setuptools import setup

setup(
    ...
    entry_points={
        "console_scripts": ["tutorial = textual_tutorial.tui:tui"],
    },
    ...
)

https://waylonwalker.com/minimal-python-package/

tui.py #

adding features

Now to get devtools through a cli without running through textual run --dev. I pulled open the textual cli source code, and this is what it does at the time of writing.

Note: I used sys.argv as a way to implement a --dev quickly tutorial. For a real project, I’d setup argparse, click, or typer. typer is my go to these days, unless I am really trying to limit dependencies, then the standard library argparse might be what I go with.

def tui():

    from textual.features import parse_features
    import os
    import sys

    dev = "--dev" in sys.argv # this works, but putting it behind argparse, click, or typer would be much better

    features = set(parse_features(os.environ.get("TEXTUAL", "")))
    if dev:
        features.add("debug")
        features.add("devtools")

    os.environ["TEXTUAL"] = ",".join(sorted(features))
    app = StopwatchApp()
    app.run()


if __name__ == "__main__":
    tui()

Other Flags??? #

If you look at the source, there is one other flag for headless mode.

FEATURES: Final = {"devtools", "debug", "headless"}

Run it #

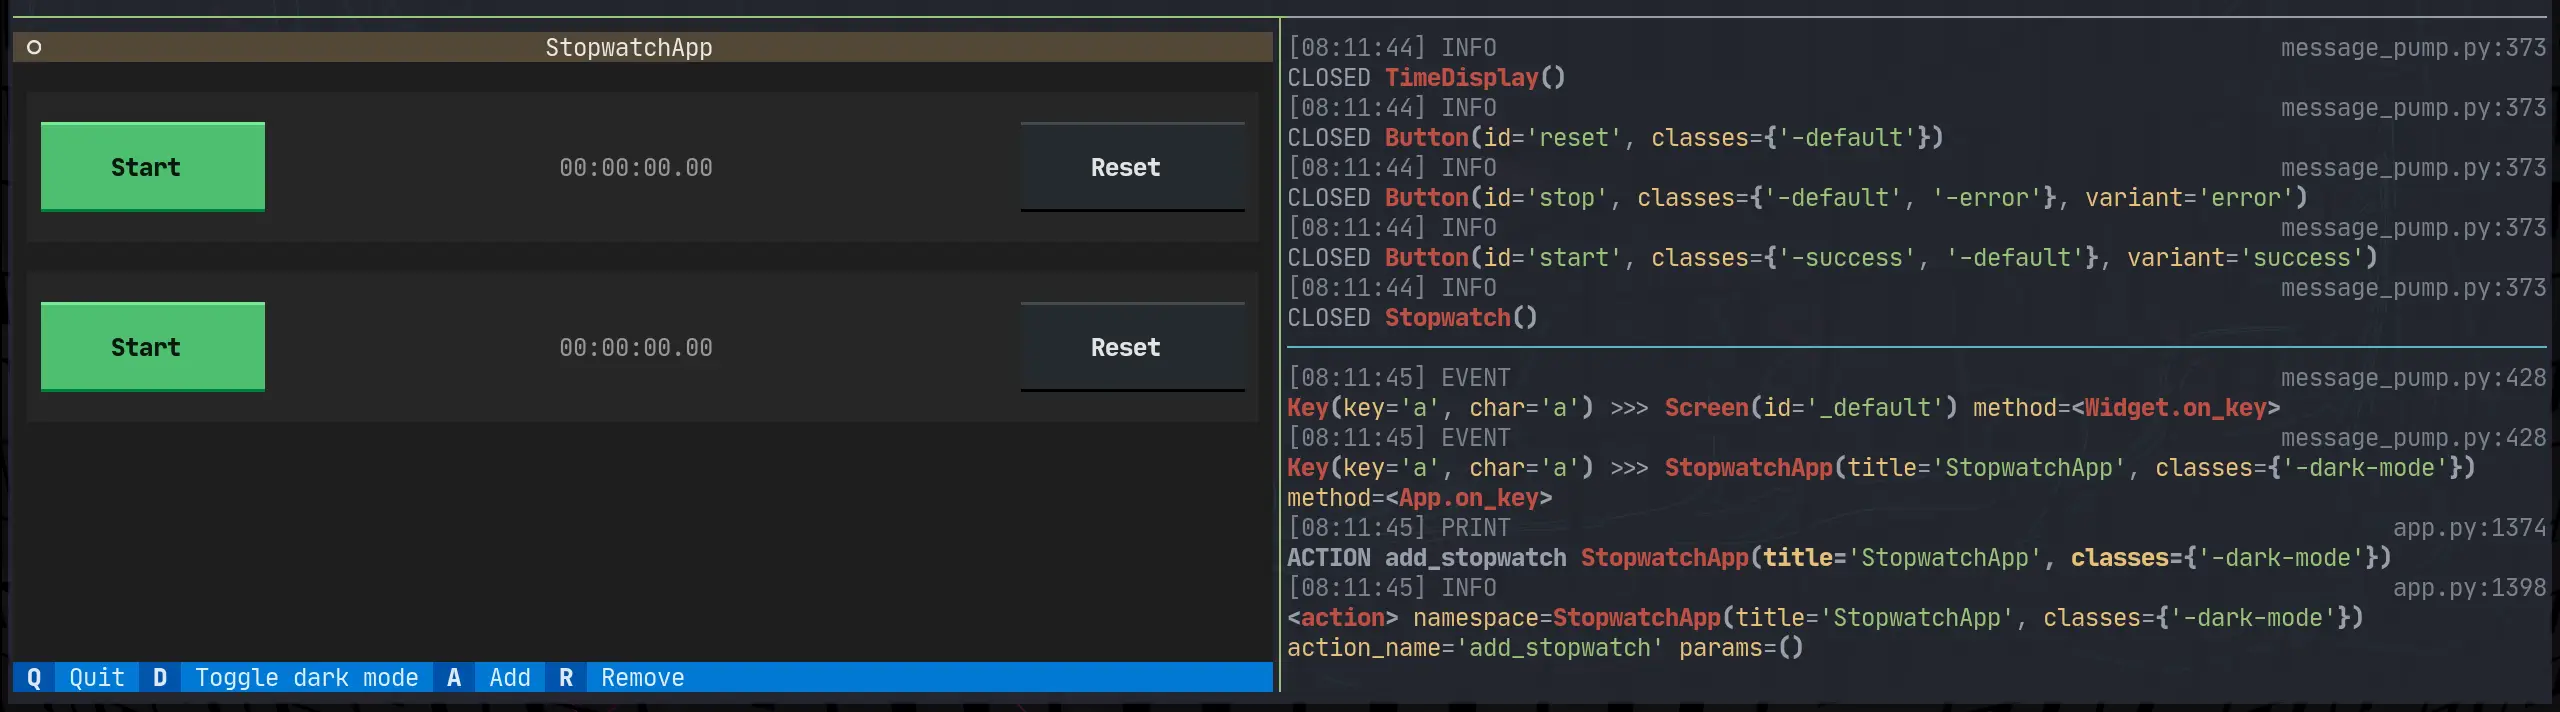
Here it is running with tutorial --dev on the left, and textual console on the right.

textual-tutorial-devtools.webp

Markata now allows you to create jinja extensions that will be loaded right in with nothing more than a pip install.

From the Changelog #

The entry for 0.5.0.dev2 from markata’s changelog

  • Created entrypoint hook allowing for users to extend marka with jinja exensions #60 0.5.0.dev2

“cybernetic soldier working on a rusting tape machine robot, cinematic lighting, detailed, cell shaded, 4 k, warm colours, concept art, by wlop, ilya kuvshinov, artgerm, krenz cushart, greg rutkowski, pixiv. cinematic dramatic atmosphere, sharp focus, volumetric lighting, cinematic lighting, studio quality” -s50 -W832 -H416 -C12.0 -Ak_lms -S1808537114

markata-gh #

The first example that you can use right now is markata-gh. It will render repos by GitHub topic and user using the gh cli, which is available in github actions!

Get it with a pip install

pip install markata-gh

Use it with some jinja in your markdown.

## Markata plugins

It uses the logged in uer by default.

{% gh_repo_list_topic "markata" %}

You can more explicitly grab your username, and a topic.
{% gh_repo_list_topic "waylonwalker", "personal-website" %}

How is this achieved #

The jinja extension details are for another post, but this is how markata-gh exposes itslef as a jinja extension.

class GhRepoListTopic(Extension):
    tags = {"gh_repo_list_topic"}

    def __init__(self, environment):
        super().__init__(environment)

    def parse(self, parser):
        line_number = next(parser.stream).lineno
        try:
            args = parser.parse_tuple().items
        except AttributeError:
            raise AttributeError(
                "Invalid Syntax gh_repo_list_topic expects <username>, or <username>,<topic> both must have the comma"
            )

        return nodes.CallBlock(self.call_method("run", args), [], [], "").set_lineno(
            line_number
        )

    def run(self, username=None, topic=None, caller=None):
        "get's markdown to inject into post"
        return repo_md(username=username, topic=topic)
“cybernetic soldier working on a rusting tape machine robot, cinematic lighting, detailed, cell shaded, 4 k, warm colours, concept art, by wlop, ilya kuvshinov, artgerm, krenz cushart, greg rutkowski, pixiv. cinematic dramatic atmosphere, sharp focus, volumetric lighting, cinematic lighting, studio quality” -s50 -W832 -H416 -C12.0 -Ak_lms -S2487720618

Entrypoints #

Then markata-gh exposes itself as an extension through entrypoints.

Creating entrypoints in pyproject.toml #

If your project is using pyproject.toml for packaging you can setup an entrypoint as follows.

[project.entry-points."markata.jinja_md"]
markta_gh = "markata_gh.repo_list:GhRepoListTopic"

Creating entrypoints in setup.py #

If your project is using setup.py for packaging you can setup an entrypoint as follows.

setup(
    ...
    entry_points={
        "markata.jinja_md": ["markta_gh" = "markata_gh.repo_list:GhRepoListTopic"]
    },
    ...
)
“cybernetic soldier working on a rusting tape machine robot, cinematic lighting, detailed, cell shaded, 4 k, warm colours, concept art, by wlop, ilya kuvshinov, artgerm, krenz cushart, greg rutkowski, pixiv. cinematic dramatic atmosphere, sharp focus, volumetric lighting, cinematic lighting, studio quality” -s50 -W832 -H416 -C12.0 -Ak_lms -S655826089
npx create-react-app todoreact
import React,{useState,useEffect} from 'react';
import './App.css';

function App() {
  const [data,setData]=useState([]);
  const [newName,setNewName]=useState([]);
  const getData=()=>{
    fetch('/api'
    ,{
      headers : {
        'Content-Type': 'application/json',
        'Accept': 'application/json'
       }
    }
    )
      .then(function(response){
        return response.json();
      })
      .then(function(myJson) {
        setData(myJson)
      });
  }
  useEffect(()=>{
    getData()
  },[])

  const addItem= async () => {
    const rawResponse = await fetch('/api/add/', {
      method: 'POST',
      headers: {
        'Accept': 'application/json',
        'Content-Type': 'application/json'
      },

    body: JSON.stringify({"name": newName})
    });
    const content = await rawResponse;

    console.log(content);
    getData()
  }


  return (
    <div className="App">
     {
       data && data.length>0 && data.map((item)=><p>{item.id}{item.priority}{item.name}<button>raise priority</button></p>)
     }
    <input type='text' value={newName} onChange={(e) => (setNewName(e.target.value))} />
    <button onClick={addItem} >add item</button>
    </div>
  );
}

export default App;

In my adventure to learn django, I want to be able to setup REST api’s to feed into dynamic front end sites. Potentially sites running react under the hood.

cell shaded full body shot of a cybernetic blue soldier with glowing eyes working ina lab, llustration, post grunge, pink glowing volumetric lighting, engulfed in smoke and fog, concept art by josan gonzales and wlop, by james jean, Victo ngai, David Rubín, Mike Mignola, Laurie Greasley, highly detailed, sharp focus,alien,Trending on Artstation, HQ, deviantart, art by artgem" -s50 -W832 -H416 -C18.0 -Ak_lms -S4270306418

Install #

To get started lets open up a todo app that I created with django-admin startproject todo.

pip install djangorestframework

Install APP #

Now we need to declare rest_framwork as an INSTALLED_APP.

INSTALLED_APPS = [
    ...
    "rest_framework",
    ...
]

create the api app #

Next I will create all the files that I need to get the api running.

mkdir api
touch api/__init__.py api/serializers.py api/urls.py api/views.py
cell shaded full body shot of a cybernetic blue soldier with glowing eyes working ina lab, llustration, post grunge, pink glowing volumetric lighting, concept art by josan gonzales and wlop, by james jean, Victo ngai, David Rubín, Mike Mignola, Laurie Greasley, highly detailed, sharp focus,alien,Trending on Artstation, HQ, deviantart, art by artgem" -s50 -W832 -H416 -C7.5 -Ak_lms -S3862698977

base/models.py #

I already have the following model from last time I was playing with django. It will suffice as it is not the focus of what I am learning for now.

Note the name of the model class is singular, this is becuase django will automatically pluralize it in places like the admin panel, and you would end up with Itemss.

from django.db import models

# Create your models here.

class Item(models.Model):
    name = models.CharField(max_length=200)
    created = models.DateTimeField(auto_now_add=True)

    def __str__(self):
        return f"{self.priority} {self.name}"

Next I will make some dummy data to be able to return. I popped open ipython and made a few records.

from base.models import Item

Item.objects.create(name='first')
Item.objects.create(name='second')
Item.objects.create(name='third')

api/serializers.py #

Next we need to set up a serializer to seriaze and de-serialize data between our model and json. You can specify each field individually or all of them by passing in __all__.

from rest_framework import serializers

from base.models import Item


class ItemSerializer(serializers.ModelSerializer):
    class Meta:
        model = Item
        fields = '__all__'

api/views.py #

“cell shaded full body shot of a shiny golden cybernetic soldier with glowing eyes looking through binoculars, llustration, post grunge, pink glowing volumetric lighting, engulfed in smoke and fog, concept art by josan gonzales and wlop, by james jean, Victo ngai, David Rubín, Mike Mignola, Laurie Greasley, highly detailed, sharp focus,alien,Trending on Artstation, HQ, deviantart, art by artgem” -s50 -W832 -H416 -C18.0 -Ak_lms -S2111691103 cell shaded full body shot of a shiny golden cybernetic soldier with glowing eyes looking through binoculars, llustration, post grunge, pink glowing volumetric lighting, engulfed in smoke and fog, concept art by josan gonzales and wlop, by james jean, Victo ngai, David Rubín, Mike Mignola, Laurie Greasley, highly detailed, sharp focus,alien,Trending on Artstation, HQ, deviantart, art by artgem command

Now we need a view leveraging the djangorestframework. The serializer we just created will be used to serialize all of the rows into a list of objects that Response can handle.

Note: to return a collection of model objects we need to set many to True

from rest_framework.decorators import api_view
from rest_framework.response import Response

from base.models import Item

from .serializers import ItemSerializer


@api_view(["GET"])
def get_data(request):
    items = Item.objects.all()
    serializer = ItemSerializer(items, many=True)
    return Response(serializer.data)

@api_view(['POST'])
def add_item(request):
    serializer = ItemSerializer(data = request.data)
    if serializer.is_valid():
        serializer.save()
    return Response()

api/urls.py #

“cell shaded full body shot of a shiny golden cybernetic soldier with glowing eyes looking at a map, llustration, post grunge, pink glowing volumetric lighting, engulfed in smoke and fog, concept art by josan gonzales and wlop, by james jean, Victo ngai, David Rubín, Mike Mignola, Laurie Greasley, highly detailed, sharp focus,alien,Trending on Artstation, HQ, deviantart, art by artgem” -s50 -W832 -H416 -C18.0 -Ak_lms -S192089936

Now we need to setup routing to access the views through an url.

from django.urls import path

from . import views

urlpatterns = [
        path('', views.get_data),
        path('add/', views.add_item),
        ]

todo/urls.py #

Then we need to include these urls from our api in the urls specified by settings.ROOT_URLCONf

from django.urls import path

urlpatterns = [
    ...
    path("api/", include("api.urls")),
]

Run it #

python manage.py runserver

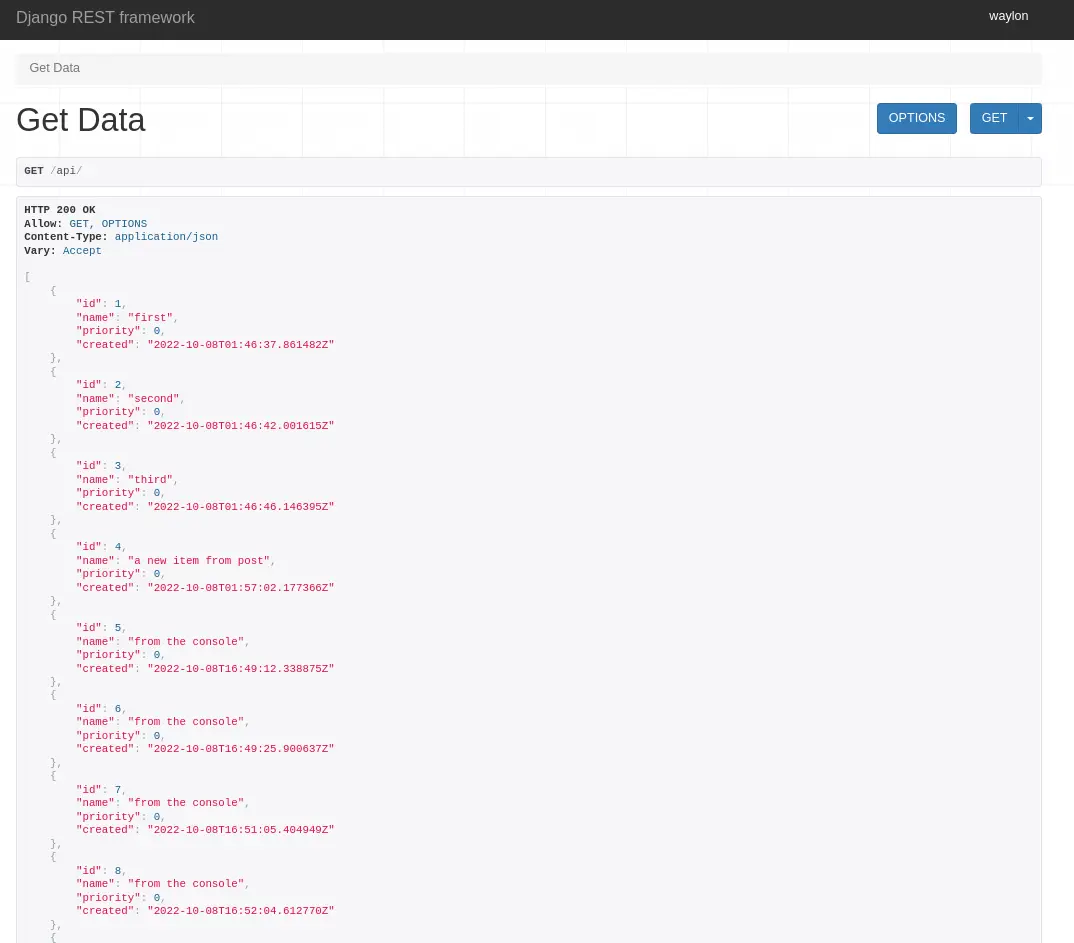
Running the developement server and going to localhost:8000/api we can see the full list of items in th api.

djangorestframework-get-items.webp

Markata now uses hatch as its build backend, and version bumping tool. setup.py, and setup.cfg are completely gone.

“An astronaut working in a lab, there is a series of eggs ready to hatch baby snakes on the table, experiments running, beakers, test tubes, cyberpunk trending on artstation, neon lighting, volumetric lighting, pink lighting” -s50 -W800 -H450 -C7.5 -Ak_lms -S4048189038

0.5.0 is big #

Markata 0.5.0 is now out, and it’s huge. Even though it’s the backend of this blog I don’t actually have that many posts directly about it. I’ve used it a bit for blog fuel in generic ways, like talking about pluggy and diskcache, but very little have I even mentioned it.

Over the last month I made a big push to get 0.5.0 out, which adds a whole bunch of new configurability to markata.

Here’s the changelog entry.

  • Moved to PEP 517 build #59 0.5.0.dev1

My Personal Simple CI/CD #

Before cutting all of my personal projects over to hatch. The first thing I did was to setup a solid github action, hatch-actionthat I can resue.

It automatically bumps versions, using pre-releases on all branches other than main, with special branches for bumping major, minor, patch, dev, alha, beta, and dev.

hatch new –init #

To convert the project over to hatch, and get rid of setup.py/setup.cfg, I ran hatch new --init. This automatically grabs all the metadata for the project and makes a pyproject.toml that has most of what I need.

hatch new --init

I then manually moved over my isort config, put flake8 config into .flake8, and dropped setup.cfg.

lint-test #

Part of my hatch-action is to run a before-command, for markata, this runs all of my linting and testing in one hatch script called lint-test. If this fails CI will fail and I can read the report in the logs, make a fix and re-publish.

[tool.hatch.envs.default.scripts]
cov = "pytest --cov-report=term-missing --cov-config=pyproject.toml --cov=markata --cov=tests"
no-cov = "cov --no-cov"
lint = "flake8 markata"
format = "black --check markata"
sort-imports = "isort markata"
build-docs = "markata build"
lint-test = [
 "lint",
 "format",
 "seed-isort-config",
 "sort-imports",
 "cov",
]
test-lint = "lint-test"

Typical branching workflow #

with automatic versioning

My typical workflow is to work on features in their own branch where they do not automatically version or publish, they keep the same version they were branched off of. Then I do a pr to develop, which will do a minor,dev bump and publish a pre-relese to pypi.

# starting with version 0.0.0
Feature1 -- │
Feature2 -- ├── dev 0.1.0.dev1,2,3 ── main 0.1.0
Feature3 -- │

I will let several features collect in develop before cutting a full relese over to main. This gives me time to make sure the solution is what makes the most sense, I try to use it in a few projects, and generally its edges show, and another pr is warranted to make the feature useful for more use cases. After running and using these new releases in a few projects, I am confident that its ready and release to main.

managing prs #

Doing PR’s with gh, probably deserves its own post but here are some helpful commands.

gh pr create --base develop --fill
gh pr edit
gh pr diff | dunk
gh pr merge -ds

Building and publishing #

“An astronaut working in a lab, hacking on a computer terminal, htop is running, shallow depth of field beakers, test tubes, volumetric lighting, pink lighting, by victo ngai, killian eng vibrant colours, dynamic lighting, digital art” -s50 -W768 -H448 -C7.5 -Ak_lms -S3512493435

hatch makes building and publishing pretty straightforward. It’s one command inside my hatch-action to build and one to publish. On each project that uses my hatch-action I only need to give it a token that I get from PyPi.

env:
  HATCH_INDEX_USER: __token__
  HATCH_INDEX_AUTH: ${{ secrets.pypi_password }}

Full set of changes #

If you want to see all of the details on how markata moved over to hatch, you can check out this diff.

https://github.com/WaylonWalker/markata/compare/v0.4.0..v0.5.0.dev0

“An astronaut working in a lab, hacking on a computer terminal, htop is running, shallow depth of field beakers, test tubes, volumetric lighting, pink lighting, by victo ngai, killian eng vibrant colours, dynamic lighting, digital art” -s50 -W768 -H448 -C7.5 -Ak_lms -U 4.0 0.6 -S2409791448

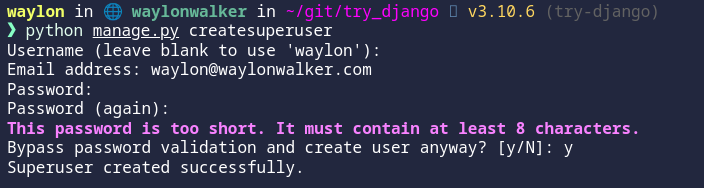
My next step into django made me realize that I do not have access to the admin panel, turns out that I need to create a cuper user first.

“cybernetic soldier working on a rusting tape machine robot, cinematic lighting, detailed, cell shaded, 4 k, warm colours, concept art, by wlop, ilya kuvshinov, artgerm, krenz cushart, greg rutkowski, pixiv. cinematic dramatic atmosphere, sharp focus, volumetric lighting, cinematic lighting, studio quality” -s50 -W832 -H416 -C12.0 -Ak_lms -S3309980874

Run Migrations #

Right away when trying to setup the superuser I ran into this issue

django.db.utils.OperationalError: no such table: auth_user

Back to the tutorial tells me that I need to run migrations to setup some tables for the INSTALLED_APPS, django.contrib.admin being one of them.

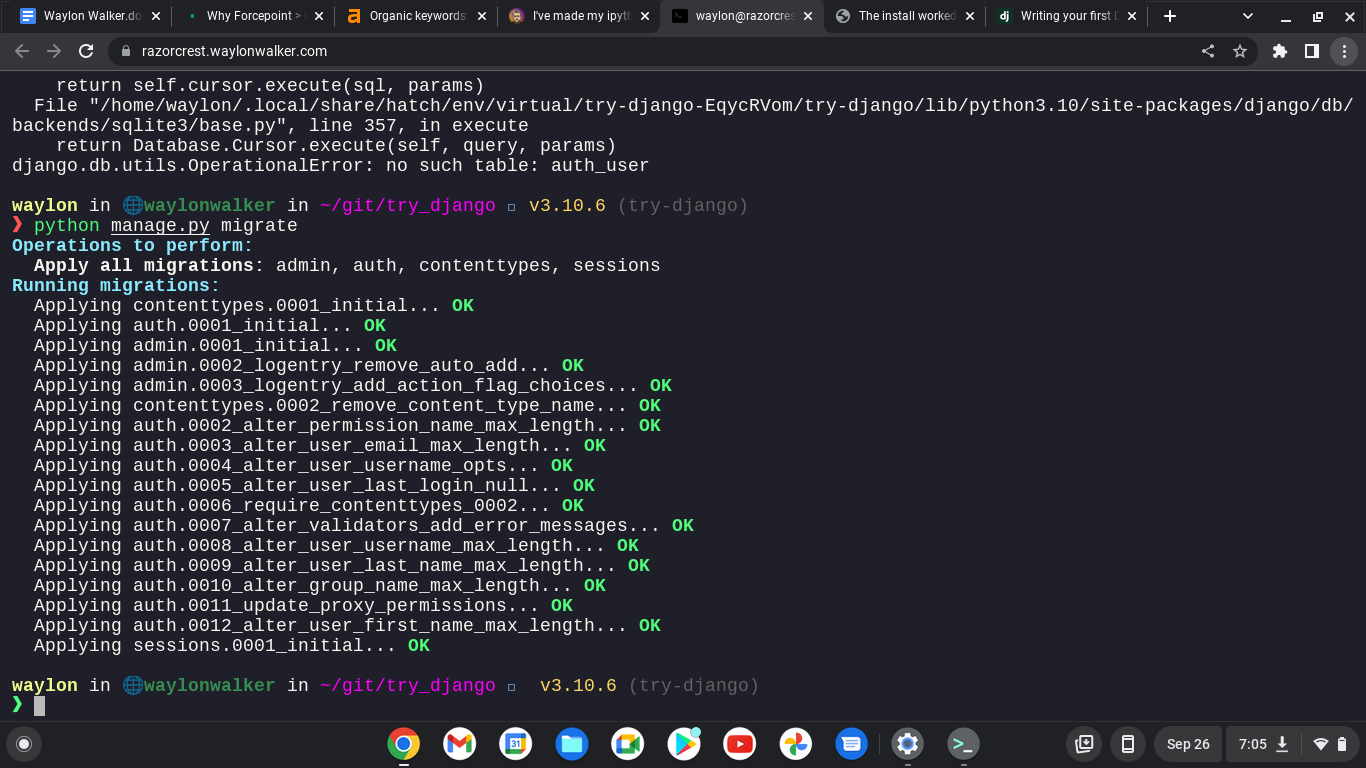
python manage.py migrate
trydjango-migration.png

yes I am still running remote on from my chromebook.

python manage.py createsuperuser
trydjango-create-superuser.png

The super user has been created.

“cybernetic soldier working on a rusting tape machine robot, cinematic lighting, detailed, cell shaded, 4 k, warm colours, concept art, by wlop, ilya kuvshinov, artgerm, krenz cushart, greg rutkowski, pixiv. cinematic dramatic atmosphere, sharp focus, volumetric lighting, cinematic lighting, studio quality” -s50 -W832 -H416 -C12.0 -Ak_lms -S2018296614

CSRF FAILURE #

My next issue trying to run off of a separate domain was a cross site request forgery error.

Since this is a valid domain that we are hosting the app from we need to tell Django that this is safe. We can do this again in the settings.py, but this time the variable we need is not there out of the box and we need to add it.

CSRF_TRUSTED_ORIGINS = ['https://localhost.waylonwalker.com']

I made it!! #

And we are in, and welcomed for the first time with this django admin panel.

trydjango-hello.webp

Remote Hosting #

You might find these settings helpful as well if you are trying to run your site on a remote host like aws, digital ocean, linode, or any sort of cloud providor. I had it running in my home lab while I was out of the house and ssh’d in over with a chromebook.

“cybernetic soldier working on a rusting tape machine robot, cinematic lighting, detailed, cell shaded, 4 k, warm colours, concept art, by wlop, ilya kuvshinov, artgerm, krenz cushart, greg rutkowski, pixiv. cinematic dramatic atmosphere, sharp focus, volumetric lighting, cinematic lighting, studio quality” -s50 -W832 -H416 -C12.0 -Ak_lms -S1092166059

I am continuing my journey into django, but today I am not at my workstation. I am ssh’d in remotely from a chromebook. I am fully outside of my network, so I can’t access it by localhost, or it’s ip. I do have cloudflared tunnel installed and dns setup to a localhost.waylonwalker.com.

Settings #

I found this in settings.py and yolo, it worked first try. I am in from my remote location, and even have auth taken care of thanks to cloudflare. I am really hoping to learn how to setup my own auth with django as this is one of the things that I could really use in my toolbelt.

ALLOWED_HOSTS = ['localhost.waylonwalker.com']
“cell shaded long shot of a cybernetic blue bald soldier with glowing blue eyes as Borderlands 3 concept art, llustration, post grunge, concept art by josan gonzales and wlop, by james jean, Victo ngai, David Rubín, Mike Mignola, Laurie Greasley, highly detailed, sharp focus,alien,Trending on Artstation, HQ, deviantart, art by artgem” -s50 -W832 -H416 -C7.5 -Ak_lms -S3422093952

I have no experience in django, and in my exploration to become a better python developer I am dipping my toe into one of the most polished and widely used web frameworks Django to so that I can better understand it and become a better python developer.

If you found this at all helpful make sure you check out the django tutorial

“An atronaut working in a lab, there is a long snake working along side, shallow depth of field beakers, test tubes, volumetric lighting, pink lighting, by victo ngai, killian eng vibrant colours, dynamic lighting, digital art” -s50 -W768 -H448 -C7.5 -Ak_lms -S2250540408

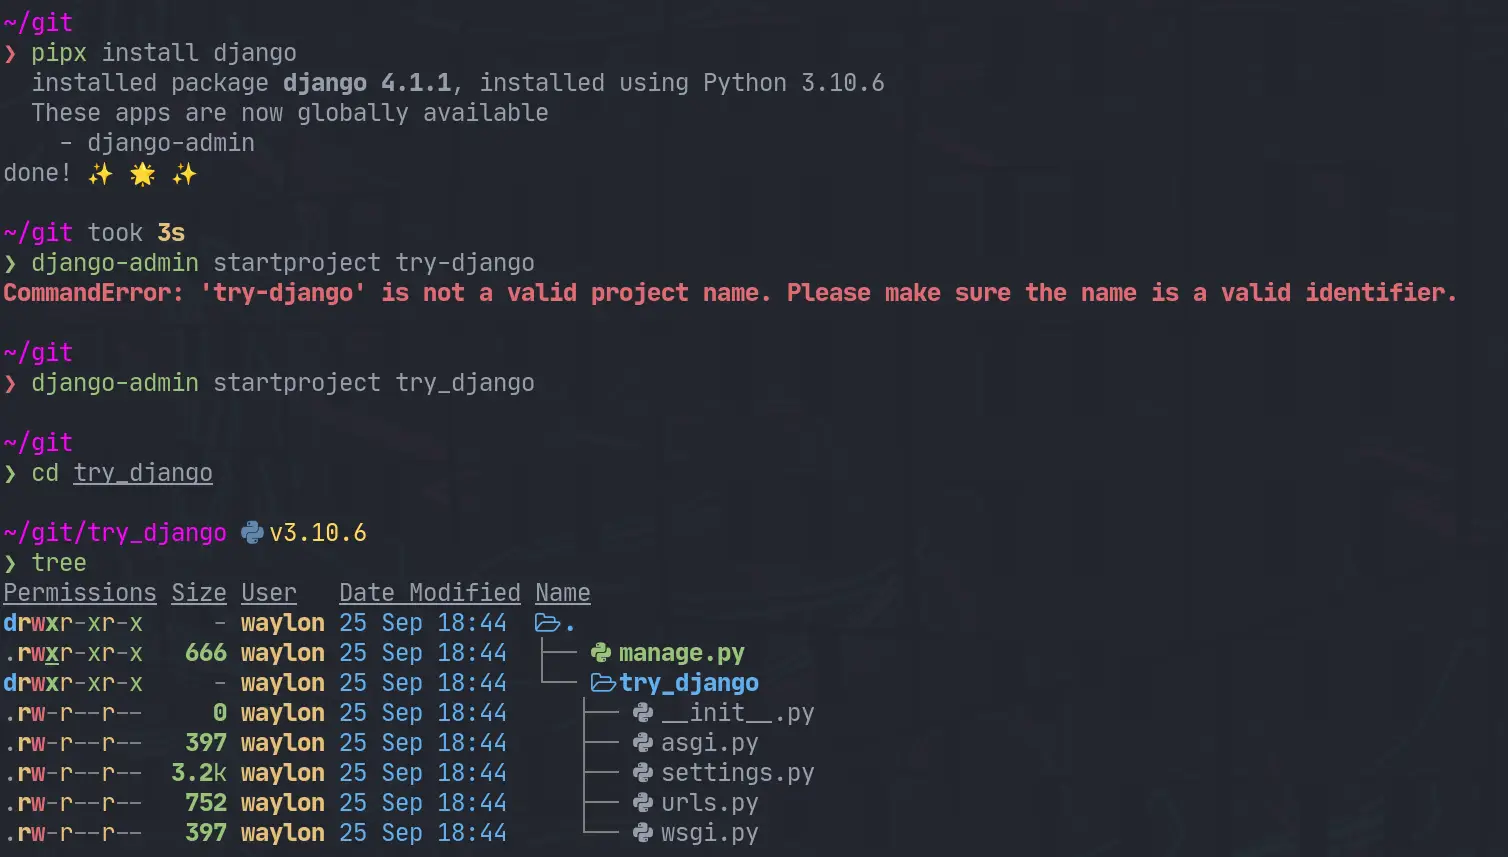
install django #

The first thing I need to do is render out a template to start the project. For this I need the django-admin cli. To get this I am going the route of pipx it will be installed globally on my system in it’s own virtual environment that I don’t have to manage. This will be useful only for using startproject as far as I know.

pipx install django
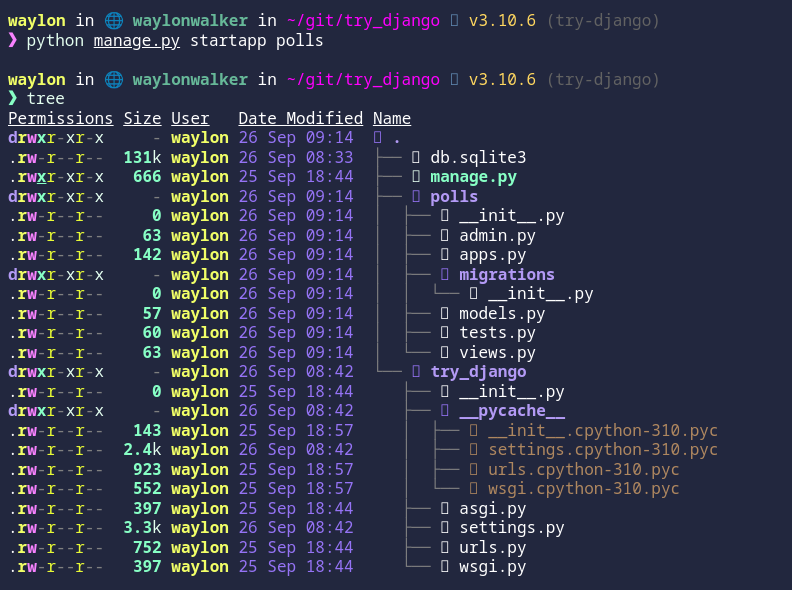
django-admin startproject try_django
cd try_django
django-startproject.webp

Make a venv #

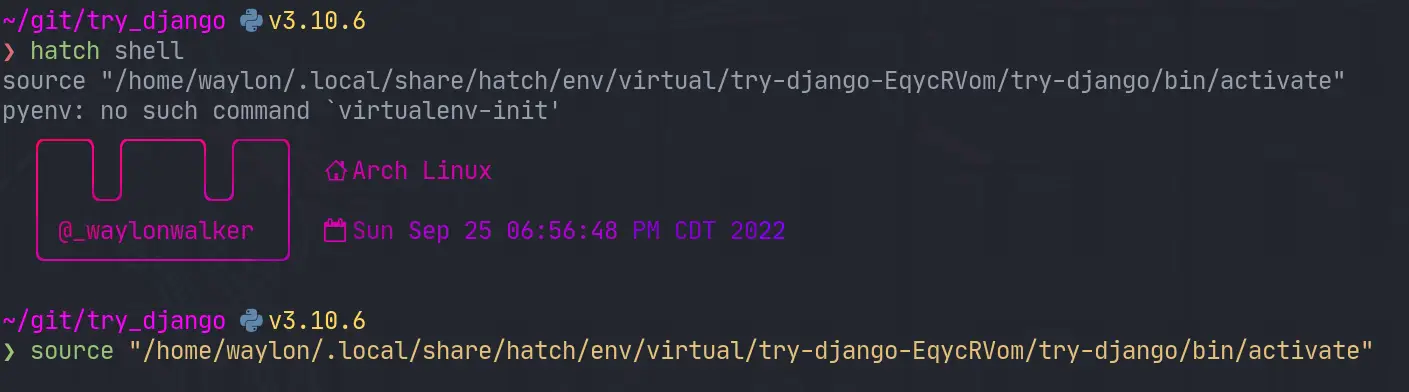
Once I have the project I need a venv for all of django and all of my dependencies I might need for the project. I have really been diggin hatch lately, and it has a one line “make a virtual environment and manage it for me” command.

hatch shell
trydjango-venv.webp

If hatch is a bit bleeding edge for you, or it has died out by the time you read this. The ol trusty venv will likely stand the test of time, this is what I would use for that.

python -m .venv --prmpt `basename $PWD`
. ./.venv/bin/activate

Start the webserver #

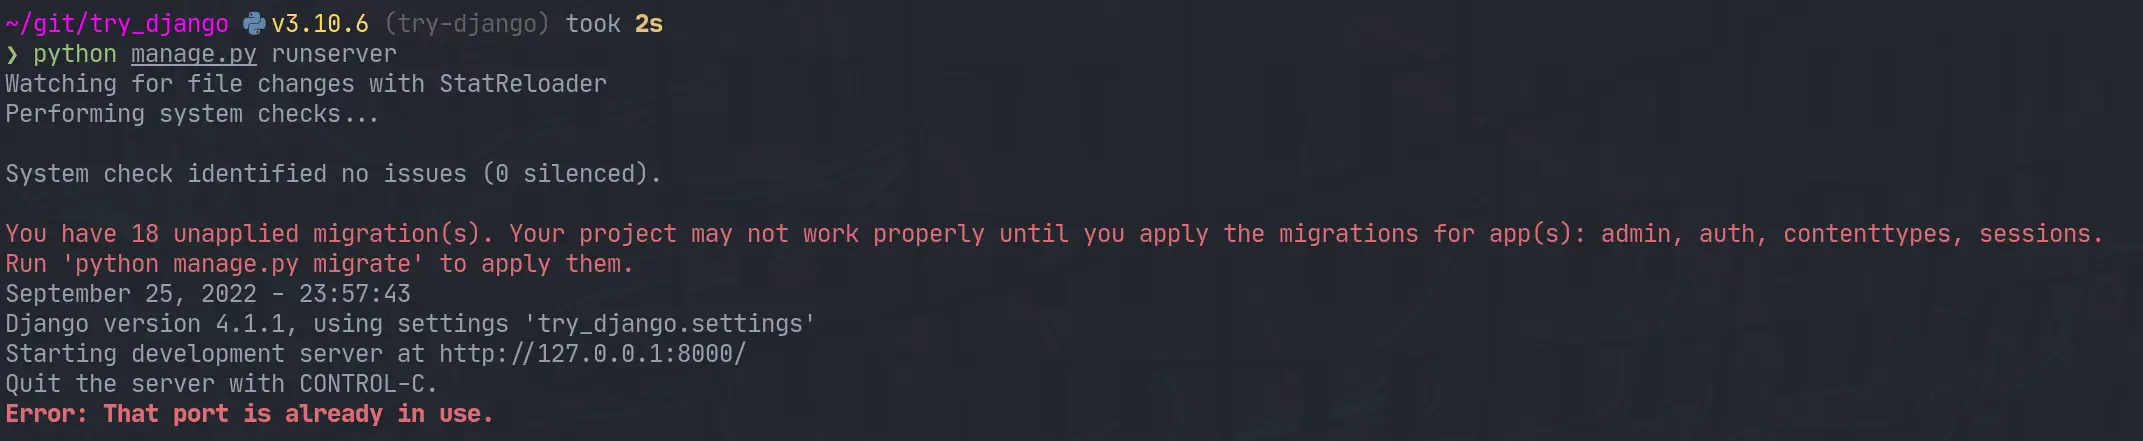
Next up we need to start the webserver to start seeing that development content. The first thing I did was run it as stated in the tutorial and find it clashed with a currently running web server port.

python manage.py runserver
django-runserver-oops.webp

I jumped over to that tmux session, killed the process and I was up and running.

trydjango-runserver.webp

What’s running #

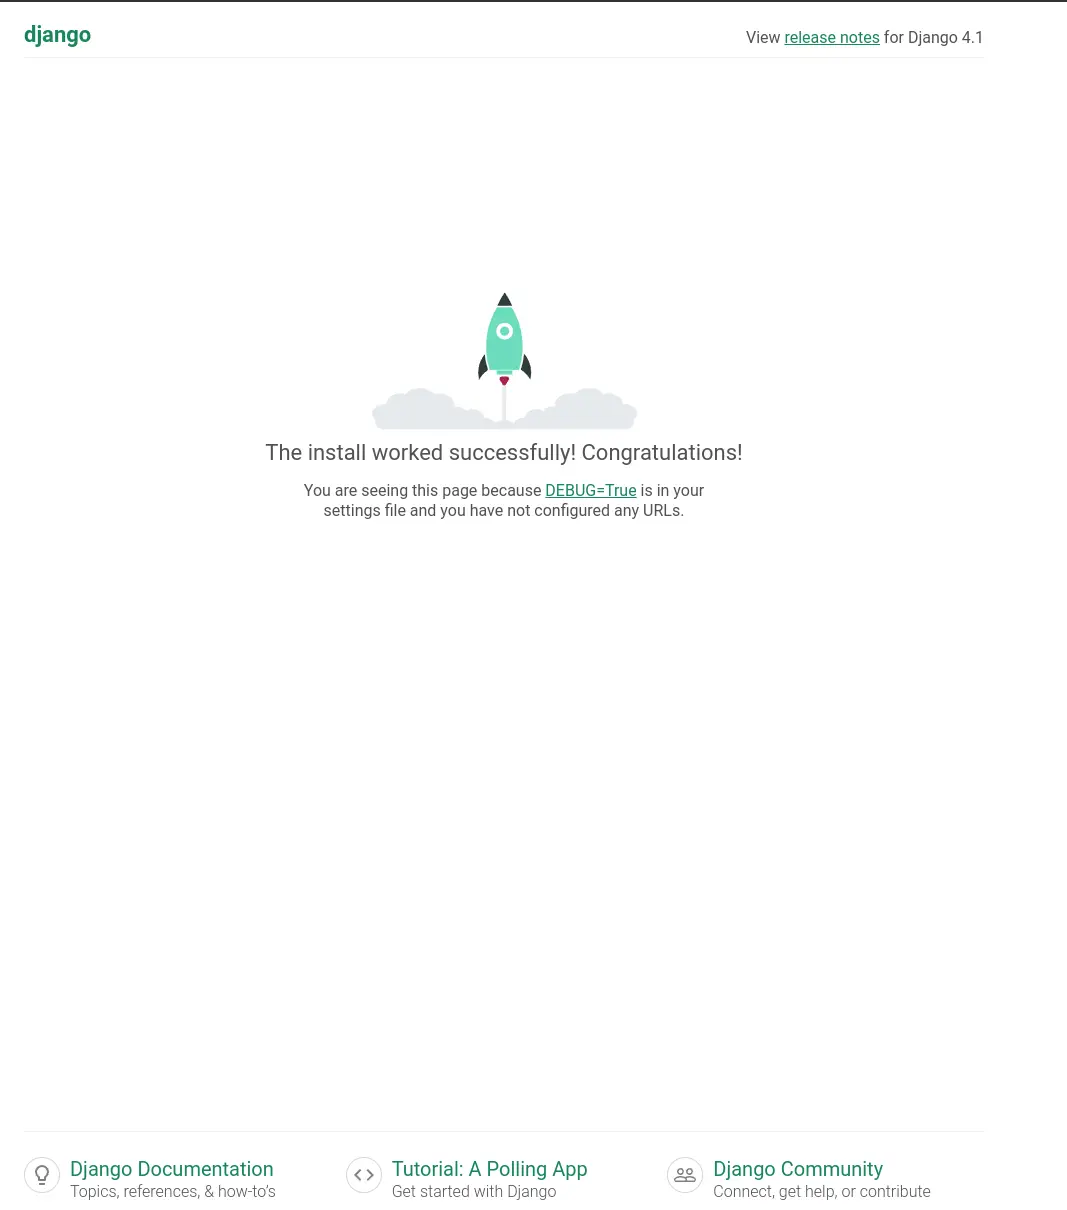
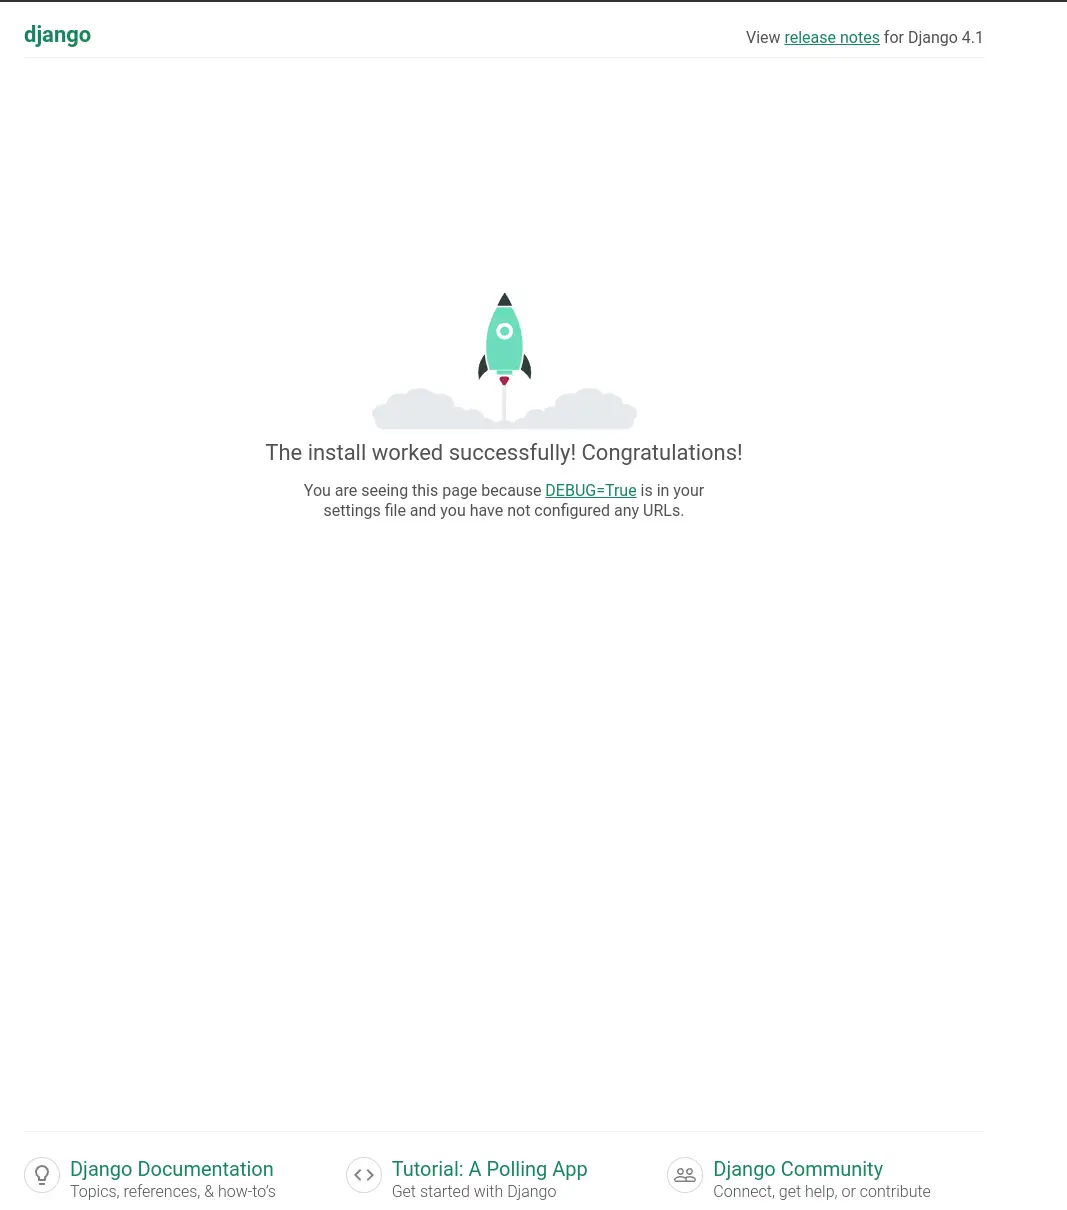
The default django hello world looks well designed. You are first presented with this page.

trydjango-hello.webp

Next #

I opened up the urls.py to discover that the only configured url was at /admin. I tried to log in as admin, but was unable to as I have not yet created a superuser. Next time I play with django that is what I will explore.

An astronaut working in a dimly lit labratory, it is almost black, heavy dark blacks, black space, heavy vingette, hacking on a computer terminal, htop is running, shallow depth of field beakers, test tubes, by Alphonse Mucha, dynamic lighting, digital art

While updating my site to use Markata’s new configurable head I ran into some escaping issues. Things like single quotes would cause jinja to fail as it was closing quotes that it shouldnt have.

Nuclear core being help up by glowing neon wires, cyberpunk synthwave, intricate abstract. delicate artwork. by tooth wu, wlop, beeple, dan mumford. pink volumetric lighting, octane render, trending on artstation, greg rutkowski very coherent symmetrical artwork. cinematic, hyper realism, high detail, octane render, 8k, depth of field, bokeh. chrome accents.

Jinja Escaping Strings #

Jinja comes with a handy utility for escaping strings. I definitly tried to over-complicate this before realizing. You can just pipe your variables into e to escape them. This has worked pretty flawless at solving some jinja issues for me.

<p>
{{ title|e }}
</p>

Creating meta tags in Markata #

The issue I ran into was when trying to setup meta tags with the new configurable head, some of my titles have single quotes in them. This is what I put in my markata.toml to create some meta tags.

[[markata.head.meta]]
name = "og:title"
content = "{{ title }}"

Using my article titles like this ended up causing this syntax error when not escaped.

SyntaxError: invalid syntax. Perhaps you forgot a comma?
Exception ignored in: <function Forward.__del__ at 0x7fa9807192d0>
Traceback (most recent call last):
    ...
TypeError: 'NoneType' object is not callable

jinja2 escape #

After making a complicated system of using html.escape I realized that jinja included escaping out of the box so I updated my markata.toml to include the escaping, and it all just worked!.

[[markata.head.meta]]
name = "og:title"
content = "{{ title|e }}"
Nuclear core being help up by wires, intricate abstract. delicate artwork. by tooth wu, wlop, beeple, dan mumford. pink volumetric lighting, octane render, trending on artstation, greg rutkowski very coherent symmetrical artwork. cinematic, hyper realism, high detail, octane render, 8k, depth of field, bokeh. chrome accents.

Hatch allows you to specify direct references for dependencies in your pyproject.toml file. This is useful when you want to depend on a package that is not available on PyPI or when you want to use a specific version from a Git repository. Often used for unreleased packages, or unreleased versions of packages.

docs

[project]
dependencies = ['markata', 'markata-todoui@git+https://github.com/waylonwalker/markata-todoui']

[tool.hatch.metadata]
allow-direct-references=true

When I am developing python code I often have a repl open alongside of it running snippets ofcode as I go. Ipython is my repl of choice, and I hace tricked it out the best I can and I really like it. The problem I recently discovered is that I have way overcomplicated it.

What Have I done?? #

So in the past the way I have setup a few extensions for myself is to add something like this to my ~/.ipython/profile_default/startup directory. It sets up some things like rich highlighting or in this example automatic imports. I even went as far as installing some of these in the case I didn’t have them installed.

import subprocess

from IPython import get_ipython
from IPython.core.error import UsageError

ipython = get_ipython()

try:
    ipython.run_line_magic("load_ext pyflyby", "inline")
except UsageError:
    print("installing pyflyby")
    subprocess.Popen(
        ["pip", "install", "pyflyby"],
        stdout=subprocess.DEVNULL,
        stderr=subprocess.DEVNULL,
    ).wait()
    ipython.run_line_magic("load_ext pyflyby", "inline")
    print("installing isort")
    subprocess.Popen(
        ["pip", "install", "isort"],
        stdout=subprocess.DEVNULL,
        stderr=subprocess.DEVNULL,
    )
A man looking over to a glowing nuclear core with hundreds of wires running from it

What I missed? #

I missed the fact that some of these tools like pyflyby and rich already have an ipython extension maintained by the library that just works. It’s less complicated and more robust to future changes in the library. If anything ever changes with these I will not have to worry about which version is installed, the extension will just take care of itself.

How to activate these. #

The reccomended way is to add them to your ~/.ipython/profile_default/ipython_config.py

c.InteractiveShellApp.extensions.append('rich')
c.InteractiveShellApp.extensions.append('markata')
c.InteractiveShellApp.extensions.append('pyflyby')

The issue that I found with this is that you can end up with a sea of errors flooding your terminal. Personally I will know immediately if ipython is working right or not and typically have scriped venv installs so I have everything I need, so If I don’t have everything it’s probably for a reason and I don’t need an error message lighting up.

My way around this was to test if the module was importable and if it had a load_ipython_extension attribute before appending it as an extension.

def activate_extension(extension):
    try:
        mod = importlib.import_module(extension)
        getattr(mod, "load_ipython_extension")
        c.InteractiveShellApp.extensions.append(extension)
    except ModuleNotFoundError:
        "extension is not installed"
    except AttributeError:
        "extension does not have a 'load_ipython_extension' function"


extensions = ["rich", "markata", "pyflyby"]
for extension in extensions:
    activate_extension(extension)

My Change #

If you want to see what I did to my config see this commit.

Astronauts stunting some stylish color explosion

A long needed feature of markata has been the ability to really configure out templates with configuration rather. It’s been long that you needed that if you really want to change the style, meta tags, or anything in the head you needed to write a plugin or eject out of the template and use your own.

Adding some Head #

Now you can add some extra style to your site with the existing built-in template.

[[markata.head]]
text = """
<style>
img {
  width: 100%;
  height: auto;
}
ul {
  display: flex;
  flex-wrap: wrap;
}
</style>
"""

You can have more than one Head #

Each text entry in markata.head just gets appended raw into the head.

[[markata.head]]
text = """
<style>
img {
  width: 100%;
  height: auto;
}
ul {
  display: flex;
  flex-wrap: wrap;
}
</style>
"""

[[markata.head]]
text = """
<script>
console.log('hey there')
</script
"""

Still need more? #

If this does not take you far enough yet, you can still eject out and use your own template pretty easy. If you are going for a full custom site it’s likely that this will be the workflow for awhile. Markata should only get better and make this required less often as it matures.

[markata]
post_template = "pages/templates/post_template.html"

Once you have this in your markata.toml you can put whatever you want in your own template.

“An astronaut working in a lab, colorful explosion, powder, particles, smoke, 35mm, bokeh, fog, f1.2, shallow depth of field, experiments running, beakers, test tubes, cyberpunk, octane render, trending on artstation, neon lighting, volumetric lighting, pink lighting” -s50 -W800 -H450 -C7.5 -Ak_lms -S2678273305