A long needed feature of markata has been the ability to really configure out
templates with configuration rather. It’s been long that you needed that if
you really want to change the style, meta tags, or anything in the head you
needed to write a plugin or eject out of the template and use your own.
If this does not take you far enough yet, you can still eject out and use your
own template pretty easy. If you are going for a full custom site it’s likely
that this will be the workflow for awhile. Markata should only get better and
make this required less often as it matures.
Once you have this in your markata.toml you can put whatever you want in your
own template.
I’m really getting into using hatch as my go to build system, and I am really
liking it so far. I am slowly finding new things that just work really well.
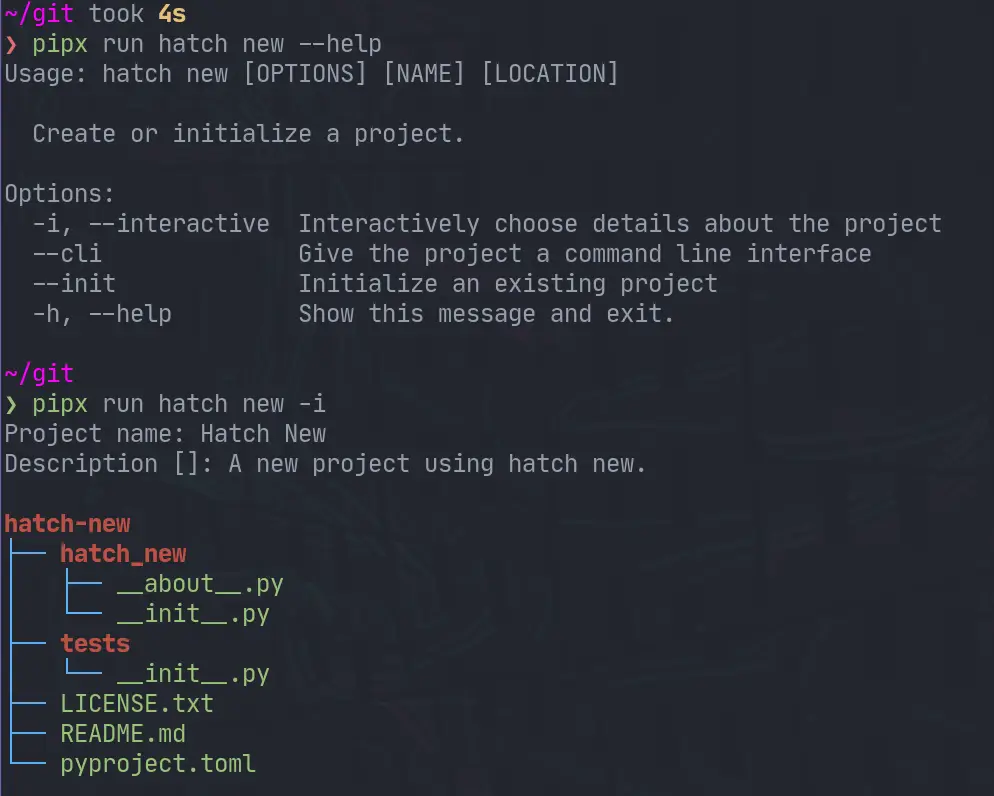
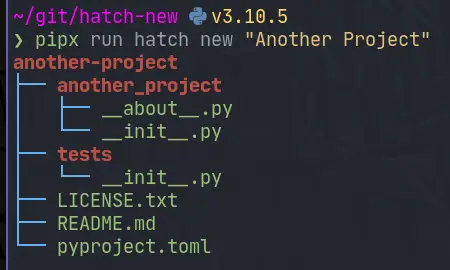
hatch new is one of those things that I didn’t realize I needed until I had
it.
creating new versions created by myself with stable diffusion
❯ pipx run hatch new --help
Usage: hatch new [OPTIONS] [NAME] [LOCATION]

  Create or initialize a project.

Options:
  -i, --interactive  Interactively choose details about the project
  --cli              Give the project a command line interface
  --init             Initialize an existing project
  -h, --help         Show this message and exit.
Note! I am running all of these commands with pipx. I like to use pipx for
all of my system level cli applications. To emphasis this point in the
article I am going to use pipx run hatch, but you can pipx install hatch
then just run hatch from there.
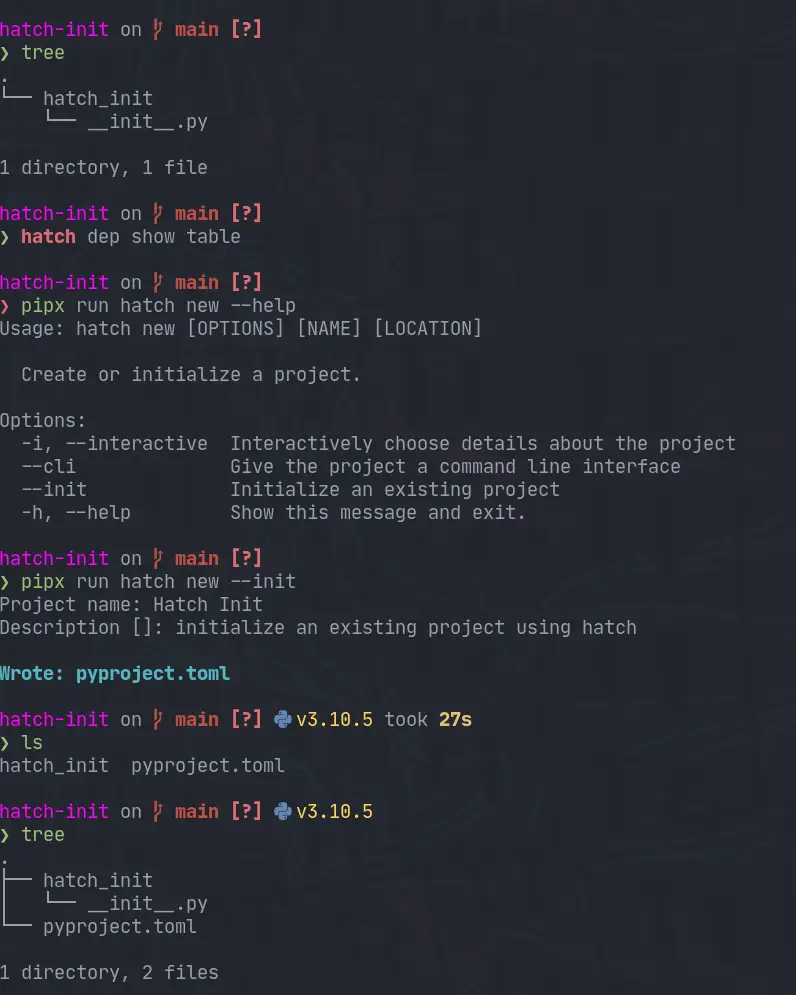
hatch new has an --init flag in order to initialize a new hatch
pyproject.toml in an existing project. This feels like it would be useful if
you are converting a project to hatch, or if like me you sometimes start making
something before you realize it’s something that you want to package. Honestly
this doesn’t happen too much anymore I package most things, and I hope hatch new completely breaks this habbit of mine.
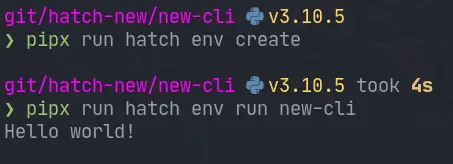
I’ll dive more into environments and the run command later, but we can run the
cli pretty damn quick with two commands. In under 5s I was able to run this cli
that it created. This is a pretty incredible startup time.
Hatch has an amazing versioning cli for python packages that just works. It
takes very little config to get going and you can start bumping versions
without worry.
creating new versions created by myself with stable diffusion
The main hero of this post is the pyproject.toml. This is what defines all
of our PEP 517 style project setup.
[project]name="pkg"description="Show how to version packages with hatch"readme="README.md"dynamic=["version",][build-system]requires=["hatchling>=1.4.1",]build-backend="hatchling.build"[tool.hatch.version]path="pkg/__about__.py"
It is possible to set the version number inside the pyproject.toml
statically. This is fine if you just want to version your package manually,
and not through the hatch cli.
[project]name="pkg"version="0.0.0"# ...
Statically versioning in pyproject.toml will not work with hatch version
Cannot set version when it is statically defined by the `project.version` field
Setting the project verion dynamically can be done by changing up the following
to your pyproject.toml. Hatch only accepts a path to store your version. If
you need to reference it elsewhere in your project you can grab it from the
package metadata for that file. I would not put anything else that could
possibly clash with the version, as you might accidently change both things.
If you really need to set it in more places use a package like bump2version.
The hatch project itself uses a
about.py
to store it’s version. It’s sole content is a single __version__ variable. I
don’t have any personal issues with this so I am going to be following this in
my projects that use hatch.
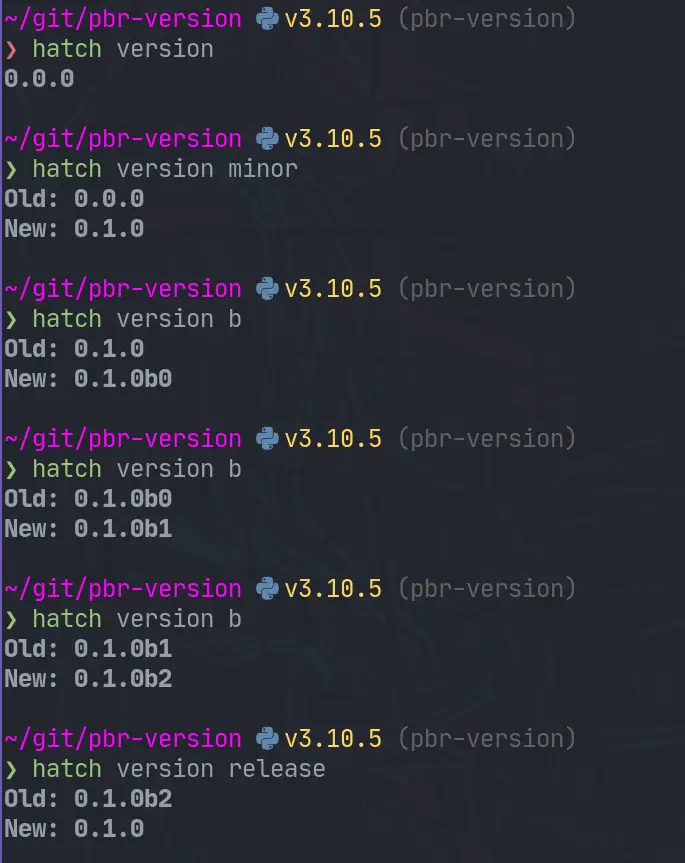
Hatch has a pretty intuitive versioning api. hatch version gives you the
version. If you pass in a version like hatch version "0.0.1" it will set it
to that version as long as it is in the future, otherwise it will error.
# print the current versionhatch version
# set the version to 0.0.1hatch version "0.0.1"
# minor bumphatch version minor
# beta pre-release bump# If published to pypi this can be installed with the --pre flag to piphatch version b
# bump minor and betahatch version minor,b
# release all of the --pre-release flags such as alpha beta rchatch release
In my github actions flow I will be utilizing this to automate my versions. In
my side projects I use the develop branch to release –pre releases. I have
all of my own dependent projets running on these –pre releases, this allows me
to cut myself in my own projects before anyone else. Then on main I
automatically release this beta version.
Here is what the ci/cd for markata looks like. There might be a better
workflow strategy, but I use a single github actions workflow and cut branches
to release –pre releases and full release. These steps will bump, tag,
commit, and deploy for me.
- name:automatically pre-release develop branchif:github.ref == 'refs/heads/develop'run:| git config --global user.name 'autobump'
git config --global user.email '[email protected]'
VERSION=`hatch version`
# if current version is not already beta then bump minor and beta
[ -z "${b##*`hatch version`*}" ] && hatch version b || hatch version minor,b
NEW_VERSION=`hatch version`
git add markta/__about__.py
git commit -m "Bump version: $VERSION → $NEW_VERSION"
git tag $VERSION
git push
git push --tags- name:automatically release main branchif:github.ref == 'refs/heads/main'run:| git config --global user.name 'autobump'
git config --global user.email '[email protected]'
VERSION=`hatch version`
hatch version release
NEW_VERSION=`hatch version`
git add markta/__about__.py
git commit -m "Bump version: $VERSION → $NEW_VERSION"
git tag $VERSION
git push
git push --tags- name:buildrun:| python -m build- name:pypi-publishif:github.ref == 'refs/heads/develop' || github.ref == 'refs/heads/main'uses:pypa/[email protected]with:password:${{ secrets.pypi_password }}
I am setting up a github custom action
waylonwalker/hatch-version-action
that will lint, test, bump, and publish for me in one step. More on that in
the future.
Markata is a great python framework that allows you to go from markdown to a
full website very quickly. You can get up and running with nothing more than
Markdown. It is also built on a full plugin architecture, so if there is extra
functionality that you want to add, you can create a plugin to make it behave
like you want.
The talk is live on YouTube. Make sure you check out the other videos from the
conference. There were quite a few quality talks that deserve a watch as well.
Markata # [1]
I open sourced the static site framework that I use to build
my-blog [2] among other side projects. It’s a plugins
all the way down static site generator, that makes me happy to use.
{% gh_repo_list_topic “waylonwalker”, “markata” %}
Repos used to build this blog # [3]
my-blog [2] is built on a number of small repos. I
set it up this way so that creating content is fast and easy to do. I don’t
have to worry about carrying around large images with my lightweight text
files just to make some posts.
{% gh_repo_list_topic “waylonwalker”, “personal-website” %}
Kedro # [4]
I am a heavy user of the kedro [5] framework, and a big
advocate for using some sort of DAG framework for your data pipelines. kedro
is built all in python which makes it easy for a python dev like me to extend,
run, maintain, and deploy.
{% gh_repo_list_topic “waylonwalker”, “kedro” %}
Neovim Plugins # [6]
I use vim for all of my text editing needs. It brings me joy to make any part
of it just a...
I spoke at python webconf in March 2022 about how I deploy this blog on a
continuous basis.
Building this blog has brought me a lot of benefits. I have
a set of custom curated notes to help describe a problem and how to solve it to
me. At theis point it’s not uncommon to google an Issue I am having and
finding my own blog with exactly the solution I need at the top.
I also bump into people from time to time that recognize me from the blog, its
a nice conversation starter, and street cred.
The talk recently released on Youtube, you can watch it without having a ticket
to the conference for free. There were a bunch of other talks that you should
check out too!
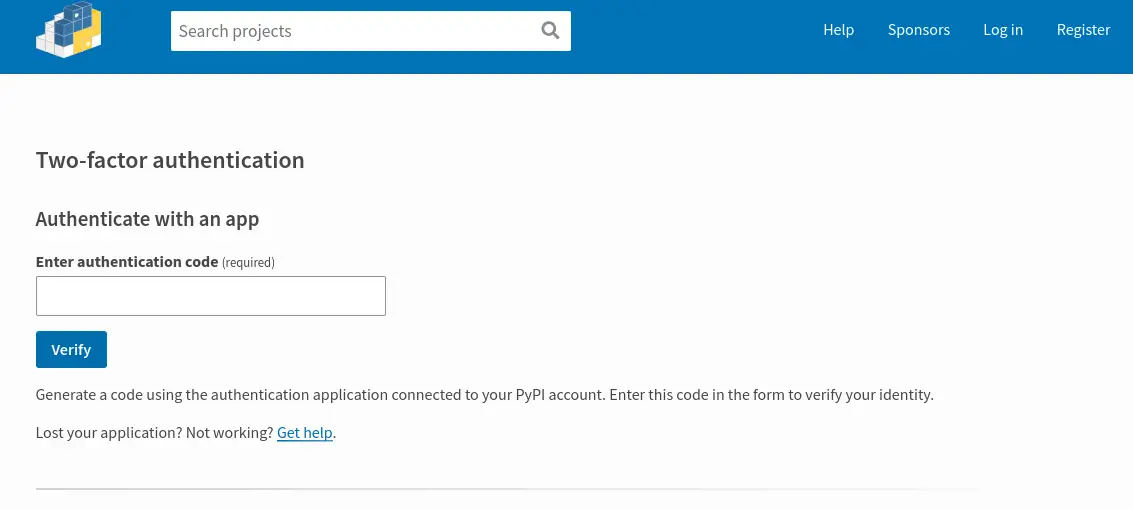
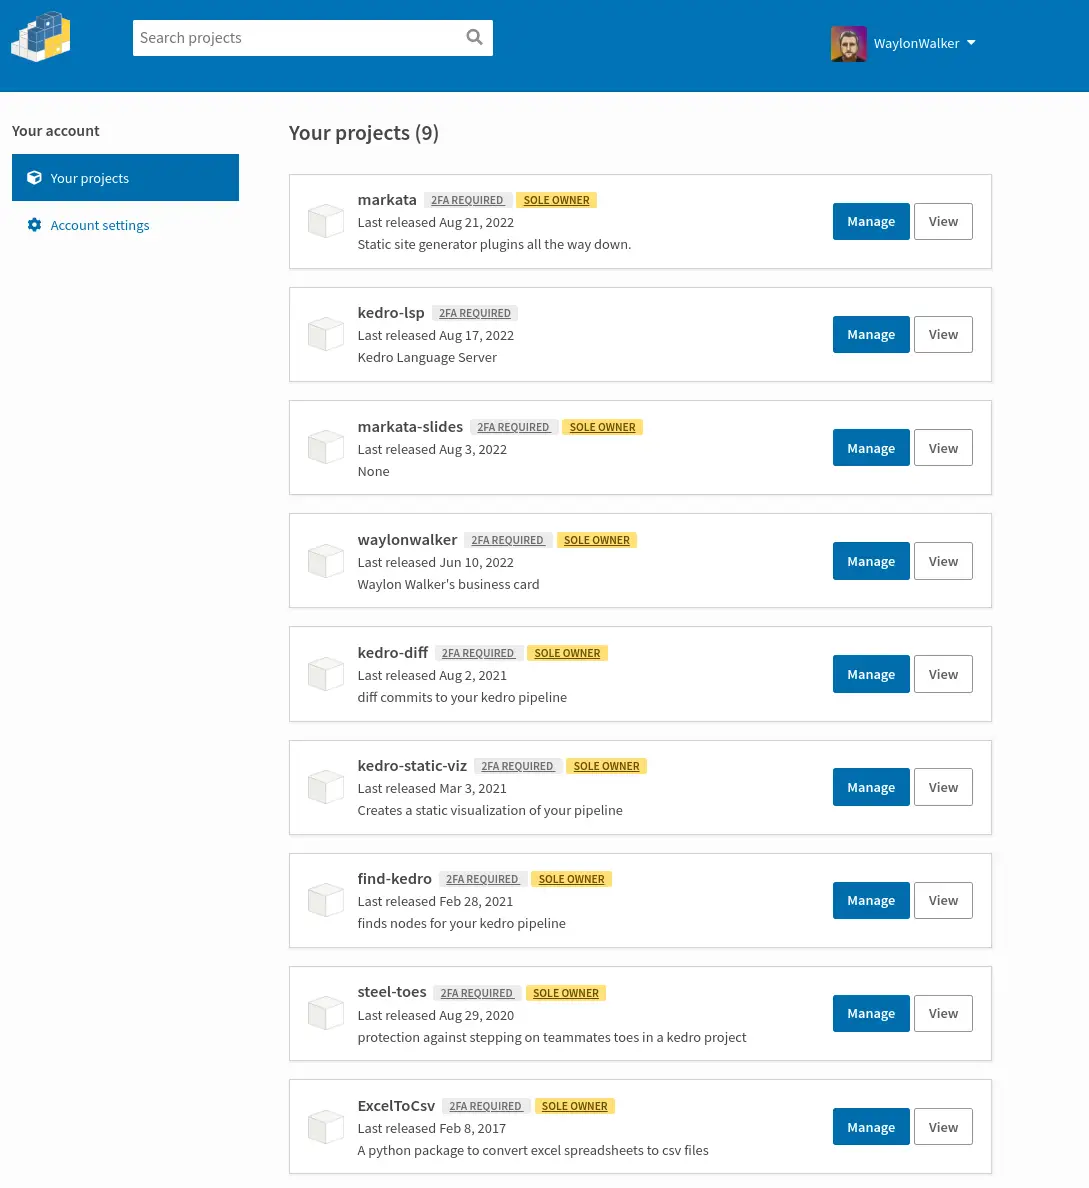
I got all the pypi packages that I own behind 2 factor authentication. 💪
Recently this really made it’s rounds in the python news since pypi was
requiring critical package maintainers to have 2FA on and even offering them
hardware tokens to help them turn this on.
I feel like this caused a bit of confusion as turning on 2FA does not mean that
you need to do anything different to deploy a package, and it DOES NOT
require a hardware token. You can continue using your favorite 2FA app.
You might wonder what this means for my projects. It means that to edit any
sensitive content such as pull a new api token, add/remove maintainers, or
deleting a release I need to use a TOPT (time based one time password)
application such as Google Authenticator, Microsoft Authenticator, Authy, or
FreeOTP.
This has very little change to my overall workflow as my CI system still
automatically deploys for me with the same api token as before.
This is one small thing that maintainers can do to prevent supply chain attacks
on their projects that they put so much work into.
Once I turned on 2FA for my account I could then turn on 2FA requirement for
each project. I am not sure how much safety there is in pypi, it might require
all maintainers to have it turned on before it allows packages to have it
turned on.
Once turned on it requires anyone who maintains the project to have 2FA on to
be able to edit any sensitive content.
After years of listening to talkpython.fm [1] I had the
honor to be part of
episode-337 [2]
to talk about Kedro for maintainable data science.
I was quite nervous to talk on a show that I helped shape my career in such a
profound way. I started my journey towards software engineering near Michaels
first few episodes. His discussions with such great developers over the years
has made an huge impact on my skill. It has always given me great advice and
topics to go deeper on.
During the episode I tried my best to let Yetu and Ivan take the spotlight as
the maintainer and chime in with my experience as a user of kedro.
Video Version # [3]
https://youtu.be/WTcjvwkXoY0
Michael made the call available on youtube as well as the audio only
podcast [2]
References:
[1]: https://talkpython.fm/
[2]: https://talkpython.fm/episodes/show/337/kedro-for-maintainable-data-science
[3]: #video-version
I just love how some features of vim are so discoverable and memorable once you
really start to grasp it. Sorting and uniqing your files or ranges is one of
those examples for me.
" sort the file:sort" sort the file only keeping unique lines:sortu" sort a range:'<,'>sort" sort a range only keeping unique lines:'<,'>sortu
I recently used this to dedupe my autogenerated links section for
rich-syntax-range-style.
More often I am using it to sort and uniqify objects like arrays and lists.
Today I’ve been playing with
py-tree-sitter a bit and I
wanted to highlight match ranges, but was unable to figure out how to do it
with rich, so I reached out to
@textualizeio for help.
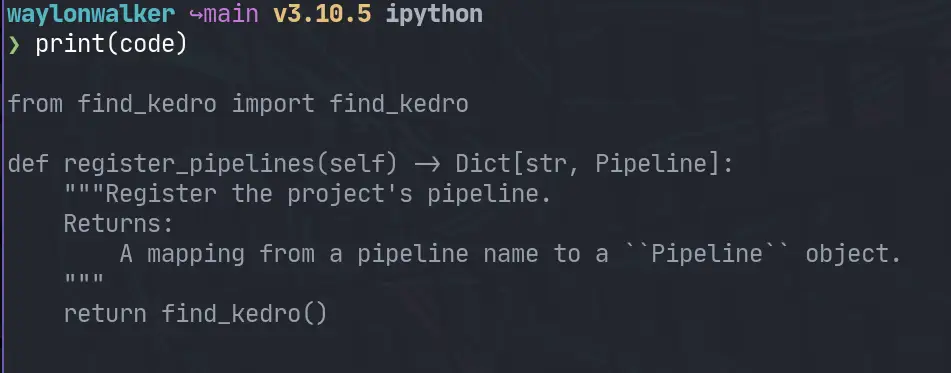
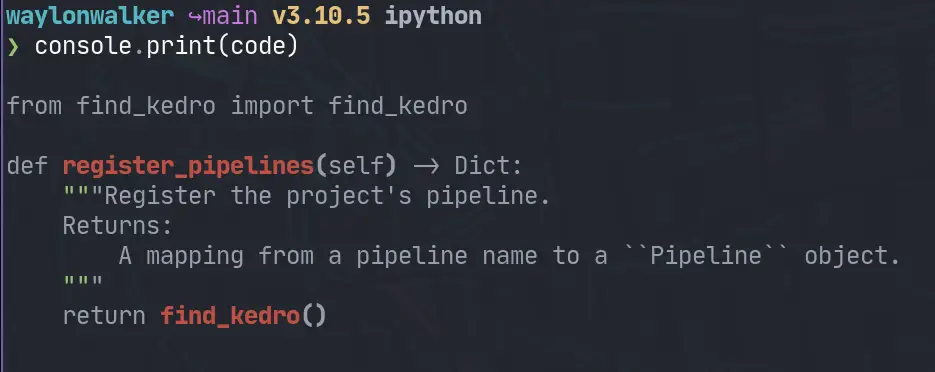
Now we need some code to highlight. I am going to rip my register_pipeline
from another post.
code='''
from find_kedro import find_kedro
def register_pipelines(self) -> Dict[str, Pipeline]:
"""Register the project's pipeline.
Returns:
A mapping from a pipeline name to a ``Pipeline`` object.
"""
return find_kedro()
'''
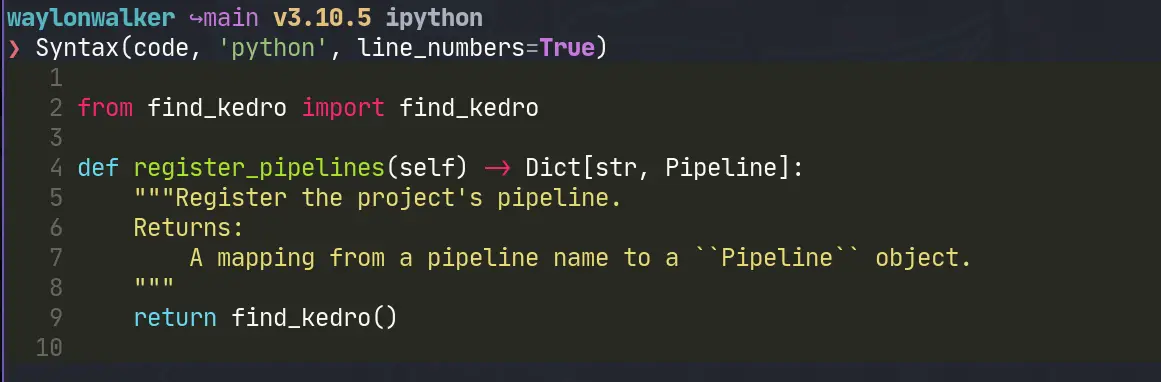
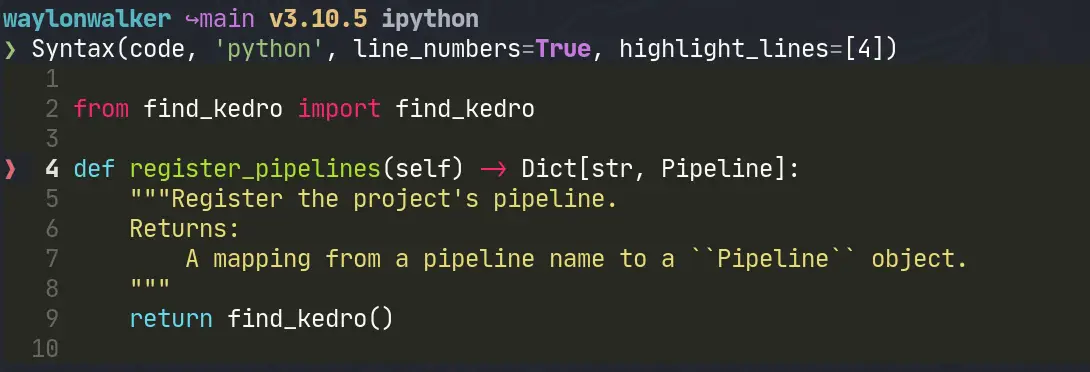
Now we can start highlighting lines right when we initialize our Syntax
instance. It looks ok. It’s not super visible, but more importantly its not
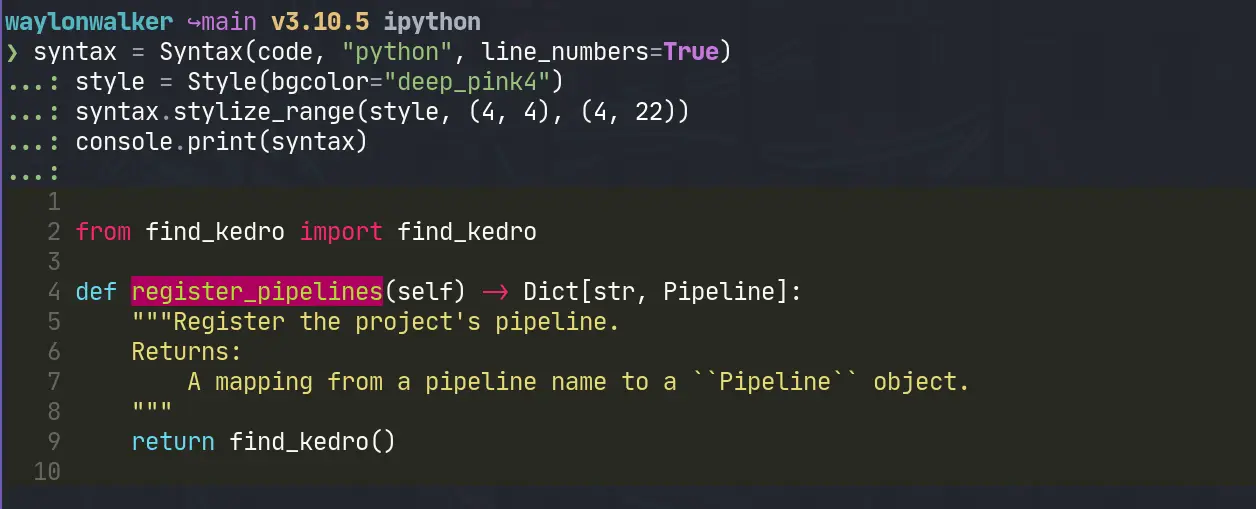
granular enough. I want to highlight specific ranges like the word
register_pipelines.
It’s about time to release Markata 0.3.0. I’ve had 8 pre-releases since the
last release, but more importantly it has about 3 months of updates. Many of
which are just cleaning up bad practices that were showing up as hot spots on
my pyinstrument reports
Markata started off partly as a python developer frustrated with using nodejs
for everything, and a desire to learn how to make frameworks in pluggy. Little
did I know how flexible pluggy would make it. It started out just as my blog
generator, but has turned into quite a bit more.
Over time this side project has grown some warts and some of them were now
becoming a big enough issue it was time to cut them out.
I like to use my tils articles for examples and tests like this as there are
enough articles for a good test, but they are pretty short and quick to render.
mkdir ~/git/tils/tils
cp  ~/git/waylonwalker.com/pages/til/ ~/tils/tils -r
cd ~/git/tils/tils
python3 -m venv .venv --prompt $(basename $PWD)# --pre installs pre-releases that include a b in their version namepip install markata --pre
markata clean
markata build
These measurements were taken with pyinstrument mostly out of convenience since
there is already a pyinstrument hook built in, but also because I like
pyinstrument.
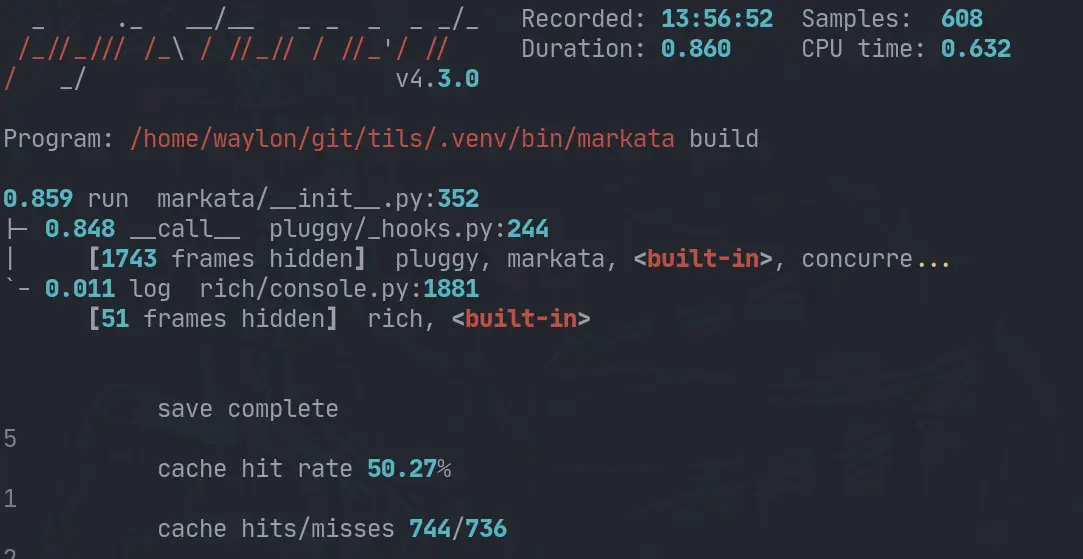
Here is the pyinstrument report from the last run.
Most of these changes revolve in how the lifecycle is ran. It was trying to be
extra cautious and run previous steps for you if it thought it might be
needes, in reality it was rerunning a few steps multiple times no matter what.
The other thing I turned off by default, but can be opted into, is
beautifulasoup’s prettify. That was one of the slower steps ran on my site.
It should be out by the time you see this, I wanted to compare the changes I
had made and make sure that it was still making forward progress and thought I
would share the results.
A common meta thing that I need in python is to find the version of a package.
Most of the time I reach for package_name.__version__, but that does not
always work.
In searching the internet for an answer nearly every one of them pointed me to
__version__. This works for most projects, but is simply a convention, its
not required. Not all projects implement a __version__, but most do. I’ve
never seen it lie to me, but there is nothing stopping someone from shipping
mismatched versions.
While its not required its super handy and easy for anyone to remember off the
top of their head. It makes it easy to start debugging differences between
what you have vs what you see somewhere else. You can do this by dropping a
__version__ variable inside your __init__.py file.
Your next option is to reach into the package metadata of the package that you
are interested in, and this has changed over time as highlighted in the stack
overflow post.
for Python >= 3.8:
from importlib.metadata import version

version('markata')
# `0.3.0.b4`
I only really use python >= 3.8 these days, but if you need to implement it for
an older version check out the stack overflow post.
Well we have a cli tool that wraps around piptools and we wanted to include the
version of piptools in the comments that it produces dynamically. This is why
I wanted to dynamically grab the version inside python without shelling out to
pip show. Now along with the version of our internal tool you will get the
version of piptools even though piptools does not ship a __version__
variable.
In the end, I am glad I learned that its so easy to use the more accurate
package metadata, but still appreciate packages shipping __version__ for all
of us n00b’s out here.
xrandr is a great cli to manage your windows in a linux distro using x11, which
is most of them. The issue is that I can never remember all the flags to the
command, and if you are using it with something like a laptop using a dock the
names of all the displays tend to change every time you redock. This makes it
really hard to make scripts that work right every time.
xrander-manager is a python cli application that is simply a nice interface
into xrandr. So you must have xrandr already installed, which is generally
just there on any x11 window manager, I’ve never had to install it.
As with any python cli that is indended to be used as a global/system level cli
application I always install them with pipx. This automates the process of
creating a virtual environment for xrandr-manager for me, and does not clutter
up my system packages with its dependencies that may eventually clash with
another that I want to use.
If you dont know the name of your monitors and and don’t want to dig through
xrandr, you can just run --prompt and tab complete to fill set your main
display.
This is what I most often use xrandr-manager for. Once you have the main
display set you can tell it where to put the other monitor. I’ve only tried
this with two monitors, I have no idea what happens with more monitors.
xrandr-manager -d right
xrandr-manager -d left
xrandr-manager -d above
xrandr-manager -d below
One thing that I always need to jump through hoops to do is mirror.
Occasionally I want to mirror so that more people can see the screen while we
are split screen gaming. This has seemed like a pain in any other xrandr
utility, but trivial in xrandr-manager.
One nice thing about xrandr-manager is that it echos out the xrandr command
that it’s running. This is nice because you can toss this behind a hotkey or an
init script.
Ya there are guis that do this. I’ve had good luck with arandr. It’s more
intuitive to drag windows around like what you would do in windows. Every once
in awhile it messes up and my polybar overlaps my windows, or my windows end up
only on half the screen.
There are also graphics card specific utilities, Ive used nvidia x server
settings and it mostly works similar to arandr.
So many terminal applications bind q to exit, even the python debugger, its
muscle memory for me. But to exit ipython I have to type out exit<ENTER>.
This is fine, but since q is muscle memory for me I get this error a few times
per day.
╭─────────────────────────────── Traceback (most recent call last) ────────────────────────────────╮
│ <ipython-input-1-2b66fd261ee5>:1 in <module>                                                     │
╰──────────────────────────────────────────────────────────────────────────────────────────────────╯
NameError: name 'q' is not defined
After digging way too deep into how IPython implements its ExitAutoCall I
realized there was a very simple solution here. IPython automatically
imports all the scripts you put in your profile directory, all I needed was to
create ~/.ipython/profile_default/startup/q.py with the following.
q = exit
It was that simple. This is not a game changer by any means, but I will now
see one less error in my workflow. I just press q<Enter> and I am out,
without error.
It’s no secret that I love automation, and lately my templating framework of
choice has been copier. One hiccup I recently ran into was having spaces in my
templated directory names. This makes it harder to run commands against as you
need to escape them, and if they end up in a url you end up with ugly %20 all
over.
Here is a slimmed down version of what the copier.yml looks like.
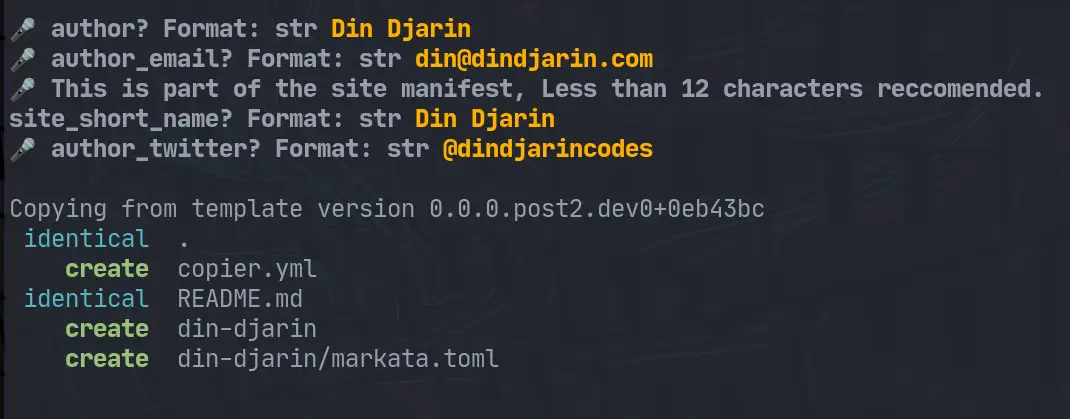
site_name:type:strhelp:What is the name of your site, this shows in seo description and the site title.default:Din Djarin_jinja_extensions:- cookiecutter.extensions.SlugifyExtension
The cookiecutter.extensions.SlugifyExtension extension provides a slugify
filter in templates that converts string into its dashed (“slugified”) version:
{% "It's a random version" | slugify %}
Would output:
it-s-a-random-version
It is different from a mere replace of spaces since it also treats some special
characters differently such as ' in the example above. The function accepts
all arguments that can be passed to the slugify function of
python-slugify_. For example to change the output from
it-s-a-random-version to it_s_a_random_version, the separator parameter
would be passed: slugify(separator='_').
Textual has devtools in the upcoming css branch, and its pretty awesome!
Textual is still very early and not really ready for prime time, but it’s quite
amazing how easy some things such as creating keybindings is. The docs are
coming, but missing right now so if you want to use textual be ready for
reading source code and examples.
As @willmcgugan shows in this tweet it’s
pretty easy to setup, it requires having two terminals open, or using tmux, and
currently you have to use the css branch.
Textual is a tui application framework. Unlike when you are building cli
applications, when the tui takes over the terminal in full screen there is no
where to print statement debug, and breakpoints don’t work.
Now you can create a virtual environment, feel free to use whatever virtual
environment tool you want, venv is built in to most python distributions
though, and should just be there.