GitPython is a python api for your git [1] repos, it can be quite handy when you
need to work with git from python.
Use Case # [2]
I recently made myself a handy tool for making screenshots in python and it
need to do a git commit and push from within the script. For this I reached
for GitPython.
How I Quickly Capture Screenshots directly into My Blog [3]
Installation # [4]
GitPython is a python library hosted on pypi that we will want to install
into our virtual environments using pip.
pip install GitPython
Create a Repo Object # [5]
Import Repo from the git library and create an instance of the Repo object by
giving it a path to the directory containing your .git directory.
from git import Repo
repo = Repo('~/git/waylonwalker.com/')
Two interfaces # [6]
from the docs
It provides abstractions of git objects for easy access of repository data,
and additionally allows you to access the git repository more directly using
either a pure python implementation, or the faster, but more resource
intensive git command implementation.
I only needed to use the more intensive but familar to me git command
implementation to get me project off the ground. There is a good
tutorial [...
Posts tagged: cli
All posts with the tag "cli"
97 posts
latest post 2026-05-24
Publishing rhythm
From the same Author that brought us command line essentials like fd and
bat written in rust comes pastel [1] an
incredible command-line tool to generate, analyze, convert and manipulate
colors.
Install # [2]
You can install from one of the
releases [3], follow the
instructions [4] for your system
from the repo. I chose to go the nix route. I have enjoyed the simplicity of
the nix package manager being cross platform and have very up to date packages
in it.
nix-env --install pastel
Mixing colors # [5]
Something I often do to blend colors together is add a little alpha to
something over top of a background. I can simulate this by mixing colors.
pastel color cornflowerblue | pastel mix goldenrod -f .1
Here is one from the docs that show how you can generate a color palette from
random colors, mix in some red, lighten and format all in one pipe.
pastel random | pastel mix red | pastel lighten 0.2 | pastel format hex
color picker # [6]
I am on Ubuntu 20.10 as I write this and it works flawlessly. When I call the
command, a color picker gui pops up along with an rgb panel. I can pick from
the panel or from anywhere on my screen.
pastel color-picker
Sorry, your browser doesn...
This morning I was trying to install a modpack on my minecraft server after
getting a zip file, and its quite painful when I unzip everything in the
current directory rather than the directory it belongs in.
I had the files on a Windows Machine # [1]
So I’ve been struggling to get mods installed on linux lately and the easiest
way to download the entire pack rather than each mod one by one seems to be to
use the overwolf application on windows. Once I have the modpack I can start
myself a small mod-server by zipping it, putting it in a mod-server directory
and running a python http.server
python -m http.server
Downoading on the server # [2]
Then I go back to my server and download the modpack with wget.
wget 10.0.0.171:8000/One%2BBlock%2BServer%2BPack-1.4.zip
Unzip to the minecraft-data directory # [3]
Now I can unzip my mods into the minecraft-data directory.
unzip One+Block+Server+Pack-1.4.zip -d minecraft-data
Running the server with docker # [4]
I run the minecraft server with docker, which is setup to mount the
minecraft-data directory.
Running a Minecraft Server in Docker [5]
A bit more on that in the other post, but when I download the whole modpack
like this I ...
I recently gave a talk at python web conf 2022, and one of the things I did
when I should have been working on my presentation was workig on how my
presentation looked… classic procrastination technique.
Slide One # [1]
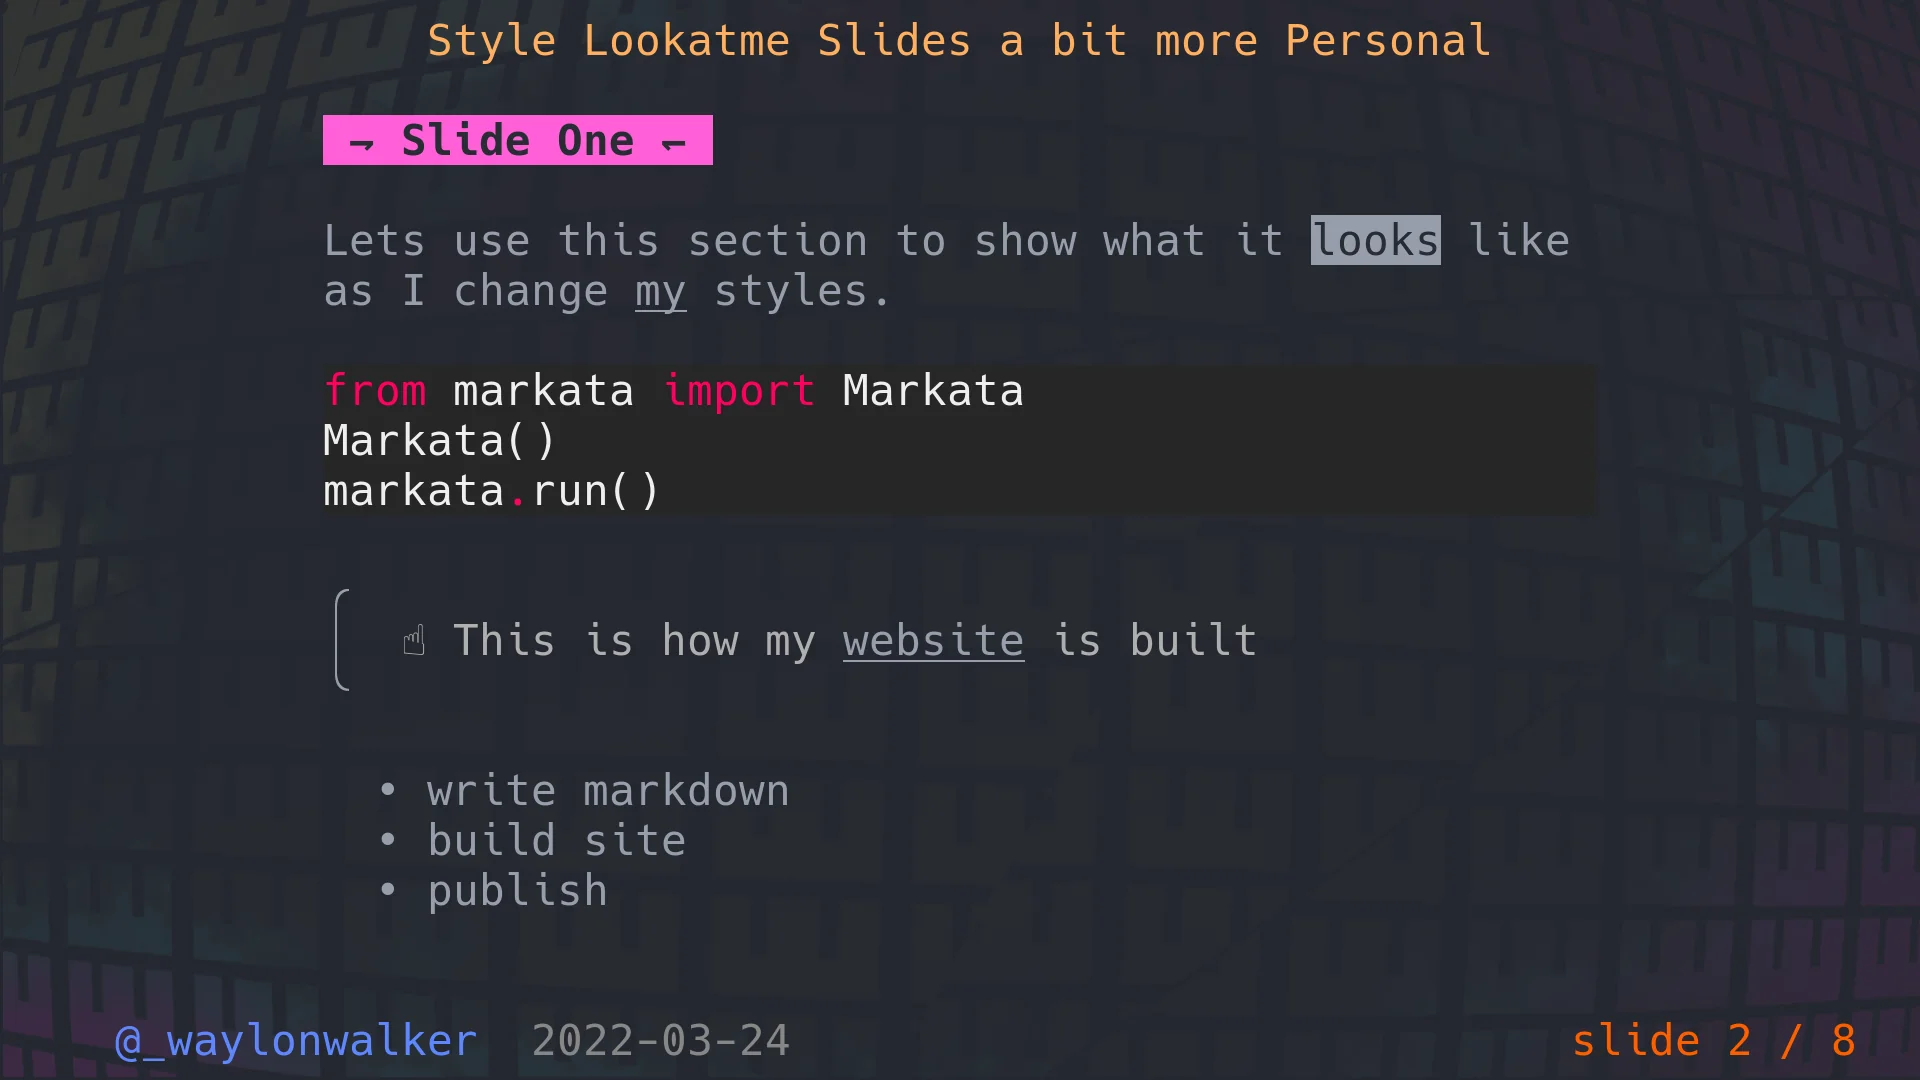
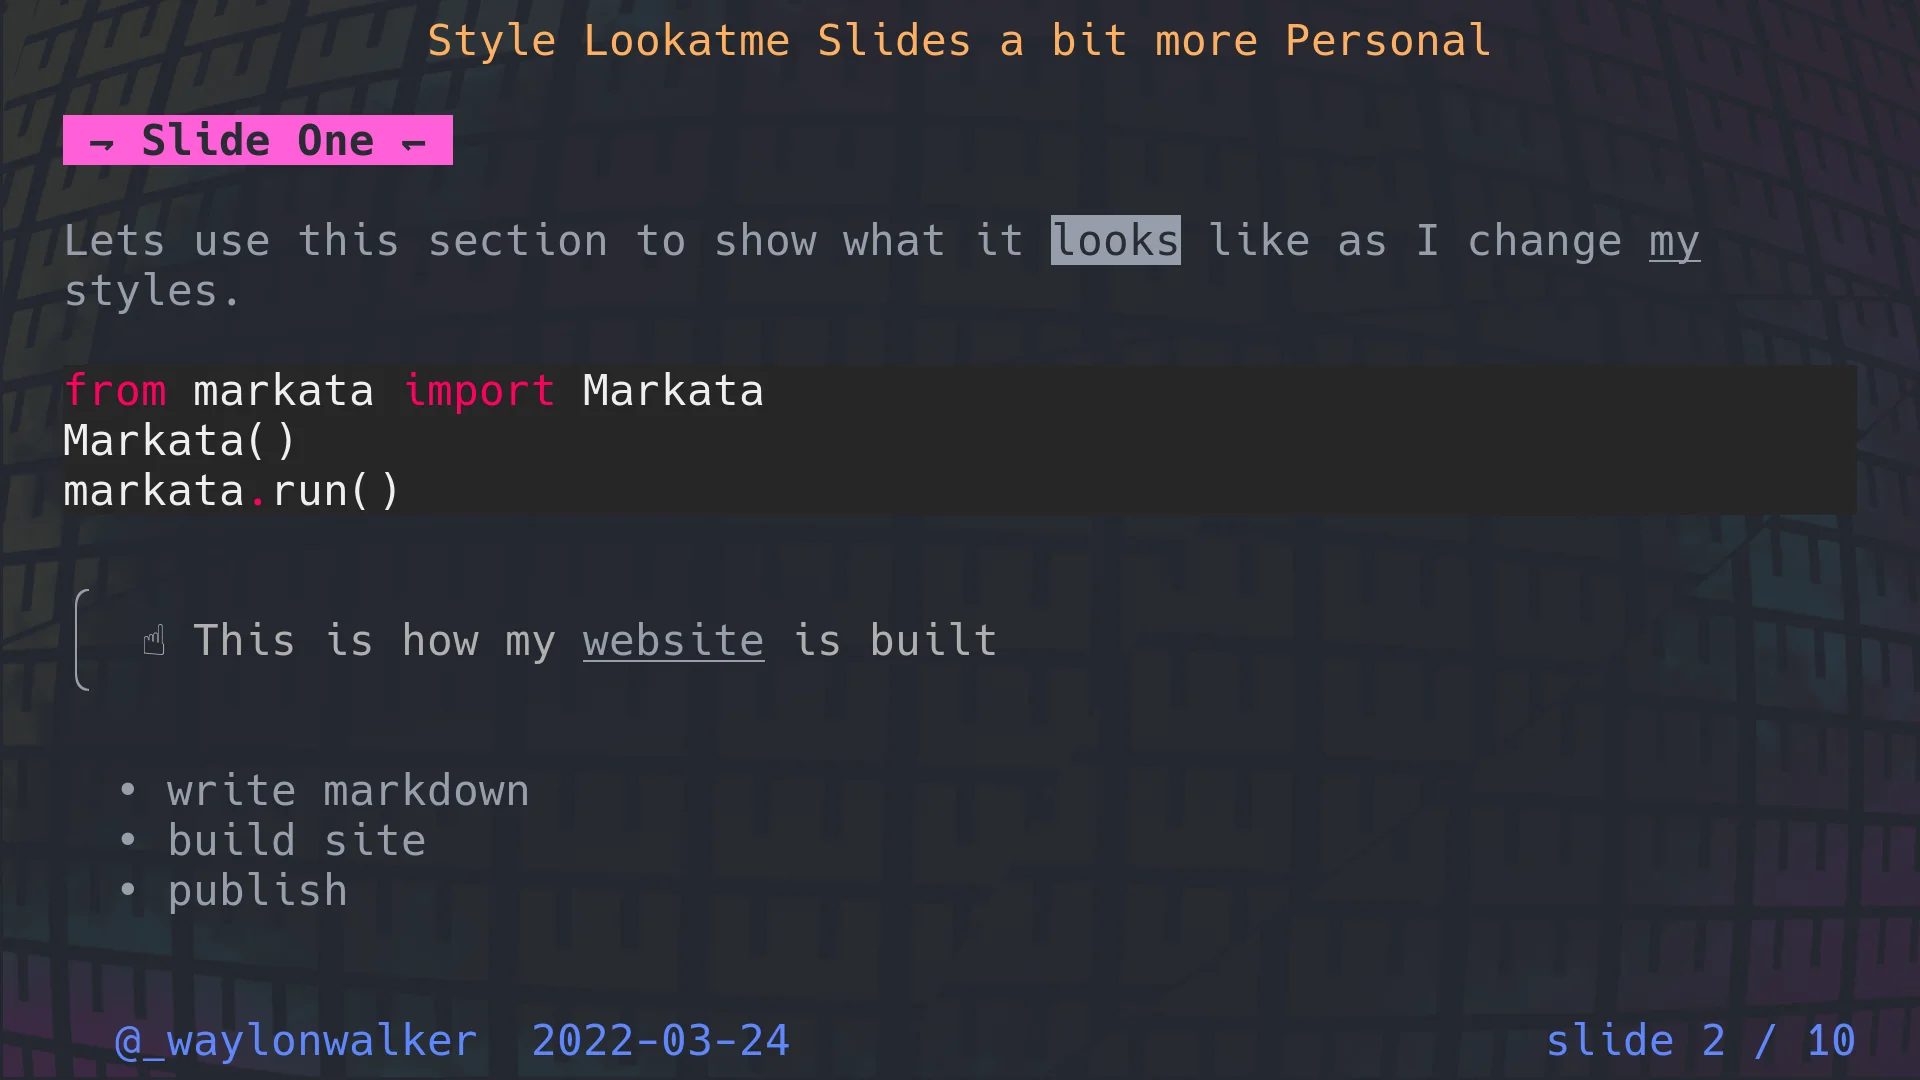
Lets use this section to show what it looks like as I change my styles.
from markata import Markata
Markata()
markata.run()
☝ This is how my website is built
- write markdown
- build site
- publish
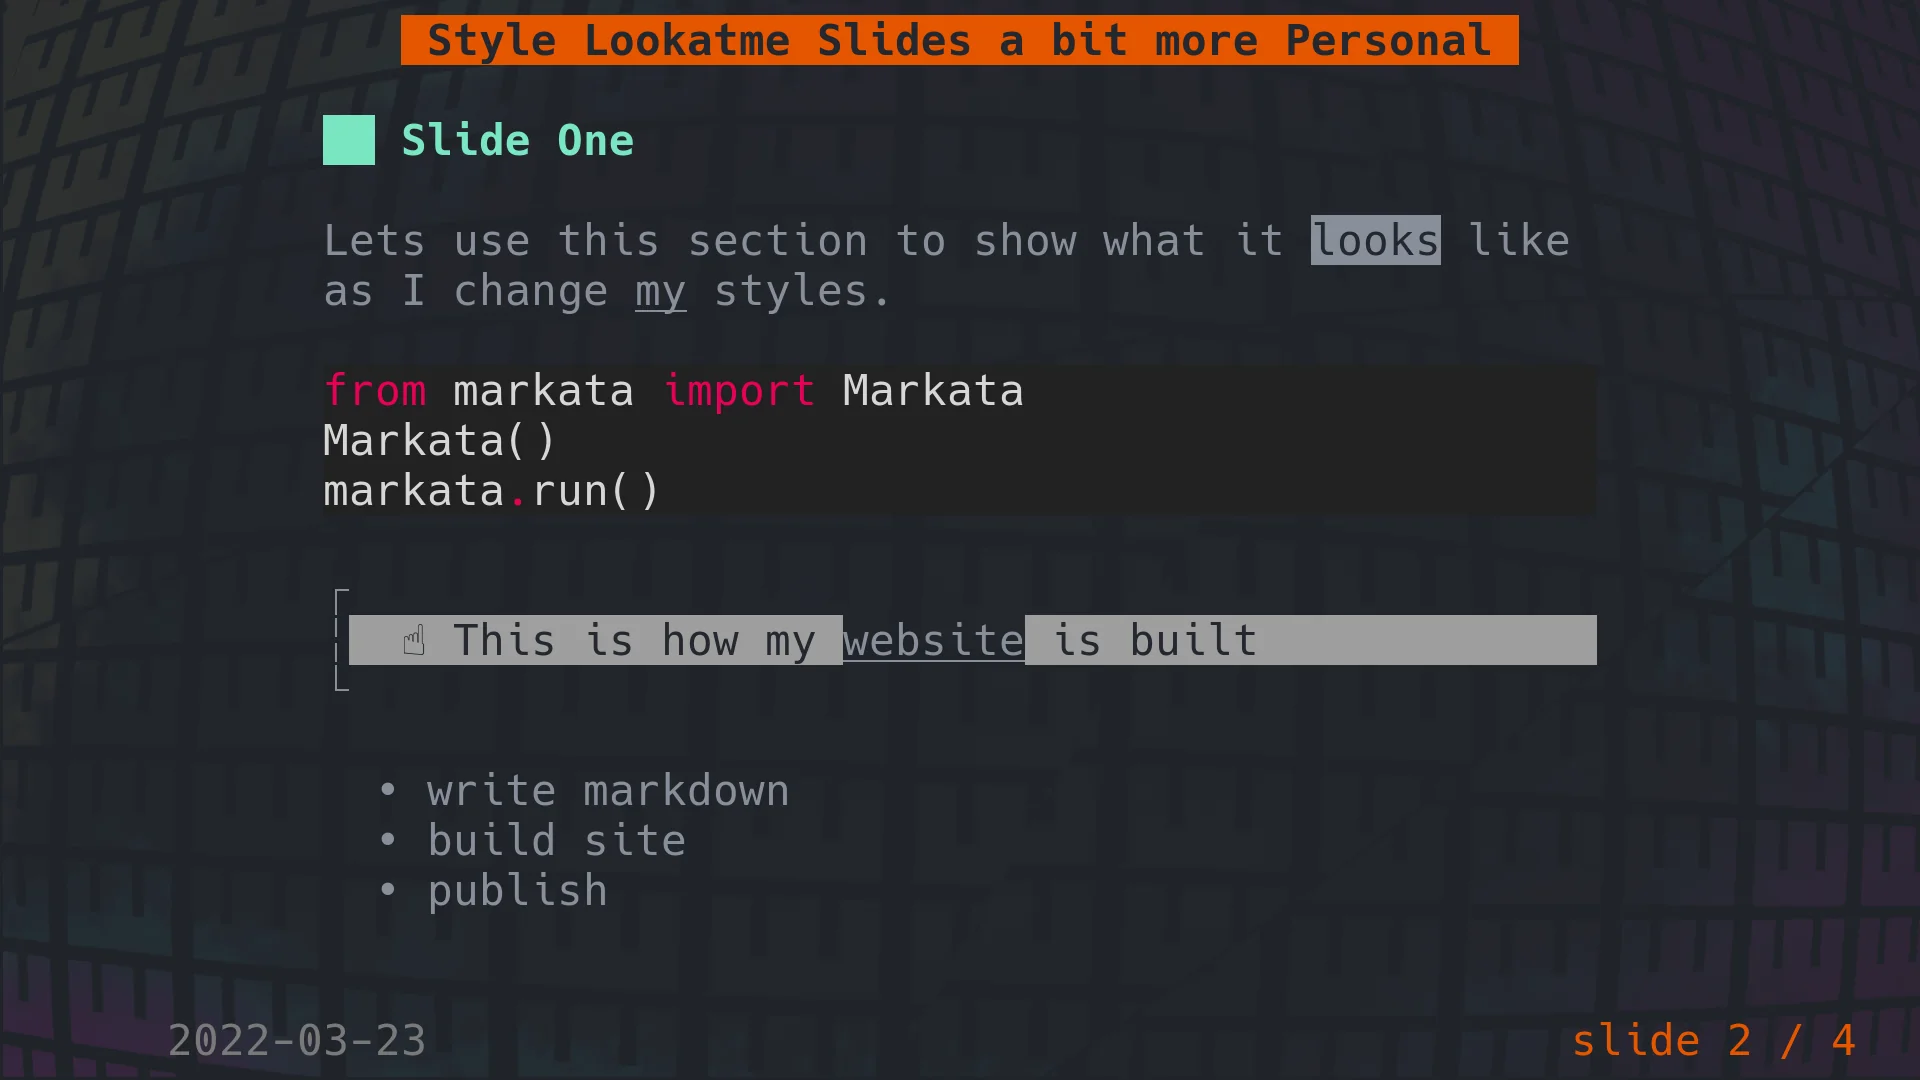
default # [2]
This is what the above slide looks like in lookatme.
[3]
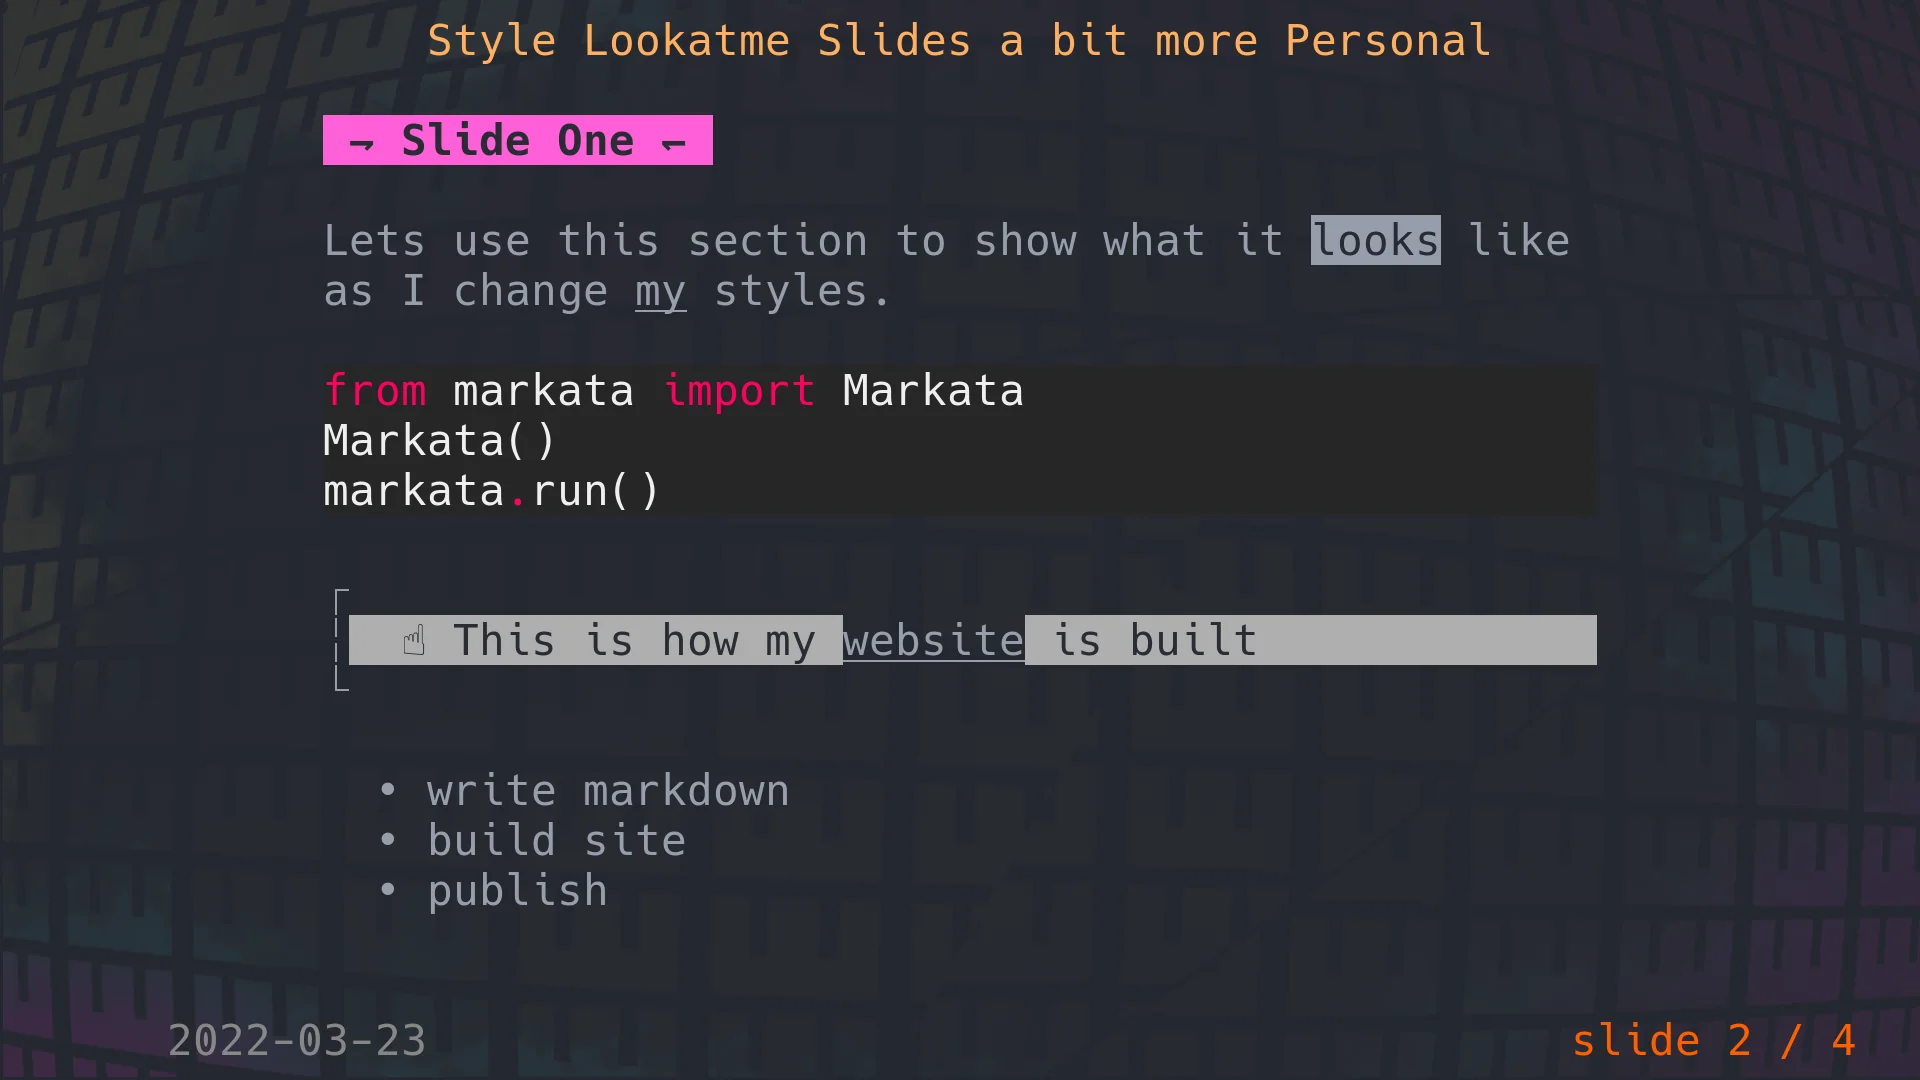
Set focus to the most important element # [4]
The way I write my slides I want the most prominant element to be the slides
title, not the presentation title. The slides title is generally the point I
am trying to make, I will leave some supporting information if I want, but
sometimes, I just have a title.
styles:
title:
bg: default
fg: '#e1af66'
headings:
'1':
bg: default
fg: '#ff66c4,bold,italics'
prefix: ' ⇁ '
suffix: ' ↽ '
[5]
by default he prefix/suffix was a full block that just went transparant into
the slide. I thought the harpoons were fun and went with them on a whim
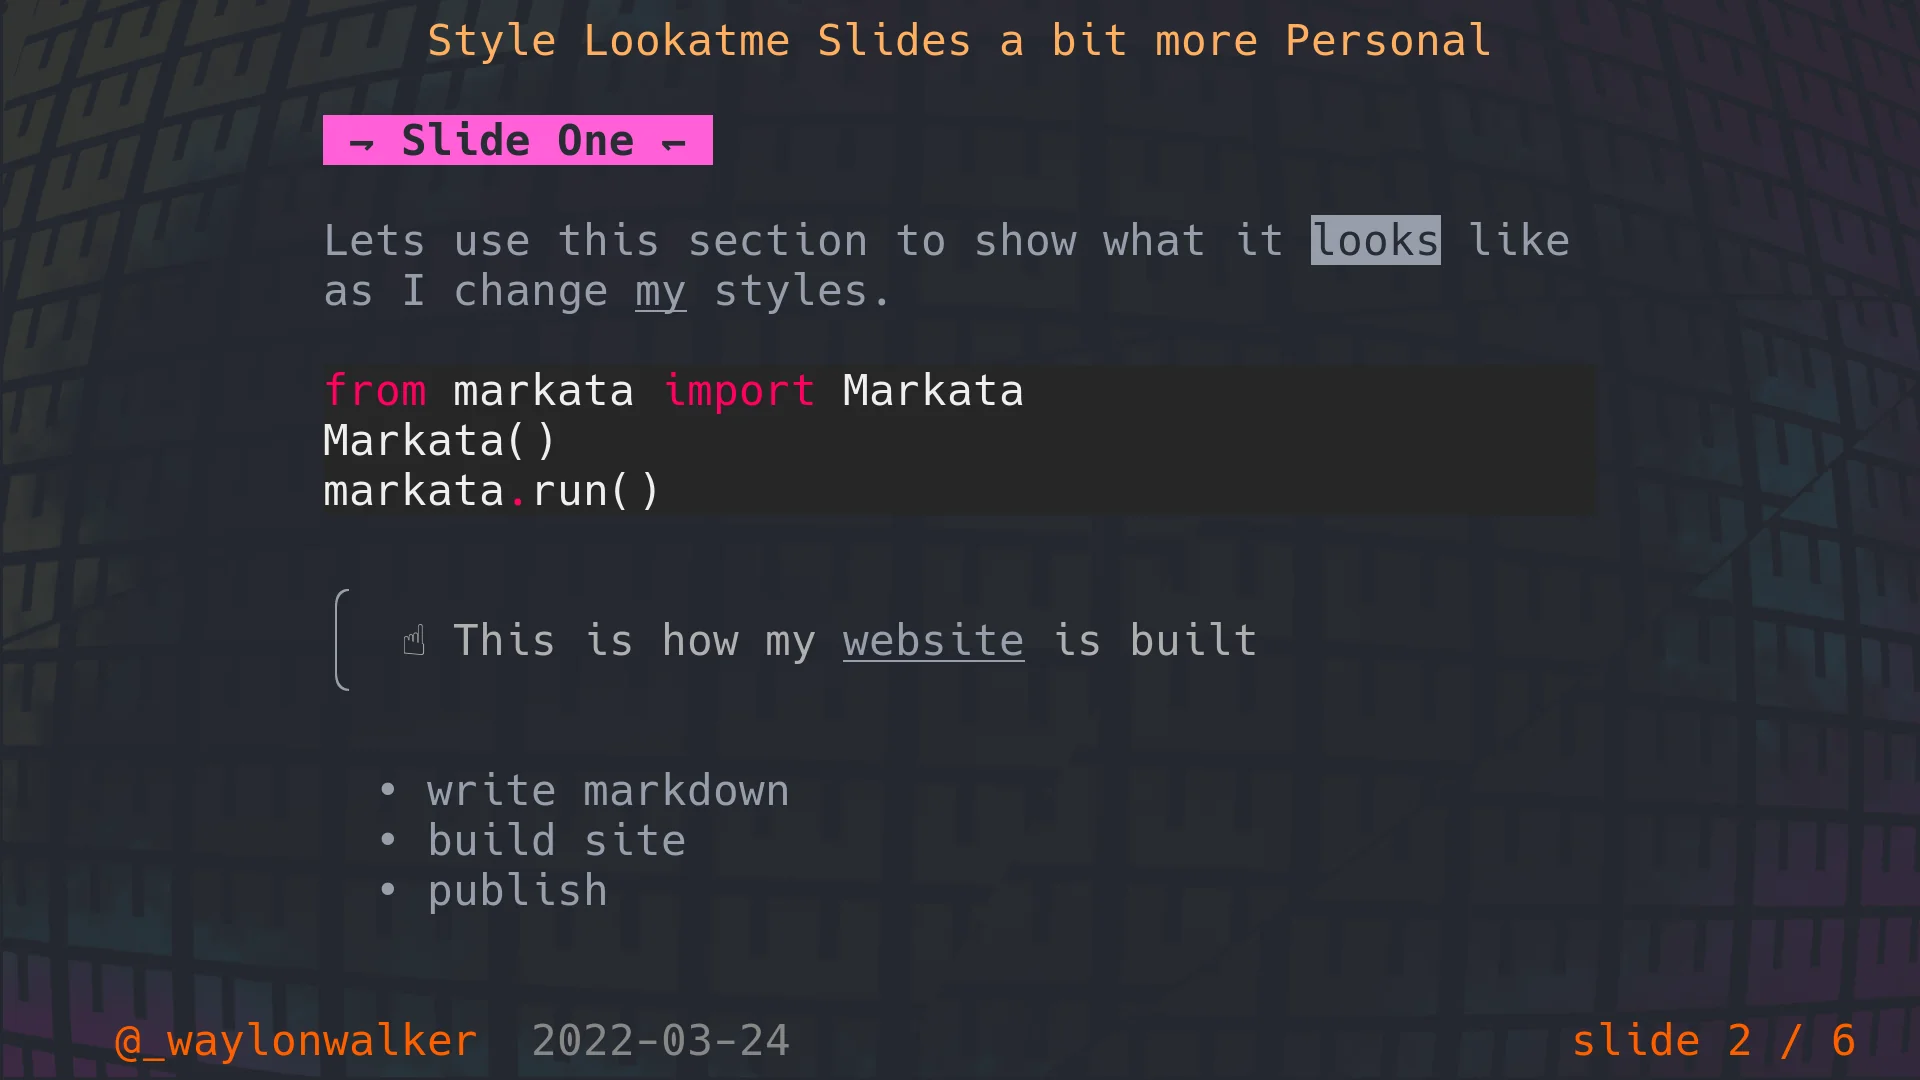
The box characters bother me # [6]
The box characters are fine really, but it really bothers me th...
I love the freedom of writing in markdown. It allows me to write content from
the comfort of my editor with very little focus on page style. It turns out
that markdown is also a fantastic tool for creating slides.
Present from the terminal # [1]
I will most often just present right from the terminal using
lookatme [2]. Presenting
from the terminal lets me see the results quick right from where I am editing.
It also allows me to pop into other terminal applications quickly.
reveal.js # [3]
I sometimes also use reveal.js, but that’s for another post. It is handy that
it lives in the browser and is easier to share.
New Slides # [4]
I leverage auto slides when I write my slides in markdown. The largest
heading, usually an h2 for me, becomes the new slide marker. Otherwise my
process is not much different, It just becomes a shorter writing style.
Installation # [5]
lookatme is a python library that is available on pypi, you can install it with
the pip command.
python -m pip install lookatme
Since it’s a command line application it works great with pipx. This prevents
the need to manage virtual environments yourself or ending up with packages
clashing in your system python e...
Setting up your git [1] pager to your liking can help you navigate diffs and logs
much more efficiently. You can set it to whatever pager you like so that your
keys feel nice and smooth and your fingers know exactly what to do. You might
even gain a few extra features.
Setting the pager # [2]
You can set the pager right from your command line with the following command.
git config --global core.pager 'more'
You can also set your pager by editing your global .gitconfig file which by
default is set to ~/.gitconfig.
[core]
pager = more
Color # [3]
In my experience you need to turn colors off with nvim. bat handles them and
looks good either way, but nvim will be plain white and display the color
codes as plain text if color is on.
git config --global color.pager no
Pagers I have tried # [4]
Here are some various configs that I tried. For some reason line numbers in
bat really bothered me, but when in nvim they felt ok. I am going to try
running both of them for a few days and see which I like better. I think
having some of my nvim config could be really handy for things like yanking a
commit hash to the system clipboard without touching the mouse.
# bat
git config --global...
If you have ever mistyped a git [1] command very close to an existing one
you have likely seen this message.
❯ git chekout dev
git: 'chekout' is not a git command. See 'git --help'.
The most similar command is
checkout
Automatically run the right one # [2]
What you might not have known is that you can configure git to just run
this command for you.
# Gives you 0.1 seconds to respond
git config --global help.autocorrect 1
# Gives you 1 seconds to respond
git config --global help.autocorrect 10
# Gives you 5 seconds to respond
git config --global help.autocorrect 50
Fat Fingers Gone # [3]
Now when you typo a git command it will autmatically run after the
configured number of tenths of a second.
❯ git chkout get-error
WARNING: You called a Git command named 'chkout', which does not exist.
Continuing in 1.0 seconds, assuming that you meant 'checkout'.
M pages/blog/how-i-deploy-2021.md
M pages/hot_tips/001.md
M pages/templates/gratitude_card.html
M plugins/index.py
M plugins/publish_amp.py
M plugins/render_template_variables.py
M plugins/youtube.py
M requirements.txt
M static/index.html
Switched to branch 'get-error'
My config # [4]
I’m rocking 10 for now just to see how I ...
yq is a command line utility for parsing and querying yaml, like jq does for json.
This is for me # [1]
I love that all of these modern tools built in go and rust, just give you a
zipped up executable right from GitHub releases, but it’s not necessarily
straight forward how to install them. yq does one of the best jobs I have
seen, giving you instructions on how to get a specific version and install it.
I use a bunch of these tools, and for what its worth I trust the devs behind
them to make sure they don’t break. This so far has worked out well for me,
but if it ever doesn’t I can always pick an older version.
Just give me the latest # [2]
Since I am all trusting of them I just want the latest version. I do not want
to update a shell script with new versions, or even care about what then next
version is, I just want it. Luckily you can script the release page for the
latest version on all that I have came accross.
What is the latest # [3]
I wrote or stole, I think I wrote it, this line of bash quite awhile ago, and
it has served me well for finding the latest release for any GitHub project
using releases. Just update it with the name of the tool, org, and repo and it
wor...
Kedro rich is a very new and unstable (it’s good, just not ready) plugin for
kedro to make the command line prettier.
Install kedro rich # [1]
There is no pypi package yet, but it’s on github. You can pip install it with
the git [2] url.
pip install git+https://github.com/datajoely/kedro-rich
Kedro run # [3]
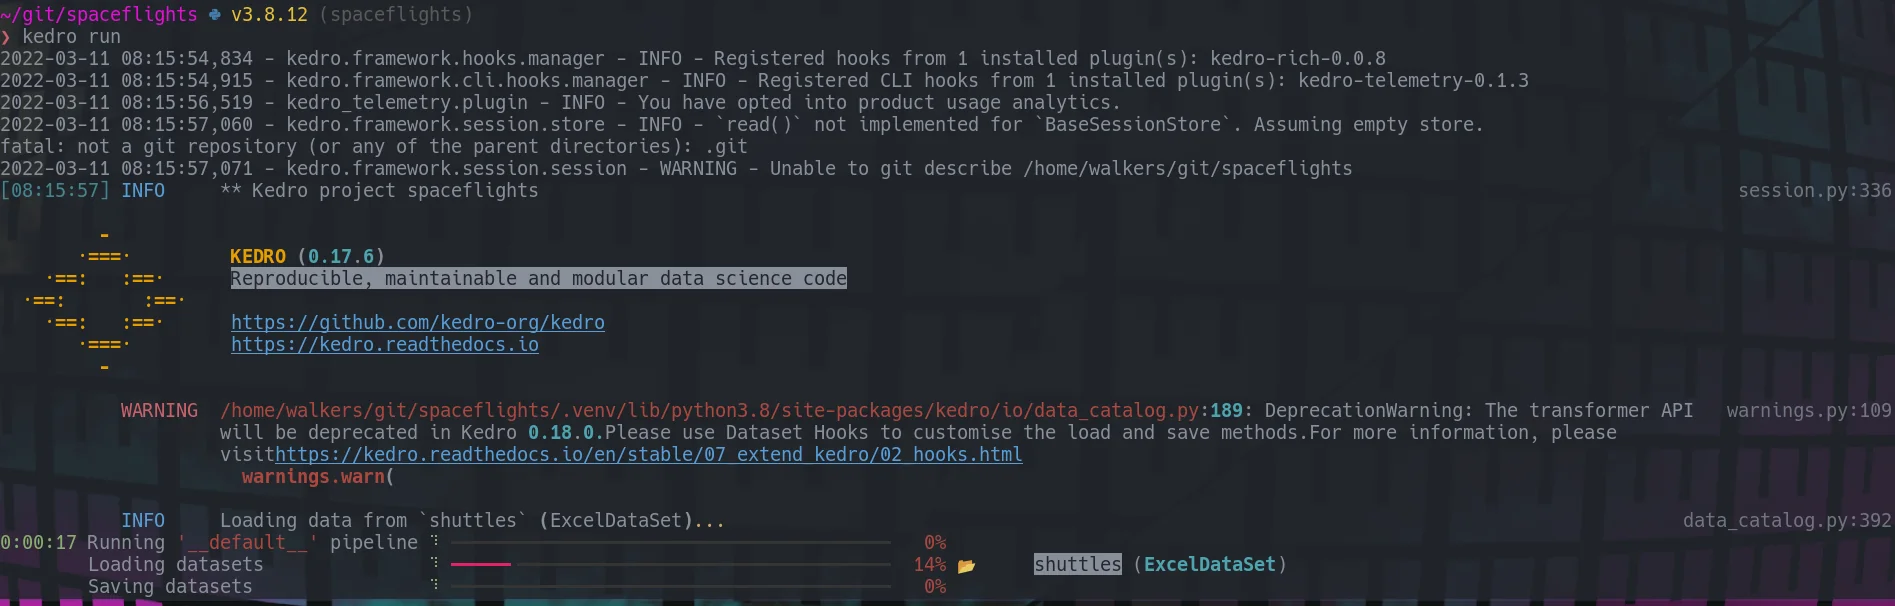
You can run your pipeline just as you normally would, except you get progress
bars and pretty prints.
kedro run
[4]
Kedro catalog # [5]
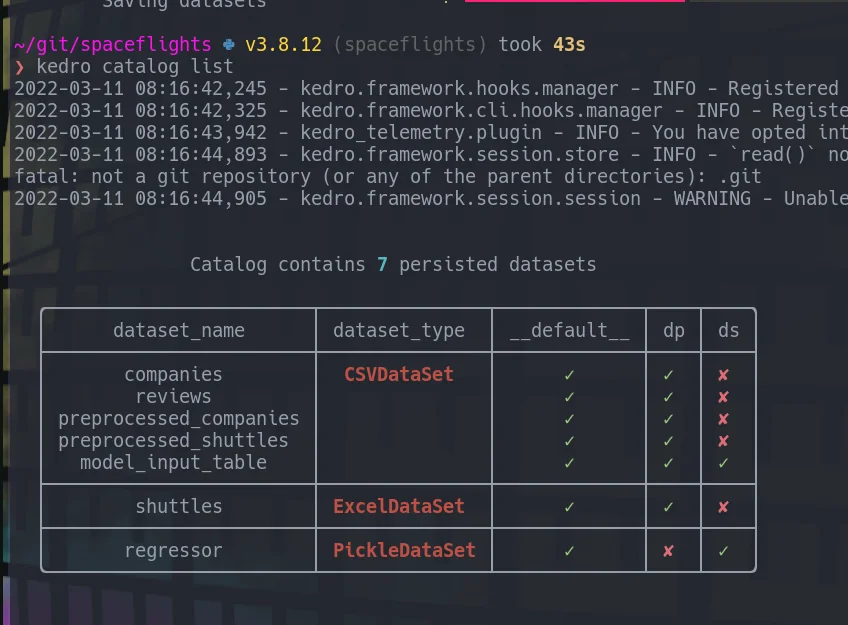
Listing out catalog entries from the command line now print out a nice pretty
table.
kedro catalog list
[6]
Give it a star # [7]
Go to the GitHub repo [8] and give it a
star, Joel deserves it.
References:
[1]: #install-kedro-rich
[2]: /glossary/git/
[3]: #kedro-run
[4]: https://images.waylonwalker.com/kedro-rich-run.png
[5]: #kedro-catalog
[6]: https://images.waylonwalker.com/kedro-rich-catalog-list.png
[7]: #give-it-a-star
[8]: https://github.com/datajoely/kedro-rich
So worktrees, I always thought they were a big scary things. Turns out they
are much simpler than I thought.
Myth #1 # [1]
no special setup
I thought you had to be all in or worktrees or normal git [2], but not both. When
I see folks go all in on worktrees they start with a bare repo, while its true
this is the way you go all in, its not true that this is required.
Lets make a worktree # [3]
Making a worktree is as easy as making a branch. It’s actually just a branch
that lives in another place in your filesystem.
# checkout a new worktree called compare based on main in /tmp/project
git worktree add -b compare /tmp/project main
# checkout a new worktree called compare based on HEAD in /tmp/project
git worktree add -b compare /tmp/project
# checkout a worktree from an existing feature branch in /tmp/project
git worktree add /tmp/project my-existing-feature-branch
The worktree that you create is considered a linked worktree, while the
original worktree is called the main worktree
Note that I put this in my tmp directory because I don’t expect it to live very
long, my recent use case was to compare two files after a big formatting
change. You put these where you want, bu...
I recently found a really great plugin [1] by
mhinz [2] to open files in neovim from a
different tmux split, without touching neovim at all.
Installation # [3]
neovim-remote [1] is not a neovim
plugin at all, it’s a python cli that you can install with pip. Unlike
the repo suggests, I use pipx to install nvr.
pipx install neovim-remote
How I use it # [4]
I have this added to my .envrc that is in every one of my projects.
This will tie a neovim session to that directory, and all directories
under it.
export NVIM_LISTEN_ADDRESS=/tmp/nvim-$(basename $PWD)
In my workflow I open a tmux session for each project, so this
essentially ties a neovim session to a tmux session.
Open neovim # [5]
First open neovim, but with the nvr command. This will open neovim,
and look pretty much the same as always.
nvr
If you try to run nvr again in another shell nothing will happen as
its already runnin under that address, but if you give it a filename it
will open the file in the first instance of neovim that you opened.
nvr readme.md
Links # [6]
- GitHub [1]
References:
[1]: https://github.com/mhinz/neovim-remote
[2]: https://github.com/mhinz
[3]: #installation
[4]: #how-i-use-it
[5]: #op...
If you have ever ran which <command> and see duplicate entries it’s likely
that you have duplicate entries in your $PATH. You can clean this up with a
one liner at the end of your bashrc or zshrc.
eval "typeset -U path"
There is GNU coreutils command called mktemp that is super handy in shell
scripts to make temporary landing spots for files so that they never clash with
another instance, and will automatically get cleaned up when you restart, or
whenever /tmp gets wiped. I’m not sure when that is, but I don’t expect it
to be long.
Making temp directories # [1]
Here are some examples of making temp directories in different places, my
favorite is mktemp -dt mytemp-XXXXXX.
# makes a temporary directory in /tmp/ with the defaul template tmp.XXXXXXXXXX
mktemp
# makes a temporary directory in your current directory
mktemp --directory mytemp-XXXXXX
# shorter version
mktemp -d mytemp-XXXXXX
# same thing, but makes a file
mktemp mytemp-XXXXXX
# makes a temporary directory in your /tmp/ directory (or what ever you have configured as your TMPDIR)
mktemp --directory --tmpdir mytemp-XXXXXX
# shorter version
mktemp -dt mytemp-XXXXXX
# same thing, but makes a file
mktemp --tmpdir mytemp-XXXXXX
# shorter version
mktemp -t mytemp-XXXXXX
Use Case # [2]
Here is a sample script that shows how to capture the tempdir as a variable and
reuse it. Here is an example of curling my bootstrap file into a temp
dir...
Once you give a branch the big D (git branch -D mybranch) its gone,
its lost from your history. It’s completely removed from your log.
There will be no reference to these commits, or will there?
TLDR # [1]
Checkout is your savior, all you need is the commit hash.
Immediate Regret # [2]
your terminal is still open
We have all done this, you give branch the big D only to realize it was
the wrong one. Don’t worry, not all is lost, this is the easiest to
recover from. When you run the delete command you will see something
like this.
❯ git branch -D new
Deleted branch new (was bc02a64).
Notice the hash is right there is the hash of your commit. You can use
that to get your content back.
git checkout -b bc02a64
git branch new
# or in one swoop checkout your new branch at the `start-point` you want
git checkout -b new bc02a64
Delayed reaction # [3]
you have closed your terminal
If you have closed your terminal, or have deleted with a gui or
something that does not tell you the hash as you run it, don’t fret, all
your work is still there (as long as you have commited). You just have
to dig it out. The reflog contains a list of all git [4] operations that
have occurred on your ...
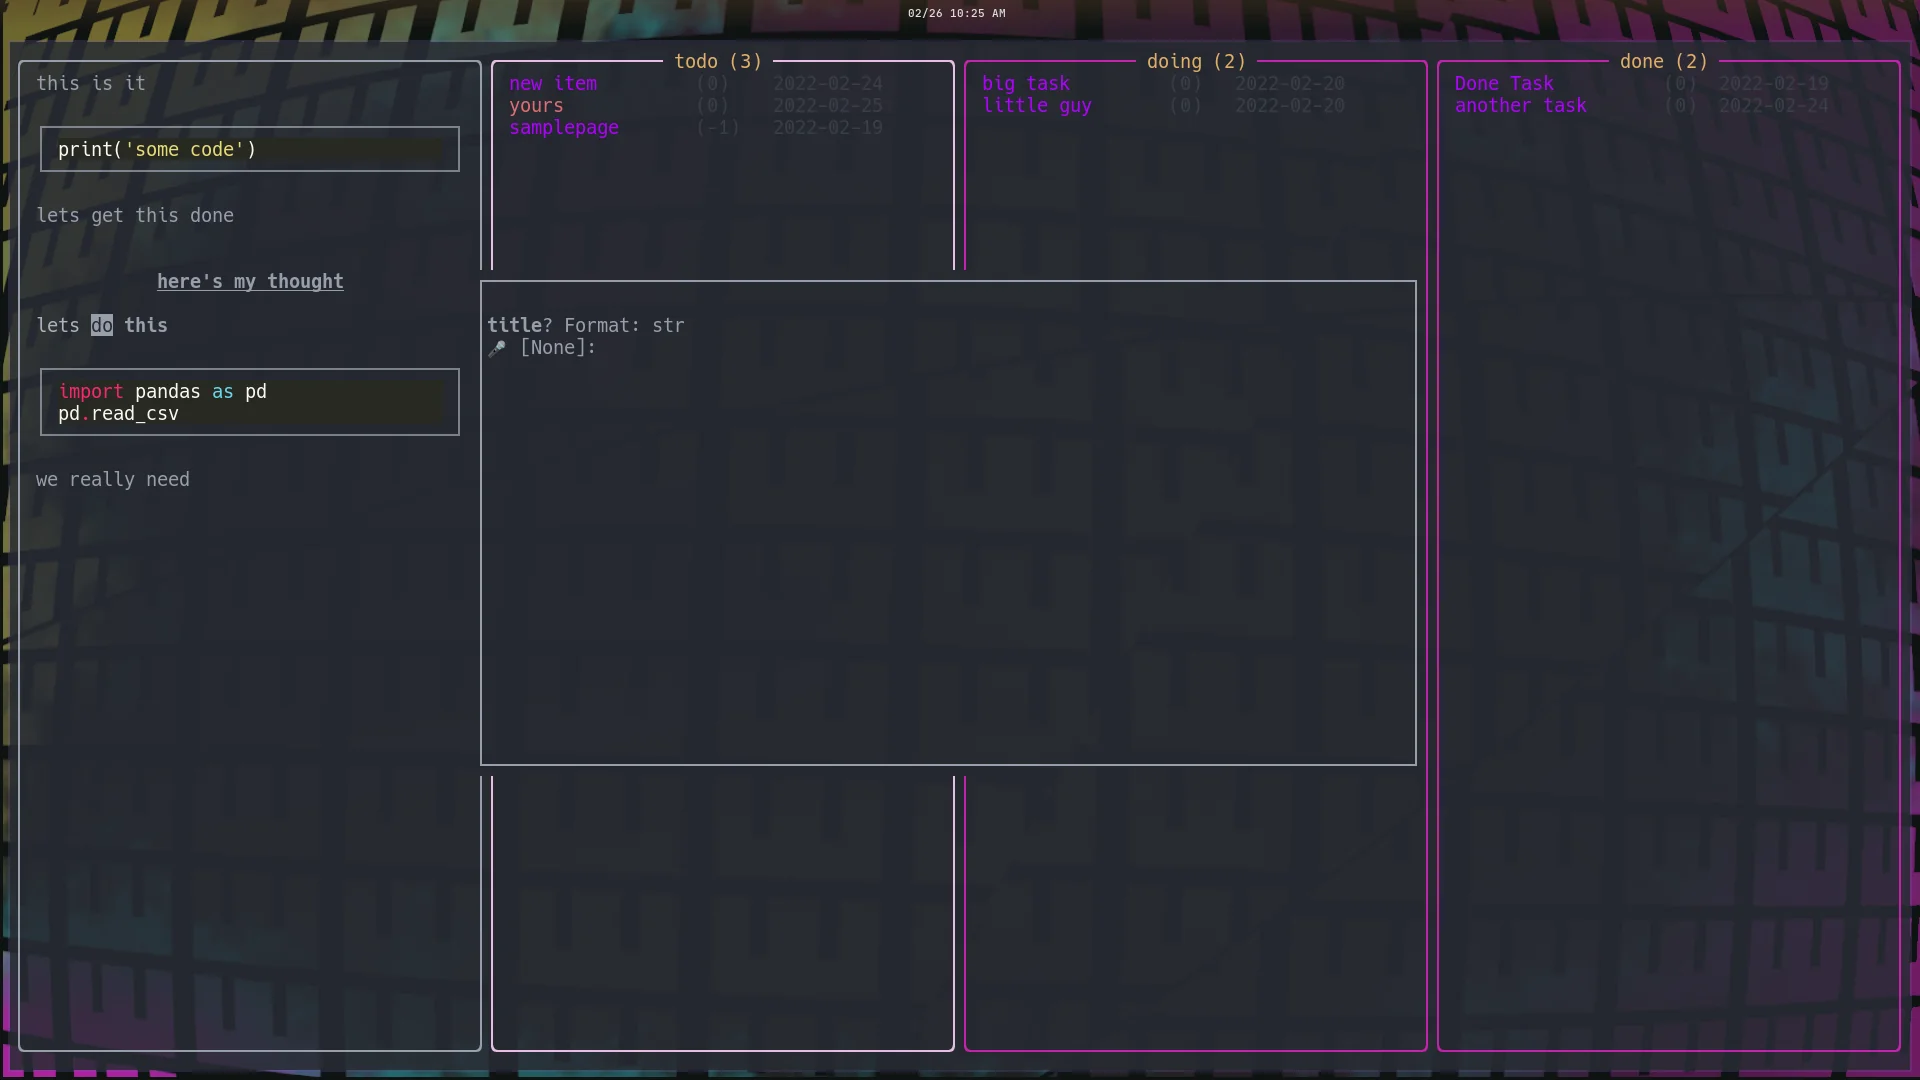
As I am toying around with textual, I am wanting some popup user input
to take over. Textual is still pretty new and likely to change quite
significantly, so I don’t want to overdo the work I put into it, So for
now on my personal tuis I am going to shell out to tmux.
The Problem # [1]
The main issue is that when you are in a textual app, it kinda owns the
input. So if you try to run another python function that calls for
input it just cant get there. There is a
textual-inputs [2] library
that covers this, and it might work really well for some use cases, but
many of my use cases have been for things that are pre-built like
copier, and I am trying to throw something together quick.
textual is still very beta
Part of this comes down to the fact that textual is still very beta and
likely to change a lot, so all of the work I have done with it is for
quick and dirty, or fun side projects.
The Solution # [3]
So the solution that was easiest for me… shell out to a tmux popup.
The application I am working on wants to create new documents using
copier templates. copier has a fantastic cli that walks throught he
template variables and asks the user to fill them in, so I just shell...
Git [1] has a built in way to rebase all the way back to the beginning of
time. There is no need to scroll through the log to find the first
hash, or find the total number of commits. Just use --root.
git rebase --root
References:
[1]: /glossary/git/
Git [1] reflog can perform some serious magic in reviving your hard work
from the dead if you happen to loose it.
caveat # [2]
You must git commit! If you never commit the file, git cannot help you.
You might look into your trashcan, filesystem versions, onedrive, box, dropbox.
If you have none of this, then you are probably hosed.
practice # [3]
I really like to practice these techniques before I need to use them so
that I understand how they work in a low stakes fashion. This helps me
understand what I can and cannot do, and how to do it in a place that
does not matter in any way at all.
This is what I did to revive a dropped docker-compose.yml file. The
idea is that if I can find the commit hash, I can cherry-pick it.
git init
touch readme.md
git add readme.md
git commit -m "add readme"
touch docker-compose.yml
git add docker-compose.yml
git commit -m "add docker-compose"
git reset 3cfc --hard
git reflog
# copy the hash of the commit with my docker-compose commit
git cherry-pick fd74df3
reflog # [4]
Here was the final reflog that shows all of my git actions. note I
did reset twice.
❯ git reflog --name-only
0404b6a (HEAD -> main) HEAD@{0}: cherry-pick: add docker-compo...
Right inside the git [1] docs [2],
is states that the git reflog command runs git reflog show by default which
is an alias for git log -g --abbrev-commit --pretty=oneline
This epiphany deepens my understanding of git, and lets me understand that most
git log flags might also work with git log -g.
full or short format # [3]
Here are some git commands for you to try out on your own that are all pretty
similar, but vary in how much information they show.
# These show only first line of the commit message subject, the hash, and index
git reflog
git log -g --abbrev-commit --pretty=oneline
# similar to git log, this is a fully featured log with author, date, and full
# commit message
git log -g
add files # [4]
If I am looking for a missing file, I might want to leverage --name-only or
--stat, to see where I might have hard reset that file, or deleted it.
git reflog --stat
git log -g --stat --abbrev-commit --pretty=oneline
git reflog --name-only
git log -g --name-only --abbrev-commit --pretty=oneline
example # [5]
Here is an example where I lost my docker-compose.yml file in a git reset,
and got it back by finding the commit hash with git reflog and cherry picked
it back.
❯...
Reading eventbridge rules from the command line can be a total drag, pipe it
into visidata to make it a breeze.
I just love when I start thinking through how to parse a bunch of json at the
command line, maybe building out my own custom cli, then the solution is as
simple as piping it into visidata. Which is a fantastic tui application that
had a ton of vim-like keybindings and data features.
alias awsevents = aws events list-rules | visidata -f json
Anyone just starting out their vim customization journey is bound to run into this error.
E5520: <Cmd> mapping must end with <CR>
I did not get it # [1]
I’ll admit, in hindsight it’s very clear what this is trying to tell me, but
for whatever reason I still did not understand it and I just used a :
everywhere.
From the docs # [2]
If you run :h <cmd> you will see a lot of reasons why you should do it, from
performance, to hygene, to ergonomics. You will also see another clear
statement about how to use <cmd>.
E5520
<Cmd> commands must terminate, that is, they must be followed by <CR> in the
{rhs} of the mapping definition. Command-line mode is never entered.
When to map with a : # [3]
You still need to map your remaps with a : if you do not close it with a
<cr>. This might be something like prefilling a command with a search term.
nnoremap <leader><leader>f :s/search/
Otherwise use # [4]
If you can close the <cmd> with a <cr> the command do so. Your map will
automatically be silent, more ergonomic, performant, and all that good stuff.
nnoremap <leader><leader>f <cmd>s/search/Search/g<cr>
References:
[1]: #i-did-not-get-it
[2]: #from-the-docs
[3]: #when-to-map-with-a-...