Today I learned how to VACUUM a sqlite database and cut its size in about half.
It’s a database that I have had running for quite awhile and has some decent
traffic on it.
Why is it important to do a VACUUM? In short its becuase the file system gets
fragmented with as data is updated. On delete the files are removed from the
database and marked as available for reuse in the filesystem, but the space is
not reclaimed.
To VACUUM a database, run the following sql command. You can do it right form
the sqlite shell by running sqlite3.
You will need about double the current size of the database as free space to
do the VACUUM, you need space for a full copy, journaling or write ahead
logs, and the existing database.
Arch Linux - News: The xz package has been backdoored
archlinux.org [1]
Check your system to see if you are vulnerable to the xz backdoor.
I found this line most pertanent to me.
The xz packages prior to version 5.6.1-2 (specifically 5.6.0-1 and 5.6.1-1) contain this backdoor.
Also it appears that arch is not vulnerable as it does not directly link openssh to liblzma, so the known attack vecotor is not possible. read to the end of the linked article for more.
References:
[1]: https://archlinux.org/news/the-xz-package-has-been-backdoored/
I learned that tailwind animations are pretty easy to add only needing a few
classes. For some reason though my brain broke, thinking that I could
dynamically change the number and you can’t cause there are only so many pre
compiled classes without using an arbitrary value with brackets.
Here are the classes that I used to transition my colors very slowly.
I recently updated ollama, and it now installs a systemd
service that I was not expecting. Seems like a great option, but I hadn’t
expeted this and I was able to kill it previously. It was using up gpu, and I
do other things on my machine with a gpu. I tried pkill, kill, and everything,
it was still coming back.
No matter what it comes back
# stop itsystemctl stop ollama.service
# disable it if you wantsystemctl disable ollama.service
# confirm its statussystemctl status ollama.service
-
I found this statement quite intriguing.
multi-cursors are just macros.
This is quite a philisophical video and mostly prime talking about the things that make vim vim, and what prime needs in and editor vs what he can live without.
Typer makes it easy to compose your cli applications, like you might with a web
router if you are more familiar with that. This allows you to build smaller
applications that compose into a larger application.
You will see similar patterns in the wild, namely the aws cli which always
has the aws <command> <subcommand> pattern.
Lets setup the cli app itself first. You can put it in project/cli/cli.py.
Creating an app that will become a command is the same as creating a regular
app in Typer. We need to create a callback that will become our command, and a
command that will become our subcommand in the parent app.
[project.scripts]# <- this project is part of the config DO NOT change itproject="project.cli.cli:app"# <- This project is the project name, DO change it
Now you can see each cli application as a sub command.
❯ project --help

 Usage: project [OPTIONS] COMMAND [ARGS]...

╭─ Options ─────────────────────────────────────────────────────────────────────────────────────────╮
│ --install-completion  [bash|zsh|fish|powershell|pwsh]  Install completion for the specified shell.│
│                                                        [default: None]                            │
│ --show-completion     [bash|zsh|fish|powershell|pwsh]  Show completion for the specified shell,   │
│                                                        to copy it or customize the installation.  │
│                                                        [default: None]                            │
│ --help                                                 Show this message and exit.                │
╰───────────────────────────────────────────────────────────────────────────────────────────────────╯
╭─ Commands ────────────────────────────────────────────────────────────────────────────────────────╮
│ api                        model cli                                                              │
│ config                     config cli                                                             │
│ user                       user cli                                                               │
│ run                        run cli                                                                │
╰───────────────────────────────────────────────────────────────────────────────────────────────────╯
In the example above we can run the command project config show to see the
current configuration of our project.
I learned not to fear the arbitrary size feature of tailwind. While building
out reader.waylonwalker.com I kept getting
content flowing off the screen, and struggling to keep it on the screen. I
really felt that I should be able to do this with vanilla tailwind, but after
some encouragement from Twitter I decided to lean on arbitrary values and it
worked.
Don’t fear the arbitrary values.
<liclass="max-w-[100vw]"></li>
Learn more about using-arbitrary-values from their docs
docs
Use an llm to automagically generate meaningful git commit messages
I
harper.blog [1]
This is pretty sick, I wanted this early on when I was making lockhart. I wanted to do the git [2] hook thing but could not figure it out and did not know that prepare-commit-msg was a hook that I could use.
Git Hooked
Then I remembered! Git hooks! Lol. Why would I have that in my brain - who knows!
I asked claude again, and they whipped up a simple script that would act as a hook that triggers with the prepare-commit-msg event.
This is awesome, cuz if you want to add a git message, you can skip the hook. But if you are lazy, you exclude the message and it will call the LLM.
Simon Willison’s llm cli comes in clutch here, it has such a good intereface to allow a prompt to be piped in, but the system prompt be set by -s.
gpt = "!f() { git diff $1 | llm -s \"$(cat ~/.config/prompts/commit-system-prompt.txt)\" }; f"
I love hacking on projects, but often I am super bad at making commits that make sense.
I completely relate to this statement, and this is why I am trying it.
References:
[1]: https://harper.blog/2024/03/11/use-an-llm-to-automagically-generate-meaningful-git-commit-messages/
...
Each time I go to set up npm I am frustrated by the errors saying that I don’t
have permission to npm i -g <package>, and it’s frustrating. And I forget
what I need to do to tell npm to install packages in a directory I own, and my
shell to look there so that I can use the executables.
Inspired by Adam Savage and his One Day builds on youtube. I often build
things, and want to make them generally useful for others and over configure
out of the gate. This project is purely for me inspired by a need I have.
- play-outside [1]
!How-To # [2]
This post will not directly show how to make a weather app, but document the
process that I went through to make mine. It will show the tools that I used
to make it, and the final result.
The Situation # [3]
It often goes in our house ask dad while he is busy and he will probably just
say yes without thinking much. This happens a lot when kids ask to go
outside. I think sure, go for it, you will figure it out. Then my wife walks
in and asks where they are, followed by, did you even check the weather, its
-11 degrees outside right now.
I need a tool for this decision making process
Lungs # [4]
You we have a family of not the most heathly lungs, we have my wife with lung
cancer, one lung missing, and kids with asthma. We nee...
If you are designing a website in dark mode the scrollbars can be finicky to
match the theme. Here is a pretty sane default that looks nice without being
obnoxiously contrast to the rest of the site.
External Link
stackoverflow.com [1]
Its sad that this is not the accepted answer.
mkdir ~/.npm-global
export NPM_CONFIG_PREFIX=~/.npm-global
export PATH=$PATH:~/.npm-global/bin
References:
[1]: https://stackoverflow.com/questions/16151018/how-to-fix-npm-throwing-error-without-sudo#answer-41395398
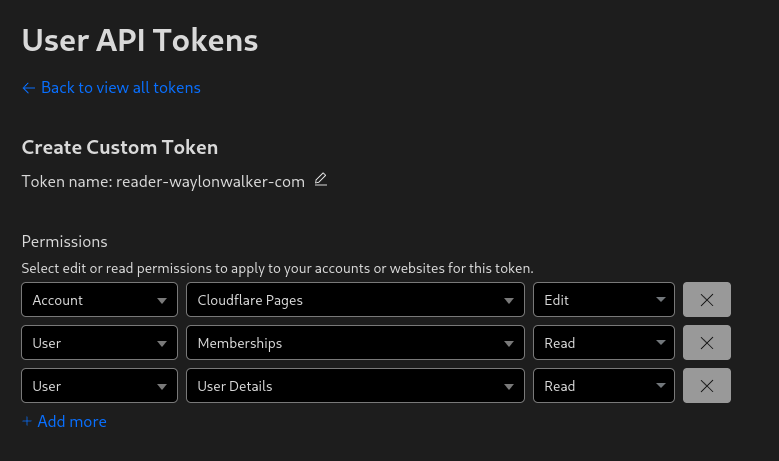
Before you deploy to cloudflare pages you need to create a project. You might
already have one, or you might want to create one in the webui, but you have
the option to create it at the command line with wrangler.
Now you can deploy your static application using wrangler to cloudflare pages.
In this example I have my application built into the markout directory, and
since the production branch is named markout I need to pass that in here as
well.
External Link
stackoverflow.com [1]
This is how you fix the stupid corner section of a double scroll bar being white on a dark theme site.
::-webkit-scrollbar-corner {
background: rgba(0,0,0,0);
}
The question included an example image where you can see white squares everywhere there are horizontal and vertical scroll bars.
[2]
References:
[1]: https://stackoverflow.com/questions/35968553/webkit-scrollbar-css-always-a-white-box-in-corner
[2]: https://i.stack.imgur.com/P6b7f.png
For my reader app I am using cronjobs to schedule my a new build and upload to
cloudflare pages every hour. In this example I have built a docker image
docker.io/waylonwalker/reader-waylonwalker-com and pushed it to dockerhub.
It uses a CLOUDFLARE_API_TOKEN secret to access cloudflare, and the
entrypoint itself does the build and upload.
-
This is an interesting problem. I want to make a solution for this on htmx [1]-patterns. I would make user specific routes with an hx-get rather than serving the whole page, serve a partial with hx-oobs to fill in user specific data with a no cache on the cdn level.
References:
[1]: /htmx/
I’m really excited about fastapi-observability [1], an amazing project by blueswen [2]. It’s worth exploring!
Observe FastAPI [3] app with three pillars of observability: Traces (Tempo), Metrics (Prometheus), Logs (Loki) on Grafana through OpenTelemetry and OpenMetrics.
References:
[1]: https://github.com/blueswen/fastapi-observability
[2]: https://github.com/blueswen
[3]: /fastapi/
I am working on a page for
htmx-patterns and I ran into a
situation with lots of duplication. Especially when i am using tailwind I run
into situations where the duplication can get tedious to maintiain. The
solution I found is macros.
Now I can use the same code for all of my links, and call the macro to use it.
If you’re into interesting projects, don’t miss out on taipy [1], created by Avaiga [2].
Turns Data and AI algorithms into production-ready web applications in no time.
References:
[1]: https://github.com/Avaiga/taipy
[2]: https://github.com/Avaiga
jinja has a loop variable that is very handy to use with htmx. Whether you
want to implement a click to load more or an infinite scroll this loop variable
is very handy.
{% for person in persons %}
<li{%ifloop.last%}hx-get="{{ url_for('infinite', page=next_page) }}"hx-trigger="intersect once"hx-target="#persons"hx-swap='beforeend'hx-indicator="#persons-loading"{%endif%}{{person.name.upper()}}-{{person.phone_number}}</li>{% endfor %}
Now for every chunk of contacts that we load we will trigger the infinite
scroll by loading more once the last one has intersected the screen.
Out of the box FastAPI.">Starlette does not support url_for with query params. When
trying to use url_for with query params it throws the following error.
In my searching for this I found starlette issue #560 quite helpful, but not complete, as it did not work for me.
importjinja2ifhasattr(jinja2,"pass_context"):pass_context=jinja2.pass_contextelse:pass_context=jinja2.contextfunction@pass_contextdefurl_for_query(context:dict,name:str,**params:dict)->str:request=context["request"]url=str(request.url_for(name))ifparams=={}:returnurlfromurllib.parseimportparse_qs,urlencode,urlparse,urlunparse# Parse the URLparsed_url=urlparse(url)# Parse the query parametersquery_params=parse_qs(parsed_url.query)# Update the query parameters with the new onesquery_params.update(params)# Rebuild the query stringupdated_query_string=urlencode(query_params,doseq=True)# Rebuild the URL with the updated query stringupdated_url=urlunparse((parsed_url.scheme,parsed_url.netloc,parsed_url.path,parsed_url.params,updated_query_string,parsed_url.fragment,))ifos.environ.get("ENV")in["dev","qa","prod"]:updated_url=updated_url.replace("http","https",1)returnupdated_urldefget_templates():templates=Jinja2Templates(directory="templates")templates.env.globals["url_for"]=url_for_queryreturntemplates
https
If you want url_for to work in production you need some way to convert http
to https. Here is how I make it work, for local development I export ENV=local then for each environment that I am running on a server I include
it in the list and update ENV appropriately.
To access the home route using url_for in a jinja template you can use the
following, once you have applied the url_for_query function as your default
url_for
<ahref="{{ url_for('home', page=1) }}">Home</a>
Kind (Kubernetes in Docker) is a tool that makes it easy to create and tear
down local clusters quickly. I like to use it to test out new workflows.
Argocd is a continuous delivery tool that makes it easy to setup gitops
workflows in kubernetes.
Here is how you can setup a new kind cluster and install argocd into it using
helm, the kubernetes package manager.
kind create cluster --name argocd
# your first time through you need to add the argocd repohelm repo add argo https://argoproj.github.io/argo-helm
helm repo update
# install argocd into the clusterhelm install argo argo/argo-cd --namespace argocd --create-namespace
# deploy the app of appskubectl apply -f apps/apps.yaml
If you want to add repos and apps to your cluster you can use the argo cli to
do that, but first you will need forward the argocd port and login.
# Wait until Argo CD API server is availableecho"Waiting for Argo CD API server to be available..."while ! kubectl wait --for=condition=available --timeout=60s deployment/argo-argocd-server -n argocd;doecho"Waiting for Argo CD API server to be ready..." sleep 10donekubectl port-forward svc/argo-argocd-server -n argocd 8080:443 &argocd_admin_password=$(kubectl get secret argocd-initial-admin-secret -n argocd -o jsonpath="{.data.password}"| base64 -d)argocd login localhost:8080 --insecure --username admin --password $argocd_admin_passwordargocd repo add https://github.com/fokais-com/app.fokais.git --username waylonwalker --password ${GH_ARGO_PAT}argocd app create app-fokais-local --repo https://github.com/fokais-com/app.fokais.git --path k8s/overlays/local --dest-server https://kubernetes.default.svc --sync-policy automated --sync-option Prune=true
Hogwarts Legacy Argyllshire map: What does the button do?
Only one spell can be used to grant you entry.
Dot Esports · dotesports.com [1]
Damn this button had me stuck for way too long. It definitely looks like a button once I see it, but I don’t recall coming into contact with many buttons in the game, I tried to set it ablaze, pull it, fly it, nothing.
References:
[1]: https://dotesports.com/hp/news/hogwarts-legacy-argyllshire-map-what-does-the-button-do
How can I add my YouTube videos via RSS?
You can share your videos or other people
SocialBee Help Documentation · help.socialbee.com [1]
YouTube makes finding rss feeds way too hard. Hats off to them for still supporting it, allowing you to find content outside the algorithm, and consuming content you asked for. But i had no idea you had to search the source code to get it.
References:
[1]: https://help.socialbee.com/article/129-how-can-i-add-my-youtube-videos-via-rss
I have several feeds that you can consume my content with. Many posts will
cross between them, so if you would like to follow a certain stream of content
in your rss reader thats what this is for. This one might feel like it has some
extra noise with multiple posts per day, including starts, and instagram style
posts, for a bit less look at the [[ main ]] feed.
TLDR
If you are looking for everything look here <https://waylonwalker.com/archive/rss.xml>
All # [1]
This is a feed of everything that I have published on my site to date
including Posts tagged: blog [2], [[ til ]], Thoughts [3], [[ stars ]], Posts tagged: shots [4],
[[ pings ]].
- web [5]
- rss [6]
Main # [7]
Like the All feed, but drops the shots (instagram style posts) and stars
(github stars).
- web [8]
- rss [9]
til - daily(ish) # [10]
think gist with a tweet
This is a feed of all of my TIL’s (Today I Learned). These are generally short
single topic posts that I write up quickly. They are generally things t...
External Link
stackoverflow.com [1]
Another interesting option for slow count queries in sqlite.
If you haven’t DELETEd any records, doing:
SELECT MAX(ROWID) FROM "table" LIMIT 1;
References:
[1]: https://stackoverflow.com/questions/8988915/sqlite-count-slow-on-big-tables
Optimizing SQLite for servers
SQLite is often misconceived as a "toy database", only good for mobile applications and embedded systems because it's default configuration is optimized for embedded use cases, so most ...
Sylvain Kerkour · kerkour.com [1]
Very interesting article by Sylvain, suggested by Simon Willison.
Definitely some things that I want to come back and try later on.
Here is the TLDR of the whole post
PRAGMA journal_mode = WAL;
PRAGMA busy_timeout = 5000;
PRAGMA synchronous = NORMAL;
PRAGMA cache_size = 1000000000;
PRAGMA foreign_keys = true;
PRAGMA temp_store = memory;
This is interesting, and something I need to consider. I definitely have an application with slow count queries. I am not sure how to make it better as its not a full count(*) so a count table doesn’t work, nor does counting by index.
I might need to have a table of cached results, and if a write matches the counter increase it, or update all counters on write.
COUNT queries are slow
SQLite doesn’t keep statistics about its indexes, unlike PostgreSQL, so COUNT queries are slow, even when using a WHERE clause on an indexed field: SQLite has to scan for all the matching records.
One solution...
-
Inspiring story transitioning into tech from nursing. I also came to tech through a set of circumstances that made it difficult for me to excel at my current job. Looking back it is something that I was always interested in and I was just unsure how to get in, I am so glad that I figured it out, it has been such a great benefit to my family.
I really enjoyed listening to trshpuppy’s journey in through building projects, and choosing tech not based on what she wanted to learn, but what fit the project the best.
These are generally my thoughts on a web page or some sort of url, except a
rare few don’t have a link. These are dual published off of my
thoughts.waylonwalker.com [1] site. It’s a
fully dynamically rendered site 2000’s style. Posts are stored in a database
and instantly available. Almost all of the posts were written in a small
<textarea> field within a chrome extension that I built for it.
These posts are intended to in two ways. One, link building for the author. I
hope that I give the people helping me out along the way just a little bit of a
boost. Two, they serve as a permanant commented bookmark for me to search, and
come back to later when I have forgotten where I have seen something.
- web [2]
- rss [3]
All thoughts posts cross posted to my site are prefixed with a thought balloon 💭.
The tech # [4]
Since this blog is mostly a tech blog about software development, and my
journey as I learn, lets talk tech.
- python
- fastapi [5]
- htmx [6]
- sqlite
- docker
- ht...
I came across Hexa [1] from wyattbubbylee [2], and it’s packed with great features and ideas.
Hexa is a game engine
References:
[1]: https://github.com/wyattbubbylee/Hexa
[2]: https://github.com/wyattbubbylee
Some Git poll results
Some Git poll results
Julia Evans · jvns.ca [1]
great poll of git [2] questions
poll: did you know that in a git merge conflict, the order of the code is different when you do a merge/rebase?
merge:
<<<<<<< HEAD
YOUR CODE
OTHER BRANCH’S CODE
c694cf8aabe
rebase:
«««< HEAD
OTHER BRANCH’S CODE
YOUR CODE
d945752 (your commit message)
This one explains a lot. I think I knew this, I might have seen it somewhere, but I have definitely noticed it go both ways and confuse the crap out of me. Feels very similar to how --ours and --theirs flip flops.
References:
[1]: https://jvns.ca/blog/2024/03/28/git-poll-results/
[2]: /glossary/git/
External Link
sealed-secrets.netlify.app [1]
kubeseal is a pretty simple to get started with way to manage secrets such that they can be stored in a git [2] repo and be picked up by your continuous delivery service.
Sealed Secrets provides declarative Kubernetes Secret Management in a secure way. Since the Sealed Secrets are encrypted, they can be safely stored in a code repository. This enables an easy to implement GitOps flow that is very popular among the OSS community.
References:
[1]: https://sealed-secrets.netlify.app/
[2]: /glossary/git/
In my homelab kubernetes cluster I am using kubeseal to encrypt secrets. I
have been using it successfully for a few months now wtih great success. It
allows me to commit all of my secrets manifests to git with out risk of leaking
secrets.
You see kubeseal encrypts your secrets with a private key only stored in your
cluster, so only the cluster itself can decrypt them using the kubeseal
controller.
Most of these commands come straight from the docs. From my experience I have
always specified the namespace, my projects go per namespace and I don’t have
any reason that other namepsaces should see the secret, and if they do I deploy
another secret in that namespace.
# Create a json/yaml-encoded Secret somehow:# (note use of `--dry-run` - this is just a local file!)echo -n bar | kubectl create secret generic mysecret --dry-run=client --from-file=foo=/dev/stdin -o yaml -n thenamespace > mysecret.yaml
note that the key of the secret is foo and the value is bar
# This is the important bit:kubeseal -f mysecret.yaml -w mysealedsecret.yaml
# At this point mysealedsecret.json is safe to upload to Github,# post on Twitter, etc.# Eventually:kubectl create -f mysealedsecret.yaml -n thenamespace
# sealedsecret.bitnami.com/mysecret created# Profit!kubectl get secret mysecret
kubectl get secret mysecret -n thenamespace
# NAME TYPE DATA AGE# mysecret Opaque 1 27scat mysealedsecret.yaml | kubeseal --validate
Now the main downside I see with kubeseal is that it does not provide a way to
store your secrets in a way that you can access outside of your cluster. So
you need to make sure that you have another solution in place to store your
secrets so that you still have them if you ever were to take the cluster down
or move from k8s to something else.
Overall the likelyhood of you loosing a production cluster is pretty low, so
maybe it’s ok to just trust it depending on what the secrets are. Especially
for things you control and can rotate anyways its fine.
Just starred codemirror-codeium [1] by val-town [2]. It’s an exciting project with a lot to offer.
Codeium code completion integration for CodeMirror 6
References:
[1]: https://github.com/val-town/codemirror-codeium
[2]: https://github.com/val-town
-
Great episode covering a seemingly simple topic. What I really benefitted from was hearing all the different use cases, from logging, debugging, to a/b testing, caching, and auth. I hadn’t even thought of it being applied to a router. I thought of it being applied for an entire application. This seems very useful for things like an admin router, all routes would need to have the admin role to get in.
![[None]]
I’ve been using these decorators to modify the behavior of specific routes. It will do things like 404 admin only routes in a way that looks just like fastapi [1]’s default, or only allow certain roles into the route, or redirect unauthenticated users to login.
After listening to yesterday’s syntaxfm I’m now really thinking about middleware and the benefits it might have. middleware would make it easy to apply things like admin to an entire admin router, so you wont forget it on any one admin route. It will look cleaner as the admin checker is only applied once per router, not once per route.
import inspect
import time
from functools import wraps
from inspect import signature
from fastapi import Request
from fastapi.responses import FileResponse, JSONResponse, RedirectResponse
from starlette import status
from fokais.config import get_config
from fokais.models.user import Role
config = get_config()
admin_routes = []
authenticated_routes = []
not_cached_routes = []
cached_routes = []
def not_found(request):
hx_request_header = request.headers.get("hx-request")
user_agent = request.headers.get("user-agent", "").lower()
if "mozilla" in user_agent or "webkit" i...
I stumbled into kubernetes December 2023 when I was looking for a better way
to self host [1] applications. I was looking for something that didn’t require
logging into a server and building and deploying like a cave man. I wanted a
smoother experience than docker compose was giving me.
https://waylonwalker.com/looking-for-a-heroku-replacement/
This post turned into a list of tools that I have adopted into my k8s workflow,
and plan to keep. enjoy.
Kompose # [2]
[3]
Kompose is a great tool for gettting going and converting your docker-compose
to kubernetes manifests or helm templates. It was a great tool for me to get
started with, but I was afraid that it was hindering me learning more and just
blindly using its output so I have tried to use it less and less. I’m now not
solely leaning on it, but using it to get out quick POCs with low friction.
Kompose really helped me go 0 to 60 and get right into kubernetes with my
existing docker compose files and very little change. I fou...
Simon Willison (@simonw) on X
TIL Google Chrome has a --headless option you can use to take a screenshot from the CLI that's built into the default installation
X (formerly Twitter) · twitter.com [1]
Huh, so this is just built right into the chrome cli.
/Applications/Google\ Chrome.app/Contents/MacOS/Google\ Chrome \
--headless \
--screenshot=/tmp/shot1.png \
https://simonwillison.net
References:
[1]: https://twitter.com/simonw/status/1772043579231445366
![[None]]
jinja’s url_for in fastapi [1] does not account for https by default, there is
probably a better way, but this is a way that allows me to configure when I use
http vs https.
@pass_context
def https_url_for(context: dict, name: str, **path_params: Any) -> str:
"""
always convert http to https
"""
request = context["request"]
http_url = request.url_for(name, **path_params)
return str(http_url).replace("http", "https", 1)
def get_templates(config: BaseSettings) -> Jinja2Templates:
templates = Jinja2Templates(directory="templates")
templates.env.globals["https_url_for"] = https_url_for
## only use the default url_for for local development, for dev, qa, and prod use https
if os.environ.get("ENV") in ["dev", "qa", "prod"]:
templates.env.globals["url_for"] = https_url_for
console.print("Using HTTPS")
else:
console.print("Using HTTP")
return templates
References:
[1]: /fastapi/
[1]@cassidoo [1]) on X — I MADE AN APP ✨" loading="lazy">
Cassidy (@cassidoo [2]) on X
I MADE AN APP ✨
X (formerly Twitter) · twitter.com
Damn are one time paid and have it apps making a comeback? Seems like the perfect thing to have someone else automate and not pay a subscription for.
Genius Idea Cassidy!!
Now what do you call this, its not software as a service, is this just sofware?
References:
[1]: https://twitter.com/cassidoo/status/1770900985382138291
[2]: https://cassidoo.co
Joining the split keyboards club: a Moonlander story | Carlos Becker
This post will describe my experience with a couple of firsts:
carlosbecker.com [1]
I switched from a 60% vortex pok3r to a 40% corne June, 2021. I can relate to a lot of what Carlos talks about here. I think going from 60%-40% made my journey harder than it needed to be. There’s no going back now, but it took me a really long time to be able to hit all of the numbers and symbols, just figuring out how to do the layout was hard there’s not much space.
I didn’t touch type. I never really used my pinkies, except maybe for ESC, Shift, CTRL, Backspace et al.
I can relate to this, my typing habits were terrible. Shortly before going split ortho I worked on my speed with lots, and lots of practice on keybr and monkeytype. I took my speed from 35wpm to 80wpm with a few months of steady practice. This is one of the best things I did for myself.
Once I got split it dropped down to single digits and slowly rose back up to 80, just barely breaking my PB on monkeytype.
I still feel like I still can’t type at my previous max speed — mostly because I wasn’t used to use my pinky and used the “wrong finger” for a lot of...
My workflow, part 1 | Carlos Becker
I keep getting asked how my setup works, how I use tmux and
nvim over ssh… all that good stuff.
carlosbecker.com [1]
Carlos has a pretty sick setup here, I can relate to mostly, cept the macos part. My main critique is that I don’t think he gave window managers much chance on linux, and they just don’t work on MacOS/Windows.
Most of the time I have a single, maximized window.
I can relate to this. I should really make a full post about my experience with tiling window managers. TLDR, I came for tiling and I stayed for the workspaces.
Multiple Displays
An exception here could be streaming: having multiple displays can help preventing doxing yourself if you only share the screen of one of them. I only did stream like 3 times and that’s what I did, but I’m sure experienced streamers have better workflows (with or without multiple displays).
Accurate, my home machine uses one monitor, and for work I use one monitor+laptop. I pair, screenshare, and present quite a bit at work, and its good to have one screen for sharing, and one for seeing things like the app you are sharing from (chat, cams, etc)
References:
[1]: https://carlosbecker.com/p...
strawberry-sqlalchemy [1] by strawberry-graphql [2] is a game-changer in its space. Excited to see how it evolves.
A SQLAlchemy Integration for strawberry-graphql
References:
[1]: https://github.com/strawberry-graphql/strawberry-sqlalchemy
[2]: https://github.com/strawberry-graphql
I recently discovered AnyText [1] by tyxsspa [2], and it’s truly impressive.
Official implementation code of the paper <AnyText: Multilingual Visual Text Generation And Editing>
References:
[1]: https://github.com/tyxsspa/AnyText
[2]: https://github.com/tyxsspa
Using Netlify Analytics to Build a List of Popular Posts
Writing about the big beautiful mess that is making things for the world wide web.
blog.jim-nielsen.com [1]
This is a sick feature of Jim’s blog, I am really inspired by this. I am not sure how to do it for my own. I honestly think the easiest non locked in way would be to just use google search console results. It’s definitely a different way to think about it, but most of my traffic is coming from google search, so it would be a pretty good ballpark estimate.
References:
[1]: https://blog.jim-nielsen.com/2020/using-netlify-analytics-to-build-list-of-popular-posts/