In my adventure to put more homelab in docker, I moved our modded minecraft setup to docker.
Getting Mods #
So far I have found all of our mods from curse forge. modpacks make getting multiple mods working together much easier, someone else has already vetted a pack of often times 100+ mods that all play well together. I have yet to get these working in docker, I will, but for not I just have individual mods.
download file #
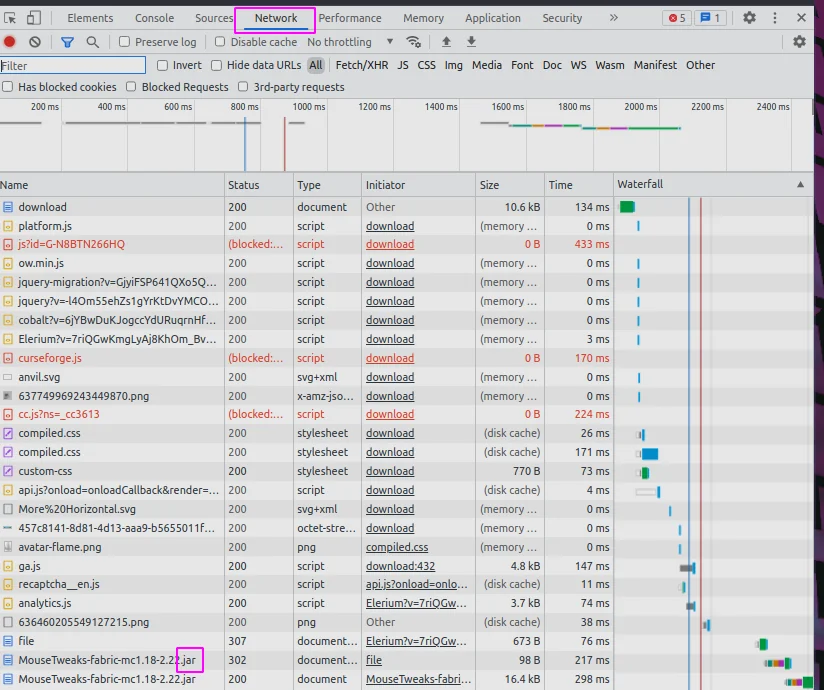
under the hood docker is using wget to get the mod. The link you click on from curseforge will block wget. What I do is pop open the devtools (f12 in chrome), click on the network tab, click the download link on the web page, and watch the real link show up.
Docker-compose #
I am using docker compose, it makes the command much easier to start, and all the things needed stored in a file. I am not using compose to run multiple things, just for the simple start command.
Create a directory for your server and add the following to a
docker-compose.yml file.
version: "3.8"

services:
  mc:
    container_name: walkercraft
    image: itzg/minecraft-server
    ports:
      - 25565:25565
    environment:
      EULA: "TRUE"
      TYPE: "FORGE"
      VERSION: 1.16.5
      MODS_FILE: /extras/mods.txt
      REMOVE_OLD_MODS: "true"
    tty: true
    stdin_open: true
    restart: unless-stopped
    ports:
      - 25565:25565
    volumes:
      - ./minecraft-data:/data
      - ./mods.txt:/extras/mods.txt:ro

volumes:
  data:
mods.txt #
Once you have your mod file link from the network tab add them to a mods.txt file next to your docker-compose file.
https://media.forgecdn.net/files/3620/189/engineersdecor-1.16.5-1.1.16.jar
start your server #
Once you have made it this far starting the server is pretty simple.
docker compose up -d
kill your server #
If your still in the same directory, taking down the server should be pretty easy as well.
docker compose down

# if that does not work you can kill it
docker ps
# copy the id of your container
docker kill <id>