Today I discovered a sweet new cli for compressing images. squoosh cli is a wasm powered cli that supports a bunch of formats that I would want to convert my website images to.
from the future
> Unfortunately, due to a few people leaving the team, and staffing issues
resulting from the current economic climate (ugh), I’m deprecating the CLI and libsquoosh parts of Squoosh. The web app will continue to be supported and improved. I know that sucks, but there simply isn’t the time & people to work on this. If anyone from the community wants to fork it, you have my blessing.
Web App #
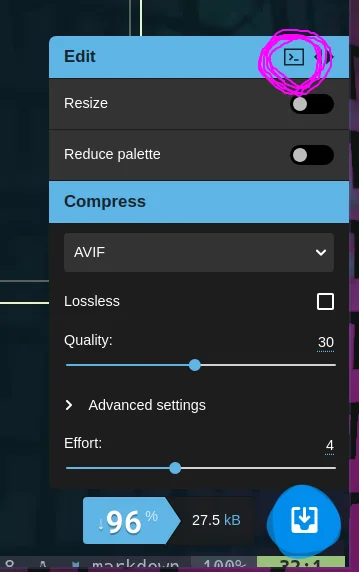
First the main feature of squoosh is a web app that makes your images smaller right in the browser, using the same wasm. It’s sweet! There is a really cool swiper to compare the output image with the original, and graphical dials to change your settings.
CLI #
What is even cooler is that once you have settings you are happy with and are really cutting down those kb’s on your images, there is a copy cli command button! If you have npx (which you should if you have nodejs and npm) already installed it just works without installing anything more.
Converting all of my png’s to webp #
I copied the command that it gave me for converting to webp, and set it up to run on all of my pngs.
npx @squoosh/cli --webp \
  '{"quality":75 \
    "target_size":0 \
    "target_PSNR":0 \
    "method":4 \
    "sns_strength":50 \
    "filter_strength":60 \
    "filter_sharpness":0 \
    "filter_type":1 \
    "partitions":0 \
    "segments":4 \
    "pass":1 \
    "show_compressed":0 \
    "preprocessing":0 \
    "autofilter":0 \
    "partition_limit":0 \
    "alpha_compression":1 \
    "alpha_filtering":1 \
    "alpha_quality":100 \
    "lossless":0 \
    "exact":0 \
    "image_hint":0 \
    "emulate_jpeg_size":0 \
    "thread_level":0 \
    "low_memory":0 \
    "near_lossless":100 \
    "use_delta_palette":0 \
    "use_sharp_yuv":0 \
    }' \
    static/*.png -d squoosh-webp
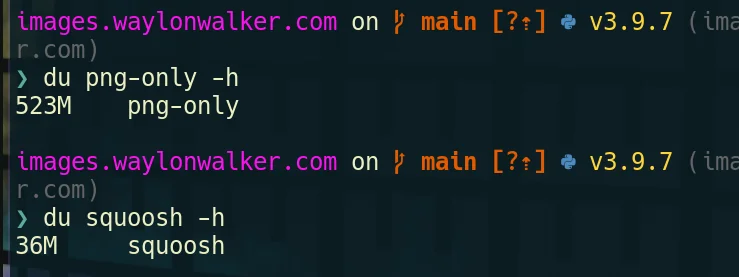
I opened my images repo and converted all pngs to webp using the command above. I got 94% compression on my existing pngs without resizing anything. This is dang impressive, and not too hard to do. I do want to refactor my images site at some point and include this as part of the ci system.
I also converted to avif, but it sent all my cpus to 100 for quite awhile, for only another 2MB total. Not sure if its worth it or not.