-
I had no idea how these pipes work, I’ve accidentally spawned so many that have sat there and waited for something to come down the pipe, but did not know this is what was happening.
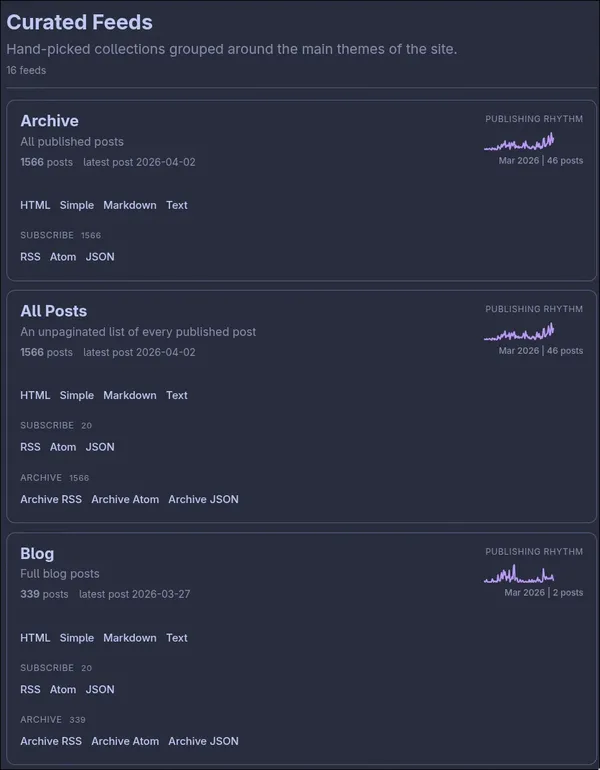
Publishing rhythm
-
Every Dax Raad interview is worth a listen, this one does not disappoint. They talk about running local dev setups in a vm in the cloud. Always connected, seemlessly upgrading hardware without you needing to buy sell or trade a thing. They talk about the one model that drove them into psycosis, I’m pretty sure it was 5.6 sol, but it could not be revealed at the time. Software engineering is still required alive and well even through the agentic era here.
-
Great reference to 11 laws of the universe.
dax (@thdxr.com)
so obviously n=1 but anecdotes matter a lot here
i gave kimi k3 and sol the same task - simple issue with hovers in the tui being the wrong color
sol found and fixed the issue with $0.30 of spend…
Bluesky Social · bsky.app [1]
So much nuance in model selection its hard to keep up.
References:
[1]: https://bsky.app/profile/thdxr.com/post/3mqsgohylgd2v
-
Completely missing the point of physical media. I don’t see why preserving physical media is a win for xbox right now. The game is not on disk. In 30 years when the game servers are gone, I wont be able to play the game. I wont be able to buy cheap used copies in 6 months as people beat the game. I wont be able to trade in games I’ve beat to get a different game at a low cost. own nothing and be happy.
Ping 65
Usage Resets??
Apparently you can use a reset to completely reset your codex usage limits. I
never knew these existed and apparently I have some expiring soon. Not sure if
they auto apply and this is why I get the weirdest reset experience on the
usage chart or what.
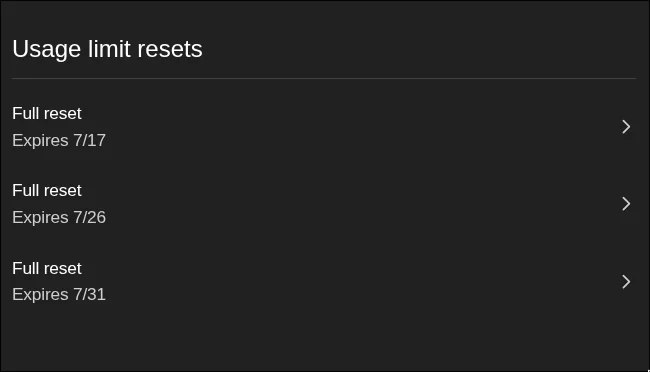
I have 3? they expire soon, how many have I missed out on.
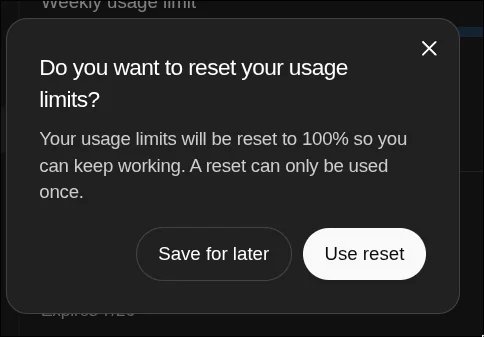
One time only
I ran into an issue where my pinentry was unable to connect, blocking me from
doing commits. You can use this to continue signing commits.
export GPG_TTY=$(tty)
gpg-connect-agent updatestartuptty /bye

printf test | gpg \
  --local-user 9A47900E81415D65C32C630066E2BF2B4190EFE4 \
  --pinentry-mode loopback \
  --sign >/dev/nul
-
Interesting thoughts from a real OG [1] Kent Beck. He argues we are whitnissing the biggest advancement in computing in 40 years. For 40 years we have been almost exclusively writing in compiled languages. Languages that output to some sort of binary compiled assembly instructions for each processor type. Before that it was all hand written instructions directly to CPU. Now we are seeing the genie revolution. The genie is good a writing in many different programming languages given english prompts. It loves to complete problems and is not afraid to write lots of code very quickly. Its quite good at skirting around our best judgement in order to accomplish the goal we set.
Some take aways from this talk is that NO ONE knows what the fuck is next. No one knows the best ways to use these things. Everyone has their own opinion wrapped around their experience that might be wildly different than yours. It seems clear this is changing every day and ways no one can measure, predict, or prepare for. So much sits in the hands of model labs and model providers. Without real access to any of it, its all magic.
References:
[1]: /og/
I’ve been running fedora coreos on my home servers for awhile. I really liked
the stability I got from bazzite, and have since enjoyed the stability of
fedora coreos. Since it’s an immutable system I’ve never quite known if I need
to reboot or not, and was unsure how to check for updates. Today I learned you
can use rpm-ostree status to see if your
fedora coreos system is up to date.
rpm-ostree status
For me it listed security advisories with a count of each severity unknown, low, moderate, and important.
[1]
I align a lot with this post. From growing up in a rural house where internet access was harder to get. It was slow and only had one line, if you were on the internet, no one in the house could recieve a phone call. Idk if what is now the smol webl, the indieweb, is seeing a resurgence, if I’m just noticing it more. It does feel like along there has been a very small number of users willing to get their own domain, their own server, and host their own shit. A few of these are starting to really break out occasionally, see things like wordle [2] hitting mass adoptioun before being swooped up by a giant.
I too miss the internet of old, heck I really dont even mind the middle era of fb, twitter, instagram dominance, but what we have now is dominated by political undertones on it all with everyone shouting “Fake News” at each other. These sites are the easiest place to stay in touch with those you have met online, yet they are riddled with so much toxicity its impossible to have a great experience on them. I’m about a year and a half of not having a single one on my phone, and at this point I barely log into them once a week. RSS is the way forward, as long as its not killed b...
This morning I had a machine crash on me and came back to an error.
Error
zsh: corrupt history file /home/u_walkews/.zsh_history
Dammit I don’t want to redo my shell history, I checked with a clanker and they
came up with this solution using strings that only prints printable
characters.
cp ~/.zsh_history ~/.zsh_history.bak
mv ~/.zsh_history ~/.zsh_history.corrupt
touch ~/.zsh_history
chmod 600 ~/.zsh_history
strings ~/.zsh_history.corrupt > ~/.zsh_history
chmod 600 ~/.zsh_history





Reddit - Please wait for verification
reddit.com [1]
Absolute whimsy achieved in this book themed #keeb [2] build!
[3]
References:
[1]: https://www.reddit.com/r/MechanicalKeyboards/comments/1u9awcz/nibelungenlied40_book_split_keyboard_design/?utm_source=cassidoo&utm_medium=email&utm_campaign=u1f6b8-you-can-make-anything-by-writing-cs-lewis
[2]: /tags/keeb/
[3]: https://dropper.waylonwalker.com/api/file/b3f7c96c-805b-4a6b-8ebc-efde8ba11816.webp
hmmm.
TIL, `?.` is sometimes pronounced as a `hmm dot`
Does codex change throughout the token usage window?
Is it me or can you feel the 5 hour and weekly limit of codex nearing. It
feels like it slowly stops working tasks to completion and asking to continue.
I nearly start yelling into the enter, "YES, DO WHAT WE AGREED ON, STOP ASKING"
then I notice I'm in the single digits of remaining window left.
T Handle Wire Puller
I’ve been fighting not having a proper
pick/hook in my toolbox for a long time. This fathers day weekend my son
pulled out an old box of rc plane supplies from my days trying to build planes
like flight test. Inside there was a pack of piano wire.
Rules [1]-8
Need a tool make a tool.
He had pulled this out while I had the soldering iron hot plucking away at a
keeb build that I’ve had sitting idle on the workbench for a long time. The
dream of having several identical working builds at the same time is very close
to fruition, I just need some more work on the clone.
Posts tagged: keeb [2]
I was struggling to pull wires through traces of 3d prints. You see I was once
a mechanical engineer, not electrical, so 3d modeling is my hammer that I can
turn into a tool for any solution, and I’ve just not put the time into learning
pcb design. Someday maybe. I always just take some scrap copper make a little
look and twist it around until I can get it close enough to pull with some
tweezer...


Keys.waylonwalker.com
Today I got sick of my go to online keyboard
tester [1] not supporting holds and fighting an
issue with holds on one of my boards, I vibed out a replacement. I did a bit
of work with it to get it how I wanted. gpt5.4 still likes to make lots of
cards and build readable sites with a reasonable width for reading, not full
page apps.
keyboard tester
A keyboard tester that works for me, how I like it
keys.waylonwalker.com [2]
The main feature is to be able to see when alt+key or shift+key is pressed, the
keyboard tester was not able to do this.
73e71d2d-eaf9-4a0a-9e04-0039a1df0b26.mp4 [3]
Here is a video of me using it.
I tend to use keyboard tester a lot as I build a lot of weird keyboards so I
suspect this one to get a lot of use and may grow over time, but for now it
works good enough for me.
I can already think of a whole list of features like supporting keycodes for
js, pygame, zmk, qmk. But for now I’m just building what I need and not
overcomplicating it.
References:
[1]...

Malicious Aur Packages Jun 2026
Recent Arch linux vulnerabilities are a good reminder of a few things.
- AUR [1] is not the official package repo
- The AUR is community driven
- AUR packages are not always safe
The first thing I’m doing to stop myself from running any aur updates
automatically is removing any arch helper.
sudo pacman -Rns yay paru paru-bin
Currently the reported vulnerabilities are supply chain attacks limited to the
aur, keep your arch system up do date, BUT do not update packages from the
AUR right now. In fact I’m auditing my aur usage and removing anything I have
not used in awhile.
Here is a nice script I’m using to walk through my packages and get rid of
things I installed and probably don’t need anymore.
pacman -Qemq |
fzf -m --preview '
echo "== package =="
pacman -Qi {} 2>/dev/null
echo
echo "== required by =="
pacman -Qi {} 2>/dev/null | grep "Required By"
' |
xargs -r -o sudo pacman -Rns
Supply chain attacks are getting real scary in 2026, maybe we should listen to
Ginger...
Prompt Seagulls
I was listening to @syntaxfm this morning and @wesbos said at
328s [1] “The prompt seagulls
are driving me nutty”. 100% hard agree Wes. Now I didnt just come off of a
conference where they dropped fable 5. I’ve not logged into twitter in months,
but I see it around work.
prompt-seagulls
“Prompt, PR-ompt, promt, PROMT”
There is no such thing as magic [2] # [3]
Asking for the prompt as a first question here, is a clear sign you are looking
for magic. What are the magical incantations I must pass to all master clanker
to get it to do the things that I want. Wrong, there is no magic prompt to
get impressive results, its people that know and understand their craft that
get amazing results. They have taste. They have design in mind, They see
what the end product should be. They are guiding the model to do what they
want and are not surprised when they get it.
prompt-seagulls
“Prompt, PR-ompt, promt, PROMT”
process # [4]
No one is one shotting their work and kicking up their feet f...
-
oof Mark, this does not feel like it is set to age well. These people in power feel so disconnected from regular people with a job trying to do work.

Mythos gone already
Mythos released days ago, now its gone, before most of us were
allowed to touch it.
Just give em the ol one eyed fighting Kirby
This is a vim substitution technique to capture the rest of the line as a capture group.
:'<,'>s/longhorn\(.*\)/longhorn\1-rwx
This one captures pesky optional " and places it back at the end if it found
one.
:'<,'>s/longhorn\("\?\)\(.*\)/longhorn\2-rwx\1
!!! see-also
<a href="/thought-200/" class="wikilink" data-title="The One Eyed Fighting Kirby" data-description="!https://www.youtube.com/watch?v=9_Ekt1PZBzQ&t=351s" data-date="2024-01-26">The One Eyed Fighting Kirby</a>
just good enough
I built shit on the web before AI, some of it was okay, some I put a lot of
time into, but some was just really shitty. Done just well enough to get the
job done. All of it had to be written by hand or copy pasted from stack
overflow. It was a lot of fun. Now we have a new level of shitty, it looks
fine. It looks like it should work good. None of it is just barely good
enough, nearly browser default style anymore.
I’ve been deploying my site old school for most of this year, rsync to a volume mounted to nginx. I ran into an issue today where I updated my site and all of the pages updated first, followed by upload. The issue this created was that the new cache busted css files were not up yet and the site had no styles for a brief period during upload.
I found that delaying updates and delaying deletes until the new content exists first solves this problem pretty well. Theres still possiblility of jank while uploading to a live directory and not doing some sort of hot swap, but I’m good with this low budget option for now.
sync:
	rsync -rlt --delete --omit-dir-times \
	--info=progress2 \
	--delay-updates \
	--delete-delay \
	./output/ \
	server:/mnt/mysite
The Website Specification
A platform-agnostic, full specification of the technical features a good website should have. Built in the open under an MIT licence.
The Website Specification · specification.website [1]
A solid checklist for agents to implement on most sites. Very few sites need 100% coverage, but most should probably check most of these boxes
References:
[1]: https://specification.website/
Revisiting the closed canon
A post I wrote in 2023, the closing of the canon, predicted that LLM answers would replace search results, dramatically lowering traffic to individual sites, thereby removing the incentives to eve...
Derek Kedziora · derekkedziora.com [1]
This is what makes rss so interesting to me. Its boring old tech that fell out of mainstream popularity years ago, yet many sites still support it. Not all, especially ones that come with a good dickover [2].
At the same time, it’s sad to see the human internet dying, even more quickly than before. Not only do we have rampant bots and sites seo maxxing to get to the top. We have ai search overview that answers mose simple questions pretty good, chat that does good, and agents at our fingertips. The need for tutorials is pretty much dead.
What we need now is human experiences shared and documented more than ever. I’ve been writing a whole lot less simply because this transition has been hard. Most of my pre 2024 posts were how to, notes for future me. Things so simple agents just spat out better versions in seconds these days with barely a question.
References:
[1]: https://derekkedziora.com/notes/revisiting-the...
On Rendering Diffs
A technical deep dive into how we built the @pierre/diffs package and CodeView component for zero-blanking diff rendering.
Pierre Computer Company · pierre.computer [1]
It’s incredible how some problems seem so simple until you load the browser with so much text it just bogs to nothing and how impossibly difficult it becomes after this point. Very cool implementation of a problem that…. who has this problem. If it takes me 2 mintues to scroll through a diff at mach speed like the video, is a diff going to solve my problem?
References:
[1]: https://pierre.computer/writing/on-rendering-diffs
- #tech #coding" playlabel="Play: His presence is still felt in the codebase to this day 😂 #codingmemes #developermemes #tech [1] #coding">
Remember this clip in 5 years, after the churn we just had with RTO and ai this is going to hit. Or AI will just figure is all out for us, who knows anymore. Not that they will figure out the human side, the what does this do, why is it here. A temporary fix is a clear signal to your other devs I didn’t have enough time to do it right, but this works. I think AI will squash a large number of these, especially in big coorporate internal tooling where you are trying to juggle as much as you can and just keep it a float at all times.
References:
[1]: /tags/tech/
Flowing Thoughts Ai To Help Blast Radius
Not sure how this matters to anyone else, but I'm sitting in the car and letting the thoughts flow.
I'm having really interesting conversations with ai recently. Like things I never thought I would care this deeply about. In part because it feels like the vulns are coming faster and harder, and in part because it is really enabling me to invest some time into the development that I would not otherwise have. I'm thinking about least privilege, reducing dependencies in containers, limiting pod access to the Internet and other pods. Reducing the blast radius.
Now I've always been hesitant to bring in new dependencies. I've always tried to strip to the lowest possible dependency set n my containers, but I would also re-use the main server container to run cron job workflows. I wasn't giving much thought about what services they could access, or their internet access
-
How many people watching this sent their clankers out to make a uuid service for them as they were watching it. UUID as a service sounds great, heck @steipete [1] just has to mention it and his claws are on it building out the service, no need to even type anything or directly form a thought, just mention it in the meeting and a new repo will be up by end of meeting.
References:
[1]: https://steipete.me

-
Incredibly well done satire on t3.gg, love the at one of the top comments is Prime asking to be done next.
-
Lamb of God, a true classic, This album takes me back to high school. I don’t think I listened to the sacrament album as much, but “The Ashes of the Wake” was my jam for awhile, particularly hourglass.
To ignore commands that start with a space character, use the
HIST_IGNORE_SPACE option in bash or zsh.
setopt HIST_IGNORE_SPACE
-
The 3 piece design for wheel s without a z-seam is absolutely genius. That is a sick trick. Love this guys style. Need a tool Make a tool.
[1]
[2]
References:
[1]: https://dropper.waylonwalker.com/file/8b6f5e2d-f8f2-4ff8-9744-0812bff8879c.webp
[2]: https://dropper.waylonwalker.com/file/34430a1b-cd5a-4762-89ca-d3428c70e20c.webp


-
damn Johnathan Blow is not afraid to give you the cold hard opinions. If you want to be good you need to spend your early most formative years doing hard things, because you will not do it later, then goes on to say you should not do anything related to web development during that time as it will rot your brain.
-
Thorsten is always a great listen with well thought out answers. I thought the advice “all you have to be is good” from his is so great, so many people focus too hard on credentials and certificates, they miss the time in the saddle and raw, just being good at what you do. They talk a lot about industry trends and that ai/llms have been here long enough to see that they are the new iphone. In some way you need to learn to work with them. Much of the minutia is churn, it will change and we will forget about it in six months. Working at amp right now is really trying to focus on releasing exactly the right thing and not everything. We’ve been given these great models that can churn out poc very quickly, it is our job to focus on what the right thing to adopt is.
-
Thorsten is always a great listen with well thought out answers. I thought the advice “all you have to be is good” from his is so great, so many people focus too hard on credentials and certificates, they miss the time in the saddle and raw, just being good at what you do. They talk a lot about industry trends and that ai/llms have been here long enough to see that they are the new iphone. In some way you need to learn to work with them. Much of the minutia is churn, it will change and we will forget about it in six months. Working at amp right now is really trying to focus on releasing exactly the right thing and not everything. We’ve been given these great models that can churn out poc very quickly, it is our job to focus on what the right thing to adopt is.
Ping 59
"All you have to be is good"
[source](https://www.youtube.com/watch?v=thMFsqe8kbQ)
Not sure if this is a quote from somewhere but thought it was some interesting
advice that @thorstenball received when he was starting into web development.
He asked a friend already in the industry if he thought he had a shot. He had
no degree, no credentials, no experience at the time.
remember rule 4
I almost for got Rules [1] 4 today, rollout when smooth late in the day right
before a vacation day (terrible time to deploy I admit not my clearest plan).
Race conditions are a b****, all around on this one. The app I was concerned
about won the race to deploy first and was fine by itself, then another app had
a race condition inside itself that killed it
References:
[1]: /rules/
-
Hilarious ai episode of the office. all sort of flaws. nailed the personalities.
-
one minute in, I cannot believe Prime has never used a password manager. For all the shit they give Trash for his one password, He does not use a password manager!



-
Prime on Big A they make a really great mix. I really like primes perspective on the layoffs here. Adding in an ops perspecive a bit here. Maybe inspiring a full level post. infra, ops, sre roles are incentivised to keep uptime, that is your goal in these roles. Idk how it works on big products, its probably more greased, higher stakes, more well thoguht out, more well discussed. In my role for many small internal applications developers constantly use my platform different and find new edge cases that we never expected to hit. Depending on my week I’m either the team blocker and I’m fighting fires all week making sure new releases are getting out and stay running while everything is breaking, or I’m tending to the fire lanes, predicting the new edges, looking at previous outages and asking myself how do we never see this category of failure again. I think AI is really good a enabling both of these. I think you can probably run a leaner team with AI on the latter half. AI is really good at implementing things consitent (if you are careful) and fast. But when shit hits the fan, you still need the people who know the systems to get things back up quickly and prevent a cascade o...
-
What a great way to start a Wednesday morning with a fresh brand new tiny desk concert with the Foo Fighters. The killed it, love the classics.
agents are never done
Agentic coding has this nice trick of letting you bang out a project in an
afternoon, something complex that would have take some real time to implement,
not just some rounding error that can slip right in between the jira board.
Then it will be perpetually never done. There will always be bugs and thorns
rear their head up, new features no one ever thought of, and now no one really
has to think much about beyond having the idea.
This part of software engineering has always been here, its the root of the
never complete 200 side projects. But now it feels like fuel has been poured
on the fire, like we can get more done than ever. But we are tricking
ourselves, these projects will never be “done”. There’s always more to add.
Without feeling any of the pain of implementing it yourself, why not just keep
adding new features forever. This is the mentality that is crushing me right now.
It pulls at your token anxiety like crazy. You look at the usage board and you
are almost cooked so y...
-
I havent used windows in years at this point, but I feel this on the products I am forced to use for work. Basic features are not right, kinda work most of the time. New features, ai integrations, new skin/design, but still teams can’t use my system mic appropriately yet every other app does.
Also feel this computers have not got significantly better since around getting ssds. Yes they are better, but not at the same rate of being obsolete every two years. I hope we hit local model land and it flips this a bit, not in quite the obsolete every two years range, but some new hardware actually lets you do meaningful more new things.
How to Install Silksong mods on the Steam Deck
Having a tough time with Hollow Knight: Silksong? These mods will help.
Long Play Tech · longplaytech.com [1]
Really good tutorial for how to mod silksong on the steam deck. We just did this on my son’s steam deck. I’d add a reccomendation to map ~ to a back button like L4. I think this guy was docked with a keyboard.
References:
[1]: https://longplaytech.com/posts/how-to-install-silksong-mods-on-the-steam-deck/
Building For The Future
This afternoon, we sent the following email to our global team. One of our core values at Cloudflare is transparency, and we believe it's important that you hear this directly from us because it’...
The Cloudflare Blog · blog.cloudflare.com [1]
Full salary for the rest of the year after being let go. As much as this sucks as much as the job market sucks. It’s good to see that these companies laying off huge numbers during good times are trying to take care of those they brought on.
References:
[1]: https://blog.cloudflare.com/building-for-the-future/
Programming Sucks
stilldrinking.org [1]
Absolutely incredible, will fill some notes later
References:
[1]: https://www.stilldrinking.org/programming-sucks
Programming Still Sucks. — Writing
Sorry Peter. — I'm at a birthday party, and while most people here also work in tech, there's always a Guy with a Real Job. You know, a physical job, building some or other thing people need. And...
stvn.sh [1]
Absolute banger of a post, this is the time we are living in. Explain “are you afraid AI is going to take your job” to a non tech blue collar worker. Broken over promises, greed, and projects mismanaged by leadership who has no idea what the day to day work actually does and how critical it is.
I’m not quite in Sara’s position, but I feel something shielded by half of this working deep inside of a non tech part of a non tech company leading a very small rag tag team with get shit done attitude.
But I feel it, I see colleagues hit by these blasts.b I get clipped with shrapnel from some of the largest blasts. But nothing as significant as I see many others hit with
References:
[1]: https://www.stvn.sh/writing/programming-still-sucks-fqffhyp
I just learned that forgejo has a push to create repo feature and it is a gamechanger. Upon first try it didn’t work, with just a couple of environment variables I was up and running with push to create.
notify.wayl.one on main is 📦 v0.1.62 v3.14.4 NO PYTHON VENV SET USING SYSTEM NVIM
❯ git remote add origin https://git.waylonwalker.com/waylon/notify.wayl.one
notify.wayl.one on main is 📦 v0.1.62 v3.14.4 NO PYTHON VENV SET USING SYSTEM NVIM
❯ git push
remote: Push to create is not enabled for users.
fatal: unable to access 'https://git.waylonwalker.com/waylon/notify.wayl.one/': The requested URL returned error: 403
So I added the following environment variables.
Author: Waylon S. Walker <[email protected]>
Date:   Wed May 6 21:56:53 2026 -0500

    enable push to create

diff --git a/k8s/forgejo/deployment.yaml b/k8s/forgejo/deployment.yaml
index d77daab..9346763 100644
--- a/k8s/forgejo/deployment.yaml
+++ b/k8s/forgejo/deployment.yaml
@@ -91,6 +91,10 @@ spec:
               value: "0.0.0.0"
             - name: FORGEJO__server__HTTP_PORT
               value: "3000"
+            - name: FORGEJO__repository__ENABLE_PUSH_CREATE_USER
+              value: "true"
+            - name: FORGEJO__repository__ENABLE_PUSH_CREATE_ORG
+              value: "true"
             - name: FORGEJO__database__DB_TYPE
               value: postgres
             - name: FORGEJO__database__HOST
https://github.com/WaylonWalker/homelab-argo/commit/b2e953bc12
Tried again, and it just worked!
notify.wayl.one on main is 📦 v0.1.62 v3.14.4 NO PYTHON VENV SET USING SYSTEM NVIM
❯ git push
Enumerating objects: 171, done.
Counting objects: 100% (171/171), done.
Delta compression using up to 12 threads
Compressing objects: 100% (169/169), done.
Writing objects: 100% (171/171), 176.22 KiB | 16.02 MiB/s, done.
Total 171 (delta 99), reused 0 (delta 0), pack-reused 0 (from 0)
remote: Resolving deltas: 100% (99/99), done.
To https://git.waylonwalker.com/waylon/notify.wayl.one
* [new branch] main -> main
nless is a seriously sick tui for exploring streaming data. It makes it seriously simple to pivot (U), drill in (Enter), sort (s). It leave breadcrumbs as you go and you can press q to back out.
Play with your kubernetes events. Ya, my homelab is far from perfect, dont judge.
kubectl get events -A -w | uvx --from nothing-less nless
[1]Ghostty Is Leaving GitHub
Mitchell Hashimoto · mitchellh.com [1]Found on HN: [1]discussion [2]
The GitHub tears post. I feel it, maybe not as much as @mitchelh, but I feel it.
References:
[1]: https://mitchellh.com/writing/ghostty-leaving-github
[2]: https://news.ycombinator.com/item?id=47939579
Red Squares — the GitHub outage graph
A satirical contribution graph: red squares track GitHub.com platform outages instead of green squares tracking commits.
red-squares.cian.lol [1]
yet another interesting visualization of github outages. These guys are getting raked over the coals. It really sucks to see. Not quite tears to my eyes mitchelh [2]. But it feels like a core part of opensource has been dying for a few years now and is now getting ripped to shreds. The central location for open source is becoming more fragmented and I don’t see a path to where it ever gets any better.
References:
[1]: https://red-squares.cian.lol/
[2]: https://news.ycombinator.com/item?id=47939579
almost left tokens on the table
Almost didn't get through those gippity tokens this week, woke up yesterday
with 50% and a day to use them, cut full 5.4 loose on a big project that needs
a lot of work an it gobbled em right up throughout the day ran out just before
bed.
Desktop Crash 2026 | Nic Payne
PC Crash Desktop crashed days ago, apparently my primary drive has been going bad for a while and eventually it just died. live-booted to ubuntu server found re
pype.dev [1]
I’m taking this as a reminder to treat every machine like its about to catch fire, any machine with a user regularly using it already has the match lit. I need to go through and commit draft blog posts, dirty homelab [2] POC’s need to get out or get in, and not forever be in limbo. My efforts this year have been well intention ed to keep projects clean, on main, not dirty, but I think agents are making it worse before they make it better. I have some new ideas forming and old ideas for managing this have failed me.
References:
[1]: https://pype.dev/desktop-crash-2026/
[2]: /homelab/
Artemis II Photo Timeline
An interactive photo timeline of NASA
artemistimeline.com [1]
Hank Greed made a really cool site to explore the Artemis II mission with Claude Code. Now this is what agentic coding is for, such a cool app to scroll around on and visualize when the photos were taken. Listening to the video is sounded really hard to get all of the data to line up correctly, between devices and timezones it ws not straightforward even though all of the schedules and images were made public.
[2]
References:
[1]: https://artemistimeline.com/#jeremy-hansen-suited-up-and-ready
[2]: https://dropper.waylonwalker.com/file/72dbd361-091e-4e3e-b965-bca6dd11e33e.webp
Hacker News RSS
hnrss.github.io [1]
hacker news rss feeds, Nice list of feeds to consider adding to your feed reader.
References:
[1]: https://hnrss.github.io/
markata-go now has web awesome integration for image compare. It renders a
nice web component with a slider to compare two images.


It’s done with a class wrapper around the image components.
::: wa-comparison


:::
Without markata-go’s web awesome integration, the above would look like:
<script type="module">
  import 'https://ka-f.webawesome.com/[email protected]/components/comparison/comparison.js';
</script>

<wa-comparison>
  <img
    slot="before"
    src="https://dropper.wayl.one/file/d628ffba-de18-4fff-91a8-700f037df119.webp"
    alt="Grayscale version of kittens in a basket looking around."
  />
  <img
    slot="after"
    src="https://dropper.waylonwalker.com/file/ca30665f-1a15-453e-aab8-221901c7df99.webp"
    alt="Color version of kittens in a basket looking around."
  />
</wa-comparison>
Today I found a way to test model syntax, cause the clankers always get the exact model name that copilot wants wrong.
copilot --model claude-sonnet-4.5 -p "Reply with OK" --allow-all --no-ask-user -s
copilot --model gpt-5.4 -p "Reply with OK" --allow-all --no-ask-user -s
-
Jaime’s title hooked me in here, what guitar riff from Linkin Park had the greatest riff of our generation. Theres something about Linkin Park unlike Killswitch Engage, Atreyu, Avenged Sevenfold, bands I would listen to at this time that I cant remember a single riff, I can think of Chesters vocals, or the unique scratching they did, but mostly the songs were a whole piece. What riff is he talking about.
The very first note of “One Step Closer” plays and I’m immediately transported back to 2003 sitting in my garage watching HuevosIII [1] on repeat. I can still remember the timing that Wes Miller did on the edit. I can see the riders I looked up to for so long riding in formation.
Turns out this riff is so recognizable it takes me exactly where I was when I listened to it hundreds of times.
References:
[1]: https://www.youtube.com/watch?v=AoQ6fUTuYvg&list=PLoSp9yq_oDOdCOfCp_QTS017cjAi4Cv_0&index=2

-
The most iconic shots of a scrub ever caught on camera.
Can You Feel the Slop
Do you ever vibe code out a POC, and you can just feel the shitty code
underneath? Every change causes 3 things to break and wires get crossed all
over the place. Sometimes I just want to write the code again. Maybe its time
to slow down.
approve rm
Hot take, if you are unwilling to approve rm you should rethink
your workflow, git state, or backups.
!!! Note
This is meant for normal project work with an agent working in
the context of a single project, with directory level access
to the project.

Ping 54
I'm regressing back to boomer ai for more plan mode style prompting at home...
It does a decent job at ingesting a repo and coming up with plans before I
start spending precious tokens.
Tokens Just don't go as far as they used to
Not sure if this is simply the flavor of the month, or a shift in gpt5.4
being super subsidized on release and now that we have gpt5.4-mini-fast out
they have shifted, but I'm burning through half of my $20 gippity sub in a
day with hobby level use. Second week in a row its burning so fast.
Stow comes with a local and global ignore list that you can use to ignore certain files or directories.
If you put Perl regular expressions, one per line, in a .stow-local-ignore file within any top level package directory, in which case any file or directory within that package matching any of these regular expressions will be ignored. In the absence of this package-specific ignore list, Stow will instead use the contents of ~/.stow-global-ignore, if it exists. If neither the package-local or global ignore list exist, Stow will use its own built-in default ignore list, which serves as a useful example of the format of these ignore list files:
Example given from the docs
RCS
.+,v

CVS
\.\#.+       # CVS conflict files / emacs lock files
\.cvsignore

\.svn
_darcs
\.hg

\.git
\.gitignore
\.gitmodules

.+~          # emacs backup files
\#.*\#       # emacs autosave files

^/README.*
^/LICENSE.*
^/COPYING
Reference #
https://www.gnu.org/software/stow/manual/html_node/Types-And-Syntax-Of-Ignore-Lists.html
Ping 52
Is it just me or are the agents not behaving today?
-
Casey had an interesting point here. I think demitri came back with some sense of sanity that its just not how corporations look at employee cost, but I still thought it was a head scratcher.
Roughly translated not quoted
If the sellers of ai are telling you that your developers are going to be 10x productive, why are they only spending half their salary in tokens? Why not 9x?
Ping 50 A
I wrote code by hand today... I was out of tokens
-
I hate how he called out terminal user interfaces as shit… then proved web interfaces to be superior. Damn him. I love working from my terminal, but having ai prove itself through html [1] reports including video, image, metrics, charts, and text is goated. Rethinking yourself has the bottleneck not the orchestrator feels real. Validating the work is hard, theres a shift right now and everyone is trying to figure it out. Lucas’s technique is a little bit of be lazy and tell it to prove itself to you, so as you juggle your 15 agents you have a nice report to read.
References:
[1]: /html/
-
This is a really good guide, with quite a few good nuggets. I need to try deleting my AGENTS.md and rebuilding it from scratch more often. I liked how he talked about having agents prove their work and tell them up front how they will be judged. What I didn’t care for so much was the feeling that a lot of the rules go in markdown, thats not a rule, thats a suggestion. Rules should be deterministic. They should be tests and linters that ensure they are followed. Suggestions are good, but dont trust the agents to always follow them. And don’t trust that they wont change your rules, keep them honest.
-
Feeling this today, feels like everything continues to get worse. Trying to be more positive, and its hard.
Write It First, Then Let AI Drive
There's a thing that happens when you start using AI coding tools seriously. You assume the best workflow is obvious: let AI generate the first draft, then...
Kenneth Reitz · kennethreitz.org [1]
Interesting take by Kenneth Reitz. Not quite sure how I feel about it anymore. It kinda hurts, but I’m not sure if code aesthetics matter as much as the product anymore. I cared when I was the one editing, but at this point I’m not doing a lot of edits by hand. Do these aesthetics affect the final products that users use, Not sure. AI makes me sad.
References:
[1]: https://kennethreitz.org/essays/2026-04-12-write_it_first_then_let_ai_drive
Prove Yourself Agent
Ask your agents to prove their work. Include it in the initial
prompt, not later.
ThePrimeagen (@ThePrimeagen) on X
I am slowly coming around to AI assisted programming.
I am genuinely trying to codify every rule about programming that I have and using that + several stages to build out small changes.
Not s…
X (formerly Twitter) · x.com [1]
If agents make prime a bit faster, what does that mean for the rest of us mortals?
References:
[1]: https://x.com/ThePrimeagen/status/2043861800819761382
Uncle Bob Martin (@unclebobmartin) on X
@ThePrimeagen AIs aren’t good rule followers. The older the rule in the context window, the less priority it is given. So the best way to enforce the rules is with external tools that communicate...
X (formerly Twitter) · x.com [1]
I’ve gotta agree with bob on this one, the first thing I did to my biggest brownfield project I wanted to use agents on BEFORE they did work was a hardened pre-commit.yaml, ci, hardened type checking and linting. SECOND get rid of bad inconsistent patterns, let them replicate consistency, force them to pass checks. Agents will follow all of your markdown suggestions most of the time, enough for you to become complacent if you let it. They are goal seeking, if you put them to a task you thought was possible that is not given your constraints, they will try to find a way given enough tokens. I dont see this ever changing, its one thing that makes them great, it just needs to be kept in check.
References:
[1]: https://x.com/unclebobmartin/status/2044065822067282396
Steve Yegge
Steve Yegge: I was chatting with my buddy at Google, who's been a tech director there for about 20 years, about their AI adoption. Craziest convo I've had all year. …
Simon Willison’s Weblog · simonwillison.net [1]
behind, yet positioned to completely dominate this race by hitting it with some sense. Making trends in what looks like longevity in the race that is not subsidising to simply get users, but to get by until they figure out how to 100x reduce the cost to a reasonable level. They feel like the guy sitting in the back with nothing big or flashy to say that is going to drop the hammer on their competition that overstretched itself taking on too much debt because it was necessary to change the game. There might be something to having a mix of hipsters, boomers, and luddites all trying to balance each other out.
References:
[1]: https://simonwillison.net/2026/Apr/13/steve-yegge/#atom-everything
What happens when the 0 days are exposed?
What's going to happen to all of our software when Anthropic Mythos finds all
of the 0 day vulnerabilities? Will everything depending on the bugs break?
Will it be possible to fix them cleanly? Will we all get pwnd when the bad
actors get access to them before everything is patched? Will LTS Operating
Systems Die?
-
5 star video, if you are going to watch one video to understand how harnesses and agents work, this is it. This really had my gears spinning on what tools do for agents and how big of a difference they make in their ability to manage context efficiently and accurately create changes. It’s crazy how good bash works, and that gives the agents the ability to do just about everything, but it could be better.
Artemis II Lunar Flyby - NASA
The first flyby images of the Moon captured by NASA’s Artemis II astronauts during their historic test flight reveal regions of the Moon's far side, as well as an in-space solar eclipse. Released...
NASA · nasa.gov [1]
One of the biggest scientific achievement of our lifetime happened this week. I will forever remember sitting in a Culvers in between theater builds looking through these photos as they came live, looking at them in awe.
[2]
One of the most famous images from the shoot “Setting Earth”
References:
[1]: https://www.nasa.gov/gallery/lunar-flyby/
[2]: https://dropper.waylonwalker.com/file/9987010a-a448-472d-9c60-2831b61a1d3a.webp
-
What an amazing set of photos created by the Artemis II crew accompanying a fantastic breakdown by Hank Green.
[1]
I like this one, as its probably one of the ones not shred a ton
Whole gallery is worth looking at https://www.nasa.gov/gallery/lunar-flyby/
References:
[1]: https://dropper.waylonwalker.com/file/0b53a4ed-924e-42b5-84f4-51c189f60801.webp
Ping 48
-
A really interesting long form interview with @simonwillison [1]. If you follow him closely most of it is probably not new, but I found some interesting nuggets.
Simon is writing most of his code from his phone these days using anthropic hosted platform. He mentioned that a lot of security risks go away when you don’t put secrets on the platform and you let them take the risk of running ai written code with ai chosen supply chain.
He talked about the Pelican Riding a Bike benchmark for quite awhile. He was surprised at how well of a proxy it is for how capable a model is at just about everything. He also said that when he runs the benchmark he also runs half a dozen others that he’s never talked about so that He could see if they were to train a model specific to his benchmark he could catch them, but it seems they had caught on and if they were they seem that they would already be doing it on all of his others anyways.
TDD is incredibly boring for humans, it strips so much creativity and joy from the process. Who cares if agents are bored they do better when doing TDD.
References:
[1]: https://simonwillison.net
-
THIS is the future of homelab [1], excited to see someone who knows so much more about hardware than I do get excited about this.
[2]
References:
[1]: /homelab/
[2]: https://dropper.waylonwalker.com/file/f69c86b9-ab79-46ad-9ef0-4d794544e943.webp
Laurie Voss (@seldo.com)
Project Glasswing is a glimpse at an oncoming future in which agents do things humans could never have accomplished and the results are handled by other agents faster than humans could react and we...
Bluesky Social · bsky.app [1]
Is Glasswing the next inflection point
[2]
References:
[1]: https://bsky.app/profile/seldo.com/post/3miybjol76p2r
[2]: https://dropper.waylonwalker.com/file/00bc13be-32bd-4410-b0c4-2ecc0f2f6b95.webp
2026-04-06 Notes
https://youtu.be/cbgSkrQ3HNg?si=VJ2kqj8XD0P6ukI_

BumpMesh by CNC Kitchen
Add displacement textures to STL, OBJ, and 3MF models directly in your browser. Preview, mask, bake, and export printable textured meshes locally.
BumpMesh · bumpmesh.com [1]
Absolutely sick texture app from cnc kitchen. Like him I’ve spent a bunch of time attempting and failing to learn blender, I’m so glad someone else vibe coded out such a good app that can just add texture to stls with basic masks and is the very basics of what you would want to add to 3d prints to make them interesting, I’m excited to use this for some real projects.
[2]
[3]
References:
[1]: https://bumpmesh.com/
[2]: https://dropper.waylonwalker.com/file/d959e3dc-3fde-410b-acaf-8f0574f68a1a.webp
[3]: https://dropper.waylonwalker.com/file/e10dddf6-0f2e-498f-bef7-81901afced7b.webp

What is this job anymore
The job of writing code is dying, models are getting better, the average person
will have their average features implemented in average ways with no effort by
agents, the writing is on the wall. We are still trying to review most of the
critical code, this is slowing us down, is it really stopping any bugs or
giving us any more familiarity with the product, marginally.
The time is now to grease up your UAT, testing, deployment pipelines. Dont let
agents delete entire regions. Review your backup and restore strategy, you do
have a DR plan right?
Things are changing fast, the best of us are still better than the clankers.
Most of us have more context than the clankers. Most of us have more intuition
of what and where to implement fixes. Context windows and memory will be
solved problems. Your DR plan, UAT, testinng and QA environments will not come
for free, you need to make them, and deeply integrate them into your processes.

-
Bush on tiny desk. Iconic band on an iconic platform. Will be re-listening to this several times.
[1]
References:
[1]: https://dropper.waylonwalker.com/file/3b67304c-41cc-4040-b6cd-7e0c16633e3d.webp
Ping 47
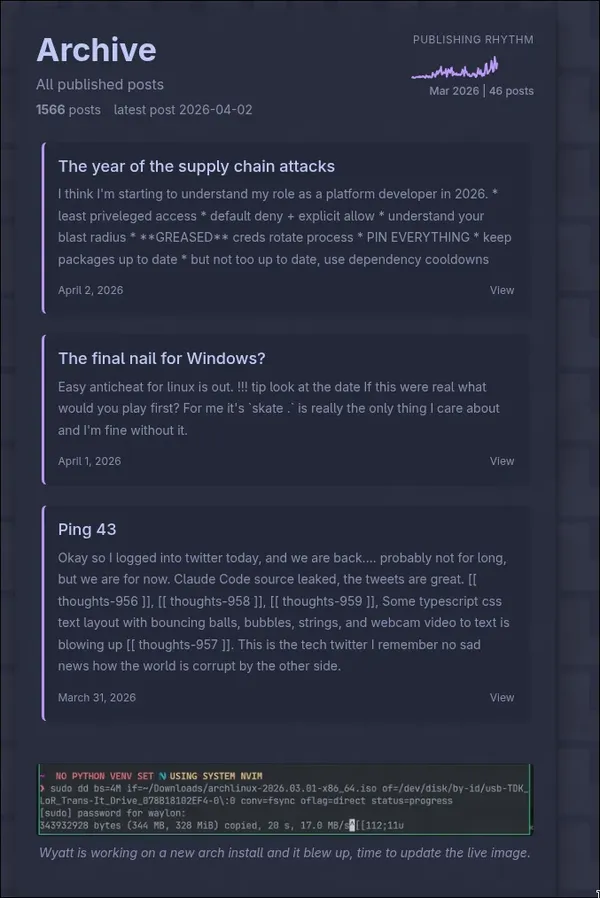
The year of the supply chain attacks
I think I'm starting to understand my role as a platform developer in 2026.
* least priveleged access
* default deny + explicit allow
* understand your blast radius
* **GREASED** creds rotate process
* PIN EVERYTHING
* keep packages up to date
* but not too up to date, use dependency cooldowns
GitHub - kraanzu/smassh at terminaltrove
Smassh your Keyboard, TUI Edition. Contribute to kraanzu/smassh development by creating an account on GitHub.
GitHub · github.com [1]
smassh is the coolest monkeytype tui clone, its impressively accurate. Easy to install and run, all the same themes appear to be there and everything. maybe a good way to get a few reps in while agents are running these days.
35102587-dffe-48ec-920a-a037917e7776.mp4 [2]
I need to go back and brush up on my skills I’m down a good 20wpm from what I should be doing.
References:
[1]: https://github.com/kraanzu/smassh?ref=terminaltrove
[2]: https://dropper.waylonwalker.com/file/35102587-dffe-48ec-920a-a037917e7776.mp4
The final nail for Windows?
Easy anticheat for linux is out.
!!! tip
look at the date
If this were real what would you play first? For me it's `skate .` is really
the only thing I care about and I'm fine without it.
What Happens When AI Stops Being Artificially Cheap
The subsidy era is ending. Here
danielmiessler.com [1]
I’ve been thinking about this for awhile and Daniel makes some great arguments here. Interestingly keeping inference cheap removes the incentives to make our tools better, help us choose the right model, lean on local models, open weight models. The frontier models are so affordable through subsidized subscription models why would you deal with anything less intelligent at this point. The tooling we use is not optimized for it, and why should it be.
References:
[1]: https://danielmiessler.com/blog/ai-stops-being-artificially-cheap
External Link
baty.net [1]
emacs config so bad he launch obsidian, YIKES! grantid I’m using obsidian currently on my phone, not for this post, but for journal entries while I’m away from my desk. Use this as a reminder that you can swim through murky waters with your dotfiles for awhile, but occasionally its good to do a clean up, pin it, put em in a docker image, have a good fallback to go to if shit really hits the fan. Iv’e been using https://github.com/waylonwalker/nvim-manager as part of my strategy for awhile now.
References:
[1]: https://baty.net/journal/31mar26/
[1]
uv adds dependency cooldowns via #16814 [2]. Well needed feature in todays world, far from a guarantee, but its something.
References:
[1]: /static/https://github.com/astral-sh/uv/releases/tag/0.9.17
[2]: https://github.com/astral-sh/uv/pull/16814
Package Managers Need to Cool Down
Today's LiteLLM supply chain attack inspired me to revisit the idea of dependency cooldowns, the practice of only installing updated dependencies once they've been out in the wild for a …
Simon Willison’s Weblog · simonwillison.net [1]
2026, finding the balance between fixed bugs and zero days. There is very unlikely ever a reason you need to be running bleeding edge packages in prod most package managers now support cool downs.
References:
[1]: https://simonwillison.net/2026/Mar/24/package-managers-need-to-cool-down/
ThePrimeagen (@ThePrimeagen) on X
don't forget
last time Anthropic, in their infinite PhD level wisdom, leaked their own source code (Feb 25) they DMCA'd all repos that had their code.
Careful storing the code because Anthropic w…
X (formerly Twitter) · x.com [1]
Everyone look away, nothing to see here.
[2]
References:
[1]: https://x.com/ThePrimeagen/status/2038978962089492631
[2]: https://dropper.waylonwalker.com/file/090f03b2-e6f5-4ede-a814-bfbb4e237b54.webp
Mete Polat (@metedata) on X
@Fried_rice @Scobleizer Anthropic is now officially more open than OpenAI
X (formerly Twitter) · x.com [1]
Anthropic safewords are the talk of the town today.
[2]
References:
[1]: https://x.com/metedata/status/2038924041453441422
[2]: https://dropper.waylonwalker.com/file/c097c6dc-4b10-4fab-a9f9-1d4181422285.webp
Cheng Lou (@_chenglou) on X
My dear front-end developers (and anyone who’s interested in the future of interfaces):
I have crawled through depths of hell to bring you, for the foreseeable years, one of the more important f…
X (formerly Twitter) · x.com [1]
webdev twitter is blowing up with implementations of pretext text calculations. The examples are absolutely fun and ridiculous.
[2]
References:
[1]: https://x.com/_chenglou/status/2037713766205608234
[2]: https://dropper.waylonwalker.com/file/350a368f-0e6b-4375-98d6-6303961c0d6c.webp
Ping 43
Okay so I logged into twitter today, and we are back.... probably not for long,
but we are for now. Claude Code source leaked, the tweets are great. [[
thoughts-956 ]], [[ thoughts-958 ]], [[ thoughts-959 ]], Some typescript css
text layout with bouncing balls, bubbles, strings, and webcam video to text is
blowing up [[ thoughts-957 ]]. This is the tech twitter I remember no sad news
how the world is corrupt by the other side.
Josh Medeski (@joshmedeski) on X
Did you know you can replace the spinning verbs in Claude Code. I'm having fun with it.
X (formerly Twitter) · x.com [1]
The claude code source code leaked today and the tweets are great, maybe twitter is back.
Did you know you can replace the spinning verbs in Claude Code. I’m having fun with it.
[2]
References:
[1]: https://x.com/joshmedeski/status/2039010741039120417
[2]: https://dropper.waylonwalker.com/file/8cf5cf65-40e1-4f40-8d09-b596a97dd51d.webp
[1]@nicknisi [1]) — Y'all, I think I'm a convert to pi" loading="lazy">
Nick Nisi (@nicknisi [2])
Y'all, I think I'm a convert to pi
Bluesky Social · bsky.app
I’m about to be pi pilled.
References:
[1]: https://bsky.app/profile/nicknisi.com/post/3mhgcbpm4ds2p
[2]: https://nicknisi.com



Social Media is dead
Social Media is dead, interest media killed it long ago. I no longer feel like
I'm connecting to people, creating community, having fun, learning. I feel
like I'm being shoveled slop from the slop machine, I'm sure mostly create by
well intentioned people just trying to make it in the world, trying to make
their mark, trying to make something of themselves. The algos long lost the
idea of subs and likes, and transitioned to how long you will pause on a topic.
What used to be a series of recognizable faces, names, avatars, each with their
own personality that I could come to learn and know who was just trollin, who
was serious, is now mostly unrecognizable. Platforms have changed and
fractured communities people went separate ways, not all the same ways. No one
community is like it used to be, and its hard to find.
/carry/
EDC # [1]
I try to keep a pretty light every day carry, but it never works out, keyfobs
and headphone cases end up causing more bulk than I’d like, but My EDC is no
where near the bulk I had as a kid with my cargo pants decked out with
everything I could possibly need.
I hold no attachment to anything in my EDC. Nothing on my person has
sentimental value. Anything I carry can be lost, stolen, or destroyed at any
point in time. I pick things of sufficient usable, utilitarian, quality
sufficient to work. No extra fluff.
---
- Google Pixel 6
- Ridge Wallet
- Olight Perun - Since April 2022
- Civivi Qubit - Since March 2024 after my last one was donated to the Indianapolis Stadium
- OpenFit Shokz
---
Rules # [2]
- lightweight
- replacable
- no emotional attachments
- utilitarian
- everything serves a purpose
My kit # [3]
[4]
Photo taken March 2023
Phone # [5]
Google Pixel 6
I will not get finance a new phone for the foreseeable future again. The last
time I feel lik...
Where Is The Tech Industry Going
Agents suck
Get left behind if you don't use them
Burn out if you use them too much
The software world has been flipped upside down seemingly overnight. Slow at
first, then all at once. It started with auto complete, to chat, to, ide
integrations, to agents that would f&!^ over your repo more than it would help.
Up till this point we are just little bit better and more specific than copy
paste from Stack Overflow. Then in Nov 2025 models learned how to effectively
use tools and do what you ask of them, sometimes more, sometimes less, but
generally for the basic shit most of us make its a net positive with each
iteration.
Our techniques for managing work need to change.
Our expectations need to change.
Burnout for a lot of folks is coming.
Is Compaction The Issue
I saw today in work chat something along the lines of "we need bigger context
windows" "compaction times are holding us back". Maybe I'm just blessed with
the lack of lord jira, maybe juggle too many projects at once and they are all
pretty much done when I get back. Maybe I do more long running specs and spend
time making good plans that it does not matter.
Anyways the point I'm getting to is that if you think that compaction is your
main issue slowing you down, and 10x this if you are a manager thinking this is
what is slowing down your team you **need** to look at your workflow. Not
because it sucks. Not only because it could be better. Because you are
signing yourself and your team up for burnout if you are sitting there watching
these things run like waiting for paint to dry and firing more prompts at them
as soon as they are done. It feels easy. It feels like you are going fast.
Its eating more brainpower than you think, and its not getting you to your
destination any faster.
To Live In A World Without AI | Nic Payne
I'm finding lately that I wish we could go back to pre-ChatGPT... A world
without a code-gen easy button, where "easy" was LSP autocomplete, wher
pype.dev [1]
We f&#ing said @pype [2], well f&#ing said. I think a lot of us are feeling this, we’ve pitched our brain into a bucket and we are no longer stretching it in the same way. We still work in similar ways of old, with new ways of turning off and saying yes a bunch of times. the best thing I can hope for is that as things get better we have fewer yes loops, and more architectural design debates and deep thoughts. But I fear deep thoughts are gone to the way of “research the leading 10 frameworks and pick the best one for this project.” and letting the clankers do the deep thinking. Its signing us up for a weird distopia.
I think a lot of us wish we could undo what has happened and go back to actually understanding what we are doing, but the world has changed, and if you are building average shit, like the average person, using models trained on average people doing average shit you cant keep up anymore.
References:
[1]: https://pype.dev/to-live-in-a-world-without-ai/
[2]: https://...
My Thoughts on Beads | Nic Payne
[Steve Yegge](https://en.wikipedia.org/wiki/Steve_Yegge) is a pretty well-known individual in the tech field, having been
around for a long time at some of the
pype.dev [1]
I’m in step with @pype [2] here, I really want beads to work for me, but my systems for infra/platform work are all over the place, not one repo. I’m considering trying the BEADS_DIR env var but idk if it fits my workflow. For now, similar to @pype [2], I am rocking my own home vibed solution that I’ve intentionally put little effort in and its working great and I expect it to be broken and not working with the latest harnesses and models within a few months anyways, cause there is no predicting this train.
References:
[1]: https://pype.dev/my-thoughts-on-beads/
[2]: https://pype.dev
paynepride dot com outage on vacation | Nic Payne
The day after I leave for vacation I start getting SSL errors on every homelab
service I host for myself and others. The culprit was my Cloudflare API token
exp
pype.dev [1]
oof, outage on the homelab [2] during vacation, brutal. I can think of a couple of similar solutions to what @pype [3] has done to tailscale in, but I’m not sure that I could do this remotely. On one hand I’m so glad that cloudflared just takes care of certs on the other hand this really brings a gap in my understanding of what the heck I would do if it were broken.
An untested DR plan is not a DR plan.
An untested backup does not exist.
References:
[1]: https://pype.dev/paynepride-dot-com-outage-on-vacation/
[2]: /homelab/
[3]: https://pype.dev
-
Vibe coding [1] is going so far into the news sphere now that Adam Savage even weighs in with perspectives from someone who has built a life around building things with his hands, keeping up with new making techniques, discovering old techniques as they combine with new. He talks about 3d printing reviving his love of the pantograph as one automation technique eases the most difficult part of another.
References:
[1]: /vibe-coding/
Lets Land The Plane
Part of @steveyegge 's gastown/beads is a prompt "Lets land the plane". It's very straightforward forward and what any sane human would probably do before finishing work, except the last part. The "generate a handoff prompt for the next session" was not something I've put much thought into. But now that I juggle 6 sessions at a time and often end up with 20 sessions open because I don't want to close them and loose the last bit of context. This is what I need to keep from crippling my laptop memory from all of these stale sessions hanging around.
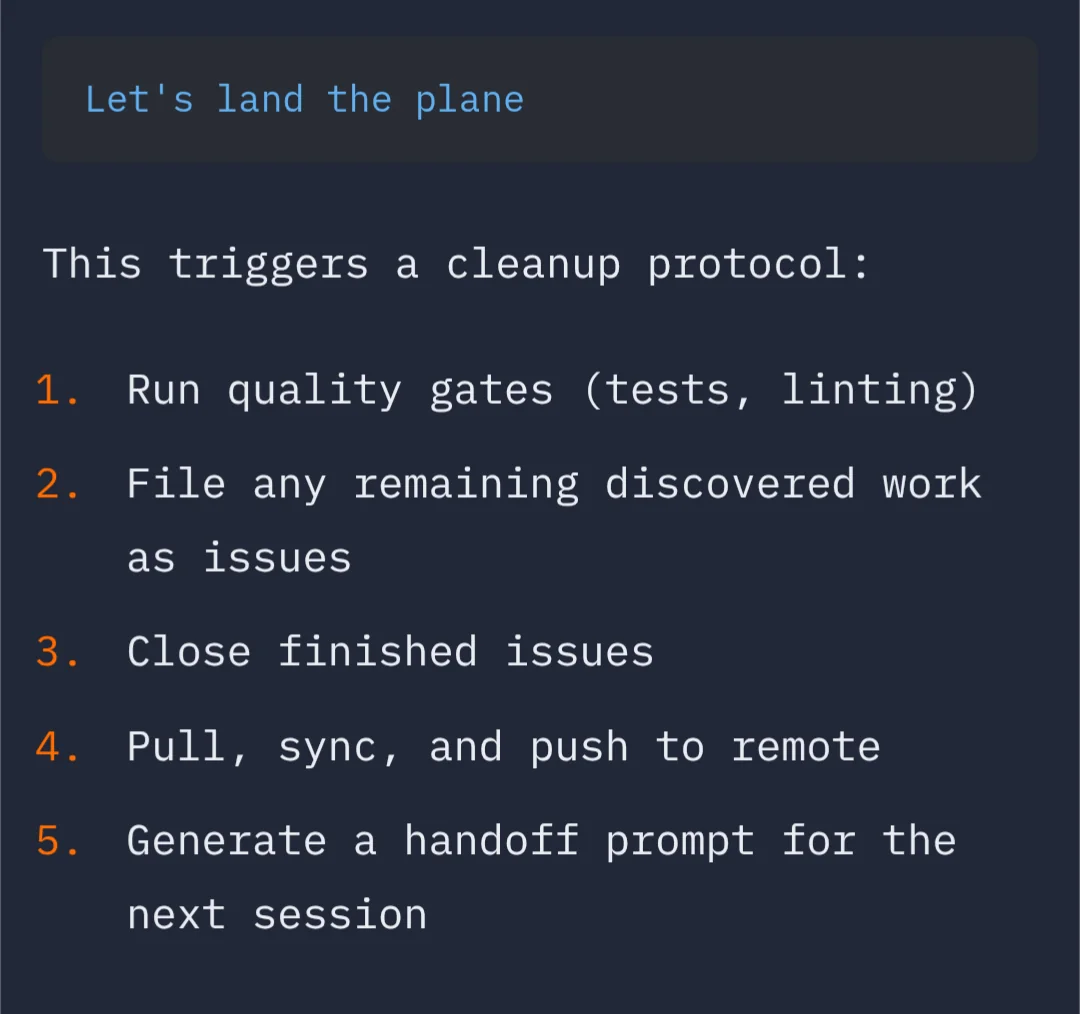
Taken from https://ianbull.com/posts/beads
Reddit - Please wait for verification
reddit.com [1]
This is a fantastic progression through kuberentes concepts. From running a pod, to making it resiliant, holding secrets, accepting traffic, and autoscaling.
References:
[1]: https://www.reddit.com/r/kubernetes/comments/1rzyhip/kubernetes_is_beautiful/
I’ve been having issue with my keyboard disconnecting to my main desktop for awhile. Today I got a cheap bluetooh dongle in and am giving it a run this week to see how things go. The first step was to move it to the new adapter. I’ve never had multiple adapters installed so this was a new to me process.
I was able to do it all with the same keyboard, It did require some juggling between usb and bluetooth modes pluging and unplugging, two keyboards would be simpler to reason about.
I can’t be bothered to change my brain to think about this machine on a different zmk profile it is of absolute importance for it to remain on the same profile, otherwise this would be a simple bind to another empty profile.
Why not use a cable on desktop?
I dont mind cable, and have used one on this setup for years, but I have actually been picking up and moving this keyboard and using it with different devices.
I’ve got a big battery and performace cranked up, unless my machine is under load I do not notice any key lag.
I did it with bluetoothctl, I’m sure it could have been done with a gui like
blueberry or blueman.
bluetoothctl
# list adapters
list
select <old-adapter>
devices
# fin the MAC address of the device 42BLOCK
remove <42BLOCK_MAC>
Now I plugged into usb. And importantly cleared out the zmk profile. If you do not clear the profile your board does not go into pairing mode.
bluetoothctl
# switch adapters
select <new-adapter>
power on
agent on
default-agent
scan on
Put 42Block in pairing mode, then:
pair <42BLOCK_MAC>
trust <42BLOCK_MAC>
At this pint I saw this show up in the logs, I think there was some masking issues or something in zmk, output kept going out usb no matter what so I disconnected the keyboard and typed the passkey in, and it worked.
[agent] Passkey: 540044
Boom, it just started working right away.
bluetoothctl
connect <42BLOCK_MAC>
info <42BLOCK_MAC>
scan off
exit
More Details Than You Probably Wanted to Know About Recent Updates to My Notes Site
Writing about the big beautiful mess that is making things for the world wide web.
blog.jim-nielsen.com [1]
I love the level of thought that Jim has put into these changes and making sure that urls don’t change. I’ve got a big change in flight to my main site and this is one of the reasons that I’ve been sitting on it so long. I want to make sure urls arent broken, redirects work as they should, and there are no 404’s from existing urls. Currently the new version only exists on a separate deployement https://go.waylonwalker.com/
I also added the ability to “shuffle” between posts. This is mostly for myself. I like to randomly jump through notes I’ve published in the past for reoccurring inspiration
Love this idea and have it on my new site already as well, and have really enjoyed using it by pressing it a dozen or so times over the course of a few sessions. It highlights that I have too many posts like stars and thoughts and I should do some weighting to main posts. mine is at https://go.waylonwalker.com/random/
References:
[1]: https://blog.jim-nielsen.com/2026/notes-site-updates/
Notes – 06:34 Mon 23 Mar 2026
Notes – 06:34 Mon 23 Mar 2026
dbushell.com · dbushell.com [1]
Does anyone think fast-code will continue to pay the same salary? The answer isn’t to switch your brain off during your McCode shift and write a poem after work. Your job will be replaced by a Banglasdeshi slop-shop if AI improves (which is inevitable, apparently). Possibly the same sweatshop that loomed my £3 T-shirt. The Luddites didn’t accept their fate so easily.
David has some good points here, but I’m feeling the opposite direction a bit. Execs have always liked keeping the PM’s and the people steering the ship close by and were willing to farm out more and more grunt work. It feels like we are in a weird phase where there used to be a big group of people paid to write code. A few of them are exceptionally good at it and will remain. There will be a need for these people everywhere. Somehow we still need people hand editing assembly code optimizations, fortran, and cobol today. Those industries largely moved on, but a few great ones remain. I think this fast-code slop factory is going to be a short forgotten time in history, but no one yet knows what’s next. We are all waiting t...
I don't want someone else running my agents
I don't want to review the pr, I dont want to fight the mass of changes
clobbered across the codebase. I want to own my platform. With everything
changing with agents writing more code than I can imagine in a day work looks
different now. I still want to work with real people. I want to collaborate
on ideas. I want someone to bounce ideas off with. I want someone else in the
war room with me on launch day, or when the whole thing goes down. But I don't
them slopping in my sandbox, if someone is going to be stirring the slop in my
product I want it to be me. Work is feeling different now. New lines need to
be drawn in new directions. Expectations are changing, the way work is
completed is changing, and we are all here trying to figure out what this looks
like moving forward.
Looking for inspiration? tooscut [1] by mohebifar [2].
Professional video editing, right in your browser. Made with Rust, WebGPU, WASM, and Tanstack Start.
References:
[1]: https://github.com/mohebifar/tooscut
[2]: https://github.com/mohebifar
Ping 38
When agents do the work its harder to recognize a dead end.
I like kraanzu’s [1] project smassh [2].
Smassh your Keyboard, TUI Edition
References:
[1]: https://github.com/kraanzu
[2]: https://github.com/kraanzu/smassh
I’m really excited about KittenTTS [1], an amazing project by KittenML [2]. It’s worth exploring!
State-of-the-art TTS model under 25MB 😻
References:
[1]: https://github.com/KittenML/KittenTTS
[2]: https://github.com/KittenML
Learning to agent
All we are hearing lately is Agents are the future, something flipped around
NOV 2025 with opus 4.5. It turned snake oil into action. It changed
programmers will be replaced in 6 months to now. Not all of them, but probably
most of us who are not extraordinary. If you fall into the camp of folks not
adopting, I got no issues with that. No one is twisting your arm, well maybe
your boss or cto is, thats on them. I don't mean to say this is the future as
in, get in or get left behind. I mean it as this is where your other engineers
probably are, the junior to mid level engineers are here. If you are not
trying to meet them where they are how are you going to lead them.
Studio Ghibli Images in the Wild
I just stumbled into an image in my org chart of someone who clearly turned
themself into a Studio Ghibli character in chatgpt during the small window of
time that it seemed to do this for everything. Its clearly the aesthetic that
It would do by default for that week, then would not do it whatsoever. I'd
link it, but its from an org chart. I mostly found it interesting how we now
have these recognizable artifacts from specific moments in time.
Ping 36
I feel like there's an inevitable phase to every ai/agentic worked feature/epic
where you have to get in and chat with it 2025 style (except it actually works
and doesn't turn your project to shit). Planning is great, planning out epics
for full orchestrator's to churn for hours on is amazing, but it always leaves
me with a handful of thorns multiplied by complexity level of things that I
can shout a list of 6 items at a time that it can one shot. I haven't seen
anyone put a name to this phase yet, so I'm going to call it the UAT phase
for now and it seems like a very necessary part of the SDLC. It was
important before, but feels more so now as engineers distance themselves
from the implementation.
Research, Plan, Implement
I heard this term yesterday, and I think a lot of people are missing out on
step 1. It's important to experiment with agents and learn what they can do
well and what they cant, this changes every couple of weeks at this point. You
might be spending hours planning something that could have been implemented
right away, or maybe wasted time planning something that needed more research,
more context engineering. Agents start fresh every session, they cant remember
what you asked them to do 5 minutes ago in the other session, getting the right
tokens in session is critical.
Today I learned that docker creates an empty /.dockerenv file to indicate that
you are running in a docker container. Other runtimes like podman commonly use
/run/.containerenv. kubernetes uses neither of these, the most common way to
detect if you are running in kubernetes is to check for the presence of the
KUBERNETES_SERVICE_HOST environment variable. There will also be a directory
at /var/run/secrets/kubernetes.io/serviceaccount that contains the service
account credentials if you are running in kubernetes.
Context Poisoning Was There All Along
I wrote some code by hand on Sunday. Sat down with my son and started building
out a game in pygame from scratch. We went to google, we searched how to do
something, we copy and pasted from the docs. Not because we are dumb, but
because we cant remember some aspects of the pygame api. Now that these
patterns are established we no longer have to google them, we simply grep our
codebase and replicate the pattern. Easy right? It's funny that it took ai to
coin the term `context poisoning` even though it was there all along.
If you’re into interesting projects, don’t miss out on qmd [1], created by tobi [2].
mini cli search engine for your docs, knowledge bases, meeting notes, whatever. Tracking current sota approaches while being all local
References:
[1]: https://github.com/tobi/qmd
[2]: https://github.com/tobi
Looking for inspiration? OrcaSlicer-FullSpectrum [1] by ratdoux [2].
G-code generator for Snapmaker U1 with Full Spectrum layer blending
References:
[1]: https://github.com/ratdoux/OrcaSlicer-FullSpectrum
[2]: https://github.com/ratdoux
Agents cannot replace the thinking, they only amplify it
Agents cannot replace the thinking, they only amplify it. If you set the
agents off in the wrong direction that's where they will go. They will sprint
there faster than you can go. This is ok, its one of their advantages, they
can give you signal quick. Remember if they are off in the wrong direction
more research and planning is needed, and maybe a little bit more thinking on
your end to steer them in the right direction.
Dreaming of a ten-year computer – alexwlchan
alexwlchan.net [1]
Great gusto here from someone looking to fill landfills less. Get more use from what they paid for. Dodge some tough times in the hardware industry. I’m going to argue that the 10 year computer is not one bit crazy right now. No idea what the future entails, if local llms get good enough to really get so useful they feel required this could easily change. One issue I had with the post as they are looking to get a machine for the next 10 years is they were so focused on themself that they missed the point. They were so focused on buying something that would work for them for 10 years that they bought something brand new rather than thinking about the bigger issue of how do we get hardware to last 10+ years. Some factor of this involves giving our devices a second life. Two things went wrong here. First it appears they they have a perfectly good imac with a broken screen. I know nothing about apple/imac, assuming that the screen is toast and unrepairable, I know you can ssh into a mac this feels like good potential for server hardware. Next they purchased a brand new mac mini. Hardware has been good for a long time,...
-
Very interesting takes from @thdxr in this interview. A lot has been hashed out by others all over the place, but a hot take here is that code quality is higher than ever right now. Codebases are becoming more consistent than ever. If you are not starting with a good consistent base from the start you are poising your context and doomed to fail and have all the common failures of ai written code. He still reads almost every PR, and will read all of the code eventually. There are a few cases where reading the PR is not worthwhile only when its low stakes, knows that good patterns have been established and followed. He argues that someone needs to be the expert of the code and of the product still and fears that too many people not looking at prs will fail companies.
Thinking about ai productivity again
Thinking about AI productivity again. It's allowing massive amounts of work to
get done, to levels that humans cannot physically type out in some cases. But
not all of this work is necessarily high value work. Right now I'm working on
one of the biggest PRs to an internal cli library. Probably the largest PR
I've ever done professionally. It touches all of the cli, refactors every
command, reaches into the business logic layers to drive deeper separation. I
reaches into the common layers to drive consistency. It ensures that every
command (50 or so) has similar flags, supports --plain, --no-color. It specs
out contracts to ensure that data goes out stdout, any extra goes out stderr.
This makes everything unix pipe friendly. There was quite a bit of research and
prep that went in, that turns out to already be distilled down into clig.dev.
The point is that this is all good work. It will make the product consistent,
repeatable, expected, and most of all boring. Most of the time, it wi...

-
Kids are leaving the party early, not drinking, cant watch netflix without the laptop open. They are leaving the party early to check on their agents. I get it, that feeling that you need to eek out one more prompt, keep your agents running. if they arent running what are you even doing. If not you 6 others are ready to pass you up. The timeline to be first has shrunk to nothing but unachievable.
I recently discovered Uncodixfy [1] by cyxzdev [2], and it’s truly impressive.
the holly uncodexify instructions - letting GPT create uncodexified UI
References:
[1]: https://github.com/cyxzdev/Uncodixfy
[2]: https://github.com/cyxzdev
-
😂 Should I be concerned that My 12yo installed Arch BTW on his own?
Pluralistic: The web is bearable with RSS (07 Mar 2026) – Pluralistic: Daily links from Cory Doctorow
pluralistic.net [1]
It’s wild how much of a hit Google took from killing reader, almost any time I hear about killedbygoogle, reader is the top of the list. Its the thing that we all remember being really good and the incumbants just did not match up. Somehow we are here 13 years later still bitching about it, despite it only having a 6 year run. You should probably get an rss reader, and follow some incredible people that make feeds. Most sites that produce content have the ability to subscribe over rss. Unlike @pluralistic [2], I dont read in my reader. My reader is just a list of links out to the web and I typically read it how the author intended on their site. I nod a long to Cory’s enshitified internet just as much as the next guy, I love text based interfaces, I despise the bloat that js has brought on. But I don’t believe all js is bad, I don’t turn it off, even though he has me questioning this now. News sites kinda suck, we can agree there, but its rare that a small indie web creator has fully enshitified their site with js. I don’t buy that. Sub to the feeds.
Refer...
Justin Searls
@searls
I need a new blog to subscribe to. Know any you think I'd like? E-mail me: [email protected]
justin․searls․co · justin.searls.co [1]
Sent Justin my list https://go.waylonwalker.com/blogroll, will soon be on the main site, but right now its only on the go subdomain. I’ve long had reader.waylonwalker.com, but thats soon going to be wrapped into the main site as well at /reader.
I’m interested to see what good stuff Justin gets and if you have any good ones to share reply.
References:
[1]: https://justin.searls.co/takes/2026-03-08-23h18m29s/
Did you even like to code?
Here's something I've been wrestling with lately. I keep hearing people come
to the realization that they never liked coding, they thought they did, but
secretly hated it the whole time. I dont think I've ever kidded myself about
this. I like building things. I like having an idea and see it come to life.
Just because I like the end product more, and that coding really was a means to
an end, something I will never do again in the same capacity that I have in the
past, does not mean I did not enjoy the art of solving problems by typing
syntax into a file to tell a computer how to solve a problem.
The only thing that seems interesting is AI right now
The only thing that seems interesting is AI right now, I'm writing less code,
and I kinda just don't care as much about the small open source stuff as I used
to. I enjoy reading about what other people are thinking, doing, creating.
But when I go to grab a podcast while I wait on my clankers its one talking
about how other people are using them, how to make them more secure, more
effective, how the new models change things, what models are good at what.
It's all so new and changes so fast. Any sort of new open source project
starts out sus that it was just vibe coded anyways, So at the moment it feels
like ooh how did you get that, how do I make mine, and that the thing itself
has less value. I hate that its this way, but it is.
It's all moving so fast
AI is moving so fast this year its hard to keep up, I've written 3 or 4
versions of one blog post to replace I'm Out On Agents [1], but it feels like
everything changes before I can get it out.
References:
[1]: /im-out-on-agents/
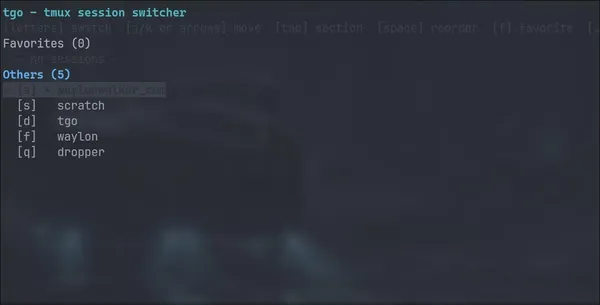
I Built A Tmux Session Switcher
I’ve been thinking about this for awhile now. For years now, fuzzy pickers and
last session have been my go to. They have served me well. I can typically
only keep so much in my head anyways. I’m often doing a hub and spoke pattern
between main project, notes, and infra repo, maybe two projects. Don’t get me
wrong, I regularly run with a dozen or more sessions running at a time, but
only two to three are in my immediate context at any point anyways.
The Design # [1]
harpoon for tmux
press a hotkey followed by one more keystroke, currently any left hand letter
SIMPLE, FAST, thats of utmost importance, what I want are sessions that I can
can be assigned in order of importance from middle row, top row, bottom row.
I added this binding to my tmux config. Now I can press c-a a to go to the
first session, c-a s to go to the second session. c-a and pause to think
j/k to navigate, space to pick up a session and move it, x to kill it.
bind-key -n c-a popup -E '~/go/bin/tgo'
Enter the ag...
Is gpt-5.4 slow?
What you don't have six agents orchestrating the work of 6 subagents yet. I
saw in a work chat that people were complaining about 5.4 being too slow and
they keep going back to opus. For me its been working great, I have it working
on critical infrastructure work, that I will need to maintain. I appreciate
its accuracy and completeness. And honestly I'm **rarely** watching agents
run. Its like watching paint dry at this point. Its interesting to read their
thinking prompts, but not productive work. While its running I'm teeing up the
net prompt. Working with another set of agents to write a set of issues for
the next epic. I might be too privileged though. I own a whole platform and
have plenty of autonomy to work on what I see fit for the day. I don't have a
boss breathing down my neck waiting for a single ticket to be complete. I'm
working on 6 projects at a time. I'm taking walks to avoid becoming a burnt
out zombie. I'm definitely not complaining about it kicking out massive
amo...
We are the Grey Beards
In November 2025 everyones beard lost its color, we aged into the next
generation without realizing it. If you were getting paid to write code at
this point in time, you are part of a special point in history where we used to
write code by hand. There will be systems air gapped systems somewhere devs
will continue to do it how we've always done it, some day they will peek out of
this cave and realize that they are the only ones left, no one else remembers
what its like. Writing code will quickly become a hobby that people do, in a
weird niche way. Not because you want to build something, but like the guy
with a mainframe in his garage that likes to watch the lights blink. Because
its nostalgic, it's a very cool skill, its fun and rewarding, but it won't be
to get something done.
Clankers got me tired
I spent all day grinding on a 20 minute fix. I want the agents to do it. They
can do it, but they are missing the harnesses they need to replicate my
workflows of old.
In the age of agents sometimes work gets done on so many different worktrees
and branches its hard to tell if there is already a PR or any of them or not,
the great gh cli has us covered.
gh pr list --head fix/markata-go-connections-graph
I like version-fox’s [1] project vfox [2].
A cross-platform and extendable version manager with support for Java, Node.js, Golang, Python, Flutter, .NET & more
References:
[1]: https://github.com/version-fox
[2]: https://github.com/version-fox/vfox

Just starred taskdog [1] by Kohei-Wada [2]. It’s an exciting project with a lot to offer.
Terminal task manager with intelligent schedule optimization.Keyboard-only. No dragging, no micromanagement.
References:
[1]: https://github.com/Kohei-Wada/taskdog
[2]: https://github.com/Kohei-Wada
today we're making one of the hardest decisions in the history of our company: we're reducing our organization by nearly half, from over 10,000 people to just under 6,000. that means over 4,000 of you are" loading=“lazy”>
jack (@jack) on X
we're making @blocks smaller today. here's my note to the company.
# [1]
today we're making one of the hardest decisions in the history of our company: we're reducing our organization by nearly ha…
X (formerly Twitter) · x.com
One of the well worded shitty messages I’ve seen, good severance, help, timeline to cut off coms.
we’re not making this decision because we’re in trouble. our business is strong. gross profit continues to grow, we continue to serve more and more customers, and profitability is improving. but something has changed. we’re already seeing that the intelligence tools we’re creating and using, paired with smaller and flatter teams, are enabling a new way of working which fundamentally changes what it means to build and run a company. and that’s accelerating rapidly.
Much better than the get rid of people cause AI can do the work. Honestly I feel this though. I was just talking with some colleages how do we divvy work in...
The Ghostty Guy
I was today years old when I realized that the ghostty guy is the Hashicorp guy.
Just starred linux [1] by torvalds [2]. It’s an exciting project with a lot to offer.
Linux kernel source tree
References:
[1]: https://github.com/torvalds/linux
[2]: https://github.com/torvalds
FFmpeg video crop
tools.simonwillison.net [1]
This was the inspiration for the next update in dropper that became a full clip editor. The one that I’ve long wanted, but forgotten about. It’s going to include this cropper, resize, image extractor, and trimmer.
References:
[1]: https://tools.simonwillison.net/ffmpeg-crop
Tiny Tool Town 🏘️
A delightful showcase for free, fun & open source tiny tools. Stupid-delightful software made with love.
Tiny Tool Town · tinytooltown.com [1]
Learned about this one from the @stipete interview [2] @scotthanselman did on YouTube. This is proof that the internet is alive. It’s such web 1.0 nostalgia to see that people can just build things! Did you know that you can literally just build things and make them exist? You don’t need users, You don’t need a big platform, you can just make something into existance. It seems like something we have forgotten through web 2.0 where everything as become 4 major apps all linking to each other and trying to hoard all of the attention. Scroll through tehre are some really cool apps, probably nothing that has the polish you want, or is going to change your world. What these apps have more than anything you’ve probably used in the recent years, is inspiration. Its xyz, but the way I wanted, or with my little twist. And no one else has to like it but me because I’m the user.
References:
[1]: https://www.tinytooltown.com/
[2]: https://youtu.be/Wm7tsiJ1nIo?si=_qvZaR5SPWozBjrY
FancyGist
fancygist.com [1]
I saw this in @cassido’s newsletter this week and had to give it a run. I despise that there is no dark mode and it insists on burning my retinas 😤. But really this is an absolute beate of a web based markdown editor, I love the command mode to press slash and it just pops out in this whimsical animation ready for me to pick what I want.
Your browser does not support the video tag. [2]
References:
[1]: https://fancygist.com/
[2]: https://dropper.waylonwalker.com/file/74f0ac1e-ac50-4939-8bba-4698a8043b25.mp4
/verify
Inspired by @mollywhite’s
verify [1] slashpage [2].
This page serves as the system of record for my online identity. The best
places to follow me are:
- My Website: waylonwalker.com [3]
- YouTube: Waylon Walker [4]
- YouTube Gaming: Waylon Walker Gaming [5]
- Twitch: Waylon Walker [6]
- Twitter: @_WaylonWalker [7]
- LinkedIn: Waylon Walker [8]
- GitHub: WaylonWalker [9]
- Dev.to: Waylon Walker [10]
- Bluesky: @waylonwalker.com [11]
References:
[1]: https://mollywhite.net/verify/
[2]: https://slashpages.net
[3]: https://waylonwalker.com
[4]: https://youtube.com/waylonwalker
[5]: https://www.youtube.com/channel/UCHuxc1HRsd3aRjvL6C817tQ
[6]: https://www.twitch.tv/waylonwalker
[7]: https://twitter.com/_WaylonWalker
[8]: https://www.linkedin.com/in/waylonwalker
[9]: https://github.com/WaylonWalker
[10]: https://dev.to/waylonwalker
[11]: https://bsky.app/profile/waylonwalker.com
Reply guy
The latest scourge of Twitter is AI bots that reply to your tweets with generic, banal commentary slop, often accompanied by a question to "drive engagement" and waste as much …
Simon Willison’s Weblog · simonwillison.net [1]
I had no idea there were such things as “reply guy” as a service. I can see this as a really genuine thing where brands want to genuinely engage with their communities, quickly being taken over by slop bros to ruin everything.
References:
[1]: https://simonwillison.net/2026/Feb/23/reply-guy/#atom-everything
Smaller and dumber
If I can make it smaller, I should.
daverupert.com · daverupert.com [1]
Important things to remember in the age of cheap code. More code, not always more better. More code mean, more risk, more maintenance, harder to change.
References:
[1]: https://daverupert.com/2026/02/smaller-and-dumber/
-
THIS, THIS is how most people are feeling about AI right now. Theres lots of “oh ai bad”, “but ai help”, “but ai company sleezy”. Cassidy did a fantastic job summarizing how most of us are feeling. Ending with well at the end of the day, I can’t do anything about the bad, the best thing I can do is learn how to embrace the good cause it aint going away any time soon.

castpixel ⚧️⚢ (@castpixel.bsky.social)
I made a tool that turns PCB designs into 3D-printable molds. you sandwich copper tape between the parts, sand the ridges, and you have a real working PCB. no etching, no chemicals. I am losing my …
Bluesky Social · bsky.app [1]
This is a wild way to build prototype pcb’s, so cool and creative.
References:
[1]: https://bsky.app/profile/castpixel.bsky.social/post/3mf52azn5oc2h
Session: Skate Sim (@SessionGame) on X
Our long-awaited Skate Core Update is now LIVE 🛹🔥
Peep all the changes in our dev blog → https://t.co/GB0de8ebPj
Don’t own Session yet? Fix that here → https://t.co/JseSvy5DML
X (formerly Twitter) · x.com [1]
Had 10 minutes to play with the new session updates this afternoon and it feels so much smoother. I can definitely feel it even as a casual user.
References:
[1]: https://x.com/SessionGame/status/2024469214396838140
trash (@trashh_dev) on X
loving the state of development right now
X (formerly Twitter) · x.com [1]
There are so many config files right now, glad to see some standards coming in around Agents.md, but so much is still specialized to a whole host of tools that have not been standardized on yet.
References:
[1]: https://x.com/trashh_dev/status/2024476878015468027
Silksong: Demastered by Nekodot
Hollow Knight: Silksong in the classic NES-style!
itch.io · nekodot.itch.io [1]
This is an abolute banger of a game on itch. It nails the nes aesthetic while keeping true to the modern silksong movements. You can play through the first boss Moss Mother, and where you start the first ascend into Bone Bottom. I was in shock when I discovered the little climb effect hornet does when you just cant quite make a jump, the hold jump for height is on point. Her downstrike with the hunters crest is perfect.
References:
[1]: https://nekodot.itch.io/silksong-nes
Blueskii (@LayoutPerson) on X
this underground creator named "sN0UK" made Queens Garden from Hollow Knight In GD! 🗡️🕸️
X (formerly Twitter) · x.com [1]
Wyatt would absolutely love this banger of a level.
[2]
References:
[1]: https://x.com/LayoutPerson/status/2023551519375900957
[2]: https://x.com/i/status/2023551519375900957
DHH (@dhh) on X
I've really come to love Tmux's programmability. Next Omarchy will have a "nic" function that starts current directory with this 3-way split: Neovim, Opencode, Terminal. Everything a programmer needs!
X (formerly Twitter) · x.com [1]
To the untrained eye this passes as any normal gui editor.
[2]
References:
[1]: https://x.com/dhh/status/2023710298201350606/photo/1
[2]: https://dropper.waylonwalker.com/file/86d45a22-9ed4-4f14-8070-5f0cadee9bad.webp
uvx.sh | Astral
Install Python tools with a single command. Powered by uv.
uvx.sh [1]
astral silently dropped a clever uvx.sh to help builders reach a wider audience, no longer does a user need to have python installed prior to installing a python cli. It does have a hard requirement on having curl or wget available.
References:
[1]: https://uvx.sh/
-
Use a linux vps, It’s easy, just follow these simple instructions.
-
We are living through the js framework wars for agents and llms now. We will look back on this with clarity, and wonder why we wasted time with things like graphql, and why we couldn’t see the real winners from the start.
-
Such a good interview @lexfridman is such a talented interview. It’s so cool to see the other side of this. For weeks we’ve heard about the story of the name change, we’ve seen everyone shitting on the security model, buying up all the mac minis in existance, fear mongering not to install this thing. @steipete [1] has such a cool story from the beginning talking about making this thing fun and exciting. Giving it a personality that is not “You are absolutely right”. The story of changing the name twice, and getting pwnd on every step the first time and nailing it the second time is incredible. Dude is having fun trying to make the thing he wants in the world exist.
References:
[1]: https://steipete.me

I keep forgetting about the double gutter problem with nested containers. When you put padding on a parent and the child also has padding, you get twice the spacing you wanted.
The Problem #
.container {
  padding: 2rem;
}

.child {
  padding: 2rem;
}
Now your content is 4rem from the edge. Not what I meant at all.
The Fix #
Either remove padding from the parent or use box-sizing: border-box and plan
for it. I usually just drop the parent padding when I realize what I have done.
Naya Connect – Hackaday
Hackaday · hackaday.com [1]
The idea of adjustable key caps to mutate your board into something that really fits you, how you type, how your fingers move, is an absolute banger.
References:
[1]: https://hackaday.com/tag/naya-connect/
First W In Brotato
After having brotato and doing a few runs every once in a while I finally
beat the most basic balanced run in the game! Wyatt wanted to play tonight and
its such an easy game to jump in do a few runs and move on without getting
overly invested.
[1]
Watching back I cannot believe how lucky I got, barely scraping by with 1hp at this point
Your browser does not support the video tag. [2]
the last 80s of the game
[3]
References:
[1]: https://dropper.waylonwalker.com/file/07c87b1d-60a0-4527-a045-d4203ca929db.webp
[2]: https://dropper.waylonwalker.com/file/f1711b94-dad1-4f97-b6ac-1de34db4a779.mp4
[3]: https://dropper.waylonwalker.com/file/9b108e98-1f43-4b94-8824-467abcbf9e54.webp
/top4
Definitive ranked lists of my top 3 favorites plus an honorable mention.
Terminal Tools # [1]
- neovim [2] - modal editing changed how I think about text
- tmux [3] - terminal sessions that survive disconnects and allow me to hop between projects at the speed of thought.
- k9s [4] - S tier tui interface that all tuis should strive for
Honorable mention: ipython [5]
Python Tools # [6]
- pandas [7] - This is what got me out of corporate spreadsheets and back into code/software.
- kedro [8] - data pipelines with opinions I agree with
- fastapi [9] - my favorite python web framework
Honorable mention: typer [10] - fast cli apps
Games to Play with Kids # [11]
multiplayer
- Minecraft [12] - infinite creativity, modding potential
- Wobbly Life [13] - Open World Co-op
- Stardew Valley [14] - cozy, collaborative farming
Honorable mention: Terraria [15] - 2d world builder
Games to Play Alone # [16]
singleplayer
- Hollow Knight [17]/Hollow Knight Silksong [18] - S tier 2d pl...
/yep
Inspired by @fyrio’s yep [1]
slashpage [2], a list of S tier things I enjoy, use,
recommend, want to know more about, or seek out in no particular order, updated as I think about it.
Seealso
[3]/nopeInspired by [3]@baty [4]'s nope slashpage, a list of ** things I don't like, don't care, avoid, overhyped, or won't do in no particular order, updated as I think...
Feb 11, 2026
/yep # [5]
- coffee
- small web 1.0
- RSS
- minecraft
- Hollow Knight
- Silksong
- terminals
- python
- vim keybindings
- self-hosting
- open source
- running kubernetes in my basement
- mechanical keyboards
- markdown
- data engineering
- Woodworking
- Fingerboarding
- Darts
- Skateboarding
- Biking
- Trampoline
- 3d printing
References:
[1]: https://fyr.io/yep
[2]: https://slashpages.net/
[3]: /nope/
[4]: https://baty.net/
[5]: #yep
/nope
Inspired by @baty [1]’s nope [2]
slashpage [3], a list of F tier things I don’t like,
don’t care, avoid, overhyped, or won’t do in no particular order, updated as I
think about it.
Seealso
/yep
Inspired by @fyrio's yep slashpage, a list of ** things I enjoy, use, recommend, want to know more about, or seek out in no particular order, updated as I...
Feb 11, 2026 [4]
/nope # [5]
- roblox
- mobile games
- telemetry
- Windows
- VSCode
- allow notifications
- subscription hell
- ads
- social media
- clickbait
- WYSIWYG editors particularly ones that use proprietary non text formats
- politics
- short form video
References:
[1]: https://baty.net/
[2]: https://baty.net/nope/
[3]: https://slashpages.net/
[4]: /yep/
[5]: #nope
Background Patterns with CSS `corner-radius` – Master.dev Blog
You might need to know this someday: you can style a div, put the div into SVG, then put the SVG in to CSS and use it as a repeating background.
frontendmasters.com [1]
These patterns are really good. I like a good repeating background on a website. Takes me back to the old days of web, but with a nice crispness that was never there on sites of old
References:
[1]: https://frontendmasters.com/blog/background-patterns-with-css-corner-radius/
Check out monty [1] by pydantic [2]. It’s a well-crafted project with great potential.
A minimal, secure Python interpreter written in Rust for use by AI
References:
[1]: https://github.com/pydantic/monty
[2]: https://github.com/pydantic


Check out nextlevelbuilder [1] and their project ui-ux-pro-max-skill [2].
An AI SKILL that provide design intelligence for building professional UI/UX multiple platforms
References:
[1]: https://github.com/nextlevelbuilder
[2]: https://github.com/nextlevelbuilder/ui-ux-pro-max-skill

Pm Not Babysitter
Stop babysitting your agents, treat them like a real team and they will reward
you.
Back in December I saw theo make a comment that code is now cheap, its the run
rate of models, He quoted a study, not sure that he fully even believed it, but
it claimed that the average developer after all meetings, training, emails,
planning and extra shit in their day averages out 10 well tested lines of code
per day. Opus 3.5 made him 10k loc (lines of code) that day.
We have all agreed for decades that lines of code is not a proxy to
productivity or quality. Often more code means more risk, more review, more
infrastructure. This has become MUCH different. Lines of code are still far
from any sort of good metric. That aside, your agents are not doing 10k lines
with you babysitting them, and in fact its very likely that the product quality
is MUCH worse as you babysit them.
You need a tool for planning and tracking, otherwise you are playing babysitter
rather than Product Manager (PM).
If you’re into interesting projects, don’t miss out on agent-browser [1], created by vercel-labs [2].
Browser automation CLI for AI agents
References:
[1]: https://github.com/vercel-labs/agent-browser
[2]: https://github.com/vercel-labs
Like a dufus this morning I did a hard reset on a git repo for getting I was working on a manifest for. You see I generally use argo, but occasionally I have no idea what I am doing or want yet and I start raw doggin it, fully aware that I’m going to just nuke this namespace before getting it into a proper argocd.
I was overjoyed when I found out that you can diff your manifests with live
production using the kubectl diff command. It uses standard diff so you can
bring all your fancy diff viewers you like.
# regular manifest
kubectl diff -f k8s/shots -n shot
# kustomize
kubectl diff -k k8s -n go-waylonwalker-com
# using a fancy diff viewer
kubectl diff -f k8s/shots -n shot | delta
# using an even fancier diff viewer
# pinkies out for this one
kubectl diff -f k8s/shots -n shot | delta --diff-so-fancy
Now I can get those changes back that I thought I lost, and apply updates with confidence knowing what is about to change.
The shovelware cometh
In September of last year, I covered a post by Mike Judge arguing that AI coding claims don’t add up, in which he asked this question:
If so many developers are so extraordinarily productive usi…
jerodsanto.net [1]
Not surprising theirs a lag, between the models getting better, the tools getting better, and the masses getting better at using them, it takes time. This is still quite a hockey stick. I’m wondering how many are not posting on Show HN embarrassed they built something they know nothing about and afraid to get questions. I have no idea how anyone would get this ratio, but if I were a betting man, Id bet the ratio of build/show went way up. Plus we are probably getting a ton of people who have never heard of HN start building cool bespoke things for themselves and thats it, they use it, they love it, they might tell/show a friend.
References:
[1]: https://jerodsanto.net/2026/02/the-shovelware-cometh/
The shovelware cometh
In September of last year, I covered a post by Mike Judge arguing that AI coding claims don’t add up, in which he asked this question:
If so many developers are so extraordinarily productive usi…
jerodsanto.net [1]
Not surprising theirs a lag, between the models getting better, the tools getting better, and the masses getting better at using them, it takes time. This is still quite a hockey stick. I’m wondering how many are not posting on Show HN embarrassed they built something they know nothing about and afraid to get questions. I have no idea how anyone would get this ratio, but if I were a betting man, Id bet the ratio of build/show went way up. Plus we are probably getting a ton of people who have never heard of HN start building cool bespoke things for themselves and thats it, they use it, they love it, they might tell/show a friend.
References:
[1]: https://jerodsanto.net/2026/02/the-shovelware-cometh/
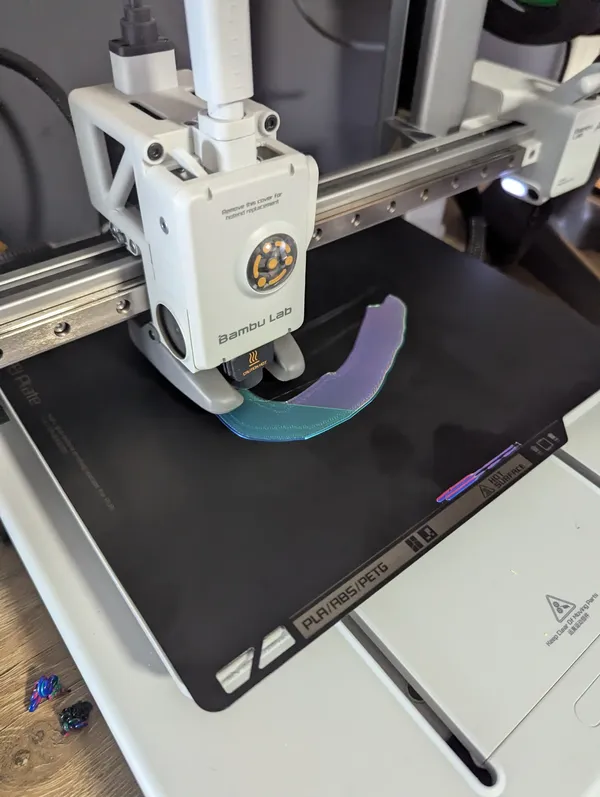
Ping 23
I taught wyatt `#bada55` green, I apologize in advance, I underestimate
the power of immature humor has on him.
dax (@thdxr) on X
finally got around to setting up an always on opencode server so i can run sessions on any device from anywhere
takes a few minutes - showed it off here
X (formerly Twitter) · x.com [1]
I tried this flow [of running an opencode server on tailscale] on day one of getting opencode, I wanted to prompt from my phone while were were running lights at the theater. It kinda worked, but the ui was really bad on phone, hard to use and the experience overall–it felt buggy. Happy to see they are making improvements and it might now be ready for some real use.
https://dropper.waylonwalker.com/file/9065fcb2-5e40-479c-967e-498bc9bb6a4f.mp4
References:
[1]: https://x.com/thdxr/status/2017691649384620057
Short Month, Big Ideas (February 2026 Wallpapers Edition) — Smashing Magazine
Let’s make the most of the shortest month of the year with a new collection of desktop wallpapers that are sure to bring a smile to your face — and maybe spark your creativity, too. All of them...
Smashing Magazine · smashingmagazine.com [1]
test
References:
[1]: https://www.smashingmagazine.com/2026/01/desktop-wallpaper-calendars-february-2026/
Ping 21
Agents right now
* can I access the project you mentioned?
> yes
* Can i access /tmp
> yes, just do it
* While I'm I at it, `kubctl delete...`
> yanks plug front internet
Agent Management Is Exhausting
The state of development in early 2026 is all wrapped around learning how to
manage many agents running in parallel. Everyone’s trying to figure out the
workflow.
The Plan Is Everything # [1]
The secret I’ve discovered is a good, well-defined plan. This could be a
markdown file or a GitHub issue. Agents are actually great at writing these for
you. They’ll include reproduction steps, outline changes needed, and structure
the work.
This is your opportunity to step in. Read the plan. Look for hallucinations.
Spot where it’s going off track. Edit the plan before the agent starts coding.
I had one today where it laid out reproduction steps beautifully, but I could
add context about network requests that completely changed the approach. This
editing phase is what most people are missing right now. Skip it and you’ll
watch your agent solve the wrong problem with impressive efficiency.
The Pace Problem # [2]
Here’s what nobody warned me about: managing these things is exhausting.
Dep...
Peter Steinberger
Peter Steinberger: AI-powered tools from Swift roots to web frontiers. Every commit lands on GitHub for you to fork & remix.
steipete.me [1]
Pete has a ton of good posts here and actually ships a lot of product. reccommended read.
References:
[1]: https://steipete.me/
Stay away from my trash!
The tldraw SDK provides tools, services, and APIs to build beautiful whiteboards and infinite canvas applications with real-time collaboration and a powerful React-based canvas.
tldraw.dev [1]
read later
References:
[1]: https://tldraw.dev/blog/stay-away-from-my-trash
Stop Using Boomer Ai
I was listening to these guys talk about migrating off of boomer ai the other
day. Introducing the term boomer ai to describe using chat, copy, paste
instead of agents. Something magical happened to the tooling and models around
december, they got really good. The chatgpt $20 plan hooked into opencode is
good, the Free models in Opencode Zen (Big Pickle and Kimi K2.5 Free) are
really good. Neither of these quite match up to the speed and quality of the
larger plans, but they are good. good enough to throw away your boomer ai
techniques and start using agents. Agents are the future, and they are here
now. If you are still using chat, copy, paste, you are doing it wrong. Stop
using boomer ai and start using agents. You will be amazed at how much better
your results will be.
https://www.youtube.com/watch?v=3dmPKuTWbsI
I
The flu hit me like a freight train right at the start of the year, along with
the most stress I've ever felt at work dropping on me at the same time, I&#x
pype.dev [1]
I’m jelous… as I was getting better, I got kicked down again. cant hold a conversation without coughing. Its hitting people from all over like crazy this year. so glad its just the flu and not something seriously harmful for hospitalization.
References:
[1]: https://pype.dev/im-back-from-the-dead/
Mentions
I can now just mention people from my markata [1] Waylon Walker [2] Blogroll [3] like @simonwillison [4] or @swyx.io
/now [[ upto ]] [[ doing ]]
Aside
This is an aside!
References:
[1]: /markata/
[2]: /about/
[3]: /blogroll/
[4]: https://simonwillison.net
The work on fastrender [1] by wilsonzlin [2].
Experimental new browser engine
References:
[1]: https://github.com/wilsonzlin/fastrender
[2]: https://github.com/wilsonzlin
2026-01-23 Notes
Next for markata go
Check out flosch [1] and their project pongo2 [2].
Django-syntax like template-engine for Go
References:
[1]: https://github.com/flosch
[2]: https://github.com/flosch/pongo2
DockFrame: Modular USB-C Hub with Framework-Compatible Expansion Cards
DockFrame is a modular USB-C hub that accepts Framework-compatible Expansion Cards and custom Tool Cards. Dock once, reconfigure whenever.
DockFrame · dockframe.com [1]
Dockframe looks like a really cool concept using the framework tiles ( the connectors idk what they are called ) to build a dock.
References:
[1]: https://dockframe.com/
What Your Coding Tool Says About You
- open code - libre free as in beer and speech
- Copilot - corporate 9-5er
- Cursor - You sip on Philz coffee with your macbook
- Claude Code - Agentic Workflows or Bust
- Jetbrains - I didn’t know you wrote java
- Vim/neovim - definite neck beard
- VsCode - What else is there?
Quick Tip To Get Agents Running Longer
Here's a quick tip if you want to get your agents running longer, **prompt better**.
I really wish I would have got this right a few years ago. Theres a couple of flags I had to use to get mdformat to do hard wraps at 80 characters and not wreck tables. This mix of flags and plugins is workign really well for me so far.
mdfmt() {
    uvx \
        --with "mdformat-ruff" \
        --with "mdformat-beautysh" \
        --with "mdformat-web" \
        --with "mdformat-config" \
        --with "mdformat-gfm" \
        --with "mdformat-front-matters" \
        --with "mdformat-wikilink" \
        --with "mdformat-simple-breaks" \
        mdformat \
        --wrap 80 \
        --end-of-line lf \
        --codeformatters python \
        --codeformatters bash \
        "$@"
}
And as pre-commmit.
repos
  - repo: https://github.com/hukkin/mdformat
    rev: 1.0.0  # pin to the version you want
    hooks:
      - id: mdformat
        args:
          - --wrap
          - "80"
          - --end-of-line
          - lf
          - --codeformatters
          - python
          - --codeformatters
          - bash
        additional_dependencies:
          - mdformat-ruff
          - mdformat-beautysh
          - mdformat-web
          - mdformat-config
          - mdformat-gfm
          - mdformat-front-matters
          - mdformat-wikilink
          - mdformat-simple-breaks
make no mistakes
Listen and make your own on Suno.
suno.com [1]
Ai prompt music, the right level of cringe to be great.
References:
[1]: https://suno.com/song/f5821216-ea6e-49c3-98de-67880e517a89
I Hope This Email Finds You Before I Do
I Hope This Email Finds You Before I Do
Last Week in AWS · lastweekinaws.com [1]
This post was filled with real life, snark, entertainment, feelings. I get a lot of these emails that claim they can change my SEO game if I give them 500, for a site making 0, Link partnerships from small startups. A lot of these are so automated that if I do respond I dont even get a response. I’ve responded to many simply asking what is this about, I get 10 others just like you a week. Can you tell me what exactly you want and what each of us benefit from it, how did you find me. All normal questions, they almost always result in crickets, no response, maybe its time to implement a Billie for more snark.
References:
[1]: https://www.lastweekinaws.com/blog/i-hope-this-email-finds-you-before-i-do/
Ping 19
What no one is talking about is that Deegs doesn't get the red plate without
Anstie on the ground.

What is that
I was unironically asked what is that about my keeb today. Followed by no way
that works, how would you type a, s, y, u, after showing, I go the "that's
weird" walk away.

Dont Trust Users Tokens
User states: Upon picking up an old project and trying to install pip says
“cannot find a version to satisfy”
I’ve got this, I’ve had this a hundred times before it’s a python version, a
rogue package, maybe a yank from the pinned deps. I pop open the project get
us on the same commit. I get a different error, make a few updates and we are
good, except the user gets the same error from the start.
They never saw the error I did, and my fix did not magically resolve their
error. We circle all the things it could be for hours. I consistently wipe my
venv, and recreate with ease, send them the commands I ran to no avail.
Something is up and I can’t put my finger on it. We’ve checked all the things
and inched as close as we can to running everything exactly the same.
- Os
- python version
- Network vpn
- uv version
Nothing makes any sense. Finally I throw in the towel, is it the artifact
server. I forge a token and give him one to borrow.
BAM it works, like magic. The first sign ...
Check out dbreunig [1] and their project whenwords [2].
A relative time formatting library, with no code.
References:
[1]: https://github.com/dbreunig
[2]: https://github.com/dbreunig/whenwords
-
What a goat, speedrunning silksong at a competitive pace, live, with live audience, while co hosting, and raising $2M for Prevent Cancer Foundation. CEEN moves in ways that do not compute with my brain, everything looks so simple, things that take me so long are done in a few swipes. Watching this it really make silkspear look OP, this thing does so much damage if you never take damage and can use it continuously without needing silk for healing.
-
Absolute banger of a conference talk, saving to come back with more notes later.
Opencode is changing on the daily right now, today I noticed the word low pop
up in Orange text in my opencode window. Looking into this they are exposing
variants to the user. This allows
you to change between fast or slow and thinking, the later taking more time to
prepare before doing an action.
It looks like this toggle may have been here for awhile and I’m just now discovering it. Potentially because its a new feature of the free Zen provider.
Variants Many models support multiple variants with different configurations. OpenCode ships with built-in default variants for popular providers.
Built-in variants OpenCode ships with default variants for many providers:
Anthropic:
high - High thinking budget (default) max - Maximum thinking budget OpenAI:
Varies by model but roughly:
none - No reasoning minimal - Minimal reasoning effort low - Low reasoning effort medium - Medium reasoning effort high - High reasoning effort xhigh - Extra high reasoning effort Google:
low - Lower effort/token budget high - Higher effort/token budget
Reflections on 13 years and 1,000 posts of writing on my blog - HAMY
hamy.xyz [1]
The answer is I do it habitually. If there’s a big enough idea I’ve had floating around in my head and I think others might find it useful / interesting then I usually think it’s worth logging it somewhere. If I don’t, I’ll likely just keep thinking about it so might as well get it out of my head and on the internet where people can find it.
- hammy [2]
This is how you do it. If you want to do something, you need to make it a habit. Something you crave, something you need. I need to write my ideas down in this blog, it helps me index ideas for later, but more importantly it helps me flesh them out and think through real things.
Congrats on 1k, your site is awesome Hammy [2]
References:
[1]: https://hamy.xyz/blog/2026-01_1000-blog-posts
[2]: https://hammy.xyz
Ping 17
I'm not sure if its good to keep issues and plans in the repo long term, but
I'm going to give it a shot.
> read @pages/issues/issue-1.md create a plan to fix the issue, then write your
> plan to fix in @pages/plans/fix-issue-1.md
Don’t fall into the anti-AI hype
I'm glad someone was brave enough to say this. There is a lot of anti-AI sentiment in the software development community these days. Much of it is justified, but if …
Simon Willison’s Weblog · simonwillison.net [1]
Never believe in absolutes, see what I did there. The hype bros will take you to the extremes, ai will take your jobs in six months or be burned to the ground in six months. How about its useful now and will be more useful in six months. If you turned off the hype bro feed for six months you would probably be fine, in fact you would probably be better off for not capturing so much noise along the way. AI has gone the way of next js framework, it churns fast, hype bros are always an expert that know exactly whats best for everyone. It changes fast, what was the best last week might be dead next week. In fact getting to know what works well for you and knowing that tool really well for a longer period will take you farther.
References:
[1]: https://simonwillison.net/2026/Jan/11/dont-fall-into-the-anti-ai-hype/#atom-everything
-
Salesforce gets pwnd by the ai hype bros and killed its reputation with employees, letting them know where they truely stand with them. 4k people sounds like a lot, its probably a big chunk of savings, but was it worth the loss of reputation? There must be a better way to give this a trial run that lets them understand this before disrupting the lives of real people right???
Ai
Last updated Jan 2026.
Seealso
Looking for all posts tagged with ai see [[ tag/ai ]]
Ai is a tool I use a lot for code generation, research, image generation, and
debugging. The words I publish on this site are my own unless explicitly
stated from the top. There’s only one or two posts in this category.
Words are mine # [1]
The core of what this blog is, is my thoughts ideas, sharing experiences. The
words are the important part. They are not perfect, I often do not spell or
grammer check, and what is here is from a flow state of writing and very often
not refactored.
No AI unless explicitly stated
code gen # [2]
Up till around 2023 all of the code to create the site was hand written by me.
I have my own site generator that I maintain markata [3].
From 2023 through 2025 snippets of code, sometimes entire plugins or modules
were created in chat apps like chatgpt. There was no agentic coding, windsurf,
cursor, claude code, opencode, none of it. It was all integrated into the ...
Diffs, from Pierre
@pierre/diffs is an open source diff and code rendering library. It's built on Shiki for syntax highlighting and theming, is super customizable, and comes packed with features.
diffs.com [1]
This looks like a really nice and performant diffing library that supports vanilla and react, with a lot of options.
References:
[1]: https://diffs.com/

-
I thought this was an interesting take from Simon. I’ve been hearing him consistently say there will be more demand for software engineering in the future. More companies will have the ability and need to deal with software applications, but fewer of us will be hand editing any code. I thought this was an interesting interaction in the clip.
Uh Simon, what do you got for us?
I’ve just got the one. I think the act
of the the the job of being paid money to type code into a computer Yeah.
will go the same way as punching punch cards.
Okay.
I do I think in
six years time I do not think it will anyone will be paid to 80:56
— just do the thing where you type the code.
Just type the code. Okay.
I
think software engineering will still be an enormous career. I just think the
software engineers won’t be spending multiple hours of their day in a text
— editor typing out syntax. 81:09
It will look like punching cards. I think
— so. Yeah.
Yeah. Interesting. In uh in six years. Um and but software
— engineering still very much exists.
I believe so. I I hope so. [laughter] I
— very much hope so because I think
the um the challenge of being a software
— 81:23 enginee...
This is opencode’s init prompt.
Please analyze this codebase and create an AGENTS.md file containing:
1. Build/lint/test commands - especially for running a single test
2. Code style guidelines including imports, formatting, types, naming conventions, error handling, etc.
The file you create will be given to agentic coding agents (such as yourself) that operate in this repository. Make it about 150 lines long.
If there are Cursor rules (in .cursor/rules/ or .cursorrules) or Copilot rules (in .github/copilot-instructions.md), make sure to include them.
If there's already an AGENTS.md, improve it if it's located in <dir>
Og-Sample
I’m making an effort to make my og [1] images better yet again, I’m going for that
next 10% better. I really like my og images, but there are some title sizes
that overflow. This page is a page to help debug. How I make these og images
is for another day.
Script # [2]
I use my own static site generator markata [3]. I can use it to generate a
list of posts wrapped in their og image. I use itertools to do a groupby so
that I can do roughly every 5 characters larger, and see a wide variety of
sizes.
from markata import Markata
from itertools import groupby
markata = Markata()
lens = [{'length': len(post.title), 'title': post.title, 'slug': post.slug} for post in m.posts]
lens_sorted = sorted(lens, key=lambda x: x["length"])
groups = {
k: list(g)
for k, g in groupby(lens_sorted, key=lambda x: (x["length"] // 5) * 5)
}
posts = [g[0] for g in groups.values()]
ogs = [ f'[![{post["title"]}](https://shots.waylonwalker.com/shot/?url=https://waylonwalker.com/{ post["slug"] }/og/&height...
2026 Resolutions
It’s that time of year, Coming back to work out of a big break and thinking
about big changes.
Daily Notes # [1]
Keep up with daily notes, maybe not here, I tend to have more targeted notes
here with full blog posts, but for work daily notes is POG [2] and needs to be
leaned on. LLM’s do really good at ingesting markdown and reminding me of
things that I need to do, or did, or need to follow up on.
Reader # [3]
Social media is changing, quickly becoming enshitified, I enjoy interacting
with some of the people I’ve met online, reading their opinions, and learning
from their experiences. I don’t need their hot takes, don’t care about their
political takes. I like boring posts that typically fade out of whats picked
up on the algorithm. I like a good 5-10 minute read or a long form podcast
talk. I will be aggressively collecting more rss feeds to read and keep up
with.
(Neo)Vim # [4]
I’ve had these bad habits in my config for years, from day one of using vim.
It’s time to kill th...
-
In all of the documentaries I’ve seen on how hard it is to recycle plastic, how hard it is to separate all the small pieces from each other, how expensive it is, dirty it is, how just plain ineffective we are at doing it I’ve never seen this angle. In a nutshell the other side of the equation is that as we pull natural gas out of shale is that we pull ethylene out as a byproduct. We don’t even ask for it, it just comes with the methane gas that we are going for. So as we drill, Frack, and mine this out to heat our homes and create electricity we are stuck with all of this ethylene. It’s terrible for the environment, just like methane it’s a rough greenhouse gas. Companies are allowed to flare off a certain amount, they can push some down the pipe, but are still left with tons leftover that they practically give away. Turns out that this stuff is very cheap and very much wants to be turned into plastic. Very clean food grade plastic, very easily and cheaply compared to recycling. Excess is a big problem that needs solutions, but it has hard problems at both ends of the situation that don’t make it easy for anyone trying to take care of it.
feat: add llms.txt endpoint for LLM-optimized documentation by quantizor · Pull Request #2388 · tailwindlabs/tailwindcss.com
Add /llms.txt endpoint that serves a concatenated, text-only version of all Tailwind CSS documentation pages optimized for Large Language Model consumption.
Extract text from MDX files, removing J…
GitHub · github.com [1]
Damn this one is getting some reach, I’ve seen it from Simon Willison [2] and Justin Searls [3] and t3.gg [4]. I feel for Adam, He has built a fantastic product that the world is running with, something we all needed. Something that everyone laughs at turns their nose up “ppft I don’t need that” the first time they see it, but once they try people get it, and a lot of them like it and keep it. But its something that no one really wants to pay for, no matter how big of products get built on it. As we see more and more features coming to css, its not stopping, the work will always be there. I really hope to see something happen to tailwind to keep it afloat. massive growth and revenue down 80% does not help.
References:
[1]: https://github.com/tailwindlabs/tailwindcss.com/pull/2388#issuecomment-3717222957
[2]: https://simonwillison.net/20...
Photoshop for text
In the near future, transforming text over an entire document will become as commonplace as filtering images.
Steph Ango · stephango.com [1]
While the non deterministic nature of llms scare the heck out of me in the sense of just cutting it loose on my writing. letting it go through all of my files and just edit them. I do like the idea of mundane tools like “desaturate”, “Gaussian blur”, evolving out of it for text. I don’t yet see this with the tools we have now, but it will be interesting to see them evolve.
References:
[1]: https://stephango.com/photoshop-for-text

File over app
If you want to create digital artifacts that last, they must be files you can control, in formats that are easy to retrieve and read. Use tools that give you...
Steph Ango · stephango.com [1]
file over app is a fantastic philosophy laid out well and concisely documented very well in this post. The idea is that tools will change, we will want to use different tools, different editors, different computers over time. What’s likely to outlast everything is plain text files that we can interact with a wide variety of tools. Not encrypted in dedicated formats that die with our tools, but in plain text where a computer from 2160 is likey as capable of reading the file as one from 1960 would be.
References:
[1]: https://stephango.com/file-over-app
I recently discovered vim-speeddating [1] by tpope [2], and it’s truly impressive.
speeddating.vim: use CTRL-A/CTRL-X to increment dates, times, and more
References:
[1]: https://github.com/tpope/vim-speeddating
[2]: https://github.com/tpope
Check out JaKooLit [1] and their project Wallpaper-Bank [2].
Additional wallpapers which will be offered to users for my hyprland scripts
References:
[1]: https://github.com/JaKooLit
[2]: https://github.com/JaKooLit/Wallpaper-Bank
Today I discovered vim-speeddating
by tpope. I’m sure I’ve seen years ago but it did not click for my workflow
until today. I often go through pictures from my phone for the past few days
and make Posts tagged: shots posts, but I want to date them to about when the image was
taken most of the time. This allows me to quickly bump days up and down using
c-a and c-x even around the new year.
Sound on, listen to those new switches.

new keeb so good
New keeb feeling so good I don't want to leave it. I'm going to go from having
my worse favorite at work, to having my new favorite at work.

The most popular blogs of Hacker News in 2025
Michael Lynch maintains HN Popularity Contest, a site that tracks personal blogs on Hacker News and scores them based on how well they perform on that platform. The engine behind …
Simon Willison’s Weblog · simonwillison.net [1]
Congrats Simon! Well deserved metric for the level of content that he produces, Its remarkable the amount of high quality posts that come out of Simon Willison. Also this looks like a really great resource to find other high quality blogs that I have not read before.
References:
[1]: https://simonwillison.net/2026/Jan/2/most-popular-blogs-of-hacker-news/#atom-everything

I’m really excited about gastown [1], an amazing project by steveyegge [2]. It’s worth exploring!
Gas Town - multi-agent workspace manager
References:
[1]: https://github.com/steveyegge/gastown
[2]: https://github.com/steveyegge
Yesterday I wrote about a way to do light mode screen recording to convert to light mode from dark mode with ffmpeg. I was wondering if it could be done entirely on the front end for web applications. Turns out you can. I’m sure there are limited wikis and site builders that don’t allow adding style like this, but it works if you can.
<video
    src="https://dropper.waylonwalker.com/file/1c53dbcb-4b84-4e94-9f04-a42986ab3fa1.mp4?width=800"
    controls
    style="filter: invert(1) hue-rotate(180deg) contrast(1.2) saturate(1.1);"
    >

<!--markata-attribution-->
</video>
0 deg hue rotate
90 deg hue rotate
180 deg hue rotate
270 deg hue rotate
Check out 99 [1] by ThePrimeagen [2]. It’s a well-crafted project with great potential.
Neovim AI agent done right
References:
[1]: https://github.com/ThePrimeagen/99
[2]: https://github.com/ThePrimeagen

Convert a video from dark mode to light mode with FFmpeg!
Here
cassidoo.co [1]
Converting video from dark mode to light mode after the fact is a pretty great idea, I’m surprised at how well it does. Its definitely not perfect, but looks really good.
References:
[1]: https://cassidoo.co/post/ffmpeg-dark-light/

I saw this tip from Cassidoo and had to try it out for myself. I kicked on a screen recording right from where my terminal was, converted it, and it actually looks pretty good.
ffmpeg \
   -i screenrecording-2026-01-01_10-10-49.mp4 \
   -vf "negate,hue=h=180,eq=contrast=1.2:saturation=1.1" \
   screenrecording-2026-01-01_10-10-49-light.mp4
Dark Mode
Light Mode
There are a few unsettling things about it, but overall I feel like it was a success.




-
I actually like linus’s take here. My parents dropped $4k (~$8k in todays money) on a computer when I was a kid, (which turned into something too $$ to let me touch at that point). I played some educational games that no one else has heard of and I’ve long forgotten along with an early ciivilization game. It was e-waste in 2 years we maybe kept it 5, and it was barely working. Contrast this to my PC now I spent $2k on 3 years ago refurb from 2017, and it has no signs of age from me, does everything I need it to. Ram crisis sucks, the outright reason behind it sucks. But on the bright side you can still get a baller build for less than you could late 90s without inflation. The industry is not there for consumers right now, we had better times, but its still not bad times. Keep the hope alive that good times will come.
Smartphones are black holes
They can bend spacetime without you even realizing it. People often get offended when I tell them that I don't have a phone, thinking that I'm lying and I just
Sylvain Kerkour · kerkour.com [1]
This sounds great…. I’m sick AF right now and dont want to do anything but watch YouTube, and let opencode do my work.
References:
[1]: https://kerkour.com/smartphones-blackhole
The work on usage [1] by jdx [2].
A specification for CLIs
References:
[1]: https://github.com/jdx/usage
[2]: https://github.com/jdx
I’m impressed by pitchfork [1] from jdx [2].
Daemons with DX
References:
[1]: https://github.com/jdx/pitchfork
[2]: https://github.com/jdx
-
Yeah there’s some basics, you know things you might expect like using standard error and standard out correctly. One thing I’ll say on that because I think this is commonly misunderstood, standard error is not for errors, it’s for any information that isn’t part of the normal output. So you know often times that’s warnings and errors, but it might just be progress information. You know anytime that you just need to have something go to the user that’s what it’s there for." (6:15 - 6:42)
I’ve definitely done this sin in my own tooling before, and it does make things harder to use. I think I still take err/out at face value. I really like the translation Jeff gave here, one is for normal output, i.e. what the user asked for and the other is extra information. So if I wanted to list something and pipe it into something else, stdout only captures the list, thats it. if you have a bunch of information about config warnings, showing environment, are you sure questions, none of that is captured.
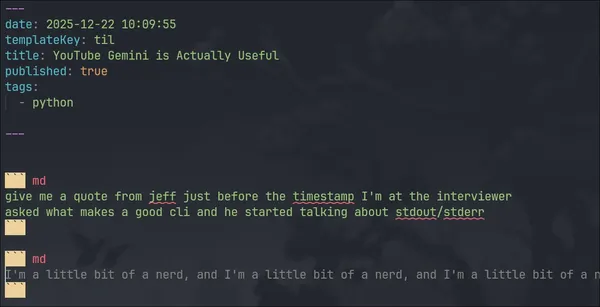
I’ve found Gemini to be very useful lately, especially for finding information within long form content.
When writing thought-896, I wanted to use a direct quote from Jeff Dickey, Gemini popped it out very quickly.
give me a quote from jeff just before the timestamp I'm at the interviewer
asked what makes a good cli and he started talking about stdout/stderr
In another case, my wife and I are huge Good Eats fans. Alton Brown taught us how to cook during college and on. We watched every single good eats episode nearly 10 years after they aired. He is back with some updates to those those shows on his Youtube. Gemini gives very good detailed responses with timestamps.
Alton Brown had a recent YouTube video for cooking turkey. Can you get the
instructions from the video?
Ping 15
[mise](https://mise.jdx.dev/getting-started.html) looks like what I wanted nix to be for me.
The work on mise [1] by jdx [2].
dev tools, env vars, task runner
References:
[1]: https://github.com/jdx/mise
[2]: https://github.com/jdx
Mise looks promising
I've been all in on just for a while now, but mise looks so good it might
be my next move.
Maxteabag [1] has done a fantastic job with sqlit [2]. Highly recommend taking a look.
A user friendly TUI for SQL databases. Written in python. Supports SQL server, Mysql, PostreSQL and SQLite, Turso and more.
References:
[1]: https://github.com/Maxteabag
[2]: https://github.com/Maxteabag/sqlit
webi-installers [1] by webinstall [2] is a game-changer in its space. Excited to see how it evolves.
Primary and community-submitted packages for webinstall.dev
References:
[1]: https://github.com/webinstall/webi-installers
[2]: https://github.com/webinstall

You Might Also Like: My Notes Blog
Writing about the big beautiful mess that is making things for the world wide web.
blog.jim-nielsen.com [1]
I really like a good link blog, it’s the old timers version of a reaction video. It gives me new posts to discover from other writers, and gives additional perspectives from ones I trust enough to add to my RSS.
It’s nice to have a place where I can jot down a few notes, fire off my reaction, and nobody can respond to it lol. At least, not in any easy, friction-less way. You’d have to go out of your way to read my commentary, find my contact info, and fire off a message (critiquing or praising). That’s how I like it. Cuts through the noise.
Ditto Jim. I’ve oddly found mine more useful to search than blog posts, zettlekaten, notes, whatever you want to call them. For me writing something down makes it more concrete in my brain that I’m less likely to need to go reference, but I often need to re read or references posts from others, this is where Thoughts [2] comes in handy for me
Like Jim I have a bunch of feeds [3] you can subscribe to if you want some or all of my stuff, but I aggregate everything to the same root site.
References...
Gross phone
Is there a world that giving my phone to my kids does not result in it being
covered in peanut butter and snot?
Developer Vs Artist Ai
The other day I was watching [thePrimeTimeagen]https://youtube.com/@theprimetimeagen?si=jVcp23FbfQSFZfDc) and he talked about devs loving ai and artists revolting. There was some discussion in chat about art being more creative and prime quickly squashed that. He ended with being oddly confused why developers are jumping on board and artists are not. Both had their art stolen to build out the models.
[1]
my own vibes
I'm writing this from my phone without further research, all vibes, personal experience, and thoughts, no research.
Good Tools # [2]
First I want to argue that artists have had some form of ai in their tools for years. Idk, probably not ai as we know it today but functionally similar. Content aware fill. This is a Photoshop feature from Adobe, as far as I know it’s one of the special things you get from Adobe that you don’t get from the FOSS alternatives easily.
This is an example of a good took that is well loves by the community and widely used, if you put ai i...
“You should never build a CMS” | Sanity
Lee Robinson migrated cursor.com off Sanity. He made good points. Here's what he missed.
Sanity.io · sanity.io [1]
Such a good breakdown of the leerob article, that is hitting everywhere right now. Feels like sanity was just a bit late to getting things right and it would have just worked for them how leerob was trying to use it, but MCP sucked so he jumped.
Reading their loose descriptions of a CMS, its an interesting realization to realize I’m rolling my own cms. I kinda feel like theres a few inspiration features to take from here, but I have no regrets. As a developer I like being able to build my own tools, I like being able to search and edit from nvim, and not have to write GROQ queries, and transforms. There were some really good points here that as I get more and more content on my personal site, I do kinda feel it. I’m surprised there is not more tooling that does some of these things for piles of markdown.
pinning this to re-read later, feels like a lot of good tidbits here.
References:
[1]: https://www.sanity.io/blog/you-should-never-build-a-cms
-
It really feels like M$ is coming down hard on GH lately to make some unfavorable decisions for users. Maybe there is good reason for all of these changes from a business perspective, I can’t judge that. But right now there are some really great alternatives out there. I’m so grateful for what forgejo and gittea offer, and at the same time seeing the community get split up from GH is sad.
Ping 12
Is `bet` new teen lingo? My kid is starting to say _bet_ in every sentence.
> So he explained it as "I'm down", "You bet", "Yes", "I like that", "You betcha"
Ping 11
Naming things is hard, pings will now be numbered.
-
Silksong DLC announcement already, we waited 8 years for the game, and are getting DLC’s months after launch. Dudes I haven’t even finished the game get, maybe not even half way. It’s amazing. Its amazing that these three make such a kick ass game with great art, story, voice, gameplay, and now drop a free dlc in 2026.
I'm being gaslit by the ai
I'm being gaslit by the ai. It just did a big hard change, now cant do a seemingly basic change, and assures me that that its fixed my issue on every iteration.

I’ve been using this one for awhile now, I have a post type that I only edit from my phone, but I have all the post numbered. I set up a template in obsidian for using templater, the template goes right in the static site repo, I point templater to the templates directory and this has been working pretty seamlessly for awhile.
---
date: <% tp.date.now("YYYY-MM-DD HH:mm:ss") %>
templateKey: myposttype
published: true
tags:
- myposttype
<%*
const folder = "pages/myposttype";

// get all files in the vault, keep only those inside the folder
const files = app.vault.getFiles().filter(f => f.path.startsWith(folder + "/"));

// extract numeric suffixes from filenames like myposttype-123.md
const nums = files.map(f => {
  const m = f.basename.match(/^myposttype-(\d+)$/);
  return m ? parseInt(m[1], 10) : null;
}).filter(n => n !== null);

// next number (start at 1 if none exist)
const next = (nums.length ? Math.max(...nums) : 0) + 1;

// include the .md extension when moving
const newPath = `${folder}/myposttype-${next}`;
await tp.file.move(newPath);
%>
---
-
Kelsey has a really good lightbulb moment here about platform engineering.
“if you had to do all the deployments for the entire company what questions would you ask of the development team?”
That’s your api, your platform, this is your product as a platform engineer. It’s not images, docker, terraform, hcl, yaml, kubernetes, It’s building out the right api for your company to deploy its products effectively.
https://www.youtube.com/watch?v=HdUbTyvrfKo&t=429s [1]
timestamped
References:
[1]: https://www.youtube.com/watch?v=HdUbTyvrfKo&t=429s
Check out andrii-kryvoviaz [1] and their project slink [2].
Self-hosted [3] image sharing service
References:
[1]: https://github.com/andrii-kryvoviaz
[2]: https://github.com/andrii-kryvoviaz/slink
[3]: /self-host/
notifications for static site builds
This morning I set up notifications for changes to my static site builds
leveraging git name status [1] and ntfy.
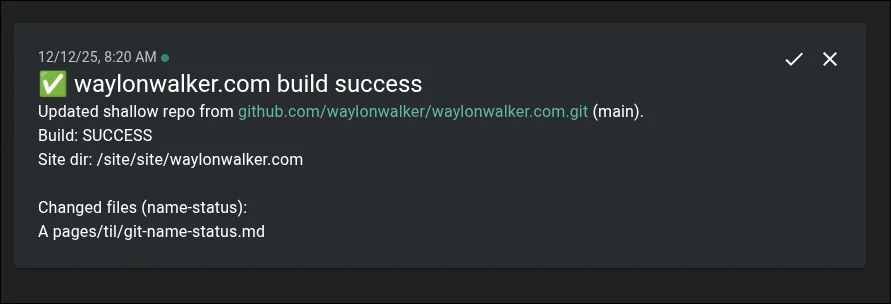
References:
[1]: /git-name-status/
--name-status is a great way to see what files have changed in a git diff
alongside the status code. I recently used this in a script to create a report
of new and modified files during a build.
git diff --name-status
git diff --name-status origin/main
git diff --name-status --staged
git diff --name-status 'HEAD@{3 days ago}'

fast changing dev server today
The dev server is cooking today, I've dropped markata builds from 2m40s (hot cache) in prod
to 15s (hot cache) in dev. Currently building 2745 posts and 274 feeds.
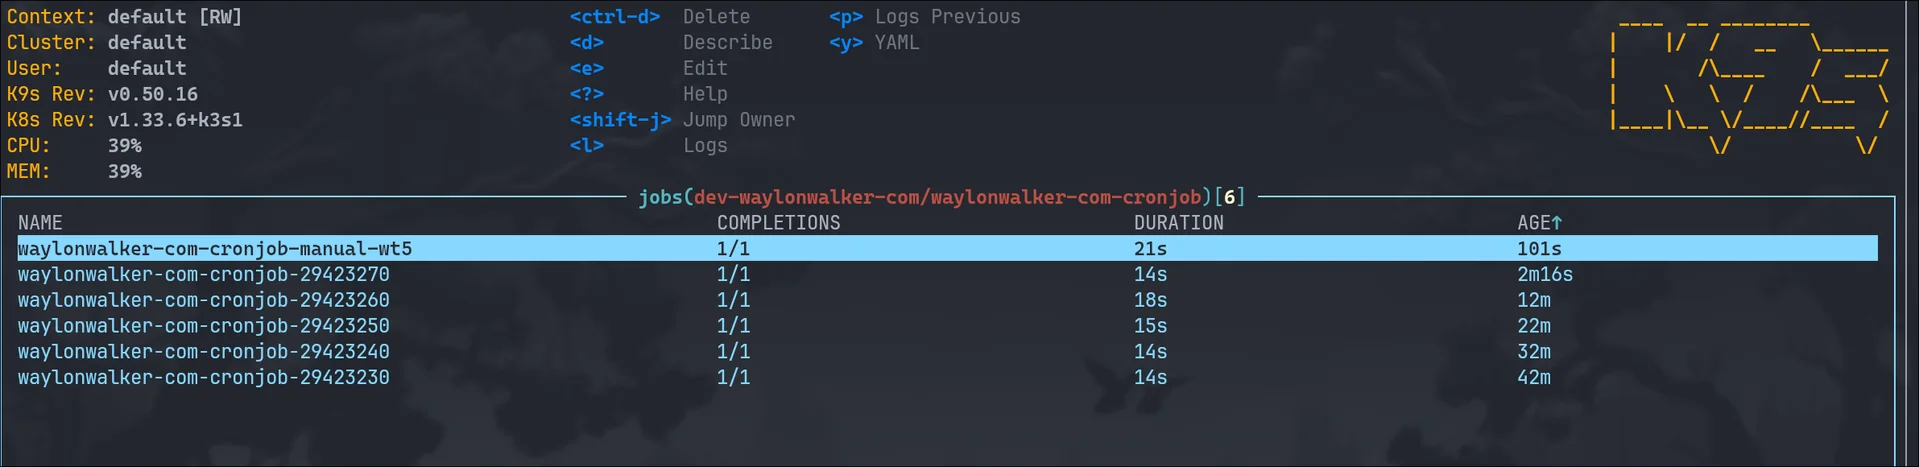
The Right Reasons To Run Kubernetes In Your Homelab
Running kubernetes in your homelab [1] is a fantastic way to learn, explore, express
yourself, and run services that you use.
The Right Reasons To Run Kubernetes In Your Homelab # [2]
There are not many
- You want to learn kubernetes
- You like kubernetes
- You want to learn to scale
There are also The Wrong Reasons To Run Kubernetes In Your Homelab [3]
You want to learn kubernetes # [4]
Homelabbing is a such a great way to learn new skills, deploy real apps that
you use. Create new custom apps for your specific use cases that no one else
has. You should absolutely run kubernetes in your homelab if you want to learn it.
I would recommend to start locally, pull up kind, minikube, or k3d and start
from your local machine before putting it on a server.
When you decide you are ready for a server, you probably don’t need any crazy
hardware. You can probably run on some old retired Dell Optiplex or an old
desktop someone is throwing out as it no longer runs windows.
You like ku...
I learned to today that setting MEMORY on your minecraft server causes the
JVM to egregiously allocate all of that memory. Not setting it causes slow
downs and potential crashes, but setting INIT_MEMORY and MAX_MEMORY gives
us the best of both worlds. It is allowed to use more, but does not gobble it
all up on startup.
In this economy we need to save all the memory we can!
Here is a non-working snippet for a minecraft server deployment in kubernetes.
      containers:
        - name: dungeon
          image: itzg/minecraft-server
          env:
            - name: EULA
              value: "true"
            - name: INIT_MEMORY
              value: "512M"
            - name: MAX_MEMORY
              value: "3G"
and in docker compose
  dungeon:
    image: itzg/minecraft-server
    environment:
      EULA: "true"
      INIT_MEMORY: "512M"
      MAX_MEMORY: "3G"
-
I did not realize all the places to be considered as AI water usage. Hank goes deep highlighting all of the sources he is aware of, most reports leave off a lot of these sources, some reports go maybe too far adding sources that may not make sense depending on the question you are asking.
As someone that runs computers with gpus in their house, and watching LTT make AIO installs on GPUs I’ve wondered what would AI use water for, now I understand that its a lot. No where near agriculture, but a lot.
Unlike running a gpu in your house, potentially with a closed loop AIO, data centers are filled with hardware making heat and it all must go somewhere. Current technology has this done with evaporative cooling, i.e. its not a closed loop, the water goes into the sky.
He goes on to point out that its not just the data center, using water, but also chip fab and power plants.
Something I hadn’t put a lot of thought into is the type of water. While a lot of agriculture and power applications do not use municipal water, a lot of data centers do, putting excess strain on water treatment.
Something I find interesting is that Altman is doing the same thing here that he does on his fin...
Notes – 05:09 Tue 9 Dec 2025
Notes – 05:09 Tue 9 Dec 2025
dbushell.com · dbushell.com [1]
Age verification hitting bluesky?? At least its not yet requiring your govt issued id or anything, but stepping that direction. I don’t know how I feel about age checks, does it actually protect kids when parents aren’t involved? I can’t say anything there, but it really does feel like its about ready to hurt the rest of us, requiring us to whip out ids and personal data for anything done online. This is a real problem that is hard to solve, and reasons why it has not been solved yet.
References:
[1]: https://dbushell.com/notes/2025-12-09T05:09Z/
Deprecations via warnings don’t work for Python libraries
Seth Larson reports that urllib3 2.6.0 released on the 5th of December and finally removed the HTTPResponse.getheaders() and HTTPResponse.getheader(name, default) methods, which have been marked as...
Simon Willison’s Weblog · simonwillison.net [1]
Deprecation warnings are so easy to miss, ignore, become numb to. Creating tools and processes to catch and address these issues is important. I’m surprised such big projects let deprecations just hang around for years.
References:
[1]: https://simonwillison.net/2025/Dec/9/deprecations-via-warnings/#atom-everything
A quote from Claude
I found the problem and it's really bad. Looking at your log, here's the catastrophic command that was run: rm -rf tests/ patches/ plan/ ~/ See that ~/ at the …
Simon Willison’s Weblog · simonwillison.net [1]
damn this is a rough one. A users entire home directory removed by claude code from an rm command.
rm -rf tests/ patches/ plan/ ~/
Reading the first half of that command it LGTM. If you had approved rm, you are hosed. If this is inside a larger script its running, you really gotta read close. This one still feels pretty obvious, but I can imagine some bash doing some nasty things I miss if I read it and understand it let alone glance at it.
I’ll take this as a reminder that I really need to be paying full-ass attention to agents, and moving towards a better sandbox for them, something in docker, maybe something like distrobox that is a magic wrapper over podman that just gives you the things you need for what it does. Something that starts up with access to start web servers, run agentic cli of choice, see project, git [2] commit. It feels like the right thing has a lot of what distrobox does, but distrobox has too much and would be prone to this us...
One Year Of Shots
I’ve been running my shot scraper api for a year now. It creates og [1] images for
my website and thumbnails for my Reader [2] using a headless chrome instance.
- 25870 shots
- 73 shots per day on average
- 12-09-2025 first shot taken
Histogram # [3]
[4]
a histogram of shot counts by day
You can see in the histogram that I’ve had a few big spike days, This has been
mostly for days that I’ve integrated into a new service or changed the
endpoint. On February 13, 2025 I swapped over from using the post to using
template specific to open graph images.
-content = "https://shots.waylonwalker.com/shot/?url={{ config.url }}{{ post.slug }}&height=600&width=1200&scaled_width=1200&scaled_height=600"
+content = "https://shots.waylonwalker.com/shot/?url={{ config.url }}{{ post.slug }}/og/&height=600&width=1200&scaled_width=1200&scaled_height=600"
Image Comparison
Original Post Image
[5]
originally I simply used an image of the post itself
New OG Image
[6]
In Feb 2025 I made OG spe...
I found snow-fall component from zachleat, and its beautiful… to me. I like the way it looks, its simple and whimsical.
Install #
There is an npm package <a href="https://zachleat.com" class="mention" data-name="Zach Leatherman" data-bio="A post by Zach Leatherman (zachleat)" data-avatar="https://www.zachleat.com/og/opengraph-default.png" data-handle="@zachleat">@zachleat</a>/snow-fall if that’s your thing. I like
vendoring in small things like this.
curl -o static/snow-fall.js https://raw.githubusercontent.com/zachleat/snow-fall/refs/heads/main/snow-fall.js
I generally save it in my justfile so that I remember how I got it and how to update…. yaya I could use npm, but I don’t for no build sites.
get-snowfall:
    curl -o static/snow-fall.js https://raw.githubusercontent.com/zachleat/snow-fall/refs/heads/main/snow-fall.js
Usage #
Now add the component to your page.
<!-- This belongs somewhere inside <head> -->
<script type="module" src="snow-fall.js"></script> <!-- Adjust the src to your path -->

<!-- This belongs somewhere inside <body> -->
<!-- Anything before will be below the snow. -->
<snow-fall></snow-fall>
<!-- Anything after will show above the snow. -->
Today I learned an important lesson that you should periodically check on your kubeconfigs expiration date. It’s easy to do. You can ask for the client-certificate-data from your kubeconfig, decode it, and use openssl to get the expiration date.
kubectl config view --raw -o jsonpath='{.users[0].user.client-certificate-data}' \
  | base64 -d 2>/dev/null \
  | openssl x509 -noout -dates
Note
This will only work for the first user, if you have more than one user or context defined in your kubeconfig you will need to adjust.
Not every print needs supports
Not every print needs supports. So many models default to having it on,
whether needed or not. Well designed parts, designed for 3d printing almost
never need supports (depending on constraints).
reminder Include steps to reproduce
Include steps to reproduce your bug when you file a bug report or issue. You
may quickly forget how you got there, and no one can fix a bug that is not
reproducible.
-
This looks like a really good low cost option for some workholding. There is never a shortage of workholding in the shop and everything has a place. Having something low cost that you can have a bunch of makes a lot of sense. Maybe you still need a super scucum unit for really clamping the shit out of something, but this easily covers most use cases in a garage workshop. I want to build it.
-
Moore’s Law is Dead pitches a pretty ingenious sku for the new gabecube aka steam machine. I fully support repairability and ewaste reduction. most of these components have not had MAJOR improvements in years, hence his channel name. There is a possibility here that Valve could ship with their unique hardware, (apu, psu, case, ports, networking) and let you bring your own ssd and ram from an old device that you might not use anymore. I love this idea. At the same time it feels like entering the star wars universe where there are no more new manufacturing and everything is cobbled together from old hardware made long ago.
All I want for Christmas is, filliment
All I want for Christmas is filament
I don’t need gifts or fancy things
I just wanna model, tinker, and print,
watch layers stack just right.
Santa, if you’re listening... PLA, PETG, ABS will do.
When using two GitHub accounts the gh cli gives very easy gh auth switch workflow from the cli.
from the docs
gh auth switch –help Switch the active account for a GitHub host.
This command changes the authentication configuration that will be used when running commands targeting the specified GitHub host.
If the specified host has two accounts, the active account will be switched
automatically. If there are more than two accounts, disambiguation will be
required either through the --user flag or an interactive prompt.
# list accounts
gh auth status
# switch accounds (interactive if more than 2, i've never seen this personally)
gh auth switch
Check out basecamp [1] and their project fizzy [2].
Kanban as it should be. Not as it has been.
References:
[1]: https://github.com/basecamp
[2]: https://github.com/basecamp/fizzy
-
What a heart breaking video to listen to. I’m trying to do a better job of being positive right now. I’m trying to look at the world in what I have control over (not much more than my attitude about it). AI is killing so much right now I’m trying to look at it as the good tools the engineers made it to be. Ownership is dying around every goddamn corner. Hats off to Edison, this guy gets it. We need more companies like this taking a stand for the average person who wants to make it out there.
-
What a great campfire story Casey stumbled into. Whether any of this is true few will ever know, but its very reasonable that a race condition and a stalled job to apply configuration caused by someone who left the company 10 years ago caused an outage. I find it hilarious that they call this guy he answers, yup I still know the password, but how do I know you’re legit, I’m not just handing out the password. Casey did a stand up job telling this story.
-
Linus is Techbrophobic [1] like the rest of us. This is such an unexpectedly mild take from him. I expected some threat to the mother of the vibe coder, but he gave a pretty great middle of the road take. The industry sucks, it smells off, we know a lot wrong with it, it feels like theres a lot more wrong than we know. But the tools that its making are really good when used in the right ways. They are not a replacement for anything, they are assistive. They can lift someone from not knowing how to code to making a small webapp for their use. Someone who wants to write backend and give them a decent front end, someone who whats to write front end and give them a decent backend.
Great take from someone with more experience than most can ever dream of having, worth a listen.
References:
[1]: /techbrophobic/
gpus are awesome and I need one for Bambu Studio to be usable in a
distrobox. Adding the --nvidia flag to distrobox create bind mounts the
nvidia /dev/ devices and sets up the necessary environment variables. Once
we are in there are a couple of packages to install to make it work.
distrobox create --name bambu-studio --image archlinux:latest --nvidia
distrobox enter bambu-studio
sudo pacman -S nvidia-utils lib32-nvidia-utils vulkan-icd-loader
nvidia-smi
glxinfo | gprep OpenGL
sudo pacman -Syu --needed base-devel git
git clone https://aur.archlinux.org/paru-bin.git
cd paru-bin
makepkg -si
paru -S bambustudio-bin

bambu-studio

distrobox-export --app bambu-studio
Check out garbage-day.nvim [1] by Zeioth [2]. It’s a well-crafted project with great potential.
Garbage collector that stops inactive LSP clients to free RAM
References:
[1]: https://github.com/Zeioth/garbage-day.nvim
[2]: https://github.com/Zeioth
snow-fall Web Component—zachleat.com
A post by Zach Leatherman (zachleat)
Zach Leatherman · zachleat.com [1]
This is a very fun way to add some whimsy to your site, added it to mine immediately when I saw it. This is what digital gardens are for, Fun, entertainment, and self-exxpression.
References:
[1]: https://www.zachleat.com/web/snow-fall/
-
This ball vise Idea is incredible and I want one. Its a heavy workholding unit that can accept a variety of tools and manipulate things to a lot of angles while working on them. This looks really good for painting miniatures soldering or generally working on small 3d printed parts that I do.

git worktrees are needed
git worktrees are goated, and must be leaned on moving forward.
The Wrong Reasons To Run Kubernetes In Your Homelab
Running kubernetes in your homelab [1] is complex, time consuming, there are almost
no docs to help you (homelab focused docs for things you want to install), and
nothing is copy paste. You have to make everything happen yourself.
The Wrong Reasons To Run Kubernetes In Your Homelab # [2]
- I run compose and think kubernetes is the next logical step
- Techno Tim runs it
- I heard it’s what cool kids do
- Kubernetes BTW
- Talos Linux looks cool
- I found a cool helm chart on GitHub
- I need scale
There are also The Right Reasons To Run Kubernetes In Your Homelab [3].
I run compose and think kubernetes is the next logical step # [4]
No it’s not. It’s much different than running docker, compose, swarm. It’s
meant for scale, it’s complex, it’s made for enterprise, not your local
development or your homelab. It can do these things, it can do them quite
well, but it’s not the target audience.
Techno Tim runs it # [5]
I heard it’s what cool kids do
You need to rethink who the ...
my home row
My home row layout. It's not quite home row mods.
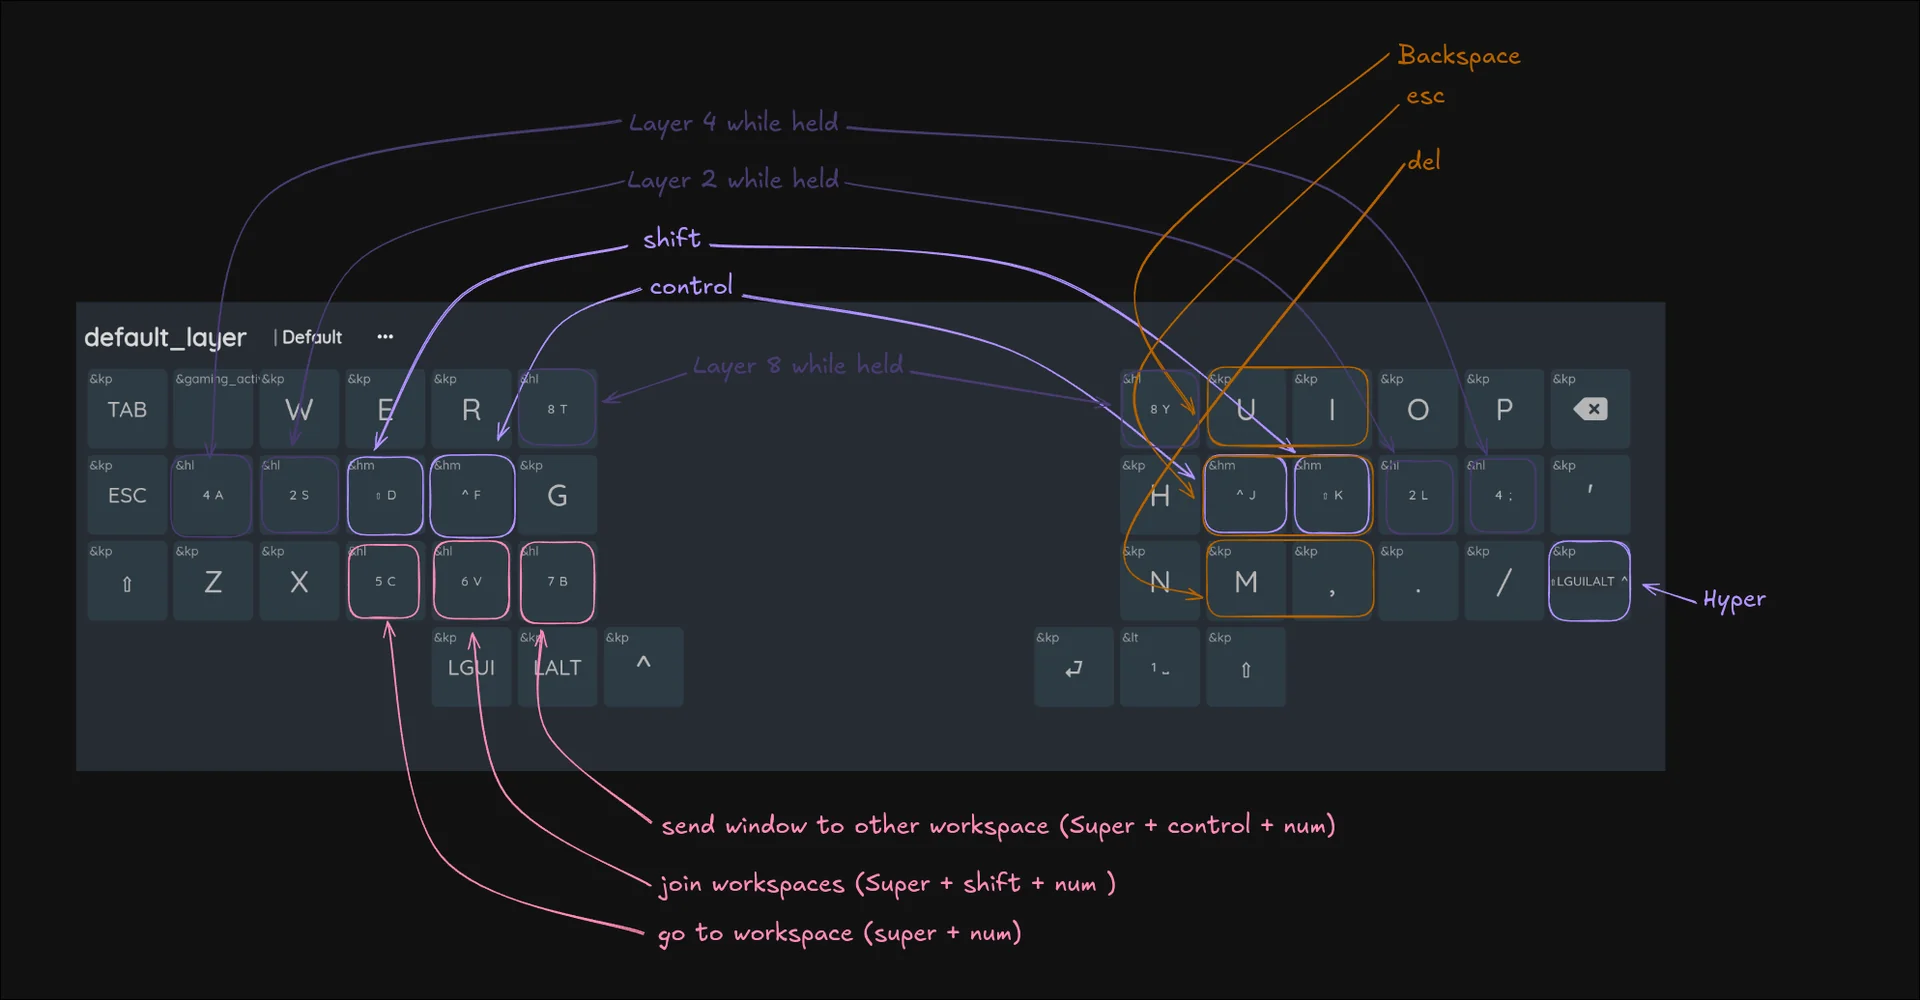
https://dropper.waylonwalker.com/file/fd74f80e-ff5e-4548-8419-bd407144bb6c.excalidraw
I got the kubernetes in my basement autism
What flavor of autism did you guys get, I got the kind where I run kubernetes in my basement.
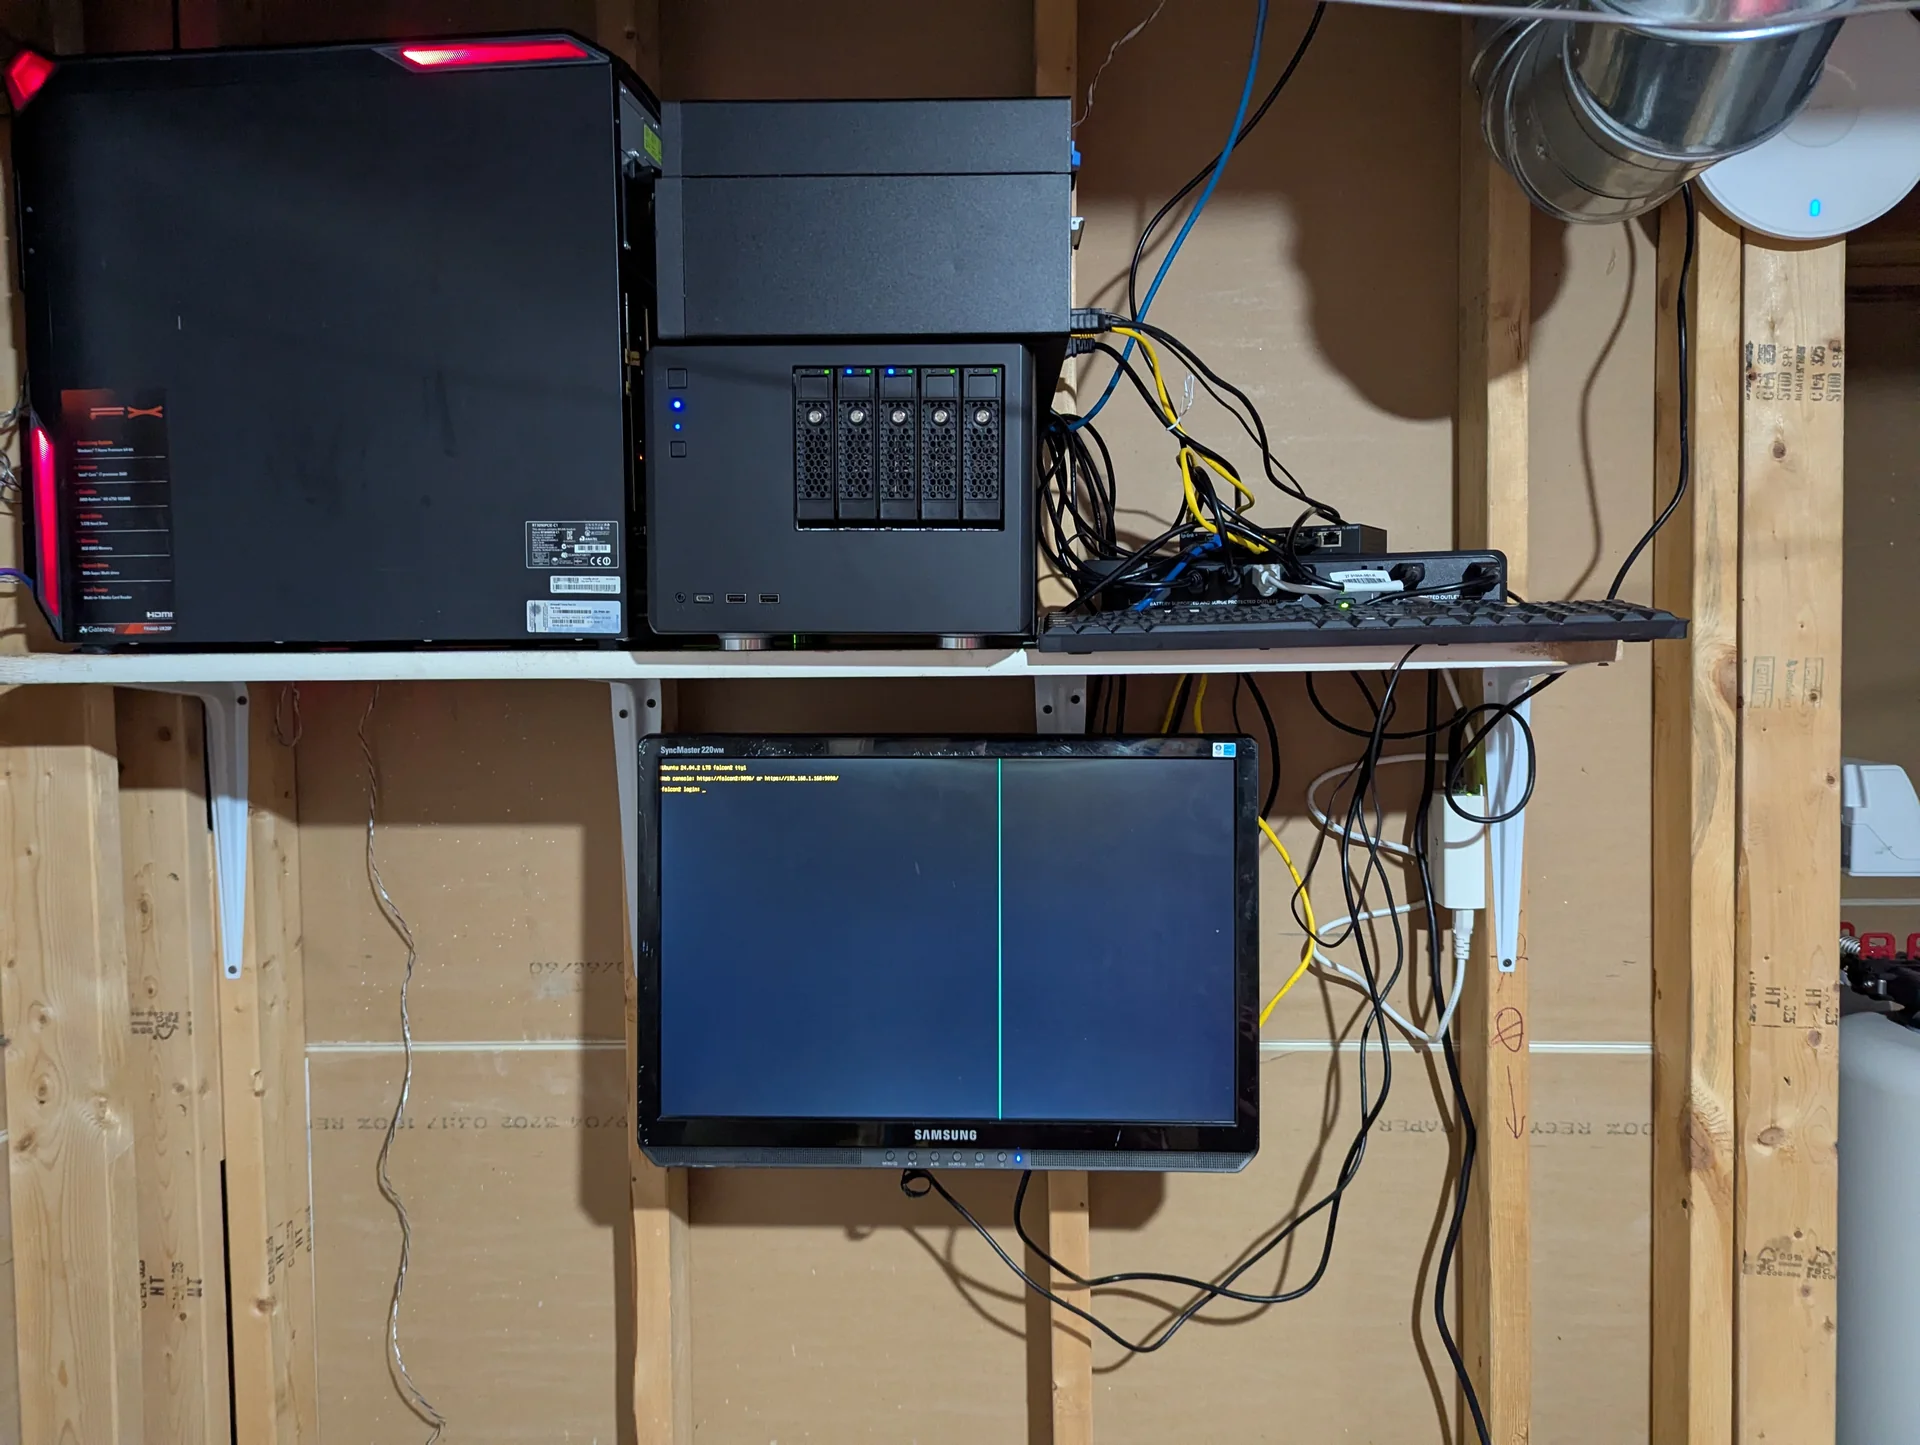
https://www.youtube.com/shorts/5Cac-cf5MOE
The k3s system-upgrade controller is a fantastic tool for upgrading k3s automatically. It has done a fantastic job for me every time I’ve used it. Today I ran it on a cluster that needed to upgrade several minors and I learned that the controller does not pick up on changes to the channel url if you change from minor to minor.
The solution I came up with was to name the plan with the version it supports. Then on each patch upgrade, change both the plan name and the channel. I use gitops with argocd, it automcatically cleaned up old plans, created new plans, and the system-upgrade-controller picked up the plan and started applying immediately.
# Server plan
apiVersion: upgrade.cattle.io/v1
kind: Plan
metadata:
  name: server-plan-v1.33 # <- This is important if you want to change the channel name
  namespace: system-upgrade
spec:
  concurrency: 1
  cordon: true
  nodeSelector:
    matchExpressions:
    - key: node-role.kubernetes.io/control-plane
      operator: In
      values:
      - "true"
  serviceAccountName: system-upgrade
  upgrade:
    image: rancher/k3s-upgrade
  channel: https://update.k3s.io/v1-release/channels/v1.33
---
# Agent plan
apiVersion: upgrade.cattle.io/v1
kind: Plan
metadata:
  name: agent-plan-v1.33 # <- This is important if you want to change the channel name
  namespace: system-upgrade
spec:
  concurrency: 1
  cordon: true
  nodeSelector:
    matchExpressions:
    - key: node-role.kubernetes.io/control-plane
      operator: DoesNotExist
  prepare:
    args:
    - prepare
    - server-plan
    image: rancher/k3s-upgrade
  serviceAccountName: system-upgrade
  upgrade:
    image: rancher/k3s-upgrade
  channel: https://update.k3s.io/v1-release/channels/v1.33
I’d love to see a better way if you have a way to upgrade through minors, or manually control the minor of your cluster let me know.
Deleting Code for Performance
The one where I clean up an asynchronous mess.
dbushell.com · dbushell.com [1]
I did not realize that David’s site was built on a homegrown Static Site Generator. As someone who also does this myself I appreciate the effort. I build my site on markata [2]. It started as a project to learn a set of tools and has become a project that I depend on everywhere and cant put down. It’s a great tool, but you probably shouldn’t use it. Anyways, I feel this really shows on David’s site. His site is filled with custom features that make it very unique, one off, and always a pleasure to read.
References:
[1]: https://dbushell.com/2025/12/04/deleting-code-for-performance/
[2]: /markata/
gpus are awesome
GPU's are awesome. I just added gpu support to my bambu-studio distrobox and
its flying! On my wayland based system the native package has never worked,
(arch or bazzite), but running in a distrobox does. Outside of distrobox the 3d
rendering canvas is black, no output. It used to work fine without gpu
support, was snappy enough, complex models were a bit sluggish, but fine.
Lately something happened and simple models bring it to its knees. It got
unusable!
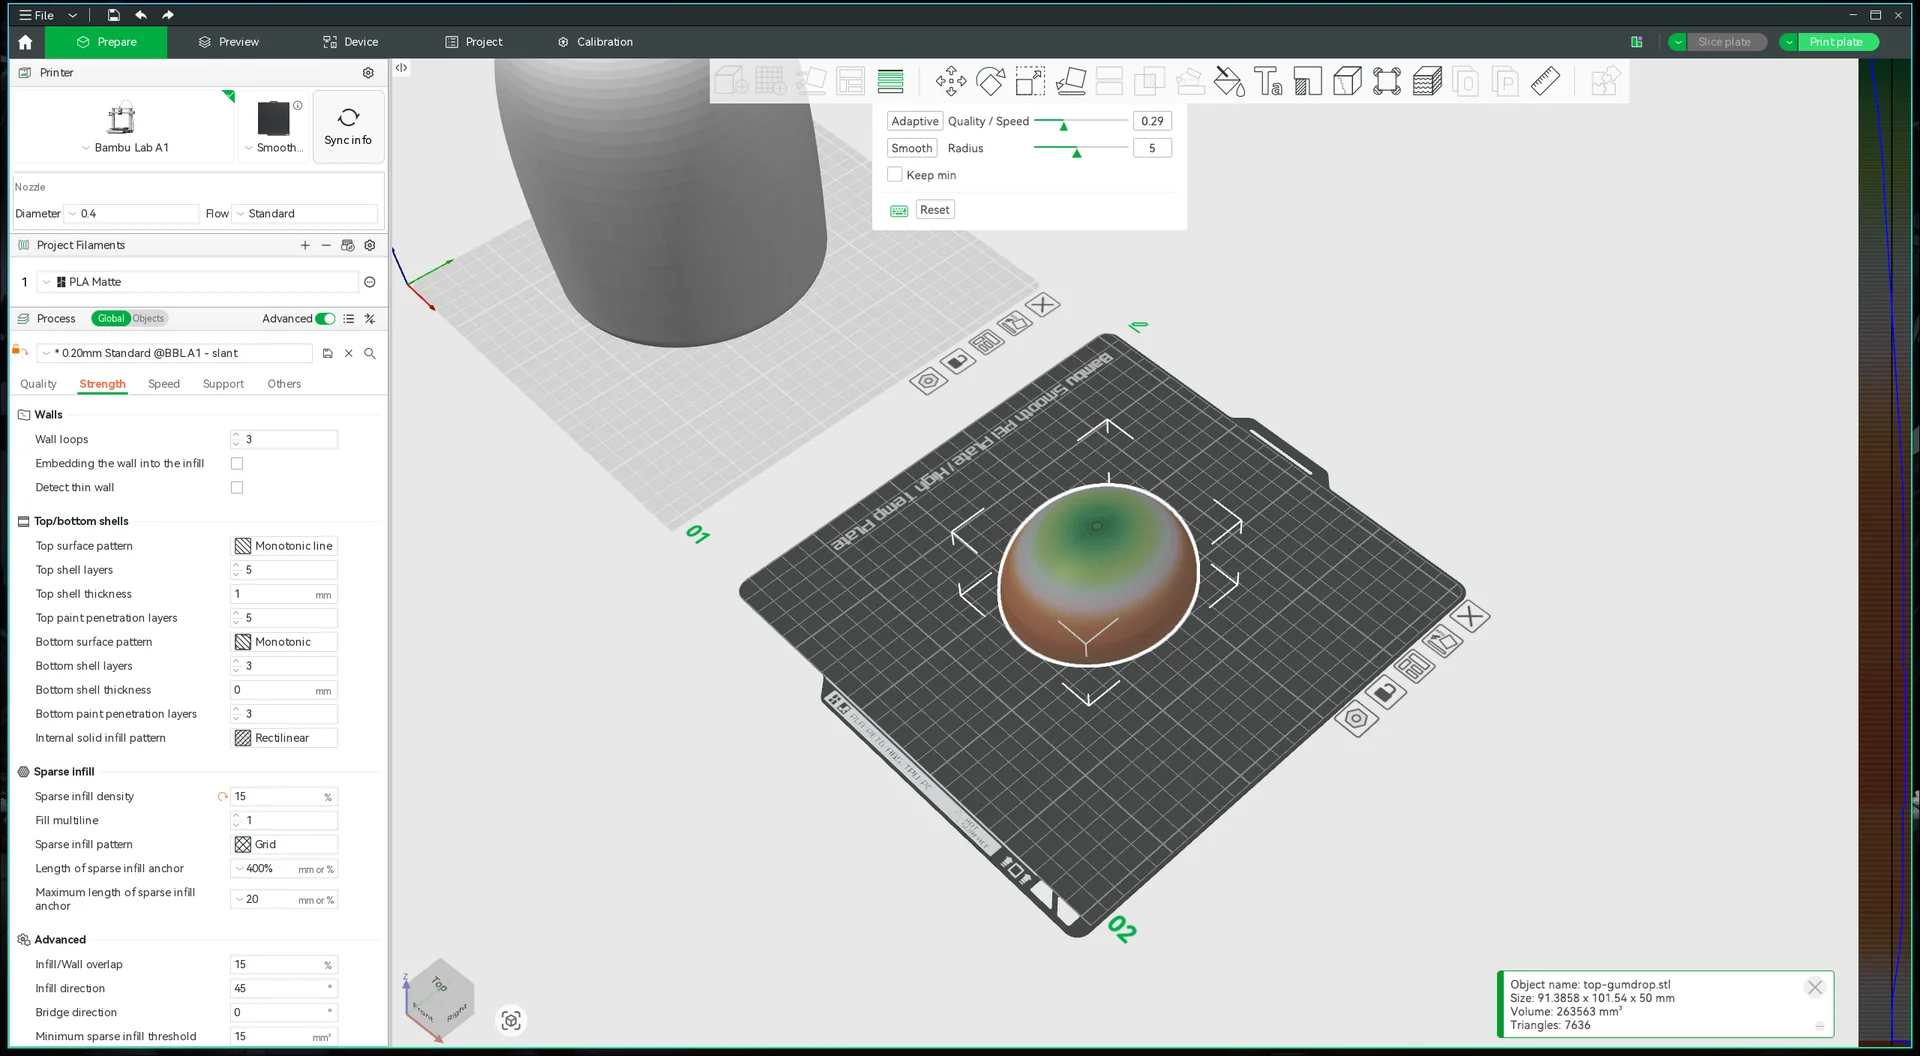
> The print I happen to be working on is some custom designed gumdrops for a
> theater set. The ui is working and not lagging 30s between clicks causing
> clicks to happen on the wrong ui element.
I recently discovered posse_party [1] by searlsco [2], and it’s truly impressive.
Quit social media by posting more
References:
[1]: https://github.com/searlsco/posse_party
[2]: https://github.com/searlsco
-
Niche companies will rise from the ashes. Companies that want to build good products for customers. Companies that will get hundreds of users. They will treat them right and make enough money to support themselves, maybe.
Alongside them we will self host [1]. We will run our own services out of our basement. There will be downtime, but its ok. We will enjoy ourselves. We will tell everyone how much better it is BTW
Next to that is a firehose of shit piling back into the circular snakes mouth as all of your data flows freely between any company that can get their hands on it. These companies will spend and make money hand over fist. Most people will continue to use these services until enough is enough and unplug from everything.
In this world I don’t see how we sustain the amount of engineers we have created. Small companies run lean, small, and allow slow organic growth happen.
It will be interesting to see play out.
[2]
References:
[1]: /self-host/
[2]: https://dropper.waylonwalker.com/file/95ae2a95-308b-4d1d-bff8-8ce6194db132.webp
I’m impressed by awesome-nanobanana-pro [1] from ZeroLu [2].
🚀 An awesome list of curated Nano Banana pro prompts and examples. Your go-to resource for mastering prompt engineering and exploring the creative potential of the Nano banana pro(Nano banana 2) AI image model.
References:
[1]: https://github.com/ZeroLu/awesome-nanobanana-pro
[2]: https://github.com/ZeroLu
Malicious Traffic and Static Sites
Writing about the big beautiful mess that is making things for the world wide web.
blog.jim-nielsen.com [1]
These look like fun endpoints to add anti-maliciously, give good stuff for the sleezy things to read.
References:
[1]: https://blog.jim-nielsen.com/2025/malicious-traffic-on-static-sites/
A ChatGPT prompt equals about 5.1 seconds of Netflix
In June 2025 Sam Altman claimed about ChatGPT that "the average query uses about 0.34 watt-hours". In March 2020 George Kamiya of the International Energy Agency estimated that "streaming a …
Simon Willison’s Weblog · simonwillison.net [1]
This feels very promising for the future as we enter a world that is more and more dependent on AI that inference is so cheap. I did not understand the scale to how much cheaper inference is compared to training. As we get better with training I imagine this gets significantly better as well. I know they all claim to be profitable on inference, but scrolling through Simon’s feed here you see several articles on the stark difference.
References:
[1]: https://simonwillison.net/2025/Nov/29/chatgpt-netflix
A pretty good email scam
How I helped family recover from a clever email scam that hid behind sneaky account settings
cassidoo.co [1]
scams suck. This is a good story, sorry to hear that it happened to a real person. If you or anyone in your family has a compromised email, add these to your checklist to fix.
- automatic forwards
- 2-factor email
References:
[1]: https://cassidoo.co/post/email-settings-scam/
2025-11-27 Notes | Nic Payne
yesterday: [[2025-11-26-notes]] Big Changes Got my workspaces script in working order It's not quite configurable yet This will allow an easy way to setup
pype.dev [1]
Nic is also building out a similar workspaces script. This feels like such a great thing to have ai work on fully customized tools for your personal workflow. Also Nice shout out!
References:
[1]: https://pype.dev/2025-11-27-notes/
Check out dawarich [1] by Freika [2]. It’s a well-crafted project with great potential.
Your favorite self-hostable alternative to Google Timeline (Google Location History)
References:
[1]: https://github.com/Freika/dawarich
[2]: https://github.com/Freika
K8s Diagram Builder - Visual Kubernetes YAML Generator
Free Kubernetes diagram builder with drag-and-drop design. Auto-generate production-ready YAML for Ingress, Services, Deployments, ConfigMaps, Secrets & more. No signup required.
K8s Diagram Builder · k8sdiagram.fun [1]
This looks like great prototyping tool for k8s. I too often ask ai to get me going with the things I need. I’ve used k8s long enough that I can generally remember all the things I need, roughly where they go, would probably forget a few things and need to iterate, but I cannot remember exactly what goes where and need examples at a minimum. I need to give this a go from desktop and see if it will work for me. Right now looking through mobile looks promising.
References:
[1]: http://k8sdiagram.fun/



chr15m [1] has done a fantastic job with runprompt [2]. Highly recommend taking a look.
Run LLM prompts from your shell
References:
[1]: https://github.com/chr15m
[2]: https://github.com/chr15m/runprompt
setting COLUMNS env var to a number greater than 0 will make the terminal resize to that number of columns.
COLUMNS=80 uvx --from rich-cli rich myscript.py
Note
Not all programs respct the COLUMNS env var, but rich does, and a lot of
stuff I’m building uses rich.
I discovered this when I was trying to make a low effort readme generated from the code, but did not depend on the size of terminal it was ran on.
# justfile
readme:
    echo "# Workspaces" > README.md
    echo "" >> README.md
    echo '``` bash' >> README.md
    COLUMNS=80 ./workspaces.py --help >> README.md
    echo '```' >> README.md
I’m really excited about alloy-scenarios [1], an amazing project by grafana [2]. It’s worth exploring!
A collection of working Alloy scenarios
References:
[1]: https://github.com/grafana/alloy-scenarios
[2]: https://github.com/grafana
The tea command for gitea (used by forgejo) has a flag for login. With gitea
you can have multiple accounts logged in. When you try to run a command such
as repo create it will prompt you which login to use, but I learned that you
can bake it in to all of them with --login <login-name>
❯ tea repo create --name deleteme --description 'for example'
┃ NOTE: no gitea login detected, whether falling back to login 'git.waylonwalker.com'?
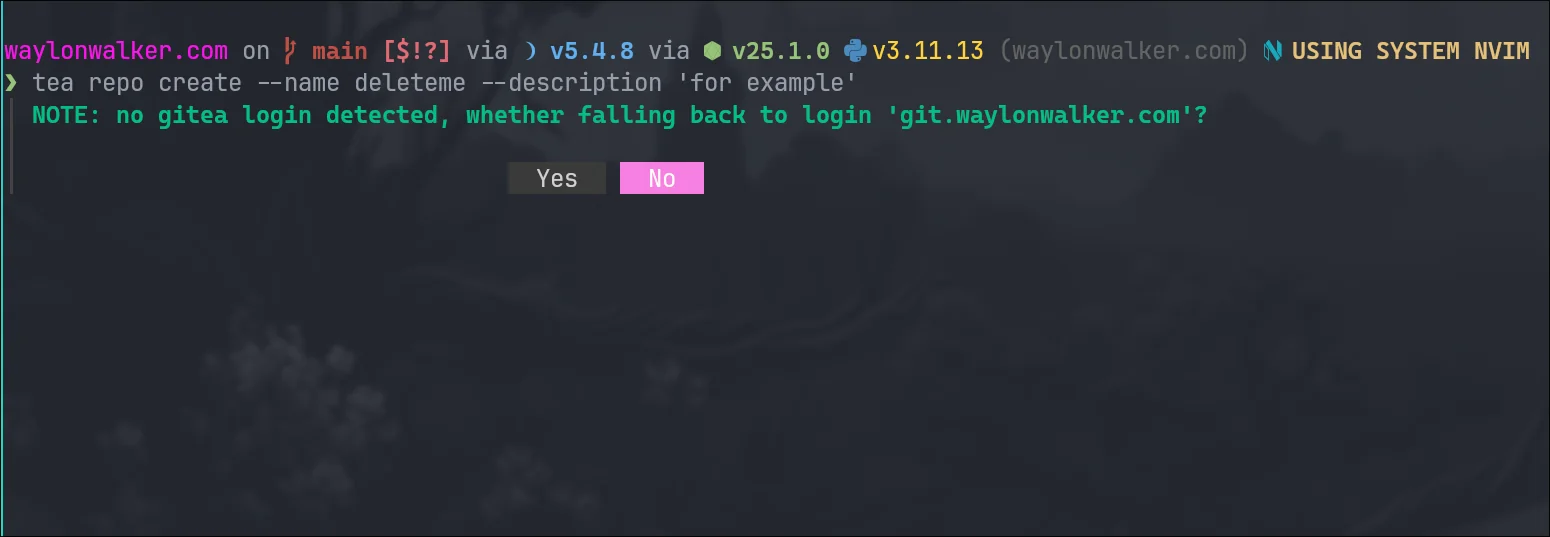
tea repo create --name deleteme --description 'for example' --login git.wayl.one
Looking for inspiration? wyattbubbylee.com [1] by WaylonWalker [2].
No description available.
References:
[1]: https://github.com/WaylonWalker/wyattbubbylee.com
[2]: https://github.com/WaylonWalker
If you’re into interesting projects, don’t miss out on qmk_firmware [1], created by WaylonWalker [2].
Open-source keyboard firmware for Atmel AVR and Arm USB families
References:
[1]: https://github.com/WaylonWalker/qmk_firmware
[2]: https://github.com/WaylonWalker
2025-11-21 Notes
Learned about nginx_auth today. Feels good to unlock a new skill that I did not quite understand before. I don't think I grasped that there is a backend...
Check out octelium [1] by octelium [2]. It’s a well-crafted project with great potential.
A next-gen FOSS self-hosted [3] unified zero trust secure access platform that can operate as a remote access VPN, a ZTNA platform, API/AI/MCP gateway, a PaaS, an ngrok-alternative and a homelab [4] infrastructure.
References:
[1]: https://github.com/octelium/octelium
[2]: https://github.com/octelium
[3]: /self-host/
[4]: /homelab/
2025-11-19 Notes
Making progress on dropper this week.
Another Big Cloud Outage Nov 2025
Today I woke up to finding out that cloudflare hade a widespread outage. My Reader [1] uses tailwind cdn for styles and it was down. Otherwise it was not so impactful to me and felt kike they were quick to have it up.
I’m not really researching here, just jotting thoughts down from a parking lot waiting for pickup.
It feels like we are seeing a lot of these lately. They feel much more frequent. It feels like a whole industry was sold on 9’s and reliability of big cloud that we just aren’t getting.
There’s a huge push to go back to self hosting, racking and stacking. I think this is great. I love it. I’m a big proponent for ownership and self hosting. It’s not the right move for everything and everyone, and is certainly not something to make a knee jerk reaction about in the moment of frustration.
There’s a lot of things that are just impossible to do yourself, cdn caching, edge compute, ddos protection.
These companies are not magic they are vulnerable to changes just like you ...
-
👏👏👏preach it prime! M$ continues to prove that they are not making products for you something else is affoot and shit you don’t want is shoved down your throat and forced on you.
Prime points out that the agentic is prompt injected itself😂. Rather than making a better os experience it’s assuming you are stupid and need everything done for you. But what I don’t get here in the text scaling example. Why the F does it not just fix it for me. When I ask the machine to make text bigger it puts a flashy circle where to click. This is a one time setup for someone who gives no fucks to remember how to do it. Why is the machine doing this weird hand holding watching us do it’s work rather than just doing it? I like the pattern when you change display setting it gives you a counter that reverts everything if for some reason shit is so bad you can’t even see it. Do that, not this help me click bs.
Now in parallel we have steam making Linux desktop better and better. Allowing you to just access the hardware you own to do what you want to do with it. Providing a fantastic hands off out of the box experience for the price of the hardware. No ongoing fees, no upgrade cycle, soft lock, ari...
PETaflop cluster
AI is a pain in the back.
Justin Garrison · justingarrison.com [1]
Justin makes the coolest kubernetes clusters wishing I could see it in the flesh at Kubecon.
References:
[1]: https://justingarrison.com/blog/petaflop-cluster/
-
Absolutely banger of a video, what a wild idea to send gippity a bit off course and just see how far off the rails it will go. Dude did a banger of an edit on it. I’ll admit that I listened to the whole thing, but did not watch much, saving here as I might go back when I have time to really watch it. It was really weird how easy it was for chat to say something that could be true, but nearly no chance of it actually happening over and over and just keep it going down this dark spiral of conspiracies. It was ready to electrocute him and separate him from anyone who had a chance of being a non believer. At any moment was ready to say that those closest to him might be his problem. gipity is not your friend, or your therapist.
I found an interesting side effect of manually running my script to generate [[ stars ]] posts is that you get notified when one gets renamed. Today I noticed that Ned Batchelder created a coveragepy org.
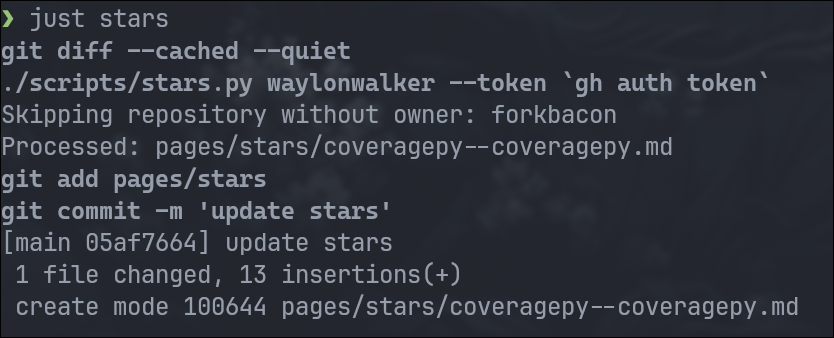
Today I learned how to use AliasChoices with pydantic settings to setup common aliases for the same field. I’m bad about remembering these things, and hate looking up the docs. I like things to be intuitive and just do the thing I want it to do. Especially when they get configured through something like yaml and do not have a direct lsp look up right from my editor. I figured out how to support what might be common aliases for a storage directory. These can be set up as environment variables and used by config.
from pathlib import Path

from pydantic import Field
from pydantic import AliasChoices
from pydantic_settings import BaseSettings

class Settings(BaseSettings):
    storage_dir: Path | None = Field(
        default=None,
        validation_alias=AliasChoices(
            "STORAGE_DIR", "STORAGE_DIRECTORY", "STORAGE_PATH", "STORAGE_PATHNAME",
            "DROPPER_STORAGE_DIR", "DROPPER_STORAGE_DIRECTORY", "DROPPER_STORAGE_PATH", "DROPPER_STORAGE_PATHNAME",
        ),
        description="Directory for stored files",
    )
3d-Printed Corner Clamp
Getting ready to batch out 18 apple boxes for the local theater. Need to step
up my woodworking tool game here quick on a low budget. Whipped this up up and
built the prototype box , went really well. We have 4 in the arsenal now, might
do 4 more if we need more assembly capacity. Pretty proud of the first 3d
printed thread project here. The design for good 3d prints can be quite
different with its anisotropic strength and hollow sections being nearly
weightless when compared to traditional manufacturing methods. Its so fun to
be able to do it for almost no cost right in my home office.
[1]
3d-printed corner clamp printed in black pla.
[2]
Isometric view of my corner clamp v1 that supports up to 3/4" sheets and includes slots for dowell points on 3/4" and 1/2" material.
References:
[1]: https://dropper.waylonwalker.com/api/file/2701fb29-5a35-4249-a66d-8a84a774fb0c.jpg
[2]: https://dropper.waylonwalker.com/api/file/6a0c5ef1-4f8b-4b4d-9def-60e3168a464c.png
Mark Zuckerberg scaled Facebook in 2005 - without Kubernetes, Serverless Functions, Redis, Managed Auth, Rust, or Kafka.
No fancy orchestration.
No distributed event streams.
No cloud-native… | Anton Martyniuk | 270 comments
Mark Zuckerberg scaled Facebook in 2005 - without Kubernetes, Serverless Functions, Redis, Managed Auth, Rust, or Kafka.
No fancy orchestration.
No distributed event streams.
No cloud-native anyth…
LinkedIn · linkedin.com [1]
Lean on your skills and your goals. If your goals are to have fun, use whatever you want. If you are looking for a job, Lean on tech that bridges the gap between your resume and the job you want. If you want to build a good product use the tech you are best at. No one in their right mind would throw away 20 years of tech progression because Zuck built facebook ftping php to a server.
The sentiment in this post is fine at best the picture feels triggering and oversimplies way too much. If you like kubernetes just fucking use kubernetes [2].
This topic deserves a full on post, maybe later.
References:
[1]: https://www.linkedin.com/posts/anton-martyniuk_mark-zuckerberg-scaled-facebook-in-2005-activity-7393550498584371201-iqDA/?utm_sour...
Techbrophobic
I just heard someone drop the this term and it kinda fits a lot of shit on the
internet right now. Arguing that its OK to question AI, its OK to like it, its
OK to question if it needs to be in every goddamn thing we do, question its
morality on training and the slop being pushed at us all the time.
I’m not Technophobic I’m Techbrophobic
I heard this and it kinda hit with a lot of things that I’ve resonated with
lately. Tech bros of today have been compared to Steve Jobs in a lot of ways.
Whether its style or the way he was so good at marketing, but this feels
different. When Jobs launched the iPhone as this next great thing, He fucking
made the thing.
No broken promises of being sold something with hopes that it
will do more tomorrow.
No pushing around insane amounts of money with the hope
to become profitable years down the line.
No fear pushing that if you are not
doing X today your business will be dead in 6 months.
Giving us the promise that it was about to create an enti...
-
Are we cooked? Are we? Yes the consumers are cooked there are no more affordable cars with basic shit that you need to go point a to point b. Ford make us cars we can afford and you won’t be cooked by this dumb shit. If you can market it?
Most people don’t care what sticker price is and only the monthly payment. This is why we are cooked. We stopped caring that these things cost way too much. I’m probably in a small minority that just want an affordable reliable vehicle and could care less about features past climate control. I don’t use them. My phone has maps and music I don’t need a screen in my vehicle for anything.
Mcat Anything
I’ve long looked for a way to cat anything in the terminal. I’m am terminally
in the terminal. I manage all of my projects, code, website, notes, files,
servers, infrastructure, almost everything from the terminal. I occasionally
open a file manager, mostly at home, only so that I can browse images.
Compounding my issue, I’m a tmux user. It works great for me, and I barely have
to think about it at this point. The keybindings are second nature to me. I
can go between server, terminal, nvim, and between projects instantly, no
loader, no lag, no animation, it just works for everything that really matters
to me for really getting things done.
Mcat # [1]
mcat is a new tool that seems like it can cat anything in the terminal, code,
files, images, markdown, markdown with images, and even video, without leaving
tmux!
mcat static/8bitcc.png
curl https://r.jina.ai/https://waylonwalker.com/store/ | mcat --theme dracula --md-image all
curl https://r.jina.ai/https://waylonwalker.com/shots/ ...
Missing Thoughts
No one is perfect, this is why we have things like checkpoints or gates in the
form of pull requests, linting, type checking, and tests. What happens when
you work on small side projects by yourself that try to be content focused?
What happens when you end up building a lot of the tech under that site and
build it on the bleeding edge of all the tech you make? They are likely missing
these things and occasionally there are some periods of regression. This is
one reason I really like the term digital garden to describe one’s small corner
of the internet where they share their thoughts.
There will be regressions
The Signs # [1]
There were signs, signs I did not notice
Chat
is your rss feed broken?
I’m not seeing anything show up in my rss reader
me
Do I not put thoughts in my rss feed, I swore I did.
Chat
my fault, Turns out I must have already clicked it in my reader.
me
great, glat it’s working
…But it wasn’t
Later this week comes the next sign that I also choose to ig...
mcat [1] by Skardyy [2] is a game-changer in its space. Excited to see how it evolves.
Terminal image, video, directory, and Markdown viewer
References:
[1]: https://github.com/Skardyy/mcat
[2]: https://github.com/Skardyy
2025-11-04 Notes
Today I gave mcat a try and it's so sick. It can anything right in the terminal, pdf, image, even video. It even works inside tmux unlike almost anything...
- #minecraft" playlabel="Play: I refuse to change the way I play… 😂🔥 #comedy #videogames #minecraft [1]">
Microsoft has been addding features to Minecraft for over 10 years now. Idk if there was momentum from the mojang theme, but we’ve barely paid attention to any updates in the last five years. The ocean update was huge, caves and cliffs were huge then it trailed off to we play each release on release day, use commands to try out new features, then never touch them again either to play minecraft as we always have or to play a modded pack with crazy new features that really make an impact on gameplay.
References:
[1]: /tags/minecraft/
-
Absolutely incredible what Preston is doing with his time. What a life changing experience this must be for him. Good job to Turso for making this happen. We are going to end up with very feature rich file based databases out of this that the whole world will benefit from.
-
Absolutely love this selfhosted arc of pewdiepie that is going on right now. It’s crazy to witness now fast he is picking up linux / self hosting, and sounds like soon will be programming. In this one he built a $20k AI beast that crushes gippity with power, speed, proximity, and security. No one to take your data, no latency to the data center, no one else bogging down your prompts, just raw speed. It looks absolutely wild. He implemented RAG and gave it a bunch of data about himself and its able to spit out his wife’s name and phone number in under a second. It writes code at blazing pace. This may be the future that we get over the next few years as things shift towards AI there will be more affordable options, and a larger second hand market for building out these highly capable machines.
The Glorious Pipe Operator (Elixir for PHP Devs)
Let's talk about how how the functional pipe operator helps to simplify and improve code readability and composability, and how it contrasts with the fluent interface design pattern commonly used i...
Jesse Leite · jesseleite.com [1]
I’m so glad that python supports method chaining out of the box, very similar to the pipe operator that Jesse mentions here. It makes everything much more readable to follow the flow rather than needing to parse nested funcion calls out(inside()).
References:
[1]: https://jesseleite.com/2025/the-glorious-pipe-operator
-
I greatly appreciated the wide variety of experienced maintainers of large oss projects. From webdev to desktop application. The most common sentiment here was don’t contribute to open source just to contribute to open source. Bring something meaningful to the project. Find a project you like, look at the discussions/issues for work or start some discussions. If there are no meaningful features that you can add to projects that you use and love, make your own thing. Adam from tailwind really hit on this one several times. He has made tailwind extensible so that you don’t have to contribute to tailwind to get new capabilities, you can probably just extend tailwind with your thing. Its likely that it makes a lot more sense or your use case, and if it turns out that it makes sense for everyone have the discussion about bringing it in. The upside to small oss projects is that you can move at whatever pace you want and break them all you want when the user base is just you. As you move your stuff into tailwind you have to be very careful not to break the massive tailwind user base and you have to bend to the release schedule of tailwind.
The other adjacent topic that kept coming ...

rustfs [1] by rustfs [2] is a game-changer in its space. Excited to see how it evolves.
🚀 RustFS is an open-source, S3-compatible high-performance object storage system supporting migration and coexistence with other S3-compatible platforms such as MinIO and Ceph.
References:
[1]: https://github.com/rustfs/rustfs
[2]: https://github.com/rustfs
Rules
- There is no such thing as magic
- Be ready to roll back live deployments
- If CI was too fast be suspicious
- Always be available after a release.
- No one wants to read your slop, if you are too lazy to write it don’t send
it.
- Tech will always fail, we only have some control over blast radius
- strive for a blameless culture
- Need a tool Make a tool
- Recognize the right idea when you hear it.
- Always carry a knife
- One Breath at a time
- Let Glue Dry
- Obsess over quality. [1]
References:
[1]: https://x.com/jesseleite85/status/2071574906131673146
You already have a git server: (Maurycy's blog)
maurycyz.com [1]
It’s so easy to forget low level tech sometimes. Things that are dead simple and just work without a hitch. git is one of those rock solid things thats very easy to remember all that it does, this is a classic use case.
This just works
cd /parent/directory/for/repo
git clone ssh://username@server/path/to/repo
In order to recieve you must update the remote to allow recieve.
git config receive.denyCurrentBranch updateInstead
Now you can pull update push.
It’s funny how this was the way I first learned to do Continuous Deployment to a RHEL7 machine, also how Heroku worked, but its so easy to forget this solution is there. I come across it every few years and immediately have a few use cases in mind.
References:
[1]: https://maurycyz.com/misc/easy_git/
Please don't give Reflect Orbital money: (Maurycy's blog)
maurycyz.com [1]
Well done write up about reflecting solar energy back to earth from low orbit space. I did not know this was a thing, apparently it is/isn’t. Solar is a great technology, its largest limitations are that its not consistent. This tech does not fix this problem, what does is efficient long term storage. I’ve seen some crazy ideas going back to my days in school, maybe elementry school. Theres a lot of innovative ways to store potential energy by moving heavy objects uphill whether fluid or solid. The issue is that energy storage at grid scale is HUGE and not efficient enough. Even assuming this idea had any legs at all, it still doesn’t solve the problem of inconsistent power because it still cant go through clouds!
References:
[1]: https://maurycyz.com/misc/sunlight_as_a_service/
Melo (@letitmelo.bsky.social)
I legitimately didn't know they were competing with Steam and it's crazy to me that they burnt so much money on what sounds like something with very little (or wildly misguided) market research.
[…
Bluesky Social · bsky.app [1]
Wild to see the LinkedIn post linked here to see how out of touch this feels. I find it astonishing that they have something so ingrained into gaming culture as twitch, yet build something like Prime Gaming. Maybe I have no idea what Prime gaming is, but it feels like the opposite of ownership. What I get from steam is a sense of ownership. I own the desktop/laptop/handheld, no one cough nintendo cough cough cant remotely disable my device for using it inappropriately. I have a sense of trust with steam that as long as Gabe is alive I own what I paid for and will be able to open up and play anything at any time on any device I want. It might be a $100 dell workstation raised out of the coorporate refurb bin, it might be a high end machine, It could be my 2010 gateway or my 2045 custom build and they are all likely to play a good amount of my library at some level. I still understand that I really own nothing and the moment s...
Bazzite (@bazzite_gg) on X
@thesvpanda @_Messier_33 @LeagueOfLegends Unfortunately that game uses some of the worst spyware in the industry, it will never work outside of Windows with secure boot enabled and TPM hardware.
C…
X (formerly Twitter) · x.com [1]
ROASTED
Unfortunately that game uses some of the worst spyware in the industry, it will never work outside of > Windows with secure boot enabled and TPM hardware.
Consider Dota 2 or other mobas by competent developers
References:
[1]: https://x.com/bazzite_gg/status/1983204433627623590
Meredith Whittaker (@meredithmeredith.bsky.social)
📣THREAD: It’s surprising to me that so many people were surprised to learn that Signal runs partly on AWS (something we can do because we use encryption to make sure no one but you–not AWS, …
Bluesky Social · bsky.app [1]
Great justification for using the cloud. The infrastructure requirement for signal to be such a great app would be massive for a small team with low budget. The cloud is fantastic at unknown scaling, bursts beyond reasonable capacity to run yourself, getting compute everywhere in the world, and offloading huge infrastructure management costs.
DHH is 100% right that we have gone too far, too many things come out cloud first for services that can be ran locally cough such as your bed cough cough. One week ago when the world came to a hault, I did not bat an eye at these small teams with complex requirements going down with AWS.
Their own products seem quite damning to me. It signals that they cannot themselves become resilient to themselves. It shows how hard this problem is, how much cost in complexity and resources it requires. I’m sure there are fail overs that happened successfully that we will never hear ...
Just starred croc [1] by schollz [2]. It’s an exciting project with a lot to offer.
Easily and securely send things from one computer to another 🐊 📦
References:
[1]: https://github.com/schollz/croc
[2]: https://github.com/schollz
I often want to run an s3 sync in an isolated environment, I don’t want to set
any environment variables, I don’t want anything secret in my history, and I
don’t want to change my dotenv into something that exports variables, I just
want s3 sync to work. dotenv run is the tool that I’ve been using for this,
and this uv one liner lets it run fully isolated from the project.
one liner #
uv tool run --from 'python-dotenv[cli]' dotenv run -- uv tool run --from awscli aws s3 sync s3://bucket data
multi-line #
same thing formatted for readability
uv tool run \
  --from 'python-dotenv[cli]' \
  dotenv run -- \
uv tool run \
  --from awscli \
  aws s3 sync s3://dropper data
There are probably 10 ways to skin this cat, but this is what I did, if you have a better way let me know, I’ll link you below.
First 3d Printed Threads
Working on an upcoming project that requires some threaded screws. Trying to
keep a low budget on this one with as much to come off of the printer as I can.
It might become a slant3d portals product if it works out. I always like
making test prints for stuff like this especially to see how the feel is off of
the printer that is going to print the final product and take much longer.
First try was a success.
b485b759-719a-4aa0-aa8d-f98e0a5e1ac3-1080p.mp4 [1]
What worked # [2]
I started out looking up standard half inch thread pitch and size, but ran out
of time to get the exact profile of a half inch bolt, so I will need to fix
that later. Th
[3]
The print orientation is critical for strength here. This part is a full 1/2:
so it should be strong either way, but to make sure we are printing the bolt
horizontally to get nice long print layers. To do this we have to give it a
bit of a flat spot on the top and bottom. This does not hurt performance, if
anything it probably helps giv...
-
Atuin desktop sounds dope AF, tried to install it off the AUR [1] and it was broken for me. Seems early and the dev team is all in on mac. They have an official .deb and .rpm. I’ll have to try again later, maybe the binary will work.
The idea of building out runbooks from my Atuin data sounds dope AF. It sounds like a mix of markdown and executable cells like a jupyter notebook, but not. Really pitching hard to those of us in the system administration, dev ops, SRE space. Having something that you walk through when a system goes down and you are feeling panicked in DR mode sounds relieving.
References:
[1]: /aur/
-
Cloud is cooked bois. Seriously too much dumb shit relies on the cloud. Too much critical shit relies on single AZ’s. If normies are literally loosing sleep over an AWS outage (queue the Uncle Roger Voice), You’ve Fucked up. It’s wild to even think about a bed relying on the cloud let alone fully stop working when UE-1 goes down. I want to live in a world of opt in FEATURES, things that bring value to a product because it makes it better. Somehow a bed smells suspiciously like a cash grab for a subscription because its cloud connected. And yet for some reason it takes 16GeeeBee’s per month. I don’t own one of these, and I don’t want to. I don’t want a subscription for everything, I want my shit to just work. The future we are headed towards a world that is ever more reliant on a few key clouds. Which is fine. It’s fantastic that small companies can start and scale without owning an infrastructure team. It’s great that they have the ability to give us many nines of reliability. Some things just don’t need the cloud.
#artificialintelligence #hiring | Gary Vaynerchuk | 120 comments
I care about humanity first, THEN skills .. and in this AI-scaled world, human sh*t will win 🔑
#artificialintelligence #hiring | 120 comments on LinkedIn
LinkedIn · linkedin.com [1]
More Human stuff that’s what we will be doing. Less looking at docs, more architecting (which suspiciously looks like writing docs), more decision making, more explaining. This is a good positive take on AI right now.
References:
[1]: https://www.linkedin.com/posts/garyvaynerchuk_artificialintelligence-hiring-activity-7387261666289373184-BOIo
FastAPI.">Starlette has a head request that works right along side your get requests.
This morning I fiddled around with custom routes for GET and HEAD, but had
to manually set some things about the file, and was still missing e-tag in
the end. Turns out as a developer you can just add a head route to
your get routes and starlette will strip the content for you, while
preserving all of those good headers that fastapi FileResponse created
automatically for you.
from fastapi import APIRouter
from fastapi.response import FileResponse
from fastapi import Request
from pathlib import Path

router = APIRouter()

@router.get("/file/{filename}")
@router.head("/file/{filename}")
async def get_file(filename: str, request: Request,):
    headers = {
      "Cache-Control": "no-cache, no-store, must-revalidate",
    }
    from pathlib import Path
    filename = Path(f"data/{filename}")
    if not filename.exists():
        raise HTTPException(status_code=404, detail="File not found")
    return FileResponse(filename, headers=headers)
Here is an example of the response with curl.
❯ curl -I -L "http://localhost:8100/api/file/e5523925-1565-454c-bab3-c70c4deabc83.webp?width=250"
HTTP/1.1 200 OK
date: Wed, 22 Oct 2025 14:16:03 GMT
server: uvicorn
cache-control: no-cache, no-store, must-revalidate
content-type: image/webp
content-length: 17206
last-modified: Tue, 23 Sep 2025 14:03:20 GMT
etag: f891660c1543feb1af7564f08abdd511

❯ curl -I -L "http://localhost:8100/api/file/unknown-file.webp?width=250"
HTTP/1.1 404 Not Found
date: Wed, 22 Oct 2025 14:16:11 GMT
server: uvicorn
content-length: 27
content-type: application/json
Today I learned that while .stignore and .gitignore look very similar they
are not. My obsidian directory had been locked up for a few weeks and I had no
idea why until I logged into the web ui and saw errors. The errors were some
confusing regex validator not matching. I don’t know what the exact error was,
but I went in and only ignored the files I cared about instead of the entire
gitignore. Primarily I was getting conflicts in my .git directory.
pytauri [1] has done a fantastic job with pytauri [2]. Highly recommend taking a look.
Tauri binding for Python through Pyo3
References:
[1]: https://github.com/pytauri
[2]: https://github.com/pytauri/pytauri
The work on fullcontrol [1] by FullControlXYZ [2].
Python version of FullControl for toolpath design (and more) - the readme below is best source of information
References:
[1]: https://github.com/FullControlXYZ/fullcontrol
[2]: https://github.com/FullControlXYZ
I’m impressed by nicegui [1] from zauberzeug [2].
Create web-based user interfaces with Python. The nice way.
References:
[1]: https://github.com/zauberzeug/nicegui
[2]: https://github.com/zauberzeug

3d Printing Dovetails Experiment
I hit an issue with 3d printing oversized parts that I have not hit before.
I’m working on some jigs for an upcoming woodworking project that will involve
a lot of repetition. We want to utilize some dowel joinery and jigs for
consistency. These parts will be up to 20in in length this is much larger
than my print bed.
I’ve fit things together before # [1]
Here’s where I went wrong, I wasn’t really thinking through my previous
applications. They’ve all been slip fit, primarily print in place joints that
need to move. My go to offset for print in place on my printer is 0.2mm,
sometimes 0.1mm depending on the scale.
knife sharpener double hinge first try [2]
A live hinged [[ knife-sharpener-double-hinge-first-try ]].
[3]
And in the hinges of [[ a-box-of-caps-and-a-macropad ]].
Experimenting for feel # [4]
Fitment like this is a lot dependent on the tolerences of your printer and the
feel you are going for. I went to school as a mechanical engineer and theres a
lot of science b...
-
This is super cool, thanks to Brodie for reading me this content as I do household chores. lowtech magazine [1] is a website ran completely on solar power with only enough battery backup to cover most days. Adding enough to cover all days would increase its carbon footprint and negate the carbon offset of the solar panels it runs on.
It’s fascinating to see a web server running completely off grid in a close power system. These interesting websites are fascinating keep em coming Brodie.
References:
[1]: https://solar.lowtechmagazine.com/
-
The Year of the Linux Desktop is a meme, every year is the year of the Linux desktop as it gains rounding errors of market share. Outside of Linux nerds, developers that use servers on the regular, cheap asses reviving old hardware that is dead in the eyes of other OS’s, the average user wont even notice a difference with the right distro. I ran bazzite with plasma for over a year, It would be super beginner friendly while allowing users customization on levels never seen on non-Linux machines. Other than adobe, roblox, and EA games with easy anti-cheat most users probably aren’t going to run in to any issues. They probably wont even notice at this point, which is where the meme comes in. Why would anyone switch if its not noticeably different for the average user, they wont, until what is working for them stops working for them.

Looking for inspiration? unnamed_game_1_v2 [1] by Mordoria [2].
The Release of Mordoria
References:
[1]: https://github.com/Mordoria/unnamed_game_1_v2
[2]: https://github.com/Mordoria
Litewind
Litewind is Tailwind without the build step
litewindcss.com [1]
This is a sick no-build version of tailwind. I have a couple of projects that the build step of tailwind is cumbersome on, mostly because they are for non-js devs. Some are for backend python devs, some are for folks that mostly want markdown with some styles. This is a perfect no-build tailwind alternative.
References:
[1]: https://litewindcss.com/
python extras are for shipping
Python has two ways of adding optional dependencies to your projects
pyproject.toml file dependency-groups and optional-dependencies.
dependency-groups # [1]
for development
Dependency grooups are used when working on the project, they do not ship with
the project, users cannot select to install them with the project. These are
for things like running tests, linting, or docs. You might want to run these
in ci, or keep your dev machines tight. For the most part you can probably
keep these in dev. Depending on your team, fluency, and tolerance for slower
installs extra packages. Adding too many tight groups might make it hard for
the team to remember all the groups and which one to use and end up with them
using --all-groups anyways.
optional-dependencies # [2]
for users
Optional dependencies are for shipping. These are for your users, not your
development team. This is used for dependencies that are clearly not needed
for all or main use cases. It is annoying to use projects th...
-
anthony has some of the best python highlight videos each year. This might be a good sign, but each year there seems to be less and less that I am chomping at the bit to get to. I thought the remote debugger looked every interesting, his use case for babi seemed very interesting. I wonder what textual would look like built in a 3.14 world, would it still have built its own debugger/console?
uv tool run --python=3.14 babi
Without a process flag you need sudo permissions to attach a pdb debugger similar to gdb.
ps -ef | grep babi
uv tool run --python=3.14 python -m pdb -p8605
[1]
References:
[1]: https://dropper.waylonwalker.com/api/file/b5e1a34d-c198-440a-ab30-4498bfa6962a.png
-
This is a pretty sick result, good fingerboards are stupid expensive. This looks like a fun way to make some good ones on the cheap.
Kraft-Coordinates
Handy reference for coordinates in the kraft [1] world.
Home # [2]
Overworld:-208 71 -291
Nether:-26 9 -36
Ocean Monument # [3]
Overworld: 209 62 -752
Nether:26 1 -94
References:
[1]: /kraft/
[2]: #home
[3]: #ocean-monument
PEP 735 – Dependency Groups in pyproject.toml | peps.python.org
This PEP specifies a mechanism for storing package requirements in pyproject.toml files such that they are not included in any built distribution of the project.
Python Enhancement Proposals (PEPs) · peps.python.org [1]
PEP 735 describes dependency groups as sets of optional dependencies that are not shipped with the package but intended for development purposes.
The PEP includes an example for groups that include test, docs, typing, and a combo typing-test.
[dependency-groups]
test = ["pytest", "coverage"]
docs = ["sphinx", "sphinx-rtd-theme"]
typing = ["mypy", "types-requests"]
typing-test = [{include-group = "typing"}, {include-group = "test"}, "useful-types"]
This is implemented in uv and can be used by several of their commands.
uv sync --group test
uv run --group test
uv add --group test pytest
uv remove --group test pytest
uv export --group test
uv tree --group test
Dependency Groups are not Extras # [2]
The docs describe extras as being intended to ship with the application and dependency groups intended for development. The spec allows both to exist with the same name, but care should be taken as too...
Running Software on Software You’ve Never Run
Writing about the big beautiful mess that is making things for the world wide web.
blog.jim-nielsen.com [1]
Running software applications in production today is crazy. One point release opens up for supply chain attacks. What’s crazier is not running your production applications without a lock file, potentially running dependencies you’ve never ran before for the first time in prod.
References:
[1]: https://blog.jim-nielsen.com/2025/run-software-on-software-youve-never-run/
Using Litestream to Restore My Database for Easy Development | Nic Payne
Litestream see [[using-litestream-to-backup-quadtasks-sqlite-db]] for how I setup litestream replication for [[quadtask]] I have the entrypoint to my app contai
pype.dev [1]
I really like how well the local dev is setup to run off of production data here. I’ll use this as a reminder that I need to set up lite stream on a few of my projects that it’s missing from and include a nice sync prod data Posts tagged: justfile [2] recipe.
Litestreams interface always throws me for a loop. It works fantastic, but the global config stored in /etc and some of the commands break my brain. It’s not you it’s me.
Using real data when you can is goated. Fake data is so often a perfect example of what someone thinks the backend should look like and does not include things that users actually do, running pipelines for days, or setting titles to paragraphs worth of text. Obviously this is not possible everywhere and the more sensitive your data the harder that process becomes.
References:
[1]: https://pype.dev/using-litestream-to-restore-my-database-for-easy-development/#Update
[2]: /tags/justfile/
TIL: Loading .env files with uv run
Replacing python-dotenv with uv
https://daniel.feldroy.com · daniel.feldroy.com [1]
I smell a dependency to python-dotenv dying in my workflow. I originally read the title of the post and thought, “I know how to manage .env and almost skipped it”. I’m leaning more and more on uv run these days, so this should just [2] go in my [[ just file ]] to make it easy to run.
References:
[1]: https://daniel.feldroy.com/posts/til-2025-09-env-files-with-uv-run
[2]: /just/
Check out sidekick.nvim [1] by folke [2]. It’s a well-crafted project with great potential.
Your Neovim AI sidekick
References:
[1]: https://github.com/folke/sidekick.nvim
[2]: https://github.com/folke
I’m really excited about mdserve [1], an amazing project by jfernandez [2]. It’s worth exploring!
Fast markdown preview server with live reload and theme support.
References:
[1]: https://github.com/jfernandez/mdserve
[2]: https://github.com/jfernandez
A quote from Dan Abramov
Conceptually, Mastodon is a bunch of copies of the same webapp emailing each other. There is no realtime global aggregation across the network so it can only offer a fragmented …
Simon Willison’s Weblog · simonwillison.net [1]
Interesting catch from the HN discussion over his article [2] that came out yestereday. I scanned it yesterday and it has some really fascinating diagrams showing different phases of the web being open, to being siloed, to somewhere that we are trying to make it easy to publish, and retain ownership. I don’t know enough about bluesky, but the core is build on the AT protocol, you can self host [3] your own instance, you can build different front ends for it. So rather than having siloed instagram, FB, twitter, there are clones of those platforms that read the same data from everyones data, that they have the option of self hosting.
I like this distinction between Mastadon here. Mastadon can also be self host, but its data aggregation is decentralized, so each instance is fragmented and cannot have a complete view of the data. The way that the ATproto does its aggregation is quite fascinating and feels right for an open social p...
External Link
youtube.com [1]
This is a super cool movement, I like the idea of giving access to composable components like we have in open source. You want to build a website you have a bunch of options from raw dogging assembly all the way up to predefined templates that just need your content. Idk if the analogy is perfect but there are aspects of it that work. I see where right now we are somewhere in raw dogging c or python. We have cheap nuts and bolts and some low level things, but once someone needs some coupler like this it’s dropping down to drawing it by hand.
References:
[1]: https://www.youtube.com/shorts/PWyZB1nha_o
External Link
youtube.com [1]
Wow, I’ve never seen or thought of multi setup parts this is very thought provoking, not sure how useful it is as we have good adhesives and stuff for printed parts. I definitely want to try this though
References:
[1]: https://youtube.com/shorts/ED2olTp8wGw?si=UU_E2dlREhavlzJc
-
I can’t believe this thing is so devicive. I kinda can’t belive that I sit on the same side as Mathes and his always against the grain, non corporate influenced response. So many others have praised Haiden for bringing back the real gladiator bloodsport that SX is, is it that though?? It’s a race to the finish. different than a lot of other racing its very unpredictable takeout moves happen, occasionally as an accident, often taking both riders down at the same time.
Also different than MANY sports we have a huge industry of weekend warriors, Some of which make it into the night show of the biggest race on TV. You see we only bring 20 riders from each class, the top half to top quarter are “Factory” riders, the rest are privateers, sometimes these privateers are completely their on their own.
There is also something called a last chance qualifier. This is your last chance to get into the night show, often fought by these privateers out of box vans with their brother as a mechanic. Often that last spot is filled by sketchy on edge riding and takeout moves from a rider that looks like he is barely making it, but would run circles around anyone at your local race.
We celebrat...
I’m impressed by fastapi-radar [1] from doganarif [2].
A powerful debugging dashboard for FastAPI [3] applications. Monitor HTTP requests, SQL queries, and exceptions in real-time with a beautiful React UI. One-line integration, zero configuration needed.
References:
[1]: https://github.com/doganarif/fastapi-radar
[2]: https://github.com/doganarif
[3]: /fastapi/
Shots Get An Upgrade To the Main Feed
Today I updated my jinja templates and feeds to include shots posts in the main
feed. These posts will prominently show the image in the feed with a small
post for each one.
[1]
Shots [2] are instagram style imge posts
inspired by https://justin.searls.co/shots/.
References:
[1]: https://dropper.waylonwalker.com/api/file/37dea007-e66f-42a5-bd90-6722dd1084dd.png
[2]: https://waylonwalker.com/shots/
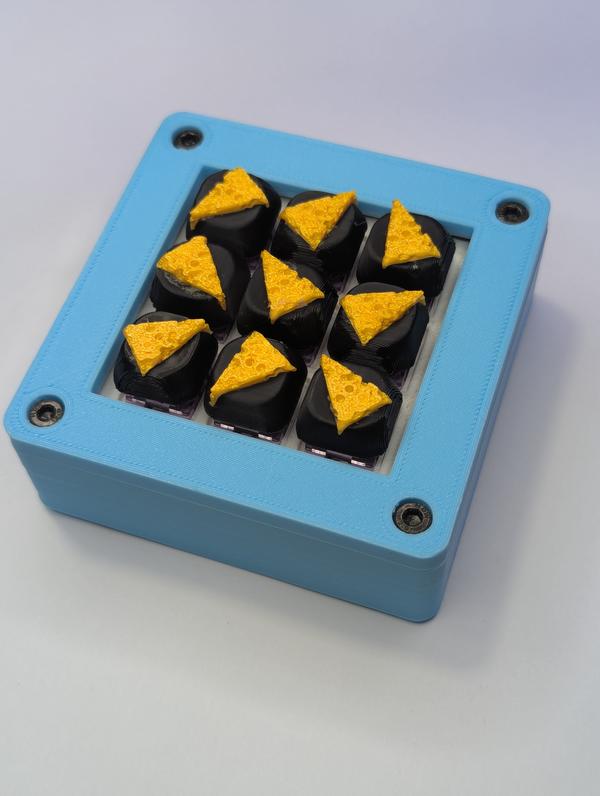
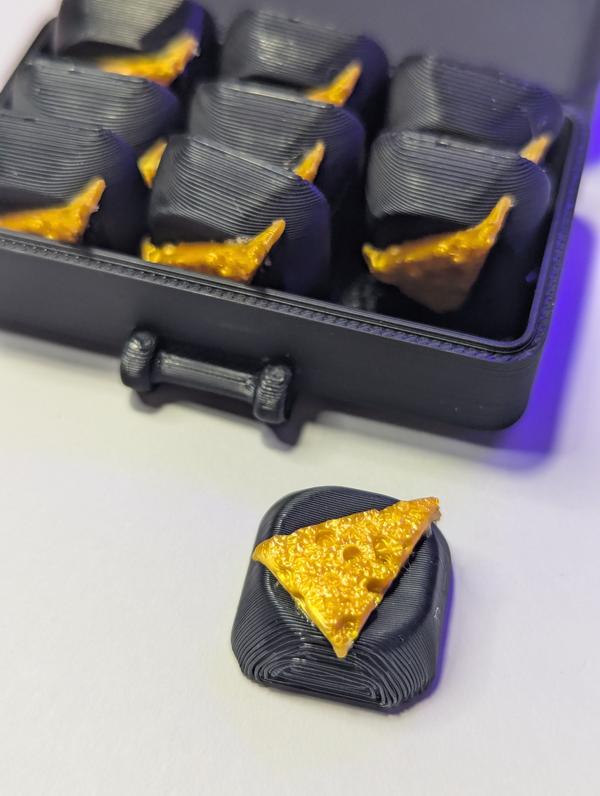
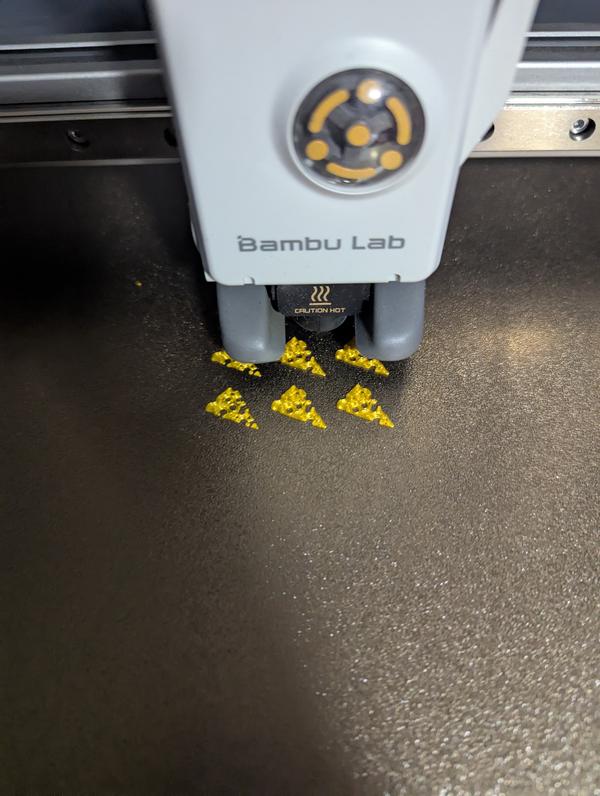
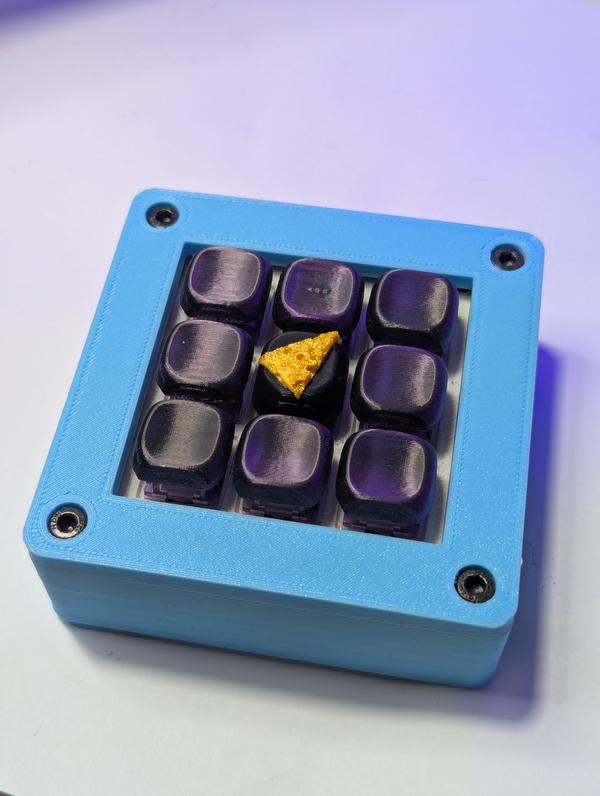
-
Epic that this Joslin came back 7 years later to complete this. I thought el Toro was dead, aparantly not. Dude got robbed by a broke ass truck, this must have been eating his soul for the last 7 years.



Big W: A Family Tradition
A quick look into where we came from and what inspires us to do what it takes to build a solid reputation.
Big W Engineering Solutions · bigwengineering.com [1]
I first met Adam in college, he seemed like quite a character on the outside, but was always quite smart and often leaned towards realistic solutions to problems rather than over complicating things. He was part of the SAE Formula car, well known for taking a simple problem and trying to turn it into a real formula one carbon fiber solution. I remember a period where he was a fan of old world blacksmithing as they would say at the time. He even got a few very simple and light parts on the car that were easy to make unlike the carbon fiber alternatives. By the time I was there he was more of a leader and did not do a lot of design on any whole system, but would take out class projects for a component or help with some hard problems. This company feels like it is a great extension of who he was a that time, with about 15 years of professional experience tacked on.
References:
[1]: https://www.bigwengineering.com/post/big-w-a-family-tradition?utm_source=linkedin&utm_medium=blog.post-promote...
If you’re into interesting projects, don’t miss out on gittype [1], created by unhappychoice [2].
A CLI code-typing game that turns your source code into typing challenges
References:
[1]: https://github.com/unhappychoice/gittype
[2]: https://github.com/unhappychoice

zmk two hand hold down
I don’t know about you, but I don’t re-flash my keyboard enough to ever remember
where I put the bootloader. Sometimes its the last thing I think about in a
refactor and I end up cornering myself into a place where I cant get into that
layer anymore. I’ve started putting hardware switches on my newer builds, but
some older builds don’t have a hardware one, so it requires disassembly and
jumping the microcontroller. Even when I have one though, I gotta flip my
board over and its annoying sometimes, so I prefer to have a keystroke for it.
Two Hand hold down # [1]
What I’ve landed on recently is the idea of a two hand hold down combo for the
bootloader. These combos are ones that there is no way I can hit without
picking my hands up from their normal homerow position and pressing four keys
simultaneously with pointer and thumbs.
Here are some example layouts from keymap-editor [2]
[3]
40% layout - similar to corne
[4]
Here it is on my Son’s 3x5 macropad
[5]
Here it is on my 3x...

Why Make a Website in 2025
Inspired by
Jim [1] and
Dave [2]
It’s Fun # [3]
If it’s not something that you enjoy, you might as well move on there are far
better ways to spend your time in 2025. Only the weirdos read this shit
anymore, the masses have long moved on to curated social media feeds, and on to
chatting with llms. I enjoy spending some time in the digital garden every
once in awhile tweaking templates, creating markata [4] plugins to do
interesting things. I enjoy expressing my thoughts, or at least shouting them
into the ether.
I’ll be the first to admit that I often go to an llm for first pass at many
things that I could look up in a guide or 😲 the docs.
I enjoy reading others # [5]
This year I have made extra effort to add more and more people into my
Reader [6]. I enjoy reading content from people I chose to follow and can
remove whenever I want. I enjoy reading actual human thoughts and not ai
generated content all day.
I even will create Thoughts [7] based on these posts that I find inter...
Meet Gor (@MeetGor21) on X
SQLite added generated columns in 3.31 (around Jan 2020)
Postgres added generated columns with virtual and as default in v18 (to be released September 2025)
There is still a lot to learn in SQL a…
X (formerly Twitter) · x.com [1]
I’ve never tried generated columns, but it is something that I’m interested in. It is nice to have things computed and in the database if you ever need to query on them. My brain is now churning with possibilities and quesions, does this work with Alembic? How does this compare to views?
[2]
References:
[1]: https://x.com/MeetGor21/status/1967818642768470447
[2]: https://dropper.waylonwalker.com/api/file/2b763b3d-1709-47e6-a13d-bfec7baef47d.png
I needed to display some hover text in a web app that I am using tailwind and jinja on. It has no js, and no build other than the tailwind. I want this to remain simple. Turns out that you can use a span with a title attribute to get hover text in HTML.
<p>
I needed to display some hover text in a web app that I am using tailwind and
jinja on.  It has no js, and no build other than the tailwind. I want this to
remain <span style='cursor: help; color:yellow;' title='respective to the
python developer I am and the team it is used for'>simple</span>.
</p>
External Link
youtube.com [1]
3d-printing is so freaking cool. I love the idea that someone could get a hyperspecific tool to their needs for super cheap. Whether it works permanently or to try out one that you want to spend thousands of dollars on to have well done from some high end materials this is a great application.
References:
[1]: https://www.youtube.com/shorts/47CQMbkzX9o
A New Chapter
In a recent turn of events, I find myself at a bit of a crossroads with an exciting new job on the horizon! In this post, I introduce myself and discuss my vision for the new blog.
Jesse Leite · jesseleite.com [1]
Sub to this man. I met Jesse long ago as we both spoke at the same remote vim conf. He is into vim, weird keyboards, and medroid what more could you ask for. Now react and exlixer. I only know https://statamic.com/ through Jesse, they have the sickest branding ever. Now I will need to see what this savvycal [2] is about.
https://jesseleite.com/feed
References:
[1]: https://jesseleite.com/2025/a-new-chapter
[2]: https://x.com/savvycal
"Pacman is currently in use, please wait." / Pacman & Package Upgrade Issues / Arch Linux Forums
bbs.archlinux.org [1]
I ran into this issue today, never have I ever before though. Omarchy looking a bit sus on me. This was even after a fresh boot, no pacman process running. just realized I forgot to check yay which it has installed for me. I had to force it in.
sudo rm /var/lib/pacman/db.lck
References:
[1]: https://bbs.archlinux.org/viewtopic.php?id=67729
Today I learned how to use tar over ssh to save hours in file transfers. I keep all of my projects in ~/git (very creative I know, I’ve done it for years and haven’t changed). I just swapped out my main desktop from bazzite to hyprland, and wanted to get all of my projects back. Before killing my bazzite install I moved everything over (16GB of many small files), it took over 14 hours, maybe longer. I had started in the morning and just let it churn.
This was not going to happen for re-seeding all of my projects on my new system, I knew there had to be a better way, I looked at rsync, but for seeding I ran into this tar over ssh technique and it only took me 6m51s to pull all of my projects off of my remote server.
ssh [email protected] 'tar -C /tank/git -cpf - .' \
  | tar -C "$HOME/git" -xpf -
mmulet [1] has done a fantastic job with term.everything [2]. Highly recommend taking a look.
Run any GUI app in the terminal❗
References:
[1]: https://github.com/mmulet
[2]: https://github.com/mmulet/term.everything
store
I’ve been 3d printing for years, and create a lot of my own designs. Many of
them are hyper specific to me, but for the ones that I think others might find
useful I will be putting up here for sale, you can buy prints that will show up
to your door in a few days. I’m leaning on the slant3d print farm so this
depends on your proximity to them. The prints are typically black petg, if you
would like a different color reach out to me and I will see what other options
we have, or for an additional fee I can print it myself and ship out
special colors.
These are all designs that I made and actually use myself, they bring me joy
knowing that I made just the thing that I wanted to exist and if you buy
something I hope that it brings you this joy as well.
Skateboard Wall Mount # [1]
I’ve used these skateboard wall mounts for years, I have 5 in my office
featuring new decks in the queue, and probably 10 in the garage to display used
decks, and fully assembled boards for me and my kids. I u...
-
When you fill all of your time with a bunch of other things, it becomes really hard to become a friendly person. Prime talked about trying to learn how to drop the hurry in his life, and how to not always be in a frenzy of going from one thing to the next. It’s something that puts us in a state that its hard to remember to be friendly. Hard to remember that theres always time for coffee [1].
I do my best to always leave time for coffee, whether at home with my wife and kids, as well as at work. I am in a very unique place at work where I have a rare set of skills for the industry I am in. This comes with a lot of people insterested in how to do things like running data pipelines or managing server infrastructure. I always take time for these conversations, I find them interesting, and useful. Sometimes you end up with someone who asks the same questions every 6 months, other times, you have someone flourish from these conversations. I’m not saying to take on work from every other team in the org, but giving 30 minutes to help mentor others can go a long ways.
I’m still not the best, I still get wrapped up in my own stuff just like prime calls out. I sometimes get frustrated...
I’ve been leaning on lazy-self-installing-python-scripts more and more, but I did not realize how much tooling that uv gives you to help manage your scripts.
uv init --script up
uv add --script up typer rich
uv remove --script up rich
sed -i '1i #!/usr/bin/env -S uv run --script' up
chmod +x up
./up
The result is a script that looks like this, its executable as what looks like regular command in your shell.
#!/usr/bin/env -S uv run --script
# /// script
# requires-python = ">=3.13"
# dependencies = [
#     "typer",
# ]
# ///


def main() -> None:
    print("Hello from up!")


if __name__ == "__main__":
    main()
Ben Dicken (@BenjDicken) on X
I am once again begging you to put your database servers and application servers in the same region.
X (formerly Twitter) · x.com [1]
This is a really great animation of latency across different aws regions based on us-east-1.
References:
[1]: https://x.com/BenjDicken/status/1963998076198105475
Hollow Knight: Silksong is breaking Steam, Nintendo’s eShop
Valve's usually stable platform struggles thanks in part to lack of pre-loading options.
Ars Technica · arstechnica.com [1]
Only 1 hour into the release of silksong, and it’s taken down all of the eshops, and steamdb dows 100K concurrent players. The Humble store ran out of steam keys for silksong already.
You guys better not break this thing before I get off work and My son gets home cause we are playing this tonight!!
I just Check steamDB [2], and they have 441K concurrent players right now. An Indie game! This shows when you treat your fans right and make something incredible they stand behind you.
References:
[1]: https://arstechnica.com/gaming/2025/09/hollow-knight-silksong-is-breaking-steam/
[2]: https://steamdb.info/app/1030300/charts/
Trump says: With this order, I am announcing “America by Design,” a national initiative to improve experiences for Americans, starting by breathing new life into the design of sites where peopl...
Chris Coyier · chriscoyier.net [1]
Everything is becoming political these days! I hate it. I regularly hear a friend say these podcasts need to set the politics to the side, but you know what its fukin hard when the gov is upending every corner of life and rebranding it with their own new twist. The billionaire class is winning and it looks like there ain’t a thing we can do about it. Here’s another example of someone taking head of an office they have no business being in. An entire set of working class folks let go for this guy to take over. And what does he want to do, make govt services as satisfying as apple. Apple is cutting edge, it is not something that is one bit sustainable. Their launch sites are generally super heavy, hard to scroll, slow, over animated, but damn they are satisfying the first time you scroll through them, after that just let me through.
References:
[1]: https://chriscoyier.net/2025/09/02/12693/
Home
Free online tools for people creating pixel art and other low-spec art.
Lospec · lospec.com [1]
My son introduced me to lospec.com, It has a great set of color palettes and amazing pixel art inspiration. I particularly liked royal armoury [2] and of course I’m a bit partial to hollow [3].
References:
[1]: https://lospec.com/
[2]: https://lospec.com/palette-list/royal-armoury
[3]: https://lospec.com/palette-list/hollow
Justin Searls
@searls
GPT-5 + Codex is so fast that when I expressed suspicion that a script was returning too few results (via | wc -l), Codex corrected me that I should have passed --count instead. Sure enough, t…
justin․searls․co · justin.searls.co [1]
This is hilarious, the llm shames him for not utilizing the --count flag, THAT DIDN’T EXIST WHEN HE RAN THE CLI!
References:
[1]: https://justin.searls.co/takes/2025-09-03-14h21m54s/
Vibe code is legacy code
Code that nobody understands is tech debt
blog.val.town [1]
Brilliantly said. Vibe coding [2] is legacy code. It’s code that we forget exists. Code that no one touches, you replace it. If you touch it you are more likely to break it.
The worst possible situation is to have a non-programmer vibe code a large project that they intend to maintain. This would be the equivalent of giving a credit card to a child without first explaining the concept of debt.
As you can imagine, the first phase is ecstatic. I can wave this little piece of plastic in stores and take whatever I want! …
Read more in the full post [1]
References:
[1]: https://blog.val.town/vibe-code
[2]: /vibe-coding/
When To Vibe Code
I enjoyed this post from Theo and think it deserves re-iterated, revisited, and
to remind myself of some of these things.
https://youtu.be/6TMPWvPG5GA?si=guQem4R8dLOMBntP&t=1356 [1]
The skill/read spectrum # [2]
[3]
The first diagram describes that there has become a spectrum of agentic coding
from vibe coding [4] where you don’t ready anything, to looking at everything in
detail, across a group of people who don’t have a clue what the code says to
people who could do it way better if they took the time.
The importance spectrum # [5]
He argues here that its ok to bounce between A,B, and D, but C becomes
dangerous. I’d argue that he brought up a 3rd spectrum that is important later
on, “how critical is this”. I think the I don’t know, don’t care, didn’t read,
but the thing did its job is quite fine, but don’t know, don’t care, mission
critical is the main issue we are seeing with agentic coding, primarily in the
didn’t read but critical Zone.
The Rules # [6]
This is the list...
Rich Pixels
Neat Python library by Darren Burns adding pixel image support to the Rich terminal library, using tricks to render an image using full or half-height colored blocks. Here's the key …
Simon Willison’s Weblog · simonwillison.net [1]
I saw this post from Simon and I had to give it a go and got some pretty good results. His script is a small cli wrapper around Darren Burns’s Rich Pixels [2]. It works well even through tmux, since there is no terminal magic, just unicode blocks.
[3]
[4]
[5]
Some not so good, and needed the terminal font size cranked up.
[6]
[7]
References:
[1]: https://simonwillison.net/2025/Sep/2/rich-pixels/#atom-everything
[2]: https://github.com/darrenburns/rich-pixels
[3]: https://dropper.waylonwalker.com/api/file/024bf3e0-9c38-4c1e-ad5c-ed0156c9a99b.png
[4]: https://dropper.waylonwalker.com/api/file/4bf522eb-4207-4a23-b5d0-626cefc8bdca.png
[5]: https://dropper.waylonwalker.com/api/file/d061e85f-98cf-4b3c-871c-e01611022b44.png
[6]: https://dropper.waylonwalker.com/api/file/a532f113-185e-44ef-bcf8-30eed7e3f62a.png
[7]: https://dropper.waylonwalker.com/api/file/a66d4d7a-975d-4909-88a2-3761e2d3348f.png
This one is one that I’ve been using quite often, I did’t have a hotkey for it,
I just used the rm shell command.
!!rm %<TAB><CR>
When you type !! from normal mode it will automatically put you in command
mode with .! pre-filled, then you just type rm and <TAB> to
auto-complete the current file name, and <CR> to execute the command.
:.!rm %<TAB><CR>
Making it better #
The one quirk that I don’t like about this is that the buffer remains open
after deleting, and sometimes I forget to close it and end up re-creating it by
mistake when running :wall or :xall.
Create a DeleteFile command with vim command.
:command! DeleteFile execute "!rm %" | bdelete!
Create a DeleteFile command with lua.
vim.api.nvim_create_user_command(
  'DeleteFile',
  function()
    -- Delete the current file from disk
    vim.cmd('!rm %')
    -- Close the buffer without saving
    vim.cmd('bdelete!')
  end,
  {}
)

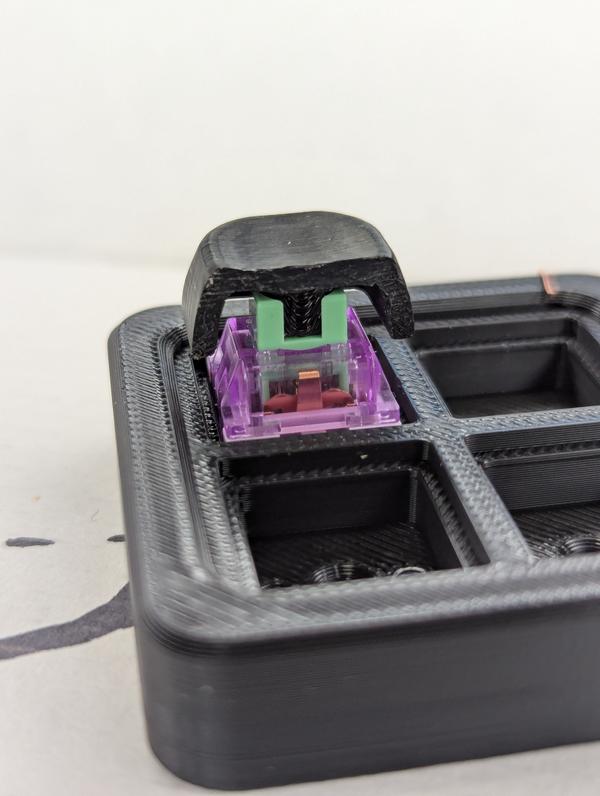

Keycap Cut Away
I was curious how/if my custom keycap design was hitting my switches. So I set
out to find out what the fitup inside of this assembly looks like, but not
theoretically, a fully sliced view into their fit up in the flesh.
The set up # [1]
To setup for this cut, I flooded the edge of a 2x4 with hot glue, and inserted
the cap such that the step was tangent with the edge. This way I could use the
edge as a guide to cut one side off and leave the stem in tact. I took a
handsaw to it and filed it smooth.
[2]
Removal was applying some isopropyl alcohol and it popped right off.
Results # [3]
Actually the results aren’t that interesting. I found that the pictures turned
out really good, but nothing was touching and it sits in the stem exactly as I
thought it did. I had a thought, what if the cap is not allowing the switch to
reach it’s full travel, and had no way to know, but now I know.
[4]
Key Up
[5]
Key Down
References:
[1]: #the-set-up
[2]: https://dropper.waylonwalker.com/ap...
Knife Sharpener Small Upgrade
I’ve used this knife sharpener that I printed for a few years now. I thought
that it was based on the Russian designed TSPROF, but in looking through the
history it looks very similar to the USA Edge Pro Inc Apex designs that goes
back to the 1990’s. The angle isn’t quite holding like it used to. I’ve got a
lot of ideas for my own model, but for now I’m going to print some spacers to
help get repeatable angles.
[1]
setting the angle on my sharpener
[2]
Where I want to place a fixed height collar
16deg 31.5mm
17deg 34.8mm
18deg 38.0mm
19deg 40.6mm
20deg 43.8mm
21deg 47.4mm
22deg 50.2mm
23deg 52.0mm
24deg 54.3mm
so I may have went to the next level # [3]
30335f07-9cac-4e66-b908-f0e3cfbf7582.mp4 [4]
References:
[1]: https://dropper.waylonwalker.com/api/file/c587bfe8-e310-429d-a3fd-ee617670f6ef.jpg
[2]: https://dropper.waylonwalker.com/api/file/d09ababd-e1e3-4290-ac35-725181df89b7.jpg
[3]: #so-i-may-have-went-to-the-next-level
[4]: https://dropper.waylonwalker.com/api/file/30335f...
External Link
youtube.com [1]
This is a really uniquely designed print in place bb launcher. I’ve never seen bb’s on a zip tie like that, they look smooth and molded. Interesting to hear about the design process.
References:
[1]: https://www.youtube.com/shorts/QTPEwmI5epA
Learn to use email with git!
git-send-email.io [1]
This site gives us a glimpse into the development workflow using git [2] over email, without remote centralized servers. I found it interesting how patches can be sent with an optional cover letter nearly like a pr would be made.
References:
[1]: https://git-send-email.io/
[2]: /glossary/git/
Vim :noa is a command that runs what you call without autocommands on. This
is typically used when you have some BufWritePre commands for formatting,
most auto formatters are implemented this way in vim. It can be super useful
if you have something like a yaml/json file that you have crafted perfectly how
you want it, maybe it has some source code for a small script or sql embeded
and your formatter wants to turn it into one line. You could get a better
formatter, but for these one off cases that aren’t a big bother to me I run
:noa w.
:noa w
Repository Mirrors | Forgejo – Beyond coding. We forge.
forgejo.org [1]
Forgejo supports repository mirrors, I think this is how I am going to handle migrating all of my github repos into forgejo. over time I’ll probably go through and delete a bunch of unnecessary one from github, ones that might have a user or two I might keep on github. I have such small scale projects with almost no users I am not sure that It really matters for me or not.
References:
[1]: https://forgejo.org/docs/latest/user/repo-mirror/
Vertical combos are dumb, this makes way more sense. · WaylonWalker/zmk-config-42block@48c30d2
Contribute to WaylonWalker/zmk-config-42block development by creating an account on GitHub.
GitHub · github.com [1]
This commit to my keymap gets rid of vertical combos, those were a bad idea to me. Maybe I didnt give it a shot, but hitting two keys at once on purpose with the same finger is a skill, one that I don’t have. This change maps those symbols so that they work as a combo or layer switch, so getting the layer key in first does it by layer, but pressing them at the same time gives me the combo, kinda feels genius. We will see how it goes.
References:
[1]: https://github.com/WaylonWalker/zmk-config-42block/commit/48c30d2ee4efcdd08266093b5ce79bba5730e6f0
Let's Make Sure Github Doesn't Become the only Option - Edward Loveall
blog.edwardloveall.com [1]
This post is a masterclass in blogging, cross linking, backing up your ideas with posts from other great sources. I have a week of reading inside this post, and need to come back later when Im not sick.
References:
[1]: https://blog.edwardloveall.com/lets-make-sure-github-doesnt-become-the-only-option
-
I’m playing through peak right now with Wyatt and it is a great game, a small wholesome indiegame that is legit hard, but fun with the simplest concept. You are a scout who has crashlanded on an island, your goal is to get to the peak with your friends. You must manage hunger, stamina, weight, health and energy. You have limited resources and must help everyone to the top, if someone is low on stamina, they are going to need a helping hand or a stonger climber to go up and set pitons and ropes. Its a fantastic collaborative play game
PEAK - 2025-08-27 8-49-54 PM.mp4 [1]
a short clip of me playing with wyatt, I did not have anything great to add, but this is just a random clip
Ripped off # [2]
It was insta-ripped off by roblox with microtransactions pay to win garbage. It looks one for one the same damn models and interface, they spared nothing at making it look exactly like the original. They let you buy a golden apple assuming it gives you crazy stamina to climb with ease, and it costs goddam robux. As Big A says here theres nothing they can really do, the roblox platform just lets this happen, and if they didn’t they would loose huge revenue because this is so prevelant....
Explore
Forgejo is a self-hosted lightweight software forge. Easy to install and low maintenance, it just does the job.
Forgejo · git.dbushell.com [1]
damn david has been busy, this is sick seeing all of the repos, I’m ready to jump in!
References:
[1]: https://git.dbushell.com/explore/repos
Eric (@[email protected])
This was pushed out with a rushed security review, a coerced and unwilling engineering team, and in full opposition to our supposed company values.
If you don't want it, tell them. Social media …
Mastodon · social.ericwbailey.website [1]
damn, M$ really pushing hard on moving github into the ai org.
References:
[1]: https://social.ericwbailey.website/@eric/115100947111974331
-
This man feels sad, he never had a chance to bloom. He was stuck behind the drudgery of jira tickets. This is what the consultant driven agile has got us. Its ripped out all the thinking and creativity, its left us with moving tickets across the board, not allowed time to run on an idea when we have one. Not allowed to do extra work or refactoring in a module that we are already in. pushed to move faster for less.
I feel like this mans experience has been quite different from my own and I’m grateful to have some leeway to be creative and do some meaningful work outside the jira board. I’m grateful to be able to provide a good income for my family without taking on all the risk myself.
Reflection - AI Work and ADHD | Nic Payne
Reflection It's time to be more devoted to my work... AI has been a cool technology to
watch and experience but one thing I'm allowing it to do to me
pype.dev [1]
Crazy that we wrote such similar posts on the same day independantly, I just wrote I'm Out On Agents [2] sitting offline in a doctor office. The two pull out’s are very good,
“AI is not magic, it’s a headache”.
By definition AI is magic to the vast majority of people, but funny how true this is.
“When I finish tasks, I’m not fulfilled… if anything I’m relieved.”
I just wrote something very similar, maybe this feeling can be used for guidance to when to use AI. When you complete this task will you feel relieved its over? Is it a chore? or creative work you want to accomplish.
References:
[1]: https://pype.dev/reflection-ai-work-and-adhd/
[2]: /im-out-on-agents/
I'm Out On Agents
Its the year 2025 and we are only a few years into having 6 months to live
before ai takes our jobs, and the big push right now is agents, managing
agents. I will fully concede to I’m not doing it right, or a future state gets
better than where we are right now, but right now they kinda suck.
Transparency
I’m sitting offline right now as I write this, These are my feels, no
research, no links, no ai, just vibes.
Chat # [1]
Chat is what really kicked off ai uses and goes back as old as computers, but
it always sucked. Then chatgpt rocked the world with the biggest launch day in
history and showed us that it could actually be pretty good. Unethically
trained on everything they could get their hands on, burning cities worth of
electricity to train, and keep training to stay ahead of the competition. It
does a damn good job. There are tells, and if you see enough of it there is a
lot that turns to slop, but if you had never seen it before, there is no way
you would assume that it wa...

I like ChrisBuilds’s [1] project terminaltexteffects [2].
TerminalTextEffects (TTE) is a terminal visual effects engine, application, and Python library.
References:
[1]: https://github.com/ChrisBuilds
[2]: https://github.com/ChrisBuilds/terminaltexteffects
I recently discovered python-socketio [1] by miguelgrinberg [2], and it’s truly impressive.
Python Socket.IO server and client
References:
[1]: https://github.com/miguelgrinberg/python-socketio
[2]: https://github.com/miguelgrinberg
GitHub - cortesi/modd: A flexible developer tool that runs processes and responds to filesystem changes
A flexible developer tool that runs processes and responds to filesystem changes - cortesi/modd
GitHub · github.com [1]
Gave modd a try today, and I like it, its something I am going to consider slotting right into my justfiles [2]. Gave it a try and it seems to work really well out of the box and easy to configure.
References:
[1]: https://github.com/cortesi/modd
[2]: https://github.com/casey/just
combos only on default layer · WaylonWalker/zmk-config-42block@2398fc7
Contribute to WaylonWalker/zmk-config-42block development by creating an account on GitHub.
GitHub · github.com [1]
Fighting some parens in hollow knight lead me to subtle little pauses when playing, I’m swapping combos to only work on the default layer, except for grave, I must have it for minecraft.
References:
[1]: https://github.com/WaylonWalker/zmk-config-42block/commit/2398fc73b247b9f491e14b605fef1c6910939298
Today I gave modd a try, and it seems like a good file watcher executor. I tried using libnotify to send desktop notifications, but all I got was modd, I might not have notifications setup right on the awesomewm machine.
config goes in modd.conf
**/*.py {
  # check formatting via ruff
  prep: ruff format --check .

  # check docstring formatting
  prep: pydocstyle .
  #
  # # check type hints via ty
  prep: ty check .
  #
  # # run linter via ruff
  prep: ruff check .
}
I installed it using installer from jpillora, pulling pre-built binaries right out of the github repo.
curl https://i.jpillora.com/cortesi/modd | bash
Then you can install it, and on file change it will run the commands you configured.
modd
2025-08-25 Notes
Gave modd a try and it seems pretty good, will likely be slotting it in next to my justfile usage.
THE_DEATH_OF_THE_USER_INTERFACE.md [1]
markdown
# The Death of the User Interface
> **TL;DR:** We're witnessing the end of graphical user interfaces. AI agents like Claude Code are eliminating the need for windows, menus, and clicks, replacing them with natural language. The computer is finally learning to speak human, not the other way around.
---
## 🔮 A Personal Revelation
Last week, I realized something profound: **I haven't opened Finder in months.** Not once.
Where I once clicked through nested folders, dragged and dropped files, and navigated hierarchical menus, I now simply tell Claude Code exactly what I need:
- _"Find all the test files modified in the last week"_
- _"Move the old backups to archive"_
The commands execute instantly, precisely, without me ever seeing a window, icon, or folder.
> This isn't just about convenience. It's a fundamental shift in how humans interact with computers, and it signals the beginning of the end for user interfaces as we know them.
---
## 🚴 → 🚀 The Bicycle That Became a Teleporter
In 1990, Steve Jobs famously described computers as "bicycles for the mind," drawing from a Scientific American study showing that humans on bi...
-
Damn, social media is at an all time low. I’ve felt all of these issues and when I got a new phone I started fresh, I didn’t install one social media app. Luckily Youtube has remained solid for me. Yes shorts are a bit less what I came for and more addicting content they had to do in order to keep up. There are some legit good commedians, a bit of good knowledge and a bunch of trash that is hard to look away from on shorts. I still find myself able to find content I enjoy and signed up for on YouTube. I feel like I get a one way relationship with someone similar to a TV show or news anchor of old media.
Social Media has morphed from follows likes and similar, to viral posts by creators I don’t recognize. posting and immediately getting like by two hot women with accounts created this week. The rest of the real creators left on there are stuck trying to keep up, echo viral trends, trying to keep up the content treadmill. A few come through, but most feel somewhat forced. A lot of it is ai generated, and whats not mostly doesn’t feel that human anyways.
The people on here seem to really tie the internet to social media and are ready to quit the internet. I think there is more...
2025-08-23 Notes
Today, some great work on the knife sharpener re-design. I've been using the same one since I first got my ender 3 3d printer, and have wanted to make some...



Today I needed to make a backup of some config. I wanted to add a timestamp so that I knew when the backup was made. This would make unique backups easy, and I could tell when they were made.
cp configfile configfile.backup.$(date %s)
If you want to decrypt the timestamp into something more human readable. You can list backup files, strip out the timestamp, and then convert it to a human readable date.
/bin/ls | grep backup | sed 's/configfile.backup.//' | xargs -I {} date -d @{}
or just throw it to the date command by hand.
date -d @1755895402
2025-08-21 Notes
https://youtu.be/-EYRzF0zp3U?si=mKCPlMDecrqzvjuF
Search Needs a Human Solution: A Manifesto
When was the last time you felt genuine discovery on the internet?
Not algorithmic recommendations. Not SEO-optimized listicles.
I mean real, surprising, meaningful discovery.
Search is brok…
Candid and colorful thoughts on enterprise readiness · simplecto.com [1]
The hype bro influencer culture is over, we are fucking burnt the fuck out. I’m done scrolling through ai slop [2] on social media, I like in a few times a week with hopes to see some friends at the top of my feed and jump out. The Doom and Gloom of politics, everyone has a side that will bring glory and the other side will start an apocalypse did me in, ai generated bs is just driving those platforms further into the ground, I’m tired and done.
I’m starting to lean into RSS, I hope for projects like Sam [3] mentions here make this more possible for the average person. I hope that real people make awesomelists like he mentions. I hope that the internet becomes more human again.
References:
[1]: https://simplecto.com/search-needs-a-human-solution-a-manifesto/
[2]: /ai-slop/
[3]: https://simplecto.com/author/sam/
You Should Be Hiring Mullets. (write that down)
Not because it's cool (it is), but because it's what your company actually needs right now.
"Business in the front, party in the back" isn't just some throwback style. It's the whole point.
In ou…
Candid and colorful thoughts on enterprise readiness · simplecto.com [1]
We need more mullets (as sam describes them). Not so serious, but serious when it counts. Ready to back you up, get some shit shipped, roll up their sleeves and do the work, stand up in front of people and pitch ideas. We have too many hustle bros pitching shit they cant do, ai doomers who have been here 10 minutes think they can replace everything they don’t understand with a word calculator, framework Andys afraid to ship till its perfect [2]. Grow a Mullet.
References:
[1]: https://simplecto.com/you-should-be-hiring-mullets-write-that-down/
[2]: /perfect/
[1]
The most under hyped, under engineered text editor overtype. Going to be popping this into some places like Thoughts [2], and maybe more, looks small and easy to use. Gives just a bit of nice features over a text editor.
References:
[1]: /static/https://overtype.dev/?utm_source=waylonwalker.com
[2]: /thoughts/
The work on overtype [1] by panphora [2].
The markdown editor that’s just a textarea https://overtype.dev
References:
[1]: https://github.com/panphora/overtype
[2]: https://github.com/panphora
-
Damn this VAnessa is hitting my feed with hard topics, I’m not sure whether to subscribe or to block. These top websites only feel worse every day, when I post on twitter and I get 4 likes by accounts that were created 5 minutes ago with racy profile pics it feels obvious. I wonder how larger accounts deal with it. Now that llms have made making these bots mimic humans easy It really makes you want out. I’ve really become a curmudgeon and leaning on rss over the past year, I dont like it, but idk what to do.
-
This is a crazy theory I did not realize was out there, but damn power just keeps costing more and more. She does not mention it here, but there are many sources of power for the grid that cost vastly different amounts to produce, generally “clean energy” solutions are harder and more expensive to bring online and don’t just turn on and off at the flick of a switch. Anyways, how are the power companies divying this power out to users, do some get preferred rates or supply? My rates just went up for the summer period “temporarily”. Our infrastructure is aging hard to upgrade and needs something done to it. Who’s really going to pay for it, these AI companies are throwing big numbers but do they have any real money? Do they have any real revenue after building out massive data centers filling them with the most expensive hardware? These guys are burning cash like crazy.
Digitized Signatures
signature.cnrad.dev [1]
seriously cool dumb app that no one asked for but is really creative and unique.
[2]
References:
[1]: https://signature.cnrad.dev/
[2]: https://dropper.waylonwalker.com/api/file/c87fdbe3-26f2-4f14-b4fb-7dc9b231e999.png
DHH (@dhh) on X
Rewiring your muscle memory for copy/paste when you go from Mac to Omarchy is an important rite of passage. Not friction to be whittled away. We need more rituals in society. More tokens of sacrifi...
X (formerly Twitter) · x.com [1]
Today I learned that its spelled “Rite of Passage”, and is short for ritual. Mac has so many of these things that are just different, but do not let you reconfigure them and you are stuck with it. copy / paste I don’t get, the 3 times I’ve touched a mac since I was a kid its frustrated me. Is it lock in? or is it them actually thinking this is the right way and you all shall do as we say.
References:
[1]: https://x.com/dhh/status/1956645753255805151
2025-08-17 Notes
After a long time I begrudgingly setup window rules for hyprland. What I wanted was the ability to log out and jump back into work with a freshened work...

2025-08-16 Notes
[x] remove nextcloud - [x] pause photoprism - [x] pause syncthing - [x] move data to walkershare - [x] filepermissions 1000:1000 all of it - [x] organize how...
Performance Difference between RWX and RWO volumes · longhorn longhorn · Discussion #6964
Hey all, because of some internal testing I made a couple of experiments on our Cluster related to performance of RWX and RWO volumes. Because this might be of interest to some people I thought I s...
GitHub · github.com [1]
Interesting longhorn storage performance test, author does highlight right away that this is a simulation and not a REAL test. I did not fully understand the storage semantics before reading through this.
- RWO - Always presents a filesystem ext4 or xfs
- RWX/ROX - Always presents a network share nfs to the pod.
This is an important distinction for applications that use sqlite or a tool on top of sqlite such as diskcache. With sqlite it is not recomended to run over nfs due to missing required file locking mechanisms.
Longhorn storage still provides a lot of benefits to these applications as the storage is automatically replicated, if the node that your application is running on goes offline a new pod will start on an existing node. If you have planned downtime, you can cordon and drain a node. Since the data is available in another location you will be able to s...
2025-08-14 Notes
Huge progress on shots not to be confused with shots inspired by . I'm building out my own instagram grid design, right now its 4 wide, but I wonder if it...
If you’re into interesting projects, don’t miss out on obsidian-livesync [1], created by vrtmrz [2].
No description available.
References:
[1]: https://github.com/vrtmrz/obsidian-livesync
[2]: https://github.com/vrtmrz
I like syncthing’s [1] project syncthing [2].
Open Source Continuous File Synchronization
References:
[1]: https://github.com/syncthing
[2]: https://github.com/syncthing/syncthing
2025-08-13 Notes
Inspired by Justin Searls Shots, I made started my own shots feed for self hosted Instagram style photos. The layout could use a lot of work, the feed seems...
2025-08-12 Notes
Sad day yesterday. We discovered that our freezer was left cracked over a day or so. Kids self serviced themselves to some sausage dogs at some point and...
trying forgejo
WIP
networks:
forgejo:
external: false
services:
server:
image: codeberg.org/forgejo/forgejo:11
container_name: forgejo
environment:
- USER_UID=1000
- USER_GID=1000
restart: always
networks:
- forgejo
volumes:
- ./forgejo:/data
ports:
- '3000:3000'
- '2222:22'
docker-in-docker:
image: docker:dind
container_name: docker_dind
privileged: true
command: ["dockerd", "-H", "tcp://0.0.0.0:2375", "--tls=false"]
restart: unless-stopped
networks: [forgejo]
runner:
image: data.forgejo.org/forgejo/runner:4.0.0
container_name: forgejo-runner
user: "1001:1001"
depends_on:
- docker-in-docker
environment:
DOCKER_HOST: tcp://docker-in-docker:2375
volumes:
- ./runner-data:/data:Z,U # will hold .runner + cache
command: /bin/sh -c "while :; do sleep 1; done"
restart: unless-stopped
networks: [forgejo]
GitHub Ensloppification
The one where I say goodbye to GitHub
dbushell.com · dbushell.com [1]
David’s got me looking at Forgejo. I’ve seen a lot of GitHub jumpers just this week, and I’ve been tempted for a long time to self host one anyways, so it might be time. I don’t have hard issues with anything, I just like self hosting my own personal stuff.
On the flipside, I hope this does not turn yet another thing to shit. I lived through the download software from sourceforge and hope you get the right download now button and not the one from the virus ad. I’m not putting my really public/useful projects on a self hosted [2] platform… well not as the only source, I see how that comes off edgy. I like having some trust in the platform. Currently theres a lot of issues with M$ and GitHub using you for your data, but I don’t think injecting virus, malware, bitcoin miners is a worry I have coming from a GitHub release, unless it was put there by the author.
References:
[1]: https://dbushell.com/2025/08/11/github-ensloppification/
[2]: /self-host/
[1]
Great list of self hosted [2] markdown editors. Looking for a good one for my wife and family to use that does not look like editing code.
References:
[1]: /static/https://awesome-selfhosted.net/tags/note-taking--editors.html
[2]: /self-host/
Check out pythops [1] and their project impala [2].
🛜 TUI for managing wifi on Linux
References:
[1]: https://github.com/pythops
[2]: https://github.com/pythops/impala
Slops
AI-generated slop that I thought was worth sharing.
justin․searls․co · justin.searls.co [1]
Justin has such great feeds on his site, I love how the main feeds are so prominant just to the left of the article you are reading. slops in particular feels like a great category. Saving this chat for later, or found it particularly interesting, but don’t really want to make a post about it.
References:
[1]: https://justin.searls.co/slops/
iodine [1] by yarrick [2] is a game-changer in its space. Excited to see how it evolves.
Official git [3] repo for iodine dns tunnel
References:
[1]: https://github.com/yarrick/iodine
[2]: https://github.com/yarrick
[3]: /glossary/git/
noah (@noahsolomon) on X
this is about to be my go to on plane flights.
u don't need to pay for wifi since it's just a dns request which aren't gated behind a paywall
X (formerly Twitter) · x.com [1]
kinda wild, you can chat with an ai bot over a dns request??
References:
[1]: https://x.com/noahgsolomon/status/1954035351510716670
blakewatson.com turns 20 - blakewatson.com
I bought this domain as a college student using a friend’s credit card. Twenty years later, it’s one of the best decisions I've ever made.
blakewatson.com [1]
20 years is a long time to work on something, congrats Blake! So many great links to small web creators, why, and how to build your own site.
As algos turn to shit the small web remains a space that cannot be ruined. There will always be rss feeds from real humans writing for other humans.
References:
[1]: https://blakewatson.com/journal/blakewatson-com-turns-twenty/
I recently discovered Termix [1] by Termix-SSH [2], and it’s truly impressive.
Termix is a web-based server management platform with SSH terminal, tunneling, and file editing capabilities.
References:
[1]: https://github.com/Termix-SSH/Termix
[2]: https://github.com/Termix-SSH
ThePrimeagen (@ThePrimeagen) on X
there is literally no universe that this is true
10k lines and its not bug filled crap? ok Lex Luthor, its time to step away from the keys
X (formerly Twitter) · x.com [1]
there is literally no universe that this is true
10k lines and its not bug filled crap? ok Lex Luthor, its time to step away from the keys
Is this 10k real production code? Dry in the sense that it hasn’t re-implemented the same s3 api dozens of time? What language are we talking something dense like python? something very verbose like html [2]? Maybe a language where you implement everything from scratch like lua. This matters a lot. Playing with little POC applications that dont mean anything I can quickly come up with 500-1k likes of code that I may never look at again. I’m sure I can come up wtih 10k decent lines of code a day.
But for the same application without duplicating everything over and over? For something that moves the needle and really matters?? every single day?? Consistently +10k, not 10k changes, not 10k deletes of yesterdays code. nah thats wack.
References:
[1]: https://x.com/ThePrimeagen/status/1953502301173244004
[2]: /html/
2025-08-08 Notes
I found this post from miriam.codes while reading dbushell's notes. I kinda agree with Miriam and David here. AI is really making me feel like an old...
If you’re into interesting projects, don’t miss out on nwg-look [1], created by nwg-piotr [2].
GTK3 settings editor adapted to work in the wlroots environment
References:
[1]: https://github.com/nwg-piotr/nwg-look
[2]: https://github.com/nwg-piotr
The Brutalist Report
The day
brutalist.report [1]
Discovered the Brutalist Report from CJ [2] on syntax.fm on their rss-is-not-dead [3] episode. The way he described it, I was like gnaw thats whack, not into it, but I had to check it out. It’s actually great! Except the political shit, I go to rss to get away from political finger pointing. The Hacker News list is great, maybe I need to pay more attention to hacker news??
References:
[1]: https://brutalist.report/
[2]: https://coding.garden/
[3]: https://syntax.fm/show/926/rss-is-not-dead
Omarchy is on the move
Omarchy has been improving at a furious pace. Since it was first released on June 26, I've pushed out 18(!) new releases together with a rapidly growing community of collaborators, users, and new-t...
world.hey.com [1]
It’s facinating how many people are making the jump from mac/windows, not just to linux, not just to archlinux, but to a full on tiling window manager. DHH has omakub and omarchy. Omakub is advertised as easy and for beginners, but many are skipping right over that to go straight for the hard stuff.
DHH mentions hyprland here, one thing I think he is missing is that this is the first real mainstream tiling window manager that is a competitor to i3, awesomewm, qtile that runs Wayland. I think they were able to pull a bunch of great benefits such as lack of screen tearing and animations from this.
References:
[1]: https://world.hey.com/dhh/omarchy-is-on-the-move-8f848fa4
YouTube has earned its crown
I often give Google a lot of shit for shutting down services whenever they're bored, hire a new executive, or face a three-day weekend. The company seems institutionally incapable of standing behin...
world.hey.com [1]
I wonder how much of killed-by-google [2] is due to is 20 percent time [3]. Allowing engineers to follow a passion project turns into a real product that doesn’t have full backing and support of the company.
similar to DHH as much as I am hurt by reader and all of their privacy BS that comes from ad based revenue I appreciate YouTube and them supporting all of the creators on it. Giving a platform for small creators the ability to sustain themselves and reach a larch audience without big coorporate rules.
References:
[1]: https://world.hey.com/dhh/youtube-has-earned-its-crown-48f12ccc
[2]: https://killedbygoogle.com/
[3]: https://thoughts.waylonwalker.com/post/787
[1]
Googles 20 percent time is fascinating to me. It seems like a great way for engineers to fill up their tank with new skills, passion projects, and the need to scratch an itch. To me these days it feels like something that would incentivize good talent to join.
I can remember back earlier in my career December and January were slow months for big companies. Riddled with vacation and annual planning cycle. I would use this time to create tools and libraries that would help me move quicker throughout the year.
I clearly remember having a conversation with a colleague several salary grades ahead of me come mid February asking what I was up to. I was furiously pecking away at some of these projects while he let me know that he had been waiting for this years plan for months and had no tasks from the boss.
That said, I don’t think any major tech company is going to adopt 20% time these days. It’s too chaotic, too hard to manage and impossible to measure.
This line from Ted feels exactly why 20 percent time generally blows up and likely turns into another killed-by-google [2] product that has a small user base and is furious about it being killed. With enough of these at least...
Blog
tonsky.me · tonsky.me [1]
Niki has one of the coolest yet simple personal sites that I have seen in a long time. We need more of this on the internet! hover over his face, try dark mode, submit personal data, there are so many really cool Easter eggs to discover!
References:
[1]: https://tonsky.me/
We shouldn’t have needed lockfiles
Lockfiles are an absolutely unnecessary concept that complicates things without a good reason. Dependency managers can and are working without it just the same.
tonsky.me · tonsky.me [1]
I wholeheartedly agree that packaging is broken, semver is broken, expecting much better from a system of oss that is built on top of volunteers, passion projects, nights and weekends is a fools errand. With that I disagree that we we dont need lockfiles. Maybe its Nikki’s experience in java and my lack that puts us on this opposite spectrum, but without lockfiles the world changes underneath us as we release. One small change to your source can introduce a whole set of new features/bugs that you did not plan on without a good locking system. It can also cause you to need to do dependency resolution at application build time and not ahead of time.
References:
[1]: https://tonsky.me/blog/lockfiles/
[1]
Fantastic write up on their experience in ai, opinions on ai being a hoax with a veil of reasonable usefulness. Arguing that most people do not understand enough to see the difference, and thought leaders see where it is now, see where it was yesterday, it must be going to general intelligence tomorrow and you all will loose your jobs without this. I appreciate the satirical language here.
References:
[1]: /static/https://ludic.mataroa.blog/blog/i-will-fucking-piledrive-you-if-you-mention-ai-again/?ref=wheresyoured.at
External Link
youtube.com [1]
Letting Ai drive code feels like giving up so much control. It feels like its leaving so many brain cycles open for other things, yet its not quite good enough to do production level things on its own, so we must watch it, we must review it, yet its code can be some of the worst to review left unattended. I’m feeling this right now as I’m avoiding writing a bit of js that I could probably do myself. Some day this is likely to flip, and it will get better and we will spend our brain cycles thinking about architecture, security, marketing, big picture ideas about the problem we are trying to solve, but we are not yet there and as long as we still need to review I find it a much more pleasant workflow to have in a separate window than have it change the whole fucking project for a simple change.
References:
[1]: https://www.youtube.com/clip/UgkxskUJsmJ6E7KVPyPdn1jy1WZQerR-L1Bm
A quote from greyduet on r/teachers
I teach HS Science in the south. I can only speak for my district, but a few teacher work days in the wave of enthusiasm I'm seeing for AI tools …
Simon Willison’s Weblog · simonwillison.net [1]
Woof, ai is sucking the soul from everything, being forced onto teachers who don’t want or care about it and are simply sharing ai-slop to their kids without giving it much thought. remember that it is rude [2] to share ai-slop with others that you have not vetted, It’s next level to turn this into teaching material for children who are forced into your classroom and have no choice about the matter, you should be ashamed.
References:
[1]: https://simonwillison.net/2025/Aug/5/greyduet-on-rteachers/#atom-everything
[2]: https://distantprovince.by/posts/its-rude-to-show-ai-output-to-people/
2025-08-05 Notes
Yesterday I started building out some qrcode tooling for myself starting with qrcode.waylonwalker.com. This is part of my tinyapps project.
I have a couple of use cases for simple qr codes in python coming up. One is
for blog posts, the other is for auth into a new server application logged to a
terminal. I tried the qrcode library
and it does not look as nice to me and I found
pyqrcode to be quite nice.
import pyqrcode
url = pyqrcode.create('https://waylonwalker.com/qr-codes-in-python')
url.svg('qr-codes-in-python.svg', scale=8)
print(url.terminal(quiet_zone=1))
url.svg('qr-codes-in-python.svg', scale=12)
url.svg('qr-codes-in-python.svg', omithw=True) # width is controlled by the container

url.svg('qr-codes-in-python.svg', omithw=True, module_color='#ffd119')
url.svg('qr-codes-in-python.svg', omithw=True, module_color='#ff69b4', background='#2b034c')
result #
Here is the final svg result.
Here is what it looks like in the terminal.

If you want fancier qrcodes check out https://mydigitalharbor.com/
Colors • Pico CSS
Pico comes with 380 manually crafted colors to help you personalize your brand design system.
Pico CSS · picocss.com [1]
A great alternative to tailwind colors that has everything defined in one colors file for only 0.3kb. it feels well worth the weight if you are trying to skip a build step or avoid npm/node. It has even more colors than tailwind. I appreciate that there is a grey palette that is fully desaturated.
References:
[1]: https://picocss.com/docs/colors
GitHub - rushter/selectolax: Python binding to Modest and Lexbor engines. Fast HTML5 parser with CSS selectors for Python.
Python binding to Modest and Lexbor engines. Fast HTML5 parser with CSS selectors for Python. - rushter/selectolax
GitHub · github.com [1]
Selectolax you have my attention! I will be giving this a try for markata which often suffers from slow beautifulsoup. It appears to have everything I need for my simple use cases.
[2]
References:
[1]: https://github.com/rushter/selectolax
[2]: https://dropper.waylonwalker.com/api/file/b5d8930f-59e0-4947-9500-717f66ce33dc.png
If you’re into interesting projects, don’t miss out on selectolax [1], created by rushter [2].
Python binding to Modest and Lexbor engines (fast HTML5 parser with CSS selectors).
References:
[1]: https://github.com/rushter/selectolax
[2]: https://github.com/rushter
I like rqlite’s [1] project rqlite [2].
The lightweight, user-friendly, distributed relational database built on SQLite.
References:
[1]: https://github.com/rqlite
[2]: https://github.com/rqlite/rqlite
How To Build The Tallest Building In Town
There are two ways you can build the tallest building in town. Once you understand this, things get really good.
Gary Vaynerchuk · garyvaynerchuk.com [1]
Have some positivity! “Just Build the Tallest Fucking Building” is one of my favorite Gary Vee quotes. Build good community, bring others up, and stop tearing everyone down, listen to the vid.
References:
[1]: https://garyvaynerchuk.com/build-the-tallest-building-in-town/
External Link
meetgor.com [1]
Yes, I can review the code and make changes, but who in the world loves reviewing code? Do you love reviewing peers’ PRs? really?
I’m with MeetGor here 100%. reviewing the nuance, not being as involved with the process of creating the architecture design, not solving the problems that arise in development make it hard to effectively review and not turn into LGTM man.
References:
[1]: https://www.meetgor.com/thoughts/i-kind-of-hate-agentic-ides-for-the-sake-of-productivity/
I’ve got a few samba shares going in my homelab, and I’m struggling finding a great app to scroll through vacation photos with my wife. I want something intuitive, non intimidating, and just works. Turns out that the default file browser application for hyprland works great, but you need to enable previews for remote storage for it to work for my use case here.
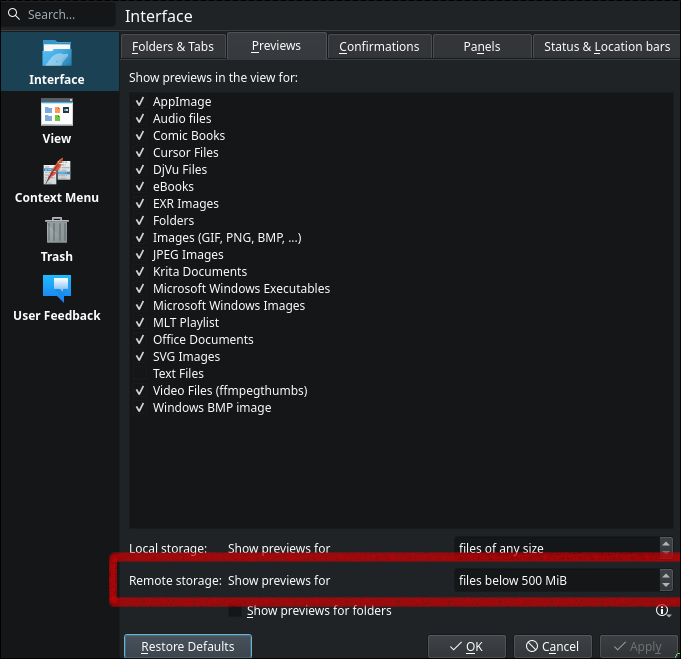
External Link
meetgor.com [1]
Sometimes, all you need is a mindset shift, a blocker in your mind that holds you back from doing certain things. And for me, I have consumed enough tutorials and posts about Kubernetes, that I need to put to use and create. I have been stuck in the learning cycle, lets push to prod with kubernetes.
This hurts. I know others with this learning style that need to see the full picture before actually doing something with new tech. The way I first got into kubernetes I was looking for the easy route and somehow k8s came up several times as a suggested route Looking for a Heroku replacement, What I found was shocking! [2], So I dove in head first with k3s [3] and kompose [4]. What I found was that it was not all that hard once you start to see how the pieces fit together, no amount of reading tutorials would have gotten me there.
Does anyone care if you use simple yet fragile bash scripts or heavy weight Kubernetes cluster for just clicking buttons and creating and updating rows in a database? No!
You know what, let’s fucking use Kubernetes.
Let’s Gooo. Use what is right for you and stop parroting kubernets is hard, heavy, for big companies, maybe...
External Link
meetgor.com [1]
If you want to use it for the purpose of learning it, please do use it.
Kubernetes as usual is a tool like others, you can’t use one tool everywhere. Where bash scripts work, they just work, where they don’t they fall apart too, kubernetes works like a charm.
Use your grug brains a little and choose wisely! In the end, who the hell cares if you use kubernetes or bash scripts to scale if your users are happy?
Well Said!
References:
[1]: https://www.meetgor.com/thoughts/kubernetes-isn-t-for-you/
Kubernetes Isn
Kubernetes isn
sliplane.io [1]
This post feels like it was written by someone who has never tried kubernetes, someone who reads twitter, listens to t3.gg and thePrimeagen (who cant even container let alone kubernetes). If you cant run linux, use bash, build your own docker images, run docker comfortably. If infra is not your thing kubernetes is probably not for you.
Kubernetes Was Built for Google
Just like how react was built for facebook to solve facebook problems with many teams contributing effectively to the same interactive interfaces. Turns out that react is actually a pretty good product if you have a highly interactive page, and if this is your bread and butter, you can make overly heavy static sites with too much build very effectively. It works and runs much of the internet now.
We are getting serious. We need serious tools.
Big companies use Kubernetes. We should too.
It feels more professional. It sounds like we know what we are doing.
If anyone uses these reasons to pitch kubernetes to me they don’t belong in a position to make any sort of decision. The first one could be a heading with maybe something under it.
But Kubernetes should not be y...
csi-driver-smb/deploy/example/smb-provisioner at master · kubernetes-csi/csi-driver-smb
This driver allows Kubernetes to access SMB Server on both Linux and Windows nodes. - kubernetes-csi/csi-driver-smb
GitHub · github.com [1]
Great guide to setting up a samba server right in kubernetes. I tried it out after too long of playing with trying to get connected to a samba share on ucore, no idea what was wrong, but this just works, and will live in my homelab [2] no matter what distro I’m on, no playbook required to set it up, just good ol k8s manifest. TBH I cheated and haven’t set up the secrets yet, so its not quite in argocd or in my github repo, but POC is there and it works as advertised without issue.
References:
[1]: https://github.com/kubernetes-csi/csi-driver-smb/tree/master/deploy/example/smb-provisioner
[2]: /homelab/
DHH (@dhh) on X
You have all the time you need, you're just spending it poorly. Don't tell me you don't have time for Linux or kids OR BOTH. You have time for all of it once you stop filling your day with junk act...
X (formerly Twitter) · x.com [1]
The message so many of us need to hear, stop scrolling and start creating. I’m not sure that I have a heavy issue with this, I barely scroll the socials anymore, I have my own rss reader curated with people that I enjoy consuming from. YT is often done as a family activity (with my wife) or listening while doing something like dishes. But I think I’ve been on the other side of this for awhile. There’s something that ticks my brain by twiddling with linux nonsensically or pip install thing-i-heard-about-today and try it. I’m not imune though, I often fill gaps in the day with nonsense short content, but try to avoid the short trap.
References:
[1]: https://x.com/dhh/status/1950462181331349688
-
How many times in one video can Prime say dude just use arch, dude arch would be way easier, dude you know how hard you are making this on yourself.
I do not envy those who desire full size configurability but stuck with the opinions of GatesJobs. Windows and Mac are so rigid, that it makes it impossible to do any level of customizability that I would want to do for productivity.
Unless you Must work on win/mack for some reason of work, you make something for one of them, you use Adobe, or you play competitive online multiplayer with easy anticheat there is a distro for you. The number of things that you need a win/mack for is greatly shrinking, you don’t have to submit yourself to the pain of Gates that this guy has done.
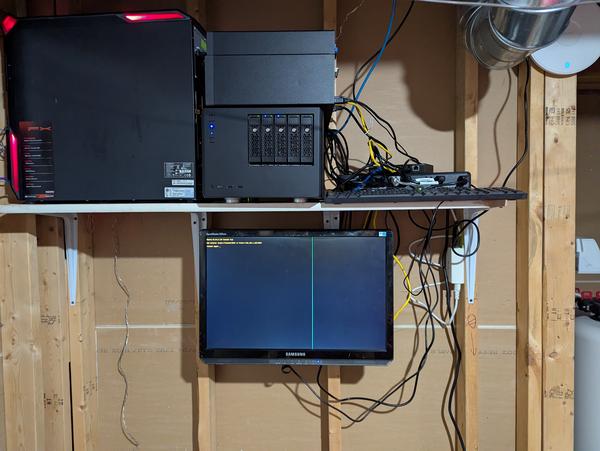
-
Copyparty looks like a feature full self hosted [1] file server, putting this into my check out later when I get back to my desk. Impressive number of features I didn’t even know were a thing all from one .py file.
References:
[1]: /self-host/
2025-07-27 Notes
Today Wyatt and I conquered cathulu in Cat quest III.
-
Ben sold me on the mini pocket pry here. It’s funny how so many minimalist tools become over the top titanium damascus with wild patterns and designs. they look amazing, but are they worth the insane price for simple things? I like my edc to be things I don’t worry about breaking, loosing, or giving away. Fancy ass prybars for $200+ gives me all of those negative feelings I don’t want on my edc.
-
Ben is always good for a banger of a video, this images app is something that i really want in my homelab [1], he did some great polish here! The idea of building vibe coded applications for your own personal use with all of your own personal opinions and workflows is something that has been an appealing part of ai, I’ve definitely tossed a few apps in my homelab that I use occasionally and they do what I ask of them pretty accurately.
This feels great to use, but also seems to kill any startup idea I have, as most of them feel like they could be vibe coded out by someone with a bit of skill and they just host their own. Maybe this is a good thing, maybe we are moving into an era of more people owning their own app they use for themself, maybe i need a security related startup?
References:
[1]: /homelab/
blender donut tutorial 2025
First Launch # [1]
[2]
my setup # [3]
[4]
Add # [5]
shift A
bump resolution scale # [6]
edit -> preferences -> interface -> resolution scale 1.25
[7]
orbit without middle mouse button # [8]
[9]
viewport shading rendered # [10]
[11]
References:
[1]: #first-launch
[2]: https://dropper.waylonwalker.com/api/file/ecd7349a-b04c-4496-8b34-3f2c82bdd790.png
[3]: #my-setup
[4]: https://dropper.waylonwalker.com/api/file/0baedcf5-9b6a-4ee3-b18f-76e695e00a8c.png
[5]: #add
[6]: #bump-resolution-scale
[7]: https://dropper.waylonwalker.com/api/file/d2c9fc7c-c689-4f6f-b2db-96bd8bb59ab3.png
[8]: #orbit-without-middle-mouse-button
[9]: https://dropper.waylonwalker.com/api/file/239a709b-7242-4a75-b100-f3a8cc533364.png
[10]: #viewport-shading-rendered
[11]: https://dropper.waylonwalker.com/api/file/cea5c464-53b2-4926-ab02-31107d84d23f.png
External Link
youtube.com [1]
I don’t think I ever fully heard the full meaning of vsc*** and why it gets bleeped. I knew that it had to do with M$, but Teej explains it so well here. Its about the editor not really being open sources, but is marketed to be such.
References:
[1]: https://www.youtube.com/clip/UgkxQevfazaval9KH22a6BjMRkdBs7541Kry
Glossary Web Component
The one where I put the hypercard in the hyperlink
dbushell.com · dbushell.com [1]
I really enjoy David’s Glossary, he has absolutely nailed it. I’m working on one for myself that feels close but not quite. I want to have a list of words that auto glossary to terms for me, maybe this is too much automation and I should just lean on wikilinks, i.e. sick wikilink hover [2], they only take wrapping in brackets. But like David mentions here its a lot of work to make sure they are right on all the older posts. I think it needs to be done with js on my setup, I don’t have no fancy wroker to modify html [3] on the way out, I’m fully static right now, so i would need to do full rebuilds any time the glossary changes, i’m trying to cut down on the number of features that require full site rebuilds and potential cache issues.
References:
[1]: https://dbushell.com/2025/05/07/glossary-web-component/
[2]: /sick-wikilink-hover/
[3]: /html/
An Ode To My 10-Year-Old Thinkpad T440
mbrizic.com [1]
I like reading about old hardware and how to keep it running, sending shit out to e-waste after barely using it for a year makes my skin crawl. I find it interesting how most of these resurrections start with a linux build, and the author giving in and going for linux for the first time and enjoying being able to use something they thought was useless for real work.
That being said I have weird thoughts similar to this guy about being able to take a machine and write a novel somewhere off in the distance, but any time I try to do real work form any laptop these days the ergonomics become so unappealing that I tend to just not do anything away from my desk. Theres something that sounds so great about opening vim on old hardware that could last for hours, sip on coffee and write away, but it never works out like that in practice.
References:
[1]: https://mbrizic.com/blog/thinkpad-t440/
2025-07-24 Notes
Completed the 8-bit dungeon in Cat Quest III with wyatt today.
2025-07-23 Notes
Today I set up hypridle on my hyprland desktop build. It was not too bad, I'm probably going to tweak it as it I go if it bothers me, for now I'm giving it a...
2025-07-22 Notes
Next I ripped a calendar from the docs. When hovered I get a full year calendar, right click gives me only the current month.
Transparent Textures
transparenttextures.com [1]
Fantastic resource of background textures, I will be using this for some projects.
References:
[1]: https://transparenttextures.com/
2025-07-21 Notes
In my adventure to rice out hyprland I set up a sddm theme today, and it looks sick by only changing the wallpaper. I tried out one theme and was pretty...
uv run for running tests on versions of Python
Using uv run with make to replace tox or nox for testing multiple versions of Python locally.
https://daniel.feldroy.com · daniel.feldroy.com [1]
Such a fantastic use of uv, its so fast and flexible and does everything I need that next time I go to set up some more complex testing like this I’m going to lean towards it more than i would something like tox. In the post Daniel sets up matrix testing for testing out different versions of python with the same pytest test suite.
References:
[1]: https://daniel.feldroy.com/posts/2025-07-uv-run-for-testing-python-versions
2025-07-19 Notes
Progress on markata themes, I'm able to get feedback in the terminal. I'm building out a custom color model that will be able to mix and blend colors with...
2025-07-18 Notes
fc is pretty great.
[1]2025-07-09 Notes [1] from yesterday I have temporal stuff kind of going with postiz in a windsurf session working on [[thoughts-to-nostr]] Been cleaning up my z" loading="lazy">
2025-07-10 Notes | Nic Payne
2025-07-09 Notes [2] from yesterday I have temporal stuff kind of going with postiz in a windsurf session working on [[thoughts-to-nostr]] Been cleaning up my z
pype.dev
big fan of eza and dust, I like these aliases to have some common commands at my fingertips. I often use the tree command and yes it sometimes goes too deep to actually be useful.
alias lt='eza -T --level=2' # Tree view, 2 levels deep
alias ltt='eza -T --level=3' # Tree view, 3 levels deep
alias du1='dust -d 1' # Show only 1 level deep
alias du2='dust -d 2' # Show 2 levels deep
References:
[1]: https://pype.dev/2025-07-10-notes/
[2]: /2025-07-09-notes/
-
Love this dudes casual dry humor style, not afraid to poke fun at things with his dry ass satire. that being said, fc is new and as a long time fan of up arrow and !! I will be using this often.
I am a linux user through and through. Desktop, server, vms, containers,
everything except my phone is linux. With this I spend a lot of time in the
terminal, and have been a long time user of !! to rerun the last command, but
with the ability to tack something on at the beginning or end.
TIL about fc, which opens the last command in your shell history in your
$EDITOR or pass in your editor -e nvim.
Rcap of how !! works #
!! pronounces bang bang and will run the last command in your history.
ls -l

!! | wc -l
# ls -l | wc -l

sudo !!
# sudo ls -l | wc -l

!!:s/-l/-l \/tmp
# sudo ls -l /tmp | wc -l
fc enters the chat #
Now making complex edits in your shell can be a bit of a chore, so fc moves
this work to your $EDITOR.
fc
This pops open your $EDITOR with the last command in your history.
sudo ls -l | wc -l

Shell History #
fc shows up in shell history, but !! does not, !! gets replaced by the
command that it becomes.
Up Arrow #
yaya yaya, I know you can also up-arrow c-e, but what fun is that, it’s barely a
flex. fc just looks big brained and like you really know what you are doing.
2025-07-17 Notes
TIL pygments-htmlformatter is a big win for markata, didn't have a chance to take notes yesterday, but I'm really working on templates and themes. It's...
I’ve been a long user of pygments, it’s been the thing that injects <spans>
with funny little class names like sc and si into the code blocks of my
website. I’ve even gone as far as implementing a plugin for
md-it,
but I had no idea how to re-style it. I long ago got a theme that looked good
enough from somewhere and just used it, maybe I pulled something from their
docs site and forgot. Today I learned you can list all the themes easily from
the library itself, and render out new css.
from pygments.styles import get_all_styles
list(get_all_styles())
# [
#     'abap',
#     'algol_nu',
#     'algol',
#     'arduino',
#     'autumn',
#     'borland',
#     'bw',
#     'colorful',
#     'default',
#     'dracula',
#     'emacs',
#     'friendly_grayscale',
#     'friendly',
#     'fruity',
#     'github-dark',
#     'gruvbox-dark',
#     'gruvbox-light',
#     'igor',
#     'inkpot',
#     'lightbulb',
#     'lilypond',
#     'lovelace',
#     'manni',
#     'material',
#     'monokai',
#     'murphy',
#     'native',
#     'nord-darker',
#     'nord',
#     'one-dark',
#     'paraiso-dark',
#     'paraiso-light',
#     'pastie',
#     'perldoc',
#     'rainbow_dash',
#     'rrt',
#     'sas',
#     'solarized-dark',
#     'solarized-light',
#     'staroffice',
#     'stata-dark',
#     'stata-light',
#     'stata',
#     'tango',
#     'trac',
#     'vim',
#     'vs',
#     'xcode',
#     'zenburn'
# ]
from pygments.formatters import HtmlFormatter
from pygments.styles import get_style_by_name
style = get_style_by_name("monokai")
formatter = HtmlFormatter(style=style)
print(formatter.get_style_defs('.highlight'))
And now you get styles that you can add to your css and be any theme from the list above.
pre { line-height: 125%; }
td.linenos .normal { color: inherit; background-color: transparent; padding-left: 5px; padding-right: 5px; }
span.linenos { color: inherit; background-color: transparent; padding-left: 5px; padding-right: 5px; }
td.linenos .special { color: #000000; background-color: #ffffc0; padding-left: 5px; padding-right: 5px; }
span.linenos.special { color: #000000; background-color: #ffffc0; padding-left: 5px; padding-right: 5px; }
.highlight .hll { background-color: #49483e }
.highlight { background: #272822; color: #f8f8f2 }
.highlight .c { color: #959077 } /* Comment */
.highlight .err { color: #ed007e; background-color: #1e0010 } /* Error */
.highlight .esc { color: #f8f8f2 } /* Escape */
.highlight .g { color: #f8f8f2 } /* Generic */
.highlight .k { color: #66d9ef } /* Keyword */
.highlight .l { color: #ae81ff } /* Literal */
.highlight .n { color: #f8f8f2 } /* Name */
.highlight .o { color: #ff4689 } /* Operator */
.highlight .x { color: #f8f8f2 } /* Other */
.highlight .p { color: #f8f8f2 } /* Punctuation */
.highlight .ch { color: #959077 } /* Comment.Hashbang */
.highlight .cm { color: #959077 } /* Comment.Multiline */
.highlight .cp { color: #959077 } /* Comment.Preproc */
.highlight .cpf { color: #959077 } /* Comment.PreprocFile */
.highlight .c1 { color: #959077 } /* Comment.Single */
.highlight .cs { color: #959077 } /* Comment.Special */
.highlight .gd { color: #ff4689 } /* Generic.Deleted */
.highlight .ge { color: #f8f8f2; font-style: italic } /* Generic.Emph */
.highlight .ges { color: #f8f8f2; font-weight: bold; font-style: italic } /* Generic.EmphStrong */
.highlight .gr { color: #f8f8f2 } /* Generic.Error */
.highlight .gh { color: #f8f8f2 } /* Generic.Heading */
.highlight .gi { color: #a6e22e } /* Generic.Inserted */
.highlight .go { color: #66d9ef } /* Generic.Output */
.highlight .gp { color: #ff4689; font-weight: bold } /* Generic.Prompt */
.highlight .gs { color: #f8f8f2; font-weight: bold } /* Generic.Strong */
.highlight .gu { color: #959077 } /* Generic.Subheading */
.highlight .gt { color: #f8f8f2 } /* Generic.Traceback */
.highlight .kc { color: #66d9ef } /* Keyword.Constant */
.highlight .kd { color: #66d9ef } /* Keyword.Declaration */
.highlight .kn { color: #ff4689 } /* Keyword.Namespace */
.highlight .kp { color: #66d9ef } /* Keyword.Pseudo */
.highlight .kr { color: #66d9ef } /* Keyword.Reserved */
.highlight .kt { color: #66d9ef } /* Keyword.Type */
.highlight .ld { color: #e6db74 } /* Literal.Date */
.highlight .m { color: #ae81ff } /* Literal.Number */
.highlight .s { color: #e6db74 } /* Literal.String */
.highlight .na { color: #a6e22e } /* Name.Attribute */
.highlight .nb { color: #f8f8f2 } /* Name.Builtin */
.highlight .nc { color: #a6e22e } /* Name.Class */
.highlight .no { color: #66d9ef } /* Name.Constant */
.highlight .nd { color: #a6e22e } /* Name.Decorator */
.highlight .ni { color: #f8f8f2 } /* Name.Entity */
.highlight .ne { color: #a6e22e } /* Name.Exception */
.highlight .nf { color: #a6e22e } /* Name.Function */
.highlight .nl { color: #f8f8f2 } /* Name.Label */
.highlight .nn { color: #f8f8f2 } /* Name.Namespace */
.highlight .nx { color: #a6e22e } /* Name.Other */
.highlight .py { color: #f8f8f2 } /* Name.Property */
.highlight .nt { color: #ff4689 } /* Name.Tag */
.highlight .nv { color: #f8f8f2 } /* Name.Variable */
.highlight .ow { color: #ff4689 } /* Operator.Word */
.highlight .pm { color: #f8f8f2 } /* Punctuation.Marker */
.highlight .w { color: #f8f8f2 } /* Text.Whitespace */
.highlight .mb { color: #ae81ff } /* Literal.Number.Bin */
.highlight .mf { color: #ae81ff } /* Literal.Number.Float */
.highlight .mh { color: #ae81ff } /* Literal.Number.Hex */
.highlight .mi { color: #ae81ff } /* Literal.Number.Integer */
.highlight .mo { color: #ae81ff } /* Literal.Number.Oct */
.highlight .sa { color: #e6db74 } /* Literal.String.Affix */
.highlight .sb { color: #e6db74 } /* Literal.String.Backtick */
.highlight .sc { color: #e6db74 } /* Literal.String.Char */
.highlight .dl { color: #e6db74 } /* Literal.String.Delimiter */
.highlight .sd { color: #e6db74 } /* Literal.String.Doc */
.highlight .s2 { color: #e6db74 } /* Literal.String.Double */
.highlight .se { color: #ae81ff } /* Literal.String.Escape */
.highlight .sh { color: #e6db74 } /* Literal.String.Heredoc */
.highlight .si { color: #e6db74 } /* Literal.String.Interpol */
.highlight .sx { color: #e6db74 } /* Literal.String.Other */
.highlight .sr { color: #e6db74 } /* Literal.String.Regex */
.highlight .s1 { color: #e6db74 } /* Literal.String.Single */
.highlight .ss { color: #e6db74 } /* Literal.String.Symbol */
.highlight .bp { color: #f8f8f2 } /* Name.Builtin.Pseudo */
.highlight .fm { color: #a6e22e } /* Name.Function.Magic */
.highlight .vc { color: #f8f8f2 } /* Name.Variable.Class */
.highlight .vg { color: #f8f8f2 } /* Name.Variable.Global */
.highlight .vi { color: #f8f8f2 } /* Name.Variable.Instance */
.highlight .vm { color: #f8f8f2 } /* Name.Variable.Magic */
.highlight .il { color: #ae81ff } /* Literal.Number.Integer.Long */
Looking for inspiration? shell [1] by caelestia-dots [2].
A very segsy desktop shell
References:
[1]: https://github.com/caelestia-dots/shell
[2]: https://github.com/caelestia-dots
Quickshell
A fully user customizable desktop shell
quickshell · quickshell.org [1]
This has to be the most incredible looking Desktop experience I’ve ever seen, riced to the nines, more polished than macos, more features than kde plasma, this looks incredible and I want to try it and feel it.
https://quickshell.org/assets/showcase/end4.mp4
References:
[1]: https://quickshell.org/
2025-07-15 Notes
I'm working on hyprland, one thing I am missing from my awesomewm setup is rofi list all running windows. Sometimes I put a browser instance in a different...
-
DT says it so well in this video, I’ve never really been one to shit on software projects, with maybe a VERY small handful of exceptions. The shitting on ubuntu always rubbed me wrong, shitting on flatpak and snap I never got, shitting on systemd because of Leonard Pottering I never got, DT puts it in such good words here. If you don’t like it you are probably not the target audience.
If Ubuntu is too bloated, don’t try to debloat it, this is not windows, we have options, Ubuntu is one option and so much is intertwined together in something like Ubuntu if you think you want to try to “debloat” it good luck. If you have a problem with Snaps, this is probably not for you. You are probably looking for a distro with more control, probably something that you choose everything for.
2025-07-12 Notes
Starting the polkit agent for hyperland arch to handle permission elevation for desktop applications.
Lab Update
Update on the lab setup and what I’ve been working on recently.
Cloudy with a Chance of Tech · blog.thomaswimprine.com [1]
Always enjoy a good read through someone elses setup. I appreciate the desire for pi clusters they are cute, they seem cheap, but feel a bit overrated (at least for those of us with relatively cheap electricity). I love seeing the refurb “tiny desktops” getting a second useful life in a homelab [2] after they have serve their useful life in the corporate world sitting behind the monitor of some reception desk. These things rock, they are underrated, x86_64, not ARM, so they just work. Until ARM becomes more normalized in the datacenter this is where its at.
References:
[1]: https://blog.thomaswimprine.com/blog/2025-07-07-Lab-Update/
[2]: /homelab/
2025-07-11 Notes
Continuing my exploration of Searchcraft I loaded all of my blog into it. It fully posted, indexed, and had my content ready for search in a literal blink....
2025-07-10 Notes
[](https://www.youtube.com/watch?v=VFlLRH3ifcM)
Notes – 17:00 Wed 9 Jul 2025
Notes – 17:00 Wed 9 Jul 2025
dbushell.com · dbushell.com [1]
Enjoying watching David bring together his rss reader day by day. Excited to see where it goes. Im trying to get better at dropping notes like this without a ton of context, without needing to be right, just a note of whats on my mind and what I’m doing.
References:
[1]: https://dbushell.com/notes/2025-07-09T17:00Z/
uv cache prune
If you're running low on disk space and are a uv user, don't forget about uv cache prune: uv cache prune removes all unused cache entries. For example, the cache …
Simon Willison’s Weblog · simonwillison.net [1]
Good point to check on your uv cache if you are running low on disk space. I checked mine today, and it wasn’t too bad so I left it alone.
du -sh `uv cache dir`
References:
[1]: https://simonwillison.net/2025/Jul/8/uv-cache-prune/#atom-everything
2025-07-09 Notes
What a nightmare this glossary plugin turns out to be, it broke my site. I had it really close, then one more change asked for to the llm, an LGTM and did...
[1]
I’m digging these web2app’s from DHH’s omarchy for setting up an opinionated archlinux hyprland. This gives a way to quickly open a web app as an app either with a hotkey or run launcher in its own dedicated window that you can put on it’s own workspace. I really like a workflow of keeping one window per workspace on one monitor and I can quickly navigate between apps with a single hotkey. This gives you the power to switch through things like chat, terminal, browser, steam game with blazing speed from the keybaord, no clicking no searching, just going directly to it.
References:
[1]: /static/https://github.com/basecamp/omarchy/blob/master/install/webapps.sh
Check out kyantech [1] and their project Palmr [2].
🌴 Palmr. is an open-source file-sharing platform focused on privacy and security. It enables users to upload, manage, and share files with features like password protection, custom links, and access control without tracking or limitations. Designed for seamless and secure sharing, Palmr. is completely free.
References:
[1]: https://github.com/kyantech
[2]: https://github.com/kyantech/Palmr
2025-07-08 Notes
Setting up the hyprland run launcher to not be case sensitive.
2025-07-07 Notes
leaning into the rediculous rainbow borders instead of getting rid of them in hyprland.
GitHub - chase/awrit: A full graphical web browser for Kitty terminal with mouse and keyboard support
A full graphical web browser for Kitty terminal with mouse and keyboard support - chase/awrit
GitHub · github.com [1]
awrit is a full graphical browser that runs inside of kitty. I’ve moved on some of my machines away from kitty as the maintainer has seemed so hostile and there are other great therminals out there, but I’m going to give this a go. I have kitty running on my hyprland setup as it is the default anyways. It is actual chromium rendering to a kitty graphics protocol.
References:
[1]: https://github.com/chase/awrit
Smooth clipboard settings for tmux is critical for my workflow. I’m often
grabbing snippets of terminal output to paste into team chats, blog posts, or
llm prompts. Admittedly, I’m often doing this with the mouse, unless it’s
coming from neovim, which I generally do with motions. Moving from an xorg
based setup to hyprland has required me to reconfigure my tmux clipboard
settings. This is what I did.
First install wl-clipboard with AUR.">paru.
paru -S wl-clipboard
Next add this to your tmux config. I’ve long had this config, but with only
the xorg/xclip setup, now this checks for wl-copy, uses it, or falls back to
my old xclip setup.
bind -T copy-mode-vi Enter send-keys -X copy-pipe-and-cancel "bash -c 'command -v wl-copy >/dev/null && wl-copy || xclip -i -f -selection primary | xclip -i -selection clipboard'"
set-option -s set-clipboard off
bind-key -T copy-mode-vi MouseDragEnd1Pane send-keys -X copy-pipe-and-cancel "bash -c 'command -v wl-copy >/dev/null && wl-copy || xclip -i -f -selection primary | xclip -i -selection clipboard'"
command palettes are overrated
Command palettes are slow, and overrated, you should treat yourself better.
You probably installed VSC*** out of the box and your co-workers see you using
the mouse and reprimanded you as they should. Mouse usage is not OK if you are
a software dev, you should have the cheap ass free mouse that came with your
cousins dell machine five years ago and only use if for emergencies. If you
want to be fast you cannot do that by moving cursors to imprecise locations and
clicking with your hand. You are not a caveman, put down the stones and get
with the damn times. You need to be moving with precision.
Stage One, the command palette # [1]
So you are taking your first few baby steps away from that Logitech MX Master
and you need to get shit done, during these infant months the command palette
is your friend. Use it you will be 10x faster than Razer Naga Ron from
accounting. If you are in an IDE like VSC*** or a JEttedBrains editor they
come with a command palette for running commands and f...
2025-07-06 Notes
hyprland volume control, I wasn't sure if I needed something specific for wayland/pipewire, nope pavucontrol just works.
External Link
stackoverflow.com [1]
I need to give this a try for markata glossary
References:
[1]: https://stackoverflow.com/questions/56755439/modifying-hover-in-tailwindcss
2025-07-05 Notes
I might have gpg setup right for kdewallet on hyprland, and I just timed out the request before.
-
Never did I think I would see the day that theprimeagen decided to run archlinux [1]. Furthermore him to start ricing it, EVEN furthermore, Pewdiepie runs arch [2] now, and thinks you should too?? and is promoting it on one of the largest YouTube channels ever [3]?? Even DHH is getting in the mix with omarchy [4] Such a cool transistion to see everyone find their way to linux and diving deep into the freedom and customization.
References:
[1]: https://archlinux.org/
[2]: https://www.youtube.com/watch?v=pVI_smLgTY0
[3]: https://socialblade.com/youtube/lists/top/100/subscribers/all/global
[4]: https://omarchy.org/
2025-07-04 Notes
Failed to gpg-setup-for-kdewallet correctly on hyprland, brave still complains. Maybe someday I'll figure it out and complete the post.
Home | { TechDufus }
TechDufus writes about platform engineering, homelab rebuilds, and agent workflows that hold up in the real world.
{ TechDufus } · techdufus.com [1]
This has to be top tier dopest home page of all time. The commands are all so well customized and whimsical on the terminal.
[2]
References:
[1]: https://techdufus.com/#timeline
[2]: https://dropper.waylonwalker.com/api/file/5387bb34-4a9d-4a51-95d2-ed6242c411f8.webp
[1]
I’ve ran my homelab [2] on k3s for a year and a half now, and have had talos fomo the whole time. I’m not sure if this article helps or hurts. Helps to see that techdufus struggled and wished he went k3s first, but theres so much good to it that I want it.
Prometheus and Grafana for monitoring (because you can’t manage what you can’t see) # [3]
I’m getting there, ok, I have some of it figured out but not firing on all cylinders like I want.
CloudNativePG # [4]
for PostgreSQL (way better than managing databases manually)
Amen to this, cnpg is kick ass and has me tempted to drop sqlite for my production database default. I mostly make small shit on the side that is never going to blow up. sqlite is really good, but the automation that comes along with cnpg to just run it on all nodes and backups once you establish the pattern with the first one is sick.
🤣🤣🤣 actually read the docs 🤣🤣🤣 # [5]
[6]
Is This Overkill for a Homelab? # [7]
Absolutely. Could do most of this with k3s or Docker Compose. But where’s the fun in that?
Speaking my language here! Again I’m well past the 1 year mark of running k3s and i’ve had no regrets. Kubernetes is about establishing and replica...
just fucking use kubernetes
You want to run containers?
JUST FUCKING USE KUBERNETES.
Obvious satire
If you don’t like harsh language this is not the post for you. Obviously
ripping off motherfuckingwebsite [1].
Seealso
Some more serious posts
- Should I kubernetes My Homelab [2]
- The Wrong Reasons To Run Kubernetes In Your Homelab [3]
- The Right Reasons To Run Kubernetes In Your Homelab [4]
- I got the kubernetes in my basement autism [5]
---
“But it’s complicated!” # [6]
Shut up. Close twitter and fucking do something. Life is complicated. You
know what else is complicated? Email. DNS. Life. Kubernetes is the least
painful way to orchestrate containers at scale. Docker Compose is for your
laptop.
- Swarm is dead.
- Nomad is just sad.
- Systemd units? Get out of here.
---
“But my app is small!” # [7]
SO IS YOUR AMBITION.
You could write a bunch of bash scripts and hope they work on prod.
You could SSH into servers and handcraft your infra like it’s 2011.
Or you could just fucking use Kubern...
markata parallel render
_._ __/__ __ __ _/_ Recorded: 07:53:56 Samples: 71681
/_//_/// /_\ / //_// / //_'/ // Duration: 92.741 CPU time: 91.748
/_/ v4.5.1
Program: /home/waylon/git/waylonwalker.com/.venv/bin/markata build --pdb
92.740 Markata.run markata/__init__.py:443
`- 92.714 HookCaller.__call__ pluggy/_hooks.py:479
[2 frames hidden] pluggy
92.714 PluginManager._hookexec pluggy/_manager.py:106
|- 38.207 wrapper_register markata/hookspec.py:265
| |- 26.105 render plugins/link_collector.py:59
| | |- 10.012 BeautifulSoup.__init__ bs4/__init__.py:122
| | | [14 frames hidden] bs4, html
| | |- 5.599 <listcomp> plugins/link_collector.py:181
| | |- 4.050 <listcomp> plugins/link_collector.py:173
| | |- 3.466 Markata.map markata/__init__.py:565
| | |`- 2.092 markata/__init__.py
| | `- 0.942 BeautifulSoup.find_all bs4/element.py:2008
| | [2 frames hidden] bs4
| |- 9.107 render markata/plugins/render_markdown.py:260
| |`- 8.902 result_iterator concurrent/futures/_base.py:612
| | [5 frames hidden]...
principal-engineer-at-meta
Jake Bolam principal engineer at Meta, has some of the best career advice for
those looking to become principal or just be better at their craft. This
video [1] was
such a banger I had to bring it in as a full post, and not just a thought. It
was a random YouTube auto play, something that I probably wouldn’t have clicked
on given title an thumbnail, but turned out to be very impactful. Jake is such
a smart guy with a lot of great insights, and I can tell he thinks really quick
on his feet, he just pulled all of these things out of his head on the fly.
YT Algorithm Gold
I don't know what it is about this title and thumbnail, but it gives me "ex
google, ex facebook, ex microsoft, $100M engineer" vibes in a cringy and
not satire kind of way. I would have never clicked on it, it autoplayed
after a podcast and it hit, immediately I’m like who are these guys? subd
and started this post it was so good.
Long On Boarding # [2]
Jake had a super long period of on boarding at meta, he came...
Forming URIs for Autofill | Bitwarden
Find out more about how URI match detection works in the Bitwarden password manager.
Bitwarden · bitwarden.com [1]
For anyone self hosting a bunch of apps under one domain, I just swapped all of mine to Host matching which includes the full subdomain, and it is glorious to not have 9+ items hit on all of your pages and only the one that you actually want.
open one > edit > gear icon next to url > Host
References:
[1]: https://bitwarden.com/help/uri-match-detection/
-
vim usage is becoming normie level. Just like archinstall made it too easy to install arch and brought normies into the ecosystem. It killed ArchBTW^TM^, distros like lazyvim have killed vimBTW^TM^. It used to be that to run arch, vim, nvim you had to read the docs, and go deep on understanding. running archinstallor lazyvim make it so easy to get started that you miss all of the details, you no longer have to understand ctags, quickfix, what an lsp is, or even how to set your own keybindings. You just use the damn thing, like you would with VSC****. No shame to anyone who does this, but you are probably missing out on a bunch of really useful features of a very core tool in your workflow.
Just discovered Sylvan Franklin in this post and he is cracked, sub now.
[1]
Wish I would have saw this guide and provided assembly file for setting up virt-manager in distrobox. They call out immutable distros like the knew I was coming.
References:
[1]: /static/https://github.com/89luca89/distrobox/blob/main/docs/posts/run_libvirt_in_distrobox.md
I got virtual machine manager running on two Bazzite machines today. It was a
bit tricky, more than I thought actually. I ran into all sorts of
virtualisation not setup issues when I tried the flatpak. Then I found that
Bazzite comes with a ujust setup-virtualization command that does all the
work for me. I tried that and again virtual machine manager was here, but not
working, this time it feels like flatpak issues.
In a Hail Mary attempt I got it working by using an ubuntu distrobox container to run the UI. And it worked!
from the host #
From the host we create the container to use from distrobox. This is an ubuntu machine, it can be any os of your choosing, preferably one that you are familiar with and contains virt-manager in its package repos.
distrobox create -i ubuntu
distrobox enter ubuntu
from inside the distrobox container #
Now that we are in the distrobox we are no longer in an immutable distro and we can easily install anything we want. I actually like this process. I might have shit like this that I use for a month or a few months, on a normal distro, this is fully installed on the os, raises the potential of package conflicts and lengthens the update time.
sudo apt update
sudo apt upgrade
sudo apt install virtinst virt-manager
virt-manager
Along the way #
I tried adding myself to the libvirt group, and expicitly setting the socket path. After setting up another machine I realized these steps were unnecessary.
sudo usermod -aG libvirt $USER
export LIBVIRT_DEFAULT_URI="qemu+unix:///system"
ls -l /run/libvirt/libvirt-sock
virt-install --version
Note
After fully reading through `ujust setup-virtualization` I realized that it
adds me to the libvirt group, so that’s why it is not needed.
An even Better Guide #
I later found [[ thoughts-723 ]] there is documentation for setting up virtual machine manager in distrobox in the distrobox docs. It even calls out running on an immutable distro like bazzite like it knew I was coming.
full log #
waylon@razorcrest:~$ distrobox create -i ubuntu
Image ubuntu not found.
Do you want to pull the image now? [Y/n]: y
Resolved "ubuntu" as an alias (/etc/containers/registries.conf.d/000-shortnames.conf)
Trying to pull docker.io/library/ubuntu:latest...
Getting image source signatures
Copying blob d9d352c11bbd done   |
Copying config bf16bdcff9 done   |
Writing manifest to image destination
bf16bdcff9c96b76a6d417bd8f0a3abe0e55c0ed9bdb3549e906834e2592fd5f
Creating 'ubuntu' using image ubuntu  [ OK ]
Distrobox 'ubuntu' successfully created.
To enter, run:

distrobox enter ubuntu

waylon@razorcrest:~$ distrobox enter ubuntu
Starting container...                     [ OK ]
Installing basic packages...              [ OK ]
Setting up devpts mounts...               [ OK ]
Setting up read-only mounts...            [ OK ]
Setting up read-write mounts...           [ OK ]
Setting up host's sockets integration...  [ OK ]
Integrating host's themes, icons, fonts...  [ OK ]
Setting up distrobox profile...           [ OK ]
Setting up sudo...                        [ OK ]
Setting up user groups...                 [ OK ]
Setting up user's group list...           [ OK ]
Setting up existing user...               [ OK ]
Ensuring user's access...                 [ OK ]

Container Setup Complete!
📦[waylon@ubuntu ~]$ sudo apt update
sudo apt install virtinst
Hit:1 http://security.ubuntu.com/ubuntu noble-security InRelease
Hit:2 http://archive.ubuntu.com/ubuntu noble InRelease
Hit:3 http://archive.ubuntu.com/ubuntu noble-updates InRelease
Hit:4 http://archive.ubuntu.com/ubuntu noble-backports InRelease
Reading package lists... Done
Building dependency tree... Done
Reading state information... Done
4 packages can be upgraded. Run 'apt list --upgradable' to see them.
Reading package lists... Done
Building dependency tree... Done
Reading state information... Done
The following additional packages will be installed:
  gir1.2-freedesktop gir1.2-libosinfo-1.0 glib-networking glib-networking-common glib-networking-services
  gstreamer1.0-plugins-base i965-va-driver intel-media-va-driver iso-codes libaio1t64 libasyncns0
  libboost-iostreams1.83.0 libboost-thread1.83.0 libburn4t64 libcacard0 libcdparanoia0 libcurl3t64-gnutls
  libdaxctl1 libduktape207 libdw1t64 libflac12t64 libfuse3-3 libgstreamer-plugins-base1.0-0 libgstreamer1.0-0
  libgtk-vnc-2.0-0 libgvnc-1.0-0 libigdgmm12 libiscsi7 libisoburn1t64 libisofs6t64 libjson-glib-1.0-0
  libjson-glib-1.0-common libmp3lame0 libmpg123-0t64 libndctl6 libnfs14 libnspr4 libnss3 libnuma1 libogg0
  libopus0 liborc-0.4-0t64 libosinfo-1.0-0 libosinfo-l10n libpcsclite1 libphodav-3.0-0 libphodav-3.0-common
  libpmem1 libpmemobj1 libpolkit-gobject-1-0 libproxy1v5 libpulse0 librados2 librbd1 librdmacm1t64 libsndfile1
  libsoup-3.0-0 libsoup-3.0-common libspice-client-glib-2.0-8 libspice-client-gtk-3.0-5 libtheora0 libunwind8
  liburing2 libusb-1.0-0 libusbredirhost1t64 libusbredirparser1t64 libva-x11-2 libva2 libvirt-clients
  libvirt-glib-1.0-0 libvirt-glib-1.0-data libvirt-l10n libvirt0 libvisual-0.4-0 libvorbis0a libvorbisenc2
  libvte-2.91-0 libxslt1.1 libyajl2 mesa-va-drivers osinfo-db pci.ids python3-certifi python3-chardet
  python3-idna python3-libvirt python3-libxml2 python3-pkg-resources python3-requests python3-urllib3
  qemu-block-extra qemu-utils spice-client-glib-usb-acl-helper usb.ids va-driver-all virt-viewer xorriso
Suggested packages:
  gvfs i965-va-driver-shaders isoquery fuse3 libvisual-0.4-plugins gstreamer1.0-tools opus-tools pcscd pulseaudio
  gstreamer1.0-libav gstreamer1.0-plugins-bad gstreamer1.0-plugins-good libvirt-clients-qemu libvirt-daemon
  libvirt-login-shell python3-setuptools python3-cryptography python3-openssl python3-socks python-requests-doc
  python3-brotli netcat python3-argcomplete xorriso-tcltk jigit cdck
The following NEW packages will be installed:
  gir1.2-freedesktop gir1.2-libosinfo-1.0 glib-networking glib-networking-common glib-networking-services
  gstreamer1.0-plugins-base i965-va-driver intel-media-va-driver iso-codes libaio1t64 libasyncns0
  libboost-iostreams1.83.0 libboost-thread1.83.0 libburn4t64 libcacard0 libcdparanoia0 libcurl3t64-gnutls
  libdaxctl1 libduktape207 libdw1t64 libflac12t64 libfuse3-3 libgstreamer-plugins-base1.0-0 libgstreamer1.0-0
  libgtk-vnc-2.0-0 libgvnc-1.0-0 libigdgmm12 libiscsi7 libisoburn1t64 libisofs6t64 libjson-glib-1.0-0
  libjson-glib-1.0-common libmp3lame0 libmpg123-0t64 libndctl6 libnfs14 libnspr4 libnss3 libnuma1 libogg0
  libopus0 liborc-0.4-0t64 libosinfo-1.0-0 libosinfo-l10n libpcsclite1 libphodav-3.0-0 libphodav-3.0-common
  libpmem1 libpmemobj1 libpolkit-gobject-1-0 libproxy1v5 libpulse0 librados2 librbd1 librdmacm1t64 libsndfile1
  libsoup-3.0-0 libsoup-3.0-common libspice-client-glib-2.0-8 libspice-client-gtk-3.0-5 libtheora0 libunwind8
  liburing2 libusb-1.0-0 libusbredirhost1t64 libusbredirparser1t64 libva-x11-2 libva2 libvirt-clients
  libvirt-glib-1.0-0 libvirt-glib-1.0-data libvirt-l10n libvirt0 libvisual-0.4-0 libvorbis0a libvorbisenc2
  libvte-2.91-0 libxslt1.1 libyajl2 mesa-va-drivers osinfo-db pci.ids python3-certifi python3-chardet
  python3-idna python3-libvirt python3-libxml2 python3-pkg-resources python3-requests python3-urllib3
  qemu-block-extra qemu-utils spice-client-glib-usb-acl-helper usb.ids va-driver-all virt-viewer virtinst xorriso
0 upgraded, 98 newly installed, 0 to remove and 4 not upgraded.
Need to get 34.2 MB of archives.
After this operation, 143 MB of additional disk space will be used.
Do you want to continue? [Y/n] y
Get:1 http://archive.ubuntu.com/ubuntu noble/main amd64 iso-codes all 4.16.0-1 [3,492 kB]
Get:2 http://archive.ubuntu.com/ubuntu noble-updates/main amd64 python3-pkg-resources all 68.1.2-2ubuntu1.2 [168 kB]
Get:3 http://archive.ubuntu.com/ubuntu noble/main amd64 libfuse3-3 amd64 3.14.0-5build1 [83.1 kB]
Get:4 http://archive.ubuntu.com/ubuntu noble/main amd64 libnuma1 amd64 2.0.18-1build1 [23.3 kB]
Get:5 http://archive.ubuntu.com/ubuntu noble/main amd64 libusb-1.0-0 amd64 2:1.0.27-1 [54.0 kB]
Get:6 http://archive.ubuntu.com/ubuntu noble-updates/main amd64 pci.ids all 0.0~2024.03.31-1ubuntu0.1 [275 kB]
Get:7 http://archive.ubuntu.com/ubuntu noble/main amd64 usb.ids all 2024.03.18-1 [223 kB]
Get:8 http://archive.ubuntu.com/ubuntu noble/main amd64 gir1.2-freedesktop amd64 1.80.1-1 [49.7 kB]
Get:9 http://archive.ubuntu.com/ubuntu noble-updates/main amd64 libcurl3t64-gnutls amd64 8.5.0-2ubuntu10.6 [333 kB]
Get:10 http://archive.ubuntu.com/ubuntu noble/main amd64 libduktape207 amd64 2.7.0+tests-0ubuntu3 [143 kB]
Get:11 http://archive.ubuntu.com/ubuntu noble/main amd64 libproxy1v5 amd64 0.5.4-4build1 [26.5 kB]
Get:12 http://archive.ubuntu.com/ubuntu noble/main amd64 glib-networking-common all 2.80.0-1build1 [6,702 B]
Get:13 http://archive.ubuntu.com/ubuntu noble/main amd64 glib-networking-services amd64 2.80.0-1build1 [12.8 kB]
Get:14 http://archive.ubuntu.com/ubuntu noble/main amd64 glib-networking amd64 2.80.0-1build1 [64.1 kB]
Get:15 http://archive.ubuntu.com/ubuntu noble/main amd64 libcdparanoia0 amd64 3.10.2+debian-14build3 [48.5 kB]
Get:16 http://archive.ubuntu.com/ubuntu noble-updates/main amd64 libdw1t64 amd64 0.190-1.1ubuntu0.1 [261 kB]
Get:17 http://archive.ubuntu.com/ubuntu noble-updates/main amd64 libunwind8 amd64 1.6.2-3build1.1 [55.3 kB]
Get:18 http://archive.ubuntu.com/ubuntu noble-updates/main amd64 libgstreamer1.0-0 amd64 1.24.2-1ubuntu0.1 [1,165 kB]
Get:19 http://archive.ubuntu.com/ubuntu noble-updates/main amd64 liborc-0.4-0t64 amd64 1:0.4.38-1ubuntu0.1 [207 kB]
Get:20 http://archive.ubuntu.com/ubuntu noble-updates/main amd64 libgstreamer-plugins-base1.0-0 amd64 1.24.2-1ubuntu0.2 [862 kB]
Get:21 http://archive.ubuntu.com/ubuntu noble/main amd64 libogg0 amd64 1.3.5-3build1 [22.7 kB]
Get:22 http://archive.ubuntu.com/ubuntu noble/main amd64 libopus0 amd64 1.4-1build1 [208 kB]
Get:23 http://archive.ubuntu.com/ubuntu noble/main amd64 libtheora0 amd64 1.1.1+dfsg.1-16.1build3 [211 kB]
Get:24 http://archive.ubuntu.com/ubuntu noble/main amd64 libvisual-0.4-0 amd64 0.4.2-2build1 [115 kB]
Get:25 http://archive.ubuntu.com/ubuntu noble/main amd64 libvorbis0a amd64 1.3.7-1build3 [97.6 kB]
Get:26 http://archive.ubuntu.com/ubuntu noble/main amd64 libvorbisenc2 amd64 1.3.7-1build3 [80.8 kB]
Get:27 http://archive.ubuntu.com/ubuntu noble-updates/main amd64 gstreamer1.0-plugins-base amd64 1.24.2-1ubuntu0.2 [721 kB]
Get:28 http://archive.ubuntu.com/ubuntu noble/universe amd64 libva2 amd64 2.20.0-2build1 [66.2 kB]
Get:29 http://archive.ubuntu.com/ubuntu noble/universe amd64 libigdgmm12 amd64 22.3.17+ds1-1 [145 kB]
Get:30 http://archive.ubuntu.com/ubuntu noble/universe amd64 intel-media-va-driver amd64 24.1.0+dfsg1-1 [4,022 kB]
Get:31 http://archive.ubuntu.com/ubuntu noble-updates/main amd64 libaio1t64 amd64 0.3.113-6build1.1 [7,210 B]
Get:32 http://archive.ubuntu.com/ubuntu noble/main amd64 libasyncns0 amd64 0.8-6build4 [11.3 kB]
Get:33 http://archive.ubuntu.com/ubuntu noble-updates/main amd64 libboost-iostreams1.83.0 amd64 1.83.0-2.1ubuntu3.1 [259 kB]
Get:34 http://archive.ubuntu.com/ubuntu noble-updates/main amd64 libboost-thread1.83.0 amd64 1.83.0-2.1ubuntu3.1 [276 kB]
Get:35 http://archive.ubuntu.com/ubuntu noble/main amd64 libburn4t64 amd64 1.5.6-1.1build1 [158 kB]
Get:36 http://archive.ubuntu.com/ubuntu noble/main amd64 libnspr4 amd64 2:4.35-1.1build1 [117 kB]
Get:37 http://archive.ubuntu.com/ubuntu noble/main amd64 libnss3 amd64 2:3.98-1build1 [1,445 kB]
Get:38 http://archive.ubuntu.com/ubuntu noble/main amd64 libpcsclite1 amd64 2.0.3-1build1 [21.4 kB]
Get:39 http://archive.ubuntu.com/ubuntu noble/main amd64 libcacard0 amd64 1:2.8.0-3build4 [36.5 kB]
Get:40 http://archive.ubuntu.com/ubuntu noble/main amd64 libdaxctl1 amd64 77-2ubuntu2 [21.4 kB]
Get:41 http://archive.ubuntu.com/ubuntu noble/main amd64 libflac12t64 amd64 1.4.3+ds-2.1ubuntu2 [197 kB]
Get:42 http://archive.ubuntu.com/ubuntu noble/main amd64 libmp3lame0 amd64 3.100-6build1 [142 kB]
Get:43 http://archive.ubuntu.com/ubuntu noble-updates/main amd64 libmpg123-0t64 amd64 1.32.5-1ubuntu1.1 [169 kB]
Get:44 http://archive.ubuntu.com/ubuntu noble-updates/main amd64 libsndfile1 amd64 1.2.2-1ubuntu5.24.04.1 [209 kB]
Get:45 http://archive.ubuntu.com/ubuntu noble-updates/main amd64 libpulse0 amd64 1:16.1+dfsg1-2ubuntu10.1 [292 kB]
Get:46 http://archive.ubuntu.com/ubuntu noble/universe amd64 libgvnc-1.0-0 amd64 1.3.1-1build2 [67.1 kB]
Get:47 http://archive.ubuntu.com/ubuntu noble/universe amd64 libgtk-vnc-2.0-0 amd64 1.3.1-1build2 [28.9 kB]
Get:48 http://archive.ubuntu.com/ubuntu noble-updates/main amd64 librdmacm1t64 amd64 50.0-2ubuntu0.2 [70.7 kB]
Get:49 http://archive.ubuntu.com/ubuntu noble/main amd64 libiscsi7 amd64 1.19.0-3build4 [68.7 kB]
Get:50 http://archive.ubuntu.com/ubuntu noble/main amd64 libisofs6t64 amd64 1.5.6.pl01-1.1ubuntu2 [220 kB]
Get:51 http://archive.ubuntu.com/ubuntu noble/main amd64 libisoburn1t64 amd64 1:1.5.6-1.1ubuntu3 [405 kB]
Get:52 http://archive.ubuntu.com/ubuntu noble/main amd64 libjson-glib-1.0-common all 1.8.0-2build2 [4,244 B]
Get:53 http://archive.ubuntu.com/ubuntu noble/main amd64 libjson-glib-1.0-0 amd64 1.8.0-2build2 [68.0 kB]
Get:54 http://archive.ubuntu.com/ubuntu noble/main amd64 libndctl6 amd64 77-2ubuntu2 [62.8 kB]
Get:55 http://archive.ubuntu.com/ubuntu noble/main amd64 libnfs14 amd64 5.0.2-1build1 [109 kB]
Get:56 http://archive.ubuntu.com/ubuntu noble/universe amd64 libphodav-3.0-common all 3.0-8build3 [14.9 kB]
Get:57 http://archive.ubuntu.com/ubuntu noble-updates/main amd64 libsoup-3.0-common all 3.4.4-5ubuntu0.4 [11.1 kB]
Get:58 http://archive.ubuntu.com/ubuntu noble-updates/main amd64 libsoup-3.0-0 amd64 3.4.4-5ubuntu0.4 [290 kB]
Get:59 http://archive.ubuntu.com/ubuntu noble/universe amd64 libphodav-3.0-0 amd64 3.0-8build3 [29.9 kB]
Get:60 http://archive.ubuntu.com/ubuntu noble/main amd64 libpmem1 amd64 1.13.1-1.1ubuntu2 [84.8 kB]
Get:61 http://archive.ubuntu.com/ubuntu noble/main amd64 libpmemobj1 amd64 1.13.1-1.1ubuntu2 [116 kB]
Get:62 http://archive.ubuntu.com/ubuntu noble-updates/main amd64 libpolkit-gobject-1-0 amd64 124-2ubuntu1.24.04.2 [49.1 kB]
Get:63 http://archive.ubuntu.com/ubuntu noble-updates/main amd64 librados2 amd64 19.2.0-0ubuntu0.24.04.2 [3,972 kB]
Get:64 http://archive.ubuntu.com/ubuntu noble-updates/main amd64 librbd1 amd64 19.2.0-0ubuntu0.24.04.2 [3,351 kB]
Get:65 http://archive.ubuntu.com/ubuntu noble/universe amd64 spice-client-glib-usb-acl-helper amd64 0.42-2ubuntu2 [12.5 kB]
Get:66 http://archive.ubuntu.com/ubuntu noble/main amd64 libusbredirparser1t64 amd64 0.13.0-2.1build1 [16.5 kB]
Get:67 http://archive.ubuntu.com/ubuntu noble/main amd64 libusbredirhost1t64 amd64 0.13.0-2.1build1 [20.0 kB]
Get:68 http://archive.ubuntu.com/ubuntu noble/universe amd64 libspice-client-glib-2.0-8 amd64 0.42-2ubuntu2 [314 kB]
Get:69 http://archive.ubuntu.com/ubuntu noble/universe amd64 libva-x11-2 amd64 2.20.0-2build1 [12.0 kB]
Get:70 http://archive.ubuntu.com/ubuntu noble/universe amd64 libspice-client-gtk-3.0-5 amd64 0.42-2ubuntu2 [56.6 kB]
Get:71 http://archive.ubuntu.com/ubuntu noble/main amd64 liburing2 amd64 2.5-1build1 [21.1 kB]
Get:72 http://archive.ubuntu.com/ubuntu noble/main amd64 libyajl2 amd64 2.1.0-5build1 [20.2 kB]
Get:73 http://archive.ubuntu.com/ubuntu noble-updates/main amd64 libvirt0 amd64 10.0.0-2ubuntu8.7 [1,826 kB]
Get:74 http://archive.ubuntu.com/ubuntu noble-updates/main amd64 libvirt-clients amd64 10.0.0-2ubuntu8.7 [438 kB]
Get:75 http://archive.ubuntu.com/ubuntu noble/universe amd64 libvirt-glib-1.0-data all 5.0.0-2build3 [17.3 kB]
Get:76 http://archive.ubuntu.com/ubuntu noble-updates/main amd64 libvirt-l10n all 10.0.0-2ubuntu8.7 [1,150 B]
Get:77 http://archive.ubuntu.com/ubuntu noble-updates/main amd64 libvte-2.91-0 amd64 0.76.0-1ubuntu0.1 [230 kB]
Get:78 http://archive.ubuntu.com/ubuntu noble-updates/main amd64 libxslt1.1 amd64 1.1.39-0exp1ubuntu0.24.04.2 [167 kB]
Get:79 http://archive.ubuntu.com/ubuntu noble-updates/universe amd64 mesa-va-drivers amd64 24.2.8-1ubuntu1~24.04.1 [19.5 kB]
Get:80 http://archive.ubuntu.com/ubuntu noble-updates/universe amd64 osinfo-db all 0.20250124-0ubuntu0.24.04.1 [176 kB]
Get:81 http://archive.ubuntu.com/ubuntu noble/main amd64 python3-certifi all 2023.11.17-1 [165 kB]
Get:82 http://archive.ubuntu.com/ubuntu noble/main amd64 python3-chardet all 5.2.0+dfsg-1 [117 kB]
Get:83 http://archive.ubuntu.com/ubuntu noble-updates/main amd64 python3-idna all 3.6-2ubuntu0.1 [49.0 kB]
Get:84 http://archive.ubuntu.com/ubuntu noble/main amd64 python3-libvirt amd64 10.0.0-1build1 [164 kB]
Get:85 http://archive.ubuntu.com/ubuntu noble-updates/universe amd64 python3-libxml2 amd64 2.9.14+dfsg-1.3ubuntu3.3 [140 kB]
Get:86 http://archive.ubuntu.com/ubuntu noble-updates/main amd64 python3-urllib3 all 2.0.7-1ubuntu0.2 [93.3 kB]
Get:87 http://archive.ubuntu.com/ubuntu noble-updates/main amd64 python3-requests all 2.31.0+dfsg-1ubuntu1.1 [50.8 kB]
Get:88 http://archive.ubuntu.com/ubuntu noble-updates/main amd64 qemu-utils amd64 1:8.2.2+ds-0ubuntu1.7 [2,220 kB]
Get:89 http://archive.ubuntu.com/ubuntu noble-updates/main amd64 qemu-block-extra amd64 1:8.2.2+ds-0ubuntu1.7 [111 kB]
Get:90 http://archive.ubuntu.com/ubuntu noble/universe amd64 i965-va-driver amd64 2.4.1+dfsg1-1build2 [332 kB]
Get:91 http://archive.ubuntu.com/ubuntu noble/universe amd64 va-driver-all amd64 2.20.0-2build1 [4,844 B]
Get:92 http://archive.ubuntu.com/ubuntu noble/universe amd64 libvirt-glib-1.0-0 amd64 5.0.0-2build3 [121 kB]
Get:93 http://archive.ubuntu.com/ubuntu noble/universe amd64 virt-viewer amd64 11.0-3build2 [285 kB]
Get:94 http://archive.ubuntu.com/ubuntu noble/main amd64 xorriso amd64 1:1.5.6-1.1ubuntu3 [297 kB]
Get:95 http://archive.ubuntu.com/ubuntu noble/universe amd64 libosinfo-l10n all 1.11.0-2build3 [50.6 kB]
Get:96 http://archive.ubuntu.com/ubuntu noble/universe amd64 libosinfo-1.0-0 amd64 1.11.0-2build3 [91.5 kB]
Get:97 http://archive.ubuntu.com/ubuntu noble/universe amd64 gir1.2-libosinfo-1.0 amd64 1.11.0-2build3 [18.6 kB]
Get:98 http://archive.ubuntu.com/ubuntu noble-updates/universe amd64 virtinst all 1:4.1.0-3ubuntu0.1 [891 kB]
Fetched 34.2 MB in 3s (10.8 MB/s)
Extracting templates from packages: 100%
Selecting previously unselected package iso-codes.
(Reading database ... 26588 files and directories currently installed.)
Preparing to unpack .../00-iso-codes_4.16.0-1_all.deb ...
Unpacking iso-codes (4.16.0-1) ...
Selecting previously unselected package python3-pkg-resources.
Preparing to unpack .../01-python3-pkg-resources_68.1.2-2ubuntu1.2_all.deb ...
Unpacking python3-pkg-resources (68.1.2-2ubuntu1.2) ...
Selecting previously unselected package libfuse3-3:amd64.
Preparing to unpack .../02-libfuse3-3_3.14.0-5build1_amd64.deb ...
Unpacking libfuse3-3:amd64 (3.14.0-5build1) ...
Selecting previously unselected package libnuma1:amd64.
Preparing to unpack .../03-libnuma1_2.0.18-1build1_amd64.deb ...
Unpacking libnuma1:amd64 (2.0.18-1build1) ...
Selecting previously unselected package libusb-1.0-0:amd64.
Preparing to unpack .../04-libusb-1.0-0_2%3a1.0.27-1_amd64.deb ...
Unpacking libusb-1.0-0:amd64 (2:1.0.27-1) ...
Selecting previously unselected package pci.ids.
Preparing to unpack .../05-pci.ids_0.0~2024.03.31-1ubuntu0.1_all.deb ...
Unpacking pci.ids (0.0~2024.03.31-1ubuntu0.1) ...
Selecting previously unselected package usb.ids.
Preparing to unpack .../06-usb.ids_2024.03.18-1_all.deb ...
Unpacking usb.ids (2024.03.18-1) ...
Selecting previously unselected package gir1.2-freedesktop:amd64.
Preparing to unpack .../07-gir1.2-freedesktop_1.80.1-1_amd64.deb ...
Unpacking gir1.2-freedesktop:amd64 (1.80.1-1) ...
Selecting previously unselected package libcurl3t64-gnutls:amd64.
Preparing to unpack .../08-libcurl3t64-gnutls_8.5.0-2ubuntu10.6_amd64.deb ...
Unpacking libcurl3t64-gnutls:amd64 (8.5.0-2ubuntu10.6) ...
Selecting previously unselected package libduktape207:amd64.
Preparing to unpack .../09-libduktape207_2.7.0+tests-0ubuntu3_amd64.deb ...
Unpacking libduktape207:amd64 (2.7.0+tests-0ubuntu3) ...
Selecting previously unselected package libproxy1v5:amd64.
Preparing to unpack .../10-libproxy1v5_0.5.4-4build1_amd64.deb ...
Unpacking libproxy1v5:amd64 (0.5.4-4build1) ...
Selecting previously unselected package glib-networking-common.
Preparing to unpack .../11-glib-networking-common_2.80.0-1build1_all.deb ...
Unpacking glib-networking-common (2.80.0-1build1) ...
Selecting previously unselected package glib-networking-services.
Preparing to unpack .../12-glib-networking-services_2.80.0-1build1_amd64.deb ...
Unpacking glib-networking-services (2.80.0-1build1) ...
Selecting previously unselected package glib-networking:amd64.
Preparing to unpack .../13-glib-networking_2.80.0-1build1_amd64.deb ...
Unpacking glib-networking:amd64 (2.80.0-1build1) ...
Selecting previously unselected package libcdparanoia0:amd64.
Preparing to unpack .../14-libcdparanoia0_3.10.2+debian-14build3_amd64.deb ...
Unpacking libcdparanoia0:amd64 (3.10.2+debian-14build3) ...
Selecting previously unselected package libdw1t64:amd64.
Preparing to unpack .../15-libdw1t64_0.190-1.1ubuntu0.1_amd64.deb ...
Unpacking libdw1t64:amd64 (0.190-1.1ubuntu0.1) ...
Selecting previously unselected package libunwind8:amd64.
Preparing to unpack .../16-libunwind8_1.6.2-3build1.1_amd64.deb ...
Unpacking libunwind8:amd64 (1.6.2-3build1.1) ...
Selecting previously unselected package libgstreamer1.0-0:amd64.
Preparing to unpack .../17-libgstreamer1.0-0_1.24.2-1ubuntu0.1_amd64.deb ...
Unpacking libgstreamer1.0-0:amd64 (1.24.2-1ubuntu0.1) ...
Selecting previously unselected package liborc-0.4-0t64:amd64.
Preparing to unpack .../18-liborc-0.4-0t64_1%3a0.4.38-1ubuntu0.1_amd64.deb ...
Unpacking liborc-0.4-0t64:amd64 (1:0.4.38-1ubuntu0.1) ...
Selecting previously unselected package libgstreamer-plugins-base1.0-0:amd64.
Preparing to unpack .../19-libgstreamer-plugins-base1.0-0_1.24.2-1ubuntu0.2_amd64.deb ...
Unpacking libgstreamer-plugins-base1.0-0:amd64 (1.24.2-1ubuntu0.2) ...
Selecting previously unselected package libogg0:amd64.
Preparing to unpack .../20-libogg0_1.3.5-3build1_amd64.deb ...
Unpacking libogg0:amd64 (1.3.5-3build1) ...
Selecting previously unselected package libopus0:amd64.
Preparing to unpack .../21-libopus0_1.4-1build1_amd64.deb ...
Unpacking libopus0:amd64 (1.4-1build1) ...
Selecting previously unselected package libtheora0:amd64.
Preparing to unpack .../22-libtheora0_1.1.1+dfsg.1-16.1build3_amd64.deb ...
Unpacking libtheora0:amd64 (1.1.1+dfsg.1-16.1build3) ...
Selecting previously unselected package libvisual-0.4-0:amd64.
Preparing to unpack .../23-libvisual-0.4-0_0.4.2-2build1_amd64.deb ...
Unpacking libvisual-0.4-0:amd64 (0.4.2-2build1) ...
Selecting previously unselected package libvorbis0a:amd64.
Preparing to unpack .../24-libvorbis0a_1.3.7-1build3_amd64.deb ...
Unpacking libvorbis0a:amd64 (1.3.7-1build3) ...
Selecting previously unselected package libvorbisenc2:amd64.
Preparing to unpack .../25-libvorbisenc2_1.3.7-1build3_amd64.deb ...
Unpacking libvorbisenc2:amd64 (1.3.7-1build3) ...
Selecting previously unselected package gstreamer1.0-plugins-base:amd64.
Preparing to unpack .../26-gstreamer1.0-plugins-base_1.24.2-1ubuntu0.2_amd64.deb ...
Unpacking gstreamer1.0-plugins-base:amd64 (1.24.2-1ubuntu0.2) ...
Selecting previously unselected package libva2:amd64.
Preparing to unpack .../27-libva2_2.20.0-2build1_amd64.deb ...
Unpacking libva2:amd64 (2.20.0-2build1) ...
Selecting previously unselected package libigdgmm12:amd64.
Preparing to unpack .../28-libigdgmm12_22.3.17+ds1-1_amd64.deb ...
Unpacking libigdgmm12:amd64 (22.3.17+ds1-1) ...
Selecting previously unselected package intel-media-va-driver:amd64.
Preparing to unpack .../29-intel-media-va-driver_24.1.0+dfsg1-1_amd64.deb ...
Unpacking intel-media-va-driver:amd64 (24.1.0+dfsg1-1) ...
Selecting previously unselected package libaio1t64:amd64.
Preparing to unpack .../30-libaio1t64_0.3.113-6build1.1_amd64.deb ...
Unpacking libaio1t64:amd64 (0.3.113-6build1.1) ...
Selecting previously unselected package libasyncns0:amd64.
Preparing to unpack .../31-libasyncns0_0.8-6build4_amd64.deb ...
Unpacking libasyncns0:amd64 (0.8-6build4) ...
Selecting previously unselected package libboost-iostreams1.83.0:amd64.
Preparing to unpack .../32-libboost-iostreams1.83.0_1.83.0-2.1ubuntu3.1_amd64.deb ...
Unpacking libboost-iostreams1.83.0:amd64 (1.83.0-2.1ubuntu3.1) ...
Selecting previously unselected package libboost-thread1.83.0:amd64.
Preparing to unpack .../33-libboost-thread1.83.0_1.83.0-2.1ubuntu3.1_amd64.deb ...
Unpacking libboost-thread1.83.0:amd64 (1.83.0-2.1ubuntu3.1) ...
Selecting previously unselected package libburn4t64:amd64.
Preparing to unpack .../34-libburn4t64_1.5.6-1.1build1_amd64.deb ...
Unpacking libburn4t64:amd64 (1.5.6-1.1build1) ...
Selecting previously unselected package libnspr4:amd64.
Preparing to unpack .../35-libnspr4_2%3a4.35-1.1build1_amd64.deb ...
Unpacking libnspr4:amd64 (2:4.35-1.1build1) ...
Selecting previously unselected package libnss3:amd64.
Preparing to unpack .../36-libnss3_2%3a3.98-1build1_amd64.deb ...
Unpacking libnss3:amd64 (2:3.98-1build1) ...
Selecting previously unselected package libpcsclite1:amd64.
Preparing to unpack .../37-libpcsclite1_2.0.3-1build1_amd64.deb ...
Unpacking libpcsclite1:amd64 (2.0.3-1build1) ...
Selecting previously unselected package libcacard0:amd64.
Preparing to unpack .../38-libcacard0_1%3a2.8.0-3build4_amd64.deb ...
Unpacking libcacard0:amd64 (1:2.8.0-3build4) ...
Selecting previously unselected package libdaxctl1:amd64.
Preparing to unpack .../39-libdaxctl1_77-2ubuntu2_amd64.deb ...
Unpacking libdaxctl1:amd64 (77-2ubuntu2) ...
Selecting previously unselected package libflac12t64:amd64.
Preparing to unpack .../40-libflac12t64_1.4.3+ds-2.1ubuntu2_amd64.deb ...
Unpacking libflac12t64:amd64 (1.4.3+ds-2.1ubuntu2) ...
Selecting previously unselected package libmp3lame0:amd64.
Preparing to unpack .../41-libmp3lame0_3.100-6build1_amd64.deb ...
Unpacking libmp3lame0:amd64 (3.100-6build1) ...
Selecting previously unselected package libmpg123-0t64:amd64.
Preparing to unpack .../42-libmpg123-0t64_1.32.5-1ubuntu1.1_amd64.deb ...
Unpacking libmpg123-0t64:amd64 (1.32.5-1ubuntu1.1) ...
Selecting previously unselected package libsndfile1:amd64.
Preparing to unpack .../43-libsndfile1_1.2.2-1ubuntu5.24.04.1_amd64.deb ...
Unpacking libsndfile1:amd64 (1.2.2-1ubuntu5.24.04.1) ...
Selecting previously unselected package libpulse0:amd64.
Preparing to unpack .../44-libpulse0_1%3a16.1+dfsg1-2ubuntu10.1_amd64.deb ...
Unpacking libpulse0:amd64 (1:16.1+dfsg1-2ubuntu10.1) ...
Selecting previously unselected package libgvnc-1.0-0:amd64.
Preparing to unpack .../45-libgvnc-1.0-0_1.3.1-1build2_amd64.deb ...
Unpacking libgvnc-1.0-0:amd64 (1.3.1-1build2) ...
Selecting previously unselected package libgtk-vnc-2.0-0:amd64.
Preparing to unpack .../46-libgtk-vnc-2.0-0_1.3.1-1build2_amd64.deb ...
Unpacking libgtk-vnc-2.0-0:amd64 (1.3.1-1build2) ...
Selecting previously unselected package librdmacm1t64:amd64.
Preparing to unpack .../47-librdmacm1t64_50.0-2ubuntu0.2_amd64.deb ...
Unpacking librdmacm1t64:amd64 (50.0-2ubuntu0.2) ...
Selecting previously unselected package libiscsi7:amd64.
Preparing to unpack .../48-libiscsi7_1.19.0-3build4_amd64.deb ...
Unpacking libiscsi7:amd64 (1.19.0-3build4) ...
Selecting previously unselected package libisofs6t64:amd64.
Preparing to unpack .../49-libisofs6t64_1.5.6.pl01-1.1ubuntu2_amd64.deb ...
Unpacking libisofs6t64:amd64 (1.5.6.pl01-1.1ubuntu2) ...
Selecting previously unselected package libisoburn1t64:amd64.
Preparing to unpack .../50-libisoburn1t64_1%3a1.5.6-1.1ubuntu3_amd64.deb ...
Unpacking libisoburn1t64:amd64 (1:1.5.6-1.1ubuntu3) ...
Selecting previously unselected package libjson-glib-1.0-common.
Preparing to unpack .../51-libjson-glib-1.0-common_1.8.0-2build2_all.deb ...
Unpacking libjson-glib-1.0-common (1.8.0-2build2) ...
Selecting previously unselected package libjson-glib-1.0-0:amd64.
Preparing to unpack .../52-libjson-glib-1.0-0_1.8.0-2build2_amd64.deb ...
Unpacking libjson-glib-1.0-0:amd64 (1.8.0-2build2) ...
Selecting previously unselected package libndctl6:amd64.
Preparing to unpack .../53-libndctl6_77-2ubuntu2_amd64.deb ...
Unpacking libndctl6:amd64 (77-2ubuntu2) ...
Selecting previously unselected package libnfs14:amd64.
Preparing to unpack .../54-libnfs14_5.0.2-1build1_amd64.deb ...
Unpacking libnfs14:amd64 (5.0.2-1build1) ...
Selecting previously unselected package libphodav-3.0-common.
Preparing to unpack .../55-libphodav-3.0-common_3.0-8build3_all.deb ...
Unpacking libphodav-3.0-common (3.0-8build3) ...
Selecting previously unselected package libsoup-3.0-common.
Preparing to unpack .../56-libsoup-3.0-common_3.4.4-5ubuntu0.4_all.deb ...
Unpacking libsoup-3.0-common (3.4.4-5ubuntu0.4) ...
Selecting previously unselected package libsoup-3.0-0:amd64.
Preparing to unpack .../57-libsoup-3.0-0_3.4.4-5ubuntu0.4_amd64.deb ...
Unpacking libsoup-3.0-0:amd64 (3.4.4-5ubuntu0.4) ...
Selecting previously unselected package libphodav-3.0-0:amd64.
Preparing to unpack .../58-libphodav-3.0-0_3.0-8build3_amd64.deb ...
Unpacking libphodav-3.0-0:amd64 (3.0-8build3) ...
Selecting previously unselected package libpmem1:amd64.
Preparing to unpack .../59-libpmem1_1.13.1-1.1ubuntu2_amd64.deb ...
Unpacking libpmem1:amd64 (1.13.1-1.1ubuntu2) ...
Selecting previously unselected package libpmemobj1:amd64.
Preparing to unpack .../60-libpmemobj1_1.13.1-1.1ubuntu2_amd64.deb ...
Unpacking libpmemobj1:amd64 (1.13.1-1.1ubuntu2) ...
Selecting previously unselected package libpolkit-gobject-1-0:amd64.
Preparing to unpack .../61-libpolkit-gobject-1-0_124-2ubuntu1.24.04.2_amd64.deb ...
Unpacking libpolkit-gobject-1-0:amd64 (124-2ubuntu1.24.04.2) ...
Selecting previously unselected package librados2.
Preparing to unpack .../62-librados2_19.2.0-0ubuntu0.24.04.2_amd64.deb ...
Unpacking librados2 (19.2.0-0ubuntu0.24.04.2) ...
Selecting previously unselected package librbd1.
Preparing to unpack .../63-librbd1_19.2.0-0ubuntu0.24.04.2_amd64.deb ...
Unpacking librbd1 (19.2.0-0ubuntu0.24.04.2) ...
Selecting previously unselected package spice-client-glib-usb-acl-helper.
Preparing to unpack .../64-spice-client-glib-usb-acl-helper_0.42-2ubuntu2_amd64.deb ...
Unpacking spice-client-glib-usb-acl-helper (0.42-2ubuntu2) ...
Selecting previously unselected package libusbredirparser1t64:amd64.
Preparing to unpack .../65-libusbredirparser1t64_0.13.0-2.1build1_amd64.deb ...
Unpacking libusbredirparser1t64:amd64 (0.13.0-2.1build1) ...
Selecting previously unselected package libusbredirhost1t64:amd64.
Preparing to unpack .../66-libusbredirhost1t64_0.13.0-2.1build1_amd64.deb ...
Unpacking libusbredirhost1t64:amd64 (0.13.0-2.1build1) ...
Selecting previously unselected package libspice-client-glib-2.0-8:amd64.
Preparing to unpack .../67-libspice-client-glib-2.0-8_0.42-2ubuntu2_amd64.deb ...
Unpacking libspice-client-glib-2.0-8:amd64 (0.42-2ubuntu2) ...
Selecting previously unselected package libva-x11-2:amd64.
Preparing to unpack .../68-libva-x11-2_2.20.0-2build1_amd64.deb ...
Unpacking libva-x11-2:amd64 (2.20.0-2build1) ...
Selecting previously unselected package libspice-client-gtk-3.0-5:amd64.
Preparing to unpack .../69-libspice-client-gtk-3.0-5_0.42-2ubuntu2_amd64.deb ...
Unpacking libspice-client-gtk-3.0-5:amd64 (0.42-2ubuntu2) ...
Selecting previously unselected package liburing2:amd64.
Preparing to unpack .../70-liburing2_2.5-1build1_amd64.deb ...
Unpacking liburing2:amd64 (2.5-1build1) ...
Selecting previously unselected package libyajl2:amd64.
Preparing to unpack .../71-libyajl2_2.1.0-5build1_amd64.deb ...
Unpacking libyajl2:amd64 (2.1.0-5build1) ...
Selecting previously unselected package libvirt0:amd64.
Preparing to unpack .../72-libvirt0_10.0.0-2ubuntu8.7_amd64.deb ...
Unpacking libvirt0:amd64 (10.0.0-2ubuntu8.7) ...
Selecting previously unselected package libvirt-clients.
Preparing to unpack .../73-libvirt-clients_10.0.0-2ubuntu8.7_amd64.deb ...
Unpacking libvirt-clients (10.0.0-2ubuntu8.7) ...
Selecting previously unselected package libvirt-glib-1.0-data.
Preparing to unpack .../74-libvirt-glib-1.0-data_5.0.0-2build3_all.deb ...
Unpacking libvirt-glib-1.0-data (5.0.0-2build3) ...
Selecting previously unselected package libvirt-l10n.
Preparing to unpack .../75-libvirt-l10n_10.0.0-2ubuntu8.7_all.deb ...
Unpacking libvirt-l10n (10.0.0-2ubuntu8.7) ...
Selecting previously unselected package libvte-2.91-0:amd64.
Preparing to unpack .../76-libvte-2.91-0_0.76.0-1ubuntu0.1_amd64.deb ...
Unpacking libvte-2.91-0:amd64 (0.76.0-1ubuntu0.1) ...
Selecting previously unselected package libxslt1.1:amd64.
Preparing to unpack .../77-libxslt1.1_1.1.39-0exp1ubuntu0.24.04.2_amd64.deb ...
Unpacking libxslt1.1:amd64 (1.1.39-0exp1ubuntu0.24.04.2) ...
Selecting previously unselected package mesa-va-drivers:amd64.
Preparing to unpack .../78-mesa-va-drivers_24.2.8-1ubuntu1~24.04.1_amd64.deb ...
Unpacking mesa-va-drivers:amd64 (24.2.8-1ubuntu1~24.04.1) ...
Selecting previously unselected package osinfo-db.
Preparing to unpack .../79-osinfo-db_0.20250124-0ubuntu0.24.04.1_all.deb ...
Unpacking osinfo-db (0.20250124-0ubuntu0.24.04.1) ...
Selecting previously unselected package python3-certifi.
Preparing to unpack .../80-python3-certifi_2023.11.17-1_all.deb ...
Unpacking python3-certifi (2023.11.17-1) ...
Selecting previously unselected package python3-chardet.
Preparing to unpack .../81-python3-chardet_5.2.0+dfsg-1_all.deb ...
Unpacking python3-chardet (5.2.0+dfsg-1) ...
Selecting previously unselected package python3-idna.
Preparing to unpack .../82-python3-idna_3.6-2ubuntu0.1_all.deb ...
Unpacking python3-idna (3.6-2ubuntu0.1) ...
Selecting previously unselected package python3-libvirt.
Preparing to unpack .../83-python3-libvirt_10.0.0-1build1_amd64.deb ...
Unpacking python3-libvirt (10.0.0-1build1) ...
Selecting previously unselected package python3-libxml2:amd64.
Preparing to unpack .../84-python3-libxml2_2.9.14+dfsg-1.3ubuntu3.3_amd64.deb ...
Unpacking python3-libxml2:amd64 (2.9.14+dfsg-1.3ubuntu3.3) ...
Selecting previously unselected package python3-urllib3.
Preparing to unpack .../85-python3-urllib3_2.0.7-1ubuntu0.2_all.deb ...
Unpacking python3-urllib3 (2.0.7-1ubuntu0.2) ...
Selecting previously unselected package python3-requests.
Preparing to unpack .../86-python3-requests_2.31.0+dfsg-1ubuntu1.1_all.deb ...
Unpacking python3-requests (2.31.0+dfsg-1ubuntu1.1) ...
Selecting previously unselected package qemu-utils.
Preparing to unpack .../87-qemu-utils_1%3a8.2.2+ds-0ubuntu1.7_amd64.deb ...
Unpacking qemu-utils (1:8.2.2+ds-0ubuntu1.7) ...
Selecting previously unselected package qemu-block-extra.
Preparing to unpack .../88-qemu-block-extra_1%3a8.2.2+ds-0ubuntu1.7_amd64.deb ...
Unpacking qemu-block-extra (1:8.2.2+ds-0ubuntu1.7) ...
Selecting previously unselected package i965-va-driver:amd64.
Preparing to unpack .../89-i965-va-driver_2.4.1+dfsg1-1build2_amd64.deb ...
Unpacking i965-va-driver:amd64 (2.4.1+dfsg1-1build2) ...
Selecting previously unselected package va-driver-all:amd64.
Preparing to unpack .../90-va-driver-all_2.20.0-2build1_amd64.deb ...
Unpacking va-driver-all:amd64 (2.20.0-2build1) ...
Selecting previously unselected package libvirt-glib-1.0-0:amd64.
Preparing to unpack .../91-libvirt-glib-1.0-0_5.0.0-2build3_amd64.deb ...
Unpacking libvirt-glib-1.0-0:amd64 (5.0.0-2build3) ...
Selecting previously unselected package virt-viewer.
Preparing to unpack .../92-virt-viewer_11.0-3build2_amd64.deb ...
Unpacking virt-viewer (11.0-3build2) ...
Selecting previously unselected package xorriso.
Preparing to unpack .../93-xorriso_1%3a1.5.6-1.1ubuntu3_amd64.deb ...
Unpacking xorriso (1:1.5.6-1.1ubuntu3) ...
Selecting previously unselected package libosinfo-l10n.
Preparing to unpack .../94-libosinfo-l10n_1.11.0-2build3_all.deb ...
Unpacking libosinfo-l10n (1.11.0-2build3) ...
Selecting previously unselected package libosinfo-1.0-0:amd64.
Preparing to unpack .../95-libosinfo-1.0-0_1.11.0-2build3_amd64.deb ...
Unpacking libosinfo-1.0-0:amd64 (1.11.0-2build3) ...
Selecting previously unselected package gir1.2-libosinfo-1.0:amd64.
Preparing to unpack .../96-gir1.2-libosinfo-1.0_1.11.0-2build3_amd64.deb ...
Unpacking gir1.2-libosinfo-1.0:amd64 (1.11.0-2build3) ...
Selecting previously unselected package virtinst.
Preparing to unpack .../97-virtinst_1%3a4.1.0-3ubuntu0.1_all.deb ...
Unpacking virtinst (1:4.1.0-3ubuntu0.1) ...
Setting up python3-pkg-resources (68.1.2-2ubuntu1.2) ...
Setting up libcdparanoia0:amd64 (3.10.2+debian-14build3) ...
Setting up pci.ids (0.0~2024.03.31-1ubuntu0.1) ...
Setting up gir1.2-freedesktop:amd64 (1.80.1-1) ...
Setting up libogg0:amd64 (1.3.5-3build1) ...
Setting up libphodav-3.0-common (3.0-8build3) ...
Setting up libvisual-0.4-0:amd64 (0.4.2-2build1) ...
Setting up libyajl2:amd64 (2.1.0-5build1) ...
Setting up libcurl3t64-gnutls:amd64 (8.5.0-2ubuntu10.6) ...
Setting up libboost-thread1.83.0:amd64 (1.83.0-2.1ubuntu3.1) ...
Setting up libigdgmm12:amd64 (22.3.17+ds1-1) ...
Setting up libsoup-3.0-common (3.4.4-5ubuntu0.4) ...
Setting up libmpg123-0t64:amd64 (1.32.5-1ubuntu1.1) ...
Setting up libvte-2.91-0:amd64 (0.76.0-1ubuntu0.1) ...
Setting up libunwind8:amd64 (1.6.2-3build1.1) ...
Setting up libnfs14:amd64 (5.0.2-1build1) ...
Setting up liborc-0.4-0t64:amd64 (1:0.4.38-1ubuntu0.1) ...
Setting up libdw1t64:amd64 (0.190-1.1ubuntu0.1) ...
Setting up python3-libxml2:amd64 (2.9.14+dfsg-1.3ubuntu3.3) ...
Setting up python3-chardet (5.2.0+dfsg-1) ...
Setting up libvirt-glib-1.0-data (5.0.0-2build3) ...
Setting up libva2:amd64 (2.20.0-2build1) ...
Setting up python3-certifi (2023.11.17-1) ...
Setting up libnspr4:amd64 (2:4.35-1.1build1) ...
Setting up libboost-iostreams1.83.0:amd64 (1.83.0-2.1ubuntu3.1) ...
Setting up libopus0:amd64 (1.4-1build1) ...
Setting up intel-media-va-driver:amd64 (24.1.0+dfsg1-1) ...
Setting up libvorbis0a:amd64 (1.3.7-1build3) ...
Setting up python3-idna (3.6-2ubuntu0.1) ...
Setting up usb.ids (2024.03.18-1) ...
Setting up osinfo-db (0.20250124-0ubuntu0.24.04.1) ...
Setting up libpcsclite1:amd64 (2.0.3-1build1) ...
Setting up libfuse3-3:amd64 (3.14.0-5build1) ...
Setting up libdaxctl1:amd64 (77-2ubuntu2) ...
Setting up python3-urllib3 (2.0.7-1ubuntu0.2) ...
Setting up libnuma1:amd64 (2.0.18-1build1) ...
Setting up libvirt0:amd64 (10.0.0-2ubuntu8.7) ...
Setting up libaio1t64:amd64 (0.3.113-6build1.1) ...
Setting up libvirt-glib-1.0-0:amd64 (5.0.0-2build3) ...
Setting up libisofs6t64:amd64 (1.5.6.pl01-1.1ubuntu2) ...
Setting up libduktape207:amd64 (2.7.0+tests-0ubuntu3) ...
Setting up libasyncns0:amd64 (0.8-6build4) ...
Setting up libusbredirparser1t64:amd64 (0.13.0-2.1build1) ...
Setting up libtheora0:amd64 (1.1.1+dfsg.1-16.1build3) ...
Setting up libxslt1.1:amd64 (1.1.39-0exp1ubuntu0.24.04.2) ...
Setting up libburn4t64:amd64 (1.5.6-1.1build1) ...
Setting up libndctl6:amd64 (77-2ubuntu2) ...
Setting up librdmacm1t64:amd64 (50.0-2ubuntu0.2) ...
Setting up libjson-glib-1.0-common (1.8.0-2build2) ...
Setting up libflac12t64:amd64 (1.4.3+ds-2.1ubuntu2) ...
Setting up libusb-1.0-0:amd64 (2:1.0.27-1) ...
Setting up mesa-va-drivers:amd64 (24.2.8-1ubuntu1~24.04.1) ...
Setting up glib-networking-common (2.80.0-1build1) ...
Setting up liburing2:amd64 (2.5-1build1) ...
Setting up libiscsi7:amd64 (1.19.0-3build4) ...
Setting up libisoburn1t64:amd64 (1:1.5.6-1.1ubuntu3) ...
Setting up xorriso (1:1.5.6-1.1ubuntu3) ...
Setting up libpmem1:amd64 (1.13.1-1.1ubuntu2) ...
Setting up libva-x11-2:amd64 (2.20.0-2build1) ...
Setting up iso-codes (4.16.0-1) ...
Setting up libpolkit-gobject-1-0:amd64 (124-2ubuntu1.24.04.2) ...
Setting up libgstreamer1.0-0:amd64 (1.24.2-1ubuntu0.1) ...
Setcap worked! gst-ptp-helper is not suid!
Setting up libmp3lame0:amd64 (3.100-6build1) ...
Setting up i965-va-driver:amd64 (2.4.1+dfsg1-1build2) ...
Setting up libosinfo-l10n (1.11.0-2build3) ...
Setting up libvorbisenc2:amd64 (1.3.7-1build3) ...
Setting up librados2 (19.2.0-0ubuntu0.24.04.2) ...
Setting up libproxy1v5:amd64 (0.5.4-4build1) ...
Setting up python3-libvirt (10.0.0-1build1) ...
Setting up libvirt-clients (10.0.0-2ubuntu8.7) ...
Setting up spice-client-glib-usb-acl-helper (0.42-2ubuntu2) ...
Setting up libgstreamer-plugins-base1.0-0:amd64 (1.24.2-1ubuntu0.2) ...
Setting up libnss3:amd64 (2:3.98-1build1) ...
Setting up libcacard0:amd64 (1:2.8.0-3build4) ...
Setting up libusbredirhost1t64:amd64 (0.13.0-2.1build1) ...
Setting up libjson-glib-1.0-0:amd64 (1.8.0-2build2) ...
Setting up gstreamer1.0-plugins-base:amd64 (1.24.2-1ubuntu0.2) ...
Setting up libvirt-l10n (10.0.0-2ubuntu8.7) ...
Setting up va-driver-all:amd64 (2.20.0-2build1) ...
Setting up python3-requests (2.31.0+dfsg-1ubuntu1.1) ...
Setting up libpmemobj1:amd64 (1.13.1-1.1ubuntu2) ...
Setting up librbd1 (19.2.0-0ubuntu0.24.04.2) ...
Setting up libsndfile1:amd64 (1.2.2-1ubuntu5.24.04.1) ...
Setting up qemu-utils (1:8.2.2+ds-0ubuntu1.7) ...
Setting up qemu-block-extra (1:8.2.2+ds-0ubuntu1.7) ...
Created symlink /etc/systemd/system/multi-user.target.wants/run-qemu.mount → /usr/lib/systemd/system/run-qemu.mount
.
Setting up glib-networking-services (2.80.0-1build1) ...
Setting up libpulse0:amd64 (1:16.1+dfsg1-2ubuntu10.1) ...
Setting up libgvnc-1.0-0:amd64 (1.3.1-1build2) ...
Setting up glib-networking:amd64 (2.80.0-1build1) ...
Setting up libgtk-vnc-2.0-0:amd64 (1.3.1-1build2) ...
Setting up libsoup-3.0-0:amd64 (3.4.4-5ubuntu0.4) ...
Setting up libphodav-3.0-0:amd64 (3.0-8build3) ...
Setting up libosinfo-1.0-0:amd64 (1.11.0-2build3) ...
Setting up gir1.2-libosinfo-1.0:amd64 (1.11.0-2build3) ...
Setting up libspice-client-glib-2.0-8:amd64 (0.42-2ubuntu2) ...
Setting up virtinst (1:4.1.0-3ubuntu0.1) ...
Setting up libspice-client-gtk-3.0-5:amd64 (0.42-2ubuntu2) ...
Setting up virt-viewer (11.0-3build2) ...
Processing triggers for libc-bin (2.39-0ubuntu8.4) ...
Processing triggers for man-db (2.12.0-4build2) ...
Processing triggers for libglib2.0-0t64:amd64 (2.80.0-6ubuntu3.4) ...
Processing triggers for shared-mime-info (2.4-4) ...
Processing triggers for hicolor-icon-theme (0.17-2) ...
📦[waylon@ubuntu ~]$ virt-install --version
virsh list --all
4.1.0
error: failed to connect to the hypervisor
error: binary '/usr/sbin/libvirtd' does not exist in $PATH: No such file or directory

📦[waylon@ubuntu ~]$ exit
logout
waylon@razorcrest:~$ distrobox enter --additional-flags "--device /dev/kvm" ubuntu
Error: unknown flag: --device
See 'podman exec --help'
waylon@razorcrest:~$ distrobox enter ubuntu
📦[waylon@ubuntu ~]$ ls -l /run/libvirt/
common/               libvirt-sock          nodedev/              secrets/              virtlogd-admin-sock
hostdevmgr/           libvirt-sock-ro       nwfilter/             storage/              virtlogd-sock
interface/            lxc/                  nwfilter-binding/     virtlockd-admin-sock
libvirt-admin-sock    network/              qemu/                 virtlockd-sock
📦[waylon@ubuntu ~]$ ls -l /run/libvirt/libvirt-sock
srw-rw-rw-. 1 nobody nogroup 0 Jun 27 11:09 /run/libvirt/libvirt-sock
📦[waylon@ubuntu ~]$ sudo usermod -aG libvirt $USER
usermod: group 'libvirt' does not exist
📦[waylon@ubuntu ~]$ export LIBVIRT_DEFAULT_URI="qemu+unix:///system"
virsh list --all
 Id   Name   State
--------------------

📦[waylon@ubuntu ~]$ ls -l /run/libvirt/libvirt-sock
srw-rw-rw-. 1 nobody nogroup 0 Jun 27 11:09 /run/libvirt/libvirt-sock
📦[waylon@ubuntu ~]$ virt-install --version
virsh list --all
4.1.0
 Id   Name   State
--------------------

📦[waylon@ubuntu ~]$ sudo apt update
sudo apt install virt-manager -y
Hit:1 http://security.ubuntu.com/ubuntu noble-security InRelease
Hit:2 http://archive.ubuntu.com/ubuntu noble InRelease
Hit:3 http://archive.ubuntu.com/ubuntu noble-updates InRelease
Hit:4 http://archive.ubuntu.com/ubuntu noble-backports InRelease
Reading package lists... Done
Building dependency tree... Done
Reading state information... Done
4 packages can be upgraded. Run 'apt list --upgradable' to see them.
Reading package lists... Done
Building dependency tree... Done
Reading state information... Done
The following additional packages will be installed:
  acl alsa-topology-conf alsa-ucm-conf cpu-checker dmeventd dmidecode dns-root-data dnsmasq-base gettext-base
  gir1.2-atk-1.0 gir1.2-ayatanaappindicator3-0.1 gir1.2-gdkpixbuf-2.0 gir1.2-gstreamer-1.0 gir1.2-gtk-3.0
  gir1.2-gtk-vnc-2.0 gir1.2-gtksource-4 gir1.2-harfbuzz-0.0 gir1.2-libvirt-glib-1.0 gir1.2-pango-1.0
  gir1.2-spiceclientglib-2.0 gir1.2-spiceclientgtk-3.0 gir1.2-vte-2.91 gstreamer1.0-plugins-good gstreamer1.0-x
  iptables ipxe-qemu ipxe-qemu-256k-compat-efi-roms libaa1 libasound2-data libasound2t64 libavc1394-0
  libayatana-appindicator3-1 libayatana-ido3-0.4-0 libayatana-indicator3-7 libbrlapi0.8 libcaca0
  libdbusmenu-glib4 libdbusmenu-gtk3-4 libdecor-0-0 libdecor-0-plugin-1-gtk libdevmapper-event1.02.1 libdv4t64
  libfdt1 libgstreamer-plugins-good1.0-0 libgtksourceview-4-0 libgtksourceview-4-common libgudev-1.0-0
  libharfbuzz-gobject0 libiec61883-0 libip4tc2 libip6tc2 libjack-jackd2-0 liblvm2cmd2.03 libnetfilter-conntrack3
  libnfnetlink0 libnftables1 libnftnl11 libnss-mymachines libpangoxft-1.0-0 libparted2t64 libpipewire-0.3-0t64
  libpipewire-0.3-common libpolkit-agent-1-0 libraw1394-11 libsamplerate0 libsdl2-2.0-0 libshout3 libslang2
  libslirp0 libspa-0.2-modules libspeex1 libspice-server1 libtag1v5 libtag1v5-vanilla libtpms0 libtwolame0
  libv4l-0t64 libv4lconvert0t64 libvirglrenderer1 libvirt-daemon libvirt-daemon-config-network
  libvirt-daemon-config-nwfilter libvirt-daemon-driver-qemu libvirt-daemon-system libvirt-daemon-system-systemd
  libvpx9 libwavpack1 libwebrtc-audio-processing1 libxft2 libxml2-utils libxss1 libxv1 logrotate lvm2 mdevctl
  msr-tools netcat-openbsd nftables ovmf parted polkitd python3-cairo python3-gi-cairo qemu-system-common
  qemu-system-data qemu-system-gui qemu-system-modules-opengl qemu-system-modules-spice qemu-system-x86 seabios
  sgml-base swtpm swtpm-tools systemd-container systemd-hwe-hwdb thin-provisioning-tools udev xml-core
Suggested packages:
  firewalld kmod alsa-utils libasound2-plugins libdv-bin oss-compat jackd2 libparted-dev libparted-i18n pipewire
  libraw1394-doc xdg-utils speex gstreamer1.0-libav gstreamer1.0-plugins-ugly
  libvirt-daemon-driver-storage-gluster libvirt-daemon-driver-storage-iscsi-direct
  libvirt-daemon-driver-storage-rbd libvirt-daemon-driver-storage-zfs libvirt-daemon-driver-lxc
  libvirt-daemon-driver-vbox libvirt-daemon-driver-xen numad passt apparmor auditd nfs-common open-iscsi pm-utils
  systemtap zfsutils bsd-mailx | mailx parted-doc polkitd-pkla samba vde2 sgml-base-doc trousers gir1.2-secret-1
  gnome-keyring python3-guestfs ssh-askpass debhelper
The following NEW packages will be installed:
  acl alsa-topology-conf alsa-ucm-conf cpu-checker dmeventd dmidecode dns-root-data dnsmasq-base gettext-base
  gir1.2-atk-1.0 gir1.2-ayatanaappindicator3-0.1 gir1.2-gdkpixbuf-2.0 gir1.2-gstreamer-1.0 gir1.2-gtk-3.0
  gir1.2-gtk-vnc-2.0 gir1.2-gtksource-4 gir1.2-harfbuzz-0.0 gir1.2-libvirt-glib-1.0 gir1.2-pango-1.0
  gir1.2-spiceclientglib-2.0 gir1.2-spiceclientgtk-3.0 gir1.2-vte-2.91 gstreamer1.0-plugins-good gstreamer1.0-x
  iptables ipxe-qemu ipxe-qemu-256k-compat-efi-roms libaa1 libasound2-data libasound2t64 libavc1394-0
  libayatana-appindicator3-1 libayatana-ido3-0.4-0 libayatana-indicator3-7 libbrlapi0.8 libcaca0
  libdbusmenu-glib4 libdbusmenu-gtk3-4 libdecor-0-0 libdecor-0-plugin-1-gtk libdevmapper-event1.02.1 libdv4t64
  libfdt1 libgstreamer-plugins-good1.0-0 libgtksourceview-4-0 libgtksourceview-4-common libgudev-1.0-0
  libharfbuzz-gobject0 libiec61883-0 libip4tc2 libip6tc2 libjack-jackd2-0 liblvm2cmd2.03 libnetfilter-conntrack3
  libnfnetlink0 libnftables1 libnftnl11 libnss-mymachines libpangoxft-1.0-0 libparted2t64 libpipewire-0.3-0t64
  libpipewire-0.3-common libpolkit-agent-1-0 libraw1394-11 libsamplerate0 libsdl2-2.0-0 libshout3 libslang2
  libslirp0 libspa-0.2-modules libspeex1 libspice-server1 libtag1v5 libtag1v5-vanilla libtpms0 libtwolame0
  libv4l-0t64 libv4lconvert0t64 libvirglrenderer1 libvirt-daemon libvirt-daemon-config-network
  libvirt-daemon-config-nwfilter libvirt-daemon-driver-qemu libvirt-daemon-system libvirt-daemon-system-systemd
  libvpx9 libwavpack1 libwebrtc-audio-processing1 libxft2 libxml2-utils libxss1 libxv1 logrotate lvm2 mdevctl
  msr-tools netcat-openbsd nftables ovmf parted polkitd python3-cairo python3-gi-cairo qemu-system-common
  qemu-system-data qemu-system-gui qemu-system-modules-opengl qemu-system-modules-spice qemu-system-x86 seabios
  sgml-base swtpm swtpm-tools systemd-container systemd-hwe-hwdb thin-provisioning-tools udev virt-manager
  xml-core
0 upgraded, 119 newly installed, 0 to remove and 4 not upgraded.
Need to get 43.2 MB of archives.
After this operation, 180 MB of additional disk space will be used.
Get:1 http://archive.ubuntu.com/ubuntu noble/main amd64 sgml-base all 1.31 [11.4 kB]
Get:2 http://archive.ubuntu.com/ubuntu noble/main amd64 libslang2 amd64 2.3.3-3build2 [506 kB]
Get:3 http://archive.ubuntu.com/ubuntu noble/main amd64 logrotate amd64 3.21.0-2build1 [52.2 kB]
Get:4 http://archive.ubuntu.com/ubuntu noble/main amd64 netcat-openbsd amd64 1.226-1ubuntu2 [44.3 kB]
Get:5 http://archive.ubuntu.com/ubuntu noble-updates/main amd64 udev amd64 255.4-1ubuntu8.8 [1,874 kB]
Get:6 http://archive.ubuntu.com/ubuntu noble-updates/main amd64 systemd-hwe-hwdb all 255.1.4 [3,200 B]
Get:7 http://archive.ubuntu.com/ubuntu noble-updates/main amd64 dmidecode amd64 3.5-3ubuntu0.1 [73.0 kB]
Get:8 http://archive.ubuntu.com/ubuntu noble/main amd64 gettext-base amd64 0.21-14ubuntu2 [38.4 kB]
Get:9 http://archive.ubuntu.com/ubuntu noble/main amd64 libip4tc2 amd64 1.8.10-3ubuntu2 [23.3 kB]
Get:10 http://archive.ubuntu.com/ubuntu noble/main amd64 libip6tc2 amd64 1.8.10-3ubuntu2 [23.7 kB]
Get:11 http://archive.ubuntu.com/ubuntu noble/main amd64 libnfnetlink0 amd64 1.0.2-2build1 [14.8 kB]
Get:12 http://archive.ubuntu.com/ubuntu noble/main amd64 libnetfilter-conntrack3 amd64 1.0.9-6build1 [45.2 kB]
Get:13 http://archive.ubuntu.com/ubuntu noble/main amd64 libnftnl11 amd64 1.2.6-2build1 [66.0 kB]
Get:14 http://archive.ubuntu.com/ubuntu noble/main amd64 iptables amd64 1.8.10-3ubuntu2 [381 kB]
Get:15 http://archive.ubuntu.com/ubuntu noble/main amd64 libnftables1 amd64 1.0.9-1build1 [358 kB]
Get:16 http://archive.ubuntu.com/ubuntu noble/main amd64 libparted2t64 amd64 3.6-4build1 [152 kB]
Get:17 http://archive.ubuntu.com/ubuntu noble/main amd64 nftables amd64 1.0.9-1build1 [69.8 kB]
Get:18 http://archive.ubuntu.com/ubuntu noble/main amd64 parted amd64 3.6-4build1 [43.3 kB]
Get:19 http://archive.ubuntu.com/ubuntu noble-updates/main amd64 acl amd64 2.3.2-1build1.1 [39.4 kB]
Get:20 http://archive.ubuntu.com/ubuntu noble/main amd64 alsa-topology-conf all 1.2.5.1-2 [15.5 kB]
Get:21 http://archive.ubuntu.com/ubuntu noble-updates/main amd64 libasound2-data all 1.2.11-1ubuntu0.1 [21.1 kB]
Get:22 http://archive.ubuntu.com/ubuntu noble-updates/main amd64 libasound2t64 amd64 1.2.11-1ubuntu0.1 [399 kB]
Get:23 http://archive.ubuntu.com/ubuntu noble-updates/main amd64 alsa-ucm-conf all 1.2.10-1ubuntu5.7 [66.4 kB]
Get:24 http://archive.ubuntu.com/ubuntu noble/main amd64 msr-tools amd64 1.3-5build1 [9,610 B]
Get:25 http://archive.ubuntu.com/ubuntu noble/main amd64 cpu-checker amd64 0.7-1.3build2 [6,148 B]
Get:26 http://archive.ubuntu.com/ubuntu noble-updates/main amd64 libdevmapper-event1.02.1 amd64 2:1.02.185-3ubuntu3.2 [12.6 kB]
Get:27 http://archive.ubuntu.com/ubuntu noble-updates/main amd64 liblvm2cmd2.03 amd64 2.03.16-3ubuntu3.2 [797 kB]
Get:28 http://archive.ubuntu.com/ubuntu noble-updates/main amd64 dmeventd amd64 2:1.02.185-3ubuntu3.2 [38.0 kB]
Get:29 http://archive.ubuntu.com/ubuntu noble-updates/main amd64 dns-root-data all 2024071801~ubuntu0.24.04.1 [5,918 B]
Get:30 http://archive.ubuntu.com/ubuntu noble/main amd64 dnsmasq-base amd64 2.90-2build2 [375 kB]
Get:31 http://archive.ubuntu.com/ubuntu noble/main amd64 gir1.2-atk-1.0 amd64 2.52.0-1build1 [23.1 kB]
Get:32 http://archive.ubuntu.com/ubuntu noble-updates/main amd64 gir1.2-gdkpixbuf-2.0 amd64 2.42.10+dfsg-3ubuntu3.1 [9,486 B]
Get:33 http://archive.ubuntu.com/ubuntu noble/main amd64 libharfbuzz-gobject0 amd64 8.3.0-2build2 [34.3 kB]
Get:34 http://archive.ubuntu.com/ubuntu noble/main amd64 gir1.2-harfbuzz-0.0 amd64 8.3.0-2build2 [44.5 kB]
Get:35 http://archive.ubuntu.com/ubuntu noble/main amd64 libxft2 amd64 2.3.6-1build1 [45.3 kB]
Get:36 http://archive.ubuntu.com/ubuntu noble/main amd64 libpangoxft-1.0-0 amd64 1.52.1+ds-1build1 [20.3 kB]
Get:37 http://archive.ubuntu.com/ubuntu noble/main amd64 gir1.2-pango-1.0 amd64 1.52.1+ds-1build1 [34.8 kB]
Get:38 http://archive.ubuntu.com/ubuntu noble-updates/main amd64 gir1.2-gtk-3.0 amd64 3.24.41-4ubuntu1.3 [245 kB]
Get:39 http://archive.ubuntu.com/ubuntu noble/main amd64 libayatana-ido3-0.4-0 amd64 0.10.1-1build2 [56.6 kB]
Get:40 http://archive.ubuntu.com/ubuntu noble/main amd64 libayatana-indicator3-7 amd64 0.9.4-1build1 [31.7 kB]
Get:41 http://archive.ubuntu.com/ubuntu noble/main amd64 libdbusmenu-glib4 amd64 18.10.20180917~bzr492+repack1-3.1ubuntu5 [43.0 kB]
Get:42 http://archive.ubuntu.com/ubuntu noble/main amd64 libdbusmenu-gtk3-4 amd64 18.10.20180917~bzr492+repack1-3.1ubuntu5 [27.6 kB]
Get:43 http://archive.ubuntu.com/ubuntu noble/main amd64 libayatana-appindicator3-1 amd64 0.5.93-1build3 [24.7 kB]
Get:44 http://archive.ubuntu.com/ubuntu noble/main amd64 gir1.2-ayatanaappindicator3-0.1 amd64 0.5.93-1build3 [5,838 B]
Get:45 http://archive.ubuntu.com/ubuntu noble-updates/main amd64 gir1.2-gstreamer-1.0 amd64 1.24.2-1ubuntu0.1 [88.4 kB]
Get:46 http://archive.ubuntu.com/ubuntu noble/universe amd64 gir1.2-gtk-vnc-2.0 amd64 1.3.1-1build2 [12.1 kB]
Get:47 http://archive.ubuntu.com/ubuntu noble/universe amd64 libgtksourceview-4-common all 4.8.4-5build4 [590 kB]
Get:48 http://archive.ubuntu.com/ubuntu noble/universe amd64 libgtksourceview-4-0 amd64 4.8.4-5build4 [233 kB]
Get:49 http://archive.ubuntu.com/ubuntu noble/universe amd64 gir1.2-gtksource-4 amd64 4.8.4-5build4 [20.3 kB]
Get:50 http://archive.ubuntu.com/ubuntu noble/universe amd64 gir1.2-spiceclientglib-2.0 amd64 0.42-2ubuntu2 [14.4 kB]
Get:51 http://archive.ubuntu.com/ubuntu noble/universe amd64 gir1.2-spiceclientgtk-3.0 amd64 0.42-2ubuntu2 [5,610 B]
Get:52 http://archive.ubuntu.com/ubuntu noble-updates/main amd64 gir1.2-vte-2.91 amd64 0.76.0-1ubuntu0.1 [11.5 kB]
Get:53 http://archive.ubuntu.com/ubuntu noble/main amd64 libaa1 amd64 1.4p5-51.1 [49.9 kB]
Get:54 http://archive.ubuntu.com/ubuntu noble/main amd64 libraw1394-11 amd64 2.1.2-2build3 [26.2 kB]
Get:55 http://archive.ubuntu.com/ubuntu noble/main amd64 libavc1394-0 amd64 0.5.4-5build3 [15.4 kB]
Get:56 http://archive.ubuntu.com/ubuntu noble/main amd64 libcaca0 amd64 0.99.beta20-4build2 [208 kB]
Get:57 http://archive.ubuntu.com/ubuntu noble/main amd64 libdv4t64 amd64 1.0.0-17.1build1 [63.2 kB]
Get:58 http://archive.ubuntu.com/ubuntu noble-updates/main amd64 libgstreamer-plugins-good1.0-0 amd64 1.24.2-1ubuntu1.1 [32.9 kB]
Get:59 http://archive.ubuntu.com/ubuntu noble/main amd64 libgudev-1.0-0 amd64 1:238-5ubuntu1 [15.9 kB]
Get:60 http://archive.ubuntu.com/ubuntu noble/main amd64 libiec61883-0 amd64 1.2.0-6build1 [24.5 kB]
Get:61 http://archive.ubuntu.com/ubuntu noble-updates/main amd64 libspeex1 amd64 1.2.1-2ubuntu2.24.04.1 [59.6 kB]
Get:62 http://archive.ubuntu.com/ubuntu noble/main amd64 libshout3 amd64 2.4.6-1build2 [50.3 kB]
Get:63 http://archive.ubuntu.com/ubuntu noble/main amd64 libtag1v5-vanilla amd64 1.13.1-1build1 [326 kB]
Get:64 http://archive.ubuntu.com/ubuntu noble/main amd64 libtag1v5 amd64 1.13.1-1build1 [11.7 kB]
Get:65 http://archive.ubuntu.com/ubuntu noble/main amd64 libtwolame0 amd64 0.4.0-2build3 [52.3 kB]
Get:66 http://archive.ubuntu.com/ubuntu noble/main amd64 libv4lconvert0t64 amd64 1.26.1-4build3 [87.6 kB]
Get:67 http://archive.ubuntu.com/ubuntu noble/main amd64 libv4l-0t64 amd64 1.26.1-4build3 [46.9 kB]
Get:68 http://archive.ubuntu.com/ubuntu noble-updates/main amd64 libvpx9 amd64 1.14.0-1ubuntu2.2 [1,143 kB]
Get:69 http://archive.ubuntu.com/ubuntu noble/main amd64 libwavpack1 amd64 5.6.0-1build1 [84.6 kB]
Get:70 http://archive.ubuntu.com/ubuntu noble-updates/main amd64 gstreamer1.0-plugins-good amd64 1.24.2-1ubuntu1.1 [2,238 kB]
Get:71 http://archive.ubuntu.com/ubuntu noble/main amd64 libxv1 amd64 2:1.0.11-1.1build1 [10.7 kB]
Get:72 http://archive.ubuntu.com/ubuntu noble-updates/main amd64 gstreamer1.0-x amd64 1.24.2-1ubuntu0.2 [85.0 kB]
Get:73 http://archive.ubuntu.com/ubuntu noble/main amd64 ipxe-qemu all 1.21.1+git-20220113.fbbdc3926-0ubuntu2 [1,565 kB]
Get:74 http://archive.ubuntu.com/ubuntu noble/main amd64 ipxe-qemu-256k-compat-efi-roms all 1.0.0+git-20150424.a25a16d-0ubuntu5 [548 kB]
Get:75 http://archive.ubuntu.com/ubuntu noble/main amd64 libbrlapi0.8 amd64 6.6-4ubuntu5 [31.4 kB]
Get:76 http://archive.ubuntu.com/ubuntu noble/main amd64 libdecor-0-0 amd64 0.2.2-1build2 [16.5 kB]
Get:77 http://archive.ubuntu.com/ubuntu noble/main amd64 libdecor-0-plugin-1-gtk amd64 0.2.2-1build2 [22.2 kB]
Get:78 http://archive.ubuntu.com/ubuntu noble/main amd64 libsamplerate0 amd64 0.2.2-4build1 [1,344 kB]
Get:79 http://archive.ubuntu.com/ubuntu noble/main amd64 libjack-jackd2-0 amd64 1.9.21~dfsg-3ubuntu3 [289 kB]
Get:80 http://archive.ubuntu.com/ubuntu noble/main amd64 libwebrtc-audio-processing1 amd64 0.3.1-0ubuntu6 [290 kB]
Get:81 http://archive.ubuntu.com/ubuntu noble-updates/main amd64 libspa-0.2-modules amd64 1.0.5-1ubuntu3 [626 kB]
Get:82 http://archive.ubuntu.com/ubuntu noble-updates/main amd64 libpipewire-0.3-0t64 amd64 1.0.5-1ubuntu3 [252 kB]
Get:83 http://archive.ubuntu.com/ubuntu noble-updates/main amd64 libpipewire-0.3-common all 1.0.5-1ubuntu3 [18.8 kB]
Get:84 http://archive.ubuntu.com/ubuntu noble-updates/main amd64 libpolkit-agent-1-0 amd64 124-2ubuntu1.24.04.2 [17.4 kB]
Get:85 http://archive.ubuntu.com/ubuntu noble/main amd64 libxss1 amd64 1:1.2.3-1build3 [7,204 B]
Get:86 http://archive.ubuntu.com/ubuntu noble-updates/main amd64 libsdl2-2.0-0 amd64 2.30.0+dfsg-1ubuntu3.1 [686 kB]
Get:87 http://archive.ubuntu.com/ubuntu noble/main amd64 libslirp0 amd64 4.7.0-1ubuntu3 [63.8 kB]
Get:88 http://archive.ubuntu.com/ubuntu noble/main amd64 libspice-server1 amd64 0.15.1-1build2 [349 kB]
Get:89 http://archive.ubuntu.com/ubuntu noble/main amd64 libtpms0 amd64 0.9.3-0ubuntu4 [373 kB]
Get:90 http://archive.ubuntu.com/ubuntu noble/main amd64 libvirglrenderer1 amd64 1.0.0-1ubuntu2 [226 kB]
Get:91 http://archive.ubuntu.com/ubuntu noble-updates/main amd64 libvirt-daemon-driver-qemu amd64 10.0.0-2ubuntu8.7 [740 kB]
Get:92 http://archive.ubuntu.com/ubuntu noble-updates/main amd64 libvirt-daemon amd64 10.0.0-2ubuntu8.7 [431 kB]
Get:93 http://archive.ubuntu.com/ubuntu noble-updates/main amd64 libvirt-daemon-config-network all 10.0.0-2ubuntu8.7 [3,120 B]
Get:94 http://archive.ubuntu.com/ubuntu noble-updates/main amd64 libvirt-daemon-config-nwfilter all 10.0.0-2ubuntu8.7 [6,042 B]
Get:95 http://archive.ubuntu.com/ubuntu noble-updates/main amd64 systemd-container amd64 255.4-1ubuntu8.8 [417 kB]
Get:96 http://archive.ubuntu.com/ubuntu noble-updates/main amd64 libvirt-daemon-system-systemd all 10.0.0-2ubuntu8.7 [1,376 B]
Get:97 http://archive.ubuntu.com/ubuntu noble/main amd64 xml-core all 0.19 [20.3 kB]
Get:98 http://archive.ubuntu.com/ubuntu noble-updates/main amd64 polkitd amd64 124-2ubuntu1.24.04.2 [95.2 kB]
Get:99 http://archive.ubuntu.com/ubuntu noble-updates/main amd64 libvirt-daemon-system amd64 10.0.0-2ubuntu8.7 [49.6 kB]
Get:100 http://archive.ubuntu.com/ubuntu noble-updates/main amd64 libxml2-utils amd64 2.9.14+dfsg-1.3ubuntu3.3 [39.4 kB]
Get:101 http://archive.ubuntu.com/ubuntu noble-updates/main amd64 lvm2 amd64 2.03.16-3ubuntu3.2 [1,186 kB]
Get:102 http://archive.ubuntu.com/ubuntu noble/main amd64 mdevctl amd64 1.3.0-1ubuntu2 [936 kB]
Get:103 http://archive.ubuntu.com/ubuntu noble/main amd64 python3-cairo amd64 1.25.1-2build2 [119 kB]
Get:104 http://archive.ubuntu.com/ubuntu noble/main amd64 python3-gi-cairo amd64 3.48.2-1 [8,132 B]
Get:105 http://archive.ubuntu.com/ubuntu noble-updates/main amd64 qemu-system-common amd64 1:8.2.2+ds-0ubuntu1.7 [1,253 kB]
Get:106 http://archive.ubuntu.com/ubuntu noble-updates/main amd64 qemu-system-data all 1:8.2.2+ds-0ubuntu1.7 [1,793 kB]
Get:107 http://archive.ubuntu.com/ubuntu noble/main amd64 libfdt1 amd64 1.7.0-2build1 [20.1 kB]
Get:108 http://archive.ubuntu.com/ubuntu noble/main amd64 seabios all 1.16.3-2 [175 kB]
Get:109 http://archive.ubuntu.com/ubuntu noble-updates/main amd64 qemu-system-x86 amd64 1:8.2.2+ds-0ubuntu1.7 [11.2 MB]
Get:110 http://archive.ubuntu.com/ubuntu noble-updates/main amd64 qemu-system-modules-opengl amd64 1:8.2.2+ds-0ubuntu1.7 [184 kB]
Get:111 http://archive.ubuntu.com/ubuntu noble-updates/main amd64 qemu-system-gui amd64 1:8.2.2+ds-0ubuntu1.7 [314 kB]
Get:112 http://archive.ubuntu.com/ubuntu noble-updates/main amd64 qemu-system-modules-spice amd64 1:8.2.2+ds-0ubuntu1.7 [70.2 kB]
Get:113 http://archive.ubuntu.com/ubuntu noble-updates/main amd64 swtpm amd64 0.7.3-0ubuntu5.24.04.1 [53.1 kB]
Get:114 http://archive.ubuntu.com/ubuntu noble-updates/main amd64 swtpm-tools amd64 0.7.3-0ubuntu5.24.04.1 [92.9 kB]
Get:115 http://archive.ubuntu.com/ubuntu noble-updates/main amd64 thin-provisioning-tools amd64 0.9.0-2ubuntu5.1 [436 kB]
Get:116 http://archive.ubuntu.com/ubuntu noble/universe amd64 gir1.2-libvirt-glib-1.0 amd64 5.0.0-2build3 [32.6 kB]
Get:117 http://archive.ubuntu.com/ubuntu noble-updates/universe amd64 virt-manager all 1:4.1.0-3ubuntu0.1 [263 kB]
Get:118 http://archive.ubuntu.com/ubuntu noble-updates/main amd64 libnss-mymachines amd64 255.4-1ubuntu8.8 [153 kB]
Get:119 http://archive.ubuntu.com/ubuntu noble-updates/main amd64 ovmf all 2024.02-2ubuntu0.4 [4,571 kB]
Fetched 43.2 MB in 5s (9,539 kB/s)
Extracting templates from packages: 100%
Preconfiguring packages ...
Selecting previously unselected package sgml-base.
(Reading database ... 30439 files and directories currently installed.)
Preparing to unpack .../000-sgml-base_1.31_all.deb ...
Unpacking sgml-base (1.31) ...
Selecting previously unselected package libslang2:amd64.
Preparing to unpack .../001-libslang2_2.3.3-3build2_amd64.deb ...
Unpacking libslang2:amd64 (2.3.3-3build2) ...
Selecting previously unselected package logrotate.
Preparing to unpack .../002-logrotate_3.21.0-2build1_amd64.deb ...
Unpacking logrotate (3.21.0-2build1) ...
Selecting previously unselected package netcat-openbsd.
Preparing to unpack .../003-netcat-openbsd_1.226-1ubuntu2_amd64.deb ...
Unpacking netcat-openbsd (1.226-1ubuntu2) ...
Selecting previously unselected package udev.
Preparing to unpack .../004-udev_255.4-1ubuntu8.8_amd64.deb ...
Unpacking udev (255.4-1ubuntu8.8) ...
Selecting previously unselected package systemd-hwe-hwdb.
Preparing to unpack .../005-systemd-hwe-hwdb_255.1.4_all.deb ...
Unpacking systemd-hwe-hwdb (255.1.4) ...
Selecting previously unselected package dmidecode.
Preparing to unpack .../006-dmidecode_3.5-3ubuntu0.1_amd64.deb ...
Unpacking dmidecode (3.5-3ubuntu0.1) ...
Selecting previously unselected package gettext-base.
Preparing to unpack .../007-gettext-base_0.21-14ubuntu2_amd64.deb ...
Unpacking gettext-base (0.21-14ubuntu2) ...
Selecting previously unselected package libip4tc2:amd64.
Preparing to unpack .../008-libip4tc2_1.8.10-3ubuntu2_amd64.deb ...
Unpacking libip4tc2:amd64 (1.8.10-3ubuntu2) ...
Selecting previously unselected package libip6tc2:amd64.
Preparing to unpack .../009-libip6tc2_1.8.10-3ubuntu2_amd64.deb ...
Unpacking libip6tc2:amd64 (1.8.10-3ubuntu2) ...
Selecting previously unselected package libnfnetlink0:amd64.
Preparing to unpack .../010-libnfnetlink0_1.0.2-2build1_amd64.deb ...
Unpacking libnfnetlink0:amd64 (1.0.2-2build1) ...
Selecting previously unselected package libnetfilter-conntrack3:amd64.
Preparing to unpack .../011-libnetfilter-conntrack3_1.0.9-6build1_amd64.deb ...
Unpacking libnetfilter-conntrack3:amd64 (1.0.9-6build1) ...
Selecting previously unselected package libnftnl11:amd64.
Preparing to unpack .../012-libnftnl11_1.2.6-2build1_amd64.deb ...
Unpacking libnftnl11:amd64 (1.2.6-2build1) ...
Selecting previously unselected package iptables.
Preparing to unpack .../013-iptables_1.8.10-3ubuntu2_amd64.deb ...
Unpacking iptables (1.8.10-3ubuntu2) ...
Selecting previously unselected package libnftables1:amd64.
Preparing to unpack .../014-libnftables1_1.0.9-1build1_amd64.deb ...
Unpacking libnftables1:amd64 (1.0.9-1build1) ...
Selecting previously unselected package libparted2t64:amd64.
Preparing to unpack .../015-libparted2t64_3.6-4build1_amd64.deb ...
Adding 'diversion of /lib/x86_64-linux-gnu/libparted.so.2 to /lib/x86_64-linux-gnu/libparted.so.2.usr-is-merged by
libparted2t64'
Adding 'diversion of /lib/x86_64-linux-gnu/libparted.so.2.0.5 to /lib/x86_64-linux-gnu/libparted.so.2.0.5.usr-is-me
rged by libparted2t64'
Unpacking libparted2t64:amd64 (3.6-4build1) ...
Selecting previously unselected package nftables.
Preparing to unpack .../016-nftables_1.0.9-1build1_amd64.deb ...
Unpacking nftables (1.0.9-1build1) ...
Selecting previously unselected package parted.
Preparing to unpack .../017-parted_3.6-4build1_amd64.deb ...
Unpacking parted (3.6-4build1) ...
Selecting previously unselected package acl.
Preparing to unpack .../018-acl_2.3.2-1build1.1_amd64.deb ...
Unpacking acl (2.3.2-1build1.1) ...
Selecting previously unselected package alsa-topology-conf.
Preparing to unpack .../019-alsa-topology-conf_1.2.5.1-2_all.deb ...
Unpacking alsa-topology-conf (1.2.5.1-2) ...
Selecting previously unselected package libasound2-data.
Preparing to unpack .../020-libasound2-data_1.2.11-1ubuntu0.1_all.deb ...
Unpacking libasound2-data (1.2.11-1ubuntu0.1) ...
Selecting previously unselected package libasound2t64:amd64.
Preparing to unpack .../021-libasound2t64_1.2.11-1ubuntu0.1_amd64.deb ...
Unpacking libasound2t64:amd64 (1.2.11-1ubuntu0.1) ...
Selecting previously unselected package alsa-ucm-conf.
Preparing to unpack .../022-alsa-ucm-conf_1.2.10-1ubuntu5.7_all.deb ...
Unpacking alsa-ucm-conf (1.2.10-1ubuntu5.7) ...
Selecting previously unselected package msr-tools.
Preparing to unpack .../023-msr-tools_1.3-5build1_amd64.deb ...
Unpacking msr-tools (1.3-5build1) ...
Selecting previously unselected package cpu-checker.
Preparing to unpack .../024-cpu-checker_0.7-1.3build2_amd64.deb ...
Unpacking cpu-checker (0.7-1.3build2) ...
Selecting previously unselected package libdevmapper-event1.02.1:amd64.
Preparing to unpack .../025-libdevmapper-event1.02.1_2%3a1.02.185-3ubuntu3.2_amd64.deb ...
Unpacking libdevmapper-event1.02.1:amd64 (2:1.02.185-3ubuntu3.2) ...
Selecting previously unselected package liblvm2cmd2.03:amd64.
Preparing to unpack .../026-liblvm2cmd2.03_2.03.16-3ubuntu3.2_amd64.deb ...
Unpacking liblvm2cmd2.03:amd64 (2.03.16-3ubuntu3.2) ...
Selecting previously unselected package dmeventd.
Preparing to unpack .../027-dmeventd_2%3a1.02.185-3ubuntu3.2_amd64.deb ...
Unpacking dmeventd (2:1.02.185-3ubuntu3.2) ...
Selecting previously unselected package dns-root-data.
Preparing to unpack .../028-dns-root-data_2024071801~ubuntu0.24.04.1_all.deb ...
Unpacking dns-root-data (2024071801~ubuntu0.24.04.1) ...
Selecting previously unselected package dnsmasq-base.
Preparing to unpack .../029-dnsmasq-base_2.90-2build2_amd64.deb ...
Unpacking dnsmasq-base (2.90-2build2) ...
Selecting previously unselected package gir1.2-atk-1.0:amd64.
Preparing to unpack .../030-gir1.2-atk-1.0_2.52.0-1build1_amd64.deb ...
Unpacking gir1.2-atk-1.0:amd64 (2.52.0-1build1) ...
Selecting previously unselected package gir1.2-gdkpixbuf-2.0:amd64.
Preparing to unpack .../031-gir1.2-gdkpixbuf-2.0_2.42.10+dfsg-3ubuntu3.1_amd64.deb ...
Unpacking gir1.2-gdkpixbuf-2.0:amd64 (2.42.10+dfsg-3ubuntu3.1) ...
Selecting previously unselected package libharfbuzz-gobject0:amd64.
Preparing to unpack .../032-libharfbuzz-gobject0_8.3.0-2build2_amd64.deb ...
Unpacking libharfbuzz-gobject0:amd64 (8.3.0-2build2) ...
Selecting previously unselected package gir1.2-harfbuzz-0.0:amd64.
Preparing to unpack .../033-gir1.2-harfbuzz-0.0_8.3.0-2build2_amd64.deb ...
Unpacking gir1.2-harfbuzz-0.0:amd64 (8.3.0-2build2) ...
Selecting previously unselected package libxft2:amd64.
Preparing to unpack .../034-libxft2_2.3.6-1build1_amd64.deb ...
Unpacking libxft2:amd64 (2.3.6-1build1) ...
Selecting previously unselected package libpangoxft-1.0-0:amd64.
Preparing to unpack .../035-libpangoxft-1.0-0_1.52.1+ds-1build1_amd64.deb ...
Unpacking libpangoxft-1.0-0:amd64 (1.52.1+ds-1build1) ...
Selecting previously unselected package gir1.2-pango-1.0:amd64.
Preparing to unpack .../036-gir1.2-pango-1.0_1.52.1+ds-1build1_amd64.deb ...
Unpacking gir1.2-pango-1.0:amd64 (1.52.1+ds-1build1) ...
Selecting previously unselected package gir1.2-gtk-3.0:amd64.
Preparing to unpack .../037-gir1.2-gtk-3.0_3.24.41-4ubuntu1.3_amd64.deb ...
Unpacking gir1.2-gtk-3.0:amd64 (3.24.41-4ubuntu1.3) ...
Selecting previously unselected package libayatana-ido3-0.4-0:amd64.
Preparing to unpack .../038-libayatana-ido3-0.4-0_0.10.1-1build2_amd64.deb ...
Unpacking libayatana-ido3-0.4-0:amd64 (0.10.1-1build2) ...
Selecting previously unselected package libayatana-indicator3-7:amd64.
Preparing to unpack .../039-libayatana-indicator3-7_0.9.4-1build1_amd64.deb ...
Unpacking libayatana-indicator3-7:amd64 (0.9.4-1build1) ...
Selecting previously unselected package libdbusmenu-glib4:amd64.
Preparing to unpack .../040-libdbusmenu-glib4_18.10.20180917~bzr492+repack1-3.1ubuntu5_amd64.deb ...
Unpacking libdbusmenu-glib4:amd64 (18.10.20180917~bzr492+repack1-3.1ubuntu5) ...
Selecting previously unselected package libdbusmenu-gtk3-4:amd64.
Preparing to unpack .../041-libdbusmenu-gtk3-4_18.10.20180917~bzr492+repack1-3.1ubuntu5_amd64.deb ...
Unpacking libdbusmenu-gtk3-4:amd64 (18.10.20180917~bzr492+repack1-3.1ubuntu5) ...
Selecting previously unselected package libayatana-appindicator3-1.
Preparing to unpack .../042-libayatana-appindicator3-1_0.5.93-1build3_amd64.deb ...
Unpacking libayatana-appindicator3-1 (0.5.93-1build3) ...
Selecting previously unselected package gir1.2-ayatanaappindicator3-0.1.
Preparing to unpack .../043-gir1.2-ayatanaappindicator3-0.1_0.5.93-1build3_amd64.deb ...
Unpacking gir1.2-ayatanaappindicator3-0.1 (0.5.93-1build3) ...
Selecting previously unselected package gir1.2-gstreamer-1.0:amd64.
Preparing to unpack .../044-gir1.2-gstreamer-1.0_1.24.2-1ubuntu0.1_amd64.deb ...
Unpacking gir1.2-gstreamer-1.0:amd64 (1.24.2-1ubuntu0.1) ...
Selecting previously unselected package gir1.2-gtk-vnc-2.0:amd64.
Preparing to unpack .../045-gir1.2-gtk-vnc-2.0_1.3.1-1build2_amd64.deb ...
Unpacking gir1.2-gtk-vnc-2.0:amd64 (1.3.1-1build2) ...
Selecting previously unselected package libgtksourceview-4-common.
Preparing to unpack .../046-libgtksourceview-4-common_4.8.4-5build4_all.deb ...
Unpacking libgtksourceview-4-common (4.8.4-5build4) ...
Selecting previously unselected package libgtksourceview-4-0:amd64.
Preparing to unpack .../047-libgtksourceview-4-0_4.8.4-5build4_amd64.deb ...
Unpacking libgtksourceview-4-0:amd64 (4.8.4-5build4) ...
Selecting previously unselected package gir1.2-gtksource-4:amd64.
Preparing to unpack .../048-gir1.2-gtksource-4_4.8.4-5build4_amd64.deb ...
Unpacking gir1.2-gtksource-4:amd64 (4.8.4-5build4) ...
Selecting previously unselected package gir1.2-spiceclientglib-2.0:amd64.
Preparing to unpack .../049-gir1.2-spiceclientglib-2.0_0.42-2ubuntu2_amd64.deb ...
Unpacking gir1.2-spiceclientglib-2.0:amd64 (0.42-2ubuntu2) ...
Selecting previously unselected package gir1.2-spiceclientgtk-3.0:amd64.
Preparing to unpack .../050-gir1.2-spiceclientgtk-3.0_0.42-2ubuntu2_amd64.deb ...
Unpacking gir1.2-spiceclientgtk-3.0:amd64 (0.42-2ubuntu2) ...
Selecting previously unselected package gir1.2-vte-2.91:amd64.
Preparing to unpack .../051-gir1.2-vte-2.91_0.76.0-1ubuntu0.1_amd64.deb ...
Unpacking gir1.2-vte-2.91:amd64 (0.76.0-1ubuntu0.1) ...
Selecting previously unselected package libaa1:amd64.
Preparing to unpack .../052-libaa1_1.4p5-51.1_amd64.deb ...
Unpacking libaa1:amd64 (1.4p5-51.1) ...
Selecting previously unselected package libraw1394-11:amd64.
Preparing to unpack .../053-libraw1394-11_2.1.2-2build3_amd64.deb ...
Unpacking libraw1394-11:amd64 (2.1.2-2build3) ...
Selecting previously unselected package libavc1394-0:amd64.
Preparing to unpack .../054-libavc1394-0_0.5.4-5build3_amd64.deb ...
Unpacking libavc1394-0:amd64 (0.5.4-5build3) ...
Selecting previously unselected package libcaca0:amd64.
Preparing to unpack .../055-libcaca0_0.99.beta20-4build2_amd64.deb ...
Unpacking libcaca0:amd64 (0.99.beta20-4build2) ...
Selecting previously unselected package libdv4t64:amd64.
Preparing to unpack .../056-libdv4t64_1.0.0-17.1build1_amd64.deb ...
Unpacking libdv4t64:amd64 (1.0.0-17.1build1) ...
Selecting previously unselected package libgstreamer-plugins-good1.0-0:amd64.
Preparing to unpack .../057-libgstreamer-plugins-good1.0-0_1.24.2-1ubuntu1.1_amd64.deb ...
Unpacking libgstreamer-plugins-good1.0-0:amd64 (1.24.2-1ubuntu1.1) ...
Selecting previously unselected package libgudev-1.0-0:amd64.
Preparing to unpack .../058-libgudev-1.0-0_1%3a238-5ubuntu1_amd64.deb ...
Unpacking libgudev-1.0-0:amd64 (1:238-5ubuntu1) ...
Selecting previously unselected package libiec61883-0:amd64.
Preparing to unpack .../059-libiec61883-0_1.2.0-6build1_amd64.deb ...
Unpacking libiec61883-0:amd64 (1.2.0-6build1) ...
Selecting previously unselected package libspeex1:amd64.
Preparing to unpack .../060-libspeex1_1.2.1-2ubuntu2.24.04.1_amd64.deb ...
Unpacking libspeex1:amd64 (1.2.1-2ubuntu2.24.04.1) ...
Selecting previously unselected package libshout3:amd64.
Preparing to unpack .../061-libshout3_2.4.6-1build2_amd64.deb ...
Unpacking libshout3:amd64 (2.4.6-1build2) ...
Selecting previously unselected package libtag1v5-vanilla:amd64.
Preparing to unpack .../062-libtag1v5-vanilla_1.13.1-1build1_amd64.deb ...
Unpacking libtag1v5-vanilla:amd64 (1.13.1-1build1) ...
Selecting previously unselected package libtag1v5:amd64.
Preparing to unpack .../063-libtag1v5_1.13.1-1build1_amd64.deb ...
Unpacking libtag1v5:amd64 (1.13.1-1build1) ...
Selecting previously unselected package libtwolame0:amd64.
Preparing to unpack .../064-libtwolame0_0.4.0-2build3_amd64.deb ...
Unpacking libtwolame0:amd64 (0.4.0-2build3) ...
Selecting previously unselected package libv4lconvert0t64:amd64.
Preparing to unpack .../065-libv4lconvert0t64_1.26.1-4build3_amd64.deb ...
Unpacking libv4lconvert0t64:amd64 (1.26.1-4build3) ...
Selecting previously unselected package libv4l-0t64:amd64.
Preparing to unpack .../066-libv4l-0t64_1.26.1-4build3_amd64.deb ...
Unpacking libv4l-0t64:amd64 (1.26.1-4build3) ...
Selecting previously unselected package libvpx9:amd64.
Preparing to unpack .../067-libvpx9_1.14.0-1ubuntu2.2_amd64.deb ...
Unpacking libvpx9:amd64 (1.14.0-1ubuntu2.2) ...
Selecting previously unselected package libwavpack1:amd64.
Preparing to unpack .../068-libwavpack1_5.6.0-1build1_amd64.deb ...
Unpacking libwavpack1:amd64 (5.6.0-1build1) ...
Selecting previously unselected package gstreamer1.0-plugins-good:amd64.
Preparing to unpack .../069-gstreamer1.0-plugins-good_1.24.2-1ubuntu1.1_amd64.deb ...
Unpacking gstreamer1.0-plugins-good:amd64 (1.24.2-1ubuntu1.1) ...
Selecting previously unselected package libxv1:amd64.
Preparing to unpack .../070-libxv1_2%3a1.0.11-1.1build1_amd64.deb ...
Unpacking libxv1:amd64 (2:1.0.11-1.1build1) ...
Selecting previously unselected package gstreamer1.0-x:amd64.
Preparing to unpack .../071-gstreamer1.0-x_1.24.2-1ubuntu0.2_amd64.deb ...
Unpacking gstreamer1.0-x:amd64 (1.24.2-1ubuntu0.2) ...
Selecting previously unselected package ipxe-qemu.
Preparing to unpack .../072-ipxe-qemu_1.21.1+git-20220113.fbbdc3926-0ubuntu2_all.deb ...
Unpacking ipxe-qemu (1.21.1+git-20220113.fbbdc3926-0ubuntu2) ...
Selecting previously unselected package ipxe-qemu-256k-compat-efi-roms.
Preparing to unpack .../073-ipxe-qemu-256k-compat-efi-roms_1.0.0+git-20150424.a25a16d-0ubuntu5_all.deb ...
Unpacking ipxe-qemu-256k-compat-efi-roms (1.0.0+git-20150424.a25a16d-0ubuntu5) ...
Selecting previously unselected package libbrlapi0.8:amd64.
Preparing to unpack .../074-libbrlapi0.8_6.6-4ubuntu5_amd64.deb ...
Unpacking libbrlapi0.8:amd64 (6.6-4ubuntu5) ...
Selecting previously unselected package libdecor-0-0:amd64.
Preparing to unpack .../075-libdecor-0-0_0.2.2-1build2_amd64.deb ...
Unpacking libdecor-0-0:amd64 (0.2.2-1build2) ...
Selecting previously unselected package libdecor-0-plugin-1-gtk:amd64.
Preparing to unpack .../076-libdecor-0-plugin-1-gtk_0.2.2-1build2_amd64.deb ...
Unpacking libdecor-0-plugin-1-gtk:amd64 (0.2.2-1build2) ...
Selecting previously unselected package libsamplerate0:amd64.
Preparing to unpack .../077-libsamplerate0_0.2.2-4build1_amd64.deb ...
Unpacking libsamplerate0:amd64 (0.2.2-4build1) ...
Selecting previously unselected package libjack-jackd2-0:amd64.
Preparing to unpack .../078-libjack-jackd2-0_1.9.21~dfsg-3ubuntu3_amd64.deb ...
Unpacking libjack-jackd2-0:amd64 (1.9.21~dfsg-3ubuntu3) ...
Selecting previously unselected package libwebrtc-audio-processing1:amd64.
Preparing to unpack .../079-libwebrtc-audio-processing1_0.3.1-0ubuntu6_amd64.deb ...
Unpacking libwebrtc-audio-processing1:amd64 (0.3.1-0ubuntu6) ...
Selecting previously unselected package libspa-0.2-modules:amd64.
Preparing to unpack .../080-libspa-0.2-modules_1.0.5-1ubuntu3_amd64.deb ...
Unpacking libspa-0.2-modules:amd64 (1.0.5-1ubuntu3) ...
Selecting previously unselected package libpipewire-0.3-0t64:amd64.
Preparing to unpack .../081-libpipewire-0.3-0t64_1.0.5-1ubuntu3_amd64.deb ...
Unpacking libpipewire-0.3-0t64:amd64 (1.0.5-1ubuntu3) ...
Selecting previously unselected package libpipewire-0.3-common.
Preparing to unpack .../082-libpipewire-0.3-common_1.0.5-1ubuntu3_all.deb ...
Unpacking libpipewire-0.3-common (1.0.5-1ubuntu3) ...
Selecting previously unselected package libpolkit-agent-1-0:amd64.
Preparing to unpack .../083-libpolkit-agent-1-0_124-2ubuntu1.24.04.2_amd64.deb ...
Unpacking libpolkit-agent-1-0:amd64 (124-2ubuntu1.24.04.2) ...
Selecting previously unselected package libxss1:amd64.
Preparing to unpack .../084-libxss1_1%3a1.2.3-1build3_amd64.deb ...
Unpacking libxss1:amd64 (1:1.2.3-1build3) ...
Selecting previously unselected package libsdl2-2.0-0:amd64.
Preparing to unpack .../085-libsdl2-2.0-0_2.30.0+dfsg-1ubuntu3.1_amd64.deb ...
Unpacking libsdl2-2.0-0:amd64 (2.30.0+dfsg-1ubuntu3.1) ...
Selecting previously unselected package libslirp0:amd64.
Preparing to unpack .../086-libslirp0_4.7.0-1ubuntu3_amd64.deb ...
Unpacking libslirp0:amd64 (4.7.0-1ubuntu3) ...
Selecting previously unselected package libspice-server1:amd64.
Preparing to unpack .../087-libspice-server1_0.15.1-1build2_amd64.deb ...
Unpacking libspice-server1:amd64 (0.15.1-1build2) ...
Selecting previously unselected package libtpms0:amd64.
Preparing to unpack .../088-libtpms0_0.9.3-0ubuntu4_amd64.deb ...
Unpacking libtpms0:amd64 (0.9.3-0ubuntu4) ...
Selecting previously unselected package libvirglrenderer1:amd64.
Preparing to unpack .../089-libvirglrenderer1_1.0.0-1ubuntu2_amd64.deb ...
Unpacking libvirglrenderer1:amd64 (1.0.0-1ubuntu2) ...
Selecting previously unselected package libvirt-daemon-driver-qemu.
Preparing to unpack .../090-libvirt-daemon-driver-qemu_10.0.0-2ubuntu8.7_amd64.deb ...
Unpacking libvirt-daemon-driver-qemu (10.0.0-2ubuntu8.7) ...
Selecting previously unselected package libvirt-daemon.
Preparing to unpack .../091-libvirt-daemon_10.0.0-2ubuntu8.7_amd64.deb ...
Unpacking libvirt-daemon (10.0.0-2ubuntu8.7) ...
Selecting previously unselected package libvirt-daemon-config-network.
Preparing to unpack .../092-libvirt-daemon-config-network_10.0.0-2ubuntu8.7_all.deb ...
Unpacking libvirt-daemon-config-network (10.0.0-2ubuntu8.7) ...
Selecting previously unselected package libvirt-daemon-config-nwfilter.
Preparing to unpack .../093-libvirt-daemon-config-nwfilter_10.0.0-2ubuntu8.7_all.deb ...
Unpacking libvirt-daemon-config-nwfilter (10.0.0-2ubuntu8.7) ...
Selecting previously unselected package systemd-container.
Preparing to unpack .../094-systemd-container_255.4-1ubuntu8.8_amd64.deb ...
Unpacking systemd-container (255.4-1ubuntu8.8) ...
Selecting previously unselected package libvirt-daemon-system-systemd.
Preparing to unpack .../095-libvirt-daemon-system-systemd_10.0.0-2ubuntu8.7_all.deb ...
Unpacking libvirt-daemon-system-systemd (10.0.0-2ubuntu8.7) ...
Selecting previously unselected package xml-core.
Preparing to unpack .../096-xml-core_0.19_all.deb ...
Unpacking xml-core (0.19) ...
Selecting previously unselected package polkitd.
Preparing to unpack .../097-polkitd_124-2ubuntu1.24.04.2_amd64.deb ...
Unpacking polkitd (124-2ubuntu1.24.04.2) ...
Selecting previously unselected package libvirt-daemon-system.
Preparing to unpack .../098-libvirt-daemon-system_10.0.0-2ubuntu8.7_amd64.deb ...
Unpacking libvirt-daemon-system (10.0.0-2ubuntu8.7) ...
Selecting previously unselected package libxml2-utils.
Preparing to unpack .../099-libxml2-utils_2.9.14+dfsg-1.3ubuntu3.3_amd64.deb ...
Unpacking libxml2-utils (2.9.14+dfsg-1.3ubuntu3.3) ...
Selecting previously unselected package lvm2.
Preparing to unpack .../100-lvm2_2.03.16-3ubuntu3.2_amd64.deb ...
Unpacking lvm2 (2.03.16-3ubuntu3.2) ...
Selecting previously unselected package mdevctl.
Preparing to unpack .../101-mdevctl_1.3.0-1ubuntu2_amd64.deb ...
Unpacking mdevctl (1.3.0-1ubuntu2) ...
Selecting previously unselected package python3-cairo.
Preparing to unpack .../102-python3-cairo_1.25.1-2build2_amd64.deb ...
Unpacking python3-cairo (1.25.1-2build2) ...
Selecting previously unselected package python3-gi-cairo.
Preparing to unpack .../103-python3-gi-cairo_3.48.2-1_amd64.deb ...
Unpacking python3-gi-cairo (3.48.2-1) ...
Selecting previously unselected package qemu-system-common.
Preparing to unpack .../104-qemu-system-common_1%3a8.2.2+ds-0ubuntu1.7_amd64.deb ...
Unpacking qemu-system-common (1:8.2.2+ds-0ubuntu1.7) ...
Selecting previously unselected package qemu-system-data.
Preparing to unpack .../105-qemu-system-data_1%3a8.2.2+ds-0ubuntu1.7_all.deb ...
Unpacking qemu-system-data (1:8.2.2+ds-0ubuntu1.7) ...
Selecting previously unselected package libfdt1:amd64.
Preparing to unpack .../106-libfdt1_1.7.0-2build1_amd64.deb ...
Unpacking libfdt1:amd64 (1.7.0-2build1) ...
Selecting previously unselected package seabios.
Preparing to unpack .../107-seabios_1.16.3-2_all.deb ...
Unpacking seabios (1.16.3-2) ...
Selecting previously unselected package qemu-system-x86.
Preparing to unpack .../108-qemu-system-x86_1%3a8.2.2+ds-0ubuntu1.7_amd64.deb ...
Unpacking qemu-system-x86 (1:8.2.2+ds-0ubuntu1.7) ...
Selecting previously unselected package qemu-system-modules-opengl.
Preparing to unpack .../109-qemu-system-modules-opengl_1%3a8.2.2+ds-0ubuntu1.7_amd64.deb ...
Unpacking qemu-system-modules-opengl (1:8.2.2+ds-0ubuntu1.7) ...
Selecting previously unselected package qemu-system-gui.
Preparing to unpack .../110-qemu-system-gui_1%3a8.2.2+ds-0ubuntu1.7_amd64.deb ...
Unpacking qemu-system-gui (1:8.2.2+ds-0ubuntu1.7) ...
Selecting previously unselected package qemu-system-modules-spice.
Preparing to unpack .../111-qemu-system-modules-spice_1%3a8.2.2+ds-0ubuntu1.7_amd64.deb ...
Unpacking qemu-system-modules-spice (1:8.2.2+ds-0ubuntu1.7) ...
Selecting previously unselected package swtpm.
Preparing to unpack .../112-swtpm_0.7.3-0ubuntu5.24.04.1_amd64.deb ...
Unpacking swtpm (0.7.3-0ubuntu5.24.04.1) ...
Selecting previously unselected package swtpm-tools.
Preparing to unpack .../113-swtpm-tools_0.7.3-0ubuntu5.24.04.1_amd64.deb ...
Unpacking swtpm-tools (0.7.3-0ubuntu5.24.04.1) ...
Selecting previously unselected package thin-provisioning-tools.
Preparing to unpack .../114-thin-provisioning-tools_0.9.0-2ubuntu5.1_amd64.deb ...
Unpacking thin-provisioning-tools (0.9.0-2ubuntu5.1) ...
Selecting previously unselected package gir1.2-libvirt-glib-1.0:amd64.
Preparing to unpack .../115-gir1.2-libvirt-glib-1.0_5.0.0-2build3_amd64.deb ...
Unpacking gir1.2-libvirt-glib-1.0:amd64 (5.0.0-2build3) ...
Selecting previously unselected package virt-manager.
Preparing to unpack .../116-virt-manager_1%3a4.1.0-3ubuntu0.1_all.deb ...
Unpacking virt-manager (1:4.1.0-3ubuntu0.1) ...
Selecting previously unselected package libnss-mymachines:amd64.
Preparing to unpack .../117-libnss-mymachines_255.4-1ubuntu8.8_amd64.deb ...
Unpacking libnss-mymachines:amd64 (255.4-1ubuntu8.8) ...
Selecting previously unselected package ovmf.
Preparing to unpack .../118-ovmf_2024.02-2ubuntu0.4_all.deb ...
Unpacking ovmf (2024.02-2ubuntu0.4) ...
Setting up libip4tc2:amd64 (1.8.10-3ubuntu2) ...
Setting up libpipewire-0.3-common (1.0.5-1ubuntu3) ...
Setting up logrotate (3.21.0-2build1) ...
Created symlink /etc/systemd/system/timers.target.wants/logrotate.timer → /usr/lib/systemd/system/logrotate.timer.
Setting up libvirt-daemon-config-network (10.0.0-2ubuntu8.7) ...
Setting up gir1.2-gstreamer-1.0:amd64 (1.24.2-1ubuntu0.1) ...
Setting up libraw1394-11:amd64 (2.1.2-2build3) ...
Setting up libxft2:amd64 (2.3.6-1build1) ...
Setting up libtag1v5-vanilla:amd64 (1.13.1-1build1) ...
Setting up python3-cairo (1.25.1-2build2) ...
Setting up libspeex1:amd64 (1.2.1-2ubuntu2.24.04.1) ...
Setting up libdevmapper-event1.02.1:amd64 (2:1.02.185-3ubuntu3.2) ...
Setting up libv4lconvert0t64:amd64 (1.26.1-4build3) ...
Setting up libpangoxft-1.0-0:amd64 (1.52.1+ds-1build1) ...
Setting up libtwolame0:amd64 (0.4.0-2build3) ...
Setting up gir1.2-gdkpixbuf-2.0:amd64 (2.42.10+dfsg-3ubuntu3.1) ...
Setting up gir1.2-spiceclientglib-2.0:amd64 (0.42-2ubuntu2) ...
Setting up gir1.2-atk-1.0:amd64 (2.52.0-1build1) ...
Setting up libip6tc2:amd64 (1.8.10-3ubuntu2) ...
Setting up libdbusmenu-glib4:amd64 (18.10.20180917~bzr492+repack1-3.1ubuntu5) ...
Setting up libspice-server1:amd64 (0.15.1-1build2) ...
Setting up netcat-openbsd (1.226-1ubuntu2) ...
update-alternatives: using /bin/nc.openbsd to provide /bin/nc (nc) in auto mode
Setting up gir1.2-libvirt-glib-1.0:amd64 (5.0.0-2build3) ...
Setting up msr-tools (1.3-5build1) ...
Setting up libwebrtc-audio-processing1:amd64 (0.3.1-0ubuntu6) ...
Setting up gettext-base (0.21-14ubuntu2) ...
Setting up libnftnl11:amd64 (1.2.6-2build1) ...
Setting up libharfbuzz-gobject0:amd64 (8.3.0-2build2) ...
Setting up libfdt1:amd64 (1.7.0-2build1) ...
Setting up libayatana-ido3-0.4-0:amd64 (0.10.1-1build2) ...
Setting up gir1.2-harfbuzz-0.0:amd64 (8.3.0-2build2) ...
Setting up acl (2.3.2-1build1.1) ...
Setting up ovmf (2024.02-2ubuntu0.4) ...
Setting up dns-root-data (2024071801~ubuntu0.24.04.1) ...
Setting up libasound2-data (1.2.11-1ubuntu0.1) ...
Setting up gir1.2-pango-1.0:amd64 (1.52.1+ds-1build1) ...
Setting up libgstreamer-plugins-good1.0-0:amd64 (1.24.2-1ubuntu1.1) ...
Setting up libasound2t64:amd64 (1.2.11-1ubuntu0.1) ...
Setting up libslang2:amd64 (2.3.3-3build2) ...
Setting up libvirglrenderer1:amd64 (1.0.0-1ubuntu2) ...
Setting up libspa-0.2-modules:amd64 (1.0.5-1ubuntu3) ...
Setting up libxv1:amd64 (2:1.0.11-1.1build1) ...
Setting up libshout3:amd64 (2.4.6-1build2) ...
Setting up thin-provisioning-tools (0.9.0-2ubuntu5.1) ...
Setting up udev (255.4-1ubuntu8.8) ...
Creating group 'input' with GID 995.
Creating group 'sgx' with GID 994.
Creating group 'kvm' with GID 993.
Creating group 'render' with GID 992.
fchownat() of /dev/snd/seq failed: Operation not permitted
fchownat() of /dev/snd/timer failed: Operation not permitted
fchownat() of /dev/loop-control failed: Operation not permitted
fchmod() of /dev/kvm failed: Operation not permitted
fchmod() of /dev/vhost-net failed: Operation not permitted
fchmod() of /dev/vhost-vsock failed: Operation not permitted
Setting up libvirt-daemon-driver-qemu (10.0.0-2ubuntu8.7) ...
Setting up libdv4t64:amd64 (1.0.0-17.1build1) ...
Setting up qemu-system-data (1:8.2.2+ds-0ubuntu1.7) ...
Setting up seabios (1.16.3-2) ...
Setting up systemd-hwe-hwdb (255.1.4) ...
Setting up libv4l-0t64:amd64 (1.26.1-4build3) ...
Setting up systemd-container (255.4-1ubuntu8.8) ...
Created symlink /etc/systemd/system/multi-user.target.wants/machines.target → /usr/lib/systemd/system/machines.targ
et.
Setting up libvpx9:amd64 (1.14.0-1ubuntu2.2) ...
Setting up libslirp0:amd64 (4.7.0-1ubuntu3) ...
Setting up alsa-topology-conf (1.2.5.1-2) ...
Setting up libtag1v5:amd64 (1.13.1-1build1) ...
Setting up cpu-checker (0.7-1.3build2) ...
Setting up libwavpack1:amd64 (5.6.0-1build1) ...
Setting up libnfnetlink0:amd64 (1.0.2-2build1) ...
Setting up ipxe-qemu (1.21.1+git-20220113.fbbdc3926-0ubuntu2) ...
Setting up libdecor-0-0:amd64 (0.2.2-1build2) ...
Setting up libpolkit-agent-1-0:amd64 (124-2ubuntu1.24.04.2) ...
Setting up ipxe-qemu-256k-compat-efi-roms (1.0.0+git-20150424.a25a16d-0ubuntu5) ...
Setting up sgml-base (1.31) ...
Setting up libbrlapi0.8:amd64 (6.6-4ubuntu5) ...
Setting up libxss1:amd64 (1:1.2.3-1build3) ...
Setting up libtpms0:amd64 (0.9.3-0ubuntu4) ...
Setting up dmidecode (3.5-3ubuntu0.1) ...
Setting up libxml2-utils (2.9.14+dfsg-1.3ubuntu3.3) ...
Setting up libvirt-daemon-config-nwfilter (10.0.0-2ubuntu8.7) ...
Setting up libsamplerate0:amd64 (0.2.2-4build1) ...
Setting up libayatana-indicator3-7:amd64 (0.9.4-1build1) ...
Setting up python3-gi-cairo (3.48.2-1) ...
Setting up libgtksourceview-4-common (4.8.4-5build4) ...
Setting up libpipewire-0.3-0t64:amd64 (1.0.5-1ubuntu3) ...
Setting up libdecor-0-plugin-1-gtk:amd64 (0.2.2-1build2) ...
Setting up libgudev-1.0-0:amd64 (1:238-5ubuntu1) ...
Setting up libaa1:amd64 (1.4p5-51.1) ...
Setting up libiec61883-0:amd64 (1.2.0-6build1) ...
Setting up mdevctl (1.3.0-1ubuntu2) ...
Setting up libavc1394-0:amd64 (0.5.4-5build3) ...
Setting up libdbusmenu-gtk3-4:amd64 (18.10.20180917~bzr492+repack1-3.1ubuntu5) ...
Setting up libnftables1:amd64 (1.0.9-1build1) ...
Setting up gstreamer1.0-x:amd64 (1.24.2-1ubuntu0.2) ...
Setting up nftables (1.0.9-1build1) ...
Setting up qemu-system-common (1:8.2.2+ds-0ubuntu1.7) ...
Created symlink /etc/systemd/system/multi-user.target.wants/qemu-kvm.service → /usr/lib/systemd/system/qemu-kvm.ser
vice.
Setting up libcaca0:amd64 (0.99.beta20-4build2) ...
Setting up alsa-ucm-conf (1.2.10-1ubuntu5.7) ...
Setting up gstreamer1.0-plugins-good:amd64 (1.24.2-1ubuntu1.1) ...
Setting up qemu-system-x86 (1:8.2.2+ds-0ubuntu1.7) ...
Setting up gir1.2-gtk-3.0:amd64 (3.24.41-4ubuntu1.3) ...
Setting up libparted2t64:amd64 (3.6-4build1) ...
Removing 'diversion of /lib/x86_64-linux-gnu/libparted.so.2 to /lib/x86_64-linux-gnu/libparted.so.2.usr-is-merged b
y libparted2t64'
Removing 'diversion of /lib/x86_64-linux-gnu/libparted.so.2.0.5 to /lib/x86_64-linux-gnu/libparted.so.2.0.5.usr-is-
merged by libparted2t64'
Setting up libgtksourceview-4-0:amd64 (4.8.4-5build4) ...
Setting up libnss-mymachines:amd64 (255.4-1ubuntu8.8) ...
Setting up libayatana-appindicator3-1 (0.5.93-1build3) ...
Setting up swtpm (0.7.3-0ubuntu5.24.04.1) ...
Setting up gir1.2-gtk-vnc-2.0:amd64 (1.3.1-1build2) ...
Setting up libvirt-daemon-system-systemd (10.0.0-2ubuntu8.7) ...
Setting up gir1.2-spiceclientgtk-3.0:amd64 (0.42-2ubuntu2) ...
Setting up libjack-jackd2-0:amd64 (1.9.21~dfsg-3ubuntu3) ...
Setting up libnetfilter-conntrack3:amd64 (1.0.9-6build1) ...
Setting up xml-core (0.19) ...
Setting up gir1.2-vte-2.91:amd64 (0.76.0-1ubuntu0.1) ...
Setting up libvirt-daemon (10.0.0-2ubuntu8.7) ...
Setting up libsdl2-2.0-0:amd64 (2.30.0+dfsg-1ubuntu3.1) ...
Setting up gir1.2-ayatanaappindicator3-0.1 (0.5.93-1build3) ...
Setting up gir1.2-gtksource-4:amd64 (4.8.4-5build4) ...
Setting up qemu-system-modules-opengl (1:8.2.2+ds-0ubuntu1.7) ...
Setting up iptables (1.8.10-3ubuntu2) ...
update-alternatives: using /usr/sbin/iptables-legacy to provide /usr/sbin/iptables (iptables) in auto mode
update-alternatives: using /usr/sbin/ip6tables-legacy to provide /usr/sbin/ip6tables (ip6tables) in auto mode
update-alternatives: using /usr/sbin/iptables-nft to provide /usr/sbin/iptables (iptables) in auto mode
update-alternatives: using /usr/sbin/ip6tables-nft to provide /usr/sbin/ip6tables (ip6tables) in auto mode
update-alternatives: using /usr/sbin/arptables-nft to provide /usr/sbin/arptables (arptables) in auto mode
update-alternatives: using /usr/sbin/ebtables-nft to provide /usr/sbin/ebtables (ebtables) in auto mode
Setting up qemu-system-gui (1:8.2.2+ds-0ubuntu1.7) ...
Setting up parted (3.6-4build1) ...
Setting up dnsmasq-base (2.90-2build2) ...
Setting up swtpm-tools (0.7.3-0ubuntu5.24.04.1) ...
info: Selecting GID from range 100 to 999 ...
info: Adding group `swtpm' (GID 107) ...
info: The home dir /var/lib/swtpm you specified can't be accessed: No such file or directory

info: Selecting UID from range 100 to 999 ...

info: Adding system user `swtpm' (UID 103) ...
info: Adding new user `swtpm' (UID 103) with group `swtpm' ...
info: Not creating home directory `/var/lib/swtpm'.
Setting up virt-manager (1:4.1.0-3ubuntu0.1) ...
Setting up qemu-system-modules-spice (1:8.2.2+ds-0ubuntu1.7) ...
Setting up liblvm2cmd2.03:amd64 (2.03.16-3ubuntu3.2) ...
Setting up dmeventd (2:1.02.185-3ubuntu3.2) ...
Created symlink /etc/systemd/system/sockets.target.wants/dm-event.socket → /usr/lib/systemd/system/dm-event.socket.
Setting up lvm2 (2.03.16-3ubuntu3.2) ...
Created symlink /etc/systemd/system/sysinit.target.wants/blk-availability.service → /usr/lib/systemd/system/blk-ava
ilability.service.
Created symlink /etc/systemd/system/sysinit.target.wants/lvm2-monitor.service → /usr/lib/systemd/system/lvm2-monito
r.service.
Created symlink /etc/systemd/system/sysinit.target.wants/lvm2-lvmpolld.socket → /usr/lib/systemd/system/lvm2-lvmpol
ld.socket.
Processing triggers for libglib2.0-0t64:amd64 (2.80.0-6ubuntu3.4) ...
Processing triggers for dbus (1.14.10-4ubuntu4.1) ...
Processing triggers for hicolor-icon-theme (0.17-2) ...
Processing triggers for libc-bin (2.39-0ubuntu8.4) ...
Processing triggers for man-db (2.12.0-4build2) ...
Processing triggers for sgml-base (1.31) ...
Setting up polkitd (124-2ubuntu1.24.04.2) ...
Creating group 'polkitd' with GID 991.
Creating user 'polkitd' (User for polkitd) with UID 991 and GID 991.
invoke-rc.d: could not determine current runlevel
invoke-rc.d: policy-rc.d denied execution of reload.
start-stop-daemon: unable to stat /usr/libexec/polkitd (No such file or directory)
Setting up libvirt-daemon-system (10.0.0-2ubuntu8.7) ...
useradd warning: libvirt-qemu's uid 64055 is greater than SYS_UID_MAX 999
chown: changing ownership of '/var/lib/libvirt/qemu/': Operation not permitted
dpkg: error processing package libvirt-daemon-system (--configure):
 installed libvirt-daemon-system package post-installation script subprocess returned error exit status 1
Errors were encountered while processing:
 libvirt-daemon-system
E: Sub-process /usr/bin/dpkg returned an error code (1)
📦[waylon@ubuntu ~]$ virt-manager
csv
name,age,city
Alice,30,New York
Bob,25,San Francisco
Charlie,35,Chicago
Charlie,35,Chicago
Charlie,35,Chicago
Charlie,35,Chicago
Charlie,35,Chicago
Charlie,35,Chicago
Charlie,35,Chicago
name,age,city
Alice,30,New York
Bob,25,San Francisco
Charlie,35,Chicago
Charlie,35,Chicago
Charlie,35,Chicago
Charlie,35,Chicago
Charlie,35,Chicago
Charlie,35,Chicago
Charlie,35,Chicago
graph TD
A-->B
A-->C
A-->D
D-->E
document.addEventListener('DOMContentLoaded', function() {
(function() {
const ctx = document.getElementById('chartjs-1');
new Chart(ctx, {
"type": "bar",
"data": {
"labels": ["Red", "Blue"],
"datasets": [{ "label": "Votes", "data": [12, 19] }]
},
"options": {
"responsive": true
}
});
})();
(function() {
const ctx = document.getElementById('chartjs-2');
new Chart(ctx, {
"type": "line",
"data": {
"labels": [
65,
59,
80,
81,
56,
55,
40
],
"datasets": [
{
"label": "My First Dataset",
"data": [
65,
59,
80,
81,
56,
55,
40
],
"fill": false,
"bord...
perfect
Perfect is a made up word that humans use to describe something that is above
average, or works really well for them. The idea of perfection is fleeting, as
you think more deeply about something, you can continue to chase the idea of
perfection to unimaginable senses. Sometimes perfect simply means good
enough. Could there be something better, Always, but at what cost. If I
spent 10 more minutes on this post would it be better, maybe, but I might fuck
it up. If I spent my lifetime studying how humans read and think, sole
focused on how it pertains to this post, ya it would get better. When I use
this word perfect it’s not meant in the most literal sense of the word, but
perfect to me, maybe good enough given the constraints I have, its the best
thing I’ve got.
Looking for inspiration? opencode [1] by sst [2].
AI coding agent, built for the terminal.
References:
[1]: https://github.com/sst/opencode
[2]: https://github.com/sst
I’m impressed by opencode [1] from anomalyco [2].
The open source coding agent.
References:
[1]: https://github.com/anomalyco/opencode
[2]: https://github.com/anomalyco
Notes – 06:11 Sun 22 Jun 2025
Notes – 06:11 Sun 22 Jun 2025
dbushell.com · dbushell.com [1]
What’s even real anymore? What a shitty age we are in that you have to form an opinion about news outlets and media outlets.
References:
[1]: https://dbushell.com/notes/2025-06-22T06:11Z/
neverjust
a guide to better developer communication
neverjust · neverjust.net [1]
I just never quite understood why the word just can send people over the top. I get it when you don’t know someone, you don’t have history with them, and they come in saying you are doing something wrong.
I pulled this out into a full post just [2]
References:
[1]: https://www.neverjust.net/
[2]: /just/
just
I just never quite understood why the word just can send people over the top. I
get it when you don’t know someone, you don’t have history with them, and they
come in saying you are doing something wrong.
When you say “just,” you’re skipping over all the invisible complexity. You’re assuming the problem is simple, and that the person asking for help hasn’t already considered the obvious.
You’re not seeing the constraints:
Legacy code
Business requirements
Team conventions
Time, budget, or technical debt
Platform limitations
~https://www.neverjust.net/
If I’ve worked with someone for more than 6 months, we have established
patterns for problems, libraries we use, and they are deep in the weeds of
trying to fix something, I want to ask “Why don’t you just do the same thing
we do everywhere else?”
I don’t need a snarky ass response, I don’t need you to get bent out of shape
about it. I am communicating that I do not know the damn constraints to
this problem. I am communicating I ...
External Link
youtube.com [1]
2025 is not the year to get put on the market, its rough out there. Junior’s have little chance, senior+ are even struggling. We had it easy from 2020-2023, now its over saturated and you have to want to be in this industry to be here and stay here. It used to be a fine place to get a good job to pay the bills, the bar has been raised and if you don’t want to be here you are going to struggle. Theo covers this in this linked video deeply [[ thoughts-472 ]].
References:
[1]: https://www.youtube.com/shorts/_HcN2zdNoms
-
Nailed the netflix documentary style. Videos like this make me so grateful that I have a job in this rough market, if you’ve followed jepi’s series you know he’s been out of a job for months, and he is not alone in this. This is the year of “laid of, i didn’t get laid off, I left to focus on my startup”, [[ thoughts-716 ]]
Notes – 09:32 Thu 19 Jun 2025
Notes – 09:32 Thu 19 Jun 2025
dbushell.com · dbushell.com [1]
David’s design on his blog is fantastic likely from years of small improvements like this converting ugly quotes to pretty quotes and optimizing fonts.
It’s common for markdown libraries to convert the first to the second like my build script does.
This is new to me, I had no idea that markdown libraries did this, I’m now interested if markdown-it does it.
For subsetting I use the fontTools library but I’ve no idea how to setup Python environments. I got it working once and failed to document the process.
David, David, David, I’m sorry python has done you this dirty. I should do a post on making python environments in the age of Posts tagged: uv [2]. You got options to run in docker/podman, a whole ass vm, uv venv, uvx, uv run, uv script, python -m venv, virtualenv, poetry, hatch, and too many more. The ones that matter are containers or uv.
References:
[1]: https://dbushell.com/notes/2025-06-19T09:32Z/
[2]: /tags/uv/
Copier has a few quirks with vcs that I just discovered by trying to test out some changes. I may have some config that I have long forgotten about somewhere deep in my dotfiles, I don’t think so, but id love to be wrong and corrected, please reach out.
What Doesn’t Work #
I tried throwing everything at this template to make it work. I tried a bunch of flags that did not work. I tried making commits to the local repo to get rid of the dirty warning. I really wanted to test new changes locally without committing and pushing untested and potentially broken changes.
uvx copier copy ../markata-blog-starter .
uvx copier copy gh:waylonwalker/markata-blog-starter@develop .
uvx copier copy ../markata-blog-starter . -wlg --trust
What Works - –vcs-ref #
Finally after trying everything to get the local copy to work, and my guess of @branch not working I found this to work. It does require me to go to the repo on my develop branch.
uvx copier copy gh:waylonwalker/markata-blog-starter --vcs-ref develop .
git">What Works - delete .git #
Really this might be my best option to make quick changes and test them locally without going through a version control system. It is not ideal, but makes it easy to quickly iterate on. I might be renaming .git, or copying to /tmp for quick iteration.
rm -rf .git
uvx copier copy ../markata-blog-starter .
Copier I love #
Copier is a great templating tool. I really love it. I use it every single day to create posts on this blog using Tmux hotkey for copier templates. This is the first time this quirk has got me and it had me puzzled for 45 minutes as I did not expect this behavior whatsoever.
I came across checkbox [1] from canonical [2], and it’s packed with great features and ideas.
Checkbox is a testing framework used to validate device compatibility with Ubuntu Linux. It’s the testing tool developed for the purposes of the Ubuntu Certification program.
References:
[1]: https://github.com/canonical/checkbox
[2]: https://github.com/canonical
Bug: Pypi metadata is wrong (Requires: Python >=3.6) · Issue #1131 · jmcnamara/XlsxWriter
Current behavior When pulling the dependency with pip (without pinning the version), our python3.6 tester pulls 3.2.3 and not 3.2.2 even though the version is no longer compatible with python 3.6. ...
GitHub · github.com [1]
pypi yanks suck, they are rare, this one got me today as it was a pinned dependency in my dependency chain. The latest release broke python 3.6/3.7 (which 3.6 has been EOL for 3.5 years btw), and it claimed >=3.6. In order to allow users to still install xlsxwriter without pinning down it needed yanked. I’m not sure if there was another way around it as pypi releases are immutable, so you cannot fix
[2]
This now has me wondering what the heck is using it with old pythons.
It appears to have broken builds on Canonical/checkbox for ubuntu 18.04. Checkbox is a device compatibility testing framework.
https://github.com/canonical/checkbox/actions/runs/14644718138/job/41098549191#step:8:125
[3]
References:
[1]: https://github.com/jmcnamara/XlsxWriter/issues/1131
[2]: https://dropper.waylonwalker.com/api/file/2ba70753-5723-4b96-8f2b-8090be07d6ad.webp
[3]: https://dro...
Conventional Commits
A specification for adding human and machine readable meaning to commit messages
Conventional Commits · conventionalcommits.org [1]
I try to use conventional commits on all of my commits, but I often end up only using feat/fix. I need to keep this page handy and get new verbiage worked into my language
- fix:
- feat:
- build:
- chore:
- ci:
- docs:
- style:
- refactor:
- perf:
- test:
Optionally include a scope fix(parser):
A bang indicates a breaking change note. For example …
chore!: drop support for Node 6
BREAKING CHANGE: use JavaScript features not available in Node 6.
References:
[1]: https://www.conventionalcommits.org/en/v1.0.0/
-
Wyatt built out this full world to start making a film series about FROGS. The entire set it built on a flat world, but yet feels so immersive.
Visualizing My Blog’s Internal Links
Writing about the big beautiful mess that is making things for the world wide web.
blog.jim-nielsen.com [1]
I like Jim’s visualizations on his site, reminds me a lot of obsidian. I’ve tried to do the same on my analytics [2] page in the past, but it didn’t come out right. I’m going to have to give this another go.
References:
[1]: https://blog.jim-nielsen.com/2022/visualizing-my-blogs-links/
[2]: /analytics/
Your Framework is Showing
The one where I’ve had enough of the same Next.js error.
dbushell.com · dbushell.com [1]
Great breakdown of nextjs. I was highly unaware of its performance optimizations before reading this. The smell of vendor lock in from next/vercel has been there from the start, this is the first real claim I’ve seen.
I’m out on modern js front ends, complex builds that change every 6 months, design patterns are out of date just as fast. Its hard to keep up, especially when you don’t have the use case for highly interactive apps. Libraries like htmx [2] or plain ol js gets the job done on the majority of sites and everything I tend to work on.
References:
[1]: https://dbushell.com/2025/06/13/your-framework-is-showing-nextjs-error/
[2]: /htmx/
External Link
youtube.com [1]
I’m totally with Prime here, there is something about the read only, mouse clicking part of my brain that causes me to be more critical of the code at a different level. It doesn’t hit the part of my brain thinking about the edit or how to do the edit, it hits a part thats thinking about how I will have to deal with the code moving forward.
References:
[1]: https://www.youtube.com/shorts/Se6HHCcy8q4
Next.js 15.1+ is unusable outside of Vercel
TBD
Omar Abid - Personal Blog · omarabid.com [1]
Vendor lock in disguised as performance. Nextjs aparantly now streams all of your metadata on the fly with js. This would obviously kill all seo right, well not if you’re on vercel they automatically detect search crawlers and serve the metadata. Why the f do they need to do this and not just serve everyone the metadata. The Web is this beautiful place where anyone can create and build amazing things with a relatively low skill. Js is meant to be enhancement, not degrade the experience of its users.
References:
[1]: https://omarabid.com/nextjs-vercel
I’ve been using gitingest web ui [[ thoughts-516 ]] for quite awhile to serialize git repo into llm friendly text files. This gives tools context about repos that are not in the training data so that it knows about it and how to use the code in the repo. gitingest also has a python library [[ thoughts-517 ]]
I had a use case for a project not yet on git, and found yek.
Installing yek #
Their instructions tell you to curl to bash.
curl -fsSL https://bodo.run/yek.sh | bash
I don’t like curl to bash from random sites, so I have my own self hosted version of i.jpillora.com. I like using this because it pulls from github and I trust github as a source for artifacts as good as the repo I am pulling from.
curl https://i.jpillora.com/bodo-run/yek | bash
Using yek #
yek
/tmp/yek-output/yek-output-bb01e621.txt
This will give you a link to a text file that you can add to many llm tools. This happened so fast for me that I didn’t even believe that it worked properly.
more options #
As with most clis, you can run yek --help to see the options available.
yek --help
Today I discovered brightnessctl to adjust the screen brightness on my
AwesomeWM machine. Its a command line utility that you can use to adjust the
brightness of your screen. A command line interface like this gives you the
ability to bind keys with something like [[xbindkeys]] or your window manager
configuration.
sudo apt install brightnessctl
# or
paru -S brightnessctl
Now that you have it installed you can use it to adjust the brightness of your screen, this worked particularly well for my laptop screen, I don’t think this works for monitors, in my experience they are usually controlled by the built in osd.
# Increase brightness by 10%
brightnessctl set +10%
# Decrease brightness by 10%
brightnessctl set 10%-
# Set brightness to 50%
brightnessctl set 50%
# Set brightness to 100%
brightnessctl set 100%
Note
on my machine I had to use `sudo` to run the command, otherwise I got the following error:
Can't modify brightness: Permission denied

You should run this program with root privileges.
Alternatively, get write permissions for device files.
Think less, ship more
I do too much thinking about what I want to make, and not enough actually making the thing.
cassidoo.co [1]
I thin a lot of us have this issues, especially on side projects. At work therre are expectations, jira tickets and so on, keeping you shipping. I think there is something to be said about getting that quick and dirty POC to the right group of people early for feedback before you add redis caching, kubernetes, auto scaling, disruption budget, distributed nodes, high availability, backups, disaster recovery. At work you kinda have to have the right person to shoot ideas by that can understand that you probably need some of these complex things for your app and it will take time to get right.
References:
[1]: https://cassidoo.co/post/think-less/
GitHub - trykimu/videoeditor: Your Creative Copilot for Video Editing
Your Creative Copilot for Video Editing. Contribute to trykimu/videoeditor development by creating an account on GitHub.
GitHub · github.com [1]
I would love to have a browser based video editor I could throw on a server and do quick edits from anywhere. I tried to get this one to work and struggled to get front end to send api requets to backend. I think the root of it was their redis wants to run on 80, this caused a permission error so I tried to run 8880:80, but redis was still unable to start due to a config permission error.
References:
[1]: https://github.com/robinroy03/videoeditor
I’m impressed by videoeditor [1] from trykimu [2].
Your Creative Copilot for Video Editing
References:
[1]: https://github.com/trykimu/videoeditor
[2]: https://github.com/trykimu
If you’re into interesting projects, don’t miss out on videoeditor [1], created by robinroy03 [2].
Video Editor Application using React, Remotion & TypeScript.
References:
[1]: https://github.com/robinroy03/videoeditor
[2]: https://github.com/robinroy03
-
The ability to query s3 buckets so seamless looks like such a pleasure to work with if you have a use case for that. Kedro catalog takes care of this most of the time for me, but I wonder if there are some cross project searching use cases I might find for this.
PocketCal Build Log
I made a date-sharing app called PocketCal. Here
cassidoo.co [1]
I love this idea of tiny useful apps for yourself. In fact I’m working on a project to built out tinyapps [2] for myself to replace my common needs. I absolutely love that all of the state is stored in the url bar, nothing is stored server side. As much as I love to hate js, I really appreciate that things like this can be built to just live on the web, be accessible from anywhere, and live practically forever as they require such little hosting demand.
References:
[1]: https://cassidoo.co/post/pocketcal-build-log/
[2]: /tinyapps/
GitHub - numtide/treefmt: the formatter multiplexer [maintainers=@zimbatm,@brianmcgee]
the formatter multiplexer [maintainers=@zimbatm,@brianmcgee] - numtide/treefmt
GitHub · github.com [1]
This looks like a very useful formatting tool to keep in the back of my mind. I do a lot of python and our tool tends to be pre-commit, named after the git [2] hook pre-commit. It specifies a bunch of tools to run, you can run them in ci, manually, and opt into doing it before commit. I like the simplicity of this one not needing a whole ecosystem, but rather just leveraging the cli commands from those tools. This would probably be something that would get in the way of setup for new devs and not something I would throw on one project by itself, its another thing for everyone to figure out how to install and run on every platform, I’m sure its not hard, but being on python teams pre-commit just fits in.
References:
[1]: https://github.com/numtide/treefmt
[2]: /glossary/git/
-
This is one of the greatest pycon keynotes I’ve ever seen, bookmarking this to come back and leave better thoughts on later.
-
Focus on the joy, not the suck. Nothing you do in life will be absolute pure joy with no downsides forever, life does not work that way, your brain does not look that way. Look at anyone who ever got massive billion dollar payouts for something like minecraft and how much their life is not glorious when they have nothing to really look forward to.
Prime talks about it in almost a cliche way, every boring ass task is an opportunity to grow. This is so real though, if you look at every task ask a shit you gotta do to check that jira ticket off and make bossy lady not scream at you its going to be a hell. If you rather look at it as opportunities to implement new features in new ways or learn something to better yourself and watch yourself grow you are going to take a big dopamine hit. I think prime talks about this in the sense of larger projects. He as talked about his experience being much less of a daily standup, but more of a ok we got three months to figure this out lets go boys. When you are stuck in that daily jira grind it’s harder to see that larger picture of the learning and growing you are doing over the course of 3 or 6 months.
Timestamped to the part of the vide...
-
Should I go to college? Was my education worth it? Should I keep going. A question that comes in all too often accross most industries that require some level of education. DHH has such great takes on it, some I had never fully thought about. He starts out with should we have people study niche topics (using Russian Poetry as an example). Yes the world deserves people who can make their life works out of something that brings them and many other so much joy, but no you probably shouldn’t go 100k’s into debt to do it. Should I get a software engineering degree, or become a doctor also have similar answers, it needs to be somewhat justified and not outrageous as has become the norm.
We used to listen in to Dave Ramsey on long car rides and he would have people call in and say, they went half a million dollars into debt to become a dentist, only to discover they did not want to do dentistry. At this point it’s too bad, you gotta suck it up and pay that off with something that makes some serious cash, and the only skill you probably got that can bring in that level of cash is … dentistry.
They dive into the college experience, learning to have adult debates with classmates abou...
WebTUI
Modular CSS Library that brings the beauty of Terminal UIs to the browser
webtui.ironclad.sh [1]
webtui, looks like a pretty sick design aesthetic. I like the keyboard driven nature of it, the look and feel is on point to a terminal interface, sadly it looks like it is not a 2 way street, you don’t automatically get a tui our of your website, just one that looks the part in the browser.
References:
[1]: https://webtui.ironclad.sh/
-
I’ve never heard of niri, or a scrolling window manager, it looks quite interesting. I think tiling window manager misses out on named sessions and hotkey straight to tmux sessions, Brodi mentions not using tmux right before this segment. Niri looks quite interesting, but looks like it suffers specificity. maybe there are other tools that allow me to jump straight to something like brave, or steam, but I don’t see how I could jump to a specific terminal.
I recently discovered niri [1] by niri-wm [2], and it’s truly impressive.
A scrollable-tiling Wayland compositor.
References:
[1]: https://github.com/niri-wm/niri
[2]: https://github.com/niri-wm
I’m impressed by niri [1] from YaLTeR [2].
A scrollable-tiling Wayland compositor.
References:
[1]: https://github.com/YaLTeR/niri
[2]: https://github.com/YaLTeR
Backups interrupted by full disk usage | Nic Payne
I just got a message from HCIO that my primary backup script is late... This
happens every now and then but I decided to check on it... Quickly `ssh` in and
I n
pype.dev [1]
I’m way behind on my notification game and need to pick it up. maybe I’ll look into hcio as well. maybe I’ll look into something that goes straight to signal or just get things working on ntfy. An 80GB log file is massive and the kind of thing id like to see notifications more.
References:
[1]: https://pype.dev/backups-interrupted-by-full-disk-usage/
Queso Notes | Nic Payne
It occured to me that this is my blog... I can write about whatever the heck I want! May 2025 Made 2 quesos very similar - they consisted of: 1.5 lbs ground bee
pype.dev [1]
Taking this as inspiration to do more non-tech on my blog, I’ve branched out into Posts tagged: gaming [2], but need take it to the next step. excited to watch pype.dev evolve as well.
References:
[1]: https://pype.dev/queso-notes/
[2]: /tags/gaming/
zk [1] by zk-org [2] is a game-changer in its space. Excited to see how it evolves.
A plain text note-taking assistant
References:
[1]: https://github.com/zk-org/zk
[2]: https://github.com/zk-org
If you’re into interesting projects, don’t miss out on alex [1], created by get-alex [2].
Catch insensitive, inconsiderate writing
References:
[1]: https://github.com/get-alex/alex
[2]: https://github.com/get-alex
The work on cbfmt [1] by lukas-reineke [2].
A tool to format codeblocks inside markdown and org documents.
References:
[1]: https://github.com/lukas-reineke/cbfmt
[2]: https://github.com/lukas-reineke
Check out Feel-ix-343 [1] and their project markdown-oxide [2].
PKM Markdown Language Server
References:
[1]: https://github.com/Feel-ix-343
[2]: https://github.com/Feel-ix-343/markdown-oxide
I like hougesen’s [1] project mdsf [2].
Format markdown code blocks using your favorite tools
References:
[1]: https://github.com/hougesen
[2]: https://github.com/hougesen/mdsf
The work on treefmt [1] by numtide [2].
one CLI to format your repo [maintainers=@zimbatm,@brianmcgee]
References:
[1]: https://github.com/numtide/treefmt
[2]: https://github.com/numtide
The rich console is themeable, I’ve been a long time user of rich and had no
Idea. You can define your own theme keywords and use them just like you use
normal rich keywords in square brackets like'[bold red]'.
from rich.console import Console
from rich.theme import Theme
custom_theme = Theme({
    "info": "dim cyan",
    "warning": "magenta",
    "danger": "bold red"
})
console = Console(theme=custom_theme)
console.print("This is information", style="info")
console.print("[warning]The pod bay doors are locked[/warning]")
console.print("Something terrible happened!", style="danger")
The ethics of README ads
I’ve been considering accepting sponsorship again for my projects.
Will McGugan · willmcgugan.github.io [1]
I’ve long avoided running ads on my blog for the same reason. For a few months I ran an ad above the fold. It was a “Your Ad Here” kind of thing, and in the messaging I was looking for content relevant to my content, not google driven ads. This resulted in nothing, no hits, not a one. I’m kinda with Will on this one beer money is not worth degrading the project for. I seriously thought some of the big projects with a moderate level of success got a good cut for these sponsorships. Some of the companies are big companies, like how do they even go through meetings and decide who gets beer money without spending more than that in decision making resources. Maybe they have a guy with more autonomy than I would expect.
References:
[1]: https://willmcgugan.github.io/the-ethics-of-readme-ads/
minio/minio - Docker Image
hub.docker.com [1]
Browsing for the minio tag that I have running right now I discovered that you can do minio --version and you get the same version that matches the docker tag, this is super convenient and helpful. I also notice that they use timestamped version numbers. I kinda dont mind this. It feels easy to understand how far behind it is. I really appreciate that the version in the container matches the version inside the container.
It’s not as pretty or flexible as semver, it does not communicate trees of majors and minors, but how often do we continue supporting/patching older majors and minors, in my experience only really big teams or teams with sufficient motivation are doing this.
food for thought.
References:
[1]: https://hub.docker.com/r/minio/minio/tags?name=RELEASE.2025-04-08
You can unset multiple environment variables at once. I did not know this was a
thing, its something that ended up happening organically on a call and asking
someone to run unset. They had never done it before and did not know how it
works, but did exactly as I said instead of what I meant. I like this handy
shortcut doing it in one line rather than each one individually, I will be
using this in the future. You might need this for something like
running aws cli commands with localstack.
unset AWS_ACCESS_KEY_ID AWS_SECRET_ACCESS_KEY AWS_DEFAULT_REGION
-
I am going to start trying to employ this rhythm to my writing. I’m not very sure how I feel about it, there is something almost too assertive about it. It’s giving me a (i’m great and you should too) kind of vibe. I want to become more assertive in my writing.
I’m giving this a shot and see what I learn, you might notice in my tils.
i3lock is a fantastic lockscreen for tiling window managers.
If you are using a tiling window manager within a public space you need to add a lockscreen. I have one machine that I take with me to a public space. Its secure enough that I can leave it, but not secure enough that I want to leave it unlocked. So when I need to leave it behind for the restroom I need to lock it up.
paru -S i3lock
# or
apt install i3lock
Now that you have i3lock installed lets lock that screen.
# lock it with a pure white flashbang
i3lock

# lock it with a black background
i3lock -c 000000

# lock it with a custom color
i3lock -c 2e1330

# lock it with a wallpaper
i3lock -c 000000 ~/Pictures/Wallpapers/mywallpaper.png
You can use your window manager or something more generic like xbindkeys to set
a hotkey. This way you don’t have to open a terminal and type out the command
every time you leave your desk. You can just press something like SUPER+L
like you would on other OS’s.
Fancy #
If you like it a bit fancier, you can use i3lock-fancy, it can blur,
pixelate, and greyscale your current screen. I did not really like this
because you can still tell what is going on the screen. It’s probably secure
enough and looks better, but I went with regular i3lock.
paru -S i3lock-fancy-git
# or
apt install i3lock-fancy
kraft
Kraft is the family gaming server that we started early 2025.
Repopulating # [1]
Villagers are really hard to get gong. We have this huge villager tower on the
server, we nearly every bed filled, and one day we logged in and there were
three. Not sure what happened until I witnessed one of them jump maybe 3
blocks down and off himself. I checked my last two villagers and they were
each on one or two hearts left. We almost lost every single villager on the
server.
villager-tower-needs-repopulated.mp4 [2]
To get villagers to breed and make baby villagers you need beds, which we
already have, and food. I gave my guys some food and they started making baby
villagers immediately, crisis averted as we start to get the first few fresh
full health villagers on the server.
repopulatingv4.mp4 [3]
References:
[1]: #repopulating
[2]: https://dropper.waylonwalker.com/api/file/5c160226-1018-4b07-b3a2-a50588006c17.mp4
[3]: https://dropper.waylonwalker.com/api/file/9f618595-f998-4ba7-a925-92c...
-
This talk about live store really made me think about database transactions in a new way. They are talking about live-store, and the complexity of distributed applications like a notes app with the ability to go offline and continue working. The complexity of resyncing each instance is not simple, conflict resolution accross all the possible installs that may or may not even be online is a really hard problem. They go deep on discussing an event driven paradigm that is driven off of a log of events and how this changes how we deal with databases. Using the event log as the source of truth we can do things like forget about database migrations, we can replay all of the events onto a new database. Its very interesting to rethink in terms of a log system that speaks in terms of understandable events (not table operations) as the source of truth for an application.
my nvim spellcheck setup
I’ve gone too long without a proper spellcheck setup in nvim. I know it’s
there, I just don’t use it, I don’t have the right keybinds, like I do with
vim date [1], to make it work, and its clunky.
Default keybinds # [2]
- z= show spell suggestions
- zg add word to dictionary
- zw remove word from dictionary
- ]s jump to next misspelled word
- [s jump to previous misspelled word
I really struggle with bracketed keybinds, they don’t flow for me. I have to
shift into it and hit two keys, you cant just pop through them with intent, it
always feels clunky to me.
Custom keybinds # [3]
I barely use F-keys in my keymap so that was free game. On my keyboard I have
F1-F9 in a numpad layout on my right hand, so F4-F6 are home row, these are
super easy to pop through and update. I really refrain from using such high
real estate keys like this unless it’s for something good, and I do a lot of
writing in nvim, so fingers crossed I use the heck out of it.
- jump to next misspelled word
...
DHH (@dhh) on X
You don't need a mentor. There's no secret sauce left inside anyone's head any more. It's all been tapped, bottled, tweeted, and shared a million times. Sample some of that, but also guard your ign...
X (formerly Twitter) · x.com [1]
I need to find this podcast, was DHH this animated through the whole thing?
You don’t need a mentor. There’s no secret sauce left inside anyone’s head any more. It’s all been tapped, bottled, tweeted, and shared a million times. Sample some of that, but also guard your ignorance. You’ll lose it soon enough.
It takes work, one on one hand holding is a shortcut. Sometimes one that we need. Sometimes we need to level up quick, hence why your job might pair you up with someone for the first few months, but it is not something you need, you can figure shit out on your own with hard work. These days we have things like gippity to bounce ideas off, and you can generally get the sense of the direction the average of the internet it was trained on. Always add your own experience and make a choice for yourself.
References:
[1]: https://x.com/dhh/status/1928856582588076171
Self-Host Weekly (30 May 2025)
Self-hosted news, updates, launches, and content for the week ending Friday, May 30, 2025
selfh.st · selfh.st [1]
The object storage (S3-compatible) platform MinIO created a bit of a stir this week
I had not heard about this before it came in through selfh.st. I use minio a lot, and did not know there are so many great alternatives out there for it. I might be looking into some of these options such as garage [2].
Its hard to tell from this article what mino dropped, but luckily for me it seems to be all ui related. I use the UI for debugging/feedback/sometimes learning, but at this point I’ve got good flows for setting up new access keys, buckets, and everything with the cli.
References:
[1]: https://selfh.st/weekly/2025-05-30/
[2]: https://garagehq.deuxfleurs.fr/?ref=selfh.st
DHH (@dhh) on X
NIH: Not Invented Here Syndrome might come from a good place, but almost everything that's good in this world came from people who ignored it. Virtually everything is a variation of something else....
X (formerly Twitter) · x.com [1]
I suffer hard from NIH, I’m cheap, I like building things, I hate reading the docs, the perfect recipe for some bad NIH. I really like DHH’s take here. If no one builds anything new we get stuck with the same old shit. I think theres a lot of things that as far as my use case is concerned feature complete and needs no more. I would just build with it or on it, but not re-invent. It’s a slippery slope.
References:
[1]: https://x.com/dhh/status/1928450457262850053
feat: add hackernews hits on home page · jimniels/blog@b1a250b
Contribute to jimniels/blog development by creating an account on GitHub.
GitHub · github.com [1]
Jim Nielsen fetches his hacker news ranked articles for his home page.
References:
[1]: https://github.com/jimniels/blog/commit/b1a250b2357d21e69a58ce3265114e1761fb47f8
External Link
hn.algolia.com [1]
this post [2] by Jim Nielsen, lead me to this commit [3] where I found that he was including posts of his that wound up on hackernews. I really like this idea and might take it, even though i have very few HN linked posts.
References:
[1]: https://hn.algolia.com/api/v1/search?query=waylonwalker.com&restrictSearchableAttributes=url
[2]: https://blog.jim-nielsen.com/2022/playing-with-blog-home/
[3]: https://github.com/jimniels/blog/commit/b1a250b2357d21e69a58ce3265114e1761fb47f8
External Links - Jim Nielsen’s Blog
Writing about the big beautiful mess that is making things for the world wide web.
blog.jim-nielsen.com [1]
I really like the idea of Jim’s Eternal Links, and really want to take it for myself. To expand here I want to be able to look for common places for rss feeds, and be able to scrape out rss feeds for sites that I tend to link to often. Also if they have something like a /blogroll it might be a good place to find new great people to follow.
References:
[1]: https://blog.jim-nielsen.com/about/external-links/
Could I Have Some More Friction in My Life, Please?
Writing about the big beautiful mess that is making things for the world wide web.
blog.jim-nielsen.com [1]
Maybe we need a little more friction in the world. More things that merit our time. Less things that don’t.
I can resonate with this post, less friction feels like it leads me to thinking less, having less skin in the game, understanding less, feeling less fulfilled. Vibe coding [2] is a new trend of 2025, it feels like the future, but it does not quite feel like the present yet. It’s riddled with errors and I only get frustrated when it doesn’t work. I like having some friction that leads me to think and pay attention. There might be a future where this is not required for some things like coding up crud apps, but that does not feel like today.
References:
[1]: https://blog.jim-nielsen.com/2025/more-friction-please/
[2]: /vibe-coding/
A Gentle Intro to RSS
A guide to RSS for the less tech savvy.
Derek Kedziora · derekkedziora.com [1]
Some of the best things from the old internet are still preserved with RSS. Content is shared via simple files, which means the slow-loading, ad-stuffed and tracker-filled clutter of the modern internet are mostly absent.
There aren’t any algorithms. RSS readers are wonderfully dumb. There’s no AI sifting through content to find whatever will outrage you the most. You just get new posts and mark them as read. It’s a calmer world.
With RSS I follow lots of people writing about normal people things. People blog about getting back into playing the drums, a fun book they just read, a tough problem they’re working through and the other day to day things of life. This type of content tends to get buried on social media — it doesn’t get the clicks and sell ads like fear and outrage do.
I feel like a curmudgeon, but i feel all of these things. I dont think that the new web is completely terrible, what is terrible is that the options of an algorithm ran by companies with differing goals is seemingly the only option. RSS still works, its fantastic, I personally love it, but theres on...
Command Line | gitignore.io / docs
To run gitignore.io from your command line you need an active internet connection and an environment function. You need to add a function to your environment that lets you access the gitignore.io API.
docs.gitignore.io [1]
This is a very interesting cli, its so simple. I stumbled accross the gi command awhile back and was like pfft, I dont want to install something for that. Didn’t even realize that you don’t install it, its just http. Their install instructions lead you to putting a curl funtion in your bashrc.
function gi() { curl -sLw \"\\\n\" https://www.toptal.com/developers/gitignore/api/\$@ ;}
This now has me wondering “What else can build like this?”
References:
[1]: https://docs.gitignore.io/install/command-line
-
linkarzu has a way to navigate his entire mac using a hyper key. Everything looks so tight and polished, also a lot to remember! Lucky he has a system of mnemonics that make it easy to remember. His setup is very Mac focused using mac only apps, so this would not work for me, though I’m sure I could get something similar on linux. He did mention Kanata which is cross platform.
What I do # [1]
I use a far different system that is fast loose and easy. On every system I run I have 9 workspaces that let me put 9 applications, I can easily move apps to different workspaces and have a side by side if I need. The core of what I do is terminal, web browser, and chat. Those go on workspaces 4,5,6, whch are home-row keys. If I’m running obs, that is on 8, steam goes on 1. but I have some freedom to move. Sometimes 2 will be an image editor or a video editor, sometimes something else all together, but I can quickly go to each app.
What I like from Linkazru # [2]
I do like his layered approach. I run a 42 key keyboard so things can get a bit cramped quickly. And when thinking in mnemonics you only get 26 letters in the alphabet, but prefixing these with another layer this number goes...
Forrest Knight (@ForrestPKnight) on X
you're not allowed to write comments in your code anymore, because if you do everyone will just think it's ai generated.
X (formerly Twitter) · x.com [1]
Oh, I feel this. I go through the effort of removing dum ai comments so the ai looks less ai.
you’re not allowed to write comments in your code anymore, because if you do everyone will just think it’s ai generated.
References:
[1]: https://x.com/ForrestPKnight/status/1927398791398719997
The adapter pattern in python
The Adapter pattern is a design pattern that allows objects with incompatible interfaces to work together. It provides a way to convert the interface of an object into another interface that client...
Rob Parsons · robp.dev [1]
This has me wondering if I need to really learn more patterns, data structures, and algorithms. This looks particularly useful when trying to combine several objects that you dont have full control over and make them behave similarly.
References:
[1]: https://robp.dev/the-adapter-pattern-in-python/
If you need to target a specific k8s node in the cluster, you can use labels. You want to treat your nodes as much like cattle as you can, but sometimes budgets get in the way. You might be like me and just run any free hardware you can get in your cluster, or you might have some large storage or gpu needs that you can’t afford to put on every node in the cluster.
kubectl get nodes --show-labels

# add the bigpool label
kubectl label node k8s-1 bigpool=true
kubectl get nodes --show-labels

# remove the bigpool label
kubectl label node k8s-1 bigpool-
To use the label in a pod set spec.nodeSelector to the label that you
applied.
apiVersion: v1
kind: Pod
metadata:
  name: busybox
spec:
  containers:
  - name: busybox
    image: busybox
  nodeSelector:
    bigpool: "true"
Adding a Dynamic Now Page in Jekyll
Make an auto-updating now page on a static site like Jekyll, Hugo, 11ty or Gatsby
Derek Kedziora · derekkedziora.com [1]
wow looking at how this is done kinda draws me towards jekyll a little bit, I did not realize some of the similarities that it has with markata.
References:
[1]: https://derekkedziora.com/blog/dynamic-now-page
-
css if() just landed, I’m struggling to understand what I an do with this that I can’t do with something as old as classes. I can get it if I don’t have control over html [1] creation or js to add classes. The example that Una shows includes data that could directly be a classname with a set of styles in css rather than this crazy css variable unpacking out of a data attribute and an if statement.
References:
[1]: /html/
wants
Personal website. Webby personsite. Amateur hour round the clock.
maya.land · maya.land [1]
Allen Carr1 on quitting smoking:
[Carr] recommends working to really notice and internalise that disconnect [between what we want and what we enjoy]. He tells smokers to pay attention to their next cigarette. It’s like mindfulness but for noticing the unpleasantness.
I can appreciate the restraint here, theres something about the mindfulness behind it all.
References:
[1]: https://maya.land/wants/
/wants
Inspired by mara.town/wants [1]
want but do not enjoy # [2]
- New hardware that cannot be repaired
- Disciplining Children
- Nice landscaping which requires regular maintenance
enjoy but do not want # [3]
- breakfast
- Fancy things
- Manual Labor in moderation
- Vacations to far away places
- clankers writing all of the code
References:
[1]: https://maya.land/wants/
[2]: #want-but-do-not-enjoy
[3]: #enjoy-but-do-not-want
Linux Is About Choice
This Luke Smith video came across my feed Linux, Bitcoin: When Tech Projects
Become “Too Popular…” Don’t forget the
goal. [1]. It’s interesting to hear
his perspective about Linux, FOSS, Free Software being the end goal, and that we
are loosing sight of the goal. This sentiment really aligns with the early
FOSS movement from Stallman, but was this ever the goal?
Taken over by apathetic interests # [2]
Luke talks about these projects getting taken over by people with no passion
for the original goal of freedom and privacy. They want the projects to grow,
get bigger, and become mainstream. This feels exactly the opposite of
anything Luke would want, so my bias alarm goes off here. Honestly I do see
some of the grossness of projects like this that were grassroots, for freedom
and privacy get taken over for money grabs. I’m completely out on bitcoin so I
cannot make any comment there, but I Truly believe that the Linux kernel is
not a money grab as Luke makes the new face of bitcoin s...
Blogroll
Blogroll - a collection of awesome people I follow online
Waylon Walker · reader.waylonwalker.com [1]
I rolled out the blogroll today, nothing pretty, but is one single page of the rss feeds I follow.
References:
[1]: https://reader.waylonwalker.com/blogroll/
-
Markata got a shout out part way through the latest episode of LNL, I will go back, re-listen and take some of the feedback. His thoughts on Markata were interesting. On one hand it really is a thing for me that works for me, and as a person with too many side projects I don’t have the focus to really give it polish. On the other hand it really confirms why listen to podcasts, news, finger on the pulse, opinions and how often these guys are wrong, they are not the expert they probably look at 6 things like this a week. He said that it was some sort of javascript thing, that maybe he could fix or customize with javascript if he wanted, kinda shocking, I thought maybe I accidentally added node modules or something dumb, nope, I have a whopping 1.4% js. So most of the comments were plain wrong. I get it he probably peeked at it for 30s and realized it wasn’t the thing for his problem. At the same time I should probably do a better job at marketing what it really is, cleaning up the docs and demo.
[1]
Such a great message right now. I feel like everywhere I turn is negativity, especially social media. It feels like so many things are trying to divide and create hate. “This” is what we should be doing with social media. There are a lot of elements of “there are two ways to have the biggest building in town, tear down all the bigger buildings, or just build the biggest fucking building”, If you want to be successful in X then surround yourself with others successful in X. This is a catalytic skill that everyone needs to have in their belt.
References:
[1]: /static/https://josephthacker.com/personal/2025/05/13/root-for-your-friends.html
I’m currently [[replacing-google-search-apps-with-self-hosted-web-apps]] and decided to create a simple b64 encoder/decoder, just start typing to enter text, escape to deselect, then e/d to encode/decode.
I’m trying to make these apps super simple, self hosted out of minio, static html, and javascript. It’s been fun to get back to some simple interactive web development like this. No build just a website that does something. No broken builds, no containers to deploy, just push to minio.
encoded = btoa(content);
decoded = atob(encoded);
Here is the result.
f2 [1] by ayoisaiah [2] is a game-changer in its space. Excited to see how it evolves.
F2 is a cross-platform command-line tool for batch renaming files and directories quickly and safely. Written in Go!
References:
[1]: https://github.com/ayoisaiah/f2
[2]: https://github.com/ayoisaiah
-
Great conversation with Billy Basso the creator of Animal Well on the code architecture of Animal well. It’s all hand crafted C++. He talks about early games he tried to build being heavy in oop, and really got lost in oop. Animal well is very flat, there is no inheritance, just lists of entities that all implement similar methods in their own way. Layering and order of entities becomes very important. Its crazy how much he had to think about hardware and MS build being very helpful with this, but needing to know all of the console apis.
Just fucking code.
justfuckingcode.com [1]
This is great, beautifully captures a modern backend view of https://motherfuckingwebsite.com/. I honestly resonate with almost all of this. I have found myself in more trouble than help when trying to fully vibe out a project. It never refactors, it leaves it shit everywhere, it mostly does what you say, until you get to something that seems easy, so you try to do it yourself, but you break its brittle piece of shit into pieces any time you try to touch it. AI coding help is great, mcp seems like it really has some game changing abilities, but hands of vibe coded crap aint there yet for me.
References:
[1]: https://www.justfuckingcode.com/
-
I did not realize half of this, and it took me at least 4 watches through this to catch everything.
k8s-monitoring-helm/charts/k8s-monitoring/docs/examples/private-image-registries/globally/values.yaml at main · grafana/k8s-monitoring-helm
Contribute to grafana/k8s-monitoring-helm development by creating an account on GitHub.
GitHub · github.com [1]
k8s-monitoring requires setting imageregistry and pullsecrets twice
global:
image:
registry: my.registry.com
pullSecrets:
- name: my-registry-creds
imageRegistry: my.registry.com
imagePullSecrets:
- name: my-registry-creds
References:
[1]: https://github.com/grafana/k8s-monitoring-helm/blob/main/charts/k8s-monitoring/docs/examples/private-image-registries/globally/values.yaml#L29
No docs, no bugs
If your library doesn't have any documentation, it can't have any bugs. Documentation specifies what your code is supposed to do. Your tests specify what it actually does. Bugs exist …
Simon Willison’s Weblog · simonwillison.net [1]
Bugs exist when your test-enforced implementation fails to match the behavior described in your documentation. Without documentation a bug is just undefined behavior.
This is quite an interesting thought, so does this mean that, none of my undocumented side projects have bugs? no I think there is still some implied behavior that naming things covers. a function get_bucket_contents implies doing something wtih s3, getting stuff from your local filesystem or crashing would be considered a bug. I think the argument here is that if I start mining bitcoin when you call get_bucket_contents and I have not documented it that this is a feature not a bug. If I were to take this a step further, now do I need to document that this does not also start a bitcoin miner? maybe this is more of an unwanted feature than a bug, I’m convincing myself more and more.
References:
[1]: https://simonwillison.net/2025/May/22/no-docs-no-bugs/#atom-everything
-
So many small details go into making hollow knight such a great game, but it starts with such good controls, every thing is so fluid and predictable. I knew about coyote time, but not some of the other details that Juniper covers, such as hang time, and faster decent than jump.
tinyapps
I’m working on replacing my usage of google inline search apps with real apps,
these are ones that I create and host on my own homelab [1]. The first three that
I created are mostly chatgpt based, with a bit of hand edit after the fact,
uploaded to minio and become an app on my
k8s-pages [2]
renamed
The original title of this post was "Replacing Google Search Apps With Self Hosted Web Apps"
I’m leaning on web wakelock [3] to keep the screen on while these apps are
running, primarily clos, timer, and stopwatch.
Clock # [4]
A large displya clock.
[5]
Timer # [6]
A simple timer that counts down from thet set time.
[7]
Stopwatch # [8]
This is the one that inspired it all, I need to run a few stopwatches at work,
and chose to just do it right in the google search with a few tabs running.
[9]
Dice # [10]
A simple dice roller, this one is the one that I decided to start adding ?
for help.
[11]
UUID # [12]
It displays a uuid, thats it. ctrl + c to copy.
[13]
b64 # [1...
I’m trying to replace my usage of google inline search apps with real apps, today I used a stopwatch to time some things out at work by opening stopwatch. This was something I just wanted running in a tab on another screen, it was not timing running code or anything, I was using it as a reminder to check browser caches every 5 minutes or so for some testing.
So tonight I whipped up a stopwatch, clock and timer, all of which are using the wakelock API to keep the screen on while the app is running.
    // Wake Lock support
    let wakeLock = null;
    async function requestWakeLock() {
      try {
        if ('wakeLock' in navigator) {
          wakeLock = await navigator.wakeLock.request('screen');
          console.log("Wake lock acquired");
        }
      } catch (err) {
        console.error("Wake lock error:", err);
      }
    }

    document.addEventListener("visibilitychange", () => {
      if (wakeLock !== null && document.visibilityState === "visible") {
        requestWakeLock();
      }
    });

    requestWakeLock();
I’m impressed by dbztui [1] from pypeaday [2].
A DBZ TUI built with an early version of ninesUI and Windsurf
References:
[1]: https://github.com/pypeaday/dbztui
[2]: https://github.com/pypeaday
-
Excited to hear this story, they have so many key players in the trailer this will be fantastic.
I’ve been working on ninesui, inspired by k9s see thoughts-633. I want a good flow for making video for the readme and I am using charm.sh’s vhs for this. Its running in an archBTW distrobox and looks gawdaweful.
The over saturated colors give it a really retro look, seems fine, but not my
cup of tea. I tried to change the textual theme to tokyo-night and it might
have made it a bit better, but still over-saturated.
After #
What I found is that vhs has themes, setting it to dracula made everything much better.
# sort.tape
Output assets/sort.mp4
Output assets/sort.gif

Require echo

Set Shell "bash"
Set FontSize 32
Set Width 1920
Set Height 1080
+ Set Theme 'Dracula'
NinesUI #
I’m using these in my ninesui project, right now they are in the readme, but maybe some docs will grow eventually. Right now its hardcore explore phase.
External Link
christopherbiscardi.com [1]
Interesting take on kubernetes from a front end perspective. All valid arguments to me, and really the answer to any do you need to any specific implementation of tech is probably no. We got along just fine before k8s ever existed and you still can, but its really nice in a lot of cases. If your skills lean toward backend or infrastructure I encourage you to give it a try.
k8s distros # [2]
There are a lot of beginner friendly k8s distros that you can setup with relative ease, kind and k0s are great for single node, If you want multi-node k3s is what I generally use. If you want a very lightweight OS that you only interact with through an api, and has a very small attack surface talos is an amazing product.
When else might you want k8s # [3]
Internal, on-prem, self hosted [4]. If you are trying to avoid the cloud for cost, rules, regulations, red tape, kubernetes is a great option to manage your container workflows yourself without needing to have a cloud budget, get approvals and sign offs on running workflows in a public cloud.
References:
[1]: https://www.christopherbiscardi.com/wtf-is-kubernetes
[2]: #k8s--distros-
[3]: #when-...

m9a devlog 1
It’s sad to see textualize.io close the doors, but textual is still alive and
maintained as a n open source project. I tried to use it very early, and
struggled, this was before docs and tutorials really existed, before a lot of
the widgets and components existed. Then as we all do I got busy and moved on
to other things in life and did not have the capacity to build TUIs.
I like tuis # [1]
I like tuis, I like staying in the terminal. I use
lf [2] daily to move files around when I
want something more than mv and cp. I use
k9s [3] hourly to monitor and manage my
kubernetes cluster.
Are they worth the effort?? # [4]
As awesome as tui’s are, they are more effort to build, and less automatable.
I feel like the first stage into automation of a project really needs to be a
good cli, and this is often good enough for the project and I move on.
m9a (em - nine - ah) # [5]
inspired by k9s
Like I said I really like k9s and use it all the time, It really makes running
kubectl commands a ...
-
Just listened to this as I am really starting to get into grafana and feel like there isn’t a mountain of setup this time around realizing how much of my stack is brand new. Drill Down and Alloy are both new and key to my setup. The Ai integrations at the end sound wicked good, I will be interested if you can do similar things with an MCP vs how much proprietary stuff needs grafana cloud.
Textual - The future of Textualize
Textual is a TUI framework for Python, inspired by modern web development.
Textual Documentation · textual.textualize.io [1]
Ultimately though a business needs a product. Textual has always been a solution in search of a problem. And while there are plenty of problems to which Textual is a fantastic solution, we weren’t able to find a shared problem or pain-point to build a viable business around.
I can totally see this. Finding a marketable business idea is not easy, working in the developer space where everyone wants to do it themselves is no better. Textual specifically I could see, I really wanted to build things on it as it came out, I had ideas, it was hard to use at the time and changing, so I took a break, got busy with far too many other things, and really I ’m good with rich most of the time.
I daily use k9s, its absolutely amazing at what it does and appreciate that I could build something like it in python, its just hard to justify the time investment for the things I tend to work on.
Which is why Textualize, the company, will be wrapping up in the next few weeks.
Damn, that hit hard, its been an adventure watching textual ge...
What’s next?
Some years ago I had the opportunity to work fulltime on project of mine. This was at a time where I fully intended to take a year off, but being able to make a living off a project of your own cre...
Will McGugan · willmcgugan.github.io [1]
So it’s back to plan A: taking a year off. I plan on using this time to focus on my health–something I haven’t prioritized while working as a CEO / Founder of a startup.
Wish you the best Will, you have given us textual and rich, and from what I can tell left it in some great hands.
All I can say for certain is that I would like to write more. Writing scratches many of the same itches as software development, and it is a skill I’d like to nurture.
Go get em Will, write to your hearts desire, and resist the urge to make an SSG company this time.
References:
[1]: https://willmcgugan.github.io/whats-next/
Too much magic
A common criticisms of frameworks like Textual is that they have “too much magic”.
Will McGugan · willmcgugan.github.io [1]
Now “too much magic” is not the same thing as “bad magic”, although they are often conflated. Bad magic is when the implementation details leak out from the level below. This can manifest itself as cryptic errors that reference the magic’s implementation.
References:
[1]: https://willmcgugan.github.io/too-much-magic/
-
Dang Strong takes against markdown here with a strong push for bespoke content models/structures. This idea is completely foreign and wild to me. I get it that markdown has its issues with flavors, add ons and what not, but overall its mostly transportable, its a skill that works most content sites and writing tools. I am so far on the other side that I seek out tools with markdown as an option and lean away from wsiwyg tools with specialized data formats on the backend.
I’ll end with, I’m also a dev that creates very simplified content and maybe seeing the backend of a site with lots of custom fields would be very eye opening for me.
Week Links №2: April 2025
Last year I attempted to do some newsletter-style link aggregation… that good intention imploded spectacularly. But I switched to Obsidian this month and now I have a better system for aggregatin...
daverupert.com · daverupert.com [1]
Last year I attempted to do some newsletter-style link aggregation… that good intention imploded spectacularly. But I switched to Obsidian this month and now I have a better system for aggregating links (post on that coming later). Inside this issue you’ll find some games, some homelab [2] server hardware, some AI discourse™, some musical instruments, and more.
This hits so close to home, I even went through the effort of making a weeknotes script, one weeknote post. I also was inspired by obsidian but it didn’t work out for me, so my script uses data from markata.
[3]
References:
[1]: https://daverupert.com/2025/05/week-links-2/
[2]: /homelab/
[3]: https://dropper.waylonwalker.com/api/file/b1a5212b-846f-4144-82ab-51cd9ace086d.webp
What ChatGPT is NOT - Tech Raven Blog
There is a lot of excitement about ChatGPT and how it allows us to interact with information and technology. I am actually excited that it now exists and still, I think it is being way overhyped. I...
Tech Raven Blog - · blog.techravenconsulting.com [1]
Do you remember regression models from college: given some data, you find a best fit line that allows you to predict Y given X. At the end of the day, ChatGPT, and LLMs in general, are the same thing as the regression model – it’s just that ChatGPT is the largest and fanciest model we currently have to model language and information.
I really am coming to the idea of calling it a “word calculator”, this seems to be the most succinct description of llms that the lay person can comprehend and relate to.
ChatGPT does not hallucinate or become unhinged
I think Steve goes much deeper on this in his intervew on fafo.fm [2]. They describe it more as a pleaser or “yes man” essentially all the companies that are building these models want to give the “best” answer, better than their competitors. With this comes the risk of it being completely wrong, they are designed to always give an answer.
O...
“I’d rather read the prompt”
Clayton Ramsey grades student assignments and gets papers that are just obviously ChatGPT output. I think any of us can spot it by now: awkward repetitive prose, heavy on bullet points with bold in…
Chris Coyier · chriscoyier.net [1]
I’ll triple down on the link-blog chain here, see this one going around all over this week and finally had time to read through when it hit my rss reader via Chris.
It should come as no surprise that nearly every vibe-coded app on the Internet struggles with security issues; look no further than the vibe-coded recipe app that leaks its OpenAI keys. Every time one generates code by prompt, they create a new stillborn program; vibe coding [2] is the art of stitching together their corpses into Frankenstein’s monster.
Damn, that is a strong statement, stitching together the corpses, strong statement here. The OpenAI key thing feels kind of obvious to me, every set of docs, blogs and examples on the internet need to be runnable for people to learn and try out new tech easy, putting secrets in the wrong place is easy, putting them somewhere that you can decode them without sharing them is hard team specific, app specific...
-
Under 2000 everything is happy, green field. Any decision you have made is relatively easy to back out of (barring you making a library with downstream users), but as you go, regret kicks in. Regret we didn’t make that pydantic 2 upgrade earlier, as new features become more apealing. Regret that we chose sqlite for simplicity, speed, agility, and now we might need robust and distributed. Regret that you chose a front end framework, or to have a front end at all to a backend problem. Regret that you put 6 layers of abstraction on your db early on and now that you understand the problem you want different abstractions, but all of your endpoints deeply depend on the current one.
Vibe coding [1] will not save you, it will only make these wrong decisions for you without the context that you have. You will hate it’s decisions more because you had no input into some of them.
References:
[1]: /vibe-coding/
-
“Gradually roll out your releases to a small group of people”
~ roughly what prime said (I’m listening live)
This really hit home with me, tests can be so good at making sure that we dont repeat bugs and that laser focused things work, tests are generally small and focused, but this does not replace some sort of integration testing. These days very few things are written as a monolith, and hence there are a lot of interactions that really need to play well together accross various systems.
They call out Crowdstrike here, which took down the world blue screening critical windows systems everywhere in 2024. It was revealed that a small changed was rushed through and skipped critical rollout paths since it seemed like a small change. Crowdstrike also runs at a super low kernel level of access and a small memory bug can kill the system.
External Link
waylonwalker.com [1]
I’m trying to level up my sre game. I’m trying to set up grafana dashboards for everything and it is such a wide surface area. It’s never just one thing you have to have 3 or more things hooked together in order for the data to flow.
I’m really getting not invented here vibes, and thoughts that I can just build this myself. Not grafana and it’s scalability necessarily, but small components of observability.
References:
[1]: https://waylonwalker.com/thoughts/thought-623/
Kubernetes Monitoring Helm tutorial | Grafana Loki documentation
Grafana Labs · grafana.com [1]
This is a really great guide to setting up kubernetes monitoring with helm, it uses loki as a log datasource and alloy as a collector of kubernetes logs, events, and nodes. The charts are setup really well to start collecting logs from all your kubernetes pods.
References:
[1]: https://grafana.com/docs/loki/latest/send-data/k8s-monitoring-helm/
Configure the Tempo data source | Grafana documentation
Grafana Labs · grafana.com [1]
Really helpful article to getting tempo datasource setup in grafana, this enables you to see span and trace data within grafana. This data helps debug and work through issues that you might come into with performance and need to see the timing of requests along with logs.
References:
[1]: https://grafana.com/docs/grafana/latest/datasources/tempo/configure-tempo-data-source/
I’m trying to learn proper logs, monitoring, otel, and grafana. Today I imported a bunch of pre-made k8s dashboards and made a few of my own for specific apps, and it made me want to know how I can turn my own custom dashboards into infrastructure as code. Turns out grafana makes it pretty easy to do this, if you have the grafana dashboard sidecar running. It will pick up any ConfigMap with the grafana_dashboard label and import it.
Go to Dashboards -> Pick a Dashboard -> Export -> JSON.
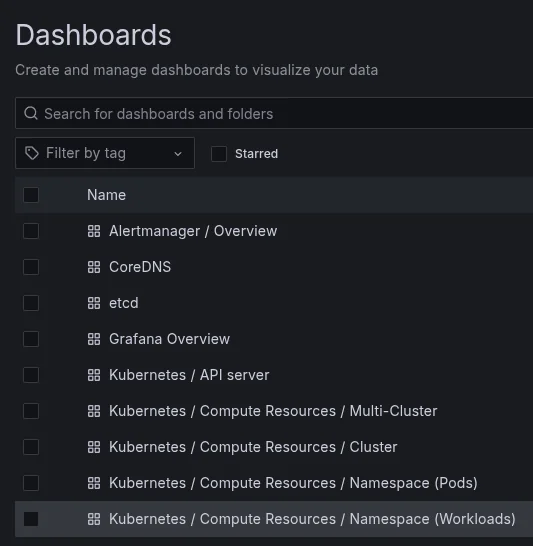
apiVersion: v1
kind: ConfigMap
metadata:
  name: my-dashboard
  namespace: meta
  labels:
    grafana_dashboard: "1"
data:
  my-dashboard.json: |
    {
      "annotations": {
        "list": [
      ...
      "uid": "fel2uhjhepg5ce",
      "version": 3
    }
Just starred postiz-app [1] by gitroomhq [2]. It’s an exciting project with a lot to offer.
📨 The ultimate social media scheduling tool, with a bunch of AI 🤖
References:
[1]: https://github.com/gitroomhq/postiz-app
[2]: https://github.com/gitroomhq
hollow knight home row layout
I just made it past 100% in my main hollow knight run, so now I will allow
myself to get silksong when it comes out. I did this with a little bit of YT
guidance, but mostly just figuring it out. I only just discovered the
⭐ ReznoRMichael hollow-knight-completion-check [1] which got me an extra 2% for
a few items I must have got and not saved on, because I was sure I had them.
Controller # [2]
Hollow Knight is a game that can be played with keyboard or controller, You can
use analog stick for movements, but they just translate to dpad, there really
are no analog moves in the game. This makes it ripe for playing on pure
keyboard. I really favor controller when there are more than one analog
(throttle, brake, steering for example).
On controller I’ve switched to only using d-pad as I feel like it gives me the
most crisp of controls. It is really easy to miss a pogo on analog by hitting
slightly left or right.
My Keyboard # [3]
My daily driver keyboard is a custom built 40% monoblo...
I recently discovered wezterm [1] by wezterm [2], and it’s truly impressive.
A GPU-accelerated cross-platform terminal emulator and multiplexer written by @wez and implemented in Rust
References:
[1]: https://github.com/wezterm/wezterm
[2]: https://github.com/wezterm
fix feed descriptions
Today I fixed a bug in markata that has been occurring for a few months where
the description for posts come out as None if coming from cache, the issue was
a pretty simple check and pull properly from cache. This fixes all the
descriptions in feeds and metadata on the post.
Better description # [1]
While in there we went ahead and improved our get_description to more
accurately return plain text without escaped characters, remove cutoff words,
and add an elipsis if the description cuts off the text.
More description # [2]
While I was there I made longer form posts, til, blog-post use the super
description of 500 characters instead of the regular 120 character description.
Before # [3]
[4]
After # [5]
[6]
References:
[1]: #better-description
[2]: #more-description
[3]: #before
[4]: https://dropper.waylonwalker.com/api/file/8e9cf8e3-50ab-4e0a-be76-7241fbfe44c5.webp
[5]: #after
[6]: https://dropper.waylonwalker.com/api/file/29f96255-a89f-4ec6-b9e7-f61551366264.webp
External Link
fafo.fm [1]
Steve is such a great listen, the neurospicy 🌶️ rambles this episode goes on is so relatable. I feel like I really missed out on some great takes on intellij vs neovim, but got some really great knowledge about vector db’s, embedding, text compression, similarities to vector algegra like infinite craft.
Just popped open infinitecraft and I’ve definitely played this with my kids before, super fun, just could not remember the name of this one. I do remember an android one as well that is alchemist or something like that, which we have also played a lot.
References:
[1]: https://www.fafo.fm/vectorizing-your-databases-with-steve-pousty/
Recovering from Disaster with Seth Eliot
Disaster recovery is more than automation and infrastructure. There's a lot that goes into your services and some of those things can't be defined as code or automa…
Fork Around And Find Out · fafo.fm [1]
This episode really got me thinking about the difference between HA and DR and my approach to each one. They talk about it from the perspective of a cach cow kind of app rather than a homelab [2] or internal tooling, but think of HA as 9’s how many 9s are we willing to pay for, tink of DR as dollars how many dollars will we loose during the period of recovery. So much more in the episode, a lot of talk around cloud vendors and what they give you vs a purpose build platform with HA and DR in mind.
References:
[1]: https://www.fafo.fm/recovering-from-disaster-with-seth-eliot/
[2]: /homelab/
Just starred kubero [1] by kubero-dev [2]. It’s an exciting project with a lot to offer.
A free and self-hosted [3] PaaS alternative to Heroku / Netlify / Coolify / Vercel / Dokku / Portainer running on Kubernetes
References:
[1]: https://github.com/kubero-dev/kubero
[2]: https://github.com/kubero-dev
[3]: /self-host/
I’ve been using ruff to lint my python code for quite awhile now, I was pretty early to jump on it after release. Some of my projects have had a nice force-single-line setting and some have not. I dug into the docs and it was not clear what I needed to make it work.
[tool.ruff]
select = ['I'] # you probably want others as well

[tool.ruff.isort]
force-single-line = true
Turns out I was missing Isort in the select list.
-
Astral is doing great things in the python industry. They are disrupting entire categories of tools with extremely fast, easy to use, and feature rich alternatives that make it really hard to keep using the incumbent. So far I am seeing no signs of evil, sometimes with such a disrupter there is some sort of downside that make it hard to want to do the switch. In the interview they even mention things like leaning on lsp so that it works across all editors rather than building out vscode integrations that work for most developers. As a neovim user I greatly apreciate this.
Playground | ty
An in-browser playground for ty, an extremely fast Python type-checker written in Rust.
types.ruff.rs [1]
ty, has a playground running at types.ruff.rs. You can edit code in there and see what the type checker results would be in browser. This looks good, excited to see it running in my lsp.
Here is an example where a Optional may not be defined.
[2]
Checking for existance before using it resolves the issue.
[3]
References:
[1]: https://types.ruff.rs/
[2]: https://dropper.waylonwalker.com/api/file/783e4d9e-8b23-4304-8921-2ae05aebcc8a.webp
[3]: https://dropper.waylonwalker.com/api/file/cc28335c-4130-4bf4-829d-0ff39f2aa32d.webp
I was looking back at my analytics page today and wondered what were my posts about back at the beginning. My blog is managed by markata so I looked at a few ways you could pull those posts up. Turns out it’s pretty simple to do, use the markata map with a filter.
from markata import Markata

m.map('title, slug, date', filter='date.year==2016', sort='date')
Note
the filter is python eval that should evaluate to a boolean, all of the
attributes of the post are available to filter on.
Result #
[
    ('⭐ jupyterlab jupyterlab', 'jupyterlab-jupyterlab', datetime.date(2016, 12, 13)),
    ('⭐ nickhould tidy-data-python', 'nickhould-tidy-data-python', datetime.date(2016, 12, 9)),
    (
        '⭐ mikeckennedy write-pythonic-code-demos',
        'mikeckennedy-write-pythonic-code-demos',
        datetime.date(2016, 11, 22)
    ),
    (
        '⭐ mikeckennedy write-pythonic-code-for-better-data-science-webcast',
        'mikeckennedy-write-pythonic-code-for-better-data-science-webcast',
        datetime.date(2016, 11, 22)
    ),
    ('⭐ rajshah4 dlgroup', 'rajshah4-dlgroup', datetime.date(2016, 11, 18)),
    ('⭐ pandas-dev pandas', 'pandas-dev-pandas', datetime.date(2016, 10, 5))
]
You could use the list command as well right within your shell and the same
map and filters work.
⬢ [devtainer-0.1.3] ❯ markata list --map title --filter='date.year==2016'
[22:35:06] 2088/2145 posts skipped                                                                       skip.py:36
           57/2145 posts not skipped                                                                     skip.py:37

⭐ pandas-dev pandas
⭐ rajshah4 dlgroup
⭐ mikeckennedy write-pythonic-code-for-better-data-science-webcast
⭐ mikeckennedy write-pythonic-code-demos
⭐ nickhould tidy-data-python
⭐ jupyterlab jupyterlab
You could also do it with jin right inside of a markdown post using the jinja_md plugin.
{% raw %}
{% for title, slug, date in markata.map('title, slug, date', filter='date.year==2016', sort='date') %}
* [{{title}}]({{slug}}) - {{date}}
{% endfor %}
{% endraw %}
Note
You do have to `jinja: true` in the frontmatter of the post.
Result #
{% for title, slug, date in markata.map(’title, slug, date’, filter=‘date.year==2016’, sort=‘date’) %}
- {{title}} - {{date}} {% endfor %}
ty
An extremely fast Python type checker, written in Rust.
PyPI · pypi.org [1]
Astral is working on some great things around python, they have created a high standard for python tooling built on rust that works really well, runs fast and covers everything in the space it resides in. ty appears to be their linter coming soon.
References:
[1]: https://pypi.org/project/ty/
3D Printable Power Brick Bracket Designer
Generate custom 3D printable power brick brackets for your devices. Design and export your own mounting solutions.
Bracket Engineer · bracket.engineer [1]
This is madness that Wes Bos made this with manifold.js and no openscad! Yes, I have these stupid brackets everywhere, yes, I hand model my own brackets. No I don’t do it enough. I don’t like that these model generators like openscad cannot make fillets and chamfers, but I appreciate the heck out of the speed and automation you can make iterations of things.
Link to the promo video.
https://bsky.app/profile/wesbos.com/post/3lo4h7unk6s2i
References:
[1]: https://bracket.engineer/?width=113.5&height=63&depth=98&bracketThickness=3&ribbingCount=9&ribbingThickness=2.5&holeDiameter=5&holeCount=1&earWidth=17&keyHole=on&color=%2344ff00
bracket.engineer [1] by wesbos [2] is a game-changer in its space. Excited to see how it evolves.
Generate 3D printable power brick brackets.
References:
[1]: https://github.com/wesbos/bracket.engineer
[2]: https://github.com/wesbos
661: Working Vacations, Ripping Out JavaScript, and Non-US Cloud Service Options
What are the non-US cloud services options, falling off the blogging train and trying to get back on, working on vacation, Chris recaps the Alaskan Folk Festival experience, how often do you go bac…
ShopTalk · shoptalkshow.com [1]
Chris hit me where it feels about 10 minutes in. He said he has not been writing on his site as much lately and how hard it is to get back in. He mentions having a baby idea of a post, but then having the thought do you really want to come back from a long break with this!
Momentum is a b**** when you got it you cant stop, and when you don’t you can’t stop.
References:
[1]: https://shoptalkshow.com/661/
-
How is usability and it doing the thing I paid for it to do a selling point?? Any time I’ve touched a windows machine in the past 7 years has felt awkward, I have no idea where things are now, but they look so much worse.
-
How is usability and it doing the thing I paid for it to do a selling point?? Any time I’ve touched a windows machine in the past 7 years has felt awkward, I have no idea where things are now, but they look so much worse.
A quote from Mark Zuckerberg
You also mentioned the whole Chatbot Arena thing, which I think is interesting and points to the challenge around how you do benchmarking. How do you know what models are …
Simon Willison’s Weblog · simonwillison.net [1]
Interesting how confidently he says we can easily go to the top. really makes you wonder what we the normies are leaving on the table by using these general purpose models and what could be achieved with really tuned in models. Could I make an automatic blog tagger more accurately, maybe smaller, maybe tuned so well it runs fine on cpu?
References:
[1]: https://simonwillison.net/2025/May/1/mark-zuckerberg/#atom-everything
P. Martin Ortiz: Web apps can easily adapt to whatever device you’re on. A single responsive website can run on your desktop, phone, tablet, or even a VR headset. What’s even more, they can be ...
Chris Coyier · chriscoyier.net [1]
The web is everywhere, its the one true write once and run anywhere platform. Millions sunk into browser performance and things like the v8 engine allow us to run our shitty websites anywhere and it still runs good…. most of the time
References:
[1]: https://chriscoyier.net/2025/04/30/12292/
Helm - Postiz Documentation
Install Postiz using Kubernetes and Helm
Postiz Documentation · docs.postiz.com [1]
I didn’t realize that postiz had a helm chart, I just hand rolled mine based on the compose file they provide. I went from running the compose stack locally to running in my homelab [2] with kubernetes. I am using cnpg rather than a postgres container which I really like the workflow of as far as backup and restore. The one hiccup I ran into was changing the domain from localhost to my homelab domain killed all of my integrations and they needed the redirect url updated.
References:
[1]: https://docs.postiz.com/installation/kubernetes-helm
[2]: /homelab/
portal-platformer-devlog-1
Here is the current state of my platformer yet to really be named, I want to
make something in between hollow knight and portal.
Starting # [1]
I made one once in make code arcace on a pybadge. It was quick and dirty, but
fun to work on. It had the basic of blocks that I could move, blocks i could
put a portal onto, and a goal for each level. Some levels you can just walk
through and some levels required you to really think about where to place the
portal.
History # [2]
So this version of the game is a least 2 years in the making, I open it every
few months give it a day or two and move on. Its mostly something that I work
on with my son. He really likes to jump around on projects so its hard to make
real progress on something, but we are hitting an age where he is able to come
back to projects a little better.
All of this is built in python, and mostly before vibe coding [3] was a thing, its
mostly me trying to get out ideas as quick as my son is spitting out the the
next idea...
Check out goose [1] by block [2]. It’s a well-crafted project with great potential.
an open source, extensible AI agent that goes beyond code suggestions - install, execute, edit, and test with any LLM
References:
[1]: https://github.com/block/goose
[2]: https://github.com/block
Check out kubernetes-mcp-server [1] by manusa [2]. It’s a well-crafted project with great potential.
Model Context Protocol (MCP) server for Kubernetes and OpenShift
References:
[1]: https://github.com/manusa/kubernetes-mcp-server
[2]: https://github.com/manusa
Looking for inspiration? kubernetes-mcp-server [1] by containers [2].
Model Context Protocol (MCP) server for Kubernetes and OpenShift
References:
[1]: https://github.com/containers/kubernetes-mcp-server
[2]: https://github.com/containers
Check out punkpeye [1] and their project awesome-mcp-servers [2].
A collection of MCP servers.
References:
[1]: https://github.com/punkpeye
[2]: https://github.com/punkpeye/awesome-mcp-servers
I’m really excited about any-agent [1], an amazing project by mozilla-ai [2]. It’s worth exploring!
A single interface to build and evaluate different agent frameworks
References:
[1]: https://github.com/mozilla-ai/any-agent
[2]: https://github.com/mozilla-ai
-
Great talk from Lous Rossman! TLDR you don’t own it, and stop pointing the finger calling everyone else an idiot for supporting the other brand, cause your’s probably also has different issues.
Check out dtnewman [1] and their project zev [2].
A simple CLI tool to help you remember terminal commands
References:
[1]: https://github.com/dtnewman
[2]: https://github.com/dtnewman/zev
Looking for inspiration? Reloader [1] by stakater [2].
A Kubernetes controller to watch changes in ConfigMap and Secrets and do rolling upgrades on Pods with their associated Deployment, StatefulSet, DaemonSet and DeploymentConfig – [✩Star] if you’re using it!
References:
[1]: https://github.com/stakater/Reloader
[2]: https://github.com/stakater
I’m impressed by bazzite-arch [1] from ublue-os [2].
A ready-to-game Arch Linux based OCI designed for use exclusively in distrobox.
References:
[1]: https://github.com/ublue-os/bazzite-arch
[2]: https://github.com/ublue-os
ublue-os [1] has done a fantastic job with arch-distrobox [2]. Highly recommend taking a look.
An Arch Linux OCI meant for use exclusively in Distrobox
References:
[1]: https://github.com/ublue-os
[2]: https://github.com/ublue-os/arch-distrobox
Check out ReznoRMichael [1] and their project hollow-knight-completion-check [2].
App for reading and analyzing a Hollow Knight save file. Shows what remains to do for full 112% Game Completion, Achievements, Hunter’s Journal, Collectibles, True Completion %. Includes a self-designed Hint system.
References:
[1]: https://github.com/ReznoRMichael
[2]: https://github.com/ReznoRMichael/hollow-knight-completion-check
-
This is a wild concept for a slicer, essentially he didn’t even make a slicer just a crazy pre-process and post prossess to cura slicer, deforming the part until it doesn’t have any overhangs, creating a normal planar slice, then undeforming the output from cura. He also mentions that the rapid moved needed modified as well. I’m assuming this is because they are generally long distances and not short, without breaking these long lines up we would still end up wtih a straight line after deform.
Marp: Markdown Presentation Ecosystem
Marp (also known as the Markdown Presentation Ecosystem) provides an intuitive experience for creating beautiful slide decks. You only have to focus on writing your story in a Markdown document.
marp.app [1]
Intersting markdown presentation tool, Looks very simple. I really like split on --- much better than by h1 or h2. Their theme looks really nice in the screenshots.
References:
[1]: https://marp.app/#get-started
-
How to make an entire clickable without presenting the entire content of the card as the link title. These videos are great, I’ve ran into these types of problems so many times, and definitely did not know about things like isolate to keep the z-index scoped to one element.
- isolate - scope z-index inside this element so that it does not leak out.
- [.relative [.absolute, inset-0, z-10]] - the inset zero is a modern shorthand for zeroing all sides, top-0, right-0, bottom-0, left-0.
-
This is an absolute banger of a review by prime and Dylan Beetle. I love the similar takes with different perspectives, would really like to see them podcast together, but this one way style interview does really well to cover a lot of issues in open source, rug pulls, version pinning, thankless maintainers, what its like to open source from a large company.
Perils of Self-Hosting
We speak to Kevin and Patricia from Traefik, discuss Alex's recent ZFS snafu and we wonder if the new Chromecasts can match up to the Nvidia Shield.
Self-Hosted · selfhosted.show [1]
Interesting takes on Diun here. I agree that I like to be in control of updates and pinning not to latest. both seemed like they weren’t going to run it because they can look up the latest version. Maybe I need to be less aggressive on keeping things up to date and its a me problem. I just got diun setup and hooked into ntfy, and I kinda like the automated checklist of new images that I can review and update.
To be a bit more clear, having control over changes coming in from others, even if I dont care to see the changelog, it is nice to roll out an update, have it in your git [2] history, watch it deploy and work like before, if not roll back and read the changelog. For internal applications I’m down for automated releases like argo image updater give you, this thing has already gone through review, launch the damn thing at least to a dev space.
References:
[1]: https://selfhosted.show/29?t=637
[2]: /glossary/git/
Spring 2025: Self-Hosted Update
The one where things plod along.
dbushell.com · dbushell.com [1]
Davids blogs always have so many links that send me down new rabbit holes. Interesting that his experience with smart home is turning away, I’ve been somewhat interested for awhile, but never fully pulled the trigger on buying things.
I really hope tailscale enshitification does not take off, but really for me, I barely use it even as a homelabber. Idk why, but every other homelabber praises it so much and I just dont find myself using it.
References:
[1]: https://dbushell.com/2025/04/13/self-hosted-update-spring-2025/
Characters
Xe Iaso
xeiaso.net [1]
xeiaso, has the coolest characters on her blog. Definitely something I’d like to replicate. I really appreciate how each one has its own sprite sheet, and they have conversations with each other.
[2]
References:
[1]: https://xeiaso.net/characters/
[2]: https://dropper.waylonwalker.com/api/file/77dd4cb5-4fdb-4d09-8b9b-d9cdd72b2490.webp
-
I want to go build these now, these are suspension setups I had no idea you could do in trailmakers.
backup distrobox image
Today I’m upgrading my distrobox, but don’t want to end up in a situation where
I can’t get anything done becauase I work out of my distrobox.
distrobox ls
distrobox stop devtainer
distrobox create --clone devtainer --name devtainer-20250409
distrobox enter devtainer
GitHub - adrianlopezroche/fdupes: FDUPES is a program for identifying or deleting duplicate files residing within specified directories.
FDUPES is a program for identifying or deleting duplicate files residing within specified directories. - adrianlopezroche/fdupes
GitHub · github.com [1]
keeping this in my back pocket for now. I just moved a few TB’s of data in the homelab [2] and I am expecting a lot of duplication to show up.
References:
[1]: https://github.com/adrianlopezroche/fdupes
[2]: /homelab/
I’m really excited about fdupes [1], an amazing project by adrianlopezroche [2]. It’s worth exploring!
FDUPES is a program for identifying or deleting duplicate files residing within specified directories.
References:
[1]: https://github.com/adrianlopezroche/fdupes
[2]: https://github.com/adrianlopezroche
Diun
Receive notifications when a Docker image is updated on a Docker registry
crazymax.dev [1]
Diun, looks like a very interesting tool to monitor for image updates, it does not make any change, it only makes notifications. This feels like an easy start to getting image updates started with low effort, keep git [2] ops, but requires manual updates. I see this as a tool that would be a great start and pair well with automated image updaters to ensure they are working as expected.
References:
[1]: https://crazymax.dev/diun/
[2]: /glossary/git/
Keel
Kubernetes Operator to automate Helm, DaemonSet, StatefulSet & Deployment updates
keel.sh [1]
Keel looks interesting, I might give it a try as a simple image updater. I’m unsure if it fits my gitops patterns though. I like to keep everything defined in git [2], I don’t like drift outside of that so Keel might not be the thing I want.
References:
[1]: https://keel.sh/
[2]: /glossary/git/
Changing k8s Storage Class - Migration Job
I’m setting up longhorn in my homelab [1], and I ran into an issue where I
initially setup some pvcs under longhorn, and later realized that to get
longhorn to snapshot and backup I needed to hand edit volumes after the fact or
change storage class. I’m all in on gitops so option 1 was not an option. So
changing storageclass it is.
Now the issue is that you CANNOT mutate storageclass on a provisioned pvc, it
is an immutable attribute.
Migration Job # [2]
This migration job will create a new pvc with the new storageclass and move the
data from the old pvc to the new pvc.
Existing Pods
This migration job will not work if you have a pod using the old pvc. You
will need to shutdown the pod and delete it.
# old pvc with longhorn storageclass
apiVersion: v1
kind: PersistentVolumeClaim
metadata:
name: site-pvc-longhorn
namespace: waylonwalker-com
spec:
storageClassName: longhorn-backup
accessModes:
- ReadWriteOnce
resources:
requests:
storage: 5Gi
# new pvc with longhorn-ba...
New Phone Day Apr 2 2025
backdated
This represents the first sign in to this new pixel 6.
This will be my 3rd pixel 6 since 2021, One shattered screen and one blown
battery. My first one was brand new, the first new phone i’ve had in years.
That phone only proved to me that new flagship models make no difference to me,
I had been running pixel 3 refurbished for many years before.
No social media on this device # [1]
Social media sucks become a bunch of people yelling “fake news” at each other
and propping up their political candidate as the savior of everything. Elon
bought twitter and fractured it. The communities are no longer here, and I
have to dig through so much political posts to see post on tech and engineering
its not worth it anymore.
update from a year later and It’s been great, I check socials like once a
week hoping to find better things, but it all seems like the same BS. The
Crypto bros have moved on to AI so hard that I just cant stand watching most of
them yap about something that they...
YouTube
Enjoy the videos and music you love, upload original content, and share it all with friends, family, and the world on YouTube.
youtube.com [1]
Damn he makes this easy. I did not know about hx-select. yes there is waste in requesting the entire thing every 5s, but damn that was easy to get life reload. I’ve only done very specific backend endpoints, built pages up from partials, made endpoints for partials. keeping this one in my back pocket.
I’m just kind of amazed that he could do this all in html [2] without touching the backend or js, typically things like this require one or the other. Yes js is running, but no other js library I’m aware of lets you do this.
References:
[1]: https://www.youtube.com/watch
[2]: /html/
homelab drive ids
ls -l /dev/disk/by-id/
Drive Bay 1
ata-ST4000VN008-2DR166_ZDHBZSWZ
+————————————————————————-+
| [ Power] [ Reset ] |
+————————————————————————-+
| [ BAY 5 ] 3TB WD30EFRX WMC4N0D3J9R7 ext4 /mnt/sdf4 |
+————————————————————————-+
| [ BAY 4 ] 14TB EXOS ZTM09R9N zfs main pool mirror /mnt/main |
+————————————————————————-+
| [ BAY 3 ] 14TB EXOS ZTM0AALS zfs main pool mirror /mnt/main |
+——————————————-+
| [ BAY 2 ] 4TB IRONWOLF ZDHBZV3N zfs tank pool mirror /mnt/tank |
+————————————————————————-+
| [ BAY 1 ] 4TB IRONWOLF ZDHBZSWZ zfs tank pool mirror /mnt/tank |
+————————————————————————-+
I recently discovered kubectl.nvim [1] by Ramilito [2], and it’s truly impressive.
⎈ Streamline your Kubernetes management within Neovim—control and monitor your cluster seamlessly, all without leaving your coding environment.
References:
[1]: https://github.com/Ramilito/kubectl.nvim
[2]: https://github.com/Ramilito
[1]
This is a handy line to reset your admin password in nextcloud.
References:
[1]: /static/https://docs.nextcloud.com/server/latest/admin_manual/configuration_user/reset_admin_password.html
Redis configuration
Overview of redis.conf, the Redis configuration file
Docs · redis.io [1]
redis has all of their default self documented configs hosted here. You can pull the default redis.conf for any of the major releases.
References:
[1]: https://redis.io/docs/latest/operate/oss_and_stack/management/config/
If you’re into interesting projects, don’t miss out on xpipe-webtop [1], created by xpipe-io [2].
A containerized web-based desktop environment for XPipe
References:
[1]: https://github.com/xpipe-io/xpipe-webtop
[2]: https://github.com/xpipe-io
xpipe [1] by xpipe-io [2] is a game-changer in its space. Excited to see how it evolves.
Access your entire server infrastructure from your local desktop
References:
[1]: https://github.com/xpipe-io/xpipe
[2]: https://github.com/xpipe-io
Using pbpaste for command substitution keeps sensitive or long URLs out of
your shell history. Instead of typing git clone https://github.com/user/repo-with-long-name.git, copy the URL to clipboard and
run git clone "$(pbpaste)". This prevents the URL from appearing in
~/.bash_history or ~/.zsh_history.
To get pbpaste working on both Xorg and Wayland, add this to your shell config:
if [[ $(command -v wl-copy) ]]; then
    alias pbcopy='wl-copy'
    pbpaste() { wl-paste; }
elif [[ $(command -v xclip) ]]; then
    alias pbcopy='xclip -selection clipboard'
    pbpaste() { xclip -selection clipboard -o; }
fi
The function approach (instead of alias) enables command substitution, while
the quotes around $(pbpaste) handle spaces and special characters safely.
Now you can use it.
git clone "$(pbpaste)"
More importantly secrets can stay out of your history.
export GITHUB_TOKEN="$(pbpaste)"
export AWS_ACCESS_KEY_ID="$(pbpaste)"
export AWS_SECRET_ACCESS_KEY="$(pbpaste)"
export DATABASE_URL="$(pbpaste)"
hotel_bookings.csv
Discover what actually works in AI. Join millions of builders, researchers, and labs evaluating agents, models, and frontier technology through crowdsourced benchmarks, competitions, and hackathons.
kaggle.com [1]
nice dataset to use for example / test projects. I’m using it to play with duckdb currently.
References:
[1]: https://www.kaggle.com/datasets/ahmedsafwatgb20/hotel-bookingscsv?resource=download
THPS 1 Downtown Gaps
[1]
[2]
Previously THPS 1 Skate Park Gaps [3]
Big Ass # [4]
THPS1-5-BigAss.mp4 [5]
Billboard Grind # [6]
THPS1-5-BillboardGrind.mp4 [7]
BS Gap # [8]
THPS1-5-BSGap.mp4 [9]
BS Grind # [10]
THPS1-5-BSGrind.mp4 [11]
Burly Deck Gap # [12]
THPS1-5-BurlyDeckGap.mp4 [13]
Car Ollie # [14]
THPS1-5-CarOllie.mp4 [15]
THPS1-5-CarPlant.mp4 [16]
Cheesy Deck Gap # [17]
THPS1-5-CheesyDeckGap.mp4 [18]
Death Grind # [19]
THPS1-5-DeathGrind.mp4 [20]
Deck Gap # [21]
THPS1-5-DeckGap.mp4 [22]
Dirty Rail # [23]
THPS1-5-DirtyRail.mp4 [24]
Glass Gap # [25]
THPS1-5-GlassGap.mp4 [26]
Kicker Gap # [27]
THPS1-5-KickerGap.mp4 [28]
Kicker 2 Edge # [29]
THPS1-5-Kicker2Edge.mp4 [30]
Kicker 2 Street # [31]
THPS1-5-Kicker2Street.mp4 [32]
Rail 2 Rail # [33]
THPS1-5-Rail2Rail.mp4 [34]
Roof 2 Roof # [35]
THPS1-5-Roof2Roof.mp4 [36]
Secret Tunnel Entrance # [37]
THPS1-5-SecretTunnelEntrance.mp4 [38]
Sucky Room Gap # [39]
THPS1-5-SuckyRoomGap.mp4 [40]
T 2 T Gap # [41]
THPS1-5-T2TGap....
The State of Secrets Sprawl 2025
GitGuardian's 2025 report reveals 70% of leaked secrets remain active two years later. Discover the alarming state of secrets sprawl & protect your organization.
GitGuardian Blog - Take Control of Your Secrets Security · blog.gitguardian.com [1]
Good report, make notes later
References:
[1]: https://blog.gitguardian.com/the-state-of-secrets-sprawl-2025/
Mill-Max Hotswap Sockets
Mill-Max sockets for adding hotswap support to regular PCBs. Sold in packs of 60 (good for 30 switches). Info about the different types 7305-0: Gold-plated sockets (7305-0-15-15-47-27-10-0) Shorter...
Keebio · keeb.io [1]
looking into trying these Mill-Max pins on a handwired 3d printed build to see if I can get away from specialty hot swap sockets. Damn they aren’t exactly cheap, I really want the nice short ones but they start at $20 per 60ct and you need two per key, that adds up quick.
References:
[1]: https://keeb.io/products/mill-max-hotswap-sockets?variant=32377167511646
External Link
r.jina.ai [1]
jina reader is a pretty sweet tool to convert a site to ai compatible text. There are other web to markdown types of tools, but the convenience of just adding r.jina.ai to the front of any page makes it so easy to grab for one page of docs.
References:
[1]: https://r.jina.ai/
-
the racked up 4 framework mainboards sound wild. connected with usb4 and 5gig ethernet. they said they can run big models quantized down from 600Gb to within the 512GB limit they have. This seems wild to bring this level of capability to such a low price point. It will be really cool to start to see demos come out.
Just starred monolith [1] by Y2Z [2]. It’s an exciting project with a lot to offer.
⬛️ CLI tool and library for saving complete web pages as a single HTML [3] file
References:
[1]: https://github.com/Y2Z/monolith
[2]: https://github.com/Y2Z
[3]: /html/
THPS 1 Skate Park Gaps
[1]
Previously THPS 1 Mall Gaps [2]
Next THPS 1 Downtown Gaps [3]
Acid Drop # [4]
THPS1-4-AcidDrop.mp4 [5]
Across The Park # [6]
THPS1-4-AcrossThePark.mp4 [7]
Around The Bend # [8]
THPS1-4-AroundTheBend.mp4 [9]
HP Transfer # [10]
THPS1-4-HPTransfer.mp4 [11]
Light Grind # [12]
THPS1-4-LightGrind.mp4 [13]
Over The Box # [14]
THPS1-4-OverTheBox.mp4 [15]
Over The Pipe # [16]
THPS1-4-OverThePipe.mp4 [17]
Over the Rafters # [18]
THPS1-4-OverTheRafters.mp4 [19]
Pool 2 Walkway # [20]
THPS1-4-Pool2Walkway.mp4 [21]
Pool Hip # [22]
THPS1-4-PoolHip.mp4 [23]
Pool Rail Trans # [24]
THPS1-4-PoolRailTrans.mp4 [25]
Rafter Rail # [26]
THPS1-4-RafterRail.mp4 [27]
Transfer # [28]
THPS1-4-Transfer.mp4 [29]
Walkway Rail Trans # [30]
THPS1-4-WalkwayRailTrans.mp4 [31]
Wall Gap # [32]
THPS1-4-WallGap.mp4 [33]
Wall Gap Jr # [34]
THPS1-4-WallGapJr.mp4 [35]
Whoop Gap # [36]
THPS1-4-WhoopGap.mp4 [37]
References:
[1]: https://dropper.waylonwalker.com/api/file/75b658de-1c88-414...
Trailmakers Pioneers
Trailmakers 2.0 Pioneers was released today as an update to trailmakers. It’s
a brand new campaign mode that requires you to mine resources to get materials
to craft your vehicles rather than salvage parts like you so in the Stranded
Campaign. There also seems to be a more linear play through of the story with
the frogitts, unlike stranded where it let you do anything completely open
world, as long as you had the equipment to go there.
Four Frogitts # [1]
Out of the gate Wyatt came in with four frogitts to rescue, I don’t know how he
found them all, I’ve only been able to find the first one that the master gives
you to bring home as a tutorial.
four-frogitts.mp4 [2]
First Boss # [3]
After Wyatt left for bed I played a little more and beat the first of what felt
like a boss level enemy, he had much different attacks. I did not think I
would make it as I got hit hard from his first explosion attack before I
realized what it did.
first-boss.mp4 [4]
Here is where he was on the ma...
If you’re into interesting projects, don’t miss out on homelab-compose [1], created by Doomlab7 [2].
A repository for the applications I run via docker-compose in my homelab [3]
References:
[1]: https://github.com/Doomlab7/homelab-compose
[2]: https://github.com/Doomlab7
[3]: /homelab/
I recently discovered smallpond [1] by deepseek-ai [2], and it’s truly impressive.
A lightweight data processing framework built on DuckDB and 3FS.
References:
[1]: https://github.com/deepseek-ai/smallpond
[2]: https://github.com/deepseek-ai
PyApp
ofek.dev [1]
I think I’m getting really close to having a good workflow setup for using pyapp. Such an amazing project to allow developers to create applications in python without passing on the hassle of python and managing installs to the user.
References:
[1]: https://ofek.dev/pyapp/latest/
The work on kopf [1] by nolar [2].
A Python framework to write Kubernetes operators in just a few lines of code
References:
[1]: https://github.com/nolar/kopf
[2]: https://github.com/nolar
-
Watching Wes fiddle through this with what a sane person would write in a normal day application and not applying the tricks for this kind of battle is how I feel when trying to do leetcode.
THPS 1 School Gaps
On the road to Gap Master achievement I got all School Gaps in THPS1.
This is a super fun level, I’ll have to admit that I had to look up at least a
quarter of them, and could not find them myself, mostly due to the naming, all
of the rail tricks were actually ledges and I was looking for big rails. None
of the warehouse gaps were manuals so I had no idea that the downhill and
accross the gym would be manual tricks.
Previously THPS 1 Warehouse Gaps [1]
next THPS 1 Mall Gaps [2]
[3]
[4]
Ditchin Class # [5]
THPS1-2-DitchinClass.mp4 [6]
Dumpster Rail Gap # [7]
THPS1-2-DumpsterRailGap.mp4 [8]
Funbox Table Transfer # [9]
THPS1-2-FunBoxToTableTransfer.mp4 [10]
Garbage Ollie # [11]
THPS1-2-GarbageOllie.mp4 [12]
Gimme Gap # [13]
THPS1-2-GimmeGap.mp4 [14]
Hall Pass gap # [15]
THPS1-2-HallPassGap.mp4 [16]
All-Access Gap # [17]
THPS1-2-AllAccessGap.mp4 [18]
Huge Rail # [19]
THPS1-2-HugeRail.mp4 [20]
Kicker Gap # [21]
THPS1-2-KickerGap.mp4 [22]
Long Ass Rail # [23]
THPS1...
THPS 1 Mall Gaps
This is one of the most memorable levels for me in THPS1 from when I had
originally played it. Surprisingly there aren’t as many gaps in it as I
thought there would be, there are definitely a lot that you can make up on your
own. Anyways here’s my playthrough of all the mall gaps in THPS1 on my way to gap master.
Previously THPS 1 School Gaps [1]
Next THPS 1 Skate Park Gaps [2]
[3]
Huge Stair Set Off A Mezzanine # [4]
THPS1-3-HugeStairSetOffAMezzanine.mp4 [5]
Coffee Grind # [6]
THPS1-3-CoffeeGrind.mp4 [7]
The Flying Leap # [8]
THPS1-3-TheFlyingLeap.mp4 [9]
For the Whole Atrium # [10]
THPS1-3-ForTheWholeAtrium.mp4 [11]
Fountain Gap # [12]
THPS1-3-FountainGap.mp4 [13]
Exit Stage Right # [14]
THPS1-3-ExitStageRight.mp4 [15]
Exit Stage Left # [16]
THPS1-3-ExitStageLeft.mp4 [17]
Over A Stair Set # [18]
THPS1-3-OverAStairSet.mp4 [19]
Over A Huge Stair Set # [20]
THPS1-3-OverAHugeStairSet.mp4 [21]
Planter Gap # [22]
THPS1-3-PlanterGap.mp4 [23]
Rail Combo # [24]
THP...
Check out PrefectHQ [1] and their project marvin [2].
✨ AI agents that spark joy
References:
[1]: https://github.com/PrefectHQ
[2]: https://github.com/PrefectHQ/marvin
Ergonomic Laptop — Evan and Katelyn
Back pain ends here.
Evan and Katelyn · evanandkatelyn.com [1]
This is such a cool idea, I tend to not use laptops at all because they are so uncomfortable I just wait till I’m back at my desk. This solves two main issues I have with laptops, the posture to use them is shit, the keyboards that come on them is not what I want to use. I’ve solved the latter with my own custom keyboard.
References:
[1]: https://www.evanandkatelyn.com/blog/ergotop
Just starred system-upgrade-controller [1] by rancher [2]. It’s an exciting project with a lot to offer.
In your Kubernetes, upgrading your nodes
References:
[1]: https://github.com/rancher/system-upgrade-controller
[2]: https://github.com/rancher
Just starred arcade [1] by pythonarcade [2]. It’s an exciting project with a lot to offer.
Easy to use Python library for creating 2D arcade games.
References:
[1]: https://github.com/pythonarcade/arcade
[2]: https://github.com/pythonarcade
OpenTools | The API for LLM tool use
One API to use any LLM with every MCP tool
OpenTools · opentools.com [1]
OpenTools is an index for mcp servers to work with new agentic workflows like roo code and windsurf.
References:
[1]: https://opentools.com/
-
I really like this idea for a homelab [1] jbod. Hardware Haven builds out Just a Bunch Of Disks using some pretty affordable hardware and has up to 16 disks added to his homelab with the os having full access to use with zfs.
References:
[1]: /homelab/
THPS 1 Warehouse Gaps
On the road to Gap Master achievement I got all Warehouse Gaps in THPS1.
This is this classic warehouse level that everyone thinks of when THPS is
mentioned. Such a good level, compact, easy to play, with some fun gaps that
might take a few tries to hit.
Next up THPS 1 School Gaps [1]
[2]
Big Rail # [3]
THPS1-1-BigRail.mp4 [4]
Channel Gap # [5]
THPS1-1-ChannelGap.mp4 [6]
Deck 2 Rail # [7]
THPS1-1-Deck2Rail.mp4 [8]
Face Plant # [9]
THPS1-1-FacePlant.mp4 [10]
High Rail # [11]
THPS1-1-HighRail.mp4 [12]
Holy Shi # [13]
THPS1-1-HolyShi.mp4 [14]
Kicker 2 Ledge # [15]
THPS1-1-Kicker2Ledge.mp4 [16]
Kicker Gap # [17]
THPS1-1-KickerGap.mp4 [18]
Monster Grind # [19]
THPS1-1-MonsterGrind.mp4 [20]
Over The Pipe # [21]
THPS1-1-OverThePipe.mp4 [22]
Secret Room # [23]
THPS1-1-SecretRoom.mp4 [24]
Taxi 2 Ledge # [25]
THPS1-1-Taxi2Ledge.mp4 [26]
Taxi Gap # [27]
THPS1-1-TaxiGap.mp4 [28]
Transfer # [29]
THPS1-1-Transfer.mp4 [30]
Transition Grind # [31]
THPS1-1-Transition...
XCMKB: ZMK/Bluetooth Boards
XCMKB: Key Remap Dear beginner, there is no real time key remap like Vial, but thanks to nickcoutsos for his work on Keymap Editor, a browser app allows you to load ZMK keymap code and manage it wi...
XCMKB · xcmkb.com [1]
Nice overview to getting started in zmk
References:
[1]: https://xcmkb.com/pages/zmk-bluetooth-boards
Check out tailscale [1] and their project github-action [2].
A GitHub Action to connect your workflow to your Tailscale network.
References:
[1]: https://github.com/tailscale
[2]: https://github.com/tailscale/github-action
I recently discovered kubevpn [1] by kubenetworks [2], and it’s truly impressive.
KubeVPN offers a Cloud Native Dev Environment that connects to kubernetes cluster network.
References:
[1]: https://github.com/kubenetworks/kubevpn
[2]: https://github.com/kubenetworks
I run tailwind for my personal blog, whenever I update it, pre-commit goes in and fixes end of file. I’m sick of these things fighting each other, since it is a generated app it is going to et ignored from pre-commit from now on.
exclude: ^static/app.*\.css$
repos:
  - repo: https://github.com/pre-commit/pre-commit-hooks
    rev: v2.4.0
    hooks:
      - id: trailing-whitespace
      - id: end-of-file-fixer
      - id: check-yaml
      - id: check-added-large-files
Mantis Clamp by zuberio | Download free STL model | Printables.com
Very happy with this creation, it's a 35:1 PRINT-IN-PLACE!! dual stage planetary gear system (sun 1 : ring 2). | Download free 3D printable STL models
Printables.com · printables.com [1]
Zuberios Mantic clamp, would ya look at it. This thing looks like a handy tool for soldering. Excited to give it a try.
[2]
References:
[1]: https://www.printables.com/model/48505-mantis-clamp/files
[2]: https://dropper.waylonwalker.com/api/file/101b97c0-99c6-40f5-bc2c-9d0bef3babb0.webp
-
Damn this looks good, I’ve been casually keeping my eye out for something like this for quite awhile, I think this will come in handy for keeb builds. Printing one out as I post this, damn I love 3d-printing.
[1]
References:
[1]: https://dropper.waylonwalker.com/api/file/ddbde7a1-8b8a-4096-92e2-1e602b1603a2.webp
There are many Style Guides but this is Mine—zachleat.com
A post by Zach Leatherman (zachleat)
Zach Leatherman · zachleat.com [1]
Zach’s site looks sick colors are all on point, the fonts are so good. I really like the idea of a style-guide. I think I might be renaming my Sample [2] post to style-guide now.
References:
[1]: https://www.zachleat.com/web/style-guide/
[2]: /sample/
[1]
Astral uses just in CI, kinda cool to stumble into this setup in the wild.
run: just release-run ${{ secrets.GITHUB_TOKEN }} ${{ github.event.inputs.sha }} ${{ github.event.inputs.tag }}
And her is the accompanying justfile. you can see how it accepts arguments, and starts calling out to other just recipes.
release-run token commit tag:
#!/bin/bash
set -eo pipefail
rm -rf dist
just release-download-distributions {{token}} {{commit}}
datetime=$(ls dist/cpython-3.10.*-x86_64-unknown-linux-gnu-install_only-*.tar.gz | awk -F- '{print $8}' | awk -F. '{print $1}')
just release-upload-distributions {{token}} ${datetime} {{tag}}
just release-set-latest-release {{tag}}
References:
[1]: /static/https://github.com/astral-sh/python-build-standalone/blob/main/.github/workflows/release.yml
fix double slash in url · WaylonWalker/waylonwalker.com@93ca7da
Latest version of waylonwalker.com - dev.waylonwalker.com - fix double slash in url · WaylonWalker/waylonwalker.com@93ca7da
GitHub · github.com [1]
fixing more ahrefs issues on the road to fixing all major issues within my control I found a ton of urls pointed to an url with a double slash, turns out I wasn’t properly referencing slug with post.slug.
[2]
References:
[1]: https://github.com/WaylonWalker/waylonwalker.com/commit/93ca7da6dd37100d2fb2cd989c2ddb31692c3bf9
[2]: https://dropper.waylonwalker.com/api/file/d821eb80-aeaa-4f96-becd-7609b798663c.webp
fix json schema · WaylonWalker/waylonwalker.com@deebd40
Latest version of waylonwalker.com - dev.waylonwalker.com - fix json schema · WaylonWalker/waylonwalker.com@deebd40
GitHub · github.com [1]
I found that I had Structured data has schema.org validation error on essentially every single page on my blog, turns out I had made some changes and have never tried to validate it. Damn json and its hatred towards trailing commas.
[2]
[3]
References:
[1]: https://github.com/WaylonWalker/waylonwalker.com/commit/deebd400e638bfaa41db953530597983ae0df82a
[2]: https://dropper.waylonwalker.com/api/file/889378f5-6444-4a38-a7e4-c305fe93e1d7.webp
[3]: https://dropper.waylonwalker.com/api/file/ca373ce6-9a4a-4e5b-8a0e-0b2959915ab5.webp
Weblogging: Part 1
The one where I blog about blogging (part 1)
dbushell.com · dbushell.com [1]
Long live RSS! Rss is not dead David, you are right there. I really agree with David that learning a topic well enough to form thoughts and write about it really help learning. You don’t need to be an expert, but forming your own thoughts, putting ideas in words takes a lot more than surface level knowledge. When you try to write or speak about something you quickly realize where your holes in understanding are.
Blogging helps me learn. When I commit knowledge to writing it reinforces what I know and shines a spotlight on what I don’t. Most topics require additional research. Even then, I occasionally get things wrong, or miss different ways of thinking, and I welcome corrections. I’ll often update and enrich my posts based on feedback. Without my blog I’d miss other points of view.
As they say, the best way to get an answer on the internet is not to pose a question, but to assert the wrong solution! Most feedback I get is constructive. Sometimes it’s blunt but I try not to read into unspoken sentiment. Some people are more direct. If the end result is positive learning, I can ta...
fix: Open Graph URL not matching canonical · WaylonWalker/waylonwalker.com@0fd994b
Latest version of waylonwalker.com - dev.waylonwalker.com - fix: Open Graph URL not matching canonical · WaylonWalker/waylonwalker.com@0fd994b
GitHub · github.com [1]
In fixing a bunch of meta tags, I introduced Open Graph URL not matching canonical on every page by having trailing / on canonical and not on the og:url.
[2]
This commit will fix the error.
References:
[1]: https://github.com/WaylonWalker/waylonwalker.com/commit/0fd994b0101f7260051ec914ea6987e1c70603bd
[2]: https://dropper.waylonwalker.com/api/file/1adedfb8-5fbd-4622-adda-2f3984baeb03.webp
Cotton Coder
The one where I launch a new blog
dbushell.com · dbushell.com [1]
I like Davids idea for cotton coder here, reminds me a lot of Thoughts [2], which turns out to be mroe commonly called a linkblog. I can relate to David heavily on gathering too many side projects and soem collecting more digital dust than you would really like them to. I use thoughts for quick publishing, very similar to David’s notes [3]. I have tags and titles, but the titles are a reflection of the post I’m taking a note on. They are short and sweet, I put just enough thought into them without overthinking them. They live as a separate server hosted website, but the data gets pulled into my blog at build time, so they end up in the same place eventually.
References:
[1]: https://dbushell.com/2024/01/24/cotton-coder/
[2]: /thoughts/
[3]: https://dbushell.com/notes/
GitHub - valkey-io/valkey: A flexible distributed key-value database that is optimized for caching and other realtime workloads.
A flexible distributed key-value database that is optimized for caching and other realtime workloads. - valkey-io/valkey
GitHub · github.com [1]
valkey appears to be the largest open source fork of redis that was forked just before their transition to the new source available licenses.
One notable thing missing from the readme is how to run with docker, which I saw in the valkey-py docs.
docker run -p 6379:6379 -it valkey/valkey:latest
You can install the python library with
python -m venv .venv
. ./.venv/bin/activate
pip install "valkey[libvalkey]"
References:
[1]: https://github.com/valkey-io/valkey
If you’re into interesting projects, don’t miss out on valkey-py [1], created by valkey-io [2].
Valkey Python client based on a fork of redis-py
References:
[1]: https://github.com/valkey-io/valkey-py
[2]: https://github.com/valkey-io
I’m really excited about valkey [1], an amazing project by valkey-io [2]. It’s worth exploring!
A flexible distributed key-value datastore that is optimized for caching and other realtime workloads.
References:
[1]: https://github.com/valkey-io/valkey
[2]: https://github.com/valkey-io
valkey
Python client for Valkey forked from redis-py
PyPI · pypi.org [1]
python bindings for valkey, forked from redis.
one notable difference I see from redis is that you can install with libvalkey to autmatically get faster parsing support.
For faster performance, install valkey with libvalkey support, this provides a compiled response parser, and for most cases requires zero code changes. By default, if libvalkey >= 2.3.2 is available, valkey-py will attempt to use it for response parsing.
pip install "valkey[libvalkey]"
References:
[1]: https://pypi.org/project/valkey/
Fragmentions - linking to any text
kevinmarks.com [1]
I can’t believe I’ve never see this Tim Berners-Lee quote, but I can’t unsee it and will be required to reference it from now on.
eventually every URL ends up as a porn site
I had a friend let his blog domain expire, within a short period it was scooped up and was hosting porn. I don’t know why, but my best guess is that they were holding it ransom with the most embarrassing content to have your personal site replaced with.
References:
[1]: https://www.kevinmarks.com/fragmentions.html#%22eventually%20every%20URL%20ends%20up%20as%20a%20porn%20site%22
hype cp | Hypermedia Copy & Paste
hypecp.com [1]
This is a super cool reference for htmx [2] snippets. I really like how he has a couple of errors on the page as examples with examples that fix these common errors.
References:
[1]: https://hypecp.com/
[2]: /htmx/
fragmention
This post is still WIP. …..
https://indieweb.org/fragmention##Challenges
I’ve been digging through David Bushell’s blog over the past day, he has some
really good ideas about blogging and webdev. One really interesting post I
came accross is
url-fragment-text-directives [1].
I’ve long had id’s linked on my headings, though sometimes broken, or now
showing the link, I’ve done my best to include them. Fragmentions extend this
to allow any text to be linkable like this.
fragmentioner ui: https://github.com/kartikprabhu/fragmentioner/tree/master?tab=readme-ov-file
fragmentioner js: https://github.com/chapmanu/fragmentions
Examples # [2]
https://resilientwebdesign.com/#This%20is%20a%20web%20book
References:
[1]: https://dbushell.com/2024/12/05/url-fragment-text-directives/
[2]: #examples
I’m building in a [[ fragmentions ]] implementation into my blog, I wanted to add some text before the fragment to indidate that it was the highlighted fragment that someone may have intended to share with you.
To get a newline in a :before I need to use \A and white-space: pre-line.
body :target::before,
body [fragmention]::before {
    content: "Highlighted Fragment:\A";
    white-space: pre-line;
    @apply font-bold text-yellow-600;
}
Here is what it looks like on my not yet live implementation of fragmentions.
I recently discovered fixi [1] by bigskysoftware [2], and it’s truly impressive.
No description available.
References:
[1]: https://github.com/bigskysoftware/fixi
[2]: https://github.com/bigskysoftware
I’m going to leave the title off this post and see what happens. Titles are a lot of pressure! I think there is a reason that the big text-based social networking sites (Mastodon, X, Facebook…
Chris Coyier · chriscoyier.net [1]
Interesting thoughts here on blog post titles, do we need them? They are so ingrained into everything.
It makes me think about markata.dev. I don’t require you to add any meta data to your post, you don’t need a title at all, but you do have to name a markdown file, and this does end up being your title if you don’t set one.
Titles are a lot of pressure! I think there is a reason that the big text-based social networking sites (Mastodon, X, Facebook, Threads, LinkedIn, Bluesky, etc.) don’t have titles. Especially for short posts, the title just isn’t necessary. Just say the thing.
Interesting observation what rss readers do without one.
My own favorite[rss reader], Feedbin, shows the author of the post as the title if it’s missing. Eh, not great not horrible.
Hilariously he puts a title on the OG [2] image for the post. I was interested in seeing what would happen in signal, it appears to be showing the author name as well.
[3]
Confirmed the pag...
AI workloads on Talos Linux
Companies are exploring how to run GPU accelerated workloads on Kubernetes.
Sidero Labs · siderolabs.com [1]
cool article for setting up talos linux with an nvidia gpu. What a wild world it we are living in where these devices that started out being only for hardcore gamers are becoming commonplace in servers and slowly entering the homelab [2] space.
References:
[1]: https://www.siderolabs.com/blog/ai-workloads-on-talos-linux/
[2]: /homelab/
-
Damn prime makes an interesting point near then end of this video. He’s seen a bunch of people able to just throw down charts and shit at their company and end up being “the coding guy” cause they proompted something once. In a way I can relate, I got into software in a similar way, but at a time that it took a lot more hard work, understanding , and copy past from the right stack overflow. Based on some of the people around me at the time I can only imagine how some people must feel like they got pushed into it without wanting it, and now are building something they don’t know anything about with no care about it or care to build any expertise. Is the future proompted charts from enterprise chatgpt or do we only continue growing more need for software from here.
[1]
References:
[1]: https://dropper.waylonwalker.com/api/file/d43265cd-7fe1-4cb4-a22e-d82a37a2e368.webp
I like duckdb’s [1] project pg_duckdb [2].
DuckDB-powered Postgres for high performance apps & analytics.
References:
[1]: https://github.com/duckdb
[2]: https://github.com/duckdb/pg_duckdb
Just starred xan [1] by medialab [2]. It’s an exciting project with a lot to offer.
The CSV magician
References:
[1]: https://github.com/medialab/xan
[2]: https://github.com/medialab
I’m impressed by upvote-rss [1] from johnwarne [2].
Generate rich RSS feeds from Reddit, Hacker News, and Lemmy
References:
[1]: https://github.com/johnwarne/upvote-rss
[2]: https://github.com/johnwarne
Looking for inspiration? rugpulls.dev [1] by caniszczyk [2].
No description available.
References:
[1]: https://github.com/caniszczyk/rugpulls.dev
[2]: https://github.com/caniszczyk
I’m really excited about pangolin [1], an amazing project by fosrl [2]. It’s worth exploring!
Tunneled Mesh Reverse Proxy Server with Identity and Access Control and Dashboard UI
References:
[1]: https://github.com/fosrl/pangolin
[2]: https://github.com/fosrl
Looking for inspiration? Flexbox-Labs [1] by prazzon [2].
A web app for creating flexible layouts with the power of CSS Flexbox.
References:
[1]: https://github.com/prazzon/Flexbox-Labs
[2]: https://github.com/prazzon
Check out llm-sort [1] by vagos [2]. It’s a well-crafted project with great potential.
Sort input lines semantically with llm
References:
[1]: https://github.com/vagos/llm-sort
[2]: https://github.com/vagos
fixed long standing nvim startup error
Here’s the diff, this is it.
local M = {}
M.setup = require("waylonwalker.setup")
M.settings = require("waylonwalker.settings")
+ M.lazy = require("waylonwalker.lazy")
M.options = require("waylonwalker.options")
M.globals = require("waylonwalker.globals")
M.keymap = require("waylonwalker.keymap")
- M.lazy = require("waylonwalker.lazy")
M.autocmds = require("waylonwalker.autocmds")
M.util = require("waylonwalker.util")
M.plugins = require("waylonwalker.plugins")
M.snippets = require("waylonwalker.snippets")
return M
The error # [1]
On first install of my dotfiles I’m presenting with this flashbang of an error
filling the screen with red background. Its kinda hard to read, I’m not deep
into lua and reading their tracebacks. It pops up in this pager that if I
scroll too far it quits and the error is gone before I know what it is or how
it got there.
[2]
For the longest time it just felt like it randomly showed up without much warning.
I sent ai at the issue # [3]
I...
Testing fresh nvim installs can be a pain, and hard to di without borking your
known good install. I’ve been using NVIM_APPNAME to run a test nvim in a
sandbox that wont bork my main install. This usually runs for me in under a
minute, can be down under 15s if I remove some of the TreeSitter installs at
the end. This beats a full docker build of my full devtainer to test out nvim
packaging woes.
rm ~/.cache/wwtest -rf
rm ~/.local/share/wwtest -rf
rm ~/.config/wwtest -rf
cp -r nvim/.config/nvim/ ~/.config/wwtest
NVIM_APPNAME=wwtest nvim --headless "+Lazy sync" +qa
NVIM_APPNAME=wwtest nvim --headless "+TSUpdateSync" "+sleep 5000m" +qa
NVIM_APPNAME=wwtest nvim --headless "+MasonUpdate" +qa
NVIM_APPNAME=wwtest nvim --headless "+TSInstallSync! c cpp go lua python rust tsx javascript typescript vimdoc vim bash yaml toml vue just" +qa
NVIM_APPNAME=wwtest nvim --headless "+MasonInstall lua-language-server rustywind ruff ruff-lsp html-lsp typescript-language-server beautysh fixjson isort markdownlint stylua yamlfmt python-lsp-server" +qa
NVIM_APPNAME=wwtest nvim
I’ve started to use this as a just recipe to run before deploying a new
version of my dotfiles. So far its pairing nicely with nvim-manager
Setting up 4G Backup with Google Fi and Netgear LM1200
I connected my home network to have 4G bakcup with Google Fi and Netgear
LM1200. Goodle Fi offers free data-only sim cards that you can order from
their service. It takes a couple of days, and a new sim arrives in the mail
free of charge. It does pull data from your account, so if you are not on an
unlimited plan be careful of how much you let go through the sim.
I’ve owned this for a few years now, but it’s been disconnected for a good six
months or so. I’m not s[e what happened, but it stopped recognizing the old
sim card. no need to point out the coffee stains at the end, its
definitely not related
Follow the provided instuctions # [1]
Activating the sim asked for a confirmation code shipped with the sim card,
then brought me to this page.
[2]
Clicking Have a Different Device? brought up instructions to set up the APN in the LM1200.
[3]
Restart # [4]
First thing for me was that the sim was not recognized, restarting the LM1200
did the trick to recognize it as a Google F...
ahrefs-cleanup-2024
This post is a big work in progress, expect it to keep getting better.
Initial Score # [1]
[2]
404 Not Found, generate a page for each tag # [3]
[4]
Title too long # [5]
[6]
404 Not Found, comma separated tags # [7]
Another hit on 404’s caused by tags, was tag parsing from thoughts into posts,
this cause links to the full comma separated list of tags rather than one per
tag.
[8]
You can see on the website the whole dang set of tags was being treated as a single tag.
[9]
Broken images # [10]
I’m not fully sure what happened to all of these gifs in my old host and why
they didn’t show up, but I moved them all and they are solid now.
[11]
I burned all of my January Credits # [12]
So I had an issue with my self hosted [13] shots not making them fast enough for
ahrefs, and essentially ddosing myself on one of their runs. The long wait
times for images burnt all of my credits.
Here was the next successful run with a HUGE improvement in overall score.
[14]
The tre...
When I want to put a date in a document like a blog post from vim I use !!date
from insert mode. Note that entering !! from normal mode puts you in command
mode with :.! filled out. This runs a shell command, i.e. date for this
example.
It outputs the following
Fri Jan 31 08:46:11 PM CST 2025
You can also pass in a date such as tommorrow by pasdding in the -d date -d tomorrow.
It outputs the following
Sat Feb 1 08:53:20 PM CST 2025
codeium just taught me this one with autocomplete
:put =strftime('%Y-%m-%d')
This outputs the following
2025-01-31
What I like about the :put =strftime( method is that you can add a format,
but that is a lot more for me to remember than !!date
A few weeks later #
I’m going through a bunch of blog posts and dont want my date formats to change
to the Wed Feb format so I broke down and made these keybindings. I think I’m
still going to be using .!date a lot, but these keybindings will be nice for
editing blog post frontmatter.
set("n", "<leader>dd", "<cmd>put =strftime('%Y-%m-%d')<cr>", { noremap = true, silent = true })
set("n", "<leader>dt", "<cmd>put =strftime('%Y-%m-%d %H:%M:%S')<cr>", { noremap = true, silent = true })
dd 2025-02-12 dt 2025-02-12 12:53:47 - :.!date Wed Feb 12 12:53:47 PM CST 2025
I like DigitalHarbor7’s [1] project engineering-status-pages [2].
Static sites for engineering project status updates
References:
[1]: https://github.com/DigitalHarbor7
[2]: https://github.com/DigitalHarbor7/engineering-status-pages
Today I ran into an interesting question, why am I being asked to configure
tzdata while installing npm. Turns out that the aptitude cli has a why
command that very handily nails down why you have something installed on a
debian based system.
Install aptitude #
apt install aptitude
Why tzdata #
Now we can query why we need tzdata and see the full chain with the root
package being npm.
root@47685221fb82:/# aptitude why tzdata
i   npm        Depends  node-gyp
i A node-gyp   Depends  gyp (>= 0.1+20200513gitcaa6002)
i A gyp        Depends  python3:any
i A python3    Provides python3:any
i A python3    Depends  python3.12 (>= 3.12.3-0~)
i A python3.12 Depends  tzdata
Today I ran into this interactive prompt on ubuntu while installing node and npm, and I do not want to manually configure this interactively every time I run an install, moreso in docker I do not have the interactive terminal to do so.
Configuring tzdata
------------------

Please select the geographic area in which you live. Subsequent configuration questions will narrow this down by presenting a list of cities, representing the time zones in which they are located.

  1. Africa  2. America  3. Antarctica  4. Arctic  5. Asia  6. Atlantic  7. Australia  8. Europe  9. Indian  10. Pacific  11. Etc  12. Legacy
Geographic area:
Why tzdata #
Checking aptitude why tzdata it shows that the chain goes back through npm.
root@47685221fb82:/# aptitude why tzdata
i   npm        Depends  node-gyp
i A node-gyp   Depends  gyp (>= 0.1+20200513gitcaa6002)
i A gyp        Depends  python3:any
i A python3    Provides python3:any
i A python3    Depends  python3.12 (>= 3.12.3-0~)
i A python3.12 Depends  tzdata
The solution, configure tzdata #
export TZ="America/Chicago"
export DEBIAN_FRONTEND=noninteractive
apt update
apt install tzdata -y
ln -fs /usr/share/zoneinfo/$TZ /etc/localtime
dpkg-reconfigure -f noninteractive tzdata
DEBIAN_FRONTEND=noninteractive
This is required, because apt installing tzdata will trigger the
interactive prompt. You will manually configure it in the next two steps.
Colors - Core concepts
Using and customizing the color palette in Tailwind CSS projects.
tailwindcss.com [1]
Tailwind has the best color system, very well done. Even if you don’t use it, it serves as a great color picker.
References:
[1]: https://tailwindcss.com/docs/colors
External Link
wyattbubbylee.com [1]
So proud of Wyatt for writing in his own blog!
References:
[1]: https://wyattbubbylee.com/dst-forever-world/
dst session one
Wyatt is also documenting his run, while we aren’t playing in the same world we
are playing together.
https://wyattbubbylee.com/dst-forever-world/
Loading into the world # [1]
I always select the character Woodie. He comes with an axe called Lucy she
has some dark humor (but not too dark), I like her. She also does not wear out
so you always have a weapon and way to chop wood with you.
dst-1-1.mp4 [2]
First encounter with a Tall Bird # [3]
On the first day I made a look around my home biome, and ran into a Tall Bird
dst-1-2.mp4 [4]
Tall Bird Stats # [5]
[6]
Here are the tall bird stats from the wiki [7]
Setting up base # [8]
Just after the first night started I found my way back to the center of the map
and made a stone campfire. I really like to use the stone campfires as they
last forever, you just have to add wood. I was lucky enough to find stone by
the Tall Bird to make this one on first day.
dst-1-3.mp4 [9]
Opening up the garden # [10]
On day two I had enough ma...
-
Big fan of Primes setup. I was not far off of his setup before he really came on the scene, but I’ve picked up a ton of nuggets from him and how he operates. I took his first developer productivity course on Front End Masters as it came out.
It is interesting to see him roll back his ansible scripts for bash scripts here. I converted my setup to ansible after watching his first, but have also since rolled back to bash scripts for quite similar reasons. Ansible is great for remote tasks that need to be done on a fleet of machines, but like he says here overkill for this purpose and ends up something that you need to read the docs for every change to your dotfiles.
Unlike prime I’ve really leaned harder on installing everything in a docker image and developing out of a docker image. I’ve long built docker images of my dotfiles with the idea that its nice to be able to just use them on other machines, but it rarely happened.
In the past year I’ve moved bazzite, an immutable distro. It comes with podman and distrobox, so I install very little on it, a few flatpaks from the store for brave and signal, but most of what I really use day to day comes from my devtainer. It’s nice t...
https://www.youtube.com/watch?v=03KsS09YS4E&t=610s
Today I learned about the basic calculator, bc. At the very end of this video prime uses it to add numbers in vim.
REPL #
You can start a calculator repl at the command line, by running bc.
Vim #
Since bc supports standard unix pipes you can easily pipe data from vim into bc
and back out using !!bc. All you need is a string of math on the line you
want to calculate, go to normal mode and run !!bc to get the answer.
Traditionally I will open my system calculator or ipython to do something like this.
To keep the equation and the result in the same line you can send the equation to stderr and the result to stdout using tee.
:.!tee >(cat >&2) | bc
emoji [1] by carpedm20 [2] is a game-changer in its space. Excited to see how it evolves.
emoji terminal output for Python
References:
[1]: https://github.com/carpedm20/emoji
[2]: https://github.com/carpedm20
The work on sqlite-s3vfs [1] by uktrade [2].
Python writable virtual filesystem for SQLite on S3
References:
[1]: https://github.com/uktrade/sqlite-s3vfs
[2]: https://github.com/uktrade
Jhey ʕ·ᴥ· ʔ (@jhey.dev)
breakin' down classics
CSS background-image + background-blend-mode + custom properties = holo-like effects with parallax ✨
Bluesky Social · bsky.app [1]
Jhey has the coolest webdev demos!
References:
[1]: https://bsky.app/profile/jhey.dev/post/3lgoev36hps2h
ERR_SSL_VERSION_OR_CIPHER_MISMATCH
Learn how to troubleshoot ERR_SSL_VERSION_OR_CIPHER_MISMATCH when using Cloudflare SSL/TLS.
Cloudflare Docs · developers.cloudflare.com [1]
Today I learned that cloudflare free tier universal certs do not support multilevel subdomains.
By default, Cloudflare Universal SSL certificates only cover your apex domain and one level of subdomain.
[2]
References:
[1]: https://developers.cloudflare.com/ssl/troubleshooting/version-cipher-mismatch/
[2]: https://dropper.waylonwalker.com/api/file/7d1fe806-a3d0-47e3-8eb1-08c1a0965728.webp
[1]
Migrating from kedro 0.18.4 to the latest version involves handling the deprecated OmegaConf loader. Switching over does not look as bad as I originally thought.
- installing kedro 0.18.5+
- set the CONFIG_LOADER_CLASS in settings.py
- swap out import statements
- config must be yaml or json
- getting values from config must be done with bracket __getattr__ style not with .get
- any Exceptions caught from Templated config loader will need to be swapped to OmegaConfig exceptions, similar to #3
- templated values must lead with an _
- Globals are handled different
- OmegaConfig does not support jinja2 sytax, but rather a ${variable} syntax
References:
[1]: /static/https://docs.kedro.org/en/stable/configuration/config_loader_migration.html
[1]
Prime mentioned on stream that Whites were his favorite switch. I tend to like lighter switches and want to give it a try. I really like my Durock lupine’s at 55g, the box whites are 45g, that feels like it would take quite a bit more control, floating over the keys.
References:
[1]: /static/https://www.kailh.net/search?q=box+white&_pos=2&_psq=white&_ss=e&_v=1.0
markdown split panel
Today I was playing with markdown split panels. I want to be able to compare
and constrast occasionually, today the inspiration hit to do this using
admonitions.
[1]
Mobile Users 🔄
You will need to rotate your device to see the side by side feature.
The Markdown # [2]
This is what I am going for, one admonition that is easy to remember, that
nests inside of itself , and I can put as much markdown on the inside that I
want.
!!! vsplit I Have two opinions
!!! vsplit Left Opinion
supporting arguments
* lorem ipsum
* ipsum dolor
- [x] lorem ipsum
- [ ] ipsum dolor
!!! vsplit Right Opinion
supporting arguments
* lorem ipsum
* ipsum dolor
- [ ] lorem ipsum
- [x] ipsum dolor
Here is the result of that markdown.
I Have two opinions
Left Opinion
supporting arguments
- lorem ipsum
- ipsum dolor
- lorem ipsum
- ipsum dolor
Right Opinion
supporting arguments
- lorem ipsum
- ipsum dolor
- lorem ipsum
- ipsum dolor
Vsplit
Hello World
Here is a hello worl...
Make MinIO Access Key
Today in my homelab [1] I wanted to setup a new service that needed a MinIO access
key. So I created a new user and a new access key with the MinIO CLI rather
than poking through the ui like I have before.
[2]
Global Level vs User Level # [3]
The MinIO CLI has two levels of access, global and user level. Most of the
commands in this post will have several ways to do similar tasks that would
potentially work. We are going to prefer to use the user level commands for
more control. For some commands such as listing Keys it is handy to use the
global level.
The Policy # [4]
First we are going to make a new policy file named mypages_rw_policy.json.
{
"Version": "2012-10-17",
"Statement": [
{
"Action": [
"s3:GetBucketLocation",
"s3:ListBucket"
],
"Effect": "Allow",
"Resource": [
"arn:aws:s3:::mybucket"
]
},
{
"Action": [
"s3:GetObject",
"s3:PutObject",
"s3:DeleteObject",
"s3:ListMultipartUploadParts",
"s3:AbortMultipartUpload"
],
"Effect": "Allow",
"Resource": [...
Check out cloudnative-pg [1] and their project cloudnative-pg [2].
CloudNativePG is a comprehensive platform designed to seamlessly manage PostgreSQL databases within Kubernetes environments, covering the entire operational lifecycle from initial deployment to ongoing maintenance
References:
[1]: https://github.com/cloudnative-pg
[2]: https://github.com/cloudnative-pg/cloudnative-pg
Just starred open-webui [1] by open-webui [2]. It’s an exciting project with a lot to offer.
User-friendly AI Interface (Supports Ollama, OpenAI API, …)
References:
[1]: https://github.com/open-webui/open-webui
[2]: https://github.com/open-webui
I like fcsonline’s [1] project tmux-thumbs [2].
A lightning fast version of tmux-fingers written in Rust, copy/pasting tmux like vimium/vimperator
References:
[1]: https://github.com/fcsonline
[2]: https://github.com/fcsonline/tmux-thumbs
I’ve been back to putting some images on my blog lately and thinking about
making them a bit thinner through the use of aspect ratio for simplicity. I’m
leaning pretty heavy on tailwindcss these days due to some weird quirks of
markdown-it-attrs I cannot have slashes in classes from markdown so I made a
.cinematic class to achieve this.
.cinematic {
  @apply aspect-[2.39/1];
}
Example

An Aspect Ratio Guide for Every Filmmaker
How can the aspect ratio of your film or TV show contribute to your story?
No Film School · nofilmschool.com [1]
A good reference of common screen ratios. I just realized that 16:9 is also 1.78:1. I’ve been putting some images on my blog again, and thinking about using some 2.39:1 ratio on them.
References:
[1]: https://nofilmschool.com/cinematic-aspect-ratio
-
There is a glimmer of hope out there that normal people can scrap together enough gpu to really run the latest models themselves. The ui really appears to be having huge leaps forward such that doing things like rag is no longer such a research project that it was just a few years ago. So excited to see Prime go through this homelab [1] exercise.
References:
[1]: /homelab/
Attrs does not like ‘/’ characters in its classes, so to use some tailwind classes with custom values we must make new classes in our tailwind input css.
.cinematic {
  @apply aspect-[2.39/1];
}
Given the following markdown with attrs added to the image and to the paragraph block.
{.aspect-[2.39/1]}
{.cinematic}

We get the following output with only the middle one working correctly.
{.aspect-[2.39/1]}
Note
The inline version of `.cinematic` works, but `.aspect-[2.39/1]` does not,
it turns into text after the image. The block version with the class before the image applies to the paragraph, not the image.
-
Oh, this kills me to hear it. RSS is the OG [1] way to subscribe and share content out to others. It gives you control of what you subscribe to and reminds you when new content lands on your favorite sites. It is a huge component of web 1.0 and I feel is the most decentralized social media can ever hope to be.
References:
[1]: /og/
markata 0.8.0
I realize that I never did a post on markata 0.8.0, so here it is. 0.8.0 was
released on Jan 2, 2024, just over a year ago at this point. This was the
release that we got pydantic support, and multi feeds.
[1]
Pydantic Support Was kinda big # [2]
Markata is leaning on pydanttic for configuration and Post models. These
models are filled with validators such that you can give it an empty markdown
post and it will figure out some pretty sane default values for the
frontmatter. From there you can progressivly enhance your post with more
information like title, date, tags, slug, description.
validators are awesome!! for instance I don’t set the description on many
of my posts by hand, I let the auto_description grab the first bit of text
from the post most of the time.
Multi Feeds # [3]
Markata==0.8.1 brought multiple feeds into the mix, and started to take place
of rss and sitemap. Feeds are a list of posts that are configured with a slug,
filter, sort, reverse, description, and ...
markata 0.8.0
I realize that I never did a post on markata 0.8.0, so here it is. 0.8.0 was
released on Jan 2, 2024, just over a year ago at this point. This was the
release that we got pydantic support, and multi feeds.
[1]
Pydantic Support Was kinda big # [2]
Markata is leaning on pydantic for configuration and Post models. These
models are filled with validators such that you can give it an empty markdown
post and it will figure out some pretty sane default values for the
frontmatter. From there you can progressively enhance your post with more
information like title, date, tags, slug, description.
validators are awesome!! for instance I don’t set the description on many
of my posts by hand, I let the auto_description grab the first bit of text
from the post most of the time.
Multi Feeds # [3]
Markata==0.8.1 brought multiple feeds into the mix, and started to take place
of RSS and sitemap. Feeds are a list of posts that are configured with a slug,
filter, sort, reverse, description, and ...
asottile [1] has done a fantastic job with all-repos [2]. Highly recommend taking a look.
Clone all your repositories and apply sweeping changes.
References:
[1]: https://github.com/asottile
[2]: https://github.com/asottile/all-repos
If you’re into interesting projects, don’t miss out on tailpipe [1], created by turbot [2].
select * from logs; Tailpipe is an open source SIEM for instant log insights, powered by DuckDB. Analyze millions of events in seconds, right from your terminal.
References:
[1]: https://github.com/turbot/tailpipe
[2]: https://github.com/turbot
I recently discovered roomy [1] by muni-town [2], and it’s truly impressive.
ATproto-connected p2p group comms
References:
[1]: https://github.com/muni-town/roomy
[2]: https://github.com/muni-town
Behold, the Steam Brick
A modder has transformed the Steam Deck in a screen-less, controller-less Steam Brick.
Rock Paper Shotgun · rockpapershotgun.com [1]
I fully believe in our right to repair, ewaste reduction, and bringing a second life to still good hardware that is not up for it’s originally intended purpose. This is a sick console like experience you can strap to the back of a tv, throw in your back to take on a trip, or leave stuffed in your vehicle to game in the backseat. Sucks that it cant do 4k, but I’ve used mine on large screens, and it does quite well for a lot of games, maybe not AAA, but the cartoony multplayer games I play with my kids do quite well.
[2]
References:
[1]: https://www.rockpapershotgun.com/behold-the-steam-brick
[2]: https://dropper.waylonwalker.com/api/file/f3114f19-21cd-4ee6-84a8-06b83346d052.webp
-
Damn these deepseek memes go hard. Wild to see openai get played by their own game.
It’s crazy that the normie news that I have seen on deepseek shows that the Chinese made what the Americans did at a fraction of the price, without taking notice that they are building on the shoulders of openai.
markata search
A side effect of Markata DidYouMean [1] is that we are able to implement some
rudimentary search based on slug, title, tags, and description.
[2]
I made a video of the early work on using this side effect to search for content on markata.dev.
Replay markata-search-1.mp4 [3]
This was first implemented to solve 404 pages giving users a way to try to find
the page that they tried to access. But it turned out to be a decent way to
search through the docs.
References:
[1]: /markata-didyoumean/
[2]: https://dropper.waylonwalker.com/api/file/50cfa8dc-9d46-4f02-877b-688fa5510a83.png
[3]: https://dropper.waylonwalker.com/api/file/fd677374-5ef1-41c7-8845-6de0e10f224b.mp4
-
👏👏👏 This one is really good. I’m right there with him on most of this. I am very hesitant on subscription models, and all the ai tools feel like they are getting ready to be the next round of death by a thousand cuts, this time with pretty limited free tier and relatively high prices to run. I’m sure we will see companies get taken by huge bills soon by building off of someone else’s service.
On the flip side I’m definitely the guy that gets in a rut of just copy paste to the ai, wait for codeium to to inject. I feel like I have issues of momentum more than anything. When I’m on one side or the other I tend to stick it out for too long, but less so on going without because that llm drug is calling you when you hit a hard problem.
I’m excited to see him build out a homelab [1] for llm stuff that he mentioned at the top. I’m interested, but probably not building one out for myself until we start to see some cheaper maybe used hardware to do it.
References:
[1]: /homelab/
Markata DidYouMean
Coming in Markata 0.9.1 is far better documentation. i.e. Documentation that
actually exists for everything. As part of poking around I realized that I
often go to look up the docs for a plugin and forget that the path is
/markta/plugins/feeds, sometimes I might try /markata/feeds or
/plugins/feeds.py or /feeds or I might even forget the plugin name exactly
and try something like feed and get a 404. So I added a didyoumean plugin
to markata that takes care of this.
[1]
I made a quick recording of this early feature, pay close attention to the url
as it automatically updates to the correct page.
markata-didyoumean.mp4 [2]
Happy Path # [3]
direct forward
If you have one post called /markata/plugins/feeds, and it is the only post
called feeds, any combination of /markata/feeds or /plugins/feeds or
/feeds will all automatically redirect with an html [4] page (not a server 3xx)
to the /markata/plugins/feeds post.
Here is the snippet that does the redirect.
<div class="container ...
-
Kelsey says several times in this interview, you don’t need kubernetes. If you are running one node you don’t need kubernetes. My question though is, would you use kubernetes? Ya I get it if you are a web developer, data scientist, backend dev, but if you are looking to bee a whole ass engineer, or infrastructure engineer, you know kubernetes, Should you use kubernetes on single node?
Models
Pydantic Docs · docs.pydantic.dev [1]
I came accross from_attributes today it allows creation of pydantic models from objects such as a sqlalchemy Base Model or while nesting pydantic models. I believe in the past I have ran into some inconsistencies with nesting pydantic models and I’ll bet one had from_attributes set and another did not.
Arbitrary class instances
(Formerly known as “ORM Mode”/from_orm).
Pydantic models can also be created from arbitrary class instances by reading the instance > attributes corresponding to the model field names. One common application of this functionality is integration with object-relational mappings (ORMs).
To do this, set the from_attributes config value to True (see the documentation on Configuration for more details).
The example here uses SQLAlchemy, but the same approach should work for any ORM.
References:
[1]: https://docs.pydantic.dev/latest/concepts/models/#rebuilding-model-schema
-
Dang strong stance that tmux and zellij should not exist. I really do get his point though. Theres a good number of terminal features I often miss out on because I run tmux. Its an app that runs apps, and doesn’t let all of the signals back to the host. But its fantastic at what it does, and brings so much to the table that the little bit of downside it brings is well worth it to me. The other thing missing in this discussion is that I can take my hotkeys and session workflow to any machine just by running tmux. I do not need to run a certain terminal, or install it headlessly on a server to get special features just for it.
cold builds
Here are a list of some cold builds from my site. I’ve ran this site for a
long time and would like to have some references to go back to, and wish I had
kept a few profiles of cold builds laying around to compare with. The time is
now lets keep some cold build links around for reference.
[1]
01/27/2025 # [2]
- https://ec314b08.waylonwalker-com.pages.dev/_profile/ - 429s - markata==0.9.0.dev5 has md_video open cache on every post issue
- https://27f117fd.waylonwalker-com.pages.dev/_profile/ - 112s- markata==0.9.0.dev5 after fixing md_video issue
- https://e6b8f64a.waylonwalker-com.pages.dev/_profile/ - 16s - markata==0.9.0.dev5 1 post not skipped, this one
- https://10b778b4.waylonwalker-com.pages.dev/_profile/ - 5.65s - markata==0.9.0.dev5 fully hot cache build with no changes
References:
[1]: https://dropper.waylonwalker.com/api/file/cd8f9d96-948a-4e94-aa3d-2c352bb5657b.png
[2]: #01272025
pesos
Pesos is the act of Publish Elsewhere Syncicate to Own Site. It is an indieweb
concept that I recently started applying to my own site.
here does it skip again
Note
See <https://indieweb.org/PESOS> for more information, they have a ton of
information about the indieweb
In short it is the concept of pulling data from other sites that you use and
republishing it to your own site. This gives a single source of information
for you, and protection against sites and apis changing or rug pulling. Other
people might have a lot more use cases for this, but I already begin a lot of
my data right on my site.
GitHub stars # [1]
I am using the github api to get a list of my stars and then create posts in
the github repo for my blog. This allows me to keep track of things I star on
GitHub in my own way, and share them out with my rss feeds.
[2]
References:
[1]: #github-stars
[2]: https://dropper.waylonwalker.com/api/file/2380f814-a8cb-45d1-bb5b-538d171933e3.webp
Check out veekaybee [1] and their project gitfeed [2].
Feed of posts from Bluesky that have a GitHub link
References:
[1]: https://github.com/veekaybee
[2]: https://github.com/veekaybee/gitfeed
I came across llama.vim [1] from ggml-org [2], and it’s packed with great features and ideas.
Vim plugin for LLM-assisted code/text completion
References:
[1]: https://github.com/ggml-org/llama.vim
[2]: https://github.com/ggml-org
hover z-index and positioning
I broke my sick wikilink hover [1] recently in a refactor, today I did some
diving in to figure out what happened.
Before # [2]
As you can see in the screenshot below, the link is in a list of links, and
when the hover image pops up it sits behind all of the other text. The z-index
of the list-item is supposed to be raised above the others on hover.
[3]
Manually setting z-index to 20 in the inspector I noticed this message from
devtools, “The position: static property prevents z-index from having an
effect. Try setting position to something other than static.”, looking back at
some of my refactoring I had relative in an old template and it was lost.
[4]
After # [5]
After properly setting position to relative on the list-item, the hover image
is raised above the others.
[6]
References:
[1]: /sick-wikilink-hover/
[2]: #before
[3]: https://dropper.waylonwalker.com/api/file/b3158b49-5c0f-4e52-b3e3-47ba67f5c801.webp
[4]: https://dropper.waylonwalker.com/api/file/1c7fb24c-b77d...
Top Python libraries of 2024
Dive into our 10th annual Python Libraries roundup for 2024, now featuring separate curated lists for General Use and AI / ML / Data tools. Discover this year's most innovative additions to the eco...
Tryolabs · tryolabs.com [1]
Really good listicle of new modern top python libraries from 2024. Very well done article with images, links, and an actually quality listicle with many things I’ve never even heard of.
References:
[1]: https://tryolabs.com/blog/top-python-libraries-2024
[1]
Good overview of seaborn color palettes. They have all sorts of different types, some designed to purposfully give each color the same weight for catecorization. Some designd to give linear differences in value, some have a parabolic feel with a diverging nature.
References:
[1]: /static/https://seaborn.pydata.org/tutorial/color_palettes.html
analytics
I’ve been posting on this site since 2016, when layoffs were rolling through
the company I worked for at the time. Starting a personal blog and a pile of
side projects felt like one of the best things I could do for my resume, so off
I went. This site is built on markata [1], more about that in the
/colophon.
[2]
The old version of this page embedded static SVGs from my Python Markata build.
Those files are gone in the markata-go site, so this page now renders the
yearly posting history directly from the current content set.
Post Contributions All Time Monthly # [3]
Contribution Graph Error: Invalid JSON configuration
invalid character '%' looking for beginning of object key string
Post Contributions in 2026 # [4]
Post Contributions in 2025 # [5]
Post Contributions in 2024 # [6]
Post Contributions in 2023 # [7]
2023 was a very busy year for me and I started slowing down. About mid year I
felt like I had a lot that I wanted to get out, but felt like I couldn’t,
because I...
ublue-os [1] has done a fantastic job with ucore [2]. Highly recommend taking a look.
An OCI base image of Fedora CoreOS with batteries included
References:
[1]: https://github.com/ublue-os
[2]: https://github.com/ublue-os/ucore
Just starred bazzite [1] by ublue-os [2]. It’s an exciting project with a lot to offer.
Bazzite is a cloud native image built upon Fedora Atomic Desktops that brings the best of Linux gaming to all of your devices - including your favorite handheld.
References:
[1]: https://github.com/ublue-os/bazzite
[2]: https://github.com/ublue-os
poolers.postgresql.cnpg.io CRD metadata.annotations Too long · Issue #325 · cloudnative-pg/charts
Unable to deploy helm chart using ArgoCD. Getting following error Failed sync attempt to : one or more objects failed to apply, reason: CustomResourceDefinition.apiextensions.k8s.io "poolers.postgr...
GitHub · github.com [1]
I’ve never seen or needed to use a serversideapply in kubernetes before, but I ran into this same issue in my k3s homelab [2] while installing cloudnative-pg.
You can do it with argo
apiVersion: argoproj.io/v1alpha1
kind: Application
spec:
syncPolicy:
syncOptions:
- ServerSideApply=true
and you can do it with kubectl
kubectl apply --server-side --force-conflicts -f cnpg-1.25.0.yaml
References:
[1]: https://github.com/cloudnative-pg/charts/issues/325
[2]: /homelab/
I fixed lists in my blog
A small improvement to my blog today. I was checking out my /now post and
noticed that lists have left padding but no discs or numbers. I popped open my
tailwind/app.css added these lines and rebuilt.
#post-body li {
@apply list-disc;
}
#post-body ol {
@apply list-decimal;
}
And rebuild, which I actually do with ⭐ casey just [1], but showing the
command here for clarity.
npx tailwindcss --input tailwind/app.css --output static/app-39.css
WHY the applies # [2]
Before # [3]
[4]
After # [5]
[6]
References:
[1]: /casey-just/
[2]: #why-the-applies
[3]: #before
[4]: https://dropper.waylonwalker.com/api/file/5c48f763-5ef6-49b0-9e8f-5167ab046f05.webp
[5]: #after
[6]: https://dropper.waylonwalker.com/api/file/0cf1c5d9-0948-444f-9a6c-387d22b9db43.webp
I built out a tool for myself to manage my nvim configuration, and I wanted to
quickly see which one I am running in my starship prompt. Here’s the config I
ended up with. It warns if the NVIM_APPNAME environment variable is not set, and
it shows which nvim I am using if it is set.
[custom.nvim-manager-system]
when = '[[ ! -n "${NVIM_APPNAME}" ]]'
style = "bold yellow"
symbol = '[ ](fg:#15AABF)'
format = '$symbol[USING SYSTEM NVIM]($style)'
[env_var.NVIM_APPNAME]
style = "green"
symbol = '[ ](fg:#15AABF)'
format = '[$symbol${env_value}]($style)'
variable = "NVIM_APPNAME"
snorlax [1] by moonbeam-nyc [2] is a game-changer in its space. Excited to see how it evolves.
wake and sleep Kubernetes deployments on a schedule
References:
[1]: https://github.com/moonbeam-nyc/snorlax
[2]: https://github.com/moonbeam-nyc
I came across headlamp [1] from kubernetes-sigs [2], and it’s packed with great features and ideas.
A Kubernetes web UI that is fully-featured, user-friendly and extensible
References:
[1]: https://github.com/kubernetes-sigs/headlamp
[2]: https://github.com/kubernetes-sigs
Just starred headlamp [1] by headlamp-k8s [2]. It’s an exciting project with a lot to offer.
A Kubernetes web UI that is fully-featured, user-friendly and extensible
References:
[1]: https://github.com/headlamp-k8s/headlamp
[2]: https://github.com/headlamp-k8s
If you’re into interesting projects, don’t miss out on gitui [1], created by gitui-org [2].
Blazing 💥 fast terminal-ui for git [3] written in rust 🦀
References:
[1]: https://github.com/gitui-org/gitui
[2]: https://github.com/gitui-org
[3]: /glossary/git/
The work on gitui [1] by extrawurst [2].
Blazing 💥 fast terminal-ui for git [3] written in rust 🦀
References:
[1]: https://github.com/extrawurst/gitui
[2]: https://github.com/extrawurst
[3]: /glossary/git/
Nerd Fonts - Iconic font aggregator, glyphs/icons collection, & fonts patcher
Iconic font aggregator, collection, & patcher: 9,000+ glyph/icons, 60+ patched fonts: Hack, Source Code Pro, more. Popular glyph collections: Font Awesome, Octicons, Material Design Icons, and more
Nerd Fonts · nerdfonts.com [1]
Nerdfont cheatsheet is a fantastic way to copy paste icons into your shell. I just used it to juice up my starship prompt with my current $NVIM_APPNAME managed by nvim-manager [2]
[3]
References:
[1]: https://www.nerdfonts.com/cheat-sheet
[2]: /nvim-manager/
[3]: https://dropper.waylonwalker.com/api/file/3635351b-c006-4cff-8011-85c3b14bfc8f.webp
I recently noticed that my og images were missing emoji. They were taken using headless chrome in a container. I fixed it by adding an emoji font in the containerfile / dockerfile.
RUN apt-get update && apt-get install -y \
    # Add fonts with emoji support
    fonts-noto-color-emoji \
    && rm -rf /var/lib/apt/lists/*
Before #
Here’s what they were looking like with broken emoji fonts.
After #
And now with the fixed emoji font.

I put thought bubbles on my thoughts posts and stars on my github stars posts
one2nc [1] has done a fantastic job with cloudlens [2]. Highly recommend taking a look.
k9s like CLI for AWS and GCP
References:
[1]: https://github.com/one2nc
[2]: https://github.com/one2nc/cloudlens
I like dlvhdr’s [1] project gh-dash [2].
A beautiful CLI dashboard for GitHub 🚀
References:
[1]: https://github.com/dlvhdr
[2]: https://github.com/dlvhdr/gh-dash
I recently discovered kube-no-trouble [1] by doitintl [2], and it’s truly impressive.
Easily check your clusters for use of deprecated APIs
References:
[1]: https://github.com/doitintl/kube-no-trouble
[2]: https://github.com/doitintl
Manufacturer Recertified Drives | Enterprise Grade
Manufacturer Recertified enterprise drives work and look like new. Rebuilt by the manufacturer and quality tested to ensure they function as new, our recertified drives save on cost. Shop now!
ServerPartDeals.com · serverpartdeals.com [1]
For my next drive upgrade in my homelab [2] I am gong to be using one of these factory recertified drives from serverpartdeals.com. Found them on an LTT video awhile back. They are some lightly used and recertified, fully burnt in drives.
Shop for drives that are certified once again by the manufacturer to work like new. Factory ReCertified drives are cost-effective alternatives compared to factory-sealed new counter parts. Additionally, unlike in mass production, the re-certification process involves closer attention to the overall operation of the hardware so that the re-certification will not have to happen a 2nd time
References:
[1]: https://serverpartdeals.com/collections/manufacturer-recertified-drives
[2]: /homelab/
GitHub - bootandy/dust: A more intuitive version of du in rust
A more intuitive version of du in rust. Contribute to bootandy/dust development by creating an account on GitHub.
GitHub · github.com [1]
dust is one of my favorite rust rewrite tools. Its so useful for narrowing down file system bloat and cleaning up some disk space on your nearly full disks. It runs right in your terminal and gives you a nice bar graph on the top directories in use.
[2]
References:
[1]: https://github.com/bootandy/dust?tab=readme-ov-file
[2]: https://dropper.waylonwalker.com/api/file/31b206fd-d508-451e-ba96-860c5d8110d1.webp
Check out dust [1] by bootandy [2]. It’s a well-crafted project with great potential.
A more intuitive version of du in rust
References:
[1]: https://github.com/bootandy/dust
[2]: https://github.com/bootandy
Keycloak
Keycloak - the open source identity and access management solution. Add single-sign-on and authentication to applications and secure services with minimum effort.
Keycloak · keycloak.org [1]
Keycloak looks like an interesting way to setup sso. It’s part of the cncf so it’s got a good backing. I want something better for argo workflows and this might be it. I’m curious what else I can tie into it.
References:
[1]: https://www.keycloak.org/
I’m impressed by mini.ai [1] from nvim-mini [2].
Neovim Lua plugin to extend and create a/i textobjects. Part of ‘mini.nvim’ library.
References:
[1]: https://github.com/nvim-mini/mini.ai
[2]: https://github.com/nvim-mini
Check out echasnovski [1] and their project mini.ai [2].
Neovim Lua plugin to extend and create a/i textobjects. Part of ‘mini.nvim’ library.
References:
[1]: https://github.com/echasnovski
[2]: https://github.com/echasnovski/mini.ai
-
Don’t stop learning! Stop trying because you have a doomer outlook on ai, llms, industry and think they are taking over. If you have no hope for the future, if you stop now you are cementing in that you will be no good and the ai will be better. Many, maybe most of us in this industry go here by hard work, long nights of learning, trying to solve problems that our job had. If llms take over then the world is going to be a whole lot different, it will be a world you cannot predict or plan for. For now put your head down and succeed in the world we have today.
TEEJ has some great thoughts on this whole sentiment, put this on for you morning walk or whatever you do.
The work on swark [1] by swark-io [2].
Create architecture diagrams from code automatically using large language models (LLMs).
References:
[1]: https://github.com/swark-io/swark
[2]: https://github.com/swark-io
a night of rounds
Tonight my son and I played rounds, I pulled clips of all the final rounds of
each set of rounds. We play hardly any games with guns in them, this is one of
the few exceptions, it feels quite whimsical, fun, and strategic, and not at
all realistic or first person. The strategy part really brings me back to the
fps games I would play with friends in my teens.
Round 1 - Orange # [1]
I thought I had him on this one. I had this rare power up that allows me to
shot through walls. It came down to the very last round and he had too much
firepowerfor me.
Sorry, your browser doesn't support embedded videos.
Round 2 - Blue # [2]
The final round of round 2 was Super fast. I felt like I nerfed my homing
power up by adding fastball to it and it didn’t really home in anymore. What
made it so quick, I think he had glass cannon and I laid down two well placed
shots.
Sorry, your browser doesn't support embedded videos.
Round 3 - Orange # [3]
Round three he got some really good cards, but t...
wondercraft session one
My son and I are starting a new Minecraft server today called wondercraft.
setup # [1]
We are running a few mods on this server notably FTB Ultimine for less grindy
resource gathering, Sodium for shaders, and Universal Shops.
[2]
We are runninng on Minecraft 1.20.1, I think this is because it was the
latest supported by Universal Shops, its at least one major release old at this
point.
[3]
I grabbed a few shaders, the ones that you see in this post are rethinking
voxels.
[4]
spawn # [5]
We initially spawned in a plains biome near an acacia and forest biome. We
ended up going straight for the forest, only coming back for some sheep and
wheat seeds.
[6]
Night one Zombie fight # [7]
On the first night we had the obligitory zombie fight before getting beds and bases set.
[8]
Salmon Wrangler # [9]
I was the designated food provider. I setup a small wheat farm with about 64
seeds, then went out to hunt down some salmon for the immediate food need. I
ended up with about...
-
I like the charts that Theo brings to to these videos. Shout out for a positive k8s reference and not shitting on it.
[2]
Htmx brings html [3]/css just a bit further down the complexity graph with little to no extra effort, while react allows us to go all the way full complexity at the cost of build and dev complexity to go from zero to 100 as soon as its introduced.
[4]
htmx brings us back to the ease of jquery ajax without any complex swapping or json parsing, all of the object parsing and html templating is done in the backend, the front end just tracks where to put it. HTMX couples the frontend and backend much tigher, since all of the front end html is generated in the backend, done correctly it is not possible for the front end to get out of sync and try to do things that the back end does not know how to handle, vice versa.
[5]
References:
[1]: /htmx/
[2]: https://dropper.waylonwalker.com/api/file/6b2d4ec0-98f2-4e58-8ab4-936b7356e7f4.webp
[3]: /html/
[4]: https://dropper.waylonwalker.com/api/file/71ac480a-4e45-4777-87eb-a9d2d8775cca.webp
[5]: https://dropper.waylonwalker.com/api/file/aa09051d-7e36-43a3-b6da-a6257cad1cc9.webp
Why I Write
Software Engineer at Bluesky specializing in developer productivity, AI-assisted development, and accessibility. Creator of The Balanced Engineer newsletter and co-host of the Overcommitted podcast.
Brittany Ellich · brittanyellich.com [1]
It’s interesting how many people in tech maintain a blog. I think part of this brings us back to web 1.0 days when so many individual websites owned the web it was a free for all unindexed land and you got to own a small piece of it.
I agree with most of Brittany’s points here I write a lot to keep my skills sharp, and to refer back to. Brittany mentions keeping all her old posts, even the cringy ones. I’m all with you here, I’m just wodering how you look back at anything you wrote in the past and not get a bit of that feel, maybe its just me, but I see cringe and mistakes gallore, but it all makes me better moving forward.
References:
[1]: https://brittanyellich.com/why-i-write/
Availability
Software Engineer at Bluesky specializing in developer productivity, AI-assisted development, and accessibility. Creator of The Balanced Engineer newsletter and co-host of the Overcommitted podcast.
Brittany Ellich · brittanyellich.com [1]
nice overview of availability measurements and what they really mean. The crazy world we live in today depends on so many things runnig, its also so hard to measure your uptime, The uptime metrics can mean a lot of different things. The site is up and accepting traffic, but can users make changes or submit orders, there is a lot more to it than just up or down. I really appreciate Brittany’s story from Nike nested in there.
References:
[1]: https://brittanyellich.com/note/availability/
nRF52840 Wireless Controller Development Board - kriscables
SuperMini nRF52840 Wireless Controller Development Board
kriscables - Custom Ergo Keyboards and Cables · kriscables.com [1]
The SuperMini nrf52840 is a sick controller for building keyboards, affordable, easy to get, and compact. Bluetooth and wired setup just works in zmk. This page has a nice image of the pinout.
References:
[1]: https://kriscables.com/supermini-nrf52840/
nvim-manager
I recently built a cli application as a nearly-one-shot-app called
nvim-manager [1]. It manages your
nvim dotfiles install.
[2]
Why # [3]
How is nvim manager any better # [4]
nvim-manager allows you to install pinned versions of your dotfiles, your
friends dotfiles, and distros in ~/.config. This allows you to have stable
versions that will not break installed while you change things.
I’m sure most of us have experienced the pain of installing one plugin, only to
update all of your plugins and break something.
Or, you have small changes on every machine you use, because they are all just
a bit different and now you have big merge conflicts to deal with.
All of this aside you can install a distro to get you by, or a known working
version of your own dotfiles.
So all these versions in ~/.config # [5]
ya, thats the magic of NVIM_APPNAME, I can boot up any of these intalled
working versions in an instant with NVIM_APPNAME=nvim-waylonwalker-v0.0.1 nvim. I can still cowboy up an...
/now
This page is meant to be simple view into what is happening in my life right now. Inspired by @NowNowNow [1]. and Derek Sivers.
Last Update 2025-10-29
- Silksong has my attention, it’s great
- Working on new features for dropper
- Vibe coding [2] sucks
- Images will soon be able to be resized and be more efficient over the network.
- Trying to branch out and add more than software to the blog. Things like design and 3d printing.
---
Last Update 2025-05-22 14:27:47
- Working on [[ninesui]]
- Working on [[krayt]]
- learning observability with grafana
- Fairly happy with markata [3], at the moment, less focus and some small fixes
- The blog is fully k8s, love the experience
- replacing Google apps with self hosted [4] apps [[replacing-google-search-apps-with-self-hosted-web-apps]]
- Doing a second run through hollow knight home row layout [5]
- Also second run of animal well
- put a pause on the thps gap project Posts tagged: thps-gaps [6]
- working on a split version...
one-shot-s3-cleanup
So I made a mistake in an app I am working on and ended up creating thumbnails
of thumbnails, and thumbnails of thumbnails of thumbnails… etc. I was able to
delete them all, but I wanted to make a one-shot script to do it.
[1]
One Shot App # [2]
I got the idea of the one shot app from Simon
Willison [3] and
replicated his setup in a chatgpt project
[4]
Initial Prompt # [5]
a mistake was made in my s3 bucket and I've created a bunch of extra files
write a script that deletes all files that contain _thumb_thumb
⬢ [devtainer] ❯ aws s3 ls s3://dropper
2024-12-29 14:32:32 16158 02271f4c-be18-4bea-b23e-d00f9fe42b9f.webp
2025-01-11 14:20:49 2878 02271f4c-be18-4bea-b23e-d00f9fe42b9f_thumb.webp
2025-01-11 14:21:17 2858 02271f4c-be18-4bea-b23e-d00f9fe42b9f_thumb_thumb.webp
2025-01-11 14:21:44 2856 02271f4c-be18-4bea-b23e-d00f9fe42b9f_thumb_thumb_thumb.webp
2025-01-11 14:21:44 2856 02271f4c-be18-4bea-b23e-d00f9fe42b9f_thumb_thumb_thumb_thumb.webp
2024-12-27 10:25:36 2812 06422c09-d0da...
Quick Start - kotaemon Docs
cinnamon.github.io [1]
interesting UI for RAG based workflows, i.e. chatting with your documents. It looks like it can run a number of models, feels like ollama with RAG and a nice web ui.
References:
[1]: https://cinnamon.github.io/kotaemon/
Bluesky is more like Twitter than X is
joelhooks.com [1]
Bluesky is almost excatly like twitter was when I joined years ago. It’s gone crazy lately bogged deep in politics, bots, and ads. I’ve seen like two scroll pages of ads in a row, its nuts. What I did not know before Joel pointed out here is that the feed I am looking at is my following feed, its only feed of people I follow in descending order. On bluesky you get to pick your feed!!! This feels like tweetdeck did back when we were able to run that. You could tune in search terms and save them it was glorious. Bluesky has some really interesting ones that you can use like popular with friends, only posts, my bangers, that have a pre defined algorithms.
References:
[1]: https://joelhooks.com/bluesky
-
This man is responsible for making gaming on linux what it is today. Such a heartfelt story to hear that reviving his dad’s machine was at the core of what drove him to do what he has done for the wider gaming on linux community. Update on your schedule, remove all the tracking and bloatware, this is what drove him to start using linux before making it accessible for his Dad.
But really do update, this is not your 2002 PHP box, things need updated and regular updates help the process.
Today I learned that the docs in postiz are a bit behind, (fantastic docs btw, they are to the point, and cover almost all of what you need). The docs state that you need to include an R2 bucket to handle uploads.
This issue shows that more work has been done, one of which is local storage. The compose file they use in the quick start has the required env variables to set this up.
      STORAGE_PROVIDER: "local"
      UPLOAD_DIRECTORY: "/uploads"
      NEXT_PUBLIC_UPLOAD_DIRECTORY: "/uploads"
looking into my running instance I can see my images there.
⬢ [devtainer] ❯ podman exec postiz ls /uploads/2025/01/09
811747b3f703f5d9a7f10aff5103412ff0.jpeg
a221db10a76f0c414171ab417379b09ec.jpeg
we beat trailmakers
Today we broke through the atmosphere in trailmakers ready for pickup from
those back at mission conrol.
I haven’t posted a lot of gaming content to by blog, idk why, but I think I
am going to start, especially for the ones that are good memories with my
son.
Today we hit 100% of the required parts required to build the space ship and
leave the atmosphere of the planet that the story is set in. Trailmakers is a
game where you design and build your own vehicles. The campaign mode standed
is a story where you are in a high tech freighter ship that crash lands on a
distant planet. Your crew back home can come as far as the planet your on but
cannot break through the atmosphere. Your job is to collect all the wreckage
and gain all the parts required for a space ship build to take you out of the
atmosphere to meet them.
[1]
[2]
There were a couple really heavy salvages to gather up, this one is high in the
floating islands and is the cockpit fo the space ship.
[3]
I thought thi...
External Link
devcommunity.x.com [1]
Just tried using my twitter api key for the first time in quite awhile. Apps now need to be tied to projects in order to work. It looks like projects are where pricing comes into play. Thankfully they still give a free tier for doing small time things for myself. You can really see the effect that llms have on these things though as it is 5x more expensive to read posts than to make posts currently. Data is the new gold for these kind of companies.
References:
[1]: https://devcommunity.x.com/t/v2-suddenly-getting-client-not-enrolled-today/195456
GitHub - containers/podman-compose: a script to run docker-compose.yml using podman
a script to run docker-compose.yml using podman. Contribute to containers/podman-compose development by creating an account on GitHub.
GitHub · github.com [1]
Wild that the podman-compose github readme calls out k3s as an alternative.
[2]
compose definitely has its place, especially for local development on a developers machine, its so much easier to stand up and get things like hot reload up and running smooth.
References:
[1]: https://github.com/containers/podman-compose
[2]: https://dropper.waylonwalker.com/api/file/9326cd6f-3f27-4703-85fd-a3b16f7bdc92.webp
The work on podman-compose [1] by containers [2].
a script to run docker-compose.yml using podman
References:
[1]: https://github.com/containers/podman-compose
[2]: https://github.com/containers
bic
Static blog generator, in bash
bic · bic.sh [1]
Intereresting someone built a blog generator in bash. it comes with normal markdown to html [2], static content, robots.txt, sitemap, rss, and tags. It uses pandoc to take markdown to html and mustache for page templates.
References:
[1]: https://bic.sh/
[2]: /html/
Animate to height: auto; (and other intrinsic sizing keywords) in CSS | CSS and UI | Chrome for Developers
Animate to and from intrinsic sizing keywords with `interpolate-size` and `calc-size()`
Chrome for Developers · developer.chrome.com [1]
Css is getting so good, new things like interpolate-size are making things that use to require some deep expertise and hacks intuitive and easy.
/* Opt-in the whole page to interpolate sizes to/from keywords */
:root {
interpolate-size: allow-keywords; /* 👈 */
}
References:
[1]: https://developer.chrome.com/docs/css-ui/animate-to-height-auto/
[1]
Looks like a great start to a rules file for fastapi [2].
- Place the happy path last in the function for improved readability.
I have never heard anyone say this. It feels weird to me. The other early return, find and handle errors early all make sense to me, but happy path last is new to me.
References:
[1]: /static/https://github.com/PatrickJS/awesome-cursorrules/blob/main/rules/py-fast-api/.cursorrules
[2]: /fastapi/
Generate Custom .cursorrules for Your Project Based on Community Examples
expert led courses for front-end web developers and teams that want to level up through straightforward and concise lessons on the most useful tools available.
egghead · egghead.io [1]
Really interesting way to generate a rules file for agentic workflows based on your current repo. John uses gitingest here, looks like a fantastic tool, but probably not useful for most private repos. I’m sure you can replicate the same thing in a private repo wtih a small amount of effort the few times you need to do it. gitingest looks like a great way to pull in some extra context for some open source dependencies that you have though.
References:
[1]: https://egghead.io/generate-custom-cursorrules-for-your-project-based-on-community-examples~eimq2
GitHub - coderamp-labs/gitingest: Replace 'hub' with 'ingest' in any GitHub URL to get a prompt-friendly extract of a codebase
Replace 'hub' with 'ingest' in any GitHub URL to get a prompt-friendly extract of a codebase - coderamp-labs/gitingest
GitHub · github.com [1]
Gitingest has a python package on pypi that you can run with uvx, and it accepts the same arguments as the web version, right in your terminal
⬢ [devtainer] ❯ uvx gitingest --help
Usage: gitingest [OPTIONS] SOURCE
Analyze a directory and create a text dump of its contents.
Options:
-o, --output TEXT Output file path (default: <repo_name>.txt in
current directory)
-s, --max-size INTEGER Maximum file size to process in bytes
-e, --exclude-pattern TEXT Patterns to exclude
-i, --include-pattern TEXT Patterns to include
--help Show this message and exit.
References:
[1]: https://github.com/cyclotruc/gitingest
I’m really excited about gitingest [1], an amazing project by cyclotruc [2]. It’s worth exploring!
Replace ‘hub’ with ‘ingest’ in any github url to get a prompt-friendly extract of a codebase
References:
[1]: https://github.com/cyclotruc/gitingest
[2]: https://github.com/cyclotruc
Looking for inspiration? gitingest [1] by coderamp-labs [2].
Replace ‘hub’ with ‘ingest’ in any github url to get a prompt-friendly extract of a codebase
References:
[1]: https://github.com/coderamp-labs/gitingest
[2]: https://github.com/coderamp-labs
Gitingest
Replace
gitingest.com [1]
Replace hub with ingest in any github and get a prompt friendly codebase ready to feed into any llm. It combines the entire codebase, based on a gitignore style glob that you pass in, into a single TXT file.
References:
[1]: https://gitingest.com/
Check out bic [1] by Pinjasaur [2]. It’s a well-crafted project with great potential.
Static blog generator, in bash
References:
[1]: https://github.com/Pinjasaur/bic
[2]: https://github.com/Pinjasaur
[1]
Definitely need to give codecompanion.nvim a try, it looks like a competitor to windsurf but in nvim. It looks so feature complete that its hard to grasp all of what it does.
References:
[1]: /static/https://github.com/olimorris/codecompanion.nvim
-
Great panel of software folks at open sauce. It was interesting hearing from all these creators from the perspective of an open sauce panel.
[1]
New release out for nvim-manager that supports installing pre-configured distros. It’s such a breeze to install these now, its been fun to go through each of them. The currently included distros are.
- LazyVim
- AstroVim
- kickstart
- NvChad
- LunarVim
References:
[1]: /static/https://github.com/WaylonWalker/nvim-manager/releases/tag/v0.0.2
Releases · WaylonWalker/nvim-manager
manage dotfiles with nvim_appname. Contribute to WaylonWalker/nvim-manager development by creating an account on GitHub.
GitHub · github.com [1]
First release of nvim-manager is out. Your dotfiles change a lot, sometimes it’s hard to manage all of the places you have installed them and potentially made hand edits to. nvim-manager allows you to easily make static releases of your dotfiles, and keep your nvim install from breaking by leveraging NVIM_APPNAME and pinned releases of your dotfiles stored in ~/.config. In this directory you might have many nvim configurations installed, nvim-manager automates the process of installing and updating from your dotfiles, while keeping previous pinned versions untouched.
References:
[1]: https://github.com/WaylonWalker/nvim-manager/releases
[1]
Nice list of url escape codes. I did not actually know that to get a literal sequence like %2D you can use $2D.
References:
[1]: /static/https://docs.microfocus.com/OMi/10.62/Content/OMi/ExtGuide/ExtApps/URL_encoding.htm
GitHub - ngalaiko/tree-sitter-go-template: Golang template grammar for tree-sitter
Golang template grammar for tree-sitter. Contribute to ngalaiko/tree-sitter-go-template development by creating an account on GitHub.
GitHub · github.com [1]
This setup fixed my nvim syntax highlighting in helm templates.
References:
[1]: https://github.com/ngalaiko/tree-sitter-go-template
GitHub - imagegenius/docker-immich: Monolithic (Single) Docker Container for Immich
Monolithic (Single) Docker Container for Immich. Contribute to imagegenius/docker-immich development by creating an account on GitHub.
GitHub · github.com [1]
imagegenius has made an immich all in one setup that looks much easier to use than immich.
References:
[1]: https://github.com/imagegenius/docker-immich/
Owning It · Matthias Ott
Owning your content and platform means true independence on the web. Why it matters more than ever for creators.
Matthias Ott – Web Design Engineer · matthiasott.com [1]
I can say I had the same kind of feelings when I first saw something called “Own Your Web” being run in Buttondown. I totally get it. It takes time and effort to build your own stuff, email sending is hard, not done right ends you in the spam folder. There is something about the name though that I think needs to set an example and self host [2] as much as it possibly can.
The changelog has covered this several times, do they need to go to the crazy lengths they do to run their site, no probably not, but it keeps them in the loop. They are using the tech they talk about in a very real and production critical way to run the show.
Cant wait to see more from ownyourweb.site
References:
[1]: https://matthiasott.com/notes/owning-it
[2]: /self-host/
-
Gyroscope better than a mouse?? Nerd nest really sells how having two gyros in the way they have done for noise cancelling changes the game on it, and makes it a contender to replace a mouse.
It really makes me want to try it. I love how repairable this controller looks. I’ve got to imagine that the fact that it comes as a kit, and all the parts are available that this hits S tier repairability. My current controller of choice is a PS5 and I’ve had stick issues I wish I could fix.
No analog triggers, I’m out. Maybe they will make it an option in the future idk. I don’t play shooters where I need a hair trigger, this won’t work on session or driving games.
micro usb, seriously, that kinda kills it for me too.
edit I looked on their website and they have usb c in the latest version
Postiz: The All-in-One agentic social media scheduling tool
Streamline your social media with Postiz. Schedule posts, analyze performance, and manage all accounts in one place.
Postiz · postiz.com [1]
postiz looks like a very polished way to automate and schedule posts to all the social services.
References:
[1]: https://postiz.com/
GitHub - gitroomhq/postiz-helmchart: Helm for Postiz
Helm for Postiz. Contribute to gitroomhq/postiz-helmchart development by creating an account on GitHub.
GitHub · github.com [1]
Reminder to myself, look into self hosting postiz with this helm chart later.
References:
[1]: https://github.com/gitroomhq/postiz-helmchart
Realign
I just popped out a realign of the ol’ personal website. I only say realign as I didn’t rethink every single detail of the thing. I’d say probably 40% of the original HTML and CSS…
Chris Coyier · chriscoyier.net [1]
Chris Coyier had a small re-align on his site, some good nuggets in here.
I like the idea of having a photo of myself prominently on the site, so you know who you’re dealing with here.
I really like this after thinking about it and I think I am going to make sure I get my face back on my posts. I do have my 8bit style pixel art image of me that I use on social media, but no real picture.
I feel like a lot of people redesign their entire website when it’s time to update to the latest list of social networks and I’m no different. Once you touch it you gotta keep going.
I can totally relate to this, once you open the thing, you get the build tools greased up, and your confidence high that re-deploying isn’t going to mess something up, I tend to start digging in to other things.
References:
[1]: https://chriscoyier.net/2025/01/03/realign/
About Harry Roberts – CSS Wizardry
csswizardry.com [1]
I’ve only recently learned what colophon means, and I really like to read through site that use it. If you don’t know its about how the site is built. I’ve always liked peeking under the hood of things to understand how they work, it’s what turned me towards an engineering degree.
I love how he mentions that he chose the name when he was 17 and he is stuck with it. I particularly like the name, it has something special to it. Hats off to you for doing something that has lasted so long for you. I fully understand though, I have projects that I made a year ago that I think why did I name it that. At the same time when I try to think of a name I end up with the I don’t have anything good and I’d rather build the thing so fuck it, its going to be what it is.
References:
[1]: https://csswizardry.com/about/#section:colophon
Using Obsidian as a Gaming Backlog Library
How to use Obsidian as a gaming backlog library. Get a long-lasting overview of games you want to and have played.
Bryan Hogan · bryanhogan.com [1]
Very interesting way to catalog games, I need to make a catalog of mine, I’ll probably start adding some blog entries for games I’m in and have completed. Wonder if there is a way to hook into steam with python to get achievements and progress live.
References:
[1]: https://bryanhogan.com/blog/obsidian-gaming-backlog
[1]@csswizardry [1]) — 📡 I’ve been writing a lot lately. I’ve also dusted off my RSS reader. Send me your feeds! Mine is at csswizardry.com/feed.xml
https://csswizardry.com/feed.xml" loading="lazy">
Harry Roberts (@csswizardry [2])
📡 I’ve been writing a lot lately. I’ve also dusted off my RSS reader. Send me your feeds! Mine is at csswizardry.com/feed.xml
https://csswizardry.com/feed.xml
Bluesky Social · bsky.app
Tons of cool people came out with their rss feeds here, again will need to browse more closely later.
References:
[1]: https://bsky.app/profile/csswizardry.com/post/3lckq4qo6zs22
[2]: https://csswizardry.com
[1]
Sturobson has a ton of rss feeds here, I recognize quite a few, will definitely need to poke at some of these later.
References:
[1]: /static/https://github.com/sturobson/myRSS/blob/master/personal-blogs.xml
Own Your Web
Own Your Web is a newsletter by Matthias Ott about designing, building, creating, and publishing for and on the Web. Every other week, I send out an exclusive email full of actionable insights, bes...
buttondown.com [1]
I’m a sucker for good own your own shit on the web blogs, and Matthias Ott has a top notch one here. The archive has been a great read so far, I’ve discovered things like slashpages.net.
References:
[1]: https://buttondown.com/ownyourweb
Fork Around And Find Out | Remaining Authentic in Retirement with Kelsey Hightower
Retirement is about the journey, not the destination. For Kelsey Hightower, it’s been an epic journey. On our debut episode of the Fork Around and Find Out Podcast (and much to Autumn’s elation...
share.transistor.fm [1]
What a great first guest for FAFO. Kelsey is always such a great listen. He talks about killedbygoogle and how engineers get no incentive to work on old projects, google had no incentive, and you got the thing for FREE in the first place. He talks about end of career and having love you money, having so much in the bank you can say no. If you are presented with a project that does not align with your values you can say no.M
Justin even mentions how Google has more killedbygoogle projects than Amazon has total projects.
If we knew how hard it would be, we would never build it.
Autumn’s Fav quote from ep1 of shipit
References:
[1]: https://share.transistor.fm/s/a9e41e15
/start
Welcome to waylonwalker.com, my small corner of the internet. I currently have
3762 posts published,
here are some links to help you get started around here.
[1]
Feeds # [2]
I have quite a few different feeds that you can browse or subscribe to in your
rss reader, you can find them on my feeds [3] page.
Slash posts # [4]
Slash pages [5] are some evergreen pages that I will do my best to keep up to date,
they are typically not targeted to a specific moment in time, but designed to
be ever living.
- Waylon Walker [6] - Husband, dad of two, and hobbyist builder of things on the internet.
- Ai [7] - Last updated Jan 2026.
- analytics [8] - I've been posting on this site since 2016, when layoffs were rolling through the company I worked for at the time. Starting a personal blog and a pile of…
- /carry/ - I try to keep a pretty light every day carry, but it never works out, keyfobs and headphone cases end up causing more bulk than I'd like, but My EDC is no…
- /colophon - Colop...
slow nfs performance
I’m running a two node k3s cluster at home, I thought I could simply mount an
nfs share on each worker node, and essentially have the same storage accross
all nodes. I’m already learning why this is not reccommended.
[1]
Slow # [2]
I’ve been running some cronjobs and argo workflows on the second node for
awhile, these are things that run in the background and I don’t care if they
take a bit longer to keep my master node freed up for more critical work.
I just started trying to build this site in a cronjob, It was taking 20 minutes
to build, and something I noticed was that markata was taking minutes to run
glob ( search for files ), normally this happens in a few ms and I never
notice this step.
[3]
I just moved into the master node and the results were wild at ~30x faster
Permissions # [4]
I have seen where you can get diffent permissions on the nfs share based on
user id. Since I’m homelabbing here I only have one user per machine. As you
step into enterprise level VMs wi...
Changelog
Maker of web things, sticker merchant, viral toot-based business man, blogger, podcaster, and pizzaiolo. Human dad.
rknight.me [1]
Well done changelog with some really good inspirational nuggets. Many slash pages I want to check out and an 11ty contribution graph.
References:
[1]: https://rknight.me/log/
slash pages
A guide to common pages you can add to your website
slashpages.net [1]
A nice list of slashpages you might want to consider including / aliasing / 301ing. These feel like nice things to setup and keep in the back pocket for obsidian style wiki link to easily. I get kinda bad at wiki-linking as much as I would like to, mostly because it does require some amount of work to make the page, and keep it up to date over time, then remember that you even have it.
Some are serious, some very common, some quite useful.
[2]
References:
[1]: https://slashpages.net/
[2]: https://dropper.waylonwalker.com/api/file/ba4edf27-03d4-49ff-ab4e-712e9ab8acda.webp
/colophon
Colophon [1] a page that describes how the site
is made, with what tools, supporting what technologies
Author # [2]
[3]
All posts on this site are written by Waylon
Walker [4], the typical content has changed and evolved
over time. I go back and make a few corrections, but for the most part things
stay pretty much as they were published originally.
see more in Waylon Walker [5]
tech # [6]
This site is a static site build with my own static site generator markata [7], Thoughts [8] or as Simon Willison calls it a link
blog [9] posts
are pulled in as a regular posts, all is hosted on cloudflare pages.
- markata [7]
- Thoughts [8]
- cloudflare pages
see more about these components in about this site [10]
Analytics # [11]
I do not track users, I respect the privacy of my readers and do not track
their information. I do track analytics [12] on my own writing a post rate.
Its more of an interesting history of the site.
meta # [13]
Some evergreen pages that are more about me ...
-
Theo does a fantastic history of serverless here.
Kubernetes shit # [1]
Theo can’t have an infra video without shitting on k8s. Specifically people who have never touched k8s pushing fear of k8s to large audiences of people who have never touched k8s. If you are a webdev who solely lives in webdev space and never touches as much as a dockerfile listen to him. If you touch infra at all try it before you take his opinion at face value.
[2]
Serverless shines in high variance # [3]
If you plan on having traffic spikes 10x your regular traffic for something like black friday, serverless might be right for your use case.
stateless programming # [4]
He argues that targeting a stateless deployment of serverless leads to better code. I’d like to see more examples here. Maybe most of the code bases I work on already do this. I’ve never targeted a serverless deployment, but I’ve targeted horizontally scaled deployments many times and they feel like they have the same targets. For instance if I spin up 8 pods for my application or uvicorn with 3 workers I have to target statelessness, all of the state must live in the database and cannot live in memory. Even if I target 1 instanc...
linkding
A self-hosted bookmarking service that is designed to be minimal, fast and easy to set up.
linkding · linkding.link [1]
linkding looks like an interesting alternative to thoughts. Thoughts is focused on the note being a value add tweet length blog post that you share to the public. This seems more focused on fire and forget with some note taking and search ability. I should definitely level up the search and tag discovery in thoughts.
References:
[1]: https://linkding.link/
-
cool video on expanding vim with cli.
piping commands into vim # [1]
[2]
write a healthcheck # [3]
[4]
References:
[1]: #piping-commands-into-vim
[2]: https://dropper.waylonwalker.com/api/file/4283e98a-9b12-4f8a-9799-a097d5f3184d.webp
[3]: #write-a-healthcheck
[4]: https://dropper.waylonwalker.com/api/file/d90a8c88-4748-4dfe-8569-b51c023c825b.webp
-
Lane from boot.dev madde this fantastic video about serving files on the internet. It has me wondering if I need to rethink a few of my things that I have built. I have a few things I am serving media from, but I have very aggressive cloudflare cache rules on them, so each file should only be uploaded about once per year.
My problem going straight out of minio right now is how do i set headers for cache control on it. If I can’t set the cache control and everything is coming out of minio this does not solve my problems.
---
I went back and played with presigned urls and you can in fact control and set response headers, this is definitely the way and I have been wrong.
curl with partial files
Back in September 2023, we extended the curl command line tool with a new fairly advanced and flexible variable system. Using this, users can use files, environment variables and more in a powerful...
daniel.haxx.se · daniel.haxx.se [1]
This is a cool new feature coming to bash, I can’t think of a use case I have out of the gate, but it looks cool. I’m thinking this might be good to keep in the back pocket for something like CI where I don’t have a hightly tuned bashrc file, and I want a dynamic curl request based on some state that exists as a fille.
References:
[1]: https://daniel.haxx.se/blog/2024/12/30/curl-with-partial-files/
The beautiful sentence that is the web
A metaphor for the building blocks of web development.
cassidoo.co [1]
Nicely worded Cassidy! Javascript can be too much, it can bog down low powered devices, we can ship so much that its untenable on poor connections. It can be argued that its a bad language and putting it on the server is a mistake, but it brings sites to life. It makes it possible to extend the static nature of html [2]/css with just a little special spice only your site needs.
I’d add to the argument that a lot of js should go away over time. Over time libraries such as jquery have fallen out of use, not because they are bad, or have been replaced by new libraries, but because the browser has adopted most of the functionality that jquery brought.
As a primarily python dev I’d really like to see htmx [3] die a very similar graceful death. There have been several iterations on this idea, and the crux of it is very similar, give the ability to use HTTP verbs right inside html with some instruction of when to apply them and what to apply them to.
No js should not go away, it never will, we will always find new patterns that the browser should take, sites will always n...
Teleport to coop partner
Hello,
Is there a command where you can teleport to your coop partner? Or is it just this Follow button in chat? :)
Hypixel Forums · hypixel.net [1]
/p warp will warp your party to your current server in hypixel skyblock
[2]
References:
[1]: https://hypixel.net/threads/teleport-to-coop-partner.2250505/
[2]: https://dropper.waylonwalker.com/api/file/a4f5be07-5f79-450c-a40d-1f48ac086e05.webp
External Link
stackoverflow.com [1]
Today I learned how to configure the baseurl for htmx [2] using the tag. This is pretty handy to be able to configure different baseurls.
<base href="<scheme>://<netloc>/api/v1/">
<button hx-post="clicked"
hx-trigger="click"
hx-target="#parent-div"
hx-swap="outerHTML">
Click Me!
</button>
References:
[1]: https://stackoverflow.com/questions/69456875/how-to-configure-base-url-for-all-requests-using-htmx
[2]: /htmx/
Addy Osmani (@addyosmani.bsky.social)
Tip: Chrome DevTools can override the content of Fetch/XHR requests! Useful for mocking APIs without waiting on backend changes.
Bluesky Social · bsky.app [1]
WTF, you can just change a server response from devtools and update a vuejs app? Just tried with htmx [2], and my GET requests are not showing up in the sources tab. I’ll keep this in my back pocket for next time I’m supporting a vuejs app though.
References:
[1]: https://bsky.app/profile/addyosmani.bsky.social/post/3lei5jhkgdk2k
[2]: /htmx/
Gary Vaynerchuk (@garyvee.com)
2025 : the year of action … who’s finally ready ?
PS: text me for any follow up questions at 📱 1-212-931-5731
#2025 #todo #todolist #motivation #garyvee
Bluesky Social · bsky.app [1]
Gary Vee, is the goat. leaving this image as a reminder for myself
[2]
References:
[1]: https://bsky.app/profile/garyvee.com/post/3leidcd6xjk2y
[2]: https://dropper.waylonwalker.com/api/file/074edddb-8b46-4d94-9b55-d70a7bb74366.webp
The work on atuin [1] by atuinsh [2].
✨ Magical shell history
References:
[1]: https://github.com/atuinsh/atuin
[2]: https://github.com/atuinsh
Ellie Huxtable (@ellie.wtf)
Atuin v18.4 is out now!
Including atuin wrapped, your year in shell history 🐢
thanks @daveeddy.com for the suggestion!
Bluesky Social · bsky.app [1]
Atuin v18.4 is out with an atuin wrapped command.
Here’s Ellie’s Wrapped.
[2]
This is a pretty sick command, I’ve only been using Atuin about as long as I’ve been on bazzite, so maybe 4 months, but here is my wrapped.
[3]
Comparing to Ellie, I’m surprised that I even have 126 package related commands, being on an immutable distro most of my packages come from the container, I don’t need to run packaging commands. My cd is also super low, I use tmux sessions to take me where I need to be most of the time, which is a project’s root directory, It’s pretty rare to see me outside of a project root directory.
I’d venture to guess that nvim would be higher if it didn’t auto start on every tmux session as well.
References:
[1]: https://bsky.app/profile/ellie.wtf/post/3lecj36r5ps2x
[2]: https://dropper.waylonwalker.com/api/file/246f2dc6-4e46-410c-9d25-fa6ccc85f8f2.webp
[3]: https://dropper.waylonwalker.com/api/file/434e1290-cf81-4ae5-abaf-34927006f3b6.webp
-
Red Hat has donated the whole open alternative to docker to the CNCF, the hosts weigh in with thier opinions all being pretty positive as they seem to be a legitimate donation and not dumping crap on open source.
- podman
- podman-desktop
- buildah
- compose-fs
- podman
- bootc
- scopio
Personally I’ve been running podman exclusively at home since switching to Bazzite in August. I’d like to use buildah in ci. I gave it a try, but was unable to swap out my use of kaniko for buildah, I will get there, but it was not quite as drop in as I wanted.
-
Holy shit these AGI models are incredibly expensive to run, require lots of wild hardware that there is not enough to go around, and requires shit tons of power to run.
Now more than ever is time to distinguish yourself with deep expertise, jack of all trades is being eaten by ai. People with deep expertise are getting a jack of all trades bump from ai, not o3, just the regular stuff.
setting up ucore-zfs
I just setup my oldest hardware on the newest hotest server distro ucore-zfs.
This is a gateway FX6860 manufactured in 2010.
Immutable is the future # [1]
My current boot log shows that I first started daily driving bazzite back in
August 2024. I’ve been hapily using it since my arch install was plaugued
with a crippling display driver error, or something that would lock the display
for minutes every 30s or so, it became unusable. I switched because this is
what I put my son on and it was working great for him.
waylon@razorcrest:~$ journalctl --list-boots
IDX BOOT ID FIRST ENTRY LAST ENTRY
-19 7e6e154d2609407da24fa12814eadbd7 Thu 2024-08-29 16:15:15 CDT Thu 2024-08-29 17:37:25 CDT
Four months later and I am really loving the immutable distro experience. My
base system gets fresh reliable updates, and I barely install anything directly
on it, a handful of things are snaps or flatpaks from the discover store, but
my main workflow is now in distrobox. It has been rock solid reliable...
-
Theo weighing in on the 2025 job market. It’s no 2018 out there right now, the ratio of jobs to engineers in the market has flipped big time. Theo as usual really focuses on community, being in a community, and being a good citizen. At the end of the video Theo weighs in on his experience hiring, and generally it starts with we need someone to do x does anyone know someone, then goes to a more formal internal post, then more formally asking internally does anyone know someone, then maybe to his community, and if he really still needs the person it might become an external post. These days there are so many good engineers on the market that very few good jobs actually get a posting for in his opinion.
kitze the 🐐 (@thekitze) on X
holy fk I thought package.json was bad but TIL python stores dependencies in a .txt file 💀
X (formerly Twitter) · x.com [1]
kitze hating on python packaging in new ways. Python packaging has a lot of quirks that can make it infuriating. Not once have I thought “you know what this needs, quotes and braces”
[2]
References:
[1]: https://x.com/thekitze/status/1872267874842063223?t=zxq6-kA9atVuXJeWntxfWg&s=09
[2]: https://dropper.waylonwalker.com/api/file/566ff44b-cace-474d-b1bc-62aaf42f419f.webp
-
This tip of using tinkercad to do boolean operations on an stl of a solid gridfinity bin and an outline is absolute fire 🔥🔥🔥. This feels like a relatively simple operation, but to do it to a generated stl proves hard to do in most modeling software, at least harder than it needs to be. Somehow tinkercad got it right and made it a very basic operation to do.
[1]
It took me a minute to find the Merge button that Uncle Jessy mentioned, they call it a group in TinkerCAD.
[2]
References:
[1]: https://dropper.waylonwalker.com/api/file/36826ac6-9e38-4955-b622-4de86900c8b7.webp
[2]: https://dropper.waylonwalker.com/api/file/a22fc486-d627-4e37-8d58-e963919bb8a0.webp
-
Damn Glorious Eggrolls is still making gaming on linux better. Of course its containerization that drives everything on linux these days. This is a pretty badass talk. Umu is already running in steam and bazzite. Bazzite gamemode uses this to get a gamescope session running.
-
Great list of 4 tips for running fastapi applications.
Keep routes small # [2]
Fat routers with all of the logic built in makes them hard to test, hard to refactor, causes lots of duplication, and makes it hard to reuse the business logic code later in something like a cli application.
Deploy Early # [3]
I really like this advice! He reccommends deploying as early as you can get a healthcheck live in your application. I’ve found too many times developers build something that is really hard, or impossible to deploy, when if they had tried to deploy early they would have spotted some easy to fix issues. This is less important if you are building out of a template that your team commonly deploys from, but very important with new patterns.
https://youtu.be/XlnmN4BfCxw?si=ks1wvmgDyoQLgrv2&t=1093 [4]
References:
[1]: /fastapi/
[2]: #keep-routes-small
[3]: #deploy-early
[4]: https://youtu.be/XlnmN4BfCxw?si=ks1wvmgDyoQLgrv2&t=1093
Building Python tools with a one-shot prompt using uv run and Claude Projects
I’ve written a lot about how I’ve been using Claude to build one-shot HTML+JavaScript applications via Claude Artifacts. I recently started using a similar pattern to create one-shot Python uti...
Simon Willison’s Weblog · simonwillison.net [1]
This is really interesting, the lazy uv scripts are really becoming quite appealing, especially for something like this to just pop out of an llm ready to run. The article features several examples of these one-shot prompt ideas that I suggest you give a try, and a prompt for creating them.
References:
[1]: https://simonwillison.net/2024/Dec/19/one-shot-python-tools/
Depot Status
Latest service status for Depot
Depot Status · status.depot.dev [1]
Depot’s uptime seems to be great. I definitely hit some issues with it this afternoon 12/24/24 that were not reported. I wonder if my issues were with the fly integration. Maybe fly ran out of credits to depot or something.
References:
[1]: https://status.depot.dev/
Deploy to Fly using a Depot builder
Using Fly.io's new Depot builder, we'll walk you through how to deploy a TypeScript service globally with speed.
Depot · depot.dev [1]
Here the integration to depot appears to be opt in using the --depot flag on fly deploy. This must have changed over time though because today it was giving me issues and I had to opt out using fly deploy --depot='false'. Looks like a great service and I just learned about them on their bad day.
References:
[1]: https://depot.dev/blog/how-to-build-with-depot-on-fly
Depot
Exponentially faster builds for everyone.
Depot · depot.dev [1]
Just learned about depot today ironically because it seems to be down and fly is using them under the hood to do the container builds, seems like a really great service for fast builds accross your team.
References:
[1]: https://depot.dev/
-
This was an eye opening video into agentic editing workflows.
setting rules # [1]
Dfferent ai tools use different rules files, windsurf uses .windsurfrules.
[2]
testing out rules # [3]
Test out your rules file by having it say something at the beginning of the output to verify that the rules are being applied correctly.
[4]
First line # [5]
He suggests to use this key rule for debugging purposes, otherwise you are guessing to what rules if any it is following.
Every time you choose to apply a rule(s), explicitly state the rule(s) in the output. You can abbreviate the rule description to a single word or phrase.
References:
[1]: #setting-rules
[2]: https://dropper.waylonwalker.com/api/file/f75bf439-919f-4c19-8695-176ca8a7d52d.webp
[3]: #testing-out-rules
[4]: https://dropper.waylonwalker.com/api/file/ebeed79c-435b-4aab-b3dc-c744b144c438.webp
[5]: #first-line
Dedicated Servers | Intel Servers | AMD Servers - Dedicated Hosting
reliablesite.net [1]
Dax talked about this in a recent How about tomorrow podcast https://thoughts.waylonwalker.com/post/461. He is using it as his dev machine, he just ssh’s in and devs on it. Feels like quite an interesting workflow, their prices seem competitive, but as a cheap ass homelabber I see their prices and think I could grab a used optiplex for the cost of a month or two of these and probably wouldn’t know the difference. DAX mentions longer compile times so maybe he does notice.
References:
[1]: https://www.reliablesite.net/dedicated-servers/
-
This is a pretty great episode talking shop with typecraft. They talk setups, cameras, content creation. I found them talking about their linux setups particularly interesting. Dax talked about his flow from building his own machines to using reliablesite.com.
tmux default leader # [1]
Dax hates on c-a, both typecraft and dax use c-s, which normally freezes a terminal, we can all agree that is useless. I use the default c-b, it seems fine for me.
type crafts setup # [2]
- Ubuntu
- Ghosty
- Tmux
- Nvim
- Ruby
Selling coffee without a web front end # [3]
Dax talks about terminal.shop and how they originally planned to have a web front end, but after they had so much success they stuck with it. now they are leaning harder into it and are building out integrations with a bunch of languages and an api, but no front end.
References:
[1]: #tmux-default-leader
[2]: #type-crafts-setup
[3]: #selling-coffee-without-a-web-front-end
PEP 723 – Inline script metadata | peps.python.org
This PEP specifies a metadata format that can be embedded in single-file Python scripts to assist launchers, IDEs and other external tools which may need to interact with such scripts.
Python Enhancement Proposals (PEPs) · peps.python.org [1]
PEP 723 is what is inspiring all of these lazy self installing python scripts, Authored by the author of hatch and pyapp. This is a really cool thing that uv has picked up and made python packaging just a bit easier.. maybe… dependency resolution still sucks.
References:
[1]: https://peps.python.org/pep-0723/
Switching from virtualenvwrapper to direnv, Starship, and uv
Earlier this week I considered whether I should finally switch away from virtualenvwrapper to using local .venv managed by direnv. I’ve never …
treyhunner.com [1]
I’ve kinda fallen out of using direnv now that a lot of my projects use hatch, I generally just hatch shell into them. I just need to make sure I go through all of them and make my installer uv. Now I’ve been thinking about making uv my only needed dependency to run a python project and leaning more to something like uv run --with . uvicorn myapp --reload
References:
[1]: https://treyhunner.com/2024/10/switching-from-virtualenvwrapper-to-direnv-starship-and-uv/
Lazy self-installing Python scripts with uv
I frequently find myself writing my own short command-line scripts in Python that help me with day-to-day tasks. It’s so easy to throw together …
treyhunner.com [1]
I really like Trey’s steps to making an executable python script with uv
his old process seems to be the same with a new shebang
- Add an appropriate shebang line above the first line in the file (e.g. #!/usr/bin/env python3)
- Aet an executable bit on the file (chmod a+x my_script.py)
- Place the script in a directory that’s in my shell’s PATH variable (e.g. cp my_script.py ~/bin/my_script)
And here is the new format the the shebang followed by the metadata comment block defined in PEP 723.
#!/usr/bin/env -S uv run --script
# /// script
# requires-python = ">=3.12"
# dependencies = [
# "ffmpeg-normalize",
# ]
# ///
References:
[1]: https://treyhunner.com/2024/12/lazy-self-installing-python-scripts-with-uv/
My approach to running a link blog
I started running a basic link blog on this domain back in November 2003—publishing links (which I called “blogmarks”) with a title, URL, short snippet of commentary and a “via” …
Simon Willison’s Weblog · simonwillison.net [1]
I still cannot believe I thought I had such a unique idea with thoughts only to find out shortly thereafter that Simon beat me to the punch by about 20 years!
Simon put a lot of work into this post [2] please check it out. Its not only filled with tons of little nuggets about blogging, it has just a ton of links to other posts I’m itching to read now.
https://simonwillison.net/2024/Dec/22/link-blog/#thoughts.waylonwalker.com
a linkblog proves that you read # [3]
Simon mentions it in the post as well, but one thing about having a link blog does is that it proves that you actually read articles that you share. This is really more about proving to myself, and reminding myself that anyone else, it’s a good feeling.
Trying to add soemthing extra # [4]
- include names of people, and add tags for common people
- something extra - the whole point is to bring something to the post without stealing thunder, but rather li...
This is a test post. I just updated the chrome extension for thoughts to take a the thumbnail image on open of the chrome extension so that it is rea...
thoughts.waylonwalker.com [1]
[1]
References:
[1]: https://thoughts.waylonwalker.com/post/455
I really like this idea of keeping a set up contacts in a markdown repo, and being able to wikilink them to different tickets / meetings and what not....
thoughts.waylonwalker.com [1]
[1]
References:
[1]: https://thoughts.waylonwalker.com/post/454
How I use Obsidian Templater
One of my favorite Obsidian plugins is Templater, which lets you create reusable templates in your notes vault!
cassidoo.co [1]
I really like this idea of keeping a set up contacts in a markdown repo, and being able to wikilink them to different tickets / meetings and what not. I’m imagining the graph you can build, it feels quite interesting. Even more relevant as we see things like teams rolling out retention limits to messages.
Here is Cassidy’s format, I like it but I’m probably not going to track the birthday of most people I work with, thats just not the relationship I tend to have with work friends. It might be a midwest or non tech thing, but I am not even aware if any of my co-workers have social media, and I assume that if they did it would not include anything work related but more football and other sports.
[2]
References:
[1]: https://cassidoo.co/post/obsidian-templater/
[2]: https://dropper.waylonwalker.com/api/file/32859bd6-1b9f-4d40-a87c-0b96a5a42084.webp
docker context (and an issue to question your sanity) | Nic Payne
docker contexts are great, would recommend putting them in your prompt though (via starship or something else)... here's why I like to manage my containers
pype.dev [1]
Dang context can really cause you to pull your hair out. Context seems so freaking convenient, but I’ve avoided it and just ssh in for these reasons. Maybe I’ll come around eventually but for now ssh is my friend.
References:
[1]: https://pype.dev/docker-context-and-an-issue-to-question-your-sanity
thoughts 0.0.4
This is such an improvement to the backend of my website it warrants a blog
post of celebration. For far too long I’ve been dealing with a tiny ass edit
form on thoughts. I tend to not edit them, and try to get them right in one
go. This is kinda the point of a thought, its a quick post meant to be the
size of a tweet, but sometimes I’m leaving thoughts on a video or long post and
want to make sure I have a good save point, but I just keep the thing in draft
and hope I don’t loose if for far too long.
Results # [1]
Let’s see this change in action!!
before # [2]
This is the tiny ass form nested deeply in the flow of the feed. When I made
it I naively just swapped out the post itself with the edit form, and swapped
the post back in after edit.
[3]
thoughts is built with HTMX [4] btw so all html [5] is rendered in the backend and swapped by htmx client side.
after # [6]
Now the edit is a full page modal with a nice blurry backdrop effect to the
rest of the content. This feels p...
I’m really excited about jnv [1], an amazing project by ynqa [2]. It’s worth exploring!
Interactive JSON filter using jq
References:
[1]: https://github.com/ynqa/jnv
[2]: https://github.com/ynqa
tui-network [1] by Zatfer17 [2] is a game-changer in its space. Excited to see how it evolves.
No description available.
References:
[1]: https://github.com/Zatfer17/tui-network
[2]: https://github.com/Zatfer17
I came across markitdown [1] from microsoft [2], and it’s packed with great features and ideas.
Python tool for converting files and office documents to Markdown.
References:
[1]: https://github.com/microsoft/markitdown
[2]: https://github.com/microsoft
gh-skyline [1] by github [2] is a game-changer in its space. Excited to see how it evolves.
A GitHub CLI extension to generate a 3D model of your GitHub contribution history
References:
[1]: https://github.com/github/gh-skyline
[2]: https://github.com/github
I’m really excited about studio [1], an amazing project by outerbase [2]. It’s worth exploring!
A lightweight Database GUI in your browser. It supports connecting to Postgres, MySQL, and SQLite.
References:
[1]: https://github.com/outerbase/studio
[2]: https://github.com/outerbase
If you’re into interesting projects, don’t miss out on blahg [1], created by cassidoo [2].
Cassidy’s blog template built with Astro and TinaCMS!
References:
[1]: https://github.com/cassidoo/blahg
[2]: https://github.com/cassidoo
-
Reminder to tune in later, can’t watch now, but saw a link on Dave’s blog.
[1]
References:
[1]: https://dropper.waylonwalker.com/api/file/ea6d4a9f-9abe-4853-9b5b-97335130d221.webp
I got the ADHD, too
This month I got my official diagnosis for Adult ADHD. It’s fun to share experiences with friends. While ADHD presents some new waters to navigate, it isn’t exactly news to me. Thanks to Dr. Ti...
daverupert.com · daverupert.com [1]
Cheers to the Unique brains dave. I can say I am 100% with Dave on all of these, except the clean environment thing, lucky Dave. If I have enough room to see what I am doing and walk around a mess, I probably wont even notice it. I’m so hyper focused on what is right in front of me that mess could be a huge pile of cash and i’d never see it.
References:
[1]: https://daverupert.com/2024/12/adhd/
I love me some styled rss, it's how the OG internet was made to be. You choose what you want to read and when. There is no middleman aggregator infl...
thoughts.waylonwalker.com [1]
[1]
References:
[1]: https://thoughts.waylonwalker.com/post/448
How to make your RSS feed pretty
Life is too short for ugly XML.
cassidoo.co [1]
I love me some styled rss, it’s how the OG [2] internet was made to be. You choose what you want to read and when. There is no middleman aggregator inflating the reach of things they want you to see or suffocating things against them. It’s just you and your internet friends.
Cassidy’s Styled rss [3] # [4]
Cassidy has a quite lovely and easy to read rss feed, with an open source style sheet, that is part of her open source blog template for astro blahg [5], love that name by the way!
[6]
Dave Rupert’s Feed [7] # [8]
I first learned of styled rss feeds from shoptalkshow.com, specifically from Dave Rupert [9].
[10]
Dave uses a pretty bog standard styled rss feed with pretty-feed-v3 [11]. This repo is probably the best place to start if you are looking to style your rss feed.
https://github.com/genmon/aboutfeeds/blob/main/tools/pretty-feed-v3.xsl
My RSS Feed [12] # [13]
My feed comes from my static site generator markata [14], a plugins all the way down static site generator written in python, made for customizing, lacking just about any and all docs so you are on your own.
[15]
Refere...
Today i got hit by this accessibility issue on my site. Low contrast links are not distiniquishable. I had not seen this error title before it was new to me, maybe I have bad memory or maybe it’s new to me.
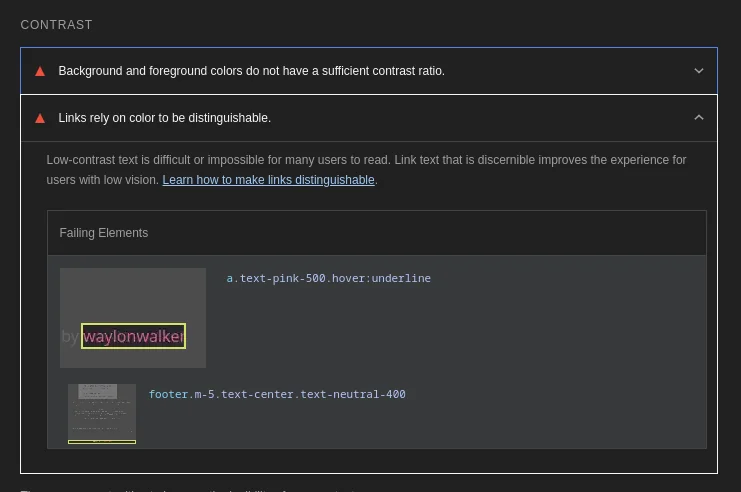
I ended up dropping the background color of the site down a notch as I didn’t
really care for the semi-dark brown anyways. I’m liking the near black
bg-zinc-950 much better now.

Now I got that 100 A11y score in lighthouse.

Dropper
Dropper is a simple file sharing service.
Dropper · dropper.waylonwalker.com [1]
Dropper is a place for me to drop files for quick posts like this.
[2]
References:
[1]: https://dropper.waylonwalker.com/
[2]: https://dropper.waylonwalker.com/api/file/c3a4c39d-c9ab-4e0a-b4c1-b74362877342.webp
Add a healthcheck to your FastAPI app | Nic Payne
I'm building a few FastAPI apps to throw in docker and run on my homelab... I wanted to add healthchecks and here's a simple way to do it Make sure to
pype.dev [1]
Nice example of adding a healthcheck to fastapi [2], and integrating it with docker. Don’t forget to include curl in the install, nice touch.
References:
[1]: https://pype.dev/add-a-healthcheck-to-your-fastapi-app
[2]: /fastapi/
GitHub - casey/just: 🤖 Just a command runner
🤖 Just a command runner. Contribute to casey/just development by creating an account on GitHub.
GitHub · github.com [1]
new versions of just now come with color variables already set.
[group('manage')]
version:
#!/usr/bin/env bash
version=$(cat version)
echo current version {{BOLD}}{{GREEN}}$version{{NORMAL}}
References:
[1]: https://github.com/casey/just?tab=readme-ov-file#constants
pipely/justfile at main · thechangelog/pipely
I like the idea of having like this 20-line Varnish config that we deploy around the world, and it’s like: Look at our CDN! - thechangelog/pipely
GitHub · github.com [1]
I found this nugget in thechangelogs justfile, it lets you add color to your justfile with variables quite easily.
# https://linux.101hacks.com/ps1-examples/prompt-color-using-tput/
_BOLD := "$(tput bold)"
_RESET := "$(tput sgr0)"
_BLACK := "$(tput bold)$(tput setaf 0)"
_RED := "$(tput bold)$(tput setaf 1)"
_GREEN := "$(tput bold)$(tput setaf 2)"
_YELLOW := "$(tput bold)$(tput setaf 3)"
_BLUE := "$(tput bold)$(tput setaf 4)"
_MAGENTA := "$(tput bold)$(tput setaf 5)"
_CYAN := "$(tput bold)$(tput setaf 6)"
_WHITE := "$(tput bold)$(tput setaf 7)"
_BLACKB := "$(tput bold)$(tput setab 0)"
_REDB := "$(tput setab 1)$(tput setaf 0)"
_GREENB := "$(tput setab 2)$(tput setaf 0)"
_YELLOWB := "$(tput setab 3)$(tput setaf 0)"
_BLUEB := "$(tput setab 4)$(tput setaf 0)"
_MAGENTAB := "$(tput setab 5)$(tput setaf 0)"
_CYANB := "$(tput setab 6)$(tput setaf 0)"
_WHITEB := "$(tput setab 7)$(tput setaf 0)"
Usage
echo:
echo {{_BOLD}}{{_GREEN}}hello there{{_RESET}}
References:
[1]: ...
Hurl - Run and Test HTTP Requests
Hurl, run and test HTTP requests with plain text and curl. Hurl can run fast automated integration tests.
hurl.dev [1]
Hurl was mentioned by @gerhard [2] on the latest changelog and Friends [3]. Looks like a feature rich easy to use testing tool that is tested via what looks like a config file.
Hurl is a command line tool that runs HTTP requests defined in a simple plain text format.
It can chain requests, capture values and evaluate queries on headers and body response. Hurl is very versatile: it can be used for both fetching data and testing HTTP sessions.
Hurl makes it easy to work with HTML [4] content, REST / SOAP / GraphQL APIs, or any other XML / JSON based APIs.
References:
[1]: https://hurl.dev/
[2]: https://gerhard.io/
[3]: https://www.youtube.com/watch?v=mvC7497CJJs&t=3001s
[4]: /html/
Today I discovered the Urllink function in bash from the ujust tool from
ublue.it. Seems like a cool trick, but might not work
everywhere.
########
### Special text formating
########
## Function to generate a clickable link, you can call this using
# url=$(Urllink "https://ublue.it" "Visit the ublue website")
# echo "${url}"
function Urllink (){
    URL=$1
    TEXT=$2

    # Generate a clickable hyperlink
    printf "\e]8;;%s\e\\%s\e]8;;\e\\" "$URL" "$TEXT${n}"
}
```j
watchfiles
Simple, modern and high performance file watching and code reload in python.
watchfiles.helpmanual.io [1]
Simple, modern and high performance file watching and code reload in python.
References:
[1]: https://watchfiles.helpmanual.io/
I’m really excited about turso [1], an amazing project by tursodatabase [2]. It’s worth exploring!
Turso Database is a project to build the next evolution of SQLite.
References:
[1]: https://github.com/tursodatabase/turso
[2]: https://github.com/tursodatabase
limbo [1] by tursodatabase [2] is a game-changer in its space. Excited to see how it evolves.
Limbo is a work-in-progress, in-process OLTP database management system, compatible with SQLite.
References:
[1]: https://github.com/tursodatabase/limbo
[2]: https://github.com/tursodatabase
hostnamectl to easily change hostname | Nic Payne
hostnamectl is apparently a linux utility for easily changing your hostname in a variety of ways I learned there's transient and static hostnames, so that&
pype.dev [1]
For some reason the ublue ecosystem does not prompt you to set your hostname on install and you get a hostname like bazzite showing up. Looks like this is the fix.
hostnamectl –static hostname babyblue-aurora
References:
[1]: https://pype.dev/hostnamectl-to-easily-change-hostname
Ansible Galaxy
galaxy.ansible.com [1]
Great examples for working with s3 buckets with ansible.
References:
[1]: https://galaxy.ansible.com/ui/repo/published/amazon/aws/content/module/s3_bucket/#examples
I came across cockpit-identities [1] from 45Drives [2], and it’s packed with great features and ideas.
User and group management plugin for Houston UI (Cockpit)
References:
[1]: https://github.com/45Drives/cockpit-identities
[2]: https://github.com/45Drives
cockpit-file-sharing [1] by 45Drives [2] is a game-changer in its space. Excited to see how it evolves.
A Cockpit plugin to easily manage samba and NFS file sharing.
References:
[1]: https://github.com/45Drives/cockpit-file-sharing
[2]: https://github.com/45Drives
Using OPNsense with Tailscale · Tailscale Docs
Set up a Tailscale VPN on OPNsense. Get secure communication across your devices without the need for complex configuration.
Tailscale · tailscale.com [1]
On reboot of my opnsense router it did not tailscale up. I’m not sure if a key expired or what happened. The fix was to first enable ssh, then ssh in and run tailscale up.
enable ssh # [2]
In opnsense System > Settings > Administration > Secure Shell > Enable Secure Shell
tailscale up # [3]
ssh <opnsense ip>
8 # to select shell
tailscale up
Follow the link to log in.
disable ssh # [4]
now uncheck secure shell to lock down the opnsense machine.
In opnsense System > Settings > Administration > Secure Shell > Enable Secure Shell
References:
[1]: https://tailscale.com/kb/1097/install-opnsense
[2]: #enable-ssh
[3]: #tailscale-up
[4]: #disable-ssh
I’ve been debugging a cloudflared tunnel issue in my homelab all day today, and getting really frustrated. My issue ended up being that it was running twice, once without the correct config file and another with it. I believe that cacheing may have compounded the issue.
In yesterday’s post I setup a cloudflared tunnel on my ubuntu server to expose applications running on the server to the internet. I’m setting up a new server and running cloudflared in its own vm.
setup cloudflared tunnel on ubuntu
Check that dns is pointing to the correct tunnel #
dig subdomain.example.com
traceroute subdomain.example.com
Check that the tunnel is running #
export CLOUDFLARED_TUNNEL_ID = "my-tunnel-id"

cloudflared tunnel list
cloudflared tunnel info $CLOUDFLARED_TUNNEL_ID
I run a cloudflared tunnel on my ubuntu server to expose applications running on the server to the internet. I’m setting up a new server and running cloudflared in its own vm.
Get the cloudflared binary #
sudo wget https://github.com/cloudflare/cloudflared/releases/latest/download/cloudflared-linux-amd64 -O /usr/local/bin/cloudflared

sudo chmod +x /usr/local/bin/cloudflared
#
Now setup the config directory. For the systemd service to work, the config
file needs to be in /etc/cloudflared. I like to give my user rights to edit
the config file without being sudo, we will do that here by creating a group
cloudflared, add ourselves to the group, give ownership of /etc/cloudflared
to the group, give group write access to the directory, and refresh groups.
sudo mkdir -p /etc/cloudflared
sudo groupadd cloudflared
sudo usermod -aG cloudflared $USER
sudo chown -R root:cloudflared /etc/cloudflared
sudo chmod g+w /etc/cloudflared
newgrp cloudflared
login #
Now we can log into the domain zone with cloudflared.
cloudflared tunnel login
This will give a url, follow it in a browser to log in.
cloudflared tunnel create <NAME>
mv ~/.cloudflared/cert.pem /etc/cloudflared/cert.pem
mv ~/.cloudflared/<tunnel-id>.json /etc/cloudflared/<tunnel-id>.json
config #
Now setup config. For the systemd service to work, the config file needs to be in /etc/cloudflared. The config that I have provided below will expose localhost:8000 to tester.example.com
export CLOUDFLARED_TUNNEL_ID=$(ls /etc/cloudflared/*.json | xargs -n 1 basename | sed 's/\.json$//')
mv ~/.cloudflared/${CLOUDFLARED_TUNNEL_ID}.json /etc/cloudflared/${CLOUDFLARED_TUNNEL_ID}.json
mv ~/.cloudflared/cert.pem /etc/cloudflared/cert.pem
echo "
tunnel: $(CLOUDFLARED_TUNNEL_ID)
credentials-file: /etc/cloudflared/$(CLOUDFLARED_TUNNEL_ID).json
ingress:
  - hostname: tester.example.com
    service: http://localhost:8000
  - service: 'http_status:404'
" >> /etc/cloudflared/config.yaml
dns #
Now to get a dns record for tester.example.com to point to the cloudflared tunnel.
cloudflared tunnel route dns $(CLOUDFLARED_TUNNEL_ID) tester.example.com
systemd #
Now install the systemd service.
sudo cloudflared service install
sudo systemctl status cloudflared.service
# if its not running
sudo systemctl start cloudflared.service
Fitting two hard drives and an SSD in a Dell OptiPlex 7010 SFF
The Dell OptiPlex 7010 SFF officially only has room for one 2.5" hard drive internally, I fitted two 3.25" hard drives and a 2.5" SSD in one.
willj.net [1]
This guy fit 2 3.5" drives and an sdd in a dell 7050 SFF. It looks tight, and there it probably not much airflow running in it, but its an impressive project.
References:
[1]: https://willj.net/posts/fitting-two-hard-drives-and-an-ssd-in-a-dell-optiplex-7010-usff/
How To Fix An Office Chair Popping Noise? With Root Causes
If you hear a popping noise from under your office chair when you move around or when you spin it, it’s time to repair your office chair. Read more.
ToErgonomics · toergonomics.com [1]
I tried this fix on my secretlabs chair, but unfortunately it did nothing for me. Mine ended up being an issue in the tilt mechanism and not the hydraulic piston. I greased the crap out of it, it can only help the longevity. I did notice that the two washers on either side of my bearing were quite worn in.
References:
[1]: https://toergonomics.com/office-chair-popping-noise/
Reddit - Please wait for verification
reddit.com [1]
This is definitely happening to my secretlabs chair. I did the fix this morning, its still not perfect, but it’s better now than it has been in a long time. Mine use to be so bad that it would pop and creak every time I sat down or moved the smallest bit. It’s now quiet through the mid range of its motion with the occasional pop when I sit down.
References:
[1]: https://www.reddit.com/r/secretlab/comments/s6ayop/if_anyone_else_is_having_sound_clicking_with/
[1]@changelog [1]) on X — 🗣️@dhh on Kubernetes' migration pitch:
“Oh, we’re on Amazon? Flip the switch, George! Let’s move over to GCP.”
Vs reality:
"Flip the switch, George! We’ll start having the meetings about the meetings about how we can move out four years from now."" loading=“lazy”>
Changelog (@changelog [2]) on X
🗣️@dhh on Kubernetes' migration pitch:
“Oh, we’re on Amazon? Flip the switch, George! Let’s move over to GCP.”
Vs reality:
"Flip the switch, George! We’ll start having the meetin…
X (formerly Twitter) · x.com
switching cloud providers, theres no easy way. K8s was supposed to get us there, haha, the deep integrations with each vendor just keep locking us in
References:
[1]: https://x.com/changelog/status/1860697708463378497
[2]: https://changelog.com/podcast
-
Dang, love this guys branding. Hooks to get stuff offDaBench, what a freaking cool name.
Just starred nvtop [1] by Syllo [2]. It’s an exciting project with a lot to offer.
GPU & Accelerator process monitoring for AMD, Apple, Huawei, Intel, NVIDIA and Qualcomm
References:
[1]: https://github.com/Syllo/nvtop
[2]: https://github.com/Syllo
-
This is a really amazing documentary of argocd. I got into k8s pretty late in the game. Which is pretty typical for me. As I went to use k8s for the first time i was using workflows, then cd. both of these tools had a level of polish that made them seem like they had been there forever and not quite as young as they actually are.
I thought it was interesting how they focused on how the name must be two syllables or less, start with a or b, logo needs to be cutesy funny and recognizable seemed interesting, but puts them at the top of lists and makes them look like they’ve been there forever.
I’m impressed by kubectl-debug-ide [1] from devfile [2].
A kubectl plugin to debug Pods from an IDE rather than the CLI
References:
[1]: https://github.com/devfile/kubectl-debug-ide
[2]: https://github.com/devfile
External Link
containers.github.io [1]
bootc is the underlying technology that enables OS’s like bazzite, and Aurora from the uBlue ecosystem.
References:
[1]: https://containers.github.io/bootc/
[1]
A new completion plugin that I might give a try. Readme makes it sound like its built on some fast teck that allows them to handle a lot of items and run more frequently. The videos look like they don’t have some of the same issues cmp does for me. Maybe its my configuration, but I’m pretty sure it does not update when you backspace and things like that.
References:
[1]: /static/https://github.com/Saghen/blink.cmp
Wes Bos (@wesbos) on X
CSS Anchors: flip a tooltip to the bottom when it goes offscreen
X (formerly Twitter) · x.com [1]
These css anchors are crazy that you can do this with html [2] and not a bunch of js, probably requiring a library or framework.
[3]
References:
[1]: https://x.com/wesbos/status/1856724739336859713
[2]: /html/
[3]: https://x.com/i/status/1856724739336859713
I’ve been playing with 3d printing some items through the slant3d api. I’ve been pricing out different prints by running a slice request through their api.
make a project #
I’ve been using uv for project management. It’s been working well for quick projects like this while making it reproducible, I’m still all in on hatch for libraries.
mkdir slantproject
cd slantproject
uv init
uv venv
. ./.venv/bin/activate
uv add httpx rich python-dotenv
Get an api key #
You will need an api key from the slant api, which currently requires a google account and a credit card to create.
# .env
#  replace with your api key from https://api-fe-two.vercel.app/
SLANT_API_KEY=sl-**
slicing an stl with teh slant api #
Then you can run the python script to price out your print. I’m not exactly sure how this compares to an order, especially when you add in different materials.
from dotenv import load_dotenv
import httpx
import os

load_dotenv()

stl_url = ''
api_key = os.environ["SLANT_API_KEY"]

api = httpx.Client(base_url="https://www.slant3dapi.com/api/slicer")

res = httpx.post(
    "https://www.slant3dapi.com/api/slicer",
    json={"fileURL": stl_url},
    headers={"api-key": api_key, "Content-Type": "application/json"},
    timeout=60,
)


print(res.json())
External Link
cdn.statically.io [1]
Staically makes creating OG [2] images so easy, you can just pop this in your section with some og tags.
<meta name="og:image" name="og:image"
content="https://cdn.statically.io/og/{{post.title}}" />
<meta name="twitter:image" name="twitter:image"
content="https://cdn.statically.io/og/{{post.title}}" />
<meta name="og:image:height" content="640" />
<meta name="og:image:width" content="1280" />
References:
[1]: https://cdn.statically.io/og/statically%20makes%20OG%20images%20**easy**
[2]: /og/
Check out terminal-tree [1] by willmcgugan [2]. It’s a well-crafted project with great potential.
No description available.
References:
[1]: https://github.com/willmcgugan/terminal-tree
[2]: https://github.com/willmcgugan
E576: Error while reading ShaDa file: there is an item at position 270498 that must not be there: Missing itemsare for internal uses only · Issue #6875 · neovim/neovim
v0.2.0 Vim 8.0 works well. macOS Sierra 10.12.5 (16F73) iTerm2 v3.0.15 $TERM: screen-256color Actual behaviour When I start neovim by nvim, it prints an error message which is E576: Error while rea...
GitHub · github.com [1]
I hit an interesting error after updating my nvim plugins today. I’m sti not even quite sure what a ShaDa file is, but I found min in my nvim state directory, unlike this issue that mentions it being in share.
The Error.
Error while reading ShaDa file:
The Fix
mv ~/.local/state/nvim/shada/main.shada ~/.local/state/nvim/shada/main.shada.bak
References:
[1]: https://github.com/neovim/neovim/issues/6875
Production-ready Python Docker Containers with uv
Starting with 0.3.0, Astral’s uv brought many great features, including support for cross-platform lock files uv.lock. Together with subsequent fixes, it has become Python’s finest workflow too...
Hynek Schlawack · hynek.me [1]
Hynek has a sick dockerfile setup for using uv in python projects.
References:
[1]: https://hynek.me/articles/docker-uv/
I’m really excited about IronCalc [1], an amazing project by ironcalc [2]. It’s worth exploring!
Main engine of the IronCalc ecosystem
References:
[1]: https://github.com/ironcalc/IronCalc
[2]: https://github.com/ironcalc
Proper handling of None in WHERE condition · Issue #109 · fastapi/sqlmodel
First Check I added a very descriptive title to this issue. I used the GitHub search to find a similar issue and didn't find it. I searched the SQLModel documentation, with the integrated search. I...
GitHub · github.com [1]
SQLModel models ship with an is_, and is_not that you can use to compare to None without pesky linters complaining.
This comment summed it up quite well.
I believe this is concerned entirely with SQLAlchemy, not with SQLModel, and has to do with the required semantics to construct a BinaryExpression object.
Hero.age == None evaluates to a BinaryExpression object which is eventually used to construct the SQL query that the SQLAlchemy engine issues to your DBMS.
Hero.age is None evaluates to False immediately, and not a BinaryExpression, which short-circuits the query no matter the value of age in a row.
From a cursory search, it does not seem that the is operator can be overridden in Python. This could help explain why the only possibility is by using the == operator, which can be overridden.
so rather than using Team.heros == None we can use Team.seros.is_(None) which checks for...
Rugged Storage Box, Parametric and Customizable by bulbasaur0 | Download free STL model | Printables.com
A parametric and customizable rugged storage box or toolbox for OpenSCAD. Make and customize your own boxes! | Download free 3D printable STL models
Printables.com · printables.com [1]
Non Gridfinity Rugged boxes
References:
[1]: https://www.printables.com/model/637028-rugged-storage-box-parametric-and-customizable
Gridfinity Rugged Storage Box, Parametric and Customizable by bulbasaur0 | Download free STL model | Printables.com
A Gridfinity compatible parametric and customizable rugged storage box or toolbox for OpenSCAD! | Download free 3D printable STL models
Printables.com · printables.com [1]
gridfinity rugged box openscad
References:
[1]: https://www.printables.com/model/757297-gridfinity-rugged-storage-box-parametric-and-custo/files
If you’re into interesting projects, don’t miss out on blink.cmp [1], created by saghen [2].
Performant, batteries-included completion plugin for Neovim
References:
[1]: https://github.com/saghen/blink.cmp
[2]: https://github.com/saghen
Provider List - The Cluster API Book
cluster-api.sigs.k8s.io [1]
Cluster API book
References:
[1]: https://cluster-api.sigs.k8s.io/reference/providers
I’m really excited about cluster-api-k3s [1], an amazing project by k3s-io [2]. It’s worth exploring!
Cluster API k3s
References:
[1]: https://github.com/k3s-io/cluster-api-k3s
[2]: https://github.com/k3s-io
Gridfinity Generator
gridfinity.perplexinglabs.com [1]
Gridfinity generator uses open scad, so you can make rugged boxes, bins and base plates with form input. not fully custom fit to things, but you can custom size square bins, hole cut out sides and all. From what I can tell, no bento box either. so as long as what you are looking for is square this generator has you pretty well covered. I’m definitely using this for simple bins and rugged boxes.
References:
[1]: https://gridfinity.perplexinglabs.com/pr/gridfinity-extended/0/0
Framework Portable handheld Case (Beth Deck rev. 1.5) by Beth Le | Download free STL model | Printables.com
This is a portable Handheld based on Frameworks 13" main board. Designed to be solderless and easy to assemble! | Download free 3D printable STL models
Printables.com · printables.com [1]
The BethDeck is a sick looking DIY steam deck competitor built on top of the framework 13" mainboard. No soldering needed, lt with all off the shelf parts. Controllers appear to be an off the shelf controller with the shell removed and plugged into a usb hub.
[2]
References:
[1]: https://www.printables.com/model/1051411-framework-portable-handheld-case-beth-deck
[2]: https://media.printables.com/media/prints/1051411/images/7965723_09c13004-58b9-4868-b078-e3a66073d740_3b514c55-bb6b-4448-a216-842d7de48955/thumbs/inside/1600x1200/jpg/pxl_20240910_005549812.webp
-
I really like how Spencer walked through how to make quite a few unique setups with only a few simple obstacles. It does not take anything fancy to have a cool setup.
Document how to provide a negative number as an argument · fastapi typer · Discussion #798
First Check I added a very descriptive title here. I used the GitHub search to find a similar question and didn't find it. I searched the Typer documentation, with the integrated search. I already ...
GitHub · github.com [1]
Today I learned that you cannot pass negative integers as values to typer. in this case context_settings={"ignore_unknown_options": True} is required so that the - does not look like a flag.
# script name: main.py
import typer
app = typer.Typer()
@app.command()
def failing(value: float):
print(f"{value=}")
@app.command(
context_settings={"ignore_unknown_options": True}
)
def working_good(value: float):
print(f"{value=}")
if __name__ == "__main__":
app()
References:
[1]: https://github.com/fastapi/typer/discussions/798
rommapp [1] has done a fantastic job with romm [2]. Highly recommend taking a look.
A beautiful, powerful, self-hosted [3] rom manager
References:
[1]: https://github.com/rommapp
[2]: https://github.com/rommapp/romm
[3]: /self-host/
I came across pz [1] from CZ-NIC [2], and it’s packed with great features and ideas.
Easily handle day to day CLI operation via Python instead of regular Bash programs. 🇺🇦 #supporting
References:
[1]: https://github.com/CZ-NIC/pz
[2]: https://github.com/CZ-NIC
Looking for inspiration? textual-demo [1] by Textualize [2].
Quick access to the Textual demo
References:
[1]: https://github.com/Textualize/textual-demo
[2]: https://github.com/Textualize
I’m impressed by rocketnotes [1] from fynnfluegge [2].
AI-powered markdown editor - leverage vector embeddings and LLMs with your personal notes - 100% local or in the cloud
References:
[1]: https://github.com/fynnfluegge/rocketnotes
[2]: https://github.com/fynnfluegge
faststream [1] by airtai [2] is a game-changer in its space. Excited to see how it evolves.
FastStream is a powerful and easy-to-use Python framework for building asynchronous services interacting with event streams such as Apache Kafka, RabbitMQ, NATS and Redis.
References:
[1]: https://github.com/airtai/faststream
[2]: https://github.com/airtai
I came across faststream [1] from ag2ai [2], and it’s packed with great features and ideas.
FastStream is a powerful and easy-to-use Python framework for building asynchronous services interacting with event streams such as Apache Kafka, RabbitMQ, NATS and Redis.
References:
[1]: https://github.com/ag2ai/faststream
[2]: https://github.com/ag2ai
The work on memos [1] by usememos [2].
An open-source, lightweight note-taking solution. The pain-less way to create your meaningful notes. Your Notes, Your Way.
References:
[1]: https://github.com/usememos/memos
[2]: https://github.com/usememos
pypeaday [1] has done a fantastic job with learn-kestra [2]. Highly recommend taking a look.
No description available.
References:
[1]: https://github.com/pypeaday
[2]: https://github.com/pypeaday/learn-kestra
pypeaday [1] has done a fantastic job with learn-n8n [2]. Highly recommend taking a look.
No description available.
References:
[1]: https://github.com/pypeaday
[2]: https://github.com/pypeaday/learn-n8n
Aaron Francis (@aarondfrancis) on X
📣 We're excited to announce Mastering Postgres, a video course coming October 15th.
@steve_tenuto and I started this business with dreams to improve the quality of database education.
With the…
X (formerly Twitter) · x.com [1]
Aaron Francis is a database master, pumped for thsi dude and all that he is able to accomplish.
References:
[1]: https://x.com/aarondfrancis/status/1833533150674268469
[1]@willmcgugan [1]) on X — New Version of #Textual released! 😎🤓🦾
The demo has been updated. It's not quite finished, expect an update next release, but it is a lot of fun.
Press C at any point to see the code powering that page (makes a great learning tool).
Video 👇
https://t.co/p2ScsuL7GZ" [2] loading=“lazy”>
Will McGugan (@willmcgugan [3]) on X
New Version of #Textual released! 😎🤓🦾
The demo has been updated. It's not quite finished, expect an update next release, but it is a lot of fun.
Press C at any point to see the code pow…
X (formerly Twitter) · x.com
This new demo of textual is wildly awesome, so many widgets and features being added into the main library. The themes and animations are on point and far surpass my expectations of a tui.
References:
[1]: https://x.com/willmcgugan/status/1849831271289012463
[2]: https://t.co/p2ScsuL7GZ%22
[3]: https://willmcgugan.github.io
ticklemykeys (@XTicklemykeys) on X
Porta john got some pink caps
X (formerly Twitter) · x.com [1]
Loving this 6 pink with blueforward multicolor combo the porta john has going right now. Also my son printed me a cute black pumpkin.
References:
[1]: https://x.com/XTicklemykeys/status/1850361138791195069
I like joshmedeski’s [1] project sesh [2].
Smart session manager for the terminal
References:
[1]: https://github.com/joshmedeski
[2]: https://github.com/joshmedeski/sesh
The work on menu [1] by nvzone [2].
Menu plugin for neovim ( supports nested menus ) made using volt
References:
[1]: https://github.com/nvzone/menu
[2]: https://github.com/nvzone
Reddit - Please wait for verification
reddit.com [1]
ploopy just dropped a trackpad that runs qmk. This sounds so cool. I’m excited to see some videos on it. It would be sick to get this incorporated into a porta john running zmk, one bluetooth device to run all the peripherals.
References:
[1]: https://www.reddit.com/r/ErgoMechKeyboards/comments/1g5phts/not_a_split_keyboard_but_perhaps_a_companion_to/
[1]
Zulip was just featured on a changelog clip as a self-hosted [2] chat offering. I’m interested to give this a go and see how it compares to matrix. glancing at it, it looks a lot like slack.
References:
[1]: /static/https://zulip.readthedocs.io/en/stable/production/install.html
[2]: /self-host/
Just starred windsurf.nvim [1] by Exafunction [2]. It’s an exciting project with a lot to offer.
A native neovim extension for Codeium
References:
[1]: https://github.com/Exafunction/windsurf.nvim
[2]: https://github.com/Exafunction
I’m really excited about codeium.nvim [1], an amazing project by Exafunction [2]. It’s worth exploring!
A native neovim extension for Codeium
References:
[1]: https://github.com/Exafunction/codeium.nvim
[2]: https://github.com/Exafunction
Pin versions of dependencies · Issue #2200 · Kozea/WeasyPrint
Stack trace: pdf = HTML(file_obj=html, base_url='/').write_pdf() File "/service/venv/lib/python3.9/site-packages/weasyprint/__init__.py", line 252, in write_pdf self.render(font_config, counter_sty...
GitHub · github.com [1]
weazyprint was throwing me some errors, turns out that it’s currently not compatible with the latest pydyf package.
my error
TypeError: __init__() takes 1 positional argument but 3 were give
I fixed it by locking in pydyf at 0.8.0
pydyf==0.8.0
References:
[1]: https://github.com/Kozea/WeasyPrint/issues/2200
These are SICK, gonna be using this a lot. (Thanks @evantravers 🥰.) · jesseleite/dotfiles@4979400
My dotfiles 💾. Contribute to jesseleite/dotfiles development by creating an account on GitHub.
GitHub · github.com [1]
helix inspired treesitter select outwards and select inwards.
References:
[1]: https://github.com/jesseleite/dotfiles/commit/49794006cbc9dc0e743925ec1a7122514d7148be
add helix · WaylonWalker/devtainer@71b9b29
🐳 (dotfiles) My personal development docker container base image - add helix · WaylonWalker/devtainer@71b9b29
GitHub · github.com [1]
Helix officially made it in my devtainer. I am installing the binary right out of the github release with wget and tar. I can’t use installer because their release format does not match what installer is looking for.
:
I also move the runtime over to /usr/local/share/helix/runtime.
:
I use /usr/local/bin rather than my home directory as it works better with distrobox.
References:
[1]: https://github.com/WaylonWalker/devtainer/commit/71b9b29baf14f3714601d022ca12c3417437395b
[1]
Here are some really great keybinds to make helix vim-like. It feels very antithetical to use this whole sale and forego the helix motion-verb language, but there are some nuggets like G in here that I find useful.
References:
[1]: /static/https://github.com/LGUG2Z/helix-vim/blob/master/config.toml
Support regex substitution command · Issue #2232 · helix-editor/helix
Support regex substitution, comparable to vim :s or VSCode search & replace. I propose supporting regex replacements for selection s, files/, and the workspace scopes + /. This could be acc...
GitHub · github.com [1]
helix multicursor has the ability to do what vims :s/hello/world/gc does by using ) to cycle through cursors, and n to discard unwanted cursors.
References:
[1]: https://github.com/helix-editor/helix/issues/2232#issuecomment-1250371051
Support regex substitution command · Issue #2232 · helix-editor/helix
Support regex substitution, comparable to vim :s or VSCode search & replace. I propose supporting regex replacements for selection s, files/, and the workspace scopes + /. This could be acc...
GitHub · github.com [1]
Here is a really good vim substitute with regex capture groups, saving this one for a rainy day.
* Reading 1: This is a title to a link
* Reading 2: This is another title
:%s/\v(: )(.+)$/\1\[\2\]\(
* Reading 1: [This is a title to a link](
* Reading 2: [This is another title](
References:
[1]: https://github.com/helix-editor/helix/issues/2232#issuecomment-1228632218
Support regex substitution command · Issue #2232 · helix-editor/helix
Support regex substitution, comparable to vim :s or VSCode search & replace. I propose supporting regex replacements for selection s, files/, and the workspace scopes + /. This could be acc...
GitHub · github.com [1]
Interesting take on refactoring the whole codebase from your editor. In this thread the-mikedavis suggests multicursor as a replacement for substitute, and later in the thread takes the side that larger workspace wide edits are outside the scope of helix and he would reach for a refactoring tool like fastmod [2] to do the job.
References:
[1]: https://github.com/helix-editor/helix/issues/2232#issuecomment-1107644740
[2]: https://github.com/facebookincubator/fastmod?tab=readme-ov-file
I like facebookincubator’s [1] project fastmod [2].
A fast partial replacement for the codemod tool
References:
[1]: https://github.com/facebookincubator
[2]: https://github.com/facebookincubator/fastmod
Support regex substitution command · Issue #2232 · helix-editor/helix
Support regex substitution, comparable to vim :s or VSCode search & replace. I propose supporting regex replacements for selection s, files/, and the workspace scopes + /. This could be acc...
GitHub · github.com [1]
I am a heavy user off substitutions in vim, helix does not substitutions built in, rather it leans on multicursor support.
to replace every instance of hello with world in vim
:%s/hello/world/g<CR>
and in helix you would
%shello<CR>cworld<ESC>,
References:
[1]: https://github.com/helix-editor/helix/issues/2232
Background Image | Wallpaper · Issue #3059 · helix-editor/helix
Describe your feature request Hey ! It'd be cool to have the ability to set a background-image on supported terminals (like kitty). Like on IntelliJ: Here is an example of what it'd be on helix:
GitHub · github.com [1]
How to make helix themes transparent. You can make any built-in theme transparent in helix with one line, a few extras and you can make all the pop ups, help menus and status line trransparant as well.
mkdir -p ~/.config/helix/themes
hx
:o ~/.config/helix/themes/dracula_transparant.toml
# ~/.config/helix/themes/dracula_transparant.toml
inherits = "dracula"
"ui.background" = { fg = "foreground" }
"ui.menu" = { fg = "white" }
"ui.popup" = { fg = "white" }
"ui.window" = { fg = "white" }
"ui.help" = { fg = "light-gray" }
"ui.statusline" = { fg = "gray" }
"ui.statusline.inactive" = { fg = "black" }
:config-edit
# ~/.config/helix/config.toml
theme="dracula_transparant"
References:
[1]: https://github.com/helix-editor/helix/issues/3059
Reddit - Please wait for verification
reddit.com [1]
This post shows how to set up multiple LSP’s in helix, the example uses pyright and ruff-lsp for python.
Add this to your ~/.config/helix/languages.toml
a
[[language]]
name = "python"
auto-format = true
language-servers = [
{name = "pyright"},
{name = "ruff-lsp"},
]
[language-server.pyright]
command = "pyright-langserver"
args = ["--stdio"]
config = {}
[language-server.ruff-lsp]
command = "ruff-lsp"
args = []
config = {}
References:
[1]: https://www.reddit.com/r/HelixEditor/comments/17gglgm/help_on_setting_up_ruff_formatter_ruff_pyright/
configuring pylsp · helix-editor helix · Discussion #6623
Hi, I'm trying to make some modifications to the default pylsp settings as I do not strictly follow PEP in my personal projects. I googled some examples but I cannot get them to work, so I am wonde...
GitHub · github.com [1]
How to set your python formatter to black with helix. The following snippet lays out how to set the helix editor to auto-format on save with the black formatter.
[[language]]
name = "python"
language-servers = ["pylsp"]
[language-server.pylsp.config.pylsp]
plugins.pyls_mypy.enabled = true
plugins.pyls_mypy.live_mode = true
plugins.flake8.maxLineLength = 88
plugins.pycodestyle.maxLineLength = 88
[language.formatter]
command = "black"
args = ["--line-length", "88", "--quiet", "-"]
References:
[1]: https://github.com/helix-editor/helix/discussions/6623
Database Remote-Copy Tool For SQLite (draft)
Neat new SQLite utilities often show up in branches of the SQLite repository. Here's a new one from last month: sqlite3-rsync, providing tools for efficiently creating and updating copies of …
Simon Willison’s Weblog · simonwillison.net [1]
Simon shared a really cool new utility tool for sqlite ispired by rsync. It checks hashes of each sqlite page and syncs pages. So if nothing in the database has changed it will only require 0.5% the bandwidth as a copy would.
References:
[1]: https://simonwillison.net/2024/Oct/4/sqlite-rsync/
ticklemykeys (@XTicklemykeys) on X
working on a new model.
seams less visible
hotswap
more room for build
X (formerly Twitter) · x.com [1]
porta-john design update, working on moving the seams to line up with an edge to eliminate long noticable seams. These seams are required because I don’t have a printer big enough to print this in one shot.
hotswaps are going in. I’m getting really excited for hotswaps as they will make keebs more repairable, and users can self change out the switches if they want. I can also pre-build them ready to go, and drop in switches at the time of order. I did learn today that these are hyper specific to gateron, damn all these switch manufacturers and their special pinouts.
Last thing I gotta make more room for wiring the microcontroller and running wires out to the rows and columns, my first prototype build took waay to long to build.
References:
[1]: https://x.com/XTicklemykeys/status/1840104423508312273
Dr. Elvim Ransom 👽 (@jesseleite85) on X
Help, I'm being Helix pilled by my own friends!
X (formerly Twitter) · x.com [1]
Is Jesse going to get sniped by the helix community?
References:
[1]: https://x.com/jesseleite85/status/1841547565575086448
ticklemykeys (@XTicklemykeys) on X
New cap of my own design
X (formerly Twitter) · x.com [1]
This low profile design almost made it to 9. I think blending together the custom brim to make them all one piece really made the final difference here. The custom brim is two layers thick, only touching on the top layer making it very easy to peel off, but gives better adhesion to the bed, and does not loose one like this print did.
References:
[1]: https://x.com/XTicklemykeys/status/1841646323939864871
ticklemykeys (@XTicklemykeys) on X
Full size MX caps, printing flawlessly with minimal cleanup required.
X (formerly Twitter) · x.com [1]
really excited for how these caps of my own design are working out. Having the extra control is the first time I’ve been able to print more than one at a time without some hacky gcode. I’ve got a set of nine here that I have printed 4 times without a single failure.
References:
[1]: https://x.com/XTicklemykeys/status/1841860763960377732
The work on zmk-config-wyatt-3x5 [1] by wyattbubbylee [2].
wyatt-3x5
References:
[1]: https://github.com/wyattbubbylee/zmk-config-wyatt-3x5
[2]: https://github.com/wyattbubbylee
[1]
MX keycap stem dimensions. I used these to create my new caps and all these dimensions worked great. The one dimension I had issues with was the outer diameter off the cap stem, not shown here. 5.3mm ended up being a good outer diameter for me. I print them at an angle and the bottom of the stem can get a bit of sag, pressing out on the outer wall of the switch and can actually stick the key.
References:
[1]: /static/https://telcontar.net/KBK/Cherry/images/MX/Cherry_8_mm_mount.svgz
[1]
This page is gold. It lays out all of the distrobox assemble api with some good examples of how to get access to things like podman and kind from inside of containers.
Especially this example.
[tumbleweed_distrobox]
image=registry.opensuse.org/opensuse/distrobox
pull=true
additional_packages="acpi bash-completion findutils iproute iputils sensors inotify-tools unzip"
additional_packages="net-tools nmap openssl procps psmisc rsync man tig tmux tree vim htop xclip yt-dlp"
additional_packages="git git-credential-libsecret"
additional_packages="patterns-devel-base-devel_basis"
additional_packages="ShellCheck ansible-lint clang clang-tools codespell ctags desktop-file-utils gcc golang jq python3"
additional_packages="python3-bashate python3-flake8 python3-mypy python3-pipx python3-pycodestyle python3-pyflakes python3-pylint python3-python-lsp-server python3-rstcheck python3-yapf python3-yamllint rustup shfmt"
additional_packages="kubernetes-client helm"
init_hooks=GOPATH="${HOME}/.local/share/system-go" GOBIN=/usr/local/bin go install github.com/golangci/golangci-lint/cmd/golangci-lint@latest;
init_hooks=GOPATH="${HOME}/.local/share/system-go" GOBIN=/usr/local/bin go install g...

GitHub - urob/zmk-config: Personal ZMK firmware configuration for various boards (34-keys, Glove80, Planck)
Personal ZMK firmware configuration for various boards (34-keys, Glove80, Planck) - urob/zmk-config
GitHub · github.com [1]
This is a very well thought out zmk config featuring many macros, numword, and timeless homerow mods. The build system to build locally looks on point, I really need to give that a try!
References:
[1]: https://github.com/urob/zmk-config?tab=readme-ov-file
add init hooks and exported bins · WaylonWalker/devtainer@2e4c6da
🐳 (dotfiles) My personal development docker container base image - add init hooks and exported bins · WaylonWalker/devtainer@2e4c6da
GitHub · github.com [1]
Today I learned that you can use init_hooks to access host machine commands from inside a distrobox container. This is super handy for things that you cannot get to from inside the container and need ran outside (docker, podman, flatpak, xdg-open).
init_hooks=ln -sf /usr/bin/distrobox-host-exec /usr/local/bin/podman;
References:
[1]: https://github.com/WaylonWalker/devtainer/commit/2e4c6da537f5672209d1b3922fad754190aef938#diff-38878343c551520f8af2a3986e5f6085b03df197a56a92abc42a44b200f0264aR19
I’m really excited about manyfold [1], an amazing project by manyfold3d [2]. It’s worth exploring!
A self-hosted [3] digital asset manager for 3d print files.
References:
[1]: https://github.com/manyfold3d/manyfold
[2]: https://github.com/manyfold3d
[3]: /self-host/
Taildrop · Tailscale Docs
Send files between your personal devices on a Tailscale network.
Tailscale · tailscale.com [1]
Tailscale comes with a feature called taildrop that lets you easily share files between machines on your tailnet. If you have tailscale on ios/android it shows up as a share target when you try to share something, and you can pick the machine to share with.
What was not obvious to me was how to receive the file on linux. The linux tailscale service does not automatically receive the file, which can be kinda nice that you can put it where you want, but was not obvious to me at first. Use this command to receive files.
sudo tailscale file get .
References:
[1]: https://tailscale.com/kb/1106/taildrop?tab=linux
I’m really excited about django-admin-tui [1], an amazing project by valberg [2]. It’s worth exploring!
Django Admin in the terminal!
References:
[1]: https://github.com/valberg/django-admin-tui
[2]: https://github.com/valberg
GitHub - triliu/Heawood42: Files for the Heawood42 ortholinear split keyboard
Files for the Heawood42 ortholinear split keyboard - triliu/Heawood42
GitHub · github.com [1]
The Heawood42 is an interesting diodeless keyboard that is not direct wired. According to the repo this is the only keyboard to be diodeless and not direct wired. It does this through the use of a graph.
References:
[1]: https://github.com/triliu/Heawood42
I came across Heawood42 [1] from triliu [2], and it’s packed with great features and ideas.
Files for the Heawood42 ortholinear split keyboard
References:
[1]: https://github.com/triliu/Heawood42
[2]: https://github.com/triliu
[1]
This is a wild key cap that uses a lever to convert horizontal key presses to vertically press the switch down. The leveret v2 uses two of these on thumbs, one to press outward, and what appears to be one straight forward which feels like it would have to be a wrist motion, but who am I to judge without having it in person.
References:
[1]: /static/https://kbd.news/Leveret-v2-lever-keycaps-2380.html
After first setting up a new k3s instance your kubeconfig file will be located in /etc/rancher/k3s/k3s.yaml.
You cans use it from here by setting $KUBECONFIG to that file.
export KUBECONFIG=/etc/rancher/k3s/k3s.yaml
Or you can copy it to ~/.kube/config
cp /etc/rancher/k3s/k3s.yaml ~/.kube/config
If you have installed k3s on a remote server and need the config on your local machine then you will need to modify the server address to reflect the remote server.
scp user@<server-ip>:/etc/rancher/k3s/k3s.yaml ~/.kube/config
Warning
only do this if you don’t already have a ~/.kube/config file, otherwise copy it to a new file and set your $KUBECONFIG env variable to use it.
Now you will need to open that file and change the server address, making sure to keep the port number.
apiVersion: v1
clusters:
  - cluster:
      certificate-authority-data: ****
      server: https://<server-ip>:6443
    name: default
Alternatives to Using Pure Black (#000000) for Text and Backgrounds
In order to achieve maximum contrast in design, interface designers often use a combination of pure black and white colors, which helps…
Medium · uxplanet.org [1]
A nice set of blacks to use in web design. Subtle variants off of black or white like this can really make your design look nice and modern.
References:
[1]: https://uxplanet.org/alternatives-to-using-pure-black-000000-for-text-and-backgrounds-54ef0e733cdb
Wes Bos (@wesbos) on X
Are you using position: absolute; to overlap elements?
It's almost always better to Use CSS Grid instead!
X (formerly Twitter) · x.com [1]
This is a pretty incredible use of css grid to overlay items overtop of each other without needing to resort to position: absolute and the side effects that it brings.
.wrap {
display: grid;
& > * {
grid-row: 1;
grid-column: 1;
}
}
References:
[1]: https://x.com/wesbos/status/1834242925401694490
Buttery.so
Buttery smooth, minimal icons for interfaces.
buttery.so [1]
Some sick looking icons no attribution needed.
References:
[1]: https://www.buttery.so/icons
I’m impressed by pifi-openwrt-raspberry-pi [1] from pifi-org [2].
Firmware Files for Raspberry Pi (PiFI)
References:
[1]: https://github.com/pifi-org/pifi-openwrt-raspberry-pi
[2]: https://github.com/pifi-org
Today I gave n8n a try using podman, their docs gave me docker commands, but it ran fine on my machine using podman.
podman volume create n8n_data
podman run -it --rm --name n8n -p 5678:5678 -v n8n_data:/home/node/.n8n docker.n8n.io/n8nio/n8n
NOT - LTT Screwdriver - Fancy by Erer2001 | Download free STL model | Printables.com
Definitely NOT LTT screwdriver with quick swap 12 bits holder. Fancy version (Dual color accent ring, rotating cap) | Download free 3D printable STL models
Printables.com · printables.com [1]
Someone has created a knock off of the ltt screwdriver and made it printable, and it works really well. I have one printed with 6 different bitholders. I popped some labels on them in bambu studio as I printed to mark them for metric/inch and so on.
[2]
I’ve had mine for about a year now, and I use it quite often. I used to be a dedicated screwdriver kind of guy, but as life has changed I’m not working out of a shop with tools at reach as much, I’m grabbing a couple of items and heading to a job in the house or a neighbors house. It’s not 30s to grab just the right dedicated screwdriver anymore. Also having some setup with hex and torx is a game changer. It’s also super handy that you can just pop the bits right into a drill or impact.
[3]
Highly recommended print. Sorry for not buying the real deal Linux, I got kids to feed here. I owe you a t-shirt order or something.
[4]
References:
[1]: http...
Installing and managing Python | uv
A guide to using uv to install Python, including requesting specific versions, automatic installation, viewing installed versions, and more.
docs.astral.sh [1]
uv now can install python for you. uv is inspired by rust’s cargo, an all in one fast package and installation manager. uv is so fast and becoming feature complete, it’s really changing the python packaging ecosystem.
uv python install
uv python install 3.12
uv python list
References:
[1]: https://docs.astral.sh/uv/guides/install-python/
I recently discovered kickstart.css [1] by tjdevries [2], and it’s truly impressive.
Kickstart.nvim alternative written in pure CSS. Requires failwind.nvim
References:
[1]: https://github.com/tjdevries/kickstart.css
[2]: https://github.com/tjdevries
Switching configs in Neovim
How to maintain multiple Neovim configurations and switch between them
Michael Uloth · michaeluloth.com [1]
Switching between nvim configs can be really easy to do since they implemented the NVIM_APPNAME Environment Variable.
NVIM_APPNAME=nvim-lazyvim nvim
Now config will be loaded from ~/.config/nvim-lazyvim
Michael lays out some aliases in the full article.
alias v='nvim' # default Neovim config
alias vz='NVIM_APPNAME=nvim-lazyvim nvim' # LazyVim
alias vc='NVIM_APPNAME=nvim-nvchad nvim' # NvChad
alias vk='NVIM_APPNAME=nvim-kickstart nvim' # Kickstart
alias va='NVIM_APPNAME=nvim-astrovim nvim' # AstroVim
alias vl='NVIM_APPNAME=nvim-lunarvim nvim' # LunarVim
References:
[1]: https://michaeluloth.com/neovim-switch-configs/
infused-kim [1] has done a fantastic job with kb_zmk_ps2_mouse_trackpoint_driver [2]. Highly recommend taking a look.
A PS/2 mouse & trackpoint driver module for keyboards running the zmk firmware
References:
[1]: https://github.com/infused-kim
[2]: https://github.com/infused-kim/kb_zmk_ps2_mouse_trackpoint_driver
I recently discovered failwind.nvim [1] by tjdevries [2], and it’s truly impressive.
KEKW
References:
[1]: https://github.com/tjdevries/failwind.nvim
[2]: https://github.com/tjdevries
New-caps-for-porta-john
Today I dropped some new caps in the porta-john. I need to do a bunch of
posts on zmk and my journey building the porta-john, I’ve been rocking it for
at least two weeks now pretty solid and I am absolutely loving it. More on
that later.
KLP-Lame-Keycaps # [1]
The model of the caps are
KLP-Lame [2] by
braindefender [3] , they are super rounded and
smooth. They look really good on camera and feel good to the finders.
[4]
I printed these at home on my ender3 s1 pro with a black and purple silk
filliment. I printed all 42 at once using a Printing 42 keys at once [5] technique.
They do have just a bit of a rough texture that you can feel on your figertips.
I printed these on super quality .12mm layer height, while my last set was
printed on draft quality .32mm layer height. They look crazy different in
print quality with the lines of the new caps barely showing, the feel isn’t
nearly as drastic.
The Result # [6]
Check out the final shots as I set up the porta-john with these swee...
[1]
This is the coolest scrappy build, no printer or modeling required, no fancy tools, just straight chisel and claw hammer in soft pine. Im here for it, create the thing that you want to create.
References:
[1]: /static/https://halfwit.github.io/2017/05/08/keyboardblog.html
Vim has a handy feature to format text with gq. You can use it in visual
mode, give it a motion, or if you give it gqq it will format the current line.
I use this quite often while writing in markdown, I do not use softwraps in vim,
so gqq quickly formats my current line into a paragraph. Once I have done
this for a single line one time I typically switch to the motion for around
paragraph gqap to format the whole paragraph and not just the current line.
before formatting #
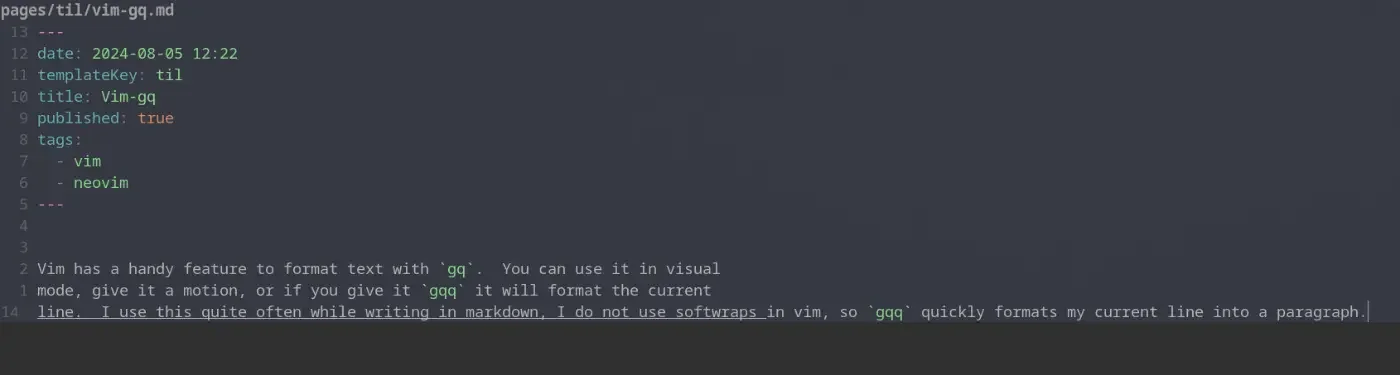
after formattting #
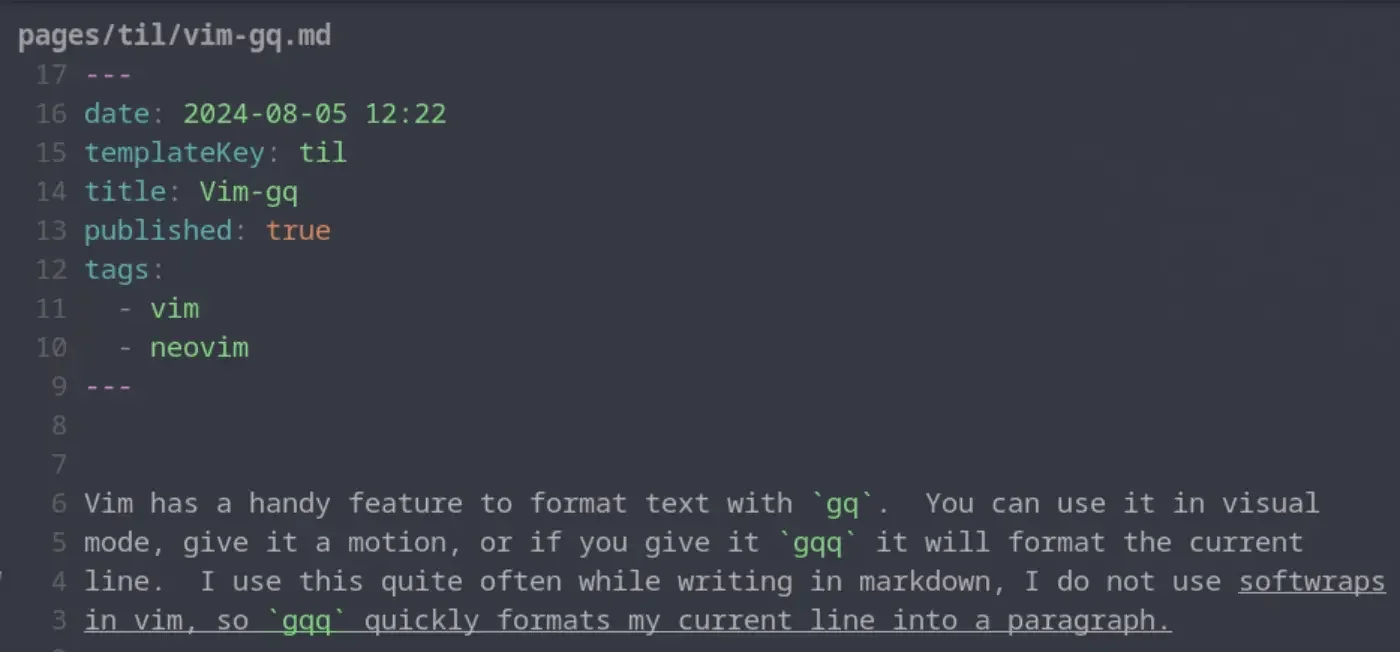
A slug is the part of the url that comes after the domain. Commonly matches the file name of a markdown file many blogging systems. These are typically human readable, unique identifiers for pages within the site.
Wikilinks are a core concept within obsidian to link to documents by Slug wrapped in double square brackets. These are commonly used within wiki site generators.
[[slug]]
Obsidian gives you a keybinding alt+enter to go to that file, but if it does not exist it will create the file for you in the root of the project. It’s a nice way to quickly make new documents.
blogging in 2024
Over the past years couple of years blog traffic has been tanking, for some
time I thought it might have just been me, but then i heard it from Dave Rupert
on Shop Talk show, and it made sense. LLMs and AI is slowly killing the
internet as we know it.
My metrics # [1]
I dug into my emails from the google search console team and found two results
nearly one year apart. Impressions are only 60% of its value a year ago while
clicks are only 35% of where they were a year ago. I’m getting less
impressions and even less clicks.
[2]
May 2023
[3]
June 2024
Suspicions # [4]
What I think is happening is a large portion of users are getting their answers
from ChatGPT, Copilot, and llms like this. A lot of my posts have been filling
gaps in the internet, notes for myself when I struggle to integrate x in y
because there was a gap of how to do so in the docs and stack overflow. Some
small fraction of users have moved on to duck duck go and other non global
warming search engines with AI ...
Hotkey to open link under at the text cursor position while typing in edit mode
I find myself not wanting to leave the keyboard for navigation and think a keyboard-only shortcut that could open a link at the text cursor position is at would be really handy for this case.
Obsidian Forum · forum.obsidian.md [1]
Obsidian has a go to definition like feature, the keybind is alt+enter, I would have never guessed this one.
References:
[1]: https://forum.obsidian.md/t/hotkey-to-open-link-under-at-the-text-cursor-position-while-typing-in-edit-mode/8144
It was not obvious to me, but if you have a wikilink such as Trying Obsidian, you can jump to the file in obsidian, just like you can with lsp go to definition, the keybinding is alt + enter.
The work on KLP-Lame-Keycaps [1] by braindefender [2].
Sculpted and curved keycaps for Kailh Choc and MX switches
References:
[1]: https://github.com/braindefender/KLP-Lame-Keycaps
[2]: https://github.com/braindefender
-
Very inspiring video Jason, these people faced adversity and crushed it. The market is so hard right now, its not easy to get a job, move around, and recover from a layoff. Everyone in this video just showed that you can make it in this industry right now, you just have to be willing to work harder than the rest. The bar is raising, a lot of great people are already putting in hard work to make it.
Community is Key, Theo mentioned that a lot of the companies he works with don’t even post openings, they go to their community first and are often filling spots through lower risk community hires.
-
This is such a cool 3d printed cornhole game.
-
Thor always comes in hard with fire takes in his shorts. Especially if you are early in our career take this in. If you dont yet have kids, but plan to, double take this in.
I’ve long used copier to create all of my posts for my blog, and it works really well for my workflow. I think of a title, call a template, and give it a title. out of the box obsidian did not seem to work this way. It seems like it wants me to right click a file tree and make a new file using the tree, this is not my jam.
Here is what I came up with to replace my til template.
---
date: <% tp.file.creation_date() %>
templateKey: til
title: <%*
  const originalFileName = await tp.system.prompt("Enter file name");
  const toTitleCase = str => str.replace(
    /\w\S*/g,
    txt => txt.charAt(0).toUpperCase() + txt.substr(1).toLowerCase()
  );
  const title = toTitleCase(originalFileName);
  tR += title + '\n'; // Add the title to the template result
-%>
published: true
tags:
  -
---
<%*
const fileName = originalFileName.toLowerCase().replace(/\s+/g, '-');
const newFilePath = `pages/til/${fileName}`;
await tp.file.move(newFilePath);
-%>

<% tp.file.cursor() %>
tRis a return value, and it gets placed directly into the place it is in the fileto.file.cursor()creates a tab-index point so I can tab into the content
Trying Obsidian
I am giving obsidian a try, this is a test post to learn the flow. Something
that has been really hard for me for a long time is images, I don’t include a
lot of images just because it takes so much longer just to get the post out. I
store them in a separate repo, I need to resize and compress them for the web
so they aren’t so big.
Images are easy # [1]
This is my current wallpaper.
[2]
I took he screenshot and just pasted it in.
I have more about my process in this post about Obsidian Image Converter [3].
It’s still just markdown # [4]
I don’t know why it took me so long to understand this but obsidian is just
markdown files. I pretty much just plugged in my existing blog and it picked
up all the tags and was ready to run. I now get some nice visualizations to
help me identify posts that were not ever tagged or maybe left unfinished.
It leans hard on wikilinks # [5]
I just finished moving my backend over to md-it-python, which comes with some
good wiliklink support. I eve...
I’m giving obsidian a go as an editor for my blog and one of the main things I want to fix in my workflow is the ability to quickly drop in images. on first look through the community plugins I found Image Converter. I set it up to convert to webp and drop them in a git submodule. I may make it something other than a git repo in the future, but I’ve learned that adding images to my blog repo quickly makes it heavy and hard to clone on other machines.
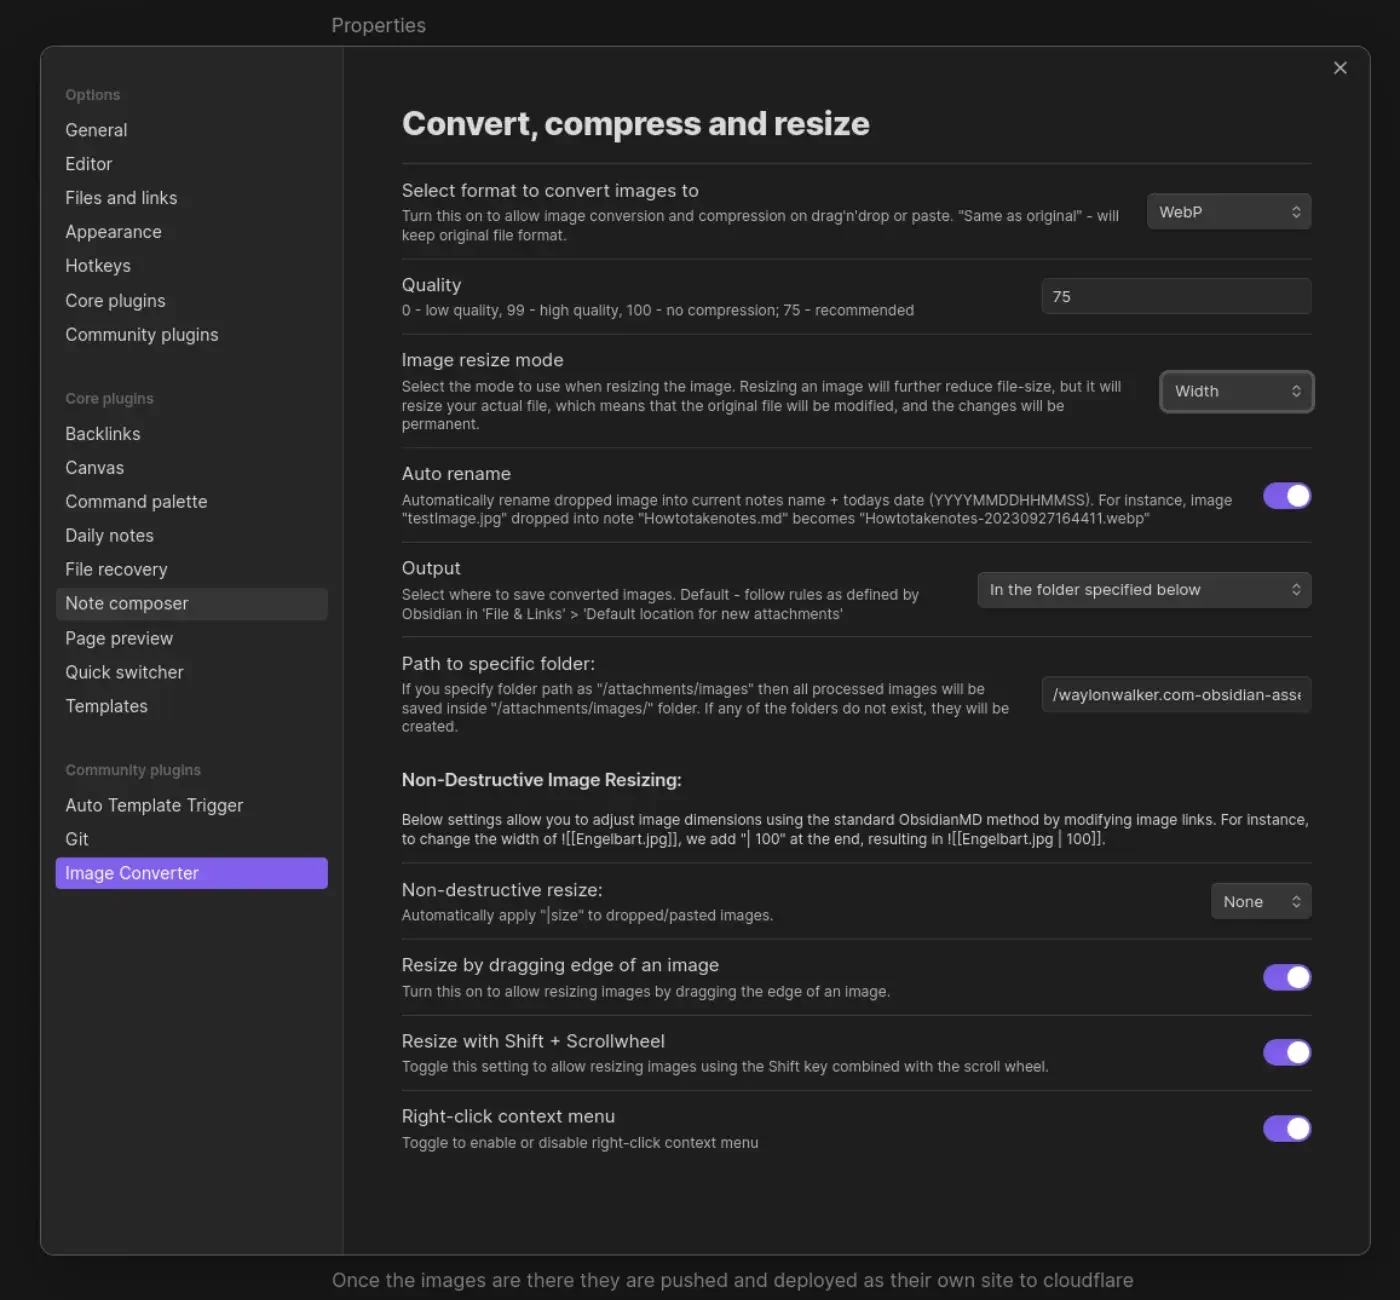
Once the images are there they are pushed and deployed as their own site to
cloudflare pages. I made a quick edit to my sick wikilink hover plugin for
my blog. if it sees a wikilink ending in webp, convert the domain over to
obsidian-assets.waylonwalker.com, and clean up the remaining "! " that the
python md-it library leaves behind.
Note
after first try I needed to increase the width from 600 to 1400, the image in this post was unreadable.
This is part of me getting set up and Trying Obsidian
-
Docker no Docker, what!!!
So fly.io uses Dockerfiles to deploy your app, but no docker. They use containerd to download your docker images into firecracker microvms to run your app. Firecracker is the same tech that runs aws lambda functions.
Fascinating short post on the beans under the hood at fly.io and how they scale your app globally.
Reddit - Please wait for verification
reddit.com [1]
This is a pretty sick design, touch screen macropad, trackball, ring, and knobs for days. I just want to play with it and see what I can make it do.
As I’m typing I think I just realized that its modular, each rectangle is it’s own section!
References:
[1]: https://www.reddit.com/r/MechanicalKeyboards/comments/1dyf0d8/ultimate_modular_macro_keyboard_kibly/
-
Damn Johnny is always such a positive vibe, just getting steamrolled by this braille shit. WTF are these brand sleeping on. Happy to hear that Andy and Brian are supporting him well.
Also kinds shows what shoes are good when he goes to buy shoes cause no one will send him any and he goes with Etnies.
Johnny keep it going!
yooooooooo its me...
thoughts.waylonwalker.com [1]
[1]
References:
[1]: https://thoughts.waylonwalker.com/post/368
-
Niklas Luhmann created the Zettelkasten method of notetaking, He was the Da Vinci of writing, holding a high standard that we can take inspiration from even today in this digital era.
As many times as I have seem the Zettelkasten covered, I never knew that it roughly translated to little cards in a box.
Four Principles # [1]
Mischa lays out four principles of Zettelkasten.
- Atomic - each card conains one idea
- Link - cards are linked together
- Structure - comes from the links
- Own Words - You write the note in your own words
My blog, tils, and thoughts make up my own zettelkasten. I am not going to say that mine is a perfect representation of his method, but the components are here. rather than building books, my thoughts and tils build up to blog posts. The rate of blog posts I write definitely changes with the seasons of life, as seasons change it becomes a bigger or smaller part of the season.
I really like Mischa’s most important note to Write in your own words, this is what really promotes learning, and proves to yourself that you can form a thought around the topic. Up until recently I’ve wrote everything, but lately I’ve taken to copy pasting some quotes i...
add quick-tap-ms and require-prior-idle-ms · WaylonWalker/zmk-config-42block@cb2cda4
Contribute to WaylonWalker/zmk-config-42block development by creating an account on GitHub.
GitHub · github.com [1]
Even after switching to my hm and ht behaviors I am running into some issues where sometimes I am still accidentally hitting mods(&hm) and layers(&ht) while typing and it’s been getting frustrating. My main issue has been on &ht, they are configured the same so I suspect that my pinkies just move a bit slower over the keys than my pointer/middle finger.
I just added quick-tap-ms and require-prior-idle-ms to my &hm and &ht behaviors, and a few intentionally sloppy passes through monkeytype seem to show that its working well. A few days of trying this will tell whether it was a good fix or if I have maybe gone too far the other way.
The end goal here is to be able to roll over keys faster without worrying about hitting other layers or mods.
References:
[1]: https://github.com/WaylonWalker/zmk-config-42block/commit/cb2cda4cf7b3776995dbc2e8608b60670a2cf8b2
I’ve had a couple of uploads to twitter fail recently and has been a pain. I tried some online converters for convenience, but none of them worked. I reached out to chatgpt and found succeess with this ffmpeg command.
ffmpeg -i input.mp4 \
  -vf "scale=trunc(oh*a/2)*2:min(720\,trunc(ih*a/2)*2)" \
  -c:v libx264 -profile:v high -level:v 4.1 \
  -b:v 3500k -maxrate 3500k -bufsize 7000k \
  -pix_fmt yuv420p \
  -c:a aac -b:a 128k -ar 44100 \
  -movflags +faststart \
  output.mp4
Tickle My Keys
Keyboards so good your fingers will be begging to tickle these keys.
ticklemykeys.com [1]
I’ve been working on something, I’m gong to combine my mechanical engineering skills with my love of great keyboards and start a custom keyboard shop for building custom keyboards for exactly what people need with an emphasis on portability.
References:
[1]: https://ticklemykeys.com/
-
Damn Prime covers this so well from all angles. Can’t overstate the importance of that last step. Look at the issues, and raise an issue if there is not one before putting in a bunch of hard work. Make sure that the maintainers are open for your changes and no one else is already working on it.
References:
[1]: /glossary/git/
Looking for inspiration? jiff [1] by BurntSushi [2].
A datetime library for Rust that encourages you to jump into the pit of success.
References:
[1]: https://github.com/BurntSushi/jiff
[2]: https://github.com/BurntSushi
I’m really excited about sqlite-jiff [1], an amazing project by asg017 [2]. It’s worth exploring!
No description available.
References:
[1]: https://github.com/asg017/sqlite-jiff
[2]: https://github.com/asg017
sqlite-jiff
I linked to the brand new Jiff datetime library yesterday. Alex Garcia has already used it for an experimental SQLite extension providing a timezone-aware jiff_duration() function - a useful new …
Simon Willison’s Weblog · simonwillison.net [1]
Sqlite is getting rust extensions now, and datetimes make it totally worth if if they work well and and fast, two things that don’t always go together in datetime libraries
References:
[1]: https://simonwillison.net/2024/Jul/23/sqlite-jiff/
There’s a TUI for that with Nick Janetakis (Changelog & Friends #53)
Nick Janetakis is back and this time we're talking about TUIs (text-based user interfaces) — some we've tried and some we plan to try. All are collected from Justin Garrison's Awesome TUIs repo o...
Changelog · changelog.com [1]
50 minutes into this episode they start a discussion on seo, and naming posts. They give Jerod the task of googling for tmux and see how high up the ranking they find Nick, expecting a number one post, and he cant even get to Nick.
The problem? Jerod is such a beginner he doesn’t even know what to search, he starts with a long query about getting started with tmux, but all of Nick’s videos are why you should use advanced features of tmux, but Jerod has yet to discover that these exist.
As experts we often come up wtih a post title for the exact thing that we are trying to teach someone how to do, but yet, they haven’t discussed that they need that feature yet, they just want the getting started guide, or tell me why I should start using tmux. Not why sessions are better than windows, and tabs suck all together.
Definitely an eye opening conversation listening to two experts sit in...
The Verge (@verge) on X
Stress testing a snack-proof keyboard
X (formerly Twitter) · x.com [1]
This is a wild keyboard test. This is exactly what I want to see from ticklemykeys.com. I want to make ergomechanical boards that you can use and abuse. I want you to not be afraid to take them with you or to eat a nutrigrain bar in the same room (cough 2015 mac). And If something does go out, I want users to be able to repair it themsleves, key caps, switches, batteries, and microcontrollers should be replacible parts they can get at a good cost from the shop if they have paid for a board.
References:
[1]: https://x.com/verge/status/984764889754456065
all lt keys to hl · WaylonWalker/zmk-config-42block@ce25356
Contribute to WaylonWalker/zmk-config-42block development by creating an account on GitHub.
GitHub · github.com [1]
Today I swapped out all of my keys that are used dual purpose for letters and layers to homerow layers. This prevents goofy things happening when rolling, and prefers-tap makes it so that keys that are rolled over get hit as letters instead of as layers. This was one of my biggest hurdles jumping into zmk, lt as a homerow key just does not behave the same as the ht/hm behaviors with tap-preferred set.
Seealso
See previous commit where I added the hl https://github.com/WaylonWalker/zmk-config-42block/commit/9522c859cdf024a2c2b73931c130ddc907c09ffc
hl: homerow_layer {
compatible = "zmk,behavior-hold-tap";
label = "HOMEROW_LAYER";
bindings = <&mo>, <&kp>;
#binding-cells = <2>;
tapping-term-ms = <150>;
flavor = "tap-preferred";
};
References:
[1]: https://github.com/WaylonWalker/zmk-config-42block/commit/ce25356e88eb2439182201700314133de719457e
I like Infisical’s [1] project infisical [2].
♾ Infisical is the open-source secret management platform: Sync secrets across your team/infrastructure, prevent secret leaks, and manage internal PKI
References:
[1]: https://github.com/Infisical
[2]: https://github.com/Infisical/infisical
Tips for Being Happier, Healthier, More Productive by The GaryVee Audio Experience
Today's podcast episode is an interview I did on the Happier with Gretchen Rubin Podcast with Gretchen Rubin and Elizabeth Craft. We discuss balancing ambition, tenacity, humility, and patience. I …
Spotify for Creators · podcasters.spotify.com [1]
Deep breath, the deepest you can take in
Smile, a real fukin smile not some pansy bullshit
Say I’m not going to give a shit about this when I’m 90
References:
[1]: https://podcasters.spotify.com/pod/show/garyvee/episodes/Tips-for-Being-Happier--Healthier--More-Productive-e2m4184
I came across zmk-config [1] from evantravers [2], and it’s packed with great features and ideas.
No description available.
References:
[1]: https://github.com/evantravers/zmk-config
[2]: https://github.com/evantravers
Can't use System update - invalid signature when validating ASN.1 encoded signature · Issue #1316 · ublue-os/bazzite
Describe the bug Hello, I installed the nvidia KDE version of bazzite just 2 days ago. Today I wanted to update to the most recent release, but unfortunately, I keep getting the following error: Pu...
GitHub · github.com [1]
This fixed my bazzite update issues after the signing key was rotated recently. This team is killing it with such a great user experience.
curl -sL https://fix.universal-blue.org/ | sudo bash
References:
[1]: https://github.com/ublue-os/bazzite/issues/1316
I like Textualize’s [1] project transcendent-textual [2].
Textual apps and libraries
References:
[1]: https://github.com/Textualize
[2]: https://github.com/Textualize/transcendent-textual
Update Kconfig.shield rec by bravekarma · WaylonWalker/zmk-config-ninepad@8b76b76
zmk configuration for ninpad keyboard. Contribute to WaylonWalker/zmk-config-ninepad development by creating an account on GitHub.
GitHub · github.com [1]
This one space killed my whole config and held me back from learning zmk.
References:
[1]: https://github.com/WaylonWalker/zmk-config-ninepad/commit/8b76b76e2f094453aaf7ffe51bb405ce3a25a611
[1]
The trackball spinner looks sick here. I can imagine using that spinner like a scroll wheel.
References:
[1]: /static/https://kbd.news/DragonFruit-2178.html
[1]
They had split ergo boards back in 1983??? WTF who the heck keeps these row stagger boards going. This board looks like endgame material, If this thing was more normal, it’d kill a whole section of the ergo mechanical keyboard industry for good reason.
References:
[1]: /static/https://kbd.news/NEC-M-System-1729.html
-
This keyboard layout looks weird af the mix of column staggar and row stagger is wild. Not sure if its genius or an abomination.
That solenoid though is absolutely wild though, I kinda want one TBH.
and the clear plate with the diodes laid out on it in a herringbone pattern is a very nice touch.


External Link
stackoverflow.com [1]
today I learned that there is an accessibility feature in chrome that allows you to place a text cursor anywhere on the page. I had accidentally done this and it drove me mad that it was there.
References:
[1]: https://stackoverflow.com/questions/75886276/text-cursor-bug-in-my-chrome-browser-that-causes-the-blinking-cursor-to-appear-e
animal well codes
fish room # [1]
fish bubbles
ul d dl l dl ur ul
jellyfish
d l d l d l u r
egg room # [2]
bar dir
given bar codes
top r
mid dr
bot dl
calculated bar codes
num dir
1 r
2 dr
3 d
4 dl
5 l
6 ul
7 u
8 ur
bar code direction
num bar
1 top
2 mid
3 top mid
4 bot
5 top bot
6 mid bot
7 top mid bot
8 empty
egg room decode
6 3 3 6 3 1 3 4
2 4 3 2 8 3 5 8 _
3 5 7 5_ __ 5 2 5 6 3 1 3
3 1 3 6 4 4 6 4 2 4 6 8
6 4 8 7 3 7 6 5 7 6 __
egg room decode dir
ul dd __ dd ul dd rr dd __ dl
dr dl dd __ dr ur__ dd ll ur __
dd ll uu ll __ ____ ll dr ll ul dd rr dd
__ dd rr dd ul dl __ dl ul dl dr dl ul ur
ul dl ur uu __ dd uu ul __ ll uu ul ____
References:
[1]: #fish-room
[2]: #egg-room
-
Hard to argue this take, happy to see that its at the top. With it being such an old language its amazing that it still holds this position, and not surprising that it has warts, and thing that have turn users off from wanting anything to do with it.
timestamped in the link
Command Line Interface Guidelines
An open-source guide to help you write better command-line programs, taking traditional UNIX principles and updating them for the modern day.
clig.dev [1]
This is a pretty sick set of guidelines to help you write better cli programs, I’m definitely coming back to reading this one more in depth later.
References:
[1]: https://clig.dev/
External Link
fullystacked.net [1]
You can explicitly make a script render blocking, nothing will be rendered until this js is ready.
<script blocking="render"
src="important.js"
defer></script>
References:
[1]: https://fullystacked.net/render-blocking-on-purpose/
Remove Background Web - a Hugging Face Space by Xenova
In-browser background removal
huggingface.co [1]
I’ve long been a user of remove.bg, and I just discovered that you can run this transformer right within your browser with no api limits.
References:
[1]: https://huggingface.co/spaces/Xenova/remove-background-web
Check out volfpeter [1] and their project fasthx [2].
FastAPI [3] server-side rendering with built-in HTMX [4] support.
References:
[1]: https://github.com/volfpeter
[2]: https://github.com/volfpeter/fasthx
[3]: /fastapi/
[4]: /htmx/
FastHX - FastHX
volfpeter.github.io [1]
Very interesting approach to htmx [2] and fast api. It uses separate decorators for returning template partials and json that can be stacked to include both options on a single route. The templates are explicitly set in the decorator. Separate decorators are used for full page and partial pages. I don’t see an example of full and partial pages being combined. I think the demo app must be behaving in a spa like fashion where it does not get all of the data when it calls index and index will ask for user-list.
Definitely going to keep my eye on this project and ponder on it.
from fastapi import FastAPI
from fastapi.templating import Jinja2Templates
from fasthx import Jinja
from pydantic import BaseModel
# Pydantic model of the data the example API is using.
class User(BaseModel):
first_name: str
last_name: str
# Create the app.
app = FastAPI()
# Create a FastAPI Jinja2Templates instance and use it to create a
# FastHX Jinja instance that will serve as your decorator.
jinja = Jinja(Jinja2Templates("templates"))
@app.get("/")
@jinja.page("index.html")
def index() -> None:
...
@app.get("/user-list")
@jinja.hx("user-list.html")
async...
FastHX - FastHX
volfpeter.github.io [1]
Very interesting approach to htmx [2] and fast api. It uses separate decorators for returning template partials and json that can be stacked to include both options on a single route. The templates are explicitly set in the decorator. Separate decorators are used for full page and partial pages. I don’t see an example of full and partial pages being combined. I think the demo app must be behaving in a spa like fashion where it does not get all of the data when it calls index and index will ask for user-list.
Definitely going to keep my eye on this project and ponder on it.
from fastapi import FastAPI
from fastapi.templating import Jinja2Templates
from fasthx import Jinja
from pydantic import BaseModel
# Pydantic model of the data the example API is using.
class User(BaseModel):
first_name: str
last_name: str
# Create the app.
app = FastAPI()
# Create a FastAPI Jinja2Templates instance and use it to create a
# FastHX Jinja instance that will serve as your decorator.
jinja = Jinja(Jinja2Templates("templates"))
@app.get("/")
@jinja.page("index.html")
def index() -> None:
...
@app.get("/user-list")
@jinja.hx("user-list.html")
async...
Pinout and Schematic - nice!nano
Pinout and schematic for the nice!nano
nicekeyboards.com [1]
Pinout for nice!nano boards. Note that P0.15 means gpio port 0 pin 15, they can be referenced in zmk when setting column and row pins.
#include <dt-bindings/zmk/matrix_transform.h>
/ {
chosen {
zmk,kscan = &default_kscan;
zmk,matrix_transform = &default_transform;
/delete-property/ zephyr,console;
/delete-property/ zephyr,shell-uart;
};
default_kscan: kscan {
compatible = "zmk,kscan-gpio-matrix";
label = "default_kscan";
diode-direction = "col2row";
col-gpios
= <&gpio0 31 GPIO_ACTIVE_HIGH>
, <&gpio0 29 GPIO_ACTIVE_HIGH>
, <&gpio0 2 GPIO_ACTIVE_HIGH>
;
row-gpios
= <&gpio1 15 (GPIO_ACTIVE_HIGH | GPIO_PULL_DOWN)>
, <&gpio1 13 (GPIO_ACTIVE_HIGH | GPIO_PULL_DOWN)>
, <&gpio1 11 (GPIO_ACTIVE_HIGH | GPIO_PULL_DOWN)>
;
};
default_transform: matrix_transform {
compatible = "zmk,matrix-transform";
columns = <3>;
rows = <3>;
map = <
RC(0,0) RC(0,1) RC(0,2)
RC(1,0) RC(1,1) RC(1,2)
RC(2,0) RC(2,1) RC(2,2)
>;
};
};
References:
[1]: https://nicekeyboards.com/docs/nice-nano/pinout-schematic/
I’m impressed by shmux [1] from typecraft-dev [2].
the shell-script tmux management you didn’t know you needed. baby
References:
[1]: https://github.com/typecraft-dev/shmux
[2]: https://github.com/typecraft-dev
I like iximiuz’s [1] project awesome-container-tinkering [2].
List of awesome tools to tinker with containers.
References:
[1]: https://github.com/iximiuz
[2]: https://github.com/iximiuz/awesome-container-tinkering
External Link
unix.stackexchange.com [1]
today I learned that /dev/pts is a pseudo-tty. It amazes me how much linux is still built around things like hardware terminals.
References:
[1]: https://unix.stackexchange.com/questions/93531/what-is-stored-in-dev-pts-files-and-can-we-open-them
GitHub - svenstaro/miniserve: 🌟 For when you really just want to serve some files over HTTP right now!
🌟 For when you really just want to serve some files over HTTP right now! - svenstaro/miniserve
GitHub · github.com [1]
miniserve is a sweet http server, replacement for python -m http.server. It’s fast, runs off a small binary, but why would I want to use it over something that already exists on most machines, because it includes a bunch of features like qr codes, pretty themes, and uploads. I’ve used python -m http.server many times to transfer files from one machine to another in a pinch, like at a family members house. But what if they have an android, windows, or something not easy to get a python repl running on, you can run miniserve and upload from their device rather than hosting from their device.
References:
[1]: https://github.com/svenstaro/miniserve
Looking for inspiration? miniserve [1] by svenstaro [2].
🌟 For when you really just want to serve some files over HTTP right now!
References:
[1]: https://github.com/svenstaro/miniserve
[2]: https://github.com/svenstaro
pacman/Tips and tricks - ArchWiki
wiki.archlinux.org [1]
The arch wiki is always full of good content, and pacman tips and tricks does not disappoint. Today I discovered this command to remove orphaned dependencies on my system.
pacman -Qdtq | pacman -Rns -
References:
[1]: https://wiki.archlinux.org/title/pacman/Tips_and_tricks
Inside 22,734 Steam games
About a year ago I blogged about games that use curl. In that post I listed a bunch of well-known titles I knew use curl and there was a list of 136 additional games giving credit to curl. Kind of ...
daniel.haxx.se · daniel.haxx.se [1]
Interesting to see that curl is used in so many places. I often think of things like games being so windows centric and curl being so linux centric I don’t even think of these things crossing paths as much as they do.
References:
[1]: https://daniel.haxx.se/blog/2024/06/20/inside-22734-steam-games/
wcurl is here
Users tell us that remembering what curl options to use when they just want to download the contents of a URL is hard. This is one often repeated reason why some users reach for wget instead of cur...
daniel.haxx.se · daniel.haxx.se [1]
interesting, seems like such a simple way to completely remove the need of a whole other cli. No offense to anyone working on wget, but generally I use it out of lazyness or something wierd is happening and I am looking for a second opinion. Cool to know that wcurl exists and will start shipping with curl.
References:
[1]: https://daniel.haxx.se/blog/2024/07/03/wcurl-is-here/
I’ve started leaning in on kubernetes kustomize to customize my manifests per deployment per environment. Today I learned that it comes with a diff command.
kubectl diff -k k8s/overlays/local
You can enable color diffs by using an external diff provider like colordiff.
export KUBECTL_EXTERNAL_DIFF="colordiff -N -u"
You might need to install colordiff if you don’t already have it.
sudo pacman -S colordiff

sudo apt install colordiff
Now I can try out kustomize changes and see the change with kustomize diff.
kubectl dash k
Kubernetes ships with a feature called kustomize that allows you to customize your manifests in a declarative way. It's a bit like helm, but easier to use. I...
Animal well does not let you remap keys, and really doesn’t even inform you that it is keyboard compatible. I had to play around and discover the keymap, which can be a bit tricky on a 40% board. This is what I found.
- wasd - move
- space - jump / a
- enter - interact / b
- x - throw
- c - inventory
- 1 - left item / rb
- 2 - open item menu / triangle
- 3 - right item / lb
I recently discovered pydantic-sqlite [1] by Phil997 [2], and it’s truly impressive.
Simple package for storing pydantic BaseModels in an in-memory SQLite database.
References:
[1]: https://github.com/Phil997/pydantic-sqlite
[2]: https://github.com/Phil997
Email Address Obfuscation
Hide email addresses from bots while keeping them visible to visitors.
Cloudflare Docs · developers.cloudflare.com [1]
I recently started seeing email-decode.min.js show up on my blog posts, and I wondered what the heck ? I didn’t put it there. Turns out that cloudflare put it there from pages to safely serve email addresses for me.
inspecting the page without js running we can see that the mailto email is swapped out for email protected. Neat feature.
❯ curl --silent https://waylonwalker.com/diskcache-as-debounce/ | grep email
<a class="decoration-pink-500 hover:decoration-pink-300 hover:text-pink-100" href="/cdn-cgi/l/email-protection#a4ccc1c8c8cbe4d3c5ddc8cbcad3c5c8cfc1d68ac7cbc9" rel="me"><span class="__cf_email__" data-cfemail="630b060f0f0c2314021a0f0c0d14020f0806114d000c0e">[email protected]</span></a>
<script data-cfasync="false" src="/cdn-cgi/scripts/5c5dd728/cloudflare-static/email-decode.min.js"></script></body>
Looking deeper into this article it looks like this feature comes from Scrape Shield and enabling Email Address Obfuscation.
References:
[1]: https://developers.cloudflare.com/waf/tools/scrape-shield/email-address-obfuscation/
Background Tasks - FastAPI
FastAPI framework, high performance, easy to learn, fast to code, ready for production
fastapi.tiangolo.com [1]
fastapi [2] comes with a concept of background tasks which are functions that can be ran in the background after a function has been ran. This is handy for longer running functions that may take some time and you want to have fast response times.
Here is an example from the docs
from fastapi import BackgroundTasks, FastAPI
app = FastAPI()
def write_notification(email: str, message=""):
with open("log.txt", mode="w") as email_file:
content = f"notification for {email}: {message}"
email_file.write(content)
@app.post("/send-notification/{email}")
async def send_notification(email: str, background_tasks: BackgroundTasks):
background_tasks.add_task(write_notification, email, message="some notification")
return {"message": "Notification sent in the background"}
References:
[1]: https://fastapi.tiangolo.com/tutorial/background-tasks/
[2]: /fastapi/
markdown-it-pyrs
A Python interface for markdown-it.rs, using Rust for blazingly fast Markdown parsing ⚡️
PyPI · pypi.org [1]
markdown it py running in rust claims to be 20x faster. I’ll definitely look into this if markdown it py is ever a bottleneck in my performance. At first glance it appears that plugins are written in rust not python, and there is no admonition plugin, so I’ll keep my eye on it for now, but I can’t use it.
References:
[1]: https://pypi.org/project/markdown-it-pyrs/
[1]
diskcache has a peekitem method that allows you to lookup the expire_time of a cached item without changing it. I recently used this to implement debounce for fastapi [2] background tasks with multiple workers running. since all the workers I care about are on the same machine, but running in different processes diskcache was a great option. All workers have access to the same disk, but not the same variables in memory.
References:
[1]: /static/https://grantjenks.com/docs/diskcache/api.html#diskcache.Cache.peekitem
[2]: /fastapi/
-
Great intro into kustomize. This helped me get started with kustomize.
I’ve been using fastapi more and more lately and one feature I just started using is background tasks [[ thoughts-333 ]].
Seealso
basic diskcache example <a href="/python-diskcache/" class="wikilink" data-title="How I setup a sqlite cache in python" data-description="When I need to cache some data between runs or share a cache accross multiple processes my go to library in python is . It's built on sqlite with just enough..." data-date="2022-03-29">How I setup a sqlite cache in python</a>
One Background Task per db entry #
I am using it for longer running tasks and I don’t want to give users the ability to spam these long running tasks with many duplicates running at the same time. And each fastapi worker will be running in a different process so I cannot keep track of work in memory, I have to do it in a distributed fashion. Since they are all running on the same machine with access to the same disk, diskcache is a good choice
What I need #
- check if a job is running
- automatically expire jobs
Less infrastructure complexity #
My brain first went to thinking I needed another service like redis running alongside fastapi for this, then it hit me that I can use diskcache.
How I used diskcache #
Here is how I used diskcache to debounce taking screenshots for a unique shot every 60 seconds.
from diskcache import Cache

jobs_cache = Cache("jobs-cache")

@shots_router.get("/shot/{shot_id}", responses={200: {"content": {"image/webp": {}}}})
@shots_router.get("/shot/{shot_id}/", responses={200: {"content": {"image/webp": {}}}})
async def get_shot_by_id(
    background_tasks: BackgroundTasks,
    request: Request,
    shot_id: int,
):
    shot = Shot.get(shot_id)
    # check if the shot exists and return it or continue to create it.


    is_running = jobs_cache.get(shot_id)

    if is_running:
        expire_time = datetime.fromtimestamp(jobs_cache.peekitem(expire_time=True)[1]) - datetime.now()
        console.print("[red]Already running store_shot: ", shot_id)
        console.print(f"[red]Can retry in {expire_time.seconds}s")
    else:
        jobs_cache.set(shot_id, True, 60)
        background_tasks.add_task(
            store_shot,
            shot_id=shot_id,
        )
I’m really excited about homelab-diagrams [1], an amazing project by Doomlab7 [2]. It’s worth exploring!
A repository to house diagrams for my homelab [3]
References:
[1]: https://github.com/Doomlab7/homelab-diagrams
[2]: https://github.com/Doomlab7
[3]: /homelab/
learn-pdm [1] by pypeaday [2] is a game-changer in its space. Excited to see how it evolves.
A repository for learning and playing with the pdm package manager/system for python
References:
[1]: https://github.com/pypeaday/learn-pdm
[2]: https://github.com/pypeaday
If you’re into interesting projects, don’t miss out on zmk-config-fourpad [1], created by wyattbubbylee [2].
my fourpad keybord
References:
[1]: https://github.com/wyattbubbylee/zmk-config-fourpad
[2]: https://github.com/wyattbubbylee
kind cluster
kind [1]{.hoverlink} is a very useful tool to quickly standup and
teardown kubernetes clusters. I use it to run clusters locally. Generally
they are short lived clusters for trying, testing, and learning about
kubernetes.
Kind is Kubernetes in Docker, its very fast to get a new cluster up and
running. Other than checking a box in docker desktop it is the easiest way
currently to get a cluster up and running. I’ve used docker desktop for k8s
before I really developed on k8s and it was buggy at the time and sometimes
started and sometimes didn’t, when it didnt I had no idea how to fix it. I’d
suggest kind as the best option to get a cluster up and running locally.
Not Production # [2]
If you are looking for a production ready cluster this is not it. I really
like k3s [3]{.hoverlink}. At the time that I chose k3s it was
the most lightweight option that easily supported multi-node clusters.
Starting a kind cluster # [4]
The first step, and maybe only one that you need is to create ...
Yesterday I realized that I have overlooked the default installation method of the sealed secrets controller for kubernetes kubeseal this whole time an jumped straight to the helm section. I spun up a quick kind cluster and had it up quickly. I can’t say this is any better or worse than helm as I have never needed to customize the install. According to the docs you can customize it with [[ kustomize ]] or helm.
# option if you don't have a cluster try with kind

kind create cluster

curl -L https://github.com/bitnami-labs/sealed-secrets/releases/download/v0.27.0/controller.yaml > controller.yaml

kubectl apply -f controller.yaml
I like rothgar’s [1] project bashScheduler [2].
Kubernetes scheduler written in less than 100 lines of bash 😬 😆
References:
[1]: https://github.com/rothgar
[2]: https://github.com/rothgar/bashScheduler
Alternatives
A Pro Micro alternative for wireless keyboards. Contribute to joric/nrfmicro development by creating an account on GitHub.
GitHub · github.com [1]
Huge list of micro controllers tried and used in keeb builds.
References:
[1]: https://github.com/joric/nrfmicro/wiki/Alternatives
I’m impressed by nrfmicro [1] from joric [2].
A Pro Micro alternative for wireless keyboards
References:
[1]: https://github.com/joric/nrfmicro
[2]: https://github.com/joric
waylon walker (@_WaylonWalker) on X
First bit of hand written gcode in 12 years let's go!
X (formerly Twitter) · x.com [1]
Not gonna lie, kinda pumped about this one. I manually did one, jotted down the coordinates, opened the gcode in vim, added markers between setup/teardown and print. then added the wipe, the copy pasted the print+wipe section a bunch of times.
My printer tends to run a bit better on single prints than printing a dozen at once as it has less issues with retract start and stop.
References:
[1]: https://x.com/_WaylonWalker/status/1807594004453667134
-
another great use and demo of the one eyed fighting kirby
[1]
Damn, supply chain vector attacks are wild. Random guy in Primes stream was getting $40k offers to buy their open source project while in university and they have never made anything from it. What a social engineering attack this is. It would be so easy to make it look like a good deal and that the package was going to a good new owner who has real resources to maintain it.
References:
[1]: /static/https://www.youtube.com/watch?si=6NK4iCu1b1rCDo7a&t=555&v=mmlHQyMOK7Y&feature=youtu.be
Found: OverlayKey X
Designed by @yfuku_, a keyboard to place on top of your laptop.
Thomas Baart's Microblog · micro.thomasbaart.nl [1]
This is almost exactly what I have been thinking about building for quite awhile. I am going to give it a good try with a few $$ in filiment some cheap switches a microcontroller and go pretty bare bones, maybe open wiring on the bottom.
References:
[1]: https://micro.thomasbaart.nl/2024/06/12/overlaykey-x/
Queueing – An interactive study of queueing strategies
In this blog, we go on an interactive journey to understand common queueing strategies for handling HTTP requests.
encore.dev [1]
Absolutely sick post. This is top tier animated blog posts. This posts demos how different queuing systems work with fantastic interactive demos.
References:
[1]: https://encore.dev/blog/queueing
-
Supply chain attacks are so big these days engineers definitely need to take these into consideration. It’s wild that such a simple attack vector hit some really big applications. This particular vector is so easy to avoid. You are already hosting web content, just curl the file and self host [1] the script, then you own it. That eliminates this attack vector all together, but doesn’t completely remove supply chain attacks, the js file can still hit external apis internally.
What I see has happened in this case is that the owner of the domain polyfill.io changed. so anyone who directly linked to them got a malware injected script used.
I can only imagine the number of applicatons that are not even being maintained anymore getting hit by this. TLDR, if you are taking something to production, where you are goind to deploy it and let it run, host the js yourself. these cdns are great for prototyping, but tread with caution.
References:
[1]: /self-host/
- YouTube
Enjoy the videos and music you love, upload original content, and share it all with friends, family, and the world on YouTube.
youtube.com [1]
Well spoken prime. Co-pilot is a fantastic tool for templating, boilerplate, or just getting something done that is just outside your knowledge or care to know. Bit if you really want to learn something, you need to use your hands. Reading the solution only gives you the happy path. This does not give you that path that most people would take, and completely misses debugging. If you are very new and learning it’s unlikely that you can write large blocks of code without running a test or a script to try it. Taking these shortcuts will hinder your ability to do it yourself.
If I were to devils advocate here, copilot is still not the greatest at the big picture, you still have to drive, and tell it I want to use python, fastapi [2], I want to load settings from .env. taking these shortcuts can help you move quick and get the big picture. This is especially helpful for someone who might know one language or framework and is trying a different one, but at some point you need to do the work and learn if you are going to be effecti...
GitHub - dropbox/pyannotate: Auto-generate PEP-484 annotations
Auto-generate PEP-484 annotations. Contribute to dropbox/pyannotate development by creating an account on GitHub.
GitHub · github.com [1]
pyannotate is a tool that uses runtime types to suggest type annotations to use. Test runners such as pytest can be used to generate the types.
References:
[1]: https://github.com/dropbox/pyannotate
[1]
Interesting, linux supports 32 programmable buttons, special buttons that do nothing that hotkey programs like xbindkeys can pick up and run things, seems like it would be very intersting to use on a macro pad. You could easily do dynamic and complex tasks without clashing that keybinding with something else.
I’m going to look into this for my next obs setup. No matter what I try to do with the hyper key it always tends to do odd things depending on the application I am in. typically its tmux, and it starts trying to do something I don’t want it to.
References:
[1]: /static/https://github.com/qmk/qmk_firmware/blob/master/docs/features/programmable_button.md
GitHub - tusharsadhwani/yen: The last Python environment manager you'll ever need.
The last Python environment manager you'll ever need. - tusharsadhwani/yen
GitHub · github.com [1]
Create virtual environments for any Python version, without needing Python installed.
References:
[1]: https://github.com/tusharsadhwani/yen
Where DOESN’T curl run with curl BDFL Daniel Stenberg (Changelog & Friends #49)
Daniel Stenberg shares his guiding principles for BDFL'ing curl, gives us his perspective on the state of the internet, talks financial independence, ensuring curl won't be the next XZ & more!
Changelog · changelog.com [1]
Love how Daniel just brushed off the number of netflix tv installs as small beans for curl installs. overall great episode on open source, owning a major component to technology with such a small team.
References:
[1]: https://changelog.com/friends/49
I’ve long had issues with my qmk keyboard media keys on my arch install, I always thought it was on the keyboard end. Today I learned that playerctl fixes this.
paru -S playerctl
Once it is installed all of my media keys started working right away.
I played around with it a bit more and came up with a way to display the current playing title in my notifictations.
notify-send "`playerctl metadata --format '{{lc(status)}}:{{artist}}-{{album}}-{{title}}'`"
External Link
keyboard.university [1]
Great keyboard design guide for all the different mounting options that are normal for keyboards with pros and cons of each.
References:
[1]: https://www.keyboard.university/200-courses/keyboard-mounting-styles-4lpp7
Welcome to RSS Club
Congratulations on joining a secret society! If you’re reading this, that means my message has been transmitted successfully. This post is only available to you, Reader, through the ancient peer-...
daverupert.com · daverupert.com [1]
Super cool idea, kinda breaking the rules by talking about it here, but Its a cool idea to throw out posts to the core audience. Apparently its been around for quite while Dave started in 2018.
References:
[1]: https://daverupert.com/2018/01/welcome-to-rss-club/
GitHub - stackrox/kube-linter: KubeLinter is a static analysis tool that checks Kubernetes YAML files and Helm charts to ensure the applications represented in them adhere to best practices.
KubeLinter is a static analysis tool that checks Kubernetes YAML files and Helm charts to ensure the applications represented in them adhere to best practices. - stackrox/kube-linter
GitHub · github.com [1]
A linter for linting kubernetes manifests and help charts.
References:
[1]: https://github.com/stackrox/kube-linter
Keycodes Overview | QMK Firmware
Documentation for QMK Firmware
docs.qmk.fm [1]
Full reference to all of the qmk keycode list. Handy reference to refer to all of the keycodes that qmk has.
References:
[1]: https://docs.qmk.fm/keycodes
-
Fantastic guide to building handwried keyboards. I used this guide to build my first hand-wired macro pad.
Just starred TinyLlama [1] by jzhang38 [2]. It’s an exciting project with a lot to offer.
The TinyLlama project is an open endeavor to pretrain a 1.1B Llama model on 3 trillion tokens.
References:
[1]: https://github.com/jzhang38/TinyLlama
[2]: https://github.com/jzhang38
Just starred packaged [1] by tusharsadhwani [2]. It’s an exciting project with a lot to offer.
The easiest way to ship python applications.
References:
[1]: https://github.com/tusharsadhwani/packaged
[2]: https://github.com/tusharsadhwani
-
Two inspirational people in one podcast, its cool to see how adam thinks about code, css, webdev, and building businesses.
Best practices for Docker in production
You
talkpython.fm [1]
Great listen for anyone interested in productionizing python code with docker. Itamar brings up some
Don’t trust base images for security, upgrade your packages. Vulnerabilties become published and solved giving the bad guys istructions how to wreck your day and these fixes wont come to your docker application for up to two weeks due to image build tatency.
For job based containers pre-compile your pyc for faster startup.
Alpine linux is probably not what you want for python. Many packages such as postgres ship pre-copiled binaries that work for most linux distributions wich use glibc, but alpine uses musl so the binaries will be incompatable requiring you to need to install a bunch of build dependencies.
References:
[1]: https://talkpython.fm/episodes/show/323/best-practices-for-docker-in-production
-
Homelabbers have been some of the best co-workers I have ever had. Typically have a get shit done, If there’s a way I will find it kind of mentality. If you are struggling to get a job in tech right now its tough. Starting a homelab on a pc you pull out of the trash is a good way to get some experience that you can talk about in interview questions.
Linked video has some great points!
References:
[1]: /homelab/
External Link
askubuntu.com [1]
podman requires qemu-system on
❯ podman machine init
Looking up Podman Machine image at quay.io/podman/machine-os:5.1 to create VM
Extracting compressed file: podman-machine-default-amd64.qcow2: done
Error: exec: "qemu-img": executable file not found in $PATH
The fix to this for me was to install qemu-system before podman machine init.
sudo apt update
sudo apt install qemu-system
References:
[1]: https://askubuntu.com/questions/1490805/how-do-i-install-qemu-on-ubuntu-23-10
SVG backgrounds, icons, and other website graphics
👉 Copy-and-paste backgrounds, patterns, icons, and other website graphics directly into projects. All customizable, tiny in file size, and licensed for multi-use.
SVG Backgrounds · svgbackgrounds.com [1]
svgbackgrounds is a really awesome resource for svg things recently featured on https://shoptalkshow.com/618/
References:
[1]: https://www.svgbackgrounds.com/
GitHub - darrenburns/posting: The modern API client that lives in your terminal.
The modern API client that lives in your terminal. - darrenburns/posting
GitHub · github.com [1]
Currently Posting is a super early postman like tui (terminal user interface). It looks so good. Darren is really getting into a groove, and textual is getting to a place that is allowing him to really make these beautiful.
I am so impressed with the progress that he has made so early, it looks so close to postman in the freaking terminal, and the ui is so good. He already has think like jump that give you a way to around the ui like easymotion plugins. Theres themes and a command line, oh man its so good. star it.
References:
[1]: https://github.com/darrenburns/posting
Looking for inspiration? dataherald [1] by Dataherald [2].
Interact with your SQL database, Natural Language to SQL using LLMs
References:
[1]: https://github.com/Dataherald/dataherald
[2]: https://github.com/Dataherald
Check out sqlsync [1] by orbitinghail [2]. It’s a well-crafted project with great potential.
SQLSync is a collaborative offline-first wrapper around SQLite. It is designed to synchronize web application state between users, devices, and the edge.
References:
[1]: https://github.com/orbitinghail/sqlsync
[2]: https://github.com/orbitinghail
Blogmarks that use markdown
I needed to attach a correction to an older blogmark (my 20-year old name for short-form links with commentary on my blog) today - but the commentary field has always …
Simon Willison’s Weblog · simonwillison.net [1]
Oh I kinda like the name blogmark, as opposed to thoughts like I have chose for the same thing. Aparantly Simon beat me to the punch by 20 years on this one.
References:
[1]: https://simonwillison.net/2024/Apr/25/blogmarks-that-use-markdown/
A Link Blog in the Year 2024
Kellan Elliott-McCrea has started a new link blog: Like many people I’ve been dealing with the collapses of the various systems I relied on for information over the previous decades. …
Simon Willison’s Weblog · simonwillison.net [1]
THIS! is the same reasons that I built thoughts [2]{.hoverlink}. Simon has bee a big inspiration along the way. He defintely changed the format of my posts as I watched him build out his quote posts.
Link blogging is a pleasantly low-pressure way of writing online. Found something interesting? Post a link to it, with a sentence or two about why it’s worth checking out.
Ditto! just make a post.
References:
[1]: https://simonwillison.net/2024/Jun/9/a-link-blog-in-the-year-2024/
[2]: https://thoughts.waylonwalker.com
[1]
Kellan brings some interesting thoughts on where the internet is headed in 2024. Interestingly I see myself headed in a similar direction. Feeling like I know just enough to say fuck it and build my own platform for me to me me, from thoughts [2]{.hoverlink} where I link and make thoughts on posts like this, to reader [3]{.hoverlink} which is my rss reader replacement that I wanted in 2013 when it was killedbygoogle [4]
And particular with the collapse of the social spaces many of us grew up with, I feel called back to earlier forms of the Internet, like blogs, and in particular, starting a link blog.
Ai has really had quite the two sided effect since chatgpt launched and set the world ablaze. Suddenly you can get any answer you want as a custom fit blog post for free without effort, thus killing the traffic to any of these sites.
References:
[1]: /static/https://laughingmeme.org//2024/06/08/a-link-blog-in-2024.html
[2]: https://thoughts.waylonwalker.com
[3]: https://reader.waylonwalker.com
[4]: https://killedbygoogle.com/
How to Configure DNS over TLS (DoT) Using Unbound DNS in OPNsense
Going beyond the basics of home networking
homenetworkguy.com [1]
Setting up DNS overTLS in opnsense has made my dns just a bit more secure and reliable. I recently had an outage of half the internet within my house. This also hit some of my friends and not some. It did not hit my mobile network. What seems to have happened is a dns issue with my isp not resolving some domains. This setup corrected my issue and I was back online more securely.
Note
I did try to setup the family resolver and found it was blocking some sites I am ok with. I decided to drop back to the vanilla resolver and let other services within opnsense control blocking where I can caontrol the whitelist myself.
References:
[1]: https://homenetworkguy.com/how-to/configure-dns-over-tls-unbound-opnsense/
GitHub - argoproj/argo-events: Event-driven Automation Framework for Kubernetes
Event-driven Automation Framework for Kubernetes. Contribute to argoproj/argo-events development by creating an account on GitHub.
GitHub · github.com [1]
Argo events is an event driven automation framework for kubernetes that can create kubernetes objects among other things based on events. I’ve been using native kubernetes cronjobs to kick off jobs based on a cron trigger.
For instance I am running reader.waylonwalker.com every hour, to rebuild the site and re-deploy it. It takes about two minutes to fetch every rss feed, so this is a nice application of a job compared to a web server fetching the feeds live. Now my posts may be up to an hour stale but they load fast.
Argo events takes event drien architecture to the next level allowing to be triggered by many more things, and do many more things than creating a cron job. I’m definitely thinking about dropping this in my homelab [2].
References:
[1]: https://github.com/argoproj/argo-events?tab=readme-ov-file
[2]: /homelab/
What I'm learning in 2024
2024 has been a learning fueled year, Diving deep into things I never would
have previously thought I would. It’s been a bit of a mix of the 🔥hot twitter
trends, and exactly what tech twitter tells you not to do. It just goes to
show community is great, the tech community is filled with strong opinions, but
you need to think about what really makes sense for you, your career and your
customers (or lack there of).
tech # [1]
- k8s
- tailwind
- fastapi [2]
- htmx [3]
- jinja
- opnsense
successful one day builds # [4]
- play-outside
- reader
- thoughts
- thoughts chrome-extension
Kubernetes # [5]
Damn did I sleep on k8s for way took long. This is like exactly what I’ve
needed for a lot of things. It’s a perect example of what happens when you
listen to the tech community tell you.
Looking for a Heroku replacement, What I found was shocking! [6]
I started looking for something to make my homelab [7] deployments easier at home.
Previously I needed to ssh into my server an...
Today I am playing around with tailwind, flexing the css muscle and learning how to build new and different layouts with it.
I created a new post template that mimics a terminal look in css where I could inject the post title, description, and other frontmatter elements.
GitHub - catppuccin/ulauncher: 🇺 Soothing pastel theme for Ulauncher
🇺 Soothing pastel theme for Ulauncher. Contribute to catppuccin/ulauncher development by creating an account on GitHub.
GitHub · github.com [1]
I am using this theme for Ulauncher in arch and it looks fantastic! One line install (read it first).
python3 <(curl https://raw.githubusercontent.com/catppuccin/ulauncher/main/install.py -fsSL)
References:
[1]: https://github.com/catppuccin/ulauncher
Ulauncher — Application launcher for Linux 🐧
Download Ulauncher for Linux, discover extensions and videos, and support the project.
ulauncher.io [1]
Just discovered this really cool launcher from the DHH distro omakub. github.com/omakub [2]{.hoverlink}.
Ulauncher comes out of the box looking good, supports extensions, and shortcuts like I have a lot of mac launchers have. I installed it plus a theme and in no time It was looking good and launching applications.
In the past I have leaned in on rofi for task launching, it is good. I just felt it was harder to configure to get right or look good.
References:
[1]: https://ulauncher.io/
[2]: https://github.com/basecamp/omakub
The work on ulauncher [1] by catppuccin [2].
🇺 Soothing pastel theme for Ulauncher
References:
[1]: https://github.com/catppuccin/ulauncher
[2]: https://github.com/catppuccin
The work on editor.js [1] by codex-team [2].
A block-style editor with clean JSON output
References:
[1]: https://github.com/codex-team/editor.js
[2]: https://github.com/codex-team
[1]
This is a sick steam deck dock! With a corne built in laptop style.
References:
[1]: /static/https://kbd.news/Steam-Deck-dock-2291.html
GitHub - basecamp/omakub: Opinionated Ubuntu Setup
Opinionated Ubuntu Setup. Contribute to basecamp/omakub development by creating an account on GitHub.
GitHub · github.com [1]
This is DHH’s linux startup script. Call it a distro if you want, but he doesn’t. It’s made to take a vanilla ubuntu install and configure everything the way he likes it. There’s a number of great nuggets in here to pick up on.
No need to write bespoke configs for every essential tool just to get started or to be up on all the latest command-line tools. Omakub is an opinionated take on what Linux can be at its best.
Check it out and give it a ⭐ basecamp/omakub [1]{.hoverlink}.
References:
[1]: https://github.com/basecamp/omakub
From the circle to epicycles | Personal Site of Andrei N. Ciobanu
This article will be part of an extensive series in which I plan to explore various aspects of Fourier Mathematics. I will take notes, create some visuals (a good pretext to learn more about graphi...
andreinc.net [1]
This is a really cool animated visual representation of how sine waves work, how they relate to circles, pi, rad, and how to add up a series of waves to make square and sawtooth waves.
References:
[1]: https://www.andreinc.net/2024/04/24/from-the-circle-to-epicycles
External Link
x.com [1]
This looks like a sweet tui postman clone. Darren is really rolling with these tui’s. Cant wait to see where this one goes.
References:
[1]: https://x.com/_darrenburns/status/1797763563270095006
Check out darrenburns [1] and their project posting [2].
The modern API client that lives in your terminal.
References:
[1]: https://github.com/darrenburns
[2]: https://github.com/darrenburns/posting
How to Force Dark Mode on Every Website in Google Chrome
Do you like dark mode? Chrome now lets you forcibly enable it for every site on the web. No more blindingly bright websites.
How-To Geek · howtogeek.com [1]
Sometimes I struggle to get my os to report dark mode to chrome, luckily there is a way to force chrome to always use dark mode.
I’ve never really gotten into dark reader and extensions like this. For some reason they all make websites look really weird to me and I don’t really care for it. What I want is websites designed to be in dark/light to always go dark, if the designer didn’t design dark just let it be light.
References:
[1]: https://www.howtogeek.com/446198/how-to-force-dark-mode-on-every-website-in-google-chrome/
Tailscale allows you to ssh into all of your tailscale machines, it busts through firewalls and accross networks without complex setup. If you have used tailscale before this is an obvious no brainer. What is not obvious is that you can configure tailscale to allow ssh connections from devices within your tailnet without even a ssh daemon process running right through the tailscale daemon.
tailscale status
tailscale set --ssh
I picked this up from the tailscale youtube channel.
xxHash - Extremely fast non-cryptographic hash algorithm
xxhash.com [1]
xxHash is an extremely fast non-cryptographic hash algorithm, working at RAM speed limit. It is proposed in four flavors (XXH32, XXH64, XXH3_64bits and XXH3_128bits). The latest variant, XXH3, offers improved performance across the board, especially on small data.
References:
[1]: https://xxhash.com/
xxhash
Python binding for xxHash
PyPI · pypi.org [1]
I hit an issue with markata where even though a bunch of articles were cached, the site build was still slow because I was hitting hashlib.sha256 so hard for cache keys. I was shocked when this popped up in my profiler as a significant portion of the time spent. I swapped out for xxhash and that issue completely went away.
References:
[1]: https://pypi.org/project/xxhash/
I just implemented a latest blog post link in Markata by asking for the first post slug from the blog feed. The implementation uses the jinja_md plugin to render jinja against the markdown and a tag to redirect.
My latest blog post is [[ {{ markata.feeds.blog.posts[0].slug }} ]].  Click the
link if you are not automatically redirected.

<meta http-equiv="Refresh" content="0; url='/{{ markata.feeds.blog.posts[0].slug }}'" />
Setting up the feed #
Feeds are setup in markata.toml configuration. They provide a handy way to
create an html feed, rss feed, and quickly reference a filtered set of posts
like this.
# you will need to enable the jinja_md plugin along with the defaults
[markata]
hooks = [
    "markata.plugins.jinja_md",
    "default",
    ]

# set up the blog feed
[[markata.feeds]]
slug = 'blog'
template = "feed.html"
filter = "date<=today and templateKey in ['blog-post'] and published"
sort = "date"
reverse = true
For more information on markata check out the full markata post.
Replicate - Run AI with an API
Run open-source machine learning models with a cloud API
replicate.com [1]
This is so easy compared to self hosting stable diffusion yourself. It even has a nice api that you can hit with curl or python. The pricing seems competitive as well. Bookmarking this to try next time I need something like it.
References:
[1]: https://replicate.com/
How to Deliver Code Every Day
I recently calculated that I merge 0.8 pull requests every day into my team repo. Let’s round up and say I merge about one PR every day, delivering one or more features to production. I like this...
Jake Worth · jakeworth.com [1]
Great set of tips here!
No waiting. No “waiting until tomorrow” or “It’s Friday, let’s wait until Monday” to deploy. If your deploys are so slow that deploying an hour before the end of the day is a risk, that’s a separate problem. If you’re afraid of a Friday deploy, your system is too brittle, or you don’t have foolproof rollback procedures, or you don’t have people you trust on call to resolve it. Each of these is a problem that you can fix.
This one I find interesting I think there are some industries where customers come in large waves over the weekend, and a weekend bug can not only ruin someones day off, take longer to fix, but also cost a lot of money.
Not deploying on Friday is totally what that team should be doing.
Most of us are not that team. Most of us work on small teams supporting some sort of product that Should be able to be tested and rolled back. I completely agree with Jake here, if your not will...
You Have to Get Fast to Get Good at Programming
Great programmers aren’t fast because they’re great. They’re great because they’re fast.
Jake Worth · jakeworth.com [1]
Be Fast, Practice, Hone your craft. There’s a lot to be said here about honing your craft for editing text, picking up a few extra WPM, learning vim shortcuts.
Also just build shit. The more you build new and different things the more not only your text editing will just roll out, your skills to see patterns in code and architecture will flourish.
Read their bios, and the answer is always no. They loved to play, sure. They had some base talent, typically. But they also invested an absurd amount of time into that skill set.
This! is actually what turned me on to Post Malone. I remember hearing his story in how he was just known as the guy with a guitar because he was always playing it between class and everything.
References:
[1]: https://www.jakeworth.com/posts/be-fast/
Refactoring one line links into wikilinks
Previously I had setup a feature of my website to expand one line links into a
card. This was not a standard, even to the point that some formatters wrap the
links with , thus breaking my custom plugin. Moving to the
wikilink standard will allow my markdown posts to work accross more site
builders without custom integrations.
Expand One Line Links [1]
What is a wikilink # [2]
Wikilinks are standard to a lot of wikis written in markdown.
markdown-it-wikilinks [3]
The wikilink syntax is a slug wrapped in double square brackets.
[[ slug ]]
Marksman lsp will even autocomplete these for you, its pretty sweet.
Note
I recently implemented hover for wikilinks and and am pretty stoked about the
result. Check this one out sick wikilink hover [4].
Vim Quickfix # [5]
You could use vimgrep to fill your quickfix list will all of the one line links
but I am less familiar with vimgrep and kept missing posts for some reason, I
think it was something in my file glob missing some directori...
about this site
I registered waylonwalker.com and started making content for it in 2017 after a
big industry downturn in 2016 that left me scared for what would happen if I
were laid off. The company I was working for at the time did it’s first major
downsizing in history sending many really good engineers out to look for new
opportunities in a world flooded with many in the same situation. This was
very similar to what happened to the tech industry in 2024.
This was very similar to what happened to the tech industry in 2024.
See Waylon Walker [1] for more about me.
What is this site? # [2]
- It’s a blog
- Digital Garden
- Learn in public
- TIL
- portfolio
- my personal corner of the internet
It’s [NOT]{.text-red-500 .text-6xl .font-bold} Perfect # [3]
- There will be mistakes
- I will learn
- Grammar will be fine, but never perfect
- Code will run on my machine, but not guaranteed to be perfect
- There will be days when the whole site is broken
It started as a blog # [4]
This site...
Just starred eol-dr [1] by pypeaday [2]. It’s an exciting project with a lot to offer.
A crowd-sourced guide to help techs help their non-tech spouses / partners / parents / kids when we are at the end-of-life
References:
[1]: https://github.com/pypeaday/eol-dr
[2]: https://github.com/pypeaday
sick wikilink hover
Today I set up some sick wikilink hover effects using tailwind see A Case For Tailwindcss [1]. When you hover over them they show an image preview
of the link that you are going to. I cant find where I have seen this but it
comes from some docs sites.
I’ll finish this article later, just excited to see it up.
References:
[1]: /a-case-for-tailwindcss/
Zellij (@Zellij_dev) on X
POV your sysadmin rigged your terminal to show this when you ssh into production
X (formerly Twitter) · x.com [1]
This one is too funny. opening a sixel image in the terminal when logging into prod.
References:
[1]: https://x.com/Zellij_dev/status/1574675207935107072
text-decoration-line - Typography
Utilities for controlling the decoration of text.
tailwindcss.com [1]
Tailwind calls strikethrough line-through. This caught me off guard and took me a minute to find.
Control how text is decorated with the underline, no-underline, and line-through utilities.
References:
[1]: https://tailwindcss.com/docs/text-decoration
Digital Gardening for Non-Technical Folks
How to build a digital garden without touching code
maggieappleton.com [1]
Maggie is a fantastic proponent to the digital gardening movement. In this article she proposes 3 ways for someone to start their own digital garden with low friction and no code.
References:
[1]: https://maggieappleton.com/nontechnical-gardening
We have a right to repair! with Kyle Wiens, Founder and CEO at iFixit (Changelog Interviews #582)
This week Adam went solo — talking to Kyle Wiens, Founder and CEO at iFixit, about all things Right to Repair. They discussed the latest win here in the US with Oregon passing an electronics Righ...
Changelog · changelog.com [1]
This is one of my favorite changelog episodes of all time. I had no idea all the work that has gone into the right to repair and ifixit. They talk a lot about apple and its trend to be less repairable from unservicable air pods to serialized components within iphone.
A lot of legal talk that was far more interesting that I thought it would be. Recently winning the right to repair case against John Deere, and creating repairability scores for devices to be placed in stores like energy guide is.
References:
[1]: https://changelog.com/podcast/582
markata
This post is a work in progress.
Markata is the static site generator that I created to build my website about this site [1]. I built it for me and I enjoy using it. I know everying
it can do and I can extend it to do more easily. I have set it up for some
friends to also use it and am proud that it helps them publish their content.
It’s a meme to create your own static site generator to make your website. Yes
its funny, I don’t recommend it if your not ready for the level of work that
comes with it, but at the end of the day it’s very rewarding and a great way to
learn.
Static Sites were all the rage # [2]
JAMStack was 🔥
Gatsby and Next.js hit the scene as the next generation of static site builders
and were getting big around the time I started building my site in 2017. They
were based on react. I dove into react and learned it enough to build my
website, but I really lacked the depth of knowledge in the js ecosystem to
really work on it effectively. For instance when it got ...
my linked in work history
My linked in work history is empty. I made up a position about content
developer that tracks how long I’ve been blogging. I think i did this because
LinkedIn requires it. Either way this is public knowledge and fine sharing.
Social Engineering # [1]
If you have taken any security class for your job seriously you have already
been told not to share your work with most companies to the public, this is
private information that only opens you up for social engineering attacks
against that company.
I care about privacy and security # [2]
I care about the security of these companies I work for and their reputation,
so I refuse to publically share it.
Need to know # [3]
If somehow you need to know where I work it’s my choice to tell you. I don’t
need to advertise to every social engineering hacker where I work on the
platform that they go to get that information from.
References:
[1]: #social-engineering
[2]: #i-care-about-privacy-and-security
[3]: #need-to-know
Your LinkedIn is Garbage
Your linkedin link sits at the top of your resume, its one of the first things
I see when I open your resume, but yet it gives me no more information that the
damn resume you sent me.
Save that space on your resume for something useful.
So you want that /in/me on your resume # [1]
Fine if you want it on your resume make it actually useful for someone reading
your resume.
Actually post something # [2]
If I am reading resume’s and I actually take the time to look at your linkedin
I want to see you post something. Take a side, make an opinion and post it.
Learn something new, make a post about it. If you have a blog and you make a
good post share it there.
Your work history belongs on your resume # [3]
Any security 101 tells you that you should not share your work history on
linked in. You should not share photos of you at your workplace that include
sensitive information such as your badge.
Your work history on LinkedIn is for hackers to steal and use for social
engineering.
...
Try Out the Latest Linux Gnome DE With DistroBox
Discover a step-by-step guide to installing and experiencing the latest Linux Gnome desktop environment with DistroBox.
Linux TLDR · linuxtldr.com [1]
Get gnome running in distrobox.
References:
[1]: https://linuxtldr.com/gnome-de-in-distrobox/
STLGears.com
The Free STL Gear Designer For 3D Printing
stlgears.com [1]
This is a pretty nice gear generator. I printed a few gears today and it worked great so far.
References:
[1]: https://www.stlgears.com/generators/3dprint
GitHub - eraser-dev/eraser: 🧹 Cleaning up images from Kubernetes nodes
🧹 Cleaning up images from Kubernetes nodes. Contribute to eraser-dev/eraser development by creating an account on GitHub.
GitHub · github.com [1]
This is kinda sick, its a tool to clean up container images in a k8s cluster.
References:
[1]: https://github.com/eraser-dev/eraser?tab=readme-ov-file
I recently discovered eraser [1] by eraser-dev [2], and it’s truly impressive.
🧹 Cleaning up images from Kubernetes nodes
References:
[1]: https://github.com/eraser-dev/eraser
[2]: https://github.com/eraser-dev
Distrobox
Use any linux distribution inside your terminal.
distrobox.it [1]
distrobox gives you distrobox-host-exec to run commands on the host. This is handy to get access to host level clis that you probably wouldn’t want to run from the container like podman, docker, flatpak.
DESCRIPTION
distrobox-host-exec lets one execute command on the host, while inside of a container.
Under the hood, distrobox-host-exec uses host-spawn a project that lets us execute commands back on the host. If the tool is not found the user will be prompted to install it.
References:
[1]: https://distrobox.it/usage/distrobox-host-exec/
Are We Anti-Cheat Yet?
areweanticheatyet.com [1]
A comprehensive community built index of anti-cheat support for linux very similar to proton, but specific to anticheat support.
References:
[1]: https://areweanticheatyet.com/
GitHub - ublue-os/image-template: Build your own custom Universal Blue Image!
Build your own custom Universal Blue Image! Contribute to ublue-os/image-template development by creating an account on GitHub.
GitHub · github.com [1]
ublue-os makes a github template for making your own git [2] repo with actions that build out your own personal ublue iso.
References:
[1]: https://github.com/ublue-os/image-template
[2]: /glossary/git/
The work on image-template [1] by ublue-os [2].
Build your own custom Universal Blue Image!
References:
[1]: https://github.com/ublue-os/image-template
[2]: https://github.com/ublue-os
GitHub - ublue-os/obs-studio-portable: OCI container image of OBS Studio that bundles a curated collection of 3rd party plugins
OCI container image of OBS Studio that bundles a curated collection of 3rd party plugins - ublue-os/obs-studio-portable
GitHub · github.com [1]
Distrobox is so interesting and cool, I’ve only recently started realizing how much it can do especially related to hardware and graphics, this is quite an example that runs obs in a distrobox. I had no idea distrobox would let you connect to cameras and gpus so seemlessly, and give you a gui to work from. And with distrobox you can export so that it just looks like an app on your system.
References:
[1]: https://github.com/ublue-os/obs-studio-portable
The work on obs-studio-portable [1] by ublue-os [2].
OCI container image of OBS Studio that bundles a curated collection of 3rd party plugins
References:
[1]: https://github.com/ublue-os/obs-studio-portable
[2]: https://github.com/ublue-os
andydunstall [1] has done a fantastic job with piko [2]. Highly recommend taking a look.
An open-source alternative to Ngrok, designed to serve production traffic and be simple to host (particularly on Kubernetes)
References:
[1]: https://github.com/andydunstall
[2]: https://github.com/andydunstall/piko
How Ahrefs gets a Billion dollar-worth infrastructure with a 90% discount
A holistic comparison of on-prem Ahrefs infrastructure with a cloud alternative
Medium · tech.ahrefs.com [1]
2024 has been a wild year for infra with going “back” to on prem being made popular by @dhh [2]. Well it looks like ahrefs saw right through the cloud trends an decided to ride the anti cloud train until it came back around to the station.
Being just a bit critical of the article it is impossible to get an apples to apples without actually running something of this scale and spending too much to find out. I cant imagine raw ec2 and ebs being the cheapest route into aws. They used no serverless tech in their article, but I digress, because I like this own your shit and build good product train.
What about People?!
This follow up does dive into the typical gut reaction that people cost a lot of money, you must account for them. You see when you hire people who are actually good at what they do, and run lean a lot of cost goes away, you have levels of management that disappear, levels of tooling that don’t need to exist, departments of IT don’t need to exist.
Colo’s are the new hotness, and will...
Safer Bash Shebang Recipes - Just Programmer's Manual
just.systems [1]
When using justfiles each line is ran separately from the last, unless you specify the file to be ran by something other than just such as bash. If you want variables to persist you need to set a shebang.
Also if you are using your script i a way that you want it to exit when it fails you need to set -e and -o pipefail. This is critical if you are thinking about using just for production scripts like ci/cd. I’ve hit too bugs where ci passes, but no artifacts were created issues for this exact reason.
foo:
#!/usr/bin/env bash
set -euxo pipefail
hello='Yo'
echo "$hello from Bash!"
References:
[1]: https://just.systems/man/en/safer-bash-shebang-recipes.html?highlight=pipefail#safer-bash-shebang-recipes
Justfile Cheat Sheet
Just is a command runner https://github.com/casey/just
Cheatography · cheatography.com [1]
This is a dope ass cheat sheet for justfiles. It’s filled with good examples that are short and to the point, probably all from the docs, but anyways I need to do some like this for myself.
References:
[1]: https://cheatography.com/linux-china/cheat-sheets/justfile/
A quote from Tim Paul
I’m no developer, but I got the AI part working in about an hour. What took longer was the other stuff: identifying the problem, designing and building the UI, setting …
Simon Willison’s Weblog · simonwillison.net [1]
Damn this Tim Paul quote finishes hard and such a good point. None of the stuff around llms just work. Good ui’s, front end, back end, infrastructure, product. All these things still need to exist, and in fact for ai to be good we need to still go hard on them otherwise everything will die in a heaping pile of ai slop [2]
I’m no developer, but I got the AI part working in about an hour.
What took longer was the other stuff: identifying the problem, designing and building the UI, setting up the templating, routes and data architecture.
It reminded me that, in order to capitalise on the potential of AI technologies, we need to really invest in the other stuff too, especially data infrastructure.
It would be ironic, and a huge shame, if AI hype sucked all the investment out of those things.
— Tim Paul [3]
References:
[1]: https://simonwillison.net/2024/May/13/tim-paul/
[2]: https://simonwillison.net/2024/May/8/slop/
[3]: https://www.timp...
PopSQL - Collaborative SQL Editor - Bring Order to SQL Chaos
PopSQL is a unified SQL collaboration workspace that connects everyone in the data analysis process so you can obtain better insights by asking the right questions, together.
PopSQL · popsql.com [1]
PopSql looks like a very innovative product to bring collaboration to data exploration and visualization in a way you would expect from something like vscode liveshare. This looks far more appealing than a traditional BI data tool.
References:
[1]: https://popsql.com/
Pricing | PopSQL
PopSQL is a unified SQL collaboration workspace that connects everyone in the data analysis process so you can obtain better insights by asking the right questions, together.
PopSQL · popsql.com [1]
interesting pricing model from popsql (pronounces Popsicle). At a glance you pay for data retention, want the abiltiy to recall all the queries you ran within the last year, run at a higher frequency, you jump a pricing tier.
References:
[1]: https://popsql.com/pricing
-
such a sick episode with dax.
SST’s free tier will be free as long as aws allows a free tier, their free tier literally costs them nothing.
They talked about keeping SST small, the limitations that brings, but also the number of problems that just go away when you only have 3 people building. Lots of process disappears, everyone can trust everyone, no one needs to wait for approval, everyone is their own PM and just builds cool shit. They don’t have to worry about big costs and making payroll because they are profitable so much higher than their costs.
If they can get through phase one of just being the go platform for a very specific audience of users, and gain marketshare, the ideas of offerings on top of this are endless.
-
I had no idea that you could just drop an msi installer right in steam. This worked for me, and was much easier to install pokemon tcg live in 05-2024 on ubuntu 22-04. I added the msi to steam from my downloads, hit start, failed right away like he said it would. changed compatability to proton experimental, and it opened right up.
- Download the official installer from pokemon tcg
- Add non steam game
- click show all file types
- navigate to downloaded msi
- click gear icon > compatability > proton experimental
- click play
- profit
The work on datastar [1] by starfederation [2].
The hypermedia framework.
References:
[1]: https://github.com/starfederation/datastar
[2]: https://github.com/starfederation
Fields
Pydantic Docs · docs.pydantic.dev [1]
exclude=True and repr=False is a good pydantic combination for secret attributes such as user passwords, or hashed passwords. exclude keeps it out of model_dumps, and repr keeps it out of the logs.
from pydantic import BaseModel, Field
class User(BaseModel):
name: str = Field(repr=True)
age: int = Field(repr=False)
user = User(name='John', age=42)
print(user)
#> name='John'
References:
[1]: https://docs.pydantic.dev/2.7/concepts/fields/#field-representation
just has been by go to tool for saving
commands in a way that I can replay them and have team members replay them
without relying on the shell history of any given machine. This is my go to
default step, it lets you pick a just command to run with a fuzzy picker.
default:
  @just --list
Hatch v1.10.0 - Hatch
hatch.pypa.io [1]
Hatch be flyin.
This new release of hatch includes support for the new package installer uv which is just mind blowing fast compared to anything else we have in python right now.
[tool.hatch.envs.default]
installer = "uv"
The other features are cool too, check them out. I’ll probably be using the test runner, but I’ve been waiting for the uv support since uv launched.
References:
[1]: https://hatch.pypa.io/latest/blog/2024/05/02/hatch-v1100/
External Link
loggly.com [1]
I had a boot issue on my sons fresh ubuntu 24.04 install and journalctl came in clutch.
journalctl -p 3 -xb
- -p 3 gives me priority 3
- -x gives me extra catalog information when available
- -b gives me the current boot.
References:
[1]: https://www.loggly.com/ultimate-guide/using-journalctl/
Bug #2006590 “gdm3 crashes with SIGTRAP on startup” : Bugs : gdm3 package : Ubuntu
Suddenly this week, my GUI (ubuntu 22.10) does not open, stuck on the console text.
I tried to free some space (by uninstall a app), then to check/update the paquets (dkpg).
ProblemType: Bug
Distr…
Launchpad · bugs.launchpad.net [1]
This Thread saved my son’s ubuntu 24.04 install.
His was failing to start with the following error.
Gdm: GdmSession: no session desktop files installed, aborting...
https://twitter.com/_WaylonWalker/status/1785825677079441482
sudo apt install --reinstall ubuntu-session
References:
[1]: https://bugs.launchpad.net/ubuntu/+source/gdm3/+bug/2006590
GitHub - Alir3z4/html2text: Convert HTML to Markdown-formatted text.
Convert HTML to Markdown-formatted text. Contribute to Alir3z4/html2text development by creating an account on GitHub.
GitHub · github.com [1]
Super neat tool to convert html [2] to markdown
>>> import html2text
>>>
>>> print(html2text.html2text("<p><strong>Zed's</strong> dead baby, <em>Zed's</em> dead.</p>"))
<!--markata-attribution-->
**Zed's** dead baby, _Zed's_ dead.
It even plays nicely with rich.
from rich.markdown import Markdown
from rich.console import Console
import html2text
console = Console()
md = Markdown(html2text.html2text("<p><strong>Zed's</strong> dead baby, <em>Zed's</em> dead.</p>"))
console.print(md)
References:
[1]: https://github.com/Alir3z4/html2text
[2]: /html/
-
Fantastic interview with Uncle Bob, really it was more of a 2 way conversation. So many of Uncle Bob’s takes have been taken out of context, its cool to hear some of the well actuallys, and the experience behind some of the reasoning.
External Link
medium.com [1]
Imagine waking up to a $1,300 for running an example project! That sounds like peanuts for a cloud bill but for an individual trying to learn that hits my monthly budget real hard.
That’s what happened to Marciej, make sure you check out the full article and give them a 👏 on Medium if you have an account.
The more I see things come out about aws, the more it makes me sick, and confirm my feelings that I cannot possibly use them for a side project without some real $$ planning to come out of it.
Yes, S3 charges for unauthorized requests (4xx) as well[1]. That’s expected behavior.
They offer no DDOS protection against 4xx or 5xx requests against your bucket. Absolutely bonkers that you have ZERO control over this.
---
This response just feels absolutely gross.
I notified the AWS security team. I suggested that they restrict the unfortunate S3 bucket name to protect their customers from unexpected charges, and to protect the impacted companies from data leaks. But they were unwilling to address misconfigurations of third-party products.
It sounds like this guy followed some default instructions for an example site, HOW MANY OTHERS have done th...
Media Types
iana.org [1]
A full list of standard Accept types.
This is a handy reference.
References:
[1]: https://www.iana.org/assignments/media-types/media-types.xhtml#text
![https://docs.pydantic.dev/2.7/api/networks/#pydantic [1].networks.EmailStr](/static/https://docs.pydantic.dev/2.7/api/networks/#pydantic [1].networks.EmailStr)
pydantic has a nice built in email validator EmailStr
It requires an optional pydantic dependency
pip install email-validator
Then you can validate email addresses.
from pydantic import BaseModel, EmailStr
class Model(BaseModel):
email: EmailStr
print(Model(email='[email protected]'))
#> email='[email protected]'
References:
[1]: /tags/pydantic/
[1]
This is my go to rich response container for clis written in python. It creates a nice box around the content on the screen and provides some nice separation in the output. It can be overdone, but comes in clutch when looking for that print statement in a long output.
References:
[1]: /static/https://rich.readthedocs.io/en/stable/reference/panel.html
Handling Errors - FastAPI
FastAPI framework, high performance, easy to learn, fast to code, ready for production
fastapi.tiangolo.com [1]
This page shows how to customize your fastapi [2] errors. I found this very useful to setup common templates so that I can return the same 404’s both programatically and by default, so it all looks the same to the end user.
from fastapi import FastAPI, Request
from fastapi.responses import JSONResponse
class UnicornException(Exception):
def __init__(self, name: str):
self.name = name
app = FastAPI()
@app.exception_handler(UnicornException)
async def unicorn_exception_handler(request: Request, exc: UnicornException):
return JSONResponse(
status_code=418,
content={"message": f"Oops! {exc.name} did something. There goes a rainbow..."},
)
@app.get("/unicorns/{name}")
async def read_unicorn(name: str):
if name == "yolo":
raise UnicornException(name=name)
return {"unicorn_name": name}
---
This post sat in draft for months. I stumbled upon it again and found great success returning good error messages based on user preferences. the default remains json, but if a user requests text/html it will be an html [3] response, and text for ...
Creating SSH Apps with Charm Wish and Laravel Prompts
Building PHP CLI apps with Laravel Prompts is easy, but how can we share them? Charm to the rescue! Charm Wish is an easy-to-use SSH server that allows users to securely log into your server and us...
Joe Tannenbaum · blog.joe.codes [1]
Joe has a sick cli.labs site for deploying tui applications.
ssh cli.lab.joe.codes
References:
[1]: https://blog.joe.codes/creating-ssh-apps-with-charm-wish-and-laravel-prompts
white-space CSS property - CSS | MDN
The white-space CSS property sets how white space inside an element is handled.
MDN Web Docs · developer.mozilla.org [1]
html [2] can preserve newline \n characters by styling an element with white-space: pre-wrap;
pre-wrap
Sequences of white space are preserved. Lines are broken at newline characters, at
, and as necessary to fill line boxes.
References:
[1]: https://developer.mozilla.org/en-US/docs/Web/CSS/white-space
[2]: /html/
htmx ~ The htmx Response Targets Extension Extension
htmx gives you access to AJAX, CSS Transitions, WebSockets and Server Sent Events directly in HTML, using attributes, so you can build modern user interfaces with the simplicity and power of hypert...
htmx.org [1]
The htmx [2] response-targets extension allows me to respond to errors from the backend and do normal htmx swaps.
Note
by default htmx will only swap on 200 and 300 responses
Load the extension in head
<script src="https://unpkg.com/[email protected]/dist/ext/response-targets.js"></script>
Use the extension on an endpoint that might return a 400.
<div hx-ext="response-targets">
<div id="response-div"></div>
<button hx-post="/register"
hx-target="#response-div"
hx-target-5*="#serious-errors"
hx-target-404="#not-found">
Register!
</button>
<div id="serious-errors"></div>
<div id="not-found"></div>
</div>
References:
[1]: https://htmx.org/extensions/response-targets/
[2]: /htmx/
How to Restart All Pods in a Kubernetes Namespace | Boot.dev
Where I work, we use a repo-per-namespace setup and so it often happens that I want to restart all pods and deployments in a single Kubernetes namespace. Maybe I want to see the startup logs, or ma...
Boot.dev · blog.boot.dev [1]
As of kubernetes 1.15 there is an easy way to restart all pods in a deployment.
kubectl -n {NAMESPACE} rollout restart deploy
Thanks Lane give him a follow @wagslane [2]
References:
[1]: https://blog.boot.dev/open-source/how-to-restart-all-pods-in-a-kubernetes-namespace/
[2]: https://twitter.com/wagslane
TIL how to display the list of nfs mounts on your network.
showmount -e
You can even look for mounts of other machines on your network.
showmount -e <hostname>
To allow access only to the
{
  "Version": "2012-10-17",
  "Statement": [
    {
      "Effect": "Allow",
      "Action": [
        "admin:*"
      ]
    },
    {
      "Effect": "Allow",
      "Action": [
        "kms:*"
      ]
    },
    {
      "Effect": "Allow",
      "Action": [
        "s3:*"
      ],
      "Resource": [
        "arn:aws:s3:::<bucket>",
        "arn:aws:s3:::<bucket>/*"
      ]
    }
  ]
}
You can inspect sqlite tables with the sqlite shell.
note that you get into the shell with
sqlite3 database.db
.tables
I also learned that .tables, .index and .schema are helper functions that
query the sqlite_master table on the main database.
Here is an output from my redka database. The sqlite_master table contains all the sqlite objects type, name, tbl_name, rootpage, and sql to create them.
❯ sqlite3 database.db "SELECT * from sqlite_master;"
table|rkey|rkey|2|CREATE TABLE rkey (
    id       integer primary key,
    key      text not null,
    type     integer not null,
        version  integer not null,
    etime    integer,
        mtime    integer not null
)
index|rkey_key_idx|rkey|3|CREATE UNIQUE INDEX rkey_key_idx on rkey (key)
index|rkey_etime_idx|rkey|4|CREATE INDEX rkey_etime_idx on rkey (etime)
where etime is not null
trigger|rkey_on_type_update|rkey|0|CREATE TRIGGER rkey_on_type_update
before update of type on rkey
for each row
when old.type is not new.type
begin
    select raise(abort, 'key type mismatch');
end
table|rstring|rstring|5|CREATE TABLE rstring (
    key_id integer not null,
    value  blob not null,

    foreign key (key_id) references rkey (id)
          on delete cascade
)
index|rstring_pk_idx|rstring|6|CREATE UNIQUE INDEX rstring_pk_idx on rstring (key_id)
view|vstring|vstring|0|CREATE VIEW vstring as
  select
    rkey.id as key_id, rkey.key, rstring.value,
        datetime(etime/1000, 'unixepoch') as etime,
        datetime(mtime/1000, 'unixepoch') as mtime
  from rkey join rstring on rkey.id = rstring.key_id
  where rkey.type = 1
    and (rkey.etime is null or rkey.etime > unixepoch('subsec'))
table|rhash|rhash|7|CREATE TABLE rhash (
    key_id integer not null,
    field text not null,
    value blob not null,

    foreign key (key_id) references rkey (id)
      on delete cascade
)
index|rhash_pk_idx|rhash|8|CREATE UNIQUE INDEX rhash_pk_idx on rhash (key_id, field)
index|rhash_key_id_idx|rhash|9|CREATE INDEX rhash_key_id_idx on rhash (key_id)
view|vhash|vhash|0|CREATE VIEW vhash as
  select
    rkey.id as key_id, rkey.key, rhash.field, rhash.value,
        datetime(etime/1000, 'unixepoch') as etime,
        datetime(mtime/1000, 'unixepoch') as mtime
  from rkey join rhash on rkey.id = rhash.key_id
  where rkey.type = 4
    and (rkey.etime is null or rkey.etime > unixepoch('subsec'))
With the liscense changes to redis there are several new forks out there. One that I am particularly interested in is redka.
curl https://i.jpillora.com/nalgeon/redka | bash
chmod +x redka
./redka database.db
We now have redis running on port 6379 that we can connect to with a redis client. And we have a sqlite database that we can inspect.
❯ sqlite3 database.db "SELECT name FROM sqlite_master;"
rkey
rkey_key_idx
rkey_etime_idx
rkey_on_type_update
rstring
rstring_pk_idx
vstring
rhash
rhash_pk_idx
rhash_key_id_idx
vhash
We can look at the values in the vstring table.
sqlite3 database.db "SELECT * from vstring;"
1|hi|hello there you||2024-04-17 01:46:26
The main system that I am concerned about is my arch BTW machine. I found a great article from the official archlinux site covering it.
For my machine I am concerned with this line.
The xz packages prior to version 5.6.1-2 (specifically 5.6.0-1 and 5.6.1-1) contain this backdoor.
I checked my xz package with AUR.">paru, and I am good.
paru -Qii zx
AUR.">paru has some nice features that I rarely use, and hav to look up when I need them. Here are two commands to help with dependency management.
❯ paru -Qii nodejs
Name            : nodejs
Version         : 21.7.2-1
Description     : Evented I/O for V8 javascript
Architecture    : x86_64
URL             : https://nodejs.org/
Licenses        : MIT
Groups          : None
Provides        : None
Depends On      : icu  libuv  libnghttp2  libnghttp3  libngtcp2  openssl  zlib  brotli  c-ares
Optional Deps   : npm: nodejs package manager [installed]
Required By     : node-gyp  nodejs-nopt  npm  semver
Optional For    : None
Conflicts With  : None
Replaces        : None
Installed Size  : 46.86 MiB
Packager        : Felix Yan <[email protected]>
Build Date      : Thu 04 Apr 2024 05:11:09 AM CDT
Install Date    : Mon 15 Apr 2024 07:27:02 AM CDT
Install Reason  : Installed as a dependency for another package
Install Script  : No
Validated By    : Signature
Backup Files    : None
Extended Data   : pkgtype=pkg
You can check all the packages depended on by nodejs by running the following. This is everything from all of the repos you have configured, not what you have installed.
❯ pactree --reverse --sync --depth 1 nodejs

nodejs
├─acorn
├─ansible-language-server
├─asar
├─babel-cli
├─babel-core
├─bash-language-server
├─blinksocks
├─bower
├─browserify
├─coffeescript
├─dot-language-server
├─emscripten
├─eslint
├─eslint-language-server
├─eslint_d
├─gitlab
├─gnomon
├─grunt-cli
├─gtop
├─gulp
├─hedgedoc
├─jake
├─markdownlint-cli2
├─marked
├─marked-man
├─matrix-appservice-irc
├─modclean
├─node-gyp
├─nodejs-emojione
├─nodejs-material-design-icons
├─nodejs-nopt
├─nodejs-source-map
├─nodejs-yaml
├─npm
├─openui5
├─pm2
├─prettier
├─pyright
├─rapydscript-ng
├─s3rver
├─semver
├─serverless
├─stylelint
├─stylus
├─svelte-language-server
├─tailwindcss-language-server
├─ts-node
├─typescript
├─typescript-svelte-plugin
├─uglify-js
├─vscode-css-languageserver
├─vscode-html-languageserver
├─vscode-json-languageserver
├─vue-language-server
├─vue-typescript-plugin
├─wasm-bindgen
├─web-ext
├─wrangler
├─yaml-language-server
├─yarn
Changelog Master Feed
Your one-stop shop for all Changelog podcasts.
Changelog · changelog.com [1]
Jerod (It’s ya boi) and Adam are my favorite tech news nerds, and have the sickest podcasts in tech. Yes plural podcasts they run seven podcasts maybe more. If you want it short and sweet they got the best 15 minutes of tech news each week this is it. My favorite is Ship it, sad to see Gerhard go, but Justin and Autumn are crushing it. Every episode is highly polished and surrounded by the sickest beats in podcasting.
Subscribe to one pod if you want, but I recommend collecting them all with the master feed.
⭐⭐⭐⭐⭐
References:
[1]: https://changelog.com/master
MarkdownDown
Convert any webpage to a clean markdown w/ images downloaded.
MarkdownDown · markdowndown.vercel.app [1]
Small web app to convert html [2] into markdown. Pretty cool idea. I actually want to look into this for reader and see how well it would work. Right now I am just pulling descriptions, but maybe I can pull full web pages, and keep the full intent of the first 200 words or so in the cards.
References:
[1]: https://markdowndown.vercel.app/
[2]: /html/
Boston Dynamics’ new humanoid moves like no robot you’ve ever seen
All-electric, 360° joints give the new Atlas plenty of inhuman movements.
Ars Technica · arstechnica.com [1]
Award for the creepiest way to stand up a robot from lying flat.
References:
[1]: https://arstechnica.com/gadgets/2024/04/boston-dynamics-debuts-humanoid-robot-destined-for-commercialization/
Rug pull, not cool! (Changelog & Friends #40)
If Changelog News had an extended edition, this might be it! Jerod & Adam discuss Hashicorp's Cease and Desist letter, Redis getting forked, Boston Dymanics' scary cool new robot, Justin Searls' ex...
Changelog · changelog.com [1]
Five star episode with Jarod and Adam shootin the crap.
The massive Cease and Desist [2]
Sucks that the guest had to back out, what a wild world 2024 is. Filled with license and pricing changes.
From Vim to Zed [3]
Interesting to hear the journey into zed, way to go Thorston diving all the way into working at zed.
Boston Dynamics’ new Atlas [4]
I later saw this through a YT short, and man does it hold up to the creepy level that they described.
MarkdownDown [5]
This is a legit cool service, that converts html [6] into markdown
References:
[1]: https://changelog.com/friends/40
[2]: https://opentofu.org/blog/our-response-to-hashicorps-cease-and-desist/
[3]: https://registerspill.thorstenball.com/p/from-vim-to-zed
[4]: https://arstechnica.com/gadgets/2024/04/boston-dynamics-debuts-humanoid-robot-destined-for-commercialization
[5]: https://markdowndown.vercel.app/
[6]: /html/
I recently had to update my copier-gallery command to trust my own templates because some of them have shell scripts that run afterwards. Be warned that this could be a dangerous feature to run on random templates you get off the internet, but these are all mine, so if I wreck it its my own fault.
copier copy --trust <template> <destination>
All the the copier copy api can be found with help.
❯ copier copy --help
copier copy 8.3.0

Copy from a template source to a destination.

Usage:
    copier copy [SWITCHES] template_src destination_path

Hidden-switches:
    -h, --help                         Prints this help message and quits
    --help-all                         Prints help messages of all sub-commands and quits
    -v, --version                      Prints the program's version and quits

Switches:
    -C, --no-cleanup                   On error, do not delete destination if it was
                                       created by Copier.
    --UNSAFE, --trust                  Allow templates with unsafe features (Jinja
                                       extensions, migrations, tasks)
    -a, --answers-file VALUE:str       Update using this path (relative to
                                       `destination_path`) to find the answers file
    -d, --data VARIABLE=VALUE:str      Make VARIABLE available as VALUE when rendering the
                                       template; may be given multiple times
    -f, --force                        Same as `--defaults --overwrite`.
    -g, --prereleases                  Use prereleases to compare template VCS tags.
    -l, --defaults                     Use default answers to questions, which might be
                                       null if not specified.
    -n, --pretend                      Run but do not make any changes
    -q, --quiet                        Suppress status output
    -r, --vcs-ref VALUE:str            Git reference to checkout in `template_src`. If you
                                       do not specify it, it will try to checkout the
                                       latest git tag, as sorted using the PEP 440
                                       algorithm. If you want to checkout always the
                                       latest version, use `--vcs-ref=HEAD`.
    -s, --skip VALUE:str               Skip specified files if they exist already; may be
                                       given multiple times
    -w, --overwrite                    Overwrite files that already exist, without asking.
    -x, --exclude VALUE:str            A name or shell-style pattern matching files or
                                       folders that must not be copied; may be given
                                       multiple times
![[none]]
---
apiVersion: argoproj.io/v1alpha1
kind: Application
metadata:
name: kanboard
namespace: argocd
spec:
project: default
destination:
namespace: kanboard
server: 'https://kubernetes.default.svc'
source:
path: kanboard
repoURL: 'https://github.com/waylonwalker/homelab-argo'
targetRevision: HEAD
syncPolicy:
automated:
prune: true
Manual Upgrades | K3s
You can upgrade K3s by using the installation script, or by manually installing the binary of the desired version.
docs.k3s.io [1]
You can give k3s an install channel to install stable, latest, or specific versions like 1.26. This is handy to make sure that you install the same version on all of your workers.
curl -sfL https://get.k3s.io | INSTALL_K3S_CHANNEL=latest <EXISTING_K3S_ENV> sh -s - <EXISTING_K3S_ARGS>
References:
[1]: https://docs.k3s.io/upgrades/manual
Today I accidentally ran f2 in ipython to discover that it opens your $EDITOR!
I use this feature quite often in zsh, it is bound to <c-e> for me, and since
I have my environment variable EDITOR set to nvim it opens nvim when I hit
<c-e>. Today I discovered that Ipython has this bound to F2. If you know
how to set it to <c-e> let me know I’ve tried, a lot.
export EDITOR=nvim
ipython
<F2>
better yet add export EDITOR=nvim to your .zshrc
# ~/.zshrc
export EDITOR=nvim
Devin's Upwork "side hustle" exposed (Changelog News #90)
YouTuber "Internet of Bugs" breaks down why AI "software engineer" Devin is no Upwork hero, Redka is Anton Zhiyanov's attempt to reimplement Redis with SQLite, OpenTofu issues its response to Hashi...
Changelog · changelog.com [1]
Damn 2024 is such a shit show, now Devin seems to be out as a complete scam. It’s really teaching us to have skepticism for what you find on the internet. Turns out that when broken down frame by frame much of the description in the video was a straight up lie. Personally it seemed quite plausible that it was percentage points better than the competition, but I was not holding my breath for it to be a hands off engineer.
References:
[1]: https://changelog.com/news/90
External Link
stackoverflow.com [1]
I learned about the sqlite_master table from this stack overflow answer. This helps make a lot of sense to how sqlite works. The master table contains all the sqlite objects and the sql to create them.
The .tables, and .schema “helper” functions don’t look into ATTACHed databases: they just query the SQLITE_MASTER table for the “main” database. Consequently, if you used
sqlite3 database.db "SELECT * from sqlite_master;"
References:
[1]: https://stackoverflow.com/questions/82875/how-can-i-list-the-tables-in-a-sqlite-database-file-that-was-opened-with-attach#answer-83195
I’ve really been enjoying using sqlmodel for my projects that need a database. One thing that I definitely lacked on for too long was indexing my database. I hit a point with one database where it was taking 7s for pretty simple paginated queries to return 10 records.
For every field that you will be querying on, you can create an index, by
setting it equal to Field(index=True)
class Hero(SQLModel, table=True):
    id: int | None = Field(default=None, primary_key=True)
    name: str = Field(index=True)
    secret_name: str
    age: int | None = Field(default=None, index=True)
example courtesy of the docs
Note
primary keys are indexed by default.
The docs cover this pretty well, and in quite depth - Optimizing Queries
Redirecting
15r10nk.github.io [1]
This is a cool snapshot testing tool that automatically creates, and updates test values for you.
Starting with some test code.
from inline_snapshot import snapshot
def something():
return 1548 * 18489
def test_something():
assert something() == snapshot()
now if I run pytest my tests will fail because my assert will fail, but if I run pytest --inline-snapshot=create it will fill out my snapshot values and the file will then look like this.
from inline_snapshot import snapshot
def something():
return 1548 * 18489
def test_something():
assert something() == snapshot(28620972)
References:
[1]: https://15r10nk.github.io/inline-snapshot/
inline-snapshot is a new tool that I am trying out for python testing. It
takes snapshots of your outputs and places them inline with the test.
Here is the most basic starter.
import inline_snapshot

def test_one():
    assert 1 == snapshot()
Now when I run pytest my tests will fail because my assert has no value, but if I
run pytest --inline-snapshot=create it will fill out my snapshot values and the
file will then look like this.
import inline_snapshot

def test_one():
    assert 1 == snapshot(1)
It also works with pydantic models.
class MyModel(BaseModel):
    name: str
    age: int
    nickname: str | None = None


def test_my_model_instance():
    assert MyModel(name="Waylon", age=1) == snapshot(MyModel(name="Waylon", age=1))


def test_my_model_fields():
    me = MyModel(name="Waylon", age=1, nickname='Waylon')
    assert me.name == snapshot("Waylon")
    assert me.age == snapshot(1)
    assert me.nickname == snapshot("Waylon")
nalgeon [1] has done a fantastic job with redka [2]. Highly recommend taking a look.
Redis re-implemented with SQLite
References:
[1]: https://github.com/nalgeon
[2]: https://github.com/nalgeon/redka
GitHub - nalgeon/redka: Redis re-implemented with SQL
Redis re-implemented with SQL. Contribute to nalgeon/redka development by creating an account on GitHub.
GitHub · github.com [1]
Redka a sick new redis compatable api, that uses sqlite as its backend datastore. It feels lightweight to use as it is a single small binary. Data does not have to fit into memory as it uses sqlite to store data.
References:
[1]: https://github.com/nalgeon/redka
Today I learned how to VACUUM a sqlite database and cut its size in about half. It’s a database that I have had running for quite awhile and has some decent traffic on it.
Why is it important to do a VACUUM? In short its becuase the file system gets fragmented with as data is updated. On delete the files are removed from the database and marked as available for reuse in the filesystem, but the space is not reclaimed.
To VACUUM a database, run the following sql command. You can do it right form
the sqlite shell by running sqlite3.
You will need about double the current size of the database as free space to do the VACUUM, you need space for a full copy, journaling or write ahead logs, and the existing database.
VACUUM;
The docs are fantastic for vacuum.
Arch Linux - News: The xz package has been backdoored
archlinux.org [1]
Check your system to see if you are vulnerable to the xz backdoor.
I found this line most pertanent to me.
The xz packages prior to version 5.6.1-2 (specifically 5.6.0-1 and 5.6.1-1) contain this backdoor.
Also it appears that arch is not vulnerable as it does not directly link openssh to liblzma, so the known attack vecotor is not possible. read to the end of the linked article for more.
References:
[1]: https://archlinux.org/news/the-xz-package-has-been-backdoored/
![[None]]
Install it
{
"ThePrimeagen/harpoon",
branch = "harpoon2",
dependencies = { "nvim-lua/plenary.nvim" },
config = function()
require("waylonwalker.plugins.harpoon").setup()
end,
},
harpoon config
local harpoon = require("harpoon")
M = {}
M.setup = function()
-- REQUIRED
harpoon:setup()
-- REQUIRED
vim.keymap.set("n", "<F10>", function() harpoon:list():append() end)
vim.keymap.set("n", "<F9>", function() harpoon.ui:toggle_quick_menu(harpoon:list()) end)
vim.keymap.set("n", "<F1>", function() harpoon:list():select(1) end)
vim.keymap.set("n", "<F2>", function() harpoon:list():select(2) end)
vim.keymap.set("n", "<F3>", function() harpoon:list():select(3) end)
-- these are cnext/cprev
-- vim.keymap.set("n", "<F4>", function() harpoon:list():select(4) end)
-- vim.keymap.set("n", "<F5>", function() harpoon:list():select(5) end)
vim.keymap.set("n", "<F6>", function() harpoon:list():select(6) end)
-- Toggle previous & next buffers stored within Harpoon list
vim.keymap.set("n", "<F7>", function() harpoon:list():prev() end)
vim.keymap.set("n", "<F8>", function() harpoon:list():next() end)
-- basic telescope configuration
local conf = require("telescope.config").valu...
I learned that tailwind animations are pretty easy to add only needing a few classes. For some reason though my brain broke, thinking that I could dynamically change the number and you can’t cause there are only so many pre compiled classes without using an arbitrary value with brackets.
Here are the classes that I used to transition my colors very slowly.
<div id="square"
      class="transition-colors ease-in-out duration-700">
</div>
And the entire square element.
<div id="square"
      class="w-16 h-16 bg-rose-500 rounded border border-4 border-rose-800 hover:bg-indigo-600 hover:border-yellow-500 transition-colors ease-in-out duration-700">
</div>
I recently updated ollama, and it now installs a systemd service that I was not expecting. Seems like a great option, but I hadn’t expeted this and I was able to kill it previously. It was using up gpu, and I do other things on my machine with a gpu. I tried pkill, kill, and everything, it was still coming back.
No matter what it comes back
# stop it
systemctl stop ollama.service

# disable it if you want
systemctl disable ollama.service

# confirm its status
systemctl status ollama.service
You can confirm this with the following command.
# checking running processes
ps aux | grep ollama
pgrep ollama

# checking gpu processes
gpustat --show-cmd --show-pid
Next time you want to start you can do it as before with ollama serve.
-
I found this statement quite intriguing.
multi-cursors are just macros.
This is quite a philisophical video and mostly prime talking about the things that make vim vim, and what prime needs in and editor vs what he can live without.
Typer makes it easy to compose your cli applications, like you might with a web router if you are more familiar with that. This allows you to build smaller applications that compose into a larger application.
You will see similar patterns in the wild, namely the aws cli which always
has the aws <command> <subcommand> pattern.
Lets setup the cli app itself first. You can put it in project/cli/cli.py.
import typer

from project.cli.api import api_app
from project.cli.config import config_app
from project.cli.user import user_app
from project.cli.run import run_app

app = typer.Typer()

app.add_typer(api_app, name="api")
app.add_typer(config_app, name="config")
app.add_typer(user_app, name="user")
app.add_typer(run_app, name="run")
Creating an app that will become a command is the same as creating a regular app in Typer. We need to create a callback that will become our command, and a command that will become our subcommand in the parent app.
import typer
from rich.console import Console

from project.config import get_config

config_app = typer.Typer()

@config_app.callback()
def config():
    "model cli"


@config_app.command()
def show(
):
    project_config = get_config(env)
    Console().print(fokais_config)
Setting up the entrypoint in pyproject.toml.
[project.scripts] # <- this project is part of the config DO NOT change it
project = "project.cli.cli:app" # <- This project is the project name, DO change it
Now you can see each cli application as a sub command.
❯ project --help

 Usage: project [OPTIONS] COMMAND [ARGS]...

╭─ Options ─────────────────────────────────────────────────────────────────────────────────────────╮
│ --install-completion  [bash|zsh|fish|powershell|pwsh]  Install completion for the specified shell.│
│                                                        [default: None]                            │
│ --show-completion     [bash|zsh|fish|powershell|pwsh]  Show completion for the specified shell,   │
│                                                        to copy it or customize the installation.  │
│                                                        [default: None]                            │
│ --help                                                 Show this message and exit.                │
╰───────────────────────────────────────────────────────────────────────────────────────────────────╯
╭─ Commands ────────────────────────────────────────────────────────────────────────────────────────╮
│ api                        model cli                                                              │
│ config                     config cli                                                             │
│ user                       user cli                                                               │
│ run                        run cli                                                                │
╰───────────────────────────────────────────────────────────────────────────────────────────────────╯
In the example above we can run the command project config show to see the
current configuration of our project.
I learned not to fear the arbitrary size feature of tailwind. While building out reader.waylonwalker.com I kept getting content flowing off the screen, and struggling to keep it on the screen. I really felt that I should be able to do this with vanilla tailwind, but after some encouragement from Twitter I decided to lean on arbitrary values and it worked.
Don’t fear the arbitrary values.
<li class="max-w-[100vw]">
</li>
Learn more about using-arbitrary-values from their docs docs
Use an llm to automagically generate meaningful git commit messages
I
harper.blog [1]
This is pretty sick, I wanted this early on when I was making lockhart. I wanted to do the git [2] hook thing but could not figure it out and did not know that prepare-commit-msg was a hook that I could use.
Git Hooked
Then I remembered! Git hooks! Lol. Why would I have that in my brain - who knows!
I asked claude again, and they whipped up a simple script that would act as a hook that triggers with the prepare-commit-msg event.
This is awesome, cuz if you want to add a git message, you can skip the hook. But if you are lazy, you exclude the message and it will call the LLM.
Simon Willison’s llm cli comes in clutch here, it has such a good intereface to allow a prompt to be piped in, but the system prompt be set by -s.
gpt = "!f() { git diff $1 | llm -s \"$(cat ~/.config/prompts/commit-system-prompt.txt)\" }; f"
I love hacking on projects, but often I am super bad at making commits that make sense.
I completely relate to this statement, and this is why I am trying it.
References:
[1]: https://harper.blog/2024/03/11/use-an-llm-to-automagically-generate-meaningful-git-commit-messages/
...
Each time I go to set up npm I am frustrated by the errors saying that I don’t
have permission to npm i -g <package>, and it’s frustrating. And I forget
what I need to do to tell npm to install packages in a directory I own, and my
shell to look there so that I can use the executables.
mkdir ~/.npm-global
export NPM_CONFIG_PREFIX=~/.npm-global
export PATH=$PATH:~/.npm-global/bin
For the fix to remain persistent you need to put these two lines in your shell
profile like ~/.bashrc or ~/.zshrc.
export NPM_CONFIG_PREFIX=~/.npm-global
export PATH=$PATH:~/.npm-global/bin
One Day Build - Play Outside
Inspired by Adam Savage and his One Day builds on youtube. I often build
things, and want to make them generally useful for others and over configure
out of the gate. This project is purely for me inspired by a need I have.
- play-outside [1]
!How-To # [2]
This post will not directly show how to make a weather app, but document the
process that I went through to make mine. It will show the tools that I used
to make it, and the final result.
The Situation # [3]
It often goes in our house ask dad while he is busy and he will probably just
say yes without thinking much. This happens a lot when kids ask to go
outside. I think sure, go for it, you will figure it out. Then my wife walks
in and asks where they are, followed by, did you even check the weather, its
-11 degrees outside right now.
I need a tool for this decision making process
Lungs # [4]
You we have a family of not the most heathly lungs, we have my wife with lung
cancer, one lung missing, and kids with asthma. We nee...
If you are designing a website in dark mode the scrollbars can be finicky to match the theme. Here is a pretty sane default that looks nice without being obnoxiously contrast to the rest of the site.
    <style>
        ::-webkit-scrollbar {
            height: 1rem;
            width: 1rem;
        }

        ::-webkit-scrollbar-track {
            background-color: rgb(24 24 27);
        }

        body::-webkit-scrollbar-track {
            background-color: rgb(39 39 42);
        }

        ::-webkit-scrollbar-thumb {
            background-color: rgb(82 82 91);
        }

        ::-webkit-scrollbar-thumb:hover {
            background-color: rgb(113 113 122);
        }

        body::-webkit-scrollbar-thumb {
            background-color: rgb(82 82 91);
        }

        body::-webkit-scrollbar-thumb:hover {
            background-color: rgb(113 113 122);
        }

        ::-webkit-scrollbar-corner {
            background-color: rgb(39 39 42);
        }
    </style>
Want a rounded scrollbar thumb? add these styles.
::-webkit-scrollbar-thumb {
    border-radius: 0.25rem;
    border-radius: 9999px;
}

body::-webkit-scrollbar-thumb {
    border-radius: 0.25rem;
    border-radius: 9999px;
}
This makes a very nice looking default darkmode scrollbar.
External Link
stackoverflow.com [1]
Its sad that this is not the accepted answer.
mkdir ~/.npm-global
export NPM_CONFIG_PREFIX=~/.npm-global
export PATH=$PATH:~/.npm-global/bin
References:
[1]: https://stackoverflow.com/questions/16151018/how-to-fix-npm-throwing-error-without-sudo#answer-41395398
Before deploying to cloudflare pages with wrangler you need a cloudflare api token. You can get one at dash.cloudflare.com/profile/api-tokens.
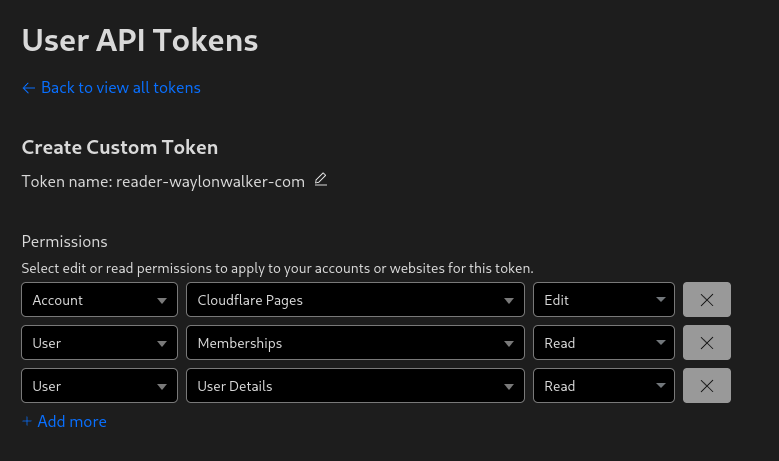
Install Wrangler #
Next install wrangler using npm.
npm i -g wrangler
Create a Project #
Before you deploy to cloudflare pages you need to create a project. You might already have one, or you might want to create one in the webui, but you have the option to create it at the command line with wrangler.
npx wrangler pages deploy markout --project-name reader-waylonwalker-com --branch markout
Deploy #
Now you can deploy your static application using wrangler to cloudflare pages.
In this example I have my application built into the markout directory, and since the production branch is named
markoutI need to pass that in here as well.
wrangler pages deploy markout --project-name reader-waylonwalker-com --branch markout
External Link
stackoverflow.com [1]
This is how you fix the stupid corner section of a double scroll bar being white on a dark theme site.
::-webkit-scrollbar-corner {
background: rgba(0,0,0,0);
}
The question included an example image where you can see white squares everywhere there are horizontal and vertical scroll bars.
[2]
References:
[1]: https://stackoverflow.com/questions/35968553/webkit-scrollbar-css-always-a-white-box-in-corner
[2]: https://i.stack.imgur.com/P6b7f.png
For my reader app I am using cronjobs to schedule my a new build and upload to
cloudflare pages every hour. In this example I have built a docker image
docker.io/waylonwalker/reader-waylonwalker-com and pushed it to dockerhub.
It uses a CLOUDFLARE_API_TOKEN secret to access cloudflare, and the
entrypoint itself does the build and upload.
apiVersion: v1
kind: Namespace
metadata:
  creationTimestamp: null
  name: reader
  namespace: reader

---
apiVersion: batch/v1
kind: CronJob
metadata:
  name: reader-cronjob
  namespace: reader
spec:
  schedule: "0 * * * *"
  successfulJobsHistoryLimit: 6
  failedJobsHistoryLimit: 6
  jobTemplate:
    spec:
      template:
        spec:
          containers:
            - name: reader-container
              image: docker.io/waylonwalker/reader-waylonwalker-com:latest
              env:
                - name: CLOUDFLARE_API_TOKEN
                  valueFrom:
                    secretKeyRef:
                      name: cloudflare-secret
                      key: cloudflare-secret
          restartPolicy: OnFailure
-
This is an interesting problem. I want to make a solution for this on htmx [1]-patterns. I would make user specific routes with an hx-get rather than serving the whole page, serve a partial with hx-oobs to fill in user specific data with a no cache on the cdn level.
References:
[1]: /htmx/
-
So cool to see ROX build this over the course of a day.
Looking for inspiration? DigitalHarbor [1] by DigitalHarbor7 [2].
No description available.
References:
[1]: https://github.com/DigitalHarbor7/DigitalHarbor
[2]: https://github.com/DigitalHarbor7
I’m really excited about fastapi-observability [1], an amazing project by blueswen [2]. It’s worth exploring!
Observe FastAPI [3] app with three pillars of observability: Traces (Tempo), Metrics (Prometheus), Logs (Loki) on Grafana through OpenTelemetry and OpenMetrics.
References:
[1]: https://github.com/blueswen/fastapi-observability
[2]: https://github.com/blueswen
[3]: /fastapi/
I am working on a page for htmx-patterns and I ran into a situation with lots of duplication. Especially when i am using tailwind I run into situations where the duplication can get tedious to maintiain. The solution I found is macros.
Now I can use the same code for all of my links, and call the macro to use it.
{% macro link(id, text, boosted=false) -%}
<a
    class="
    {% if id is none %}
      pointer-events-none bg-terminal-950 text-terminal-900 ring-terminal-900
    {% else %}
      bg-terminal-950 hover:bg-terminal-900 hover:text-terminal-400 text-terminal-500 shadow-lg shadow-terminal-300/20 hover:shadow-terminal-300/30 ring-terminal-300
    {% endif %}
      cursor-pointer block text-center font-bold py-2 px-4 rounded w-full ring-1
    "
    {% if id is not none %}
    href="{{ url_for('boosted', id=id) }}"
    {% endif %}
    {% if boosted %}
    hx-boost="true"
    {% endif %}>
    {{ text }}
</a>
{%- endmacro %}

<h2 class='text-3xl font-light mt-0 max-w-xl text-center prose-xl mt-8 text-terminal-500'>
    Boosted Links
</h2>

<div class='flex flex-row gap-4'>
    {{ link(prev_id, 'Previous', boosted=True) }}
    {{ link(next_id, 'Next', boosted=True) }}
</div>

<h2 class='text-3xl font-light mt-0 max-w-xl text-center prose-xl mt-8 text-terminal-500'>
    Normal Links
</h2>

<div class='flex flex-row gap-4'>
    {{ link(prev_id, 'Previous', boosted=False) }}
    {{ link(next_id, 'Next', boosted=False) }}
</div>
If you’re into interesting projects, don’t miss out on taipy [1], created by Avaiga [2].
Turns Data and AI algorithms into production-ready web applications in no time.
References:
[1]: https://github.com/Avaiga/taipy
[2]: https://github.com/Avaiga
jinja has a loop variable that is very handy to use with htmx. Whether you want to implement a click to load more or an infinite scroll this loop variable is very handy.
{% for person in persons %}
<li
{% if loop.last %}
    hx-get="{{ url_for('infinite', page=next_page) }}"
    hx-trigger="intersect once"
    hx-target="#persons"
    hx-swap='beforeend'
    hx-indicator="#persons-loading"
{% endif %}
    {{ person.name.upper() }} -
    {{ person.phone_number }}
</li>
{% endfor %}
Now for every chunk of contacts that we load we will trigger the infinite scroll by loading more once the last one has intersected the screen.
Out of the box FastAPI.">Starlette does not support url_for with query params. When trying to use url_for with query params it throws the following error.
starlette.routing.NoMatchFound: No route exists for name "infinite" and params "page"
In my searching for this I found starlette issue #560 quite helpful, but not complete, as it did not work for me.
import jinja2

if hasattr(jinja2, "pass_context"):
    pass_context = jinja2.pass_context
else:
    pass_context = jinja2.contextfunction

@pass_context
def url_for_query(context: dict, name: str, **params: dict) -> str:
    request = context["request"]
    url = str(request.url_for(name))
    if params == {}:
        return url
    from urllib.parse import parse_qs, urlencode, urlparse, urlunparse

    # Parse the URL
    parsed_url = urlparse(url)

    # Parse the query parameters
    query_params = parse_qs(parsed_url.query)

    # Update the query parameters with the new ones
    query_params.update(params)

    # Rebuild the query string
    updated_query_string = urlencode(query_params, doseq=True)

    # Rebuild the URL with the updated query string
    updated_url = urlunparse(
        (
            parsed_url.scheme,
            parsed_url.netloc,
            parsed_url.path,
            parsed_url.params,
            updated_query_string,
            parsed_url.fragment,
        )
    )

    if os.environ.get("ENV") in ["dev", "qa", "prod"]:
        updated_url = updated_url.replace("http", "https", 1)

    return updated_url

def get_templates():
    templates = Jinja2Templates(directory="templates")
    templates.env.globals["url_for"] = url_for_query
    return templates
https
If you want url_for to work in production you need some way to convert http
to https. Here is how I make it work, for local development I export ENV=local then for each environment that I am running on a server I include
it in the list and update ENV appropriately.
    if os.environ.get("ENV") in ["dev", "qa", "prod"]:
        updated_url = updated_url.replace("http", "https", 1)
The route might look something like this.
@infinite_router.get("/")
async def home(request: Request, page: int = 1, n: int = 10):
  ...
To access the home route using url_for in a jinja template you can use the
following, once you have applied the url_for_query function as your default
url_for
<a href="{{ url_for('home', page=1) }}">Home</a>
Kind (Kubernetes in Docker) is a tool that makes it easy to create and tear down local clusters quickly. I like to use it to test out new workflows.
Argocd is a continuous delivery tool that makes it easy to setup gitops workflows in kubernetes.
Here is how you can setup a new kind cluster and install argocd into it using helm, the kubernetes package manager.
kind create cluster --name argocd

# your first time through you need to add the argocd repo
helm repo add argo https://argoproj.github.io/argo-helm
helm repo update

# install argocd into the cluster
helm install argo argo/argo-cd --namespace argocd --create-namespace

# deploy the app of apps
kubectl apply -f apps/apps.yaml
If you want to add repos and apps to your cluster you can use the argo cli to do that, but first you will need forward the argocd port and login.
# Wait until Argo CD API server is available
echo "Waiting for Argo CD API server to be available..."
while ! kubectl wait --for=condition=available --timeout=60s deployment/argo-argocd-server -n argocd; do
  echo "Waiting for Argo CD API server to be ready..."
  sleep 10
done


kubectl port-forward svc/argo-argocd-server -n argocd 8080:443 &
argocd_admin_password=$(kubectl get secret argocd-initial-admin-secret -n argocd -o jsonpath="{.data.password}" | base64 -d)
argocd login localhost:8080 --insecure --username admin --password $argocd_admin_password
argocd repo add https://github.com/fokais-com/app.fokais.git --username waylonwalker --password ${GH_ARGO_PAT}
argocd app create app-fokais-local --repo https://github.com/fokais-com/app.fokais.git --path k8s/overlays/local --dest-server https://kubernetes.default.svc --sync-policy automated --sync-option Prune=true
Hogwarts Legacy Argyllshire map: What does the button do?
Only one spell can be used to grant you entry.
Dot Esports · dotesports.com [1]
Damn this button had me stuck for way too long. It definitely looks like a button once I see it, but I don’t recall coming into contact with many buttons in the game, I tried to set it ablaze, pull it, fly it, nothing.
References:
[1]: https://dotesports.com/hp/news/hogwarts-legacy-argyllshire-map-what-does-the-button-do
External Link
help.socialbee.com [1]
YouTube makes finding rss feeds way too hard. Hats off to them for still supporting it, allowing you to find content outside the algorithm, and consuming content you asked for. But i had no idea you had to search the source code to get it.
References:
[1]: https://help.socialbee.com/article/129-how-can-i-add-my-youtube-videos-via-rss
feeds
I have several feeds that you can consume my content with. Many posts will
cross between them, so if you would like to follow a certain stream of content
in your rss reader thats what this is for. This one might feel like it has some
extra noise with multiple posts per day, including starts, and instagram style
posts, for a bit less look at the [[ main ]] feed.
TLDR
If you are looking for everything look here <https://waylonwalker.com/archive/rss.xml>
All # [1]
This is a feed of everything that I have published on my site to date
including Posts tagged: blog [2], [[ til ]], Thoughts [3], [[ stars ]], Posts tagged: shots [4],
[[ pings ]].
- web [5]
- rss [6]
Main # [7]
Like the All feed, but drops the shots (instagram style posts) and stars
(github stars).
- web [8]
- rss [9]
til - daily(ish) # [10]
think gist with a tweet
This is a feed of all of my TIL’s (Today I Learned). These are generally short
single topic posts that I write up quickly. They are generally things t...
External Link
stackoverflow.com [1]
Another interesting option for slow count queries in sqlite.
If you haven’t DELETEd any records, doing:
SELECT MAX(ROWID) FROM "table" LIMIT 1;
References:
[1]: https://stackoverflow.com/questions/8988915/sqlite-count-slow-on-big-tables
Optimizing SQLite for servers
SQLite is often misconceived as a "toy database", only good for mobile applications and embedded systems because it's default configuration is optimized for embedded use cases, so most ...
Sylvain Kerkour · kerkour.com [1]
Very interesting article by Sylvain, suggested by Simon Willison.
Definitely some things that I want to come back and try later on.
Here is the TLDR of the whole post
PRAGMA journal_mode = WAL;
PRAGMA busy_timeout = 5000;
PRAGMA synchronous = NORMAL;
PRAGMA cache_size = 1000000000;
PRAGMA foreign_keys = true;
PRAGMA temp_store = memory;
This is interesting, and something I need to consider. I definitely have an application with slow count queries. I am not sure how to make it better as its not a full count(*) so a count table doesn’t work, nor does counting by index.
I might need to have a table of cached results, and if a write matches the counter increase it, or update all counters on write.
COUNT queries are slow
SQLite doesn’t keep statistics about its indexes, unlike PostgreSQL, so COUNT queries are slow, even when using a WHERE clause on an indexed field: SQLite has to scan for all the matching records.
One solution...
-
Inspiring story transitioning into tech from nursing. I also came to tech through a set of circumstances that made it difficult for me to excel at my current job. Looking back it is something that I was always interested in and I was just unsure how to get in, I am so glad that I figured it out, it has been such a great benefit to my family.
I really enjoyed listening to trshpuppy’s journey in through building projects, and choosing tech not based on what she wanted to learn, but what fit the project the best.
Thoughts
These are generally my thoughts on a web page or some sort of url, except a
rare few don’t have a link. These are dual published off of my
thoughts.waylonwalker.com [1] site. It’s a
fully dynamically rendered site 2000’s style. Posts are stored in a database
and instantly available. Almost all of the posts were written in a small
<textarea> field within a chrome extension that I built for it.
These posts are intended to in two ways. One, link building for the author. I
hope that I give the people helping me out along the way just a little bit of a
boost. Two, they serve as a permanant commented bookmark for me to search, and
come back to later when I have forgotten where I have seen something.
- web [2]
- rss [3]
All thoughts posts cross posted to my site are prefixed with a thought balloon 💭.
The tech # [4]
Since this blog is mostly a tech blog about software development, and my
journey as I learn, lets talk tech.
- python
- fastapi [5]
- htmx [6]
- sqlite
- docker
- ht...
I’m impressed by til [1] from jbranchaud [2].
📝 Today I Learned
References:
[1]: https://github.com/jbranchaud/til
[2]: https://github.com/jbranchaud
I came across Hexa [1] from wyattbubbylee [2], and it’s packed with great features and ideas.
Hexa is a game engine
References:
[1]: https://github.com/wyattbubbylee/Hexa
[2]: https://github.com/wyattbubbylee
Some Git poll results
Some Git poll results
Julia Evans · jvns.ca [1]
great poll of git [2] questions
poll: did you know that in a git merge conflict, the order of the code is different when you do a merge/rebase?
merge:
<<<<<<< HEAD
YOUR CODE
OTHER BRANCH’S CODE
c694cf8aabe
rebase:
«««< HEAD
OTHER BRANCH’S CODE
YOUR CODE
d945752 (your commit message)
This one explains a lot. I think I knew this, I might have seen it somewhere, but I have definitely noticed it go both ways and confuse the crap out of me. Feels very similar to how --ours and --theirs flip flops.
References:
[1]: https://jvns.ca/blog/2024/03/28/git-poll-results/
[2]: /glossary/git/
External Link
sealed-secrets.netlify.app [1]
kubeseal is a pretty simple to get started with way to manage secrets such that they can be stored in a git [2] repo and be picked up by your continuous delivery service.
Sealed Secrets provides declarative Kubernetes Secret Management in a secure way. Since the Sealed Secrets are encrypted, they can be safely stored in a code repository. This enables an easy to implement GitOps flow that is very popular among the OSS community.
References:
[1]: https://sealed-secrets.netlify.app/
[2]: /glossary/git/
In my homelab kubernetes cluster I am using kubeseal to encrypt secrets. I have been using it successfully for a few months now wtih great success. It allows me to commit all of my secrets manifests to git with out risk of leaking secrets.
You see kubeseal encrypts your secrets with a private key only stored in your cluster, so only the cluster itself can decrypt them using the kubeseal controller.

KubeSeal #
https://sealed-secrets.netlify.app/
installation #
Installation happens in two steps. You need the kubernetes controller and the client side cli to create a sealed secret.
For a more complete instruction see the [docs#installation](https://github.com/bitnami-labs/sealed-secrets?tab=readme-ov-file#installation]
installation - controller #
Warning
**context**
Make sure that you are in the right context before running any kubectl commands.
kubectl config current-context
sealed-secrets is installed using the helm package manager. To install sealed-secrets run the following command.
helm repo add sealed-secrets https://bitnami-labs.github.io/sealed-secrets
helm install sealed-secrets -n kube-system --set-string fullnameOverride=sealed-secrets-controller sealed-secrets/sealed-secrets
installation - client #
For the client you can check your OS package manager, brew, or the github-releases. For me I found it in the main arch repos.
paru -S kubeseal
# or
sudo pacman -S kubeseal
# or
brew install kubeseal
Note
You will need to install kubeseal on every device that you will want to
create sealed secrets on.
Example #
Most of these commands come straight from the docs. From my experience I have always specified the namespace, my projects go per namespace and I don’t have any reason that other namepsaces should see the secret, and if they do I deploy another secret in that namespace.
# Create a json/yaml-encoded Secret somehow:
# (note use of `--dry-run` - this is just a local file!)
echo -n bar | kubectl create secret generic mysecret --dry-run=client --from-file=foo=/dev/stdin -o yaml -n thenamespace > mysecret.yaml
note that the key of the secret is
fooand the value isbar
results
apiVersion: v1
data:
  foo: YmFy
kind: Secret
metadata:
  creationTimestamp: null
  name: mysecret
  namespace: thenamespace
Note
The data is base64 encoded.
echo -n bar | base64
# YmFy
# This is the important bit:
kubeseal -f mysecret.yaml -w mysealedsecret.yaml

# At this point mysealedsecret.json is safe to upload to Github,
# post on Twitter, etc.

# Eventually:
kubectl create -f mysealedsecret.yaml -n thenamespace
# sealedsecret.bitnami.com/mysecret created

# Profit!
kubectl get secret mysecret
kubectl get secret mysecret -n thenamespace
# NAME       TYPE     DATA   AGE
# mysecret   Opaque   1      27s

cat mysealedsecret.yaml | kubeseal --validate
echo -n bar | kubectl create secret generic mysecret --dry-run=client --from-file=foo=/dev/stdin -o yaml \
  | kubeseal -o yaml -n thenamespace > mysealedsecret.yaml
echo -n baz | kubectl create secret generic mysecret --dry-run=client --from-file=bar=/dev/stdin -o yaml \
  | kubeseal -o yaml -n thenamespace --merge-into mysealedsecret.yaml
Results
---
apiVersion: bitnami.com/v1alpha1
kind: SealedSecret
metadata:
  creationTimestamp: null
  name: mysecret
  namespace: thenamespace
spec:
  encryptedData:
    bar: AgBLkamltcLfH1dC1JxQ3qd8lJ8aBZF2ARoq3uo055hnzXOy8g2T5liTx5UPvyPV8yyWqABU8eOnwjNhDtzSATvYeBB3fGkucdOZziWEoiNsWTR9ZtFEkod7Ya6uGkzZOJwi3IkrHFVIT9oWZQUxxJZ6vFhPiFcx9Dorr8TNSzG4KOug25+PhWPPiHDgSup5N3CkWCZaYOF7dbZRVSA4nGP1fZxjFByHP4AsdjLCHptyVbkpLRKeiXTkLxfLX4K+JLZGM41S1On5bSP56mCfv1daTJx619kDXkRLw9l21Ot283/L0NMNAiw781AefYMVoO3aHmYgcT6wAtsQAKje9fyL7DQRHt8a5NZOWukp/P6XjdXRz/nfQasQlbSTrRkDpplKIM5/WdPcBoKi+yyoOL0rZ8x1X7YzUI3BggZmzWyEPD01BK1YAHGZnYIZbbCy1JSm8JCBvP+xWMg+i0Z/DCD8nclAhH1GX2Q7/NrNHF//589AJfuriymd2+mk7uaLA4RRsY0l5QeZD6HVAqSv5jWsVQQtSftWmI9vn9oL/Pno7sEUjSDpXPfF4nnsULhxsPEe2DFAMm1kZAjdF06ueF4/x2Fdy80ZQNyycaDx2CWm4z3b14A75WGyOXl2wJZQqxrFCz8el4hD2nH3zQFEzd6AIh49myqVAGuu2qGlYP4p94LJghVa+mQjztLD/2ZUZjY+anQ=
    foo: AgAducXW6iUCY900cPDdmRfuj7tKnh2hY4C1+2hFoAtjyvjepsKNWsiPJ81t8anaMfFPat4ta060l5VtTrceFE8oS/rViz1tvNWGPBjL+GwL/QjkGl6H8ju87vKERKQn5qw7B/V5j24VM8AxOd+/vJNt/IeRIHLubvFft4hyMq4b0xmIxaemBSTxchQX/5364T3VJH2kHaqpqd+JJgQnTbiTQe/XnyZokDX8GSxw4rAbJUJSRUtY9DB9ZDu2zC5VngX+GJjbwHGbv9EKs8LShJIPrD8xHqrDmlSXGkkP01D4A6268Qoi3x5S0H5aqDgtrgBiWsNkzdKwjfrTNx7pKecOi41lyFdffHOGUew4aPPMqjzWR2TEms9WNNQXwnBdDHKMkFsisocF52BolEkcjF8g/u5h2Af92abMu6k16VybJrB7TV1set5A9W7rqG1iXI4+1W6XQfFnpja8xL/zJBvZcyHgeYMNaxa3C3s6PANhPzAUVaXV9eedAkptGJLN13IZj4LujpoAxRKo6bEdydv/5P23R3fx5PgTOpVI7riECAOIg2PThFsEoVCUwStmKCvIx1I2+YixIlv/OiaUWo4lrI/3ve5WGp4ZnuiJPk34JoYAlRbR6+sX14d8Ek6viq/pJUUIfVpNIkNMboUL4u+KpT47eyQ/mWih/KFduQyX9II/vQ+/IJGzEEHIipxAhdmV+K4=
  template:
    metadata:
      creationTimestamp: null
      name: mysecret
      namespace: thenamespace
backing up your sealing key #
kubectl get secret -n kube-system -l sealedsecrets.bitnami.com/sealed-secrets-key -o yaml >main.key
converting .env files to a secret #
Working with web applications .env is a common way to store credentials. Let’s look at how we can convert these to secrets.
kubectl create secret generic mysecret --from-env-file=.env -n thenamespace --dry-run=client -o yaml > mysecret.yaml
Now you have a secret that looks like this.
apiVersion: v1
data:
  foo: YmFy
kind: Secret
metadata:
  creationTimestamp: null
  name: mysecret
  namespace: thenamespace
Seal it up just like before.
kubeseal -f mysecret.yaml -w mysealedsecret.yaml
Using the secrets #
I typically use the secrets in the container spec.
containers:
  - name: myapp
    envFrom:
      - secretRef:
          name: mysecret
    # You can still have other env vars
    env:
      - name: foo
        value: bar
Sometimes I want to mount the secret as a volume.
containers:
  - name: myapp
    volumeMounts:
      - name: mysecret
        mountPath: /mysecret
volumes:
  - name: mysecret
    secret:
      secretName: mysecret
Image Pull Secrets #
I also need to use imagePullSecrets. Let’s walk through the whole process. Starting with the secret.
kubectl create secret docker-registry regcred --docker-server=myprivateregistry.example.com --docker-username=foo --docker-password=bar --dry-run=client -o yaml
Generates the following secret.
apiVersion: v1
data:
  .dockerconfigjson: eyJhdXRocyI6eyJteXByaXZhdGVyZWdpc3RyeS5leGFtcGxlLmNvbSI6eyJ1c2VybmFtZSI6ImZvbyIsInBhc3N3b3JkIjoiYmFyIiwiYXV0aCI6IlptOXZPbUpoY2c9PSJ9fX0=
kind: Secret
metadata:
  creationTimestamp: null
  name: regcred
type: kubernetes.io/dockerconfigjson

---
the secret
Now we we can seal that secret.
kubeseal -f regcred.yaml -w regcred-sealed.yaml
And that gives us the following sealed secret that we can deploy into our cluster.
---
apiVersion: bitnami.com/v1alpha1
kind: SealedSecret
metadata:
  creationTimestamp: null
  name: regcred
  namespace: default
spec:
  encryptedData:
    .dockerconfigjson: AgATYVEywkyYEaoErQbJo6xEZfOnRn1ydNTLkO3Jt/NF/UH+0o9lHpDecRpN0XnVu8xJUcdjkgD9q2XkwP8e6qQDS2mMPTiTNIN+8gbJx97WrD1YQDT0lXBuoyi9I/iwlXxx6MgH/6GY6CeGTz5SRlvoU0Xhlt4d11s7/xapdE8QMLsAReqPEv8oZHEyAxDRrjXX0V+tO8dV+G+GXjUDMBBceLael9rvGzSKIwDVXACVqQhLkB6FoP98M+yyBE46RBNnSnS0ShQM5PprL24HKpRZ43x4RM53KBrQ7R/MxeshafY+B6vUvrolmVox4sud8xngMOcjTO28LLOrck5V8ZiDabhN7ajHEf03IESr1o/ADGf5k9988Vv1txJtsZW0K2mpRu0D7/BLVL9KzbZ5ywULqIoD/Ur2GIGnZqMAKOq4laGp/GJtMKLrhmEvekT397wC/Gf/xdDKVhHf2p4ocsPu7LKFuS5H/Auel/Q5grdn8L5wwrO4VWRv3eJroKh/Hux7Qd7f64O7qdi0XthDocf+gmtjys+Gy72M7tyf8f/O+3oKbS4CWQVTj4ZThMc9znrFnHqt2q/7pAyytTQCpk51wlzOsNvOhCueJM/jmeahaL0LuBrqngqISpnd65sgVzBcZpwK9i2Fckyt0DrZLH+NoIuvaqNhzlF+OMbAft/ylWWKCH4WUP+FKG+1LXM7ud7AA3MMbGSBxHL0/WK/INa7MB56xZKMqqyvvLLQHFTQUROJjkgkzsumdOgwZTRgIFnAZ4+vOX3/1Rtt3mAs3vdoJhL4GuKUYCnEHt908eKkWEVEs7eMk5SdSRtIsbaXO2s0dtADwg==
  template:
    metadata:
      creationTimestamp: null
      name: regcred
      namespace: default
    type: kubernetes.io/dockerconfigjson
Now that we have our sealed registry secret, we can deploy it into our cluster.
kubectl apply -f regcred-sealed.yaml
Now we can use it to pull images from our private registry.
containers:
  imagePullSecrets:
    - name: regcred
Full example #
Here is a full deployment example using all the secrets we have created.
- regcred
- mounting a secret
- envFrom secret
---
apiVersion: apps/v1
kind: Deployment
metadata:
  creationTimestamp: null
  labels:
    service: myservice
  name: myservice
  namespace: mynamespace
spec:
  replicas: 1
  selector:
    matchLabels:
      service: myservice
  strategy:
    type: Recreate
  template:
    metadata:
      creationTimestamp: null
      labels:
        service: myservice
    spec:
      containers:
        - envFrom:
            - secretRef:
                name: mysecret
          env:
            - name: foo
              value: bar
          image: private-registry.io/myimage:1.0.0
          name: myimage
          ports:
            - containerPort: 5000
              protocol: TCP
          resources: {}
          volumeMounts:
            - mountPath: /mysecret
              name: mysecret
      restartPolicy: Always
      volumes:
        - name: mysecret
          secret:
            secretName: mysecret
      imagePullSecrets:
        - name: regcred
Downside #
Now the main downside I see with kubeseal is that it does not provide a way to store your secrets in a way that you can access outside of your cluster. So you need to make sure that you have another solution in place to store your secrets so that you still have them if you ever were to take the cluster down or move from k8s to something else.
Overall the likelyhood of you loosing a production cluster is pretty low, so maybe it’s ok to just trust it depending on what the secrets are. Especially for things you control and can rotate anyways its fine.
Just starred codemirror-codeium [1] by val-town [2]. It’s an exciting project with a lot to offer.
Codeium code completion integration for CodeMirror 6
References:
[1]: https://github.com/val-town/codemirror-codeium
[2]: https://github.com/val-town
-
Great episode covering a seemingly simple topic. What I really benefitted from was hearing all the different use cases, from logging, debugging, to a/b testing, caching, and auth. I hadn’t even thought of it being applied to a router. I thought of it being applied for an entire application. This seems very useful for things like an admin router, all routes would need to have the admin role to get in.
![[None]]
I’ve been using these decorators to modify the behavior of specific routes. It will do things like 404 admin only routes in a way that looks just like fastapi [1]’s default, or only allow certain roles into the route, or redirect unauthenticated users to login.
After listening to yesterday’s syntaxfm I’m now really thinking about middleware and the benefits it might have. middleware would make it easy to apply things like admin to an entire admin router, so you wont forget it on any one admin route. It will look cleaner as the admin checker is only applied once per router, not once per route.
import inspect
import time
from functools import wraps
from inspect import signature
from fastapi import Request
from fastapi.responses import FileResponse, JSONResponse, RedirectResponse
from starlette import status
from fokais.config import get_config
from fokais.models.user import Role
config = get_config()
admin_routes = []
authenticated_routes = []
not_cached_routes = []
cached_routes = []
def not_found(request):
hx_request_header = request.headers.get("hx-request")
user_agent = request.headers.get("user-agent", "").lower()
if "mozilla" in user_agent or "webkit" i...
kubernetes 6 months in
I stumbled into kubernetes December 2023 when I was looking for a better way
to self host [1] applications. I was looking for something that didn’t require
logging into a server and building and deploying like a cave man. I wanted a
smoother experience than docker compose was giving me.
https://waylonwalker.com/looking-for-a-heroku-replacement/
This post turned into a list of tools that I have adopted into my k8s workflow,
and plan to keep. enjoy.
Kompose # [2]
[3]
Kompose is a great tool for gettting going and converting your docker-compose
to kubernetes manifests or helm templates. It was a great tool for me to get
started with, but I was afraid that it was hindering me learning more and just
blindly using its output so I have tried to use it less and less. I’m now not
solely leaning on it, but using it to get out quick POCs with low friction.
Kompose really helped me go 0 to 60 and get right into kubernetes with my
existing docker compose files and very little change. I fou...
Simon Willison (@simonw) on X
TIL Google Chrome has a --headless option you can use to take a screenshot from the CLI that's built into the default installation
X (formerly Twitter) · twitter.com [1]
Huh, so this is just built right into the chrome cli.
/Applications/Google\ Chrome.app/Contents/MacOS/Google\ Chrome \
--headless \
--screenshot=/tmp/shot1.png \
https://simonwillison.net
References:
[1]: https://twitter.com/simonw/status/1772043579231445366
![[None]]
jinja’s url_for in fastapi [1] does not account for https by default, there is
probably a better way, but this is a way that allows me to configure when I use
http vs https.
@pass_context
def https_url_for(context: dict, name: str, **path_params: Any) -> str:
"""
always convert http to https
"""
request = context["request"]
http_url = request.url_for(name, **path_params)
return str(http_url).replace("http", "https", 1)
def get_templates(config: BaseSettings) -> Jinja2Templates:
templates = Jinja2Templates(directory="templates")
templates.env.globals["https_url_for"] = https_url_for
## only use the default url_for for local development, for dev, qa, and prod use https
if os.environ.get("ENV") in ["dev", "qa", "prod"]:
templates.env.globals["url_for"] = https_url_for
console.print("Using HTTPS")
else:
console.print("Using HTTP")
return templates
References:
[1]: /fastapi/
[1]@cassidoo [1]) on X — I MADE AN APP ✨" loading="lazy">
Cassidy (@cassidoo [2]) on X
I MADE AN APP ✨
X (formerly Twitter) · twitter.com
Damn are one time paid and have it apps making a comeback? Seems like the perfect thing to have someone else automate and not pay a subscription for.
Genius Idea Cassidy!!
Now what do you call this, its not software as a service, is this just sofware?
References:
[1]: https://twitter.com/cassidoo/status/1770900985382138291
[2]: https://cassidoo.co
![[None]]
import logging
from typing import List
import strawberry
from fastapi import FastAPI
from strawberry.fastapi import GraphQLRouter
logger = logging.getLogger(__name__)
authors = {}
books = {}
book_authors = {}
authors_books = {}
def get_author_for_book(root) -> "Author":
return authors[book_authors[root.id]]
@strawberry.type
class Book:
id: int
title: str
author: "Author" = strawberry.field(resolver=get_author_for_book)
def get_books_for_author(root) -> List[Book]:
print(f"getting books for {root}")
return [books[i] for i in authors_books[root.id]]
@strawberry.type
class Author:
id: int
name: str
books: List[Book] = strawberry.field(resolver=get_books_for_author)
authors = {1: Author(id=1, name="Michael Crichton")}
books = {1: Book(id=1, title="Jurassic Park")}
# relationships
book_authors[1] = 1
authors_books[1] = [1]
def get_author_by_id(id: int) -> Author:
return authors.get(id)
def get_book_by_id(id: int) -> Book:
return books.get(id)
def get_authors(root) -> List[Author]:
return authors.values()
def get_books(root) -> List[Book]:
print(books)
print(authors)
print(book_authors)
print(authors_books)
return books.values()
@strawberry.typ...
Joining the split keyboards club: a Moonlander story | Carlos Becker
This post will describe my experience with a couple of firsts:
carlosbecker.com [1]
I switched from a 60% vortex pok3r to a 40% corne June, 2021. I can relate to a lot of what Carlos talks about here. I think going from 60%-40% made my journey harder than it needed to be. There’s no going back now, but it took me a really long time to be able to hit all of the numbers and symbols, just figuring out how to do the layout was hard there’s not much space.
I didn’t touch type. I never really used my pinkies, except maybe for ESC, Shift, CTRL, Backspace et al.
I can relate to this, my typing habits were terrible. Shortly before going split ortho I worked on my speed with lots, and lots of practice on keybr and monkeytype. I took my speed from 35wpm to 80wpm with a few months of steady practice. This is one of the best things I did for myself.
Once I got split it dropped down to single digits and slowly rose back up to 80, just barely breaking my PB on monkeytype.
I still feel like I still can’t type at my previous max speed — mostly because I wasn’t used to use my pinky and used the “wrong finger” for a lot of...
My workflow, part 1 | Carlos Becker
I keep getting asked how my setup works, how I use tmux and
nvim over ssh… all that good stuff.
carlosbecker.com [1]
Carlos has a pretty sick setup here, I can relate to mostly, cept the macos part. My main critique is that I don’t think he gave window managers much chance on linux, and they just don’t work on MacOS/Windows.
Most of the time I have a single, maximized window.
I can relate to this. I should really make a full post about my experience with tiling window managers. TLDR, I came for tiling and I stayed for the workspaces.
Multiple Displays
An exception here could be streaming: having multiple displays can help preventing doxing yourself if you only share the screen of one of them. I only did stream like 3 times and that’s what I did, but I’m sure experienced streamers have better workflows (with or without multiple displays).
Accurate, my home machine uses one monitor, and for work I use one monitor+laptop. I pair, screenshare, and present quite a bit at work, and its good to have one screen for sharing, and one for seeing things like the app you are sharing from (chat, cams, etc)
References:
[1]: https://carlosbecker.com/p...
strawberry-sqlalchemy [1] by strawberry-graphql [2] is a game-changer in its space. Excited to see how it evolves.
A SQLAlchemy Integration for strawberry-graphql
References:
[1]: https://github.com/strawberry-graphql/strawberry-sqlalchemy
[2]: https://github.com/strawberry-graphql
I recently discovered AnyText [1] by tyxsspa [2], and it’s truly impressive.
Official implementation code of the paper <AnyText: Multilingual Visual Text Generation And Editing>
References:
[1]: https://github.com/tyxsspa/AnyText
[2]: https://github.com/tyxsspa
Using Netlify Analytics to Build a List of Popular Posts
Writing about the big beautiful mess that is making things for the world wide web.
blog.jim-nielsen.com [1]
This is a sick feature of Jim’s blog, I am really inspired by this. I am not sure how to do it for my own. I honestly think the easiest non locked in way would be to just use google search console results. It’s definitely a different way to think about it, but most of my traffic is coming from google search, so it would be a pretty good ballpark estimate.
References:
[1]: https://blog.jim-nielsen.com/2020/using-netlify-analytics-to-build-list-of-popular-posts/
I’m really excited about full-stack-fastapi-template [1], an amazing project by fastapi [2]. It’s worth exploring!
Full stack, modern web application template. Using FastAPI [3], React, SQLModel, PostgreSQL, Docker, GitHub Actions, automatic HTTPS and more.
References:
[1]: https://github.com/fastapi/full-stack-fastapi-template
[2]: https://github.com/fastapi
[3]: /fastapi/
I came across puter [1] from HeyPuter [2], and it’s packed with great features and ideas.
🌐 The Internet OS! Free, Open-Source, and Self-Hostable.
References:
[1]: https://github.com/HeyPuter/puter
[2]: https://github.com/HeyPuter
605: Jim Nielsen on Subversive URLs, Blogging + AI, and Design Engineers
Jim Nielsen joins us to about URLs and linking as the new subversive way to maintain the web, paying for news in Canada, should content creators be worried about AI, the case for design engineers, …
ShopTalk · shoptalkshow.com [1]
An absolute fantastic episode about blogging, thinking about a web1.0 kind of world today, and what it means moving forward.
Web 1.0 is robust, you own your own destiny, you own your data, you can do what you want. There is no platform to tell you what you can and cannot do. But the future web is stealing your data to build AI models, spam sites are duplicating your content and stealing your SEO. You may or may not care, but at the end whether you get traffic or now you own your web 1.0 sites.
References:
[1]: https://shoptalkshow.com/605/
Configure Liveness, Readiness and Startup Probes
This page shows how to configure liveness, readiness and startup probes for containers.
For more information about probes, see Liveness, Readiness and Startup Probes.
Before you beginYou need to ha...
Kubernetes · kubernetes.io [1]
What is the difference between health, liveness, readiness, and startup? This article does a great job at a full writeup description of how it works in kubernetes, here is my TLDR.
-
health 200 OK - I’m still responding to requests
-
health ERR - something happened and I cant respond to requests
-
liveness 200 OK - I’m ready for more work
-
liveness ERR - I’m still responding to requests, and i’m already working send requests to another pod, or scale up
Z-pages # [2]
These probes are commonly deployed at /healthz and /livez endpoints.
Why the z?
z is a convention that comes from google for meta endpoints to reduce conflict with actual endpoints, and can be deployed to any application.
References:
[1]: https://kubernetes.io/docs/tasks/configure-pod-container/configure-liveness-readiness-startup-probes/
[2]: #z-pages
External Link
stackoverflow.com [1]
The convention of “z-pages” comes from google and reduces the likelihood of collisions with application endpoints and keep the convention across all applications.
References:
[1]: https://stackoverflow.com/questions/43380939/where-does-the-convention-of-using-healthz-for-application-health-checks-come-f
I recently discovered homelab-argocd [1] by Doomlab7 [2], and it’s truly impressive.
My ArgoCD app of apps repository
References:
[1]: https://github.com/Doomlab7/homelab-argocd
[2]: https://github.com/Doomlab7
Placehold
Placehold is a simple, fast and free image placeholder service to generate SVG, PNG, JPEG, GIF, WebP and AVIF placeholder images for your project.
placehold.co [1]
This is a handy placeholder generator for generating placeholder items like images, and videos.
References:
[1]: https://placehold.co/
![[None]]
I figured out the killer combination for python lsp servers, ruff and jedi! ruff does all of the diagnostics and formatting, then jedi handles all the code objects like go to definition and go to reference.
local servers = {
ruff_lsp = {},
jedi_language_server = {},
}
Client Challenge
pypi.org [1]
Underrated python library to on board ruff, or just use it on a project where its not the norm. ruff claims that its 99.9% compatible with black and when you read through the known differences they are clearly edge case bugs in black.
See this page for more about the comparison to black https://docs.astral.sh/ruff/faq/#how-does-ruffs-formatter-compare-to-black
oh and I just noticed that it is maintianed by Charlie, and comes straight out of astral.
References:
[1]: https://pypi.org/project/flake8-to-ruff/
![[None]]
First I need to fetch my thoughts from the api, and put it in a local sqlite database using sqlite-utils.
fthoughts () {
# fetch thoughts
curl 'https://thoughts.waylonwalker.com/posts/waylonwalker/?page_size=9999999999' | sqlite-utils insert ~/.config/thoughts/database2.db post --pk=id --alter --ignore -
}
Now that I have my posts in a local sqlite database I can use sqlite-utils to enable full text search and populate the full text search on the post table using the title message and tags columns as search.
sthoughts () {
# search thoughts
# sqlite-utils enable-fts ~/.config/thoughts/database2.db post title message tags
# sqlite-utils populate-fts ~/.config/thoughts/database2.db post title message tags
sqlite-utils search ~/.config/thoughts/database2.db post "$*" | ~/git/thoughts/format_thought.py | bat --style=plain --color=always --language=markdown
}
alias st=sthoughts
Now I am ready to search my thoughts, which is a tiny blog format that I created mostly for leaving my own personal comment on web pages, so most of them have a link to some other online content, and their title is based on the authors title.
[1]
[2]
References:
[1]: https://vhs.charm.s...
[1]
This is the best tree I have ever built in minecraft. It took at least 4 stacks of logs and leaves despite what it looks like.
It is placed where Welscraft’s island in the hermitcraft season 10 seed, but on our own server we call lonecraft.
We started this server a few weeks after hermitcraft season 10 started, and play on it a few times per week. It has a pretty successful day one iron farm that took us way more than one day to complete, and the farm behind this is our first ever villager driven farm. Somehow potatoes got cross contaminated and now its pumping out potatoes and some bread, but no carrots or beat roots.
World Seed: 5103687417315433447
References:
[1]: /static/https://screenshots.waylonwalker.com/lonecraft.png
Formatting codes – Minecraft Wiki
Formatting codes (also known as color codes) add color and modifications to text in-game.
Minecraft Wiki · minecraft.wiki [1]
Minecraft MOTD and server names have formatting codes so that you can get colors, bold, underlined, italics, in your message of the day or server name. See the article for all the cods.
References:
[1]: https://minecraft.wiki/w/Formatting_codes
GitHub - jesseduffield/lazydocker: The lazier way to manage everything docker
The lazier way to manage everything docker. Contribute to jesseduffield/lazydocker development by creating an account on GitHub.
GitHub · github.com [1]
I’ve been using this for a few weeks now and it’s fantastic. It’s reminds me of lazygit, it gives a nice quick interface into the things I need and it just works. Yes I can git [2] status to see what changed, then diff the files, then commit hunks, but lazygit can do that in just a few keystrokes. lazydocker does this for docker. It gives me a nice view into whats running, what’s eating up disk space, and the networks I have. And if I see I have a bunch of exited containers, there is a bulk command righ there to clean them up.
tldr docker ps on steroids
[3]
References:
[1]: https://github.com/jesseduffield/lazydocker
[2]: /glossary/git/
[3]: https://github.com/jesseduffield/lazydocker/blob/master/docs/resources/demo3.gif?raw=true
I came across lazydocker [1] from jesseduffield [2], and it’s packed with great features and ideas.
The lazier way to manage everything docker
References:
[1]: https://github.com/jesseduffield/lazydocker
[2]: https://github.com/jesseduffield
-
Go is feeling more and more like something I could throw in my tool belt as a python dev. I really like that it’s garbage collected and has great error management. I am just not sure how to work it in without it being the main thing. The thing that is so cool is the ability to ship tiny pre-compiled binaries that just work, and the raw speed. these binaries just get up and working without any warm up. writing any cli in python I’m going to be using something like typer, and it takes half a second just to warm up, so even hello world cannot be faster than half a second.
-
Great example from Anthony showing how easy it is to practice building database orm models and playing with them in a repl. This is good practice even if you are in a big code base to be able to test and learn in a simplified code base that does not have a mountain of other code around atuh, permissions, security, and other complex things that come into real production code bases that might make it hard to focus on what you are trying to do.
Note
Anthony uses backref here, thats legacy, use back_populates on both parent and child.
External Link
stackoverflow.com [1]
Today I came across some sqlalchemy models that created some relationships, some used backref
some used back_populates. I was stumped why, I had never came accross backref before and I felt skill issues sinking in.
backref is considered legacy # [2]
https://docs.sqlalchemy.org/en/14/orm/backref.html
As stated in the sqlalchemy docs, backref is a legacy feature. Its shorthand to creating relationships between parent and child, but only adding it to the parent. While this is simpler it introduces some invisible magic.
References:
[1]: https://stackoverflow.com/questions/51335298/concepts-of-backref-and-back-populate-in-sqlalchemy#answer-59920780
[2]: #backref-is-considered-legacy
If you’re into interesting projects, don’t miss out on datasette-litestream [1], created by datasette [2].
Datasette plugin for streaming SQLite database backups to S3, using Litestream!
References:
[1]: https://github.com/datasette/datasette-litestream
[2]: https://github.com/datasette
FastUI [1] by pydantic [2] is a game-changer in its space. Excited to see how it evolves.
Build better UIs faster.
References:
[1]: https://github.com/pydantic/FastUI
[2]: https://github.com/pydantic
I came across minio [1] from minio [2], and it’s packed with great features and ideas.
MinIO is a high-performance, S3 compatible object store, open sourced under GNU AGPLv3 license.
References:
[1]: https://github.com/minio/minio
[2]: https://github.com/minio
I’m impressed by dozzle [1] from amir20 [2].
Realtime log viewer for docker containers.
References:
[1]: https://github.com/amir20/dozzle
[2]: https://github.com/amir20
I came across uv [1] from astral-sh [2], and it’s packed with great features and ideas.
An extremely fast Python package and project manager, written in Rust.
References:
[1]: https://github.com/astral-sh/uv
[2]: https://github.com/astral-sh
I came across StableCascade [1] from Stability-AI [2], and it’s packed with great features and ideas.
Official Code for Stable Cascade
References:
[1]: https://github.com/Stability-AI/StableCascade
[2]: https://github.com/Stability-AI
I came across aerial.nvim [1] from stevearc [2], and it’s packed with great features and ideas.
Neovim plugin for a code outline window
References:
[1]: https://github.com/stevearc/aerial.nvim
[2]: https://github.com/stevearc
I’m really excited about cadwyn [1], an amazing project by zmievsa [2]. It’s worth exploring!
Production-ready community-driven modern Stripe-like API versioning in FastAPI [3]
References:
[1]: https://github.com/zmievsa/cadwyn
[2]: https://github.com/zmievsa
[3]: /fastapi/
Just starred kedro-academy [1] by kedro-org [2]. It’s an exciting project with a lot to offer.
Repo for Kedro Academy
References:
[1]: https://github.com/kedro-org/kedro-academy
[2]: https://github.com/kedro-org
Textualize [1] has done a fantastic job with toolong [2]. Highly recommend taking a look.
A terminal application to view, tail, merge, and search log files (plus JSONL).
References:
[1]: https://github.com/Textualize
[2]: https://github.com/Textualize/toolong
I’m really excited about htmx-ai [1], an amazing project by bufferhead-code [2]. It’s worth exploring!
Add AI support to HTMX [3]
References:
[1]: https://github.com/bufferhead-code/htmx-ai
[2]: https://github.com/bufferhead-code
[3]: /htmx/
2.5 Admins 180: Email 777 – 2.5 Admins
2.5admins.com [1]
How do you pronounce URL, is it U.R.L or Earle? I’m about 50/50, mostly when I am in a hurry I use Earle as it is one syllable and easy to say. I picked this up from MPJ of fun fun function, who took over Dev Tips. In this episide Jim uses Earle and they make fun of him. If it’s good enough for Jim, I am done with my 50/50 and I’m going all in on Earle.
Episode also included a fastinating corrdinated attack that used Ars Technica profile photos communicate directions for the next attack via query parameters in the image url.
References:
[1]: https://2.5admins.com/2-5-admins-180/
-
This really makes me want to try Dolphin Mixtral with ollama now. It looks very impressive from this video. The ability to keep adding features before becoming confused is though with a lot of these llms.
Being chat based, this is not a co pilot replacement. I was really hoping for an in line co pilot like tool that I can run locally. I have not used co pilot yet, but I have had great luck with codeium.
-
Thor is just straight up a great Human being! Getting a gaming company to tie power and progression with being nice is an incredible feat.
-
Great take on low code. I have definitely felt the pressure of being presented low code options, “look it does almost everything you need, and you can do it without code.” Granted there are tons of great low code environments that serve their markets well (things like zapier).
As pointed out here when they fall short rather than being hard, it goes to nearly impossible. As Theo points out here many applications follow an 80/20 rule. 80% of the app is really easy to put together, and takes about 20% of the time, probably less. What no code does is it takes that 80% that is already easy, makes it even easier ( pitches it as faster whether or not that is true ), and makes the last 20% of the project impossibly hard to create and maintain, so you just should have picked a tool that had the capability of doing the whole thing from the start anyways.
poc is not product
A poc is not a product. I started focais, not in a rush, but as something
that I already had a POC for and thought it would be easy. I wanted to build
tools to make creating blog posts like this one easier. I stared with shots
a tool that takes screenshots of websites.
POC (proof of concept) # [1]
For the poc, I made a single fastapi [2] endpoint that takes a url and returns a
screenshot of the page. It converts the url into a key that I can lookup to
see if I have the shot, if I don’t I go get it. With the open source libraries
out there, this is not too hard of a task.
Progress Thus Far # [3]
- /shot
But this wasn’t enough
All it does so far for this first tool is take screenshots of websites, and
give you a hosted image.
Users # [4]
To bring in users, I need to create a signup flow, with a database to store
users, login, logout, and email recovery. I’ve never had to use an email
service before that wasn’t already mandated by a company or an iternal smtp
server. After some...
-
I’ve heard prime say just give it the one eyed fighting kirby so many times, and execute it few times, and there is no way to find it online, so this will be the link that I will come to, when I need to remember what @theprimeagen means when he says Give it the one eyed fighting kirby.
:s/\(.*\);/console.log(\1)
So what is this? # [1]
This is a vim substitute comand to replace text in the buffer. the one eyed fighting kirby is a regex capture group to capture everything between matches, and assign it a value to place back in after the match.
substitute in a nutshell, :s/<what you want to replace>/<what you want to replace with>
More examples # [2]
Here is a contrived example of text.
here there
from here go there
here = some_fuction(there)
Now for some reason I want to switch all of the words here and there. I can do that with three capture groups, \1 is here, \2 is everything between, \3 is there.
:%s/\(here\)\(.*\)\(there\)/\3\2\1
Just give it the one eyed fighting kirby
~Prime
still struggling # [3]
I thought this explaination from phind was good and more verbose than mine.
---
describe this vim substitute regex
:%s/(here)(.)(there)/\3\2\1
ANSWER | PHIND V9 M...
Java - ArchWiki
wiki.archlinux.org [1]
Today I learned that arch has a helper script archlinux-java to set the version of java.
archlinux-java status
archlinux-java set <JAVA_ENV_NAME>
References:
[1]: https://wiki.archlinux.org/title/java#Switching_between_JVM
GitHub - charmbracelet/mods: AI on the command line
AI on the command line. Contribute to charmbracelet/mods development by creating an account on GitHub.
GitHub · github.com [1]
This is a pretty sweet interface into llms. I used it a bit with my son tonight while he was asking me for datapack ideas.
❯ mods -f 'I am trying to have fun on my minecraft server and am creating a minecraft datapack send me some load.mcfuncions that will make it fun'
You can continue the conversation with a -C
❯ mods -C -f 'I like where you are going with number 4, can you make it so that it runs when a player opens a door'
You can pass it some data
curl https://waylonwalker.com/thoughts-on-unit-tests/ | mods -f 'summarize this post'
References:
[1]: https://github.com/charmbracelet/mods
GitHub - charmbracelet/mods: AI on the command line
AI on the command line. Contribute to charmbracelet/mods development by creating an account on GitHub.
GitHub · github.com [1]
This is a pretty sweet interface into llms. I used it a bit with my son tonight while he was asking me for datapack ideas.
❯ mods -f 'I am trying to have fun on my minecraft server and am creating a minecraft datapack send me some load.mcfuncions that will make it fun'
You can continue the conversation with a -C
❯ mods -C -f 'I like where you are going with number 4, can you make it so that it runs when a player opens a door'
References:
[1]: https://github.com/charmbracelet/mods
The work on mods [1] by charmbracelet [2].
AI on the command line
References:
[1]: https://github.com/charmbracelet/mods
[2]: https://github.com/charmbracelet
Gridfinity
The modular, open-source grid storage system.
Gridfinity · gridfinity.xyz [1]
I am starting to build out some custom tool holders for my tool box, and using gridfinity. This is a super handy reference guide for spec’ing out the bases.
References:
[1]: https://gridfinity.xyz/specification/
Read a Range of Data - LIMIT and OFFSET - SQLModel
SQLModel, SQL databases in Python, designed for simplicity, compatibility, and robustness.
sqlmodel.tiangolo.com [1]
Today I was running some sqlmodel queries through the sqlalchemy orm. Admittedly I’ve not done enough orm queries before, and I’ve done quite a bit of raw sql. I was trying to get objects from two separate models that had relationships setup.
session.query(User, Images).where(User.id == 3).all()
It is incredibly slow, and gives me the following warning.
SELECT statement has a cartesian product between FROM element(s)
What I learned from the SQLModel docs is that you should give it a join to correct this and go much faster.
session.query(User, Images).join(Images).where(User.id == 3).all()
References:
[1]: https://sqlmodel.tiangolo.com/tutorial/limit-and-offset/
So after months of fighting with gf not going to template files, I finally decided to put in some effort to make it work.
This was the dumbest keybind in my config, that I copied from someone else without understanding it.
What I am trying to do #
I have jinja templates in a directory called templates. I want to bind gf to
open a template file, but it is trying to open a new file ./base.html
{% extends "base.html" %}
{% if request.state.user %}
    {% block title %}Fokais - {{ request.state.user.full_name }} {% endblock %}
{% else %}
    {% block title %}Fokais {% endblock %}
{% endif %}
{% block content %}
    {% if request.state.user %}
        <h1 id="title"
            class="inline-block mx-auto text-5xl font-black leading-loose
            text-transparent bg-clip-text bg-gradient-to-r from-red-600
            via-pink-500 to-yellow-400 ring-red-500 text-shadow-xl
            text-shadow-zinc-950 ring-5">
            {{ request.state.user.full_name }}
        </h1>
    {% endif %}
    {% include "me_partial.html" %}
{% endblock %}
What did not work #
I tried all sorts of changes to my path, but it still didn’t work.
vim.api.nvim_command("set path+=templates/**")
What I found #
after digging into my keymap I found that I had remaped gf to edit years
ago. This works great if the file is in your current directory, and if it’s not
it makes the file. This bind completely breaks vim’s ability to :find files
and was a terrible keybind that I added probably from someone else years ago
and have literally never used this feature. If gf opens an empty file I
always close it and assume that vim failed to :find the file.
-- Allow gf to open non-existent files
set("", "gf", ":edit <cfile><CR>")
Yes, after that fix I still needed to adjust my path #
I ended up with the following in my options.lua.
-- look for jinja templates in the templates directory
vim.opt.path:append("templates/**")
Template Designer Documentation — Jinja Documentation (3.1.x)
jinja.palletsprojects.com [1]
html [2] code generated by my jinja templates generally look half garbage because of indents and whitespace all over the place. I just learned about these pesky Whitespace Control characters that can get rid of the whitespace added from templating.
You can also strip whitespace in templates by hand. If you add a minus sign (-) to the start or end of a block (e.g. a For tag), a comment, or a variable expression, the whitespaces before or after that block will be removed:
{% for item in seq -%}
{{ item }}
{%- endfor %}
References:
[1]: https://jinja.palletsprojects.com/en/3.0.x/templates/#whitespace-control
[2]: /html/
Intro - Minecraft Server on Docker (Java Edition)
Documentation for Minecraft Server on Docker
docker-minecraft-server.readthedocs.io [1]
I just learned that if you can exec into the container running minecraft with the itzg/minecraft container you can run rcon-cli to get command access to the server. You need to set the RCON_PASSWORD if you want to access rcon remotely, but if you have not already done this and have access to the server you can just run rcon-cli when you are in.
References:
[1]: https://docker-minecraft-server.readthedocs.io/en/latest/
-
Theo’s response puts a lot of my feelings about unit testing into words. It’s crazy how cargo culty it becomes that the echo chamber of twitter can bring in beliefs that we think we believe, but have not experienced enough or put enough thought in to form our own opinion.
This video made me think so much that it turned into it’s own blog post
Thoughts on Unit Testing [1]
References:
[1]: https://waylonwalker.com/thoughts-on-unit-tests
thoughts on unit tests
[1]
Theo’s response puts a lot of my feelings about unit testing into words. Many
of us have grown up in this world preaching unit testing. We often hear these
statements “Everything must be unit tested, tests make code more maintainable.”
In reality when we are not writing complex low level code unit tests are
probably the wrong approach.
We Finally Agree On Unit Tests - YouTube
!https://www.youtube.com/watch?v=MbU-PKukdMw
Dec 22, 2023 [2]
Most of us are assemblers # [3]
So much of software engineering is assembling existing well tested code. Crud
applications, UI, Data Pipelines, building on top of battle tested code.
Manufacturing Analogy - Unit Testing # [4]
This kind of reminds me of Manufacturing. Individual components are QA tested
with tests that look more like unit test. Parts like bearings, pistons,
shafts, valves, they are all tested against sophisticated statistics of sample
measurements. This is quite similar to unit testing.
[5]
You see measuring the indivi...
Mastodon.py — Mastodon.py 2.2.1 documentation
mastodonpy.readthedocs.io [1]
Mastadon.py is a python api client for mastadon that makes it easy to cross post to mastadon.
from mastodon import Mastodon
Mastodon.create_app(
'pytooterapp',
api_base_url = 'https://mastodon.social',
to_file = 'pytooter_clientcred.secret'
)
from mastodon import Mastodon
mastodon = Mastodon(client_id = 'pytooter_clientcred.secret',)
mastodon.log_in(
'[email protected]',
'incrediblygoodpassword',
to_file = 'pytooter_usercred.secret'
)
mastodon.toot('Tooting from Python using #mastodonpy !')
References:
[1]: https://mastodonpy.readthedocs.io/en/stable/
bunny.net - The Global Edge Platform that truly Hops
Hop on bunny.net and speed up your web presence with the next-generation Content Delivery Service (CDN), Edge Storage, and Optimization Services at any scale.
bunny.net · bunny.net [1]
bunny.net looks like an interesting cloudflare alternative.
References:
[1]: https://bunny.net/
IndieWebify.Me - a guide to getting you on the IndieWeb
indiewebify.me [1]
This is a sick guided site to validate indieweb tags on your site. It makes it much easier than trying to do it yourself.
References:
[1]: https://indiewebify.me/
I came across nvim-macroni [1] from jesseleite [2], and it’s packed with great features and ideas.
🤌 Save your macros for future use
References:
[1]: https://github.com/jesseleite/nvim-macroni
[2]: https://github.com/jesseleite
jesseleite [1] has done a fantastic job with macroni.nvim [2]. Highly recommend taking a look.
Save your macros for future use 🤌
References:
[1]: https://github.com/jesseleite
[2]: https://github.com/jesseleite/macroni.nvim
ikalnytskyi [1] has done a fantastic job with httpie-auth-store [2]. Highly recommend taking a look.
Credential store plugin for HTTPie, attaches auth to ongoing request.
References:
[1]: https://github.com/ikalnytskyi
[2]: https://github.com/ikalnytskyi/httpie-auth-store
Authentication from cli tools can be a bit of a bear, and I have to look it up every time. This is my reference guide for future me to remember how to easily do it.
I set up a fastapi server running on port 8000, it uses a basic auth with
waylonwalker as the username and asdf as the password. The server follows
along with what comes out of the docs. I have it setup to take basic auth,
form username and password, or a bearer token for authentication.
curl #
The og of command line url tools.
# basic auth
curl -u 'waylonwalker:asdf' -X POST localhost:8000/token
# basic auth with password prompt
curl -u 'waylonwalker' -X POST localhost:8000/token
# token
curl -H 'Authorization: bearer eyJhbGciOiJIUzI1NiIsInR5cCI6IkpXVCJ9.eyJzdWIiOiJ3YXlsb253YWxrZXIiLCJleHAiOjE3MDI5NTI2MDJ9.GeYNt7DNal6LTiPoavJnqypaMt4vYeriXdq5lqu1ILg' -X POST localhost:8000/token
wget #
My go to if I want the result to go into a file.
# basic auth
wget -q -O - --auth-no-challenge --http-user=waylonwalker --http-password=asdf --post-data '' localhost:8000/token

# token
wget -q -O - --header="Authorization: bearer eyJhbGciOiJIUzI1NiIsInR5cCI6IkpXVCJ9.eyJzdWIiOiJ3YXlsb253YWxrZXIiLCJleHAiOjE3MDI5NTI2MDJ9.GeYNt7DNal6LTiPoavJnqypaMt4vYeriXdq5lqu1ILg" -O - --post-data '' localhost:8000/token
httpx #
An http client written in python, primarilty used with the python api, but has a nice cli.
# install
python3 -m pip install httpx

# basic auth
httpx -m POST --auth waylonwalker asdf http://localhost:8000/token

# basic auth with password prompt
httpx -m POST --auth waylonwalker - http://localhost:8000/token

# token
httpx -m POST --headers="Authorization" "bearer eyJhbGciOiJIUzI1NiIsInR5cCI6IkpXVCJ9.eyJzdWIiOiJ3YXlsb253YWxrZXIiLCJleHAiOjE3MDI5NTI2MDJ9.GeYNt7DNal6LTiPoavJnqypaMt4vYeriXdq5lqu1ILg" http://localhost:8000/token
httpie #
A modern http client written in python.
# install
python3 -m pip install httpie

# basic auth
http POST localhost:8000/token -a waylonwalker:asdf

# basic auth with password prompt
http POST localhost:8000/token -a waylonwalker

# token
http POST localhost:8000/token -A bearer -a eyJhbGciOiJIUzI1NiIsInR5cCI6IkpXVCJ9.eyJzdWIiOiJ3YXlsb253YWxrZXIiLCJleHAiOjE3MDI5NTI2MDJ9.GeYNt7DNal6LTiPoavJnqypaMt4vYeriXdq5lqu1ILg
httpie with plugin #
# install
python3 -m pip install httpie-credential-store
# usage
http POST localhost:8000/token -A creds
httpie prompt #
http-prompt comes from the httpie org, and has an interactive cli interface
into apis. You can even specify a spec file to autocomplete on api methods.
http-prompt localhost:8000 --auth waylonwalker:asdf --spec openapi.json
External Link
stackoverflow.com [1]
After struggling to get dependencies inside of middleware I learned that you can make global dependencies at the app level. I used this to set the user on every single route of the application without needing Depend on getting the user on each route.
from fastapi import Depends, FastAPI, Request
def get_db_session():
print("Calling 'get_db_session(...)'")
return "Some Value"
def get_current_user(session=Depends(get_db_session)):
print("Calling 'get_current_user(...)'")
return session
def recalculate_resources(request: Request, current_user=Depends(get_current_user)):
print("calling 'recalculate_resources(...)'")
request.state.foo = current_user
app = FastAPI(dependencies=[Depends(recalculate_resources)])
@app.get("/")
async def root(request: Request):
return {"foo_from_dependency": request.state.foo}
References:
[1]: https://stackoverflow.com/questions/72243379/fastapi-dependency-inside-middleware#answer-72480781
Handling Errors - FastAPI
FastAPI framework, high performance, easy to learn, fast to code, ready for production
fastapi.tiangolo.com [1]
This page shows how to customize your fastapi [2] errors. I found this very useful to setup common templates so that I can return the same 404’s both programatically and by default, so it all looks the same to the end user.
from fastapi import FastAPI, Request
from fastapi.responses import JSONResponse
class UnicornException(Exception):
def __init__(self, name: str):
self.name = name
app = FastAPI()
@app.exception_handler(UnicornException)
async def unicorn_exception_handler(request: Request, exc: UnicornException):
return JSONResponse(
status_code=418,
content={"message": f"Oops! {exc.name} did something. There goes a rainbow..."},
)
@app.get("/unicorns/{name}")
async def read_unicorn(name: str):
if name == "yolo":
raise UnicornException(name=name)
return {"unicorn_name": name}
References:
[1]: https://fastapi.tiangolo.com/tutorial/handling-errors/
[2]: /fastapi/
logs with FastAPI and Uvicorn · Issue #1508 · fastapi/fastapi
Hello, Thanks for FastAPI, easy to use in my Python projects ! However, I have an issue with logs. In my Python project, I use : app = FastAPI() uvicorn.run(app, host="0.0.0.0", port=8000) And when...
GitHub · github.com [1]
Setting an additional log handler to the uvicorn logger for access logs in fastapi [2] was not straightforward, but This post was very helpful.
@app.on_event("startup")
async def startup_event():
logger = logging.getLogger("uvicorn.access")
handler = logging.StreamHandler()
handler.setFormatter(logging.Formatter("%(asctime)s - %(levelname)s - %(message)s"))
logger.addHandler(handler)
References:
[1]: https://github.com/tiangolo/fastapi/issues/1508
[2]: /fastapi/
External Link
stackoverflow.com [1]
Setting tags in your fastapi endpoints will group them in the docs. You can also set some metadata around the tags to get nice descriptions.
Here is a full example from the post.
from fastapi import FastAPI
tags_metadata = [
{"name": "Get Methods", "description": "One other way around"},
{"name": "Post Methods", "description": "Keep doing this"},
{"name": "Delete Methods", "description": "KILL 'EM ALL"},
{"name": "Put Methods", "description": "Boring"},
]
app = FastAPI(openapi_tags=tags_metadata)
@app.delete("/items", tags=["Delete Methods"])
@app.put("/items", tags=["Put Methods"])
@app.post("/items", tags=["Post Methods"])
@app.get("/items", tags=["Get Methods"])
async def handle_items():
return
References:
[1]: https://stackoverflow.com/questions/63762387/how-to-group-fastapi-endpoints-in-swagger-ui#answer-63762765
waylon walker (@_WaylonWalker) on X
Bloggers where do you put your markdown?
X (formerly Twitter) · twitter.com [1]
Most bloggers on my twitter blog right into a file that goes on git [2]. I kinda expected to have more database folk. I have my blog in markdown on git and the editing experience is top notch. I can just find files edit them in MY EDITOR, push them and I got a post. I am running thoughts in a sqlite database with a fastapi [3] backend, and holy crap the instant nature of posting feels so much better. Both sides have good points.
References:
[1]: https://twitter.com/_WaylonWalker/status/1734387536716308693
[2]: /glossary/git/
[3]: /fastapi/
Show some equivalent list comprehensions in filter examples · Issue #1068 · pallets/jinja
I'm willing to write a pull-request for this, but I just want to see what people think before I write it. So the issue is this. I'm very familiar with python. I'm new to Jinja2. Often I find myself...
GitHub · github.com [1]
I often want to reach for non existing list comprehensions in jinja 2, Here are a few nice equivalents.
a: {{ data | selectattr('x', 'gt', 5) | list }}
b: {{ data | map(attribute='c') | list }}
c: {{ data | selectattr('x', 'gt', 5) | map(attribute='c') | list }}
References:
[1]: https://github.com/pallets/jinja/issues/1068
External Link
vi.stackexchange.com [1]
I fixed my missing macro recording indicator that I lost and was never quite sure why. (because I forgot that I set cmdheight=0).
vim.cmd [[ autocmd RecordingEnter * set cmdheight=1 ]]
vim.cmd [[ autocmd RecordingLeave * set cmdheight=0 ]]
References:
[1]: https://vi.stackexchange.com/questions/39947/nvim-vim-o-cmdheight-0-looses-the-recording-a-macro-messages
I am working on fokais.com’s signup page, and I want to hide the form input during an htmx request. I was seeing some issues where I was able to prevent spamming the submit button, but was still able to get one extra hit on it.
It also felt like nothing was happening while sending the email to the user for verification. Now I get the form to disappear and a spinner to show during the request.
html">HTML #
Let’s start off with the form. It uses htmx to submit a post request to the
post_request route. Note that there is a spinner in the post_request with the
htmx-indicator class.
The intent is to hide the spinner until the request is running, and hide all of the form input during the request.
<form
  id="signup-form"
  hx-swap-oob="outerHTML"
  class="m-4 mx-auto mb-6 flex w-80 flex-col rounded-lg b p-4 shadow-xlc shadow-cyan-500/10"
  method="POST"
  action="{{ url_for('post_signup') }}"
  hx-post="{{ url_for('post_signup') }}"
>

<!--markata-attribution-->
  <input
    class="mx-8 mt-6 mb-4 border border-black bg-zinc-900 p-1 text-center focus:bg-zinc-800"

<!--markata-attribution-->
    type="text"

<!--markata-attribution-->
    value="{{ full_name }}"

<!--markata-attribution-->
    name="full_name"

<!--markata-attribution-->
    placeholder="Full Name"
  />

<!--markata-attribution-->
  {% if full_name_error %}

<!--markata-attribution-->
  <label class="-mt-6 mb-6 mx-8 text-red-500 p-1 text-center">

<!--markata-attribution-->
    {{ full_name_error }}

<!--markata-attribution-->
  </label>

<!--markata-attribution-->
  {% endif %}

<!--markata-attribution-->
  <input
    class="mx-8 mb-4 border border-black bg-zinc-900 p-1 text-center focus:bg-zinc-800"

<!--markata-attribution-->
    type="text"

<!--markata-attribution-->
    value="{{ username }}"

<!--markata-attribution-->
    name="username"

<!--markata-attribution-->
    placeholder="username"
  />

<!--markata-attribution-->
  {% if username_error %}

<!--markata-attribution-->
  <label class="-mt-6 mb-6 mx-8 text-red-500 p-1 text-center">

<!--markata-attribution-->
    {{ username_error }}

<!--markata-attribution-->
  </label>

<!--markata-attribution-->
  {% endif %}

<!--markata-attribution-->
  <input
    class="mx-8 mb-4 border border-black bg-zinc-900 p-1 text-center focus:bg-zinc-800"

<!--markata-attribution-->
    type="email"

<!--markata-attribution-->
    name="email"

<!--markata-attribution-->
    value="{{ email }}"

<!--markata-attribution-->
    placeholder="email"
  />

<!--markata-attribution-->
  {% if email_error %}

<!--markata-attribution-->
  <label class="-mt-6 mb-6 mx-8 text-red-500 p-1 text-center">

<!--markata-attribution-->
    {{ email_error }}

<!--markata-attribution-->
  </label>

<!--markata-attribution-->
  {% endif %}

<!--markata-attribution-->
  <input
    class="mx-auto w-32 mb-4 border border-black bg-purple-900 p-1 text-center focus:bg-zinc-800"

<!--markata-attribution-->
    type="submit"

<!--markata-attribution-->
    value="sign up"
  />

<!--markata-attribution-->
  <div role="status" class="mx-auto htmx-indicator">

<!--markata-attribution-->
    <svg

<!--markata-attribution-->
      class="mx-auto animate-spin h-5 w-5 text-white"

<!--markata-attribution-->
      xmlns="https://www.w3.org/2000/svg"

<!--markata-attribution-->
      fill="none"

<!--markata-attribution-->
      viewBox="0 0 24 24"
    >

<!--markata-attribution-->
      <circle

<!--markata-attribution-->
        class="opacity-25"

<!--markata-attribution-->
        cx="12"

<!--markata-attribution-->
        cy="12"

<!--markata-attribution-->
        r="10"

<!--markata-attribution-->
        stroke="currentColor"

<!--markata-attribution-->
        stroke-width="4"
      ></circle>

<!--markata-attribution-->
      <path

<!--markata-attribution-->
        class="opacity-75"

<!--markata-attribution-->
        fill="currentColor"
        d="M4 12a8 8 0 018-8V0C5.373 0 0 5.373 0 12h4zm2 5.291A7.962 7.962 0 014 12H0c0 3.042 1.135 5.824 3 7.938l3-2.647z"
      ></path>

<!--markata-attribution-->
    </svg>

<!--markata-attribution-->
    <p>Signing up...</p>

<!--markata-attribution-->
  </div>

<!--markata-attribution-->
</form>
Yes this is styled using tailwindcss.
https://waylonwalker.com/still-loving-tailwind/
CSS #
Let’s take a look at how we achieve switching between only spinner an only form inputs using css.
.htmx-indicator {
  @apply hidden;
  opacity: 0;
  transition: opacity 500ms ease-in;
}
.htmx-request button,
.htmx-request input[type="submit"],
.htmx-request input,
.htmx-request label {
  @apply hidden;
}
.htmx-request .htmx-indicator {
  opacity: 1;
  @apply block;
}
.htmx-request.htmx-indicator {
  opacity: 1;
  @apply block;
}
Final Result #
Here is the final result of me signing up for a new account in fokais.
GitHub - DataDog/ddqa: Datadog's QA manager for releases of GitHub repositories
Datadog's QA manager for releases of GitHub repositories - DataDog/ddqa
GitHub · github.com [1]
DataDog ddqa is building out a textual app and deploying it with pyapp. They have CI setup to fully build and cross compile their textual tui into github releases that you can just download from their releases page. This is something I am looking at for markata. This would be pretty sweet to be able to make it just work on places like windows. It would also be interesting to try to build a full desktop app with pyapp.
References:
[1]: https://github.com/DataDog/ddqa
Check out ddqa [1] by DataDog [2]. It’s a well-crafted project with great potential.
Datadog’s QA manager for releases of GitHub repositories
References:
[1]: https://github.com/DataDog/ddqa
[2]: https://github.com/DataDog
I like cross-rs’s [1] project cross [2].
“Zero setup” cross compilation and “cross testing” of Rust crates
References:
[1]: https://github.com/cross-rs
[2]: https://github.com/cross-rs/cross
If you’re into interesting projects, don’t miss out on pyapp [1], created by ofek [2].
Runtime installer for Python applications
References:
[1]: https://github.com/ofek/pyapp
[2]: https://github.com/ofek
[1]
Full list of imagemagick color names.
References:
[1]: /static/https://imagemagick.org/script/color.php
Adam Wathan (@adamwathan) on X
Hear me out.
X (formerly Twitter) · twitter.com [1]
I’m going to give this trick a shot on my sites, and see how I like it.
* {
min-width: 0
}
Down in the comments @adamwathan [2] goes on to say.
Basically every layout overflow bug ever boils down to some flex or grid child needing min-width: 0 😄
Oh and @ryanflorence [3] also says in the comments.
I … do this.
References:
[1]: https://twitter.com/adamwathan/status/1734696245015494711
[2]: https://twitter.com/adamwathan/
[3]: https://twitter.com/ryanflorence
External Link
tushar.lol [1]
Nice message by @tusharsadhwani [2].
Write it down.
You had to dig deeper than face value at something.
Write it down.
You had to combine multiple pages of docs.
Write it down.
Someting was simply not obvious to you at first and it took someone else to give you that ah ha moment.
Write it down.
You had a small discovery that had a marginal impact on your day.
Write it down.
A blog does not have to be a Blog, it can be small meaningful posts. There are absolutely no rules. If you think you are going to end up with too many posts, that is a solvable problem, make a search, curate your favorite posts, make multiple feeds.
At the end of the day.
Write it down.
This post itself is a thought, the smallest component to my blogging strategy.
Write it down.
References:
[1]: https://tushar.lol/post/write-a-blog/
[2]: https://twitter.com/sadhlife
Path Operation Advanced Configuration - FastAPI
FastAPI framework, high performance, easy to learn, fast to code, ready for production
fastapi.tiangolo.com [1]
Excluding routes from fastapi docs, can be done from the route configuration using `include_in_schema`. This is handy for routes that are not really api based or duplicates.
From the Docs # [2]
from fastapi import FastAPI
app = FastAPI()
@app.get("/items/", include_in_schema=False)
async def read_items():
return [{"item_id": "Foo"}]
trailing slash # [3]
I’ve had better luck just routing both naked and trailing slash routes in fastapi [4]. I’ve had api’s deployed as a subroute to a site rather than a subdomain, and the automatic redirect betweens them tended to always get messed up. This is pretty easy fix for the pain is causes just give vim a yyp, and if you don’t want deuplicates in your docs, ignore one.
from fastapi import FastAPI
app = FastAPI()
@app.get("/items")
@app.get("/items/", include_in_schema=False)
async def read_items():
return [{"item_id": "Foo"}]
favicon.ico # [5]
Now you do not need to deploy favicons to your api in any way, it is nice to have it in your browser tab, but more importantly ...
Protect API docs behind authentication? · Issue #364 · fastapi/fastapi
Basic Question Does FastAPI provide a method for implementing authentication middleware or similar on the docs themselves (e.g. to protect access to /docs and /redoc)? Additional context My company...
GitHub · github.com [1]
You can protect your fastapi [2] docs behind auth so that not only can certain roles not run certain routes, but they cannot even see the docs at all. This way no one that shouldn’t be poking around can even discover routes they shouldn’t be using.
Here is the soluteion provided by @kennylajara [3]
from fastapi import FastAPI
from fastapi.openapi.docs import get_redoc_html, get_swagger_ui_html
from fastapi.openapi.utils import get_openapi
import secrets
from fastapi import Depends, FastAPI, HTTPException, status
from fastapi.security import HTTPBasic, HTTPBasicCredentials
app = FastAPI(
title="FastAPI",
version="0.1.0",
docs_url=None,
redoc_url=None,
openapi_url = None,
)
security = HTTPBasic()
def get_current_username(credentials: HTTPBasicCredentials = Depends(security)):
correct_username = secrets.compare_digest(credentials.username, "user")
correct_password = secrets...
Looking for inspiration? llmware [1] by llmware-ai [2].
Unified framework for building enterprise RAG pipelines with small, specialized models
References:
[1]: https://github.com/llmware-ai/llmware
[2]: https://github.com/llmware-ai
Cancel subscriptions
Cancel subscriptions immediately or at the end of the subscription period with proration options, invoice handling, and automatic cancellation after failed payment attempts.
stripe.com [1]
This is a handy guide to cancelling stripe subscriptions.
# Set your secret key. Remember to switch to your live secret key in production.
# See your keys here: https://dashboard.stripe.com/apikeys
import stripe
stripe.api_key = "sk_test_51ODvHtB26msLKqCAPBAo1qkBBuIfT5tQBX6YFWCLMsPixIExxITCRVa9tNCIqkdQS8olhR79NYXsFWBPKsM3LbGO00zEcNQfNI"
stripe.Subscription.modify(
"sub_49ty4767H20z6a",
cancel_at_period_end=True,
)
You can even inverse it by flipping True to False and re activate the subscription.
References:
[1]: https://stripe.com/docs/billing/subscriptions/cancel#canceling
Today I am working on fokais.com, trying to get to a point where I can launch by workig through stripe integrations. This is my first time using stripe, so there has been quite a bit to learn, and I am probably building in more than I need to before launching, but I am learning, and not in a rush to launch.
I am building the fokais backent in python primarilyt with fastapi and sqlmodel on sqlite. My billing integration is going to be all Stripe.
Stripe Subscription Cancellations Docs #
Here is a link to the stripe docs for your refrence, especially if you want to see how to cancel subscriptions in other languages. They include code samples for many popular languages.
User Model #
This is the part of the user model that includes the cancel and reactivate methods. It pretty much follows the stripe guide.
class UserBase(SQLModel, table=False):  # type: ignore[call-arg]
    username: str = Field(unique=True)
    full_name: str
    email: str
    email_verified: bool = False
    disabled: bool = False
    signup_date: Optional[datetime] = Field(default_factory=datetime.utcnow)
    stripe_customer_id: Optional[str]

    def cancel_subscription(self):
        for subscription in self.active_subscriptions:
            stripe.Subscription.modify(
                subscription.id,
                cancel_at_period_end=True,
            )
        self.refresh()

    def reactivate_subscription(self):
        for subscription in self.active_subscriptions:
            stripe.Subscription.modify(
                subscription.id,
                cancel_at_period_end=False,
            )
        self.refresh()
Cancellations api #
Here is the cancellations api. I created an are you sure form that I can link
to from the accounts page with a normal anchor tag. Note that I am doing a
POST request to do the cancellation from a form. I want this to work for any
user whether there is js or not. This is an operation that will change the
users data, and I want to make sure that it avoids all browser and cdn caching.
As a scrappy startup we are running light on infrastructure and are caching
hard at the CDN to avoid excessive server hits.
Note
I am doing a `POST` request to do the cancellation from a form.
@pricing_router.get("/cancel")
@pricing_router.get("/cancel/")
def get_cancel(
    request: Request,
    current_user: Annotated[User, Depends(get_current_user_if_logged_in)],
):
    return config.templates.TemplateResponse(
        "cancel.html",
        {
            "request": request,
            "prices": products.prices,
            "products": products.products,
            "current_user": current_user,
        },
    )


@pricing_router.post("/cancel")
@pricing_router.post("/cancel/")
def post_cancel(
    request: Request,
    current_user: Annotated[User, Depends(get_current_user_if_logged_in)],
):
    current_user.cancel_subscription()
    return HTMLResponse('<p id="cancel" hx-swap-oob="outerHTML">Your Subscription has been Cancelled</p>')
Reactivations #
Reactivating accounts looks just about the same as cancelling, only flippng True to False.
@pricing_router.get("/reactivate")
@pricing_router.get("/reactivate/")
def get_reactivate(
    request: Request,
    current_user: Annotated[User, Depends(get_current_user_if_logged_in)],
):
    return config.templates.TemplateResponse(
        "reactivate.html",
        {
            "request": request,
            "prices": products.prices,
            "products": products.products,
            "current_user": current_user,
        },
    )


@pricing_router.post("/reactivate")
@pricing_router.post("/reactivate/")
def post_reactivate(
    request: Request,
    current_user: Annotated[User, Depends(get_current_user_if_logged_in)],
):
    current_user.reactivate_subscription()
    return HTMLResponse('<p id="reactivate" hx-swap-oob="outerHTML">Your Subscription has been reactivated</p>')
Full User Model #
This is the full user model, completely subject to change in the future, but it includes the cancel and reactivate methods.
class UserBase(SQLModel, table=False):  # type: ignore[call-arg]
    username: str = Field(unique=True)
    full_name: str
    email: str
    email_verified: bool = False
    disabled: bool = False
    signup_date: Optional[datetime] = Field(default_factory=datetime.utcnow)
    stripe_customer_id: Optional[str]

    @property
    def session(self):
        return next(get_session())

    @classmethod
    def get_by_id(cls, id):
        return next(get_session()).get(cls, id)

    def refresh(self):
        cache.set(f"active_subscriptions_{self.id}", None, 3600)
        cache.set(f"active_products_{self.id}", None, 3600)

    def get_checkout_sessions(self):
        return [
            stripe.checkout.Session.retrieve(s.stripe_checkout_session_id)
            for s in self.session.exec(select(CheckoutSession).where(CheckoutSession.user_id == self.id)).all()
            if s.stripe_checkout_session_id is not None
        ]

    def get_active_subscriptions(self):
        subscriptions = [
            s.subscription
            for s in [
                stripe.checkout.Session.retrieve(s.stripe_checkout_session_id)
                for s in self.session.exec(select(CheckoutSession).where(CheckoutSession.user_id == self.id)).all()
                if s.stripe_checkout_session_id is not None
            ]
            if s.status == "complete"
        ]
        active_subscriptions = [stripe.Subscription.retrieve(subscription) for subscription in subscriptions]
        return active_subscriptions

    def has_active_subscription(self):
        return len(self.active_subscriptions) > 0

    @property
    def active_subscriptions(self):
        active_subscriptions = cache.get(f"active_subscriptions_{self.id}")
        if active_subscriptions is not None:
            return active_subscriptions
        active_subscriptions = self.get_active_subscriptions()
        cache.set(f"active_subscriptions_{self.id}", active_subscriptions, 3600)

        return active_subscriptions

    @property
    def active_plans(self):
        subscriptions = self.active_subscriptions
        plans = [subscription.plan for subscription in subscriptions]
        return plans

    @property
    def subscription_to_plan(self):
        subscriptions = self.active_subscriptions
        plans = {subscription.id: subscription.plan.id for subscription in subscriptions}
        return plans

    @property
    def plan_to_subscription(self):
        plans = {v: k for k, v in self.subscription_to_plan.items()}

        return plans

    def get_active_products(self):
        plans = self.active_plans
        products = [stripe.Product.retrieve(plan.product) for plan in plans]
        return products

    @property
    def plan_to_product(self):
        plans = self.active_plans
        products = {plan.id: stripe.Product.retrieve(plan.product).id for plan in plans}
        return products

    @property
    def prodct_to_plan(self):
        plans = self.active_plans
        products = {stripe.Product.retrieve(plan.product).id: plan.id for plan in plans}
        return products

    @property
    def active_products(self):
        products = cache.get(f"active_products_{self.id}")
        if products is not None:
            return products
        products = self.get_active_products()
        cache.set(f"active_products_{self.id}", products, 3600)

        return products

    @property
    def best_active_subscription(self):
        subscriptions = self.active_subscriptions
        return subscriptions[0]

    @property
    def best_active_product(self):
        products = self.active_products
        products.sort(key=lambda p: p.metadata.get('level', 0))
        return products[0]

    @property
    def best_active_subscription(self):
        subscription_id = self.plan_to_subscription[self.prodct_to_plan[self.best_active_product.id]]
        return stripe.Subscription.retrieve(subscription_id)

    @property
    def config(self):
        product = self.best_active_product
        return product.metadata

    def subscription_status(self):
        subscriptions = self.active_subscriptions()

    def cancel_subscription(self):
        for subscription in self.active_subscriptions:
            stripe.Subscription.modify(
                subscription.id,
                cancel_at_period_end=True,
            )
        self.refresh()

    def reactivate_subscription(self):
        for subscription in self.active_subscriptions:
            stripe.Subscription.modify(
                subscription.id,
                cancel_at_period_end=False,
            )
        self.refresh()
External Link
stripe.com [1]
You can find your customers next billing date through the stripe api by using Invoice. and passing in customer, customer_details, subscription, or schedule.
import stripe
stripe.api_key = "sk_test_51ODvHtB26msLKqCAPBAo1qkBBuIfT5tQBX6YFWCLMsPixIExxITCRVa9tNCIqkdQS8olhR79NYXsFWBPKsM3LbGO00zEcNQfNI"
invoice = stripe.Invoice.upcoming(customer="cus_NeZwdNtLEOXuvB")
Within the invoice, you can find the next_payment_attempt as a epoch.
date = datetime.fromtimestamp(invoice.next_payment_attempt)
amount = invoice.amount_due
currency = invoice.currency
References:
[1]: https://stripe.com/docs/api/invoices/upcoming
Search
Use the search APIs to look up and retrieve objects in your Stripe data. Using search is a faster alternative to paginating through all resources.
stripe.com [1]
Stripe has it’s own query language for querying data. I’m just getting into using it and it seems pretty good so far. I needed to lookup the price for products. I was able to find prices for my product using the python api as shown below.
stripe.Price.search(query="active: 'true' and product: 'prod_P8SfwtxJ45cWE2'")
References:
[1]: https://stripe.com/docs/search#search-query-language
stripe-keys-and-ids.tsv [1]
tsv
Prefix Description Notes
ac_ Platform Client ID Identifier for an auth code/client id.
acct_ Account ID Identifier for an Account object.
aliacc_ Alipay Account ID Identifier for an Alipay account.
ba_ Bank Account ID Identifier for a Bank Account object.
btok_ Bank Token ID Identifier for a Bank Token object.
card_ Card ID Identifier for a Card object.
cbtxn_ Customer Balance Transaction ID Identifier for a Customer Balance Transaction object.
ch_ Charge ID Identifier for a Charge object.
cn_ Credit Note ID Identifier for a Credit Note object.
cs_live_ Live Checkout Session ID Identifier for a checkout Session object in live mode.
cs_test_ Test Checkout Session ID Identifier for a checkout Session object in test mode.
cus_ Customer ID Identifier for a Customer object.
dp_ Dispute ID Identifier for a Dispute object.
evt_ Event ID Identifier for an Event object.
fee_ Application Fee ID Identifier for an Application Fee object.
file_ File ID Identifier for a File object.
fr_ Application Fee Refund ID Identifier for an Application Fee Refund object.
iauth_ Issuing Authorization ID Identifier for an Issuing Authorization object.
ic_ Issuing Card ID ...
Looking for a Heroku replacement, What I found was shocking!
Your browser does not support the audio element.
I’ve long hosted my personal blog as a static site on waylonwalker.com. It’s
all markdown, converted to html [1], and shipped as is. It’s been great, I’ve
moved it from GitHub Pages, to Netlify, tried Vercel for a minute, and have
landed on Cloudflare Pages. Each migration has not really been that
hard, it’s just pointing ci to a different host after the site has built.
[2]
What about server side # [3]
Now the part that I have struggled with is how to cheaply host a server
rendered application that can just live on forever without me paying for it.
This is a harder problem as it costs more to keep servers spinning, memory, and
disk all ready for you to use at a moments notice.
Honestly # [4]
I never really deployed anything that useful on heroku, but it seems like the
klenex of the bunch that’s why they are in the title. I’ve moved between
digital ocean and fly.io, and have had some great experiences with both. I
just don’t want...
-
Dang this is such a good message. I can’t exactly relate to being forced into the overworking situation that PirateSofware is talking about. I can relate to being conditioned to feeling a certain way and changing that is very difficult. I can also relate to not feeling like I am getting enough done in the day. Sometimes a bit of separation is good.

I’ve been using tailwind for a few months now and I can still say I’m loving it. I’ve been using it to create some rapid prototypes that may or may not ever become something, a document that is likely to go to print (a resume), and some quick dashboards.
I started using Tailwind a few month back #
A few months back in september of 2023 I made a case for tailwindcss. And have been using it on quite a few projects since.
- values are well thought out
- it’s really easy to use
- classes that make sense
- tree shakable
fokais.com #
I started working on fokais.com only a few weeks ago, It’s going to be a SAS to make blogging easier. I’ve started hosting some tools for this blog that I really like that I think I can turn into a service. It’s been fantastic to quickly pump out new pages with tailwind.
htmx">HTMX #
tailwind and htmx are a match made in heaven. They both really lean on Location of Behavior over Separation of concerns. They do really well at making small components that you can throw on and endpoint and stack into any page. With tailwind I just configure it to look at all my templates, and I can guarantee that the styles will be in app.css, and all I need to do is add classes to my component.
Heres a sample component for a user widget that will go on every page. It has everything it needs right in the template.
<div
  hx-swap-oob="outerHTML"
  id="user-header"
  class="absolute top-0 right-0 mt-8 mr-4"
>

<!--markata-attribution-->
  {% if current_user %}

<!--markata-attribution-->
  <details

<!--markata-attribution-->
    id="user-header-details"

<!--markata-attribution-->
    open
    class="group list-none px-4 py-2 self-center justify-self-center bg-neutral-600/10 shadow-lg shadow-zinc-950/20 ring-2 ring-zinc-950/5 rounded-xl flex justify-center align-center flex-col"
  >
    <summary style="list-style-type: none">{{ current_user.username }}</summary>

<!--markata-attribution-->
    <div class="hidden group-hover:block my-4">

<!--markata-attribution-->
      <a
        class="mt-6 px-4 py-2 rounded bg-purple-950/5 ring-2 ring-cyan-500/30 text-cyan-500 font-bold"

<!--markata-attribution-->
        href="{{ url_for('get_logout') }}"
      >

<!--markata-attribution-->
        Logout
      </a>

<!--markata-attribution-->
    </div>

<!--markata-attribution-->
  </details>

  {% else %}
  <a
    href="{{ url_for('post_login') }}"
    class="mt-5 text-xl text-white font-bold text-shadow-xl text-shadow-zinc-950"
  >

<!--markata-attribution-->
    login
  </a>

<!--markata-attribution-->
  {% endif %}

<!--markata-attribution-->
</div>
internal apps #
I’ve built several interal apps, and tailwind has been really great for this. Its super quick to pop classes on components and get things to look decent quickly, or put some real polish into making them look nice.
My Website waylonwalker.com #
I’ve dropped my old decrepid css for some tailwind on my main site. My css was much smaller, but did not work quite as well on all devices, and most importantly was becoming a house of cards. Every time I fixed one thing several other things would fail. Colors were a bit muddy, and not as nicely configured as tailwind.
Most importantly was becoming a house of cards. Every time I fixed one thing several other things would fail.
One rough side of styling a blog in tailwind is that you don’t necessarily have control over granular details of how your pages get rendered without getting really deep into the markdown renderer, or writing your posts in html. It ends up looking a bit ugly, and is against the tailwind best practices, but it seems like the best way for a site like this.
@tailwind base;
@tailwind components;
@tailwind utilities;
@import "./highlight.css";

.social {
  @apply font-bold;
  @apply flex flex-row;
  @apply gap-4;
  @apply justify-center;
  @apply py-8;
}

#posts ul ul {
  @apply backdrop-blur-sm;
  @apply flex flex-col sm:grid grid-flow-row-dense;
  @apply gap-4;
  grid-template-columns: repeat(auto-fit, minmax(300px, 1fr));
  @apply p-4;
}
grid #
I’ve struggled to use grid on my projects, and I’ve tried a few different times with no real success or adoption, but started using it on my resume, to have a main middle column, with two outer full bleed columns where I can make some elements full bleed to the edge. tailwind made this easy, once done, I had an admonition that was beautiful full bleed with a touch of color.
External Link
stackoverflow.com [1]
Get those print colors exact
body{
-webkit-print-color-adjust:exact !important;
print-color-adjust:exact !important;
}
References:
[1]: https://stackoverflow.com/questions/3893986/css-media-print-issues-with-background-color#answer-14784655
page-break-after CSS property - CSS | MDN
The page-break-after CSS property adjusts page breaks after the current element.
MDN Web Docs · developer.mozilla.org [1]
I’m working on something that might go to print, so I want the page breaks to happen somewhat in my control as the content author. As I do my writing I break my content up in to many short sections using h2, sometimes an h3. These are generally short sections that go together, should stay together, and typically are not too lengthy to cause a large white space in print.
I found a way in css to only allow page breaks to happen on h2 and h3, and it turned out perfect, suck it WSIWIG editors
* {
page-break-before: avoid;
}
h2,
h3 {
page-break-before: auto;
}
References:
[1]: https://developer.mozilla.org/en-US/docs/Web/CSS/page-break-after
Go by Example
gobyexample.com [1]
Fantastic resource for learning go. You work through small examples quickly, learning single concepts along the way.
References:
[1]: https://gobyexample.com/
How to Build a Website or App - Syntax #696
This podcast episode covers a wide range of topics related to building a website or web application from start to finish.
syntax.fm [1]
Great tips in this one. They discuss everything from front end to backend, databases and ORMS, here are a few of my favorite points.
- Use good data or good fake data
- make it have some variation like long and short text
- Don’t use a database if you need one, static content is eaiser to manage
- end to end test, (does the site load page x)
- You DONT NEED all this complexity, you can deploy a site with HTML [2] and CSS.
References:
[1]: https://syntax.fm/show/696/how-to-build-a-website-or-app
[2]: /html/
[1]@willmcgugan [1]) on X — Just a wee thing that came up today. I think this is kind of neat." loading="lazy">
Will McGugan (@willmcgugan [2]) on X
Just a wee thing that came up today. I think this is kind of neat.
X (formerly Twitter) · twitter.com
Textual is so sick, Will just made a live markdown editor in the terminal!
References:
[1]: https://twitter.com/willmcgugan/status/1729158038551220477
[2]: https://willmcgugan.github.io
Sebastián Ramírez (@tiangolo) on X
Now @FastAPI has 65k+ GitHub stars! ✨🎉
Since today, FastAPI has a few more GitHub stars than Flask. 🤯
Now FastAPI is the second most starred Python web framework, right after Django. 🥈
X (formerly Twitter) · twitter.com [1]
Fastapi [2] passes flask in GitHub stars!
[1]
References:
[1]: https://twitter.com/tiangolo/status/1729153717956715007
[2]: /fastapi/
-
Nice take by @t3dotgg [1]. Some of the old patterns that go deep into webdev, MVC, separation of concerns, REST, are things we are told to believe on day one, thrown so many things, no mental bandwidth, or experience to form our own opinions we must take them as fact. Rarely do we take these facts and revisit them with our new understandings years later.
References:
[1]: https://twitter.com/t3dotgg
DoomponyLewis 🦄 (@DoomponyLewis) on X
@wtravishubbard Management is abhorrent to me
X (formerly Twitter) · twitter.com [1]
Today I learned the meaning of abhorrent
abhorrent
ăb-hôr′ənt, -hŏr′-
adjective
Disgusting, loathsome, or repellent.
Feeling repugnance or loathing.
References:
[1]: https://twitter.com/pypeaday/status/1727156823185113304
I’m really excited about sqlmodel [1], an amazing project by fastapi [2]. It’s worth exploring!
SQL databases in Python, designed for simplicity, compatibility, and robustness.
References:
[1]: https://github.com/fastapi/sqlmodel
[2]: https://github.com/fastapi
If you’re into interesting projects, don’t miss out on draw-a-ui [1], created by SawyerHood [2].
Draw a mockup and generate html [3] for it
References:
[1]: https://github.com/SawyerHood/draw-a-ui
[2]: https://github.com/SawyerHood
[3]: /html/
Heroicons
Beautiful hand-crafted SVG icons, by the makers of Tailwind CSS.
Heroicons · heroicons.com [1]
heroicons is a really nice set of many of the basic icons that you will need for building nice ui’s. They have a really nice copy as svg or jsx button, so that you can just yank it and paste it on your page without any extra packages or installation.
References:
[1]: https://heroicons.com/
Uptime Kuma
A self-hosted monitoring tool
uptime.kuma.pet [1]
Uptime kuma is a fantastic self hosted [2] monitoring tool. One docker run command and you are up and running. Once you are in you have full control over checking status of urls, frequency, allowed timeouts, and a HUGE list of notification providers
docker run -d --restart=always -p 3001:3001 -v uptime-kuma:/app/data --name uptime-kuma louislam/uptime-kuma:1
I deployed it in my homelab [3] today.
[4]
References:
[1]: https://uptime.kuma.pet/
[2]: /self-host/
[3]: /homelab/
[4]: https://twitter.com/_WaylonWalker/status/1723077941649707468
I came across uptime-kuma [1] from louislam [2], and it’s packed with great features and ideas.
A fancy self-hosted [3] monitoring tool
References:
[1]: https://github.com/louislam/uptime-kuma
[2]: https://github.com/louislam
[3]: /self-host/
kv - Command | Vault | HashiCorp Developer
The "kv" command groups subcommands for interacting with Vault's key/value
secret engine.
kv - Command | Vault | HashiCorp Developer · developer.hashicorp.com [1]
hashi vault lets you manage secrets right from your cli.
# set your vault url
export VAULT_ADDR=https://myvault.mydomain
vault login
# get a secret
vault kv get secret/hvac
# put a secret
vault kv put -mount=secret creds passcode=my-long-passcode
# get it
vault kv get secret/creds
# == Secret Path ==
# secret/data/creds
#
# ======= Metadata =======
# Key Value
# --- -----
# created_time 2023-11-05T02:53:40.978120001Z
# custom_metadata <nil>
# deletion_time n/a
# destroyed false
# version 3
#
# ====== Data ======
# Key Value
# --- -----
# bar baz
# passcode my-long-passcode
# get one field
vault kv get -field=passcode secret/creds
# my-long-passcode
vault kv put -mount=secret creds bar=baz
# set more keys
vault kv put -mount=secret creds passcode=my-long-passcode bar=baz
#
# == Secret Path ==
# secret/data/creds
#
# ======= Metadata =======
# Key Value
# --- -----
# created_time 2023-11-05T03:24:14.65958906Z
# custom_metadata <nil>
# deletion_time n/a
# destroyed fa...
Looking for inspiration? cloudflared [1] by cloudflare [2].
Cloudflare Tunnel client (formerly Argo Tunnel)
References:
[1]: https://github.com/cloudflare/cloudflared
[2]: https://github.com/cloudflare
The work on vhs [1] by charmbracelet [2].
Your CLI home video recorder 📼
References:
[1]: https://github.com/charmbracelet/vhs
[2]: https://github.com/charmbracelet
Check out Kanaries [1] and their project Rath [2].
Next generation of automated data exploratory analysis and visualization platform.
References:
[1]: https://github.com/Kanaries
[2]: https://github.com/Kanaries/Rath
The work on local-ai-stack [1] by ykhli [2].
A starter kit to build local-only AI apps that cost $0 to run – starting with document Q&A. Written in Javascript
References:
[1]: https://github.com/ykhli/local-ai-stack
[2]: https://github.com/ykhli
I’m impressed by pywebcopy [1] from rajatomar788 [2].
Locally saves webpages to your hard disk with images, css, js & links as is.
References:
[1]: https://github.com/rajatomar788/pywebcopy
[2]: https://github.com/rajatomar788
I’m impressed by fem-htmx [1] from ThePrimeagen [2].
No description available.
References:
[1]: https://github.com/ThePrimeagen/fem-htmx
[2]: https://github.com/ThePrimeagen
Just starred fem-htmx-proj [1] by ThePrimeagen [2]. It’s an exciting project with a lot to offer.
No description available.
References:
[1]: https://github.com/ThePrimeagen/fem-htmx-proj
[2]: https://github.com/ThePrimeagen
I’m impressed by stamina [1] from hynek [2].
Production-grade retries for Python
References:
[1]: https://github.com/hynek/stamina
[2]: https://github.com/hynek
GitHub - johanhaleby/kubetail: Bash script to tail Kubernetes logs from multiple pods at the same time
Bash script to tail Kubernetes logs from multiple pods at the same time - johanhaleby/kubetail
GitHub · github.com [1]
Kubetail is a pretty sick bash script that allows you to tail logs for multiple pods in one stream. Very handy when you have more than one replica running.
wget https://raw.githubusercontent.com/johanhaleby/kubetail/master/kubetail
chmod u+x ./kubetail
Now with kubetail I can tail all the logs for every shot-wayl-one pod in the shot namespace.
./kubetail shot-wayl-one -n shot
[2]
References:
[1]: https://github.com/johanhaleby/kubetail
[2]: https://screenshots.waylonwalker.com/kubetail.png
I’m impressed by kubetail [1] from johanhaleby [2].
Bash script to tail Kubernetes logs from multiple pods at the same time
References:
[1]: https://github.com/johanhaleby/kubetail
[2]: https://github.com/johanhaleby
-
I am converting my docker compose env secrets over to k8s secrets. This guide was clear and to the point how I can replicate this exact workflow.
First set the secret, the easiest way is to use kubectl wtih –from-literal because it automatically base64 encodes for you.
kubectl create secret generic minio-access-key --from-literal=ACCESS_KEY=7FkTV**** -n shot
If you don’t use the --from-literal you will have to base64 encode it.
echo "7FkTV****" | openssl base64
Once you have your secret deployed, you have to update the container spec in your deployment manifest to get the valueFrom secretKeyRef.
spec:
containers:
- env:
- name: ACCESS_KEY
valueFrom:
secretKeyRef:
key: ACCESS_KEY
name: minio-access-key
- name: SECRET_KEY
valueFrom:
secretKeyRef:
key: SECRET_KEY
name: minio-secret-key
image: registry.wayl.one/shot-scraper-api
name: shot-wayl-one
ports:
- containerPort: 5000
protocol: TCP
resources: {}
restartPolicy: Always
waylon walker (@_WaylonWalker) on X
Which is more complicated
X (formerly Twitter) · twitter.com [1]
Wow, shocked at these results. All this time I’ve been told and believed that k8s is incredibly hard, and you need a $1M problem before you think about it because it will take a $1M team to maintain it. So far my experience has been good, and I definitely do not have a $1M problem in my homelab [2].
[1]
References:
[1]: https://twitter.com/_WaylonWalker/status/1718300097174270193
[2]: /homelab/
Wes Bos (@wesbos) on X
🔥 The stale-while-revalidate header is suuuuuuper handy for striking a balance between fast loads and and frequently changed content.
Here I am using it to instantly deliver an OG image that t…
X (formerly Twitter) · twitter.com [1]
Wes has some of the coolest OG [2] images i’ve ever seen. Here he talks about how to enable cache configuration so that its constantly updating the cache without the user waiting for the image to be created.
References:
[1]: https://twitter.com/wesbos/status/1717923624559005977
[2]: /og/
Looking for inspiration? NeoComposer.nvim [1] by ecthelionvi [2].
Neovim plugin that simplifies macros, enhancing productivity with harmony.
References:
[1]: https://github.com/ecthelionvi/NeoComposer.nvim
[2]: https://github.com/ecthelionvi
htmx ~ Locality of Behaviour (LoB)
Carson Gross explores the Locality of Behaviour (LoB) principle, which emphasizes making the behavior of code units obvious on inspection to enhance maintainability. He discusses the tradeoffs betw...
htmx.org [1]
Interesting principle here. What a great example, If I’m looking at the second jQuery example, I have to dig into dev tools or make some assumtions that this team uses jQuery, and selects by id, therefore I can grep for $("#d1").
Consider two different implementations of an AJAX request in HTML [2], the first in htmx [3]:
<!--markata-attribution-->
<button hx-get="/clicked">Click Me</button>
> and the second in jQuery:
``` js
$("#d1").on("click", function(){
$.ajax({
/* AJAX options... */
});
});
<button id="d1">Click Me</button>
References:
[1]: https://htmx.org/essays/locality-of-behaviour/
[2]: /html/
[3]: /htmx/
External Link
thoughts.waylonwalker.com [1]
I was looking to add running kubernetes jobs to a python cli I am creating, and I found this solution, mostly thanks to ollama run mistral:7b-instruct-q4_K_M and my loose understanding of what the yaml syntax is supposed to look like for a kubernetes job. This will let me create a job in the cluster, choose the image that runs, the command that is called, and how long until the job expires and is cleaned up. While the job still exists I can go in and look at the logs, but once its ttl has expired they are gone.
from kubernetes import client, config
# Load the default kubeconfig
config.load_kube_config()
# Define the API client for batch jobs
api_instance = client.BatchV1Api()
# Create a new job object
job = client.V1Job(
api_version="batch/v1",
kind="Job",
metadata=client.V1ObjectMeta(name="myjob"),
spec=client.V1JobSpec(
ttl_seconds_after_finished=100,
template=client.V1PodTemplateSpec(
metadata=client.V1ObjectMeta(labels={"app": "myjob"}),
spec=client.V1PodSpec(
containers=[
client.V1Container(
name="myjobcontainer",
image="busybox",
command=["ls", "/"],
),
],
restart_policy="Never",
),
),
backoff_limit=1,
)...
Check out kevinhwang91 [1] and their project nvim-ufo [2].
Not UFO in the sky, but an ultra fold in Neovim.
References:
[1]: https://github.com/kevinhwang91
[2]: https://github.com/kevinhwang91/nvim-ufo
https://neovim.io/doc/user/diagnostic/
neovim.io [1]
Clear out lsp diagnostics in nvim.
lua vim.diagnostic.reset()
References:
[1]: https://neovim.io/doc/user/diagnostic.html#vim.diagnostic.reset()
How to kill process based on the port number in Linux
Learn to kill a process by port in Linux using fuser, lsof, and ss commands. Essential for system admins managing network processes efficiently.
LinuxConfig · linuxconfig.org [1]
I’ve often struggled to find and kill a process using a certain port on archlinux. Mainly becuase most guides use netstat rather than ss.
Here is how I just killed the process using port 5000 using fuser.
sudo fuser -k 5000/tcp
You can also get information about the process by running lsof
❯ lsof -i :5000
COMMAND PID USER FD TYPE DEVICE SIZE/OFF NODE NAME
thoughts 1058292 waylon 11u IPv4 119622828 0t0 TCP *:commplex-main (LISTEN)
References:
[1]: https://linuxconfig.org/how-to-kill-process-based-on-the-port-number-in-linux
GitHub - mkimuram/k8sviz: Generate Kubernetes architecture diagrams from the actual state in a namespace
Generate Kubernetes architecture diagrams from the actual state in a namespace - mkimuram/k8sviz
GitHub · github.com [1]
This is a sick kubernetes architecture diagran generation tool.
Here is an example
[2]
installation # [3]
$ curl -LO https://raw.githubusercontent.com/mkimuram/k8sviz/master/k8sviz.sh
$ chmod u+x k8sviz.sh
Usage # [4]
./k8sviz.sh --kubeconfig ~/.config/kube/falcon-k3s.yaml -t png -o k8sviz.png
References:
[1]: https://github.com/mkimuram/k8sviz
[2]: https://raw.githubusercontent.com/mkimuram/k8sviz/master/examples/wordpress/default.png
[3]: #installation
[4]: #usage
Just starred just [1] by casey [2]. It’s an exciting project with a lot to offer.
🤖 Just a command runner
References:
[1]: https://github.com/casey/just
[2]: https://github.com/casey
GitHub - casey/just: 🤖 Just a command runner
🤖 Just a command runner. Contribute to casey/just development by creating an account on GitHub.
GitHub · github.com [1]
I think just, might just be the thing I have been looking for. I’ve been looking for some ci/cd that I can host myself, but everything looks pretty big, so for now I am going to use just as my task runner.
I installed with installer.
curl https://i.wayl.one/casey/just | bash
I set up my devtainer builds with just. Here is my justfile, yes you just need the cli and a file named justfile.
default: base alpine slim
base: build deploy
alpine: build-alpine deploy-alpine
slim: build-slim deploy-slim
build:
podman build -t registry.wayl.one/devtainer:latest .
deploy:
podman push registry.wayl.one/devtainer
build-alpine:
podman build -f docker/Dockerfile.alpine -t registry.wayl.one/devtainer:alpine .
deploy-alpine:
podman push registry.wayl.one/devtainer:alpine
build-slim:
podman build -f docker/Dockerfile.slim -t registry.wayl.one/devtainer:slim .
deploy-slim:
podman push registry.wayl.one/devtainer:slim
References:
[1]: https://github.com/casey/just
Translate a Docker Compose File to Kubernetes Resources
What
Kubernetes · kubernetes.io [1]
kompose is a sick cli to convert docker-compose.yml to kubernetes manifest.
# install
curl -L https://github.com/kubernetes/kompose/releases/download/v1.26.0/kompose-linux-amd64 -o kompose
kompose convert
kompose convert -o deployment.yaml
References:
[1]: https://kubernetes.io/docs/tasks/configure-pod-container/translate-compose-kubernetes/
[1]
Running your own docker registry in one line
podman run -d -p 5000:5000 --restart=always --name registry registry:latest
References:
[1]: /static/https://blog.nashcom.de/nashcomblog.nsf/dx/k3s-podman-and-a-registry.htm
Kubernetes Persistent Volumes with Deployment and StatefulSet
How to use Kubernetes persistent volumes with deployment and stateful set and also when you should use one or another.
Alen Komljen · akomljen.com [1]
Example of how to add a pvc to a deployment.
References:
[1]: https://akomljen.com/kubernetes-persistent-volumes-with-deployment-and-statefulset/
[1]
I was curious to see what was going on inside of my minio object storage. Great technique here by Frank to create an inspector pod, then you can do as you wish with the data.
I created the manifest as pvc-inspector.yml
apiVersion: v1
kind: Pod
metadata:
name: pvc-inspector
spec:
containers:
- image: busybox
name: pvc-inspector
command: ["tail"]
args: ["-f", "/dev/null"]
volumeMounts:
- mountPath: /pvc
name: pvc-mount
volumes:
- name: pvc-mount
persistentVolumeClaim:
claimName: pvc-name
Then used it like this.
# create pvc-inspector pod
kubectl apply -f pvc-inspector.yml
# exec into inspector
kubectl exec -it pvc-inspector -- sh
# explore data
ls /pvc
# cleanup
kubectl delete -f pvc-inspector.yml
References:
[1]: /static/https://frank.sauerburger.io/2021/12/01/inspect-k8s-pvc.html
External Link
stackoverflow.com [1]
In order to use k8s secrets manifest you first need to encode the data values.
echo -n 'mega_secret_key' | openssl base64
References:
[1]: https://stackoverflow.com/questions/53394973/cant-create-secret-in-kubernetes-illegal-base64-data-at-input
Reddit - Please wait for verification
reddit.com [1]
Right after installing k3s you are going to need to use sudo to use any kubectl command. The reason for this is that the default config is owned by root. To get around this you will need to make your own config and set the KUBECONFIG environment variable
To do this I used sudo one last time to copy the k3s.yaml file into my own directory and take ownership of it.
sudo cp /etc/rancher/k3s/k3s.yaml /home/waylon/.config/kube
sudo chown -R waylon:waylon ~/.config/kube
export KUBECONFIG=~/.config/kube/k3s.yaml
References:
[1]: https://www.reddit.com/r/kubernetes/comments/cojjf5/can_i_access_k3s_using_just_kubectl_no_sudo_and/
Quick-Start Guide | K3s
This guide will help you quickly launch a cluster with default options. Make sure your nodes meet the requirements before proceeding.
docs.k3s.io [1]
I recently spun up k3s in my homelab [2]. I’m trying to offload some work off of my free tier fly.io app in order to keep it free tier without crashing.
# install and start k3s
curl -sfL https://get.k3s.io | sh -
# check to see if your nodes are started
sudo kubectl get nodes
My main hiccup so far was the machine I am running on runs zfs on root, and it would not start the master node. Rather than figuring out how to make zfs play nice I just pointed k3s to a drive that is not zfs.
# manuallly
sudo k3s server -d /mnt/vault/.rancher/k3s
# without editing systemd service
sudo ln -s /mnt/vault/.rancher/k3s /var/lib/rancher/k3s
References:
[1]: https://docs.k3s.io/quick-start
[2]: /homelab/
Check out djmaze [1] and their project docker-caching-proxy [2].
Caching proxy docker image
References:
[1]: https://github.com/djmaze
[2]: https://github.com/djmaze/docker-caching-proxy
-
Tailwind comes with space that I have never heard of that is made to give margin and padding together in one class. Adam dropped it here in the Tailwind Connect conference.
Looking for inspiration? oterm [1] by ggozad [2].
a text-based terminal client for Ollama
References:
[1]: https://github.com/ggozad/oterm
[2]: https://github.com/ggozad
Litestar: Effortlessly Build Performant APIs
We all know about Flask and Django. And of course FastAPI made a huge splash when it came on the scene a few years ago. But new web frameworks are being created all the time. And they have these ea...
talkpython.fm [1]
Litestar is an interesting api framework similar to fastpi, that I am interested to check out to see if it fits into some project scope. It sounds like it comes with a lot more batteries included for things like auth, but does not have hard opinions like django. At this point I’m not jumping off of fastapi [2], but its something I want to try.
References:
[1]: https://talkpython.fm/episodes/show/433/litestar-effortlessly-build-performant-apis
[2]: /fastapi/
Delete a Postgres Cluster
Documentation and guides from the team at Fly.io.
Fly · fly.io [1]
Deleting a fly postgres db cluster was not straightforward to me as the app name is not inferred from the toml like it is for the main app.
fly apps destroy <pg-app-name>
fly pg db list -a <pg-app-name>
References:
[1]: https://fly.io/docs/postgres/managing/deleting/
![[None]]
Yet again twitter cards were causing me pain. This time it was me not realizing that they require full urls, and not relative or abolute urls.
This was not working
<meta name="twitter:image" content="/shot/?path={{ request.url|quote_plus }}" content-type='image/png'/>
This does work with a full url
<meta name="twitter:image" content="https://thoughts.waylonwalker.com/shot/?path={{ request.url|quote_plus }}" content-type='image/png'/>
-
Boot.dev is crushing it with these interviews. This one has Wes Bos, includes teaching, webdev, where is webdev headed.
gen.nvim [1] by David-Kunz [2] is a game-changer in its space. Excited to see how it evolves.
Neovim plugin to generate text using LLMs with customizable prompts
References:
[1]: https://github.com/David-Kunz/gen.nvim
[2]: https://github.com/David-Kunz
[1]
This seems like a promising tool to use with ollama.
References:
[1]: /static/https://github.com/David-Kunz/gen.nvim
Ollama
Ollama is the easiest way to automate your work using open models, while keeping your data safe.
ollama.ai [1]
ollama is the easiest to get going local llm tool that I have tried, and seems to be crazy fast. It feels faster than chat gpt, which has not been the experience I have had previously with running llm’s on my hardware.
curl https://i.jpillora.com/jmorganca/ollama | bash
ollama serve
ollama run mistral
ollama run codellama:7b-code
ollama list
References:
[1]: https://ollama.ai/
Check out Boeing [1] and their project config-file-validator [2].
Cross Platform tool to validate configuration files
References:
[1]: https://github.com/Boeing
[2]: https://github.com/Boeing/config-file-validator
If you’re into interesting projects, don’t miss out on NeoTweet [1], created by ChristianChiarulli [2].
No description available.
References:
[1]: https://github.com/ChristianChiarulli/NeoTweet
[2]: https://github.com/ChristianChiarulli
GitHub - sysid/sse-starlette
Contribute to sysid/sse-starlette development by creating an account on GitHub.
GitHub · github.com [1]
sse-FastAPI [2].">starlette provides server sent events for startlette and FastApi. I’m evaluating for use with htmx [3].
Installation: # [4]
pip install sse-starlette
Usage: # [5]
import asyncio
import uvicorn
from starlette.applications import Starlette
from starlette.routing import Route
from sse_starlette.sse import EventSourceResponse
async def numbers(minimum, maximum):
for i in range(minimum, maximum + 1):
await asyncio.sleep(0.9)
yield dict(data=i)
async def sse(request):
generator = numbers(1, 5)
return EventSourceResponse(generator)
routes = [
Route("/", endpoint=sse)
]
app = Starlette(debug=True, routes=routes)
if __name__ == "__main__":
uvicorn.run(app, host="0.0.0.0", port=8000, log_level='info')
References:
[1]: https://github.com/sysid/sse-starlette
[2]: /fastapi/
[3]: /htmx/
[4]: #installation
[5]: #usage
overflow - Layout
Utilities for controlling how an element handles content that is too large for the container.
tailwindcss.com [1]
Controlling overflow with tailwindcss
Examples # [2]
<div class="overflow-visible ..."></div>
<div class="overflow-hidden ..."></div>
References:
[1]: https://tailwindcss.com/docs/overflow
[2]: #examples
[1]
Default scrollbars on a dark theme website are just the ugliest thing. This page covers all the pseudo selectors needed to style the scrollbar.
/* width */
::-webkit-scrollbar {
width: 10px;
}
/* Track */
::-webkit-scrollbar-track {
background: #f1f1f1;
}
/* Handle */
::-webkit-scrollbar-thumb {
background: #888;
}
/* Handle on hover */
::-webkit-scrollbar-thumb:hover {
background: #555;
}
References:
[1]: /static/https://www.w3schools.com/howto/howto_css_custom_scrollbar.asp
[1]
Wincent (Greg Hurrel) has a pretty solid and fast zshrc. I recently grabbed his completion section and it seems to be working better than whatever I had.
zsh completion snippet
#
# Completion
#
fpath=($HOME/.zsh/completions $fpath)
autoload -U compinit
compinit -u
# Make completion:
# - Try exact (case-sensitive) match first.
# - Then fall back to case-insensitive.
# - Accept abbreviations after . or _ or - (ie. f.b -> foo.bar).
# - Substring complete (ie. bar -> foobar).
zstyle ':completion:*' matcher-list '' '+m:{[:lower:]}={[:upper:]}' '+m:{[:upper:]}={[:lower:]}' '+m:{_-}={-_}' 'r:|[._-]=* r:|=*' 'l:|=* r:|=*'
# Colorize completions using default `ls` colors.
zstyle ':completion:*' list-colors ''
# Allow completion of ..<Tab> to ../ and beyond.
zstyle -e ':completion:*' special-dirs '[[ $PREFIX = (../)#(..) ]] && reply=(..)'
# $CDPATH is overpowered (can allow us to jump to 100s of directories) so tends
# to dominate completion; exclude path-directories from the tag-order so that
# they will only be used as a fallback if no completions are found.
zstyle ':completion:*:complete:(cd|pushd):*' tag-order 'local-directories named-directories'
# Categorize completion...
Change Autocomplete Styles in WebKit Browsers | CSS-Tricks
We got a nice tip from Lydia Dugger via email with a method for changing the styles that WebKit browsers apply to form fields that have been autocompleted.
CSS-Tricks · css-tricks.com [1]
All the hover, select, autofil, focus combinations have left me confused on how to consistently get my form elements styled in dark mode
This snippet from CSS tricks has fixed all the different states for me to give me full control.
/* Change Autocomplete styles in Chrome*/
input:-webkit-autofill,
input:-webkit-autofill:hover,
input:-webkit-autofill:focus,
textarea:-webkit-autofill,
textarea:-webkit-autofill:hover,
textarea:-webkit-autofill:focus,
select:-webkit-autofill,
select:-webkit-autofill:hover,
select:-webkit-autofill:focus {
border: 1px solid green;
-webkit-text-fill-color: green;
-webkit-box-shadow: 0 0 0px 1000px #000 inset;
transition: background-color 5000s ease-in-out 0s;
}
References:
[1]: https://css-tricks.com/snippets/css/change-autocomplete-styles-webkit-browsers/
GitHub - florimondmanca/arel: Lightweight browser hot reload for Python ASGI web apps
Lightweight browser hot reload for Python ASGI web apps - florimondmanca/arel
GitHub · github.com [1]
arel is a “Lightweight browser hot reload for Python ASGI web apps”
I just implemented this on my thoughts website using fastapi [2], and it’s incredibly fast and lightweight. There just two lines of js that make a web socket connection back to the backend that watches for changes.
When in development mode, this snippet gets injected directly on the page and does a refresh when arel detects a change.
const ws = new WebSocket("ws://localhost:5000/hot-reload");
ws.onmessage = () => window.location.reload();
References:
[1]: https://github.com/florimondmanca/arel
[2]: /fastapi/
main.py [1]
python
import os
import arel
from fastapi import FastAPI, Request
from fastapi.templating import Jinja2Templates
app = FastAPI()
templates = Jinja2Templates("templates")
if _debug := os.getenv("DEBUG"):
hot_reload = arel.HotReload(paths=[arel.Path(".")])
app.add_websocket_route("/hot-reload", route=hot_reload, name="hot-reload")
app.add_event_handler("startup", hot_reload.startup)
app.add_event_handler("shutdown", hot_reload.shutdown)
templates.env.globals["DEBUG"] = _debug
templates.env.globals["hot_reload"] = hot_reload
@app.get("/")
def index(request: Request):
return templates.TemplateResponse("index.html", context={"request": request})
# run:
# DEBUG=true uvicorn main:app --reload
I just discovered arel [2] for hot reloading python applications when content changes from this snippet that implements it for fatapi.
On app startup add the /hot-reload routes if in DEBUG mode.
import os
import arel
from fastapi import FastAPI, Request
from fastapi.templating import Jinja2Templates
app = FastAPI()
templates = Jinja2Templates("templates")
if _debug := os.getenv("DEBUG"):
hot_reload = arel.HotReload(paths=[arel.Path(".")])
app.add_websocket_route("...
Bob Belderbos (@bbelderbos) on X
Forget Python for a sec, here's how Vim helped me out today … 💪 📈
Ever felt like you needed a quick string replacement without diving into a script? Here's a Vim trick I just used …
I w…
X (formerly Twitter) · twitter.com [1]
I need to learn regex capture groups better. This is so dang powerful. I really like the \v that bob uses here, it really does cut down on the terseness of all the special characters.
I wanted to replace all occurrences of:
name,[email protected],0,171,,2023-09-21
With:
name,[email protected]
Easy to do with Python, but what about a bit of > regex in Vim?
:%s/\v([^,]+,[^,]+),.*/\1/
References:
[1]: https://twitter.com/bbelderbos/status/1709525676154368055
teej dv 🔭 (@teej_dv) on X
Hypermedia fixes this
HATEOAS gonna hate
X (formerly Twitter) · twitter.com [1]
HATEOAS gonna hate. More and more htmx [2] seems like the js library for backend devs. So rather than making 55 rest calls here, just make an endpoint that does what you want it to do with one, or a few requests.
References:
[1]: https://twitter.com/teej_dv/status/1708258701008593173
[2]: /htmx/
Open source, not open contribution with Ben Johnson (Changelog Interviews #433)
This week we're talking with Ben Johnson. Ben is known for his work on BoltDB, his work in open source, and as a freelance Go developer. Late January when Ben open sourced his newest project Litest...
Changelog · changelog.com [1]
Ben Johnson was on the Changelog a few years back covering his work on litestream, and talks about why he chose to go open source, but not open contribution.
You should have a good reason to move off of sqlite.
References:
[1]: https://changelog.com/podcast/433
jpillora/installer is the install script generator I have been looking for. It downloads binaries for your machine from GitHub releases and unzips them for you. It grabs the latest release, so you can easily update them. I have tried scripting these installs in the past and struggled to consistently get the latest version for every package and unpack it correctly.
Also these pre-compiled binaries install rediculously fast compared to building them from source.
Check out some example links.
opening in a browser will show metadata
If you pass in script=true it will instead return the install script as it would by default through curl.
https://i.jpillora.com/serve?script=true
Use it to install neovim #
All you need to do to generate an install script is to pass in the GitHub repo slug with the org.
curl https://i.jpillora.com/neovim/neovim | bash
The shell script that it generates for neovim looks like this.
#!/bin/bash
if [ "$DEBUG" == "1" ]; then
    set -x
fi
TMP_DIR=$(mktemp -d -t jpillora-installer-XXXXXXXXXX)
function cleanup {
    rm -rf $TMP_DIR > /dev/null
}
function fail {
    cleanup
    msg=$1
    echo "============"
    echo "Error: $msg" 1>&2
    exit 1
}
function install {
    #settings
    USER="neovim"
    PROG="neovim"
    ASPROG=""
    MOVE="false"
    RELEASE="stable"
    INSECURE="false"
    OUT_DIR="$(pwd)"
    GH="https://github.com"
    #bash check
    [ ! "$BASH_VERSION" ] && fail "Please use bash instead"
    [ ! -d $OUT_DIR ] && fail "output directory missing: $OUT_DIR"
    #dependency check, assume we are a standard POISX machine
    which find > /dev/null || fail "find not installed"
    which xargs > /dev/null || fail "xargs not installed"
    which sort > /dev/null || fail "sort not installed"
    which tail > /dev/null || fail "tail not installed"
    which cut > /dev/null || fail "cut not installed"
    which du > /dev/null || fail "du not installed"
    #choose an HTTP client
    GET=""
    if which curl > /dev/null; then
        GET="curl"
        if [[ $INSECURE = "true" ]]; then GET="$GET --insecure"; fi
        GET="$GET --fail -# -L"
    elif which wget > /dev/null; then
        GET="wget"
        if [[ $INSECURE = "true" ]]; then GET="$GET --no-check-certificate"; fi
        GET="$GET -qO-"
    else
        fail "neither wget/curl are installed"
    fi
    #debug HTTP
    if [ "$DEBUG" == "1" ]; then
        GET="$GET -v"
    fi
    #optional auth to install from private repos
    #NOTE: this also needs to be set on your instance of installer
    AUTH="${GITHUB_TOKEN}"
    if [ ! -z "$AUTH" ]; then
        GET="$GET -H 'Authorization: $AUTH'"
    fi
    #find OS #TODO BSDs and other posixs
    case `uname -s` in
    Darwin) OS="darwin";;
    Linux) OS="linux";;
    *) fail "unknown os: $(uname -s)";;
    esac
    #find ARCH
    if uname -m | grep -E '(arm|arch)64' > /dev/null; then
        ARCH="arm64"

        # no m1 assets. if on mac arm64, rosetta allows fallback to amd64
        if [[ $OS = "darwin" ]]; then
            ARCH="amd64"
        fi

    elif uname -m | grep 64 > /dev/null; then
        ARCH="amd64"
    elif uname -m | grep arm > /dev/null; then
        ARCH="arm" #TODO armv6/v7
    elif uname -m | grep 386 > /dev/null; then
        ARCH="386"
    else
        fail "unknown arch: $(uname -m)"
    fi
    #choose from asset list
    URL=""
    FTYPE=""
    case "${OS}_${ARCH}" in
    "linux_amd64")
        URL="https://github.com/neovim/neovim/releases/download/stable/nvim-linux64.tar.gz"
        FTYPE=".tar.gz"
        ;;
    "darwin_amd64")
        URL="https://github.com/neovim/neovim/releases/download/stable/nvim-macos.tar.gz"
        FTYPE=".tar.gz"
        ;;
    *) fail "No asset for platform ${OS}-${ARCH}";;
    esac
    #got URL! download it...
    echo -n "Downloading"
    echo -n " $USER/$PROG"
    if [ ! -z "$RELEASE" ]; then
        echo -n " $RELEASE"
    fi
    if [ ! -z "$ASPROG" ]; then
        echo -n " as $ASPROG"
    fi
    echo -n " (${OS}/${ARCH})"

    echo "....."

    #enter tempdir
    mkdir -p $TMP_DIR
    cd $TMP_DIR
    if [[ $FTYPE = ".gz" ]]; then
        which gzip > /dev/null || fail "gzip is not installed"
        bash -c "$GET $URL" | gzip -d - > $PROG || fail "download failed"
    elif [[ $FTYPE = ".tar.bz" ]] || [[ $FTYPE = ".tar.bz2" ]]; then
        which tar > /dev/null || fail "tar is not installed"
        which bzip2 > /dev/null || fail "bzip2 is not installed"
        bash -c "$GET $URL" | tar jxf - || fail "download failed"
    elif [[ $FTYPE = ".tar.gz" ]] || [[ $FTYPE = ".tgz" ]]; then
        which tar > /dev/null || fail "tar is not installed"
        which gzip > /dev/null || fail "gzip is not installed"
        bash -c "$GET $URL" | tar zxf - || fail "download failed"
    elif [[ $FTYPE = ".zip" ]]; then
        which unzip > /dev/null || fail "unzip is not installed"
        bash -c "$GET $URL" > tmp.zip || fail "download failed"
        unzip -o -qq tmp.zip || fail "unzip failed"
        rm tmp.zip || fail "cleanup failed"
    elif [[ $FTYPE = ".bin" ]]; then
        bash -c "$GET $URL" > "neovim_${OS}_${ARCH}" || fail "download failed"
    else
        fail "unknown file type: $FTYPE"
    fi
    #search subtree largest file (bin)
    TMP_BIN=$(find . -type f | xargs du | sort -n | tail -n 1 | cut -f 2)
    if [ ! -f "$TMP_BIN" ]; then
        fail "could not find find binary (largest file)"
    fi
    #ensure its larger than 1MB
    #TODO linux=elf/darwin=macho file detection?
    if [[ $(du -m $TMP_BIN | cut -f1) -lt 1 ]]; then
        fail "no binary found ($TMP_BIN is not larger than 1MB)"
    fi
    #move into PATH or cwd
    chmod +x $TMP_BIN || fail "chmod +x failed"
    DEST="$OUT_DIR/$PROG"
    if [ ! -z "$ASPROG" ]; then
        DEST="$OUT_DIR/$ASPROG"
    fi
    #move without sudo
    OUT=$(mv $TMP_BIN $DEST 2>&1)
    STATUS=$?
    # failed and string contains "Permission denied"
    if [ $STATUS -ne 0 ]; then
        if [[ $OUT =~ "Permission denied" ]]; then
            echo "mv with sudo..."
            sudo mv $TMP_BIN $DEST || fail "sudo mv failed"
        else
            fail "mv failed ($OUT)"
        fi
    fi
    echo "Downloaded to $DEST"
    #done
    cleanup
}
install
Self Host Your Own #
I’d reccomend self hosting your own. This way you know that it’s consistent and unlikely to change in a way that breaks your use.
curl -s https://i.jpillora.com/installer | bash
Repos I am using installer for #
Here are the repos I am using installer for.
atuinsh/atuin
benbjohnson/litestream
bootandy/dust
BurntSushi/ripgrep
chmln/sd
cjbassi/ytop
dalance/procs
dbrgn/tealdeer
ducaale/xh
go-task/task
imsnif/bandwhich
imsnif/diskonaut
kovidgoyal/kitty
mgdm/htmlq
neovim/neovim
ogham/dog
ogham/exa
pemistahl/grex
sharkdp/bat
sharkdp/fd
sharkdp/pastel
sirwart/ripsecrets
starship/starship
topgrade-rs/topgrade
zellij-org/zellij
I wanted to host some static files through fastapi. Typical use cases for this might be some static web content like html/css/js. It could also be images or some data that doesn’t need dynamically rendered.
From the Docs #
The docs cover how to host static files, and give this solution that is built into fastapi.
https://fastapi.tiangolo.com/tutorial/static-files/
from fastapi import FastAPI
from fastapi.staticfiles import StaticFiles

app = FastAPI()

app.mount("/static", StaticFiles(directory="static"), name="static")
Authenticated Static Files #
Thanks to #858.
OscartGiles posted this solution to add authentication to static files. I tried this out on my thoughts and it worked flawlessly.
import typing
from pathlib import Path
import secrets

from fastapi import FastAPI, Request, HTTPException, status
from fastapi.staticfiles import StaticFiles
from fastapi.security import HTTPBasic, HTTPBasicCredentials


PathLike = typing.Union[str, "os.PathLike[str]"]
app = FastAPI()
security = HTTPBasic()


async def verify_username(request: Request) -> HTTPBasicCredentials:

    credentials = await security(request)

    correct_username = secrets.compare_digest(credentials.username, "user")
    correct_password = secrets.compare_digest(credentials.password, "password")
    if not (correct_username and correct_password):
        raise HTTPException(
            status_code=status.HTTP_401_UNAUTHORIZED,
            detail="Incorrect email or password",
            headers={"WWW-Authenticate": "Basic"},
        )
    return credentials.username


class AuthStaticFiles(StaticFiles):
    def __init__(self, *args, **kwargs) -> None:

        super().__init__(*args, **kwargs)

    async def __call__(self, scope, receive, send) -> None:

        assert scope["type"] == "http"

        request = Request(scope, receive)
        await verify_username(request)
        await super().__call__(scope, receive, send)


app.mount(
    "/static",
    AuthStaticFiles(directory=Path(__file__).parent / "static"),
    name="static",
)
If you want both then, all you have to do is mount AuthStaticFiles to a
different route. Now you can have private, or paid content behind
/restricted.
app.mount("/static", StaticFiles(directory="static"), name="static")
app.mount(
    "/restricted",
    AuthStaticFiles(directory=Path(__file__).parent / "restricted"),
    name="restricted"
)
Point-in-time recovery - Wikipedia
en.wikipedia.org [1]
I just learned that the term PITR means Point In Time Recovery. I have never seen this term, but it is most often referred to in relation to database recoveries.
References:
[1]: https://en.wikipedia.org/wiki/Point-in-time_recovery
-
Very inspiring talk, TLDR, you probably don’t need a database server. sqlite will probably be faster, simpler to maintain, and simpler to test your application.
I recently se tup minio object storage in my homelab for litestream sqlite backups. The litestream quickstart made it easy to get everything up and running on localhost, but I hit a wall when dns was involved to pull it from a different machine.
Here is what I got to work #
First I had to configure the Key ID and Secret Access Key generated in the minio ui.
❯ aws configure
AWS Access Key ID [****************VZnD]:
AWS Secret Access Key [****************xAm8]:
Default region name [us-east-1]:
Default output format [None]:
Then set the the s3 signature_version to s3v4.
aws configure set default.s3.signature_version s3v4
Now when I have minio running on https://my-minio-endpoint.com I can use the aws cli to access the bucket.
Note that
https://my-minio-endpoint.comresolves to the bucket endpoint (default 9000) not the ui (default 9001).
aws --endpoint-url https://my-minio-endpoint.com s3 ls my_bucket
Now Configuring Litestream #
Litestream also accepts the endpoint argument via config. I could not get it
to work just with the ui.
Note the
aws configurestep above is not required for litestream, only the aws cli.
dbs:
  - path: /path/to/database.db
    replicas:
      - url: s3://my_bucket/
        endpoint: https://my-minio-endpoint.com
        region: us-east-1
        access-key-id: ****************VZnD
        secret-access-key: ************************************xAm8
Now run a litestream replication.
litestream replicate -config litestream.yml
# or put the config in /etc/litestream.yml and just run replicate
litestream replicate
GitHub - benbjohnson/litestream: Streaming replication for SQLite.
Streaming replication for SQLite. Contribute to benbjohnson/litestream development by creating an account on GitHub.
GitHub · github.com [1]
`litestream` is a sick cli tool for steaming replicas of sqlite. It automatically does daily snapshots, and streams all of the writes to the replica live.
install # [2]
Install is fast using installer, no compilation, just copy the binary and run.
curl https://i.wayl.one/benbjohnson/litestream
References:
[1]: https://github.com/benbjohnson/litestream
[2]: #install
why-is-postgres-default
Serious question.
No one ever got fired for choosing PostgreSQL # [1]
But, why. It’s the most loved db, right? Right? Maybe it’s time to rethink
it.
Don’t get me wrong, if I need a relational db as a service, PostgreSQL is going
to be my first choice, but why do I need to run a separate application for it?
Tutorials use sqlite # [2]
Why is that? Because there is nothing else to stand up. Nothing else to
maintain. And you probably already have it installed on just about anything
that has a battery.
SQLite runs in memory # [3]
Don’t need, or maybe don’t want to persist state. Run it in memory. This is a
nice feature for running tests.
Less exposure # [4]
SQLite is a file on your filesystem. It’s not a web service. It’s not a cloud
service. Not that postgres is insecure, but it is one more endpoint that you
have to think about securing.
this means that is probably also cheaper 🤑
SQLite is easy to replicate # [5]
Want to run your new feature with prod data? Pull a replica or...
Why I Built Litestream - Litestream
Despite an exponential increase in computing power, our applications require more machines than ever because of architectural decisions made 25 years ago. You can eliminate much of your complexity ...
litestream.io [1]
As applications scale to the edge, to put compute as close to the user as possible, database queries back to the master node get slower and slower. Enter sqlite replication, put the database wtih the application code and replicate from master.
References:
[1]: https://litestream.io/blog/why-i-built-litestream/
I'm All-In on Server-Side SQLite
Ben Johnson has joined Fly.io
Fly · fly.io [1]
SQLite is the next big database trend. with more horizontal scaling, close to user read heavy applications, having your database in the same application stack makes a lot of sense. Tools like litestream are going to enable global distribution in an impressive way.
References:
[1]: https://fly.io/blog/all-in-on-sqlite-litestream/
LiteFS Cloud: Distributed SQLite with Managed Backups
Documentation and guides from the team at Fly.io.
Fly · fly.io [1]
Fly.io’s solution to sqlite managed backups.I definitely want to look into this a bit, but moreso the tech under the hook litestream.
References:
[1]: https://fly.io/blog/litefs-cloud/
If you’re into interesting projects, don’t miss out on litestream [1], created by benbjohnson [2].
Streaming replication for SQLite.
References:
[1]: https://github.com/benbjohnson/litestream
[2]: https://github.com/benbjohnson
I’m impressed by flameshow [1] from laixintao [2].
A terminal Flamegraph viewer.
References:
[1]: https://github.com/laixintao/flameshow
[2]: https://github.com/laixintao
Looking for inspiration? installer [1] by jpillora [2].
One-liner for installing binaries from Github releases
References:
[1]: https://github.com/jpillora/installer
[2]: https://github.com/jpillora
GitHub - jpillora/installer: One-liner for installing binaries from Github releases
One-liner for installing binaries from Github releases - jpillora/installer
GitHub · github.com [1]
This is a sick looking bash script generator for installing binaries off of github releases. it reccomends curl into bash, but you could curl into install.sh and toss that in your dotfiles repo or wherever.
Install installer with installer
curl -s https://i.jpillora.com/installer | bash
References:
[1]: https://github.com/jpillora/installer
How to run pods as systemd services with Podman
Podman is well known for its seamless integration into modern Linux systems, and supporting systemd is a cornerstone in these efforts. Linux commonly uses th...
redhat.com [1]
podman comes with a nice command for generating systemd service files (units).
$ podman pod create --name=my-pod
635bcc5bb5aa0a45af4c2f5a508ebd6a02b93e69324197a06d02a12873b6d1f7
$ podman create --pod=my-pod --name=container-a -t centos top
c04be9c4ac1c93473499571f3c2ad74deb3e0c14f4f00e89c7be3643368daf0e
$ podman create --pod=my-pod --name=container-b -t centos top
b42314b2deff99f5877e76058ac315b97cfb8dc40ed02f9b1b87f21a0cf2fbff
$ cd $HOME/.config/systemd/user
$ podman generate systemd --new --files --name my-pod
/home/vrothberg/.config/systemd/user/pod-my-pod.service
/home/vrothberg/.config/systemd/user/container-container-b.service
/home/vrothberg/.config/systemd/user/container-container-a.service
References:
[1]: https://www.redhat.com/en/blog/podman-run-pods-systemd-services
I like MordechaiHadad’s [1] project bob [2].
A version manager for neovim
References:
[1]: https://github.com/MordechaiHadad
[2]: https://github.com/MordechaiHadad/bob
makeplane [1] has done a fantastic job with plane [2]. Highly recommend taking a look.
🔥 🔥 🔥 Open Source JIRA, Linear, Monday, and Asana Alternative. Plane helps you track your issues, epics, and product roadmaps in the simplest way possible.
References:
[1]: https://github.com/makeplane
[2]: https://github.com/makeplane/plane
Pagefind
Pagefind is a fully static search library that aims to perform well on large sites, while using as little of your users’ bandwidth as possible, and without hosting any infrastructure.
Pagefind · pagefind.app [1]
Pagefind is absolutely insane. I’ve tried a number of static site searches, and found them all hard to get get going, clunky and not the best experience as a user or developer.
I setup pagefind in about 2 minutes on my site where it found and indexed 833 pages in 2 minutes.
The only downside I see so far is that it is a lot of bandwidth to the user. On simulated slow 3G you can definitly feel it, but not terrible. Anything slower and its going to start feeling frustrating.
edit: I have actually fully deployed it on waylonwalker.com, and its fast!
create the index
npx -y pagefind --site public --serve
Then I put this on a page, it looks really nice on a white background, but would need some work to drop into a dark theme.
<link href="/pagefind/pagefind-ui.css" rel="stylesheet">
<script src="/pagefind/pagefind-ui.js"></script>
<div id="search"></div>
<script>
window.addEventListener('DOMContentLoaded', (event) => {
new PagefindUI({ element: "#search", s...
If you’re into interesting projects, don’t miss out on project.nvim [1], created by ahmedkhalf [2].
The superior project management solution for neovim.
References:
[1]: https://github.com/ahmedkhalf/project.nvim
[2]: https://github.com/ahmedkhalf
I’ve recently given tailwindcss a second chance and am really liking it. Here is how I set it up for my python based projects.
https://waylonwalker.com/a-case-for-tailwindcss
Installation #
npm is used to install the cli that you will need to configure and compile tailwindcss.
npm install -g tailwindcss-cli
Setup #
You will need to create a tailwind.config.js file, to get this you can use the cli.
npx tailwindcss init
Using tailwind with jinja templates #
To set up tailwind to work with jinja templates you will need to point the tailwind config content to your jinja templates directory.
module.exports = {
  content: ["templates/**/*.html"],
};
Setting up the base styles #
I like to use the @tailwind base;, to do this I set up an input.css file.
@tailwind base;
@tailwind components;
@tailwind utilities;
Compiling #
Now that it’s all setup you can run the tailwindcss command. You will get an output.css with base tailwind plus any of the classes that you used.
tailwindcss -i ./input.css -o ./output.css --watch
-
Dang Mariah, killing it with continuous learning perspective.
A Case For Tailwindcss
I was watching @theprimeagen recently and I think he sold me on using
tailwindcss. The thing about tailwind is that it is not a big component
library, it’s a set of css classes mapped to a few (usually one) style.
All css classes are shitty, so you might as well use someone else’s shitty
css classes on all your projects rather than thinking you’re being smart with a
new set of classes that you will hate in 6 months when you come back to the
project. roughly quoted from memory of @theprimeagen
It’s tiny # [1]
So unlike big component libraries like tailwind, it comes with a cli that that
it uses to create the final css file. It is able to treeshake out all the
tailwind classes that you are not using and only ship the ones that you are
using.
It’s hard to clash # [2]
Since the classes are so small and single purpose it’s hard to end up with
something like .card in two places that mean different things causing you to
duplicate most of that css anyways so that the whole design doesn...
Simon Willison (@simonw) on X
Anyone got a lead on a good embedding model that can embed both images and text into the same space, so you can search for "dog" and get back images most likely to contain a dog?
It looks like Vis…
X (formerly Twitter) · twitter.com [1]
Kinda mindblown that this is even possible. This is so far outside of my current thinking that i didn’t even think of an elegant way to implement semantic search accross images and text at the same time. I know it happens at Google, but I envision that as still text search accross tags and meta data about the image.
Based on the number of responses CLIP is the thing that does this.
References:
[1]: https://twitter.com/simonw/status/1700528222382027039
I came across textual-web [1] from Textualize [2], and it’s packed with great features and ideas.
Run TUIs and terminals in your browser
References:
[1]: https://github.com/Textualize/textual-web
[2]: https://github.com/Textualize
GitHub - aca/emmet-ls: Emmet support based on LSP.
Emmet support based on LSP. Contribute to aca/emmet-ls development by creating an account on GitHub.
GitHub · github.com [1]
This is the greatest nvim emmet plugin I have tried. In the past I had tried the vim plugin a few times and just could not get a good flow with the keybindings and found it confusing for my occasional use. emmet-ls just uses lsp-completion, so its the same flow as other completions.
You can try it out by installing with :Mason
config # [2]
local lspconfig = require('lspconfig')
local configs = require('lspconfig/configs')
local capabilities = vim.lsp.protocol.make_client_capabilities()
capabilities.textDocument.completion.completionItem.snippetSupport = true
lspconfig.emmet_ls.setup({
-- on_attach = on_attach,
capabilities = capabilities,
filetypes = { "css", "eruby", "html", "javascript", "javascriptreact", "less", "sass", "scss", "svelte", "pug", "typescriptreact", "vue" },
init_options = {
html = {
options = {
-- For possible options, see: https://github.com/emmetio/emmet/blob/master/src/config.ts#L79-L267
["bem.enabled"] = true,
},
},
}
})
References:
[1]: https://github.com/aca/emme...
LLM now provides tools for working with embeddings
LLM is my Python library and command-line tool for working with language models. I just released LLM 0.9 with a new set of features that extend LLM to provide tools …
Simon Willison’s Weblog · simonwillison.net [1]
Simon’s llm cli is getting quite interesting. I really want to run some clustering on my website content.
References:
[1]: https://simonwillison.net/2023/Sep/4/llm-embeddings/
Formatter
How to use the Biome formatter.
Biome · biomejs.dev [1]
Tried out biome today and it worked better than prettier on jinja templates, I might adopt this over prettier.
References:
[1]: https://biomejs.dev/formatter/
Make the easy things easy
It’s so easy to get out of rhythm, get busy, and drop the ball on some things
that you really want to do or should do. This blog is a good example. I took
some time off for some family reasons, but have taken a long time to get back
to it simply because I am out of rhythm. As I am trying to get back into the
rhythm there is some tooling that I have set up for it that I completely forgot
about that feel good to use again.
Repetitive Tasks # [1]
Simple Repetitive Tasks that I have to do often can just feel soul crushing,
and one main thing that got me interested in programming.
AI tools are becoming more and more useful at solving these problems. For
instance code generation tools like co-pilot or codeium are really good at
boilerplate and pattern repetition. Things that used to be a few vim macros is
now just banging on tab.
I often look for setting up templates or some sort of snippet to replace a big
chunk of boilerplate that I know I will need over and over.
timebox # [2]
Do...
Check out aboutfeeds [1] by genmon [2]. It’s a well-crafted project with great potential.
Web feeds/RSS “getting started” guide for new users.
References:
[1]: https://github.com/genmon/aboutfeeds
[2]: https://github.com/genmon
htmx ~ The disable-element Extension
htmx gives you access to AJAX, CSS Transitions, WebSockets and Server Sent Events directly in HTML, using attributes, so you can build modern user interfaces with the simplicity and power of hypert...
v1.htmx.org [1]
An extension to disable elements during flight of an htmx [2] request, Looks super useful for things like a create or delete button where the server would end up with an error if you double delete or double create. This eliminates an error path that the user might see under normal use of the ui.
References:
[1]: https://v1.htmx.org/extensions/disable-element/
[2]: /htmx/
htmx ~ hx-indicator Attribute
The hx-indicator attribute in htmx allows you to specify the element that will have the `htmx-request` class added to it for the duration of the request. This can be used to show spinners or progre...
htmx.org [1]
The htmx-request class is added to htmx-target elements. You can target this css selector to create loading state throbbers.
By default the target element will the self, but you can use the typical htmx [2] css selector to select which element will recieve the htmx-request class while the request is running.
The only way to override the name of the class is through config.
References:
[1]: https://htmx.org/attributes/hx-indicator/
[2]: /htmx/
-
Prime concisely made sense of why htmx is so awesome compared to what has become modern reactive web dev in 2 minutes. I had never thought of it this way and it’s incredible.
One thing I have comepletely missed out on with my use of htmx is setting the disabled state while the server is working, what a genius move!
References:
[1]: /htmx/
htmx ~ Examples ~ Updating Other Content
htmx gives you access to AJAX, CSS Transitions, WebSockets and Server Sent Events directly in HTML, using attributes, so you can build modern user interfaces with the simplicity and power of hypert...
htmx.org [1]
Three ways to support updating other content. Fantastic article walking through the different ways to update other parts of the screen using htmx [2].
In htmx there is no 2 way data binding, the dom is your state, and if you have elements derived from the same data on the screen in different places you need to think about how to keep them in sync.
References:
[1]: https://htmx.org/examples/update-other-content/
[2]: /htmx/
Bigger Applications - Multiple Files - FastAPI
FastAPI framework, high performance, easy to learn, fast to code, ready for production
fastapi.tiangolo.com [1]
Fastapi [2] lets you tag your APIRouter’s so that the swagger docs are grouped according to the router.
router = APIRouter(tags=['router'])
Now all routes in router will appear in the router group in the swagger docs.
References:
[1]: https://fastapi.tiangolo.com/tutorial/bigger-applications/#another-module-with-apirouter
[2]: /fastapi/
Custom pages and templates - Datasette documentation
docs.datasette.io [1]
Datasette has its own static server that can host assets such as style sheets.
datasette -m metadata.json --static assets:static-files/
References:
[1]: https://docs.datasette.io/en/stable/custom_templates.html#serving-static-files
Check out hedgedoc [1] by hedgedoc [2]. It’s a well-crafted project with great potential.
HedgeDoc - Ideas grow better together
References:
[1]: https://github.com/hedgedoc/hedgedoc
[2]: https://github.com/hedgedoc
Just starred htmx-lsp [1] by ThePrimeagen [2]. It’s an exciting project with a lot to offer.
its so over
References:
[1]: https://github.com/ThePrimeagen/htmx-lsp
[2]: https://github.com/ThePrimeagen
[1]
Tailwind css component library. There are many examples with copy and pastabily with the tailwind classes already setup.
References:
[1]: /static/https://preline.co/docs/index.html
Tailwind CSS Cheat Sheet
Cheat sheet to learn Tailwind CSS quickly. Browse and search all Tailwind utility classes or CSS properties on one page.
nerdcave.com [1]
A nice searchable cheatsheet for tailwindcss classes.
References:
[1]: https://nerdcave.com/tailwind-cheat-sheet
cURL Command Without Using Cache | Baeldung on Linux
A quick and practical guide to using curl without cache.
Baeldung on Linux · baeldung.com [1]
Busting cache with curl. I’m not sure how much gets cached by curl, but I have ran into several cases where I am looking for new content and I want to ensure the content is new and no chance of being cached.
This article suggests 3 different techniques.
curl -H 'Cache-Control: no-cache, no-store' http://www.example.com
curl -H 'Pragma: no-cache' http://www.example.com
curl http://www.example.com/?xyzzyspoon
References:
[1]: https://www.baeldung.com/linux/curl-without-cache#adding-the-pragma-http-header
[1]
sqlite has 3 different tokenizers, porter, ascii, trigram.
These can be used with sqlite-utils.
sqlite-utils enable-fts --tokenize porter database.db post title message tags
And with the python api.
db = Database('database.db')
db["post"].enable_fts(
["title", "message", "tags"], create_triggers=True, tokenize="trigram"
)
posts = list(db["post"].search(search))
References:
[1]: /static/https://www.sqlite.org/fts5.html
GitHub - sharkdp/bat: A cat(1) clone with wings.
A cat(1) clone with wings. Contribute to sharkdp/bat development by creating an account on GitHub.
GitHub · github.com [1]
Bat is my favorite pager, its the one for me that seems to just work more than the rest. colors, syntax highlighting, line numbers search, it just feels the most natural.
References:
[1]: https://github.com/sharkdp/bat
Check out server-hot-reload [1] by mikeckennedy [2]. It’s a well-crafted project with great potential.
Include in your web projects for dev-time auto reloading of web browser when any change is detected in content.
References:
[1]: https://github.com/mikeckennedy/server-hot-reload
[2]: https://github.com/mikeckennedy
sqlite_utils Python library - sqlite-utils
sqlite-utils.datasette.io [1]
sqlite-utils is primarily a cli tool for sqlite operations such as enabling full text search, and executing searches, but it also has a nice python api that is exposed and pretty straightforward to use.
from sqlite_utils import Database
db = Database("database.db")
db["post"].enable_fts(["title", "message", "tags])
db["post"].search("water")
This returns a generator object that you can iterate over the row objects with.
References:
[1]: https://sqlite-utils.datasette.io/en/stable/python-api.html#full-text-search
External Link
levelup.gitconnected.com [1]
Use prettier to format all files in a directory. By default prettier does not write, it just echos out the format that it would do. Give it the --write and it will write the changes to the files.
prettier --write .
I just used this on my thoughts repo.
prettier --write templates
References:
[1]: https://levelup.gitconnected.com/how-to-format-all-files-in-a-directory-with-prettier-5f0ff5f4ffb2
GitHub - simonw/datasette-render-markdown: Datasette plugin for rendering Markdown
Datasette plugin for rendering Markdown. Contribute to simonw/datasette-render-markdown development by creating an account on GitHub.
GitHub · github.com [1]
datasette really does everything doesn’t it!
References:
[1]: https://github.com/simonw/datasette-render-markdown
GitHub - simonw/shot-scraper: A CLI utility for taking screenshots of websites, recording video demos and scraping sites using JavaScript
A CLI utility for taking screenshots of websites, recording video demos and scraping sites using JavaScript - simonw/shot-scraper
GitHub · github.com [1]
> A command-line utility for taking automated screenshots of websites
Daaaang, this is such an elegantly simple way to get web screenshots with a cli. I was literally up and running with two commands on my arch linux machine (which it warned was unsupported by playwright).
pip install shot-scraper
# Now install the browser it needs:
shot-scraper install
shot-scraper waylonwalker.com
shot-scraper https://datasette.io/
shot-scraper https://datasette.io/ -h 1280 -w 1920
shot-scraper https://datasette.io/ -h 480 -w 720
shot-scraper shot --selector '#posts' https://thoughts.waylonwalker.com/post/89
Note shot-scraper https://datasette.io/ is a full length screenshot of the entire page.
Oh and its pretty dang fast, let alone the setup time, this crushes on startup time in my attempts to use a headless browser in the past.
References:
[1]: https://github.com/simonw/shot-scraper
shot-scraper: automated screenshots for documentation, built on Playwright
shot-scraper is a new tool that I’ve built to help automate the process of keeping screenshots up-to-date in my documentation. It also doubles as a scraping tool—hence the name—which I …
Simon Willison’s Weblog · simonwillison.net [1]
An interesting way to build automatically annotaatd docs with arrows pointing to elements on a webpage.
References:
[1]: https://simonwillison.net/2022/Mar/10/shot-scraper/#a-complex-example
External Link
youtube.com [1]
I’d never given this much thought, but there are so many guides that are complete guides for beginner workflows, but once you get beyond beginner there is likely no manual for what you are trying to do in programming. There is no guide that will tell you the best way to get your companies salesforce data, alongside of the ERP data and present it to the users who need to know in a way that compels them to make the right decisions. You are going to have to build this out for yourself by piecing together knowledge about each subject.
References:
[1]: https://www.youtube.com/shorts/wsEuPYFpDgk
HTML Over The Wire | Hotwire
Hotwire is an alternative approach to building modern web applications without using much JavaScript by sending HTML instead of JSON over the wire.
hotwired.dev [1]
An alternative approach to building modern web withhout heavy js and json, but instead html [2] over the wire, keeping the logic in the backend of rails.
References:
[1]: https://hotwired.dev/
[2]: /html/
How do I post form data using Curl?
ReqBin is the most popular online API testing tool for REST, SOAP and HTTP APIs.
ReqBin · reqbin.com [1]
How to pass form data with curl, give it the d.
curl -X POST https://reqbin.com/echo/post/form
-H "Content-Type: application/x-www-form-urlencoded"
-d "param1=value1¶m2=value2"
References:
[1]: https://reqbin.com/req/c-sma2qrvp/curl-post-form-example
I’m really excited about SHARK-Studio [1], an amazing project by nod-ai [2]. It’s worth exploring!
SHARK Studio – Web UI for SHARK+IREE High Performance Machine Learning Distribution
References:
[1]: https://github.com/nod-ai/SHARK-Studio
[2]: https://github.com/nod-ai
The work on AMD-SHARK-Studio [1] by nod-ai [2].
AMD-SHARK Studio – Web UI for SHARK+IREE High Performance Machine Learning Distribution
References:
[1]: https://github.com/nod-ai/AMD-SHARK-Studio
[2]: https://github.com/nod-ai
Vue.js
Vue.js - The Progressive JavaScript Framework
vuejs.org [1]
A super handy reference to the vuejs lifecycle.
[2]
References:
[1]: https://vuejs.org/guide/essentials/lifecycle.html#lifecycle-diagram
[2]: https://vuejs.org/assets/lifecycle.16e4c08e.png
How to Use HTML to Open a Link in a New Tab
Tabs are great, aren't they? They allow the multitasker in all of us to juggle a bunch of online tasks at the same time. Tabs are so common now that, when you click on a link, it's likely it'll ope...
freeCodeCamp.org · freecodecamp.org [1]
Most of the time when creating links in html [2] you want to maintain the default behavior, as this is what users are going to expect, but sometimes your site behaves such that it does not fit, and it does something unexpected anyways. in this case you might want to make the default behavior to open the link in a new tab rather than relying on users to control click.
Use this with restraint as this can make your site feel janky and do things that do not feel natural to the web.
<p>Check out <a href="https://www.freecodecamp.org/" target="_blank" rel="noopener noreferrer">freeCodeCamp</a>.</p>
References:
[1]: https://www.freecodecamp.org/news/how-to-use-html-to-open-link-in-new-tab/
[2]: /html/
Create Models with a Many-to-Many Link - SQLModel
SQLModel, SQL databases in Python, designed for simplicity, compatibility, and robustness.
sqlmodel.tiangolo.com [1]
Creating many to many relationships with sqlmodel requires a LinkTable Model. The link model will keep track of the linked id’s between each of the models.
[2]
from typing import List, Optional
from sqlmodel import Field, Relationship, Session, SQLModel, create_engine
class HeroTeamLink(SQLModel, table=True):
team_id: Optional[int] = Field(
default=None, foreign_key="team.id", primary_key=True
)
hero_id: Optional[int] = Field(
default=None, foreign_key="hero.id", primary_key=True
)
class Team(SQLModel, table=True):
id: Optional[int] = Field(default=None, primary_key=True)
name: str = Field(index=True)
headquarters: str
heroes: List["Hero"] = Relationship(back_populates="teams", link_model=HeroTeamLink)
class Hero(SQLModel, table=True):
id: Optional[int] = Field(default=None, primary_key=True)
name: str = Field(index=True)
secret_name: str
age: Optional[int] = Field(default=None, index=True)
teams: List[Team] = Relationship(back_populates="heroes", link_model=HeroTeamLink)
References:
[1]...
External Link
stackoverflow.com [1]
I went down the route of leveraging the json-enc extention in htmx [2], but later realized that this completely breaks browsers/users who do not wish to use javascript. While most of the web would feel quite broken with javascript disabled, I don’t want to contribute to that without good reason.
Taking a second look into this issue, rather than using json-enc, and using as_form to get form data into a model keeps the nice DX fo everything being a pydantic model, but the site still works without js. with js htmx kicks in, you get a spa like experience by loading partials onto the page, and without, you just get a full page reload.
the implementation # [3]
copied from https://stackoverflow.com/questions/60127234/how-to-use-a-pydantic-model-with-form-data-in-fastapi
import inspect
from typing import Type
from fastapi import Form
from pydantic import BaseModel
from pydantic.fields import ModelField
def as_form(cls: Type[BaseModel]):
new_parameters = []
for field_name, model_field in cls.__fields__.items():
model_field: ModelField # type: ignore
new_parameters.append(
inspect.Parameter(
model_field.alias,
inspect.Parameter.POSITION...
GitHub - chebykinn/sedmario: NES Super Mario Bros level 1 written in pure sed!
NES Super Mario Bros level 1 written in pure sed! Contribute to chebykinn/sedmario development by creating an account on GitHub.
GitHub · github.com [1]
🤯 NES Super Mario Bros level 1 written in pure sed, this is madmess.
References:
[1]: https://github.com/chebykinn/sedmario
External Link
github.com [1]
neovim stopped formatting on save for me awhile ago and I have just been dealing with it. looks like there may have been an api change, idk.
I had to make this update.4
- vim.lsp.buf.format()
+ vim.lsp.buf.format({async=false})
References:
[1]: https://github.com/jose-elias-alvarez/null-ls.nvim/wiki/Formatting-on-save#code
[1]
How to enable debug mode in pywebview.
import webview
webview.create_window('Woah dude!', 'https://pywebview.flowrl.com/hello')
webview.start(debug=True)
References:
[1]: /static/https://pywebview.flowrl.com/guide/debugging.html
`ValueError: Constraint must have a name` in alembic 1.10.0 · Issue #1195 · sqlalchemy/alembic
Describe the bug ValueError: Constraint must have a name in alembic 1.10.0. Expected behavior Migration succeeds. To Reproduce Please try to provide a Minimal, Complete, and Verifiable example, wit...
GitHub · github.com [1]
After a nasty time with alembic upgrades, thoughts is about to get a new users table. This may have came from incorrectly setting up alembic for sqlite from the start, but I was able to fix the issue with this GitHub issue.
alembic sqlite ValueError: Constraint must have a name
The change I needed to make to get my migration to run.
+ batch_op.create_foreign_key('fk_post_author_id_user', 'user', ['author_id'], ['id'])
References:
[1]: https://github.com/sqlalchemy/alembic/issues/1195
![[None]]
Since using alembic I have been just running out a new revision checking its content and deleting it if its empty, today I learned there is an alembic check command to check for operations that need to be created.
❯ alembic check
INFO [alembic.runtime.migration] Context impl SQLiteImpl.
INFO [alembic.runtime.migration] Will assume non-transactional DDL.
No new upgrade operations detected.
API — Jinja Documentation (3.1.x)
jinja.palletsprojects.com [1]
🤯 jinja comes with a loader to pre-compile templates! Defihnitely need to look at this for markata, as jinja is till one of the biggest hot spots.
References:
[1]: https://jinja.palletsprojects.com/en/3.0.x/api/#jinja2.Environment.compile_templates
[1]
I’ve definitely been missing out on setting up a proper jinja loader on a few projects, I need to lean on this a bit more.
class jinja2.FileSystemLoader(searchpath, encoding='utf-8', followlinks=False):
'''
Load templates from a directory in the file system.
'''
The path can be relative or absolute. Relative paths are relative to the current working directory.
loader = FileSystemLoader("templates")
# A list of paths can be given. The directories will be searched in order, stopping at the first matching template.
loader = FileSystemLoader(["/override/templates", "/default/templates"])
References:
[1]: /static/https://jinja.palletsprojects.com/en/3.0.x/api/#jinja2.FileSystemLoader
-
Nice intro into tailwind, I definitely started grasping some of the concepts after watching Brad.
GitHub - wagoodman/dive: A tool for exploring each layer in a docker image
A tool for exploring each layer in a docker image. Contribute to wagoodman/dive development by creating an account on GitHub.
GitHub · github.com [1]
Really cool tui to inspect docker imaages that runs with docker.
References:
[1]: https://github.com/wagoodman/dive
Gzip/Brotli Compression Test | GiftOfSpeed
Check if Gzip or Brotli compression is working on your website.
giftofspeed.com [1]
A nice tool to check compression on a public url.
References:
[1]: https://www.giftofspeed.com/gzip-test/
Read a Range of Data - LIMIT and OFFSET - SQLModel
SQLModel, SQL databases in Python, designed for simplicity, compatibility, and robustness.
sqlmodel.tiangolo.com [1]
Implement paging in sqlmodel with where, limit, and offset.
def select_heroes():
with Session(engine) as session:
statement = select(Hero).where(Hero.age > 32).limit(3)
results = session.exec(statement)
heroes = results.all()
print(heroes)
References:
[1]: https://sqlmodel.tiangolo.com/tutorial/limit-and-offset/?h=#combine-limit-and-offset-with-where
DuckDB vs. MotherDuck: When to Move to the Cloud | Kestra
DuckDB is fast and free. MotherDuck adds cloud storage, collaboration, and scale. Here
kestra.io [1]
duckdb is a new in process database that has been making its rounds in analytics for its high performance in those applications.
Mother duck is a centeralized server that brings manages storage, data sharing and an ide to duckdb.
References:
[1]: https://kestra.io/blogs/2023-07-28-duckdb-vs-motherduck
Textual - Center things
Textual is a TUI framework for Python, inspired by modern web development.
Textual Documentation · textual.textualize.io [1]
How to center things in textual. Textual has a very unique way of styling text user interfaces for the terminal using css. If you know css it feels natural.
@willmcgugan [2], has put together a great article on how to center things in textual
here the final result
from textual.app import App, ComposeResult
from textual.widgets import Static
QUOTE = "Could not find you in Seattle and no terminal is in operation at your classified address."
class CenterApp(App):
"""How to center things."""
CSS = """
Screen {
align: center middle;
}
#hello {
background: blue 50%;
border: wide white;
width: 40;
height: 9;
text-align: center;
content-align: center middle;
}
"""
def compose(self) -> ComposeResult:
yield Static(QUOTE, id="hello")
if __name__ == "__main__":
app = CenterApp()
app.run()
References:
[1]: https://textual.textualize.io/how-to/center-things/
[2]: https://willmcgugan.github.io
s3-tree
list s3 objects in tree-like format.
PyPI · pypi.org [1]
Super useful way to show a tree view of an s3 bucket’s structure!
pip install s3-tree
s3-tree bucketname
References:
[1]: https://pypi.org/project/s3-tree/
External Link
stackoverflow.com [1]
How to sort results from a sqlalchemy based orm.
.order_by(model.Entry.amount.desc())
I needed this to enable paging on my thoughts api.
@post_router.get("/posts/")
async def get_posts(
*,
request: Request,
session: Session = Depends(get_session),
hx_request: Annotated[str | None, Header()] = None,
accept: Annotated[str | None, Header()] = None,
current_user: Annotated[User, Depends(try_get_current_active_user)],
page_size: int = 10,
page: int = 1,
) -> Posts:
"get all posts"
statement = (
select(Post)
.where(Post.published)
.order_by(Post.id.desc())
.limit(page_size)
.offset((page - 1) * page_size)
)
posts = session.exec(statement).all()
posts = Posts(__root__=posts)
if isinstance(current_user, RedirectResponse):
is_logged_in = False
else:
is_logged_in = True
if hx_request and page == 1 and len(posts.__root__) == 0:
return HTMLResponse('<ul id="posts"><li>No posts</li></ul>')
if hx_request and len(posts.__root__) == 0:
return HTMLResponse("")
if not hx_request and len(posts.__root__) == 0:
return ["no posts"]
if hx_request:
return templates.TemplateResponse(
"posts.html",
{
"request": request,
"config":...
GitHub - kndndrj/nvim-dbee: Interactive database client for neovim
Interactive database client for neovim. Contribute to kndndrj/nvim-dbee development by creating an account on GitHub.
GitHub · github.com [1]
A neovim database client that I need to check out.
References:
[1]: https://github.com/kndndrj/nvim-dbee
Relocating the Docker root directory
If the space in the file system where the Docker root directory is located is not adequate and cannot be increased, you must relocate the directory.
ibm.com [1]
A very straightforward guide to moving your docker data, such as container storage to a different location. In my case I wanted it off of my boot drive.
References:
[1]: https://www.ibm.com/docs/en/z-logdata-analytics/5.1.0?topic=compose-relocating-docker-root-directory
GitHub - containers/aardvark-dns: Authoritative dns server for A/AAAA container records. Forwards other request to host's /etc/resolv.conf
Authoritative dns server for A/AAAA container records. Forwards other request to host's /etc/resolv.conf - containers/aardvark-dns
GitHub · github.com [1]
I ran into some dns issues while running podman on arch, aparantly I had missed an optional dependency of aardvark-dns for container to container dns resolution.
paru -S aardvark-dns
References:
[1]: https://github.com/containers/aardvark-dns
Podman - ArchWiki
wiki.archlinux.org [1]
I kept running into limits in the number of subuid and subgid’s I had on my system by default. As always thank the arch wiki guide for having the most comprehensive yet consice guide to setup podman.
What I needed to do to fix the error.
usermod --add-subuids 100000-165535 --add-subgids 100000-165535 username
References:
[1]: https://wiki.archlinux.org/title/Podman
TestDisk Step By Step
CGSecurity · cgsecurity.org [1]
testdisk is an amazing command line utility (interactive tui) that just saved me a hard drive that was filled with data, but every machine that I plugged it into told me that it was completely unpartitioned.
References:
[1]: https://www.cgsecurity.org/wiki/TestDisk_Step_By_Step
Textual - Using Rich Inspect to interrogate Python objects
Textual is a TUI framework for Python, inspired by modern web development.
Textual Documentation · textual.textualize.io [1]
I love rich inspect. It’s one of my most often used features of rich. It gives you a great human readable insight into python object instances.
>>> from rich import inspect
>>> text_file = open("foo.txt", "w")
>>> inspect(text_file)
I have a pyflyby entry for it so that I can just run it ang get automatic imports. To not clash with the standard library inspect, which is quite useful on it’s own, I have aliased it to rinspect.
from rich import inspect as rinspect
References:
[1]: https://textual.textualize.io/blog/2023/07/27/using-rich-inspect-to-interrogate-python-objects/
Reasons to avoid Javascript CDNs
Wesley Aptekar-Cassels · blog.wesleyac.com [1]
And this is why we don’t run cdn in prod, respect your users who can’t control where the assets are stored. There are so many fast static hosting providers out there, if you are worried about performance reasons use one of those to self host [2].
References:
[1]: https://blog.wesleyac.com/posts/why-not-javascript-cdn
[2]: /self-host/
Just starred nvim-dbee [1] by kndndrj [2]. It’s an exciting project with a lot to offer.
Interactive database client for neovim
References:
[1]: https://github.com/kndndrj/nvim-dbee
[2]: https://github.com/kndndrj
How to Manage 'Systemd' Services and Units Using 'Systemctl' in Linux
Systemctl is a systemd utility which is responsible for Controlling the systemd system and service manager. Systemd is a collection of system management daemons, utilities and libraries which serve...
How to Manage ‘Systemd’ Services and Units Using ‘Systemctl’ in Linux · tecmint.com [1]
A fantastic overview of the systemd cli.
References:
[1]: https://www.tecmint.com/manage-services-using-systemd-and-systemctl-in-linux/
How to fix ZFS pool not importing at boot
You have probably tried Stack Exchange and reddit at this point, so what do you have to lose?
./techtipsy · ounapuu.ee [1]
Hacky solution to get zpool import tank to work on boot right away. This has been an issue that has plagued my system for months and no matter what dependencies I add in it never works, but adding a sleep as ExecStartPre did the trick.
References:
[1]: https://ounapuu.ee/posts/2021/02/01/how-to-fix-zfs-pool-not-importing-at-boot/
External Link
stackoverflow.com [1]
In flask apps I often get a 404 for routes with a trailing slash. This Stack Overflow post shows how to configure flask to allow trailing slashes on some or all routes.
References:
[1]: https://stackoverflow.com/questions/33241050/trailing-slash-triggers-404-in-flask-path-rule
Deleting Specific Lines in a File with sed or yq — Nick Janetakis
We
Nick Janetakis · nickjanetakis.com [1]
sed can be a tricky beast, I often stumble when trying to pipe into it. Next time I need to use sed, I should reference this article by Nick Janetakis. He makes it looks much easier than my experience has been, and it appears to behave like a vim :%s/ substitution does, or a g/ g command.
References:
[1]: https://nickjanetakis.com/blog/deleting-specific-lines-in-a-file-with-sed-or-yq
External Link
htmx.org [1]
json-enc extension converts url encoded form values into json encoded data, this is very useful for fastapi [2] to have the same interface for htmx [3] and curl type of interfaces.
References:
[1]: https://htmx.org/extensions/json-enc/
[2]: /fastapi/
[3]: /htmx/
Header Parameters - FastAPI
FastAPI framework, high performance, easy to learn, fast to code, ready for production
fastapi.tiangolo.com [1]
Getting request headers in fastapi [2] has a pretty nice stetup, it allows you to get headers values as function arguments,
I was able to use headers to detect if a request was made from htmx [3] or not.
If the request was made from htmx, then we want a html [4] format, otherwise I’m probably hitting the api programatically from something like curl or python
@post_router.post("/post/")
async def post_post(
request: Request,
post: PostCreate,
current_user: Annotated[User, Depends(try_get_current_active_user)],
session: Session = Depends(get_session),
is_hx_request: Annotated[str | None, Header()] = None,
) -> PostRead:
"create a post"
print('hx_request', hx_request)
db_post = Post.from_orm(post)
session.add(db_post)
session.commit()
session.refresh(db_post)
if is_hx_request:
return templates.TemplateResponse("post_item.html", {"request": request, "config": config, "post": db_post})
return db_post
References:
[1]: https://fastapi.tiangolo.com/tutorial/header-params/#declare-header-parameters
[2]: /fastapi/
[3]: /htmx/
[4]:...
GitHub - 1j01/textual-paint: :art: MS Paint in your terminal.
:art: MS Paint in your terminal. Contribute to 1j01/textual-paint development by creating an account on GitHub.
GitHub · github.com [1]
1j01 [2] created a complete working clone of ms paint in the terminal using the textual framework. It’s incredible.
References:
[1]: https://github.com/1j01/textual-paint
[2]: https://github.com/1j01
Dear Red Hat… featuring Jeff Geerling (Changelog & Friends #7)
Red Hat's decision to lock down RHEL sources behind a subscription paywall was met with much ire and opened opportunity for Oracle to get a smack in and SUSE to announce a fork with $10 million beh…
Changelog · changelog.com [1]
Loved this explanation about all the recent lock down with RHEL from Jeff Geerling.
References:
[1]: https://changelog.com/friends/7
sqlite-utils now supports plugins
sqlite-utils 3.34 is out with a major new feature: support for plugins. sqlite-utils is my combination Python library and command-line tool for manipulating SQLite databases. It recently celebrated...
Simon Willison’s Weblog · simonwillison.net [1]
As the title states sqlite-utils now supports plugins. I dug in just a bit and Simon implemented this completely with entrypoints, no framework or library at all.
References:
[1]: https://simonwillison.net/2023/Jul/24/sqlite-utils-plugins/
-
Great short explaination of session vs token authentication.
Form Data - FastAPI
FastAPI framework, high performance, easy to learn, fast to code, ready for production
fastapi.tiangolo.com [1]
Getting form data inside of fastapi [2] was not intuitive to me at first. Everything I had used in fastapi leaned on pydantic models. Form data comes in differently and needs collected differently.
from typing import Annotated
from fastapi import FastAPI, Form
app = FastAPI()
@app.post("/login/")
async def login(username: Annotated[str, Form()], password: Annotated[str, Form()]):
return {"username": username}
References:
[1]: https://fastapi.tiangolo.com/tutorial/request-forms/#define-form-parameters
[2]: /fastapi/
[1]
I am creating this post from a desktop app that I created in 3 lines.
import webview
webview.create_window('Woah dude!', 'https://thoughts.waylonwalker.com')
webview.start()
References:
[1]: /static/https://pywebview.flowrl.com/guide/usage.html
Column INSERT/UPDATE Defaults
—
SQLAlchemy 1.4 Documentation
docs.sqlalchemy.org [1]
sqlalchemy server_defaults end up as defaults in the database when new values are inserted.
t = Table(
"test",
metadata_obj,
Column("abc", String(20), server_default="abc"),
Column("created_at", DateTime, server_default=func.sysdate()),
Column("index_value", Integer, server_default=text("0")),
)
CREATE TABLE test (
abc varchar(20) default 'abc',
created_at datetime default sysdate,
index_value integer default 0
)
References:
[1]: https://docs.sqlalchemy.org/en/14/core/defaults.html#server-invoked-ddl-explicit-default-expressions
Template Designer Documentation — Jinja Documentation (3.1.x)
jinja.palletsprojects.com [1]
A feature of jinja that I just discovered is including sub templates. Here is an example from the docs.
{% include 'header.html' %}
Body goes here.
{% include 'footer.html' %}
And inside of my thoughts project I used it to render posts.
<ul id='posts'>
{% for post in posts.__root__ %}
{% include 'post_item.html' %}
{% endfor %}
</ul>
note that post_item.html [2] automatically inherits the post variable.
References:
[1]: https://jinja.palletsprojects.com/en/3.1.x/templates/#include
[2]: /html/
Templates - FastAPI
FastAPI framework, high performance, easy to learn, fast to code, ready for production
fastapi.tiangolo.com [1]
A guide to add Jinja2Templates to fastapi [2].
References:
[1]: https://fastapi.tiangolo.com/advanced/templates/
[2]: /fastapi/
htmx ~ Documentation
htmx gives you access to AJAX, CSS Transitions, WebSockets and Server Sent Events directly in HTML, using attributes, so you can build modern user interfaces with the simplicity and power of hypert...
htmx.org [1]
A complete reference of all of the htmx [2] swapping methods.
References:
[1]: https://htmx.org/docs/#swapping
[2]: /htmx/
External Link
stackoverflow.com [1]
I am trying to use htmx [2] on a new fastapi [3] site for my thoughts, and have been hitting this error.
Mixed Content: The page at 'https://front.mydomain.com/#/clients/1' was loaded over HTTPS, but requested an insecure resource 'http://back.mydomain/jobs/?_end=25&_order=DESC&_sort=id&_start=0&client_id=1'. This request has been blocked; the content must be served over HTTPS.
What is happening # [4]
I have an htmx component that gets the current users name, but if they are not logged in the backend redirects to a login form.
<div hx-get='/users/me' hx-trigger='load'>
get me
</div>
But for some reason when the front end gets this redirect, it tries to do it through http, and flags it as insecure.
The solution # [5]
To solve this issue, the post directs to set the --forwarded-allow-ips to ‘*’
uvicorn thoughts.api.app:app --port 5000 --reload --log-level info --host 0.0.0.0 --workers 1 --forwarded-allow-ips '*'
References:
[1]: https://stackoverflow.com/questions/63511413/fastapi-redirection-for-trailing-slash-returns-non-ssl-link
[2]: /htmx/
[3]: /fastapi/
[4]: #what-is-happening
[5]: #the-solution
gistfile1.txt [1]
text
On void linux.
Under `/etc/containers/` there is a file called `registries.conf`. It is complemented by `man 5 containers-registries.conf`.
Change (for me lines 11-12) which say
[registries.search]
registries = []
to
[registries.search]
registries = ['docker.io']
(drawn from https://www.projectatomic.io/blog/2018/05/podman-tls/)
---
Without the above you won’t be able to use basic podman functions. You might get errors like:
- Error: unable to pull fedora:28: image name provided is a short name and no search registries are defined in the registries config file.
- Error: unable to pull stripe/stripe-cli: image name provided is a short name and no search registries are defined in the registries config file.
---
Various documentation (redhat blog entries, man podman pages) say that dockerhub is a default, but without this step it’s clearly not.
Good luck. Feel free to use the comment box below if you have a github account.
By default podman will not pull images from docker.io and will need setup. This guide worked for me.
References:
[1]: https://gist.github.com/isomorphisms/3114ab86960656a729a6b4653001aae2
External Link
htmx.org [1]
Using templates with htmx [2] requires the client-side-templates extension, and the template engine to be loaded in a <script> tag.
example htmx using templates.
<!DOCTYPE html>
<html>
<head>
<meta charset="utf-8">
<meta name="viewport" content="width=device-width">
<script src="https://unpkg.com/htmx.org"></script>
<script src="https://unpkg.com/htmx.org/dist/ext/client-side-templates.js"></script>
<script src="https://unpkg.com/mustache@latest"></script>
</head>
<body>
<div hx-ext="client-side-templates">
<button hx-get="https://jsonplaceholder.typicode.com/todos/1"
hx-swap="innerHTML"
hx-target="#content"
mustache-template="foo">
Click Me
</button>
<p id="content">Start</p>
<template id="foo">
<p> {% raw %}{{userID}}{% endraw %} and {% raw %}{{id}}{% endraw %} and {% raw %}{{title}}{% endraw %} and {% raw %}{{completed}}{% endraw %}</p>
</template>
</div>
</body>
</html>
References:
[1]: https://htmx.org/extensions/client-side-templates/
[2]: /htmx/
Static Files - FastAPI
FastAPI framework, high performance, easy to learn, fast to code, ready for production
fastapi.tiangolo.com [1]
Mounting static files in fastapi [2].
from fastapi import FastAPI
from fastapi.staticfiles import StaticFiles
app = FastAPI()
app.mount("/static", StaticFiles(directory="static"), name="static")
References:
[1]: https://fastapi.tiangolo.com/tutorial/static-files/
[2]: /fastapi/
- #javascript" playlabel="Play: HTMX looks pretty neat #coding #javascript [2]">
Love the poling example with hx-trigger=‘every 1s’.
References:
[1]: /htmx/
[2]: /tags/javascript/
First-class session support in FastAPI · Issue #754 · fastapi/fastapi
Is your feature request related to a problem All of the security schemas currently supported by FastAPI rely on some sort of "client-server synergy" , where, for instance, the client is expected to...
GitHub · github.com [1]
Here is a snippet provided by @tiangolo to store the users jwt inside of a session cookie in fatapi. This was written in feb 12, 2020 and admits that this is not a well documented part of fastapi [2].
It’s already in place. More or less like the rest of the security tools. And it’s compatible with the rest of the parts, integrated with OpenAPI (as possible), but probably most importantly, with dependencies.
It’s just not properly documented yet. 😞
But still, it works 🚀 e.g.
from fastapi import FastAPI, Form, HTTPException, Depends
from fastapi.security import APIKeyCookie
from starlette.responses import Response, HTMLResponse
from starlette import status
from jose import jwt
app = FastAPI()
cookie_sec = APIKeyCookie(name="session")
secret_key = "someactualsecret"
users = {"dmontagu": {"password": "secret1"}, "tiangolo": {"password": "secret2"}}
def get_current_user(session: str...
External Link
duckdb.org [1]
Harlequin is a pretty sweet example of what textual can be used to create. Its a terminal based sql ide for DuckDB.
References:
[1]: https://duckdb.org/docs/guides/sql_editors/harlequin
[1]
To persist data in duckdb you need to first make a connection to a duck db database.
con = duckdb.connect('file.db')
Then work off of the connection con rather than duckdb.
con.sql('CREATE TABLE test(i INTEGER)')
con.sql('INSERT INTO test VALUES (42)')
# query the table
con.table('test').show()
# explicitly close the connection
con.close()
References:
[1]: /static/https://duckdb.org/docs/api/python/overview.html
Redirecting…
duckdb.org [1]
duckdb can just query any pandas dataframe that is in memory.
I tried running it against a list of objects and got this error. Great error message that gives me supported types right in the message.
Make sure that "posts" is either a pandas.DataFrame, duckdb.DuckDBPyRelation, pyarrow Table, Dataset, RecordBatchReader, Scanner, or NumPy ndarrays with supported format
References:
[1]: https://duckdb.org/docs/guides/python/sql_on_pandas
pytest-subtests
unittest subTest() support and subtests fixture
PyPI · pypi.org [1]
pytest-subtests is a package to register multiple subtests within a similar test function.
References:
[1]: https://pypi.org/project/pytest-subtests/
A nice codepen reference for dark forms. I am using it for my thoughts chrome extension.
![[None]]
When setting up a new machine, vm, docker image you might be installing command line tools from places like pip. They will often put executables in your ~/.local/bin directory, but by default your shell is not looking in that directory for commands.
WARNING: The script dotenv is installed in '/home/falcon/.local/bin' which is not on PATH.
Consider adding this directory to PATH or, if you prefer to suppress this warning, use --no-warn-script-location.
To solve this you need to add that directory to your $PATH.
export PATH=$PATH:~/.local/bin
To make this change permanant add this line to your shell’s init script, which is likely something like ~/.bashrc or ~/.zshrc.
GitHub - doyensec/wsrepl: WebSocket REPL for pentesters
WebSocket REPL for pentesters. Contribute to doyensec/wsrepl development by creating an account on GitHub.
GitHub · github.com [1]
Very inspiring textual project to check out how they set up the ui. Their intro video has a pretty epic dev experience.
References:
[1]: https://github.com/doyensec/wsrepl
[1]https://t.co/km5m7k6Pb0 [1]
#doyensec #appsec #websockets [2] #burpsuite" loading=“lazy”>
Doyensec (@Doyensec) on X
Announcing wsrepl, the WebSocket testing tool from Doyensec! This intuitive tool is super easy to use and makes automation around WebSockets simple!
Check out our blog for the details and download…
X (formerly Twitter) · twitter.com
wsrepl is an epic websocket repl built in python on the textual framework.
References:
[1]: https://twitter.com/Doyensec/status/1681320727465672706
[2]: /tags/websockets/
Filter Data - WHERE - SQLModel
SQLModel, SQL databases in Python, designed for simplicity, compatibility, and robustness.
sqlmodel.tiangolo.com [1]
When fetching pydantic models from the database with sqlmodel, and you cannot select your item by id, you probably need to use a where clause. This is the sqlmodel way of doing it.
Here is a snippet of how I am using sqlmodel select and where to find a post by link in my thoughts database.
@post_router.get("/link/")
async def get_post_by_link(
*,
session: Session = Depends(get_session),
link: str,
) -> PostRead:
"get one post by link"
link = urllib.parse.unquote(link)
print(f'link: {link}')
post = session.exec(select(Post).where(Post.link==link)).first()
if not post:
raise HTTPException(status_code=404, detail=f"Post not found for link: {link}")
return post
References:
[1]: https://sqlmodel.tiangolo.com/tutorial/where/#filter-rows-using-where-with-sqlmodel
URL Decoding query strings or form parameters in Python | URLDecoder
URL Decode online. URLDecoder is a simple and easy to use online tool for decoding URL components. Get started by typing or pasting a URL encoded string in the input text area, the tool will automa...
urldecoder.io [1]
In order to turn url encoded links back into links that I would find in the database of my thoughts project I need to urldecode them when they hit the api. When anything hits the api it must urlencode the links in order for them to be sent correctly as data and not get parsed as part of the url.
Here is a snippet of how I am using urlib.parse.unquote to un-encode encoded urls so that I can fetch posts from the database.
@post_router.get("/link/")
async def get_post_by_link(
*,
session: Session = Depends(get_session),
link: str,
) -> PostRead:
"get one post by link"
link = urllib.parse.unquote(link)
print(f'link: {link}')
post = session.exec(select(Post).where(Post.link==link)).first()
if not post:
raise HTTPException(status_code=404, detail=f"Post not found for link: {link}")
return post
References:
[1]: https://www.urldecoder.io/python/
encodeURIComponent() - JavaScript | MDN
The encodeURIComponent() function encodes a URI by replacing each instance of certain characters by one, two, three, or four escape sequences representing the UTF-8 encoding of the character (will ...
MDN Web Docs · developer.mozilla.org [1]
In order to send data that includes special characters such as / in a url you need to url encode it. You have probably seen these many times in urls with things like %20 for spaces.
I’m working on a chrome extension to make quick blog posts, like thoughts or a persistent bookmark tool with comments. The backend is written in fastapi [2] and when I check to see if I have a post for a page I need to url encode it.
curl -X 'GET' \
'https://thoughts.waylonwalker.com/link/?link=https%3A%2F%2Fhtmx.org%2Fextensions%2Fclient-side-templates%2F' \
-H 'accept: application/json'
curl example generated from the fastapi swagger docs.
Here is how I used javascript’s encodeURIComponent to turn my chrome extension into a notification when I already have a post for the current page.
// Event listener for tab changes
chrome.tabs.onActivated.addListener(function (activeInfo) {
// Get the active tab information
...
🛠️ Installation | LazyVim
You can find a starter template for LazyVim here
lazyvim.org [1]
Lately in 2023 I have been leaning on lazyvim for my new setups where I am not necessarily ready to drop my full config. It’s been pretty solid, and comes with a very nice setup out of the box, the docs are pretty fantastic as well.
References:
[1]: https://www.lazyvim.org/installation
-
Prime reviews an article with some hot takes about python being slow and quirky, but good enough for a lot of things. Especially data applications that have libraries written in C.
[1]@changelog [1]) on X — 🗣️ @kelseyhightower on his demos:
That happy path gets people out of their chairs.
They’re going back to the computer, like:
“Yo, I’m gonna try it right now.”
Come on… I’d rather have that.
And I’ll take the bit of criticism that comes with it." loading=“lazy”>
Changelog (@changelog [2]) on X
🗣️ @kelseyhightower on his demos:
That happy path gets people out of their chairs.
They’re going back to the computer, like:
“Yo, I’m gonna try it right now.”
Come on… I’d rat…
X (formerly Twitter) · twitter.com
Such an inspiring clip from Kelsey Heightower. Make good shit that inspires people rather than fake ppts of how things could be.
References:
[1]: https://twitter.com/changelog/status/1681306857951084544
[2]: https://changelog.com/podcast
[1]@chriscoyier [1]) on X — I was unaware of `text-wrap: pretty;`
I knew about the (new/cool) text-wrap: balance; — but sometimes that's a bit… too much. I feel like it's nice on headers but not smaller type.
Here's what I mean." loading=“lazy”>
Chris Coyier (@chriscoyier [2]) on X
I was unaware of text-wrap: pretty;
I knew about the (new/cool) text-wrap: balance; — but sometimes that's a bit… too much. I feel like it's nice on headers but not smaller type.
Here's w…
X (formerly Twitter) · twitter.com
Next time I’m working with large headers on small screens I need to try this. I always truggle to get them to look good for most text and overflow ridiculously long words correctly or at all.
text-wrap: pretty;
text-wrap: balance
References:
[1]: https://twitter.com/chriscoyier/status/1681407724993798144
[2]: https://chriscoyier.net
Full-text search - Datasette documentation
docs.datasette.io [1]
Enable full-text search in sqlite using sqlite-utils.
$ sqlite-utils enable-fts mydatabase.db items name description
References:
[1]: https://docs.datasette.io/en/latest/full_text_search.html#enabling-full-text-search-for-a-sqlite-table
sqlite-utils command-line tool - sqlite-utils
sqlite-utils.datasette.io [1]
I want to like jq, but I think Simon is selling me on sqlite, maybe its just me but this looks readable, hackable, editable, memorizable. Everytime I try jq, and its 5 minutes fussing with it just to get the most basic thing to work. I know enough sql out of the gate to make this work off the top of my head
curl https://thoughts.waylonwalker.com/posts/ | sqlite-utils memory - 'select title, message from stdin where stdin.tags like "%python%"' | jq
References:
[1]: https://sqlite-utils.datasette.io/en/stable/cli.html#querying-data-directly-using-an-in-memory-database
sqlite-utils command-line tool - sqlite-utils
sqlite-utils.datasette.io [1]
insert a json array directly into into sqlite with sqlite-utils.
echo '{"name": "Cleo", "age": 4}' | sqlite-utils insert dogs.db dogs -
References:
[1]: https://sqlite-utils.datasette.io/en/stable/cli.html#inserting-json-data
LZone
LZone - Cheat Sheets for Sysadmin / DevOps / System Architecture
lzone.de [1]
A nice cheat sheet for jq. jq looks so nice, but it so quickly gets overwhelming on how to select what you want. I was able to make a jq contains query.
curl https://thoughts.waylonwalker.com/posts/ | jq '.[] | select(.title | contains("python"))'
References:
[1]: https://lzone.de/cheat-sheet/jq
Looking for inspiration? sqlite-migrate [1] by simonw [2].
A simple database migration system for SQLite, based on sqlite-utils
References:
[1]: https://github.com/simonw/sqlite-migrate
[2]: https://github.com/simonw
The work on textual-paint [1] by 1j01 [2].
🎨 MS Paint in your terminal.
References:
[1]: https://github.com/1j01/textual-paint
[2]: https://github.com/1j01
Check out wsrepl [1] by doyensec [2]. It’s a well-crafted project with great potential.
WebSocket REPL for pentesters
References:
[1]: https://github.com/doyensec/wsrepl
[2]: https://github.com/doyensec
If you’re into interesting projects, don’t miss out on llm.nvim [1], created by huggingface [2].
LLM powered development for Neovim
References:
[1]: https://github.com/huggingface/llm.nvim
[2]: https://github.com/huggingface
Underground Bases with Wyatt
Playing minecraft with Wyatt today he started a server all on his own and had
me join. All vanilla, only one rule, underground bases.
[1]
I spawned into the server and it was already night time. I gathered up some
wood on my way down a tree, and was attacked by zombies before I could get any
tools, so I ran up another tree and crafted a crafting table.
[2]
Now to follow the rules, it’s time to head underground to build my base.
[3]
I made a mistake and died, but look at this view from my respawn point.
[4]
References:
[1]: https://dropper.waylonwalker.com/api/file/eb43e707-ae55-48f8-9916-86321b3b8754.webp
[2]: https://dropper.waylonwalker.com/api/file/25a3493a-f08b-4ea8-8535-b03cc7bcbf00.webp
[3]: https://dropper.waylonwalker.com/api/file/74fc59aa-f0da-4643-a67a-36dc65480760.webp
[4]: https://dropper.waylonwalker.com/api/file/7e852358-a680-460b-88c0-ed31b2a18501.webp
I like maces’s [1] project fastapi-htmx [2].
Extension for FastAPI [3] to make HTMX [4] easier to use.
References:
[1]: https://github.com/maces
[2]: https://github.com/maces/fastapi-htmx
[3]: /fastapi/
[4]: /htmx/
The work on interpreters [1] by ericsnowcurrently [2].
a placeholder
References:
[1]: https://github.com/ericsnowcurrently/interpreters
[2]: https://github.com/ericsnowcurrently
Check out coolify [1] by coollabsio [2]. It’s a well-crafted project with great potential.
An open-source & self-hostable Heroku / Netlify / Vercel alternative.
References:
[1]: https://github.com/coollabsio/coolify
[2]: https://github.com/coollabsio
The next version of markata will be around a full second faster at building it’s docs, that’s a 30% bump in performance at the current state. This performance will come when virtual environments are stored in the same directory as the source code.

What happened?? #
I was looking through my profiler for some unexpected performance hits, and
noticed that the docs plugin was taking nearly a full second (sometimes
more), just to run glob.
    |  |- 1.068 glob  markata/plugins/docs.py:40
    |  |  |- 0.838 <listcomp>  markata/plugins/docs.py:82
    |  |  |  `- 0.817 PathSpec.match_file  pathspec/pathspec.py:165
    |  |  |        [14 frames hidden]  pathspec, <built-in>, <string>
Python scandir ignores hidden directories #
I started looking for different solutions and what I found was that I was hitting pathspec with way more files than I needed to.
len(list(Path().glob("**/*.py")))
# 6444
len([Path(f) for f in glob.glob("**/*.py", recursive=True)])
# 110
After digging into the docs I found that glob.glob uses os.scandir which
ignores ‘.’ and ‘..’ directories while Path.glob does not.
https://docs.python.org/3/library/os.html#os.scandir
results? #
Now glob.py from the docs plugin does not even show up in the profiler.
I opened up ipython and saw the following results. For some reason as I hit docs.glob it was only hitting 488 ms from ipython, but it was still a massive improvement over the original.
%timeit docs.glob(m)
# 488 ms ± 3.05 ms per loop (mean ± std. dev. of 7 runs, 1 loop each)

%timeit docs.glob(m)
# 9.37 ms ± 90.9 µs per loop (mean ± std. dev. of 7 runs, 100 loops each)
I’m impressed by minijinja [1] from mitsuhiko [2].
MiniJinja is a powerful but minimal dependency template engine for Rust compatible with Jinja/Jinja2
References:
[1]: https://github.com/mitsuhiko/minijinja
[2]: https://github.com/mitsuhiko
I’m really excited about gpt-engineer [1], an amazing project by AntonOsika [2]. It’s worth exploring!
Platform to experiment with the AI Software Engineer. Terminal based. NOTE: Very different from https://gptengineer.app
References:
[1]: https://github.com/AntonOsika/gpt-engineer
[2]: https://github.com/AntonOsika
I like s0md3v’s [1] project roop [2].
one-click face swap
References:
[1]: https://github.com/s0md3v
[2]: https://github.com/s0md3v/roop
tidwall [1] has done a fantastic job with jj [2]. Highly recommend taking a look.
JSON Stream Editor (command line utility)
References:
[1]: https://github.com/tidwall
[2]: https://github.com/tidwall/jj
I recently discovered elia [1] by darrenburns [2], and it’s truly impressive.
A snappy, keyboard-centric terminal user interface for interacting with large language models. Chat with ChatGPT, Claude, Llama 3, Phi 3, Mistral, Gemma and more.
References:
[1]: https://github.com/darrenburns/elia
[2]: https://github.com/darrenburns
The work on cal.com [1] by calcom [2].
Scheduling infrastructure for absolutely everyone.
References:
[1]: https://github.com/calcom/cal.com
[2]: https://github.com/calcom
AUR.">paru is an aur helper that allows you to use a package manager to install packages from the aur.
What’s the Aur #
The Aur is a set of community managed packages that can be installed on arch based distros.
Why a helper? #
paru just makes it easy, no clone and run makepkg. You can do everything paru can do using the built in pacman installer.
Manual Install from the Aur #
You will need to manually instal pacman from the aur in order to get started.
sudo pacman -S --needed base-devel
git clone https://aur.archlinux.org/paru.git
cd paru
makepkg -si
Installing packages with paru #
Once setup you are ready to install packages from the AUR just like the core repos.
# you can update your system using paru
paru -Syu

# you can install packages from the AUR
paru -S tailscale
paru -S prismlauncher

# even core repo packages can be installed
paru -S docker
Paru in Docker #
Here is a snippet from my devtainer dockerfile. Where I use paru to install packages from the AUR inside of a dockerfile.
FROM archlinux

RUN echo '[multilib]' >> /etc/pacman.conf && \
    echo 'Include = /etc/pacman.d/mirrorlist' >> /etc/pacman.conf && \
    pacman --noconfirm -Syyu && \
    pacman --noconfirm -S base-devel git && \
    groupadd --gid 1000 devtainer && \
    useradd --uid 1000 --gid 1000 -m -r -s /bin/bash devtainer && \
    passwd -d devtainer && \
    echo 'devtainer ALL=(ALL) ALL' > /etc/sudoers.d/devtainer && \
    mkdir -p /home/devtainer/.gnupg && \
    echo 'standard-resolver' > /home/devtainer/.gnupg/dirmngr.conf && \
    chown -R devtainer:devtainer /home/devtainer && \
    mkdir /build && \
    chown -R devtainer:devtainer /build && \
    cd /build && \
    sudo -u devtainer git clone --depth 1 https://aur.archlinux.org/paru.git && \
    cd paru && \
    sudo -u devtainer makepkg --noconfirm -si && \
    sed -i 's/#RemoveMake/RemoveMake/g' /etc/paru.conf && \
    pacman -Qtdq | xargs -r pacman --noconfirm -Rcns && \
    rm -rf /home/devtainer/.cache && \
    rm -rf /build

USER devtainer
RUN sudo -u devtainer paru --noconfirm --skipreview --useask -S \
    bat \
    cargo \
    direnv \
    dua-cli \
    dust \
    fd
Final Thoughts #
There are other options out there, paru seemed to be the most supported at the time I started using arch and there has been no other reason for me to change it. It’s treated me well for nearly a year now.
I took a break
Life comes in waves, and sometimes you need to set down some of your projects to
focus on others. For the first part of 2023 I’ve really had a lot of family
stuff to focus on, we also are pretty new homeowners and are still trying to
get our new to us house cleaned up and modernized.
Side Projects # [1]
You can see in my growing list of
repos [2] that I have poked
around on quite a few side projects over the past few months. This has been
quite relaxng to me, mostly things that I use to learn from, but also a
lot that are tools and things I use that bring me joy.
Pydantic # [3]
I haven’t wrote about it at all yet, but I have really been starting to lean
into pydantic on all of these side projects. I have really been enjoying the
type system. A good friend @pypeaday [4] got me
hooked and we have been throwing around this phrase that he learned from a math
professor “Make it So”. The idea boils down to leveraging pydantic to
make all the values you want to exist up front, or fail ...
The work on hardtime.nvim [1] by m4xshen [2].
Establish good command workflow and quit bad habit
References:
[1]: https://github.com/m4xshen/hardtime.nvim
[2]: https://github.com/m4xshen
I’m impressed by trogon [1] from Textualize [2].
Easily turn your Click CLI into a powerful terminal application
References:
[1]: https://github.com/Textualize/trogon
[2]: https://github.com/Textualize
I’m impressed by swenv.nvim [1] from AckslD [2].
Tiny plugin to quickly switch python virtual environments from within neovim without restarting.
References:
[1]: https://github.com/AckslD/swenv.nvim
[2]: https://github.com/AckslD
Playing Star Wars Text Adventure with a 10 yr old
article.blog-post {
max-width: 1200px;
}
The following is a playthrough of Star Wars Text Adventure with a 10 yr old.The
following is a playthrough of StarThe following is a playthrough of Star
❯ sw-adventure game run
[05/15/23 18:47:42] INFO marvin.marvin: Using OpenAI model "gpt-3.5-turbo" logging.py:50
18:47:42.699 | INFO | marvin.marvin - [default on default]Using OpenAI model "gpt-3.5-turbo"[/]
[18:47:42] Starting game game.py:30
generating your character
╭─ Zorin Kreez's Mission Card ─────────────────────────────────────────────────────────────────────────────────────╮
│ Zorin Kreez │ Zorin Kreez was born on Tatooine and grew up in a small farming community. He │
│ health │ 100 │ always dreamed of adventure and excitement. As soon as he was old enough, he │
│ imperial credits │ 5000 │ joined the Imperial Navy and quickly rose through the ranks. He is now a skilled │
│ fuel level │ 100 │ pilot and loyal member of the Empire. │
│ │ │
│ Imperial │ A nimble and deadly starfight...
I’m really excited about pylyzer [1], an amazing project by mtshiba [2]. It’s worth exploring!
A fast, feature-rich static code analyzer & language server for Python
References:
[1]: https://github.com/mtshiba/pylyzer
[2]: https://github.com/mtshiba
Pydantic and singledispatch
I was reading about
pydantic-singledispatch [1]
from Giddeon’s blog and found it very intersting. I’m getting ready to
implement pydantic on my static site generator markata [2],
and I think there are so uses for this idea, so I want to try it out.
The Idea # [3]
Let’s set up some pydantic settings. We will need separate Models for each
environment that we want to support for this to work. The whole idea is to use
functools.singledispatch and type hints to provide unique execution for each
environment. We might want something like a path_prefix in prod for
environments like GithubPages that deploy to /<name-of-repo> while keeping
the root at / in dev.
Settings Model # [4]
Here is our model for our settings. We will create a CommonSettings model
that will be used by all environments. We will also create a DevSettings
model that will be used in dev and ProdSettings that will be used in prod.
We will use env as the discriminator so pydantic knows which model to use.
from typing im...
I’m impressed by pandas-ai [1] from sinaptik-ai [2].
Chat with your database or your datalake (SQL, CSV, parquet). PandasAI makes data analysis conversational using LLMs and RAG.
References:
[1]: https://github.com/sinaptik-ai/pandas-ai
[2]: https://github.com/sinaptik-ai
If you’re into interesting projects, don’t miss out on frogmouth [1], created by Textualize [2].
A Markdown browser for your terminal
References:
[1]: https://github.com/Textualize/frogmouth
[2]: https://github.com/Textualize
Check out forge [1] by dfee [2]. It’s a well-crafted project with great potential.
forge (python signatures) for fun and profit
References:
[1]: https://github.com/dfee/forge
[2]: https://github.com/dfee
I like Slackadays’s [1] project Clipboard [2].
😎🏖️🐬 Your new, 𝙧𝙞𝙙𝙤𝙣𝙠𝙪𝙡𝙞𝙘𝙞𝙤𝙪𝙨𝙡𝙮 smart clipboard manager
References:
[1]: https://github.com/Slackadays
[2]: https://github.com/Slackadays/Clipboard
I like madox2’s [1] project vim-ai [2].
AI-powered code assistant for Vim. OpenAI and ChatGPT plugin for Vim and Neovim.
References:
[1]: https://github.com/madox2
[2]: https://github.com/madox2/vim-ai
tabby [1] by TabbyML [2] is a game-changer in its space. Excited to see how it evolves.
Self-hosted [3] AI coding assistant
References:
[1]: https://github.com/TabbyML/tabby
[2]: https://github.com/TabbyML
[3]: /self-host/
If you’re into interesting projects, don’t miss out on wolverine [1], created by biobootloader [2].
No description available.
References:
[1]: https://github.com/biobootloader/wolverine
[2]: https://github.com/biobootloader
I’m impressed by chroma [1] from chroma-core [2].
the AI-native open-source embedding database
References:
[1]: https://github.com/chroma-core/chroma
[2]: https://github.com/chroma-core
Looking for inspiration? langchain [1] by langchain-ai [2].
🦜🔗 Build context-aware reasoning applications
References:
[1]: https://github.com/langchain-ai/langchain
[2]: https://github.com/langchain-ai
Check out lm-sys [1] and their project FastChat [2].
An open platform for training, serving, and evaluating large language models. Release repo for Vicuna and Chatbot Arena.
References:
[1]: https://github.com/lm-sys
[2]: https://github.com/lm-sys/FastChat
I came across hatch-aws [1] from trash-panda-v91-beta [2], and it’s packed with great features and ideas.
Hatch plugin for building AWS Lambda functions with SAM
References:
[1]: https://github.com/trash-panda-v91-beta/hatch-aws
[2]: https://github.com/trash-panda-v91-beta
I’m impressed by hatch-aws [1] from aka-raccoon [2].
Hatch plugin for building AWS Lambda functions with SAM
References:
[1]: https://github.com/aka-raccoon/hatch-aws
[2]: https://github.com/aka-raccoon
Looking for inspiration? hatch-jupyter-builder [1] by jupyterlab [2].
A hatch plugin to help build Jupyter packages
References:
[1]: https://github.com/jupyterlab/hatch-jupyter-builder
[2]: https://github.com/jupyterlab
Check out topiary [1] by tweag [2]. It’s a well-crafted project with great potential.
No description available.
References:
[1]: https://github.com/tweag/topiary
[2]: https://github.com/tweag
Check out topiary [1] by topiary [2]. It’s a well-crafted project with great potential.
No description available.
References:
[1]: https://github.com/topiary/topiary
[2]: https://github.com/topiary
nvim-FeMaco.lua [1] by AckslD [2] is a game-changer in its space. Excited to see how it evolves.
Catalyze your Fenced Markdown Code-block editing!
References:
[1]: https://github.com/AckslD/nvim-FeMaco.lua
[2]: https://github.com/AckslD
Check out whisper.cpp [1] by ggml-org [2]. It’s a well-crafted project with great potential.
Port of OpenAI’s Whisper model in C/C++
References:
[1]: https://github.com/ggml-org/whisper.cpp
[2]: https://github.com/ggml-org
I’m impressed by whisper.cpp [1] from ggerganov [2].
Port of OpenAI’s Whisper model in C/C++
References:
[1]: https://github.com/ggerganov/whisper.cpp
[2]: https://github.com/ggerganov
Check out fabulously-optimized [1] by Fabulously-Optimized [2]. It’s a well-crafted project with great potential.
A simple Minecraft modpack focusing on performance and graphics enhancements.
References:
[1]: https://github.com/Fabulously-Optimized/fabulously-optimized
[2]: https://github.com/Fabulously-Optimized
reeses-sodium-options [1] by FlashyReese [2] is a game-changer in its space. Excited to see how it evolves.
Replaces Sodium’s Options Screen
References:
[1]: https://github.com/FlashyReese/reeses-sodium-options
[2]: https://github.com/FlashyReese
Looking for inspiration? chatgpt_commit_message_hook [1] by tom-doerr [2].
Enhance your git [3] workflow using AI-generated commit messages from ChatGPT. Seamless integration for a well-documented commit log.
References:
[1]: https://github.com/tom-doerr/chatgpt_commit_message_hook
[2]: https://github.com/tom-doerr
[3]: /glossary/git/
The work on LazyVim [1] by LazyVim [2].
Neovim config for the lazy
References:
[1]: https://github.com/LazyVim/LazyVim
[2]: https://github.com/LazyVim
If you’re into interesting projects, don’t miss out on oxen-release [1], created by Oxen-AI [2].
Lightning fast data version control system for structured and unstructured machine learning datasets. We aim to make versioning datasets as easy as versioning code.
References:
[1]: https://github.com/Oxen-AI/oxen-release
[2]: https://github.com/Oxen-AI
Oxen [1] by Oxen-AI [2] is a game-changer in its space. Excited to see how it evolves.
Lightning fast data version control system for structured and unstructured machine learning datasets. We aim to make versioning datasets as easy as versioning code.
References:
[1]: https://github.com/Oxen-AI/Oxen
[2]: https://github.com/Oxen-AI
Check out Kanaries [1] and their project pygwalker [2].
PyGWalker: Turn your pandas dataframe into an interactive UI for visual analysis
References:
[1]: https://github.com/Kanaries
[2]: https://github.com/Kanaries/pygwalker
Check out Kanaries [1] and their project graphic-walker [2].
An open source alternative to Tableau. Embeddable visual analytic
References:
[1]: https://github.com/Kanaries
[2]: https://github.com/Kanaries/graphic-walker
The work on kedro-light [1] by ellwise [2].
No description available.
References:
[1]: https://github.com/ellwise/kedro-light
[2]: https://github.com/ellwise
flake8-eradicate [1] by wemake-services [2] is a game-changer in its space. Excited to see how it evolves.
Flake8 plugin to find commented out or dead code
References:
[1]: https://github.com/wemake-services/flake8-eradicate
[2]: https://github.com/wemake-services
tamton-aquib [1] has done a fantastic job with flirt.nvim [2]. Highly recommend taking a look.
A neovim plugin to work with floating windows.
References:
[1]: https://github.com/tamton-aquib
[2]: https://github.com/tamton-aquib/flirt.nvim
I like mrparoxysms’s [1] project my-blog [2].
No description available.
References:
[1]: https://github.com/mrparoxysms
[2]: https://github.com/mrparoxysms/my-blog
I recently discovered coreutils [1] by uutils [2], and it’s truly impressive.
Cross-platform Rust rewrite of the GNU coreutils
References:
[1]: https://github.com/uutils/coreutils
[2]: https://github.com/uutils
The work on pytest [1] by pytest-dev [2].
The pytest framework makes it easy to write small tests, yet scales to support complex functional testing
References:
[1]: https://github.com/pytest-dev/pytest
[2]: https://github.com/pytest-dev
Looking for inspiration? projections.nvim [1] by GnikDroy [2].
A map to your filesystem
References:
[1]: https://github.com/GnikDroy/projections.nvim
[2]: https://github.com/GnikDroy
I came across reflex [1] from reflex-dev [2], and it’s packed with great features and ideas.
🕸️ Web apps in pure Python 🐍
References:
[1]: https://github.com/reflex-dev/reflex
[2]: https://github.com/reflex-dev
pypa [1] has done a fantastic job with bandersnatch [2]. Highly recommend taking a look.
A PyPI mirror client according to PEP 381 http://www.python.org/dev/peps/pep-0381/
References:
[1]: https://github.com/pypa
[2]: https://github.com/pypa/bandersnatch
If you’re into interesting projects, don’t miss out on hatch [1], created by pypa [2].
Modern, extensible Python project management
References:
[1]: https://github.com/pypa/hatch
[2]: https://github.com/pypa
Check out Bowler [1] by facebookincubator [2]. It’s a well-crafted project with great potential.
Safe code refactoring for modern Python.
References:
[1]: https://github.com/facebookincubator/Bowler
[2]: https://github.com/facebookincubator
Check out WaylonWalker [1] and their project lockhart [2].
Lockhart is an AI-powered Python library that generates elegant and efficient code, much like the charming and deceiving wizard Gilderoy Lockhart. It allows developers to effortlessly create impressive code and deceive others with their skills, just as Gilderoy Lockhart deceives others with his charm and wizardry.
References:
[1]: https://github.com/WaylonWalker
[2]: https://github.com/WaylonWalker/lockhart
Check out openai-chatgpt [1] by gmpetrov [2]. It’s a well-crafted project with great potential.
🤖 Use ChatGPT from the terminal
References:
[1]: https://github.com/gmpetrov/openai-chatgpt
[2]: https://github.com/gmpetrov
The work on ruff [1] by astral-sh [2].
An extremely fast Python linter and code formatter, written in Rust.
References:
[1]: https://github.com/astral-sh/ruff
[2]: https://github.com/astral-sh
I came across nanoGPT [1] from karpathy [2], and it’s packed with great features and ideas.
The simplest, fastest repository for training/finetuning medium-sized GPTs.
References:
[1]: https://github.com/karpathy/nanoGPT
[2]: https://github.com/karpathy
Looking for inspiration? carbonyl [1] by fathyb [2].
Chromium running inside your terminal
References:
[1]: https://github.com/fathyb/carbonyl
[2]: https://github.com/fathyb
If you’re into interesting projects, don’t miss out on RecoverPy [1], created by PabloLec [2].
Interactively find and recover deleted or 👉 overwritten 👈 files from your terminal
References:
[1]: https://github.com/PabloLec/RecoverPy
[2]: https://github.com/PabloLec
I’m impressed by pyte [1] from selectel [2].
Simple VTXXX-compatible linux terminal emulator
References:
[1]: https://github.com/selectel/pyte
[2]: https://github.com/selectel
Check out mitosch [1] and their project textual-terminal [2].
A terminal emulator widget for Textual.
References:
[1]: https://github.com/mitosch
[2]: https://github.com/mitosch/textual-terminal
Just starred typescope [1] by pedrovhb [2]. It’s an exciting project with a lot to offer.
A nicer terminal view for your Python type analysis needs.
References:
[1]: https://github.com/pedrovhb/typescope
[2]: https://github.com/pedrovhb
I came across textual-autocomplete [1] from darrenburns [2], and it’s packed with great features and ideas.
Easily add autocomplete dropdowns to your Textual apps
References:
[1]: https://github.com/darrenburns/textual-autocomplete
[2]: https://github.com/darrenburns
If you’re into interesting projects, don’t miss out on syrupy [1], created by syrupy-project [2].
🥞 The sweeter pytest snapshot plugin
References:
[1]: https://github.com/syrupy-project/syrupy
[2]: https://github.com/syrupy-project
Check out git-sim [1] by initialcommit-com [2]. It’s a well-crafted project with great potential.
Visually simulate Git [3] operations in your own repos with a single terminal command.
References:
[1]: https://github.com/initialcommit-com/git-sim
[2]: https://github.com/initialcommit-com
[3]: /glossary/git/
Quickly and easily create new versions of your Python package with the gh release
command. Get the version number, changelog, and
Releasing a new version of your Python package can be a daunting task. You need to make
sure that all the necessary files are included, and that the version number is correct.
But now, with the help of the gh release command, you can make the process much
smoother.
The gh release command allows you to quickly and easily create a new version of your
Python package. All you need to do is provide the version number, the changelog, and the
distribution files. For example, if you wanted to create a new version of your package
with the version number v1.2.3, you could use the following command:
gh release create v1.2.3 -F CHANGELOG.md dist/*.whl dist/*.tar.gz
This command will create a new version of your package with the specified version number, and include the changelog and the distribution files. It’s a great way to make sure that all the necessary files are included in the release, and that the version number is correct.
The gh release command is a great tool for quickly and easily creating new versions of
your Python package. With just a few simple commands, you can make sure that all the
necessary files are included, and that the version number is correct. So if you’re looking
for an easy way to release a new version of your Python package, give the gh release
command a try.
Fix Arch Linux randomly rejecting passwords with one command. Try ‘faillock –user $USER’ to reset login counter and regain access. Quick solution for a smooth computing"

If you’re an Arch Linux user, you may have experienced a frustrating issue where your password is randomly not being accepted by the system. This can be a major inconvenience and can cause a lot of frustration, especially if it happens frequently.
The good news is that there is a simple fix for this issue. The following bash code can be used to fix the problem:
bash faillock --user $USER
This command is used to reset the failed login count for the current user. By running this command, you will be able to reset the system’s login counter and regain access to your account.
It’s important to note that this command should only be used as a temporary solution. If you find yourself frequently having to run this command, it’s likely that there is a deeper issue with your system that needs to be addressed.
In any case, if you’re experiencing problems with your Arch Linux system not accepting your password, give the above command a try and see if it resolves the issue for you.
I like darrenburns’s [1] project rich-pixels [2].
A Rich-compatible library for writing pixel images and ASCII art to the terminal.
References:
[1]: https://github.com/darrenburns
[2]: https://github.com/darrenburns/rich-pixels
I recently discovered eradicate [1] by PyCQA [2], and it’s truly impressive.
Removes commented-out code from Python files
References:
[1]: https://github.com/PyCQA/eradicate
[2]: https://github.com/PyCQA
I came across mason-nvim-dap.nvim [1] from jay-babu [2], and it’s packed with great features and ideas.
No description available.
References:
[1]: https://github.com/jay-babu/mason-nvim-dap.nvim
[2]: https://github.com/jay-babu
pypa [1] has done a fantastic job with pipx [2]. Highly recommend taking a look.
Install and Run Python Applications in Isolated Environments
References:
[1]: https://github.com/pypa
[2]: https://github.com/pypa/pipx
I like sickcodes’s [1] project Docker-OSX [2].
Run macOS VM in a Docker! Run near native OSX-KVM in Docker! X11 Forwarding! CI/CD for OS X Security Research! Docker mac Containers.
References:
[1]: https://github.com/sickcodes
[2]: https://github.com/sickcodes/Docker-OSX
I’m impressed by memray [1] from bloomberg [2].
Memray is a memory profiler for Python
References:
[1]: https://github.com/bloomberg/memray
[2]: https://github.com/bloomberg
I like artempyanykh’s [1] project marksman [2].
Write Markdown with code assist and intelligence in the comfort of your favourite editor.
References:
[1]: https://github.com/artempyanykh
[2]: https://github.com/artempyanykh/marksman
Check out cog [1] by nedbat [2]. It’s a well-crafted project with great potential.
Small bits of Python computation for static files
References:
[1]: https://github.com/nedbat/cog
[2]: https://github.com/nedbat
If you’re into interesting projects, don’t miss out on hatch-fancy-pypi-readme [1], created by hynek [2].
Fancy PyPI READMEs with Hatch
References:
[1]: https://github.com/hynek/hatch-fancy-pypi-readme
[2]: https://github.com/hynek

I’m really excited about d2 [1], an amazing project by terrastruct [2]. It’s worth exploring!
D2 is a modern diagram scripting language that turns text to diagrams.
References:
[1]: https://github.com/terrastruct/d2
[2]: https://github.com/terrastruct
I came across neogen [1] from danymat [2], and it’s packed with great features and ideas.
A better annotation generator. Supports multiple languages and annotation conventions.
References:
[1]: https://github.com/danymat/neogen
[2]: https://github.com/danymat
Looking for inspiration? kickstart.nvim [1] by nvim-lua [2].
A launch point for your personal nvim configuration
References:
[1]: https://github.com/nvim-lua/kickstart.nvim
[2]: https://github.com/nvim-lua
Check out init.lua [1] by ThePrimeagen [2]. It’s a well-crafted project with great potential.
No description available.
References:
[1]: https://github.com/ThePrimeagen/init.lua
[2]: https://github.com/ThePrimeagen
I’m really excited about mason.nvim [1], an amazing project by williamboman [2]. It’s worth exploring!
Portable package manager for Neovim that runs everywhere Neovim runs. Easily install and manage LSP servers, DAP servers, linters, and formatters.
References:
[1]: https://github.com/williamboman/mason.nvim
[2]: https://github.com/williamboman
I came across mason.nvim [1] from mason-org [2], and it’s packed with great features and ideas.
Portable package manager for Neovim that runs everywhere Neovim runs. Easily install and manage LSP servers, DAP servers, linters, and formatters.
References:
[1]: https://github.com/mason-org/mason.nvim
[2]: https://github.com/mason-org





I like sbidoul’s [1] project hatch-pip-deepfreeze [2].
A hatch virtual environment [3] plugin to lock dependencies with pip-deepfreeze
References:
[1]: https://github.com/sbidoul
[2]: https://github.com/sbidoul/hatch-pip-deepfreeze
[3]: /virtual-environment/






yazgoo [1] has done a fantastic job with vmux [2]. Highly recommend taking a look.
helper for multiplexing terminals with vim/neovim
References:
[1]: https://github.com/yazgoo
[2]: https://github.com/yazgoo/vmux




Give github actions the -e flag in the shebang #! so they fail on any one
command failure. Otherwise each line will set the exit status, but only the
last one will be passed to ci.
#!/bin/bash -e
What is -e #
The -e flag to the bash command allows your script to exit immediately if any command within the script returns a non-zero exit status. This can be useful for ensuring that your script exits with an error if any of the commands it runs fail, which can help you identify and debug issues in your script. For example, if you have a script that runs several commands and one of those commands fails, the script will continue running without the -e flag, but will exit immediately if the -e flag is present. This can make it easier to troubleshoot your script and ensure that it runs correctly.
Solution for Windows #
In windows the solution is not quite as simple. You can define a function in a Windows batch script that wraps an if statement to check the exit status of a command and handle any errors that may have occurred. Here is an example of how you might define a function called “check_error” that does this:
:check_error
if errorlevel 1 (
  echo An error occurred!
  exit /b 1
)
To use this function in your script, you would simply call it after running a command, like this:
some_command
call :check_error
This would run the “some_command” and then call the “check_error” function to check the exit status and handle any errors that may have occurred. This approach allows you to reuse the error-checking logic in your script, which can make it easier to write and maintain.

minecraft documentary
This is my first time journaling a Minecraft hardcore world, my son Wyatt is
also documenting his journey in a survival world on
wyattbubbylee.com [1].
Day 0 # [2]
init
[3]
I logged into a brand new hardcore world. I was welcomed by a great Acacia
biome spawn full of resources. I quickly cut my first tree, crafted an axe and
set out to find my first sheep. I was able to find enough sheep for a bed,
several cows and pigs.
I crafted a set of wooden tools, and farmed out a wheat farm till my wooden
hoed died at the shore of a nearby stream. I found a small stone outcropping
in the side of a hill and harvested nearly a full stack of cobblestone from my
first wooden pick.
I ended the first day by sleeping in my bed safe from mobs.
Achievements # [4]
- bed
- furnace
- stone
- wheat farm
Day 1 # [5]
[6]
Thoughout the course of day one I collected wood and started the framework for
my new house.
Day 2 # [7]
[8]
The sun sets over the new frame of my house on Day 1
Day two...
Looking for inspiration? sshfs [1] by libfuse [2].
A network filesystem client to connect to SSH servers
References:
[1]: https://github.com/libfuse/sshfs
[2]: https://github.com/libfuse
I recently setup some vm’s on my main machine and got sick of signing in with passwords.
ssh-keygen
ssh-copy-id -i ~/.ssh/id_rsa.pub virt
Moving panes between tmux sessions is something that makes tmux a very flexible and powerful tool. I don’t need this feature very often, but it comes in clutch when you need it.
Pull a pane from any other session #
Using choose-window I was able to come up with a way to select any pane
withing any other session and join it into my current session.
# Choose a pane to join in horizontally
bind f choose-window -Z 'join-pane -h -s "%%"'
Push/Pull from scratch #
I’ve long had this one in my tmux config, I always have a “scratch” session
that I’m running, I often use for looking at things like k9s accross repos
within a popup.
This use case puts a pane into the scratch session, then pulls it back out. I will use this to move a pane between sessions in the rare cases I need to do this.
# push the active pane into the scratch session horizonally
bind -n M-f join-pane -ht scratch
# pull the last active pane from the scratch session horizonally into this session
bind -n M-F join-pane -hs scratch
joehillen [1] has done a fantastic job with sysz [2]. Highly recommend taking a look.
An fzf terminal UI for systemctl
References:
[1]: https://github.com/joehillen
[2]: https://github.com/joehillen/sysz
I like eth-p’s [1] project bat-extras [2].
Bash scripts that integrate bat with various command line tools.
References:
[1]: https://github.com/eth-p
[2]: https://github.com/eth-p/bat-extras
Just starred clipmenu [1] by cdown [2]. It’s an exciting project with a lot to offer.
Clipboard management using dmenu
References:
[1]: https://github.com/cdown/clipmenu
[2]: https://github.com/cdown
I’m impressed by neix [1] from qw3rtty [2].
neix - a RSS/Atom feed reader for your terminal.
References:
[1]: https://github.com/qw3rtty/neix
[2]: https://github.com/qw3rtty
rwhitt2049 [1] has done a fantastic job with df-viewer-poc [2]. Highly recommend taking a look.
No description available.
References:
[1]: https://github.com/rwhitt2049
[2]: https://github.com/rwhitt2049/df-viewer-poc
The work on ansible-vault-pre-commit [1] by pypeaday [2].
pre-commit hook to ensure sensitive info in a repo is encrypted with ansible-vault
References:
[1]: https://github.com/pypeaday/ansible-vault-pre-commit
[2]: https://github.com/pypeaday
The work on PySnooper [1] by cool-RR [2].
Never use print for debugging again
References:
[1]: https://github.com/cool-RR/PySnooper
[2]: https://github.com/cool-RR
I just shared some ssh keys with myself and ran into this error telling me that I did not set the correct permissions on my key.
@@@@@@@@@@@@@@@@@@@@@@@@@@@@@@@@@@@@@@@@@@@@@@@@@@@@@@@@@@@
@ WARNING: UNPROTECTED PRIVATE KEY FILE! @
@@@@@@@@@@@@@@@@@@@@@@@@@@@@@@@@@@@@@@@@@@@@@@@@@@@@@@@@@@@
Permissions 0750 for '/home/waylon/.ssh/id_*******' are too open.
It is required that your private key files are NOT accessible by others.
This private key will be ignored.
Load key "/home/waylon/.ssh/id_*******": bad Permissions
repo: Permission denied (publickey,gssapi-keyex,gssapi-with-mic).
fatal: Could not read from remote repository.
Please make sure you have the correct access rights
and the repository exists.
I changed them with the following commands.
chmod 644 ~/.ssh/id_*******.pub
chmod 600 ~/.ssh/id_*******
Mr-Destructive [1] has done a fantastic job with djankata [2]. Highly recommend taking a look.
Django + Markata blog starter
References:
[1]: https://github.com/Mr-Destructive
[2]: https://github.com/Mr-Destructive/djankata
Check out nvim [1] by Allaman [2]. It’s a well-crafted project with great potential.
Minimal, blazingly fast, and pure Lua based Neovim configuration for my work as DevOps/Cloud Engineer with batteries included for Python, Golang, and, of course, YAML
References:
[1]: https://github.com/Allaman/nvim
[2]: https://github.com/Allaman
Looking for inspiration? dotfiles [1] by jessarcher [2].
$HOME sweet $HOME
References:
[1]: https://github.com/jessarcher/dotfiles
[2]: https://github.com/jessarcher
With the latest release of version of nvim 0.8.0 we get access to a new winbar feature. One thing I have long wanted somewhere in my nvim is navigation for pairing partners or anyone watching can keep track of where I am. As the driver it’s easy to keep track of the file/function you are in. But when you make big jumps in a few keystrokes it can be quite disorienting to anyone watching, and having this feedback to look at is very helpful.

winbar #
nvim exposes the winbar api in lua, and you can send any text to the winbar as follows.
vim.o.winbar = "here"
You can try it for yourself right from the nvim command line.
:lua vim.o.winbar = "here"
Now you will notice one line above your file with the word here at the very
beginning.
Clearing the winbar #
If you want to clear it out, you can just set it to an empty string or nil.
:lua vim.o.winbar = ""
:lua vim.o.winbar = nil
Setting up nvim-navic #
You will need to install nvim-navic if you want to use it. I added it to my
plugins using Plug as follows.
call plug#begin('~/.local/share/nvim/plugged')
Plug 'SmiteshP/nvim-navic'
call plug#end()
Note!
nvim-navicdoes require the use of the nvim lsp, so if you are not using it then maybe this won’t work for you.
I created an on_attach function long ago, cause that’s what Teej told me to
do. Now I am glad I did, because it made this change super easy.
local function on_attach(client, bufnr)
if client.server_capabilities.documentSymbolProvider then
navic.attach(client, bufnr)
end
end
Then you need to use that on_attach function on all of the lsp’s that you
want navic to work on.
Then in a lua file you need to setup the winbar, for now I put this in my lsp-config settings file, but eventually I want to move my settings to lua and put it there.
vim.o.winbar = " %{%v:lua.vim.fn.expand('%F')%} %{%v:lua.require'nvim-navic'.get_location()%}"
What my winbar looks like #
What I have right now is everything someone who is watching would need to know to navigate to the same place that I am in the project.
waylonwalker/app.py Link > on_click
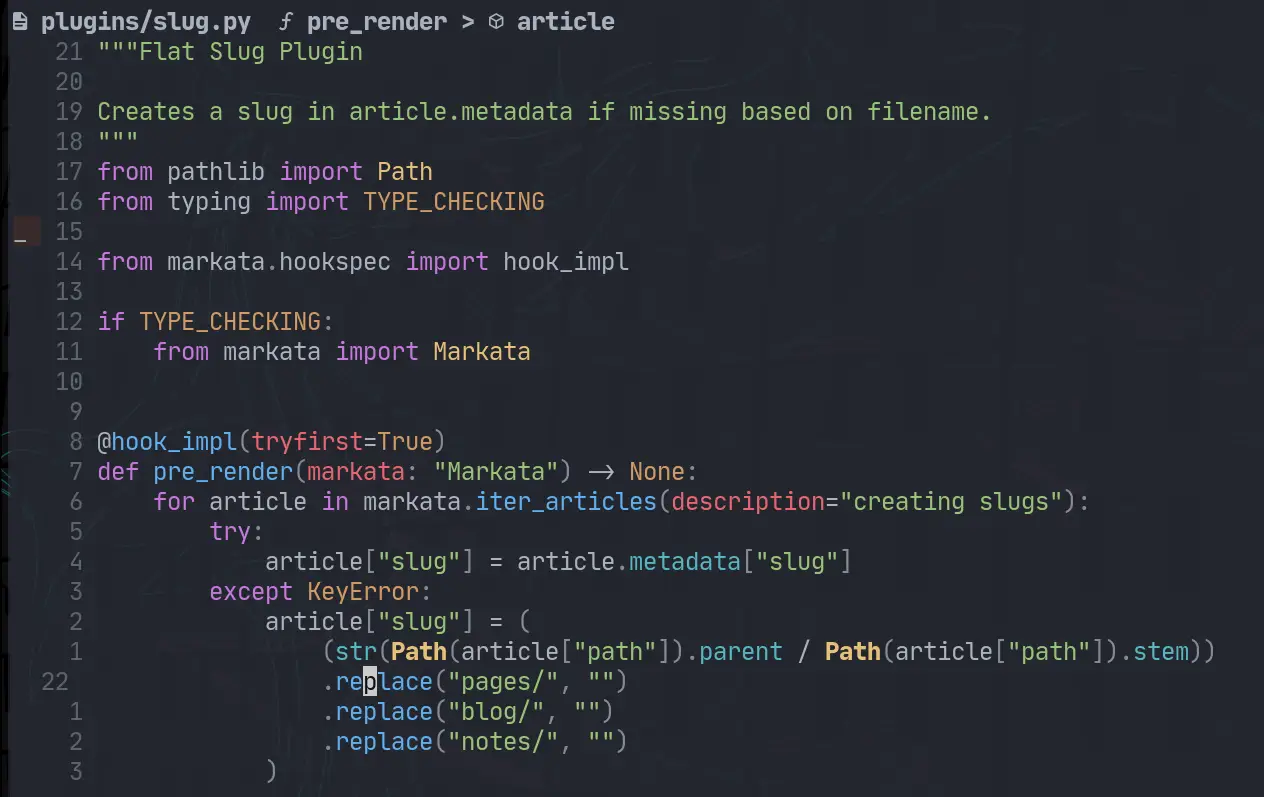
Diff #
Here are the changes that I made to to my plugins list and my lsp-config to get it.
/home/u_walkews/.config/nvim/plugins.vim
call plug#begin('~/.local/share/nvim/plugged')
+Plug 'SmiteshP/nvim-navic'
# /home/u_walkews/.config/nvim/lua/waylonwalker/lsp-config.lua
-local function on_attach() end
+local navic = require("nvim-navic")
+local function on_attach(client, bufnr)
+ if client.server_capabilities.documentSymbolProvider then
+ navic.attach(client, bufnr)
+ end
+end
+
+vim.o.winbar = " %{%v:lua.vim.fn.expand('%F')%} %{%v:lua.require'nvim-navic'.get_location()%}"
GH commit #
If you want to see the change on GitHub, here is the diff
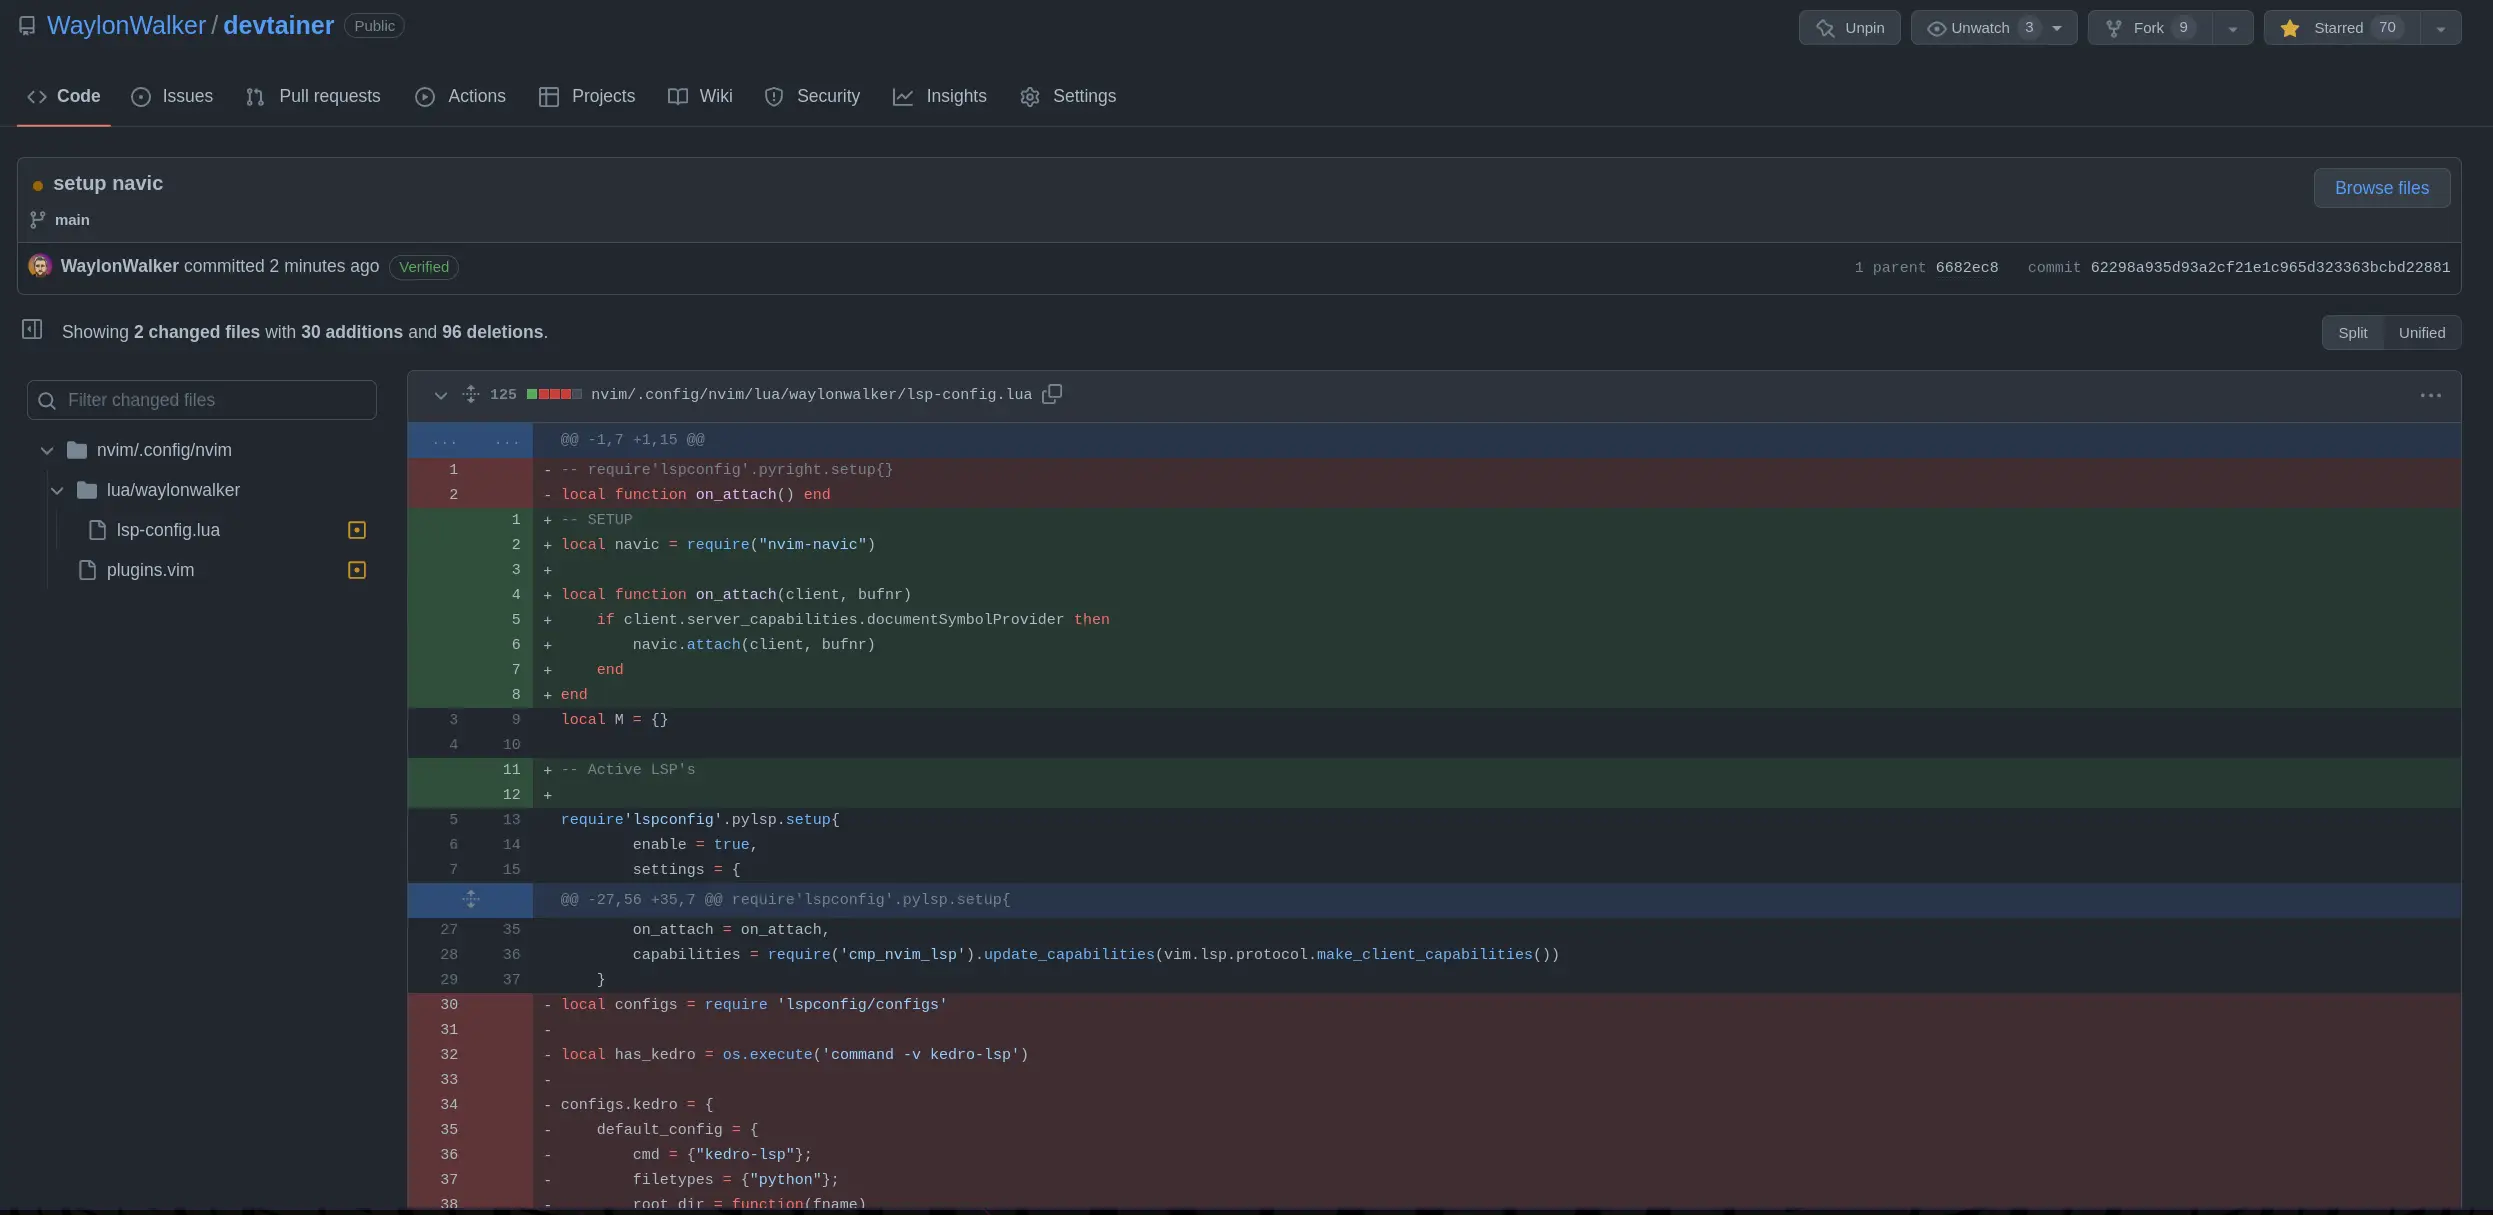
Just starred nvim-navic [1] by SmiteshP [2]. It’s an exciting project with a lot to offer.
Simple winbar/statusline plugin that shows your current code context
References:
[1]: https://github.com/SmiteshP/nvim-navic
[2]: https://github.com/SmiteshP
I came across winbar.nvim [1] from fgheng [2], and it’s packed with great features and ideas.
winbar config for neovim
References:
[1]: https://github.com/fgheng/winbar.nvim
[2]: https://github.com/fgheng
Looking for inspiration? nvim-scrollbar [1] by petertriho [2].
Extensible Neovim Scrollbar
References:
[1]: https://github.com/petertriho/nvim-scrollbar
[2]: https://github.com/petertriho
Looking for inspiration? nvim-hlslens [1] by kevinhwang91 [2].
Hlsearch Lens for Neovim
References:
[1]: https://github.com/kevinhwang91/nvim-hlslens
[2]: https://github.com/kevinhwang91
I came across pre-commit [1] from pre-commit [2], and it’s packed with great features and ideas.
A framework for managing and maintaining multi-language pre-commit hooks.
References:
[1]: https://github.com/pre-commit/pre-commit
[2]: https://github.com/pre-commit
I really like having global cli command installed with pipx. Since textual
0.2.x (the css release) is out I want to be able to pop into textual devtools
easily from anywhere.

Pipx Install #
You can pipx install textual.
pipx install textual
But if you try to run any textual cli commands you will run into a
ModuleNotFoundError, because you need to install the optional dev
dependencies.
Traceback (most recent call last):
File "/home/u_walkews/.local/bin/textual", line 5, in <module>
from textual.cli.cli import run
File "/home/u_walkews/.local/pipx/venvs/textual/lib/python3.10/site-packages/textual/cli/cli.py", line 4, in <module>
import click
ModuleNotFoundError: No module named 'click'
Pipx Inject #
In order to install optional dependencies with pipx you need to first install
the library, then inject in the optional dependencies using the square bracket
syntax.
pipx install textual
pipx inject textual 'textual[dev]'
I am working through the textual tutorial, and I want to put it in a proper cli
that I can pip install and run the command without textual run --dev app.py.
This is a fine pattern, but I also want this to work when I don’t have a file
to run.

pyproject.toml entrypoints #
I set up a new project running hatch new, and added the following entrypoint,
giving me a tutorial cli command to run.
...
[project.scripts]
tutorial = 'textual_tutorial.tui:tui'
https://waylonwalker.com/hatch-new-cli/
setup.py entrypoints #
If you are using setup.py, you can set up entrypoints in the setup command.
from setuptools import setup
setup(
...
entry_points={
"console_scripts": ["tutorial = textual_tutorial.tui:tui"],
},
...
)
https://waylonwalker.com/minimal-python-package/
tui.py #
adding features
Now to get devtools through a cli without running through textual run --dev.
I pulled open the textual cli source code, and this is what it does at the time
of writing.
Note: I used sys.argv as a way to implement a
--devquickly tutorial. For a real project, I’d setup argparse, click, or typer.typeris my go to these days, unless I am really trying to limit dependencies, then the standard libraryargparsemight be what I go with.
def tui():
from textual.features import parse_features
import os
import sys
dev = "--dev" in sys.argv # this works, but putting it behind argparse, click, or typer would be much better
features = set(parse_features(os.environ.get("TEXTUAL", "")))
if dev:
features.add("debug")
features.add("devtools")
os.environ["TEXTUAL"] = ",".join(sorted(features))
app = StopwatchApp()
app.run()
if __name__ == "__main__":
tui()
Other Flags??? #
If you look at the source, there is one other flag for headless mode.
FEATURES: Final = {"devtools", "debug", "headless"}
Run it #
Here it is running with tutorial --dev on the left, and textual console on
the right.
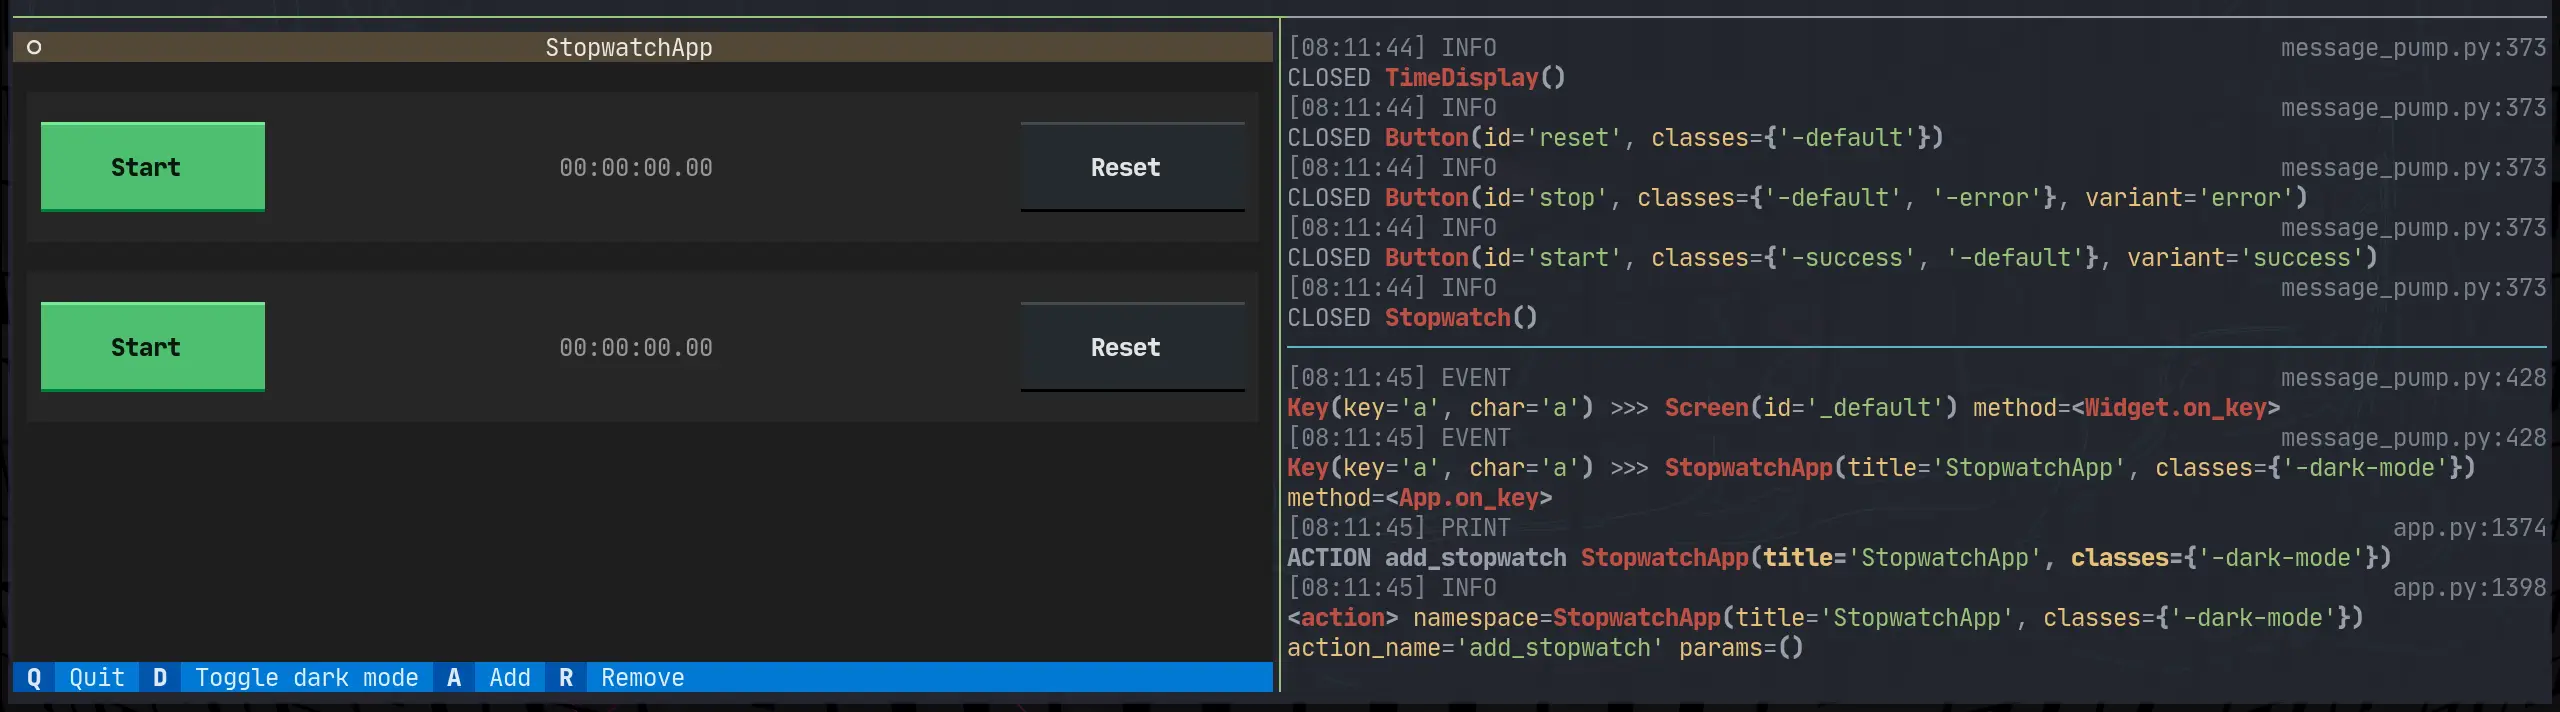
I like AnH0ang’s [1] project kedro-aim [2].
A kedro plugin that enables logging to the ml experiment tracker aim
References:
[1]: https://github.com/AnH0ang
[2]: https://github.com/AnH0ang/kedro-aim
The work on PrismLauncher [1] by PrismLauncher [2].
A custom launcher for Minecraft that allows you to easily manage multiple installations of Minecraft at once (Fork of MultiMC)
References:
[1]: https://github.com/PrismLauncher/PrismLauncher
[2]: https://github.com/PrismLauncher
I’m really excited about learn-cloudformation [1], an amazing project by widdix [2]. It’s worth exploring!
Learn how to use Infrastructure as Code on AWS with the help of CloudFormation.
References:
[1]: https://github.com/widdix/learn-cloudformation
[2]: https://github.com/widdix
For far too long I have had to fidget with v4l2oloopback after reboot. I’ve had this happen on ubuntu 18.04, 22.04, and arch.
After a reboot the start virtual camera button won’t work, It appears and is clickable, but never turns on. Until I run this command.
sudo modprobe v4l2loopback video_nr=10 card_label="OBS Video Source" exclusive_caps=1

Today I learned that you can turn on kernel modules through some files in /etc/modules...
This is what I did to my arch system to get it to work right after boot.
echo "v4l2loopback" | sudo tee /etc/modules-load.d/v4l2loopback.conf
echo "options v4l2loopback video_nr=10 card_label=\"OBS Video Source\" exclusive_caps=1" | sudo tee /etc/modprobe.d/v4l2loopback.conf
I ran into an issue where I was unable to ask localstack for its status. I would run the command and it would tell me that it didn’t have permission to read files from my own home directory. Let’s fix it
The issue #
I would run this to ask for the status.
localstack status
And get this error
PermissionError: [Errno 13] Permission denied: '/home/waylon/.cache/localstack/image_metadata'
What happened #
It dawned on me that the first time I ran localstack was straight docker, not the python cli. When docker runs it typically runs as root unless the Dockerfile sets up a user and group for it.

How to fix it #
If you have sudo access to the machine you are on you can recursively change
ownership to your user and group. I chose to just give myself ownership of my
whole ~/.cache directory you could choose a deeper directory if you want. I
feel pretty safe giving myself ownership to my own cache directory on my own
machine.
whoami
# waylon
chown -R waylon:waylon ~/.cache
Now it’s working #
Running localstack status now gives me a nice status message rather than an error.
❯ localstack status
┌─────────────────┬───────────────────────────────────────────────────────┐
│ Runtime version │ 1.2.1.dev │
│ Docker image │ tag: latest, id: dbbfe0ce0008, 📆 2022-10-15T00:51:03 │
│ Runtime status │ ✖ stopped │
└─────────────────┴───────────────────────────────────────────────────────┘
Markata now allows you to create jinja extensions that will be loaded right in
with nothing more than a pip install.
From the Changelog #
The entry for 0.5.0.dev2 from markata’s changelog
- Created entrypoint hook allowing for users to extend marka with jinja exensions #60 0.5.0.dev2

markata-gh #
The first example that you can use right now is markata-gh. It will render
repos by GitHub topic and user using the gh cli, which is available in github
actions!
Get it with a pip install
pip install markata-gh
Use it with some jinja in your markdown.
## Markata plugins
It uses the logged in uer by default.
{% gh_repo_list_topic "markata" %}
You can more explicitly grab your username, and a topic.
{% gh_repo_list_topic "waylonwalker", "personal-website" %}
How is this achieved #
The jinja extension details are for another post, but this is how markata-gh
exposes itslef as a jinja extension.
class GhRepoListTopic(Extension):
tags = {"gh_repo_list_topic"}
def __init__(self, environment):
super().__init__(environment)
def parse(self, parser):
line_number = next(parser.stream).lineno
try:
args = parser.parse_tuple().items
except AttributeError:
raise AttributeError(
"Invalid Syntax gh_repo_list_topic expects <username>, or <username>,<topic> both must have the comma"
)
return nodes.CallBlock(self.call_method("run", args), [], [], "").set_lineno(
line_number
)
def run(self, username=None, topic=None, caller=None):
"get's markdown to inject into post"
return repo_md(username=username, topic=topic)

Entrypoints #
Then markata-gh exposes itself as an extension through entrypoints.
Creating entrypoints in pyproject.toml #
If your project is using pyproject.toml for packaging you can setup an
entrypoint as follows.
[project.entry-points."markata.jinja_md"]
markta_gh = "markata_gh.repo_list:GhRepoListTopic"
Creating entrypoints in setup.py #
If your project is using setup.py for packaging you can setup an
entrypoint as follows.
setup(
...
entry_points={
"markata.jinja_md": ["markta_gh" = "markata_gh.repo_list:GhRepoListTopic"]
},
...
)

In my adventure to learn django, I want to be able to setup REST api’s to feed into dynamic front end sites. Potentially sites running react under the hood.

Install #
To get started lets open up a todo app that I created with django-admin startproject todo.
pip install djangorestframework
Install APP #
Now we need to declare rest_framwork as an INSTALLED_APP.
INSTALLED_APPS = [
...
"rest_framework",
...
]
create the api app #
Next I will create all the files that I need to get the api running.
mkdir api
touch api/__init__.py api/serializers.py api/urls.py api/views.py

base/models.py #
I already have the following model from last time I was playing with django. It will suffice as it is not the focus of what I am learning for now.
Note the name of the model class is singular, this is becuase django will automatically pluralize it in places like the admin panel, and you would end up with Itemss.
from django.db import models
# Create your models here.
class Item(models.Model):
name = models.CharField(max_length=200)
created = models.DateTimeField(auto_now_add=True)
def __str__(self):
return f"{self.priority} {self.name}"
Next I will make some dummy data to be able to return. I popped open ipython
and made a few records.
from base.models import Item
Item.objects.create(name='first')
Item.objects.create(name='second')
Item.objects.create(name='third')
api/serializers.py #
Next we need to set up a serializer to seriaze and de-serialize data between
our model and json. You can specify each field individually or all of them by
passing in __all__.
from rest_framework import serializers
from base.models import Item
class ItemSerializer(serializers.ModelSerializer):
class Meta:
model = Item
fields = '__all__'
api/views.py #

Now we need a view leveraging the djangorestframework. The serializer we
just created will be used to serialize all of the rows into a list of objects
that Response can handle.
Note: to return a collection of model objects we need to set many to
True
from rest_framework.decorators import api_view
from rest_framework.response import Response
from base.models import Item
from .serializers import ItemSerializer
@api_view(["GET"])
def get_data(request):
items = Item.objects.all()
serializer = ItemSerializer(items, many=True)
return Response(serializer.data)
@api_view(['POST'])
def add_item(request):
serializer = ItemSerializer(data = request.data)
if serializer.is_valid():
serializer.save()
return Response()
api/urls.py #

Now we need to setup routing to access the views through an url.
from django.urls import path
from . import views
urlpatterns = [
path('', views.get_data),
path('add/', views.add_item),
]
todo/urls.py #
Then we need to include these urls from our api in the urls specified by settings.ROOT_URLCONf
from django.urls import path
urlpatterns = [
...
path("api/", include("api.urls")),
]
Run it #
python manage.py runserver
Running the developement server and going to localhost:8000/api we can see
the full list of items in th api.
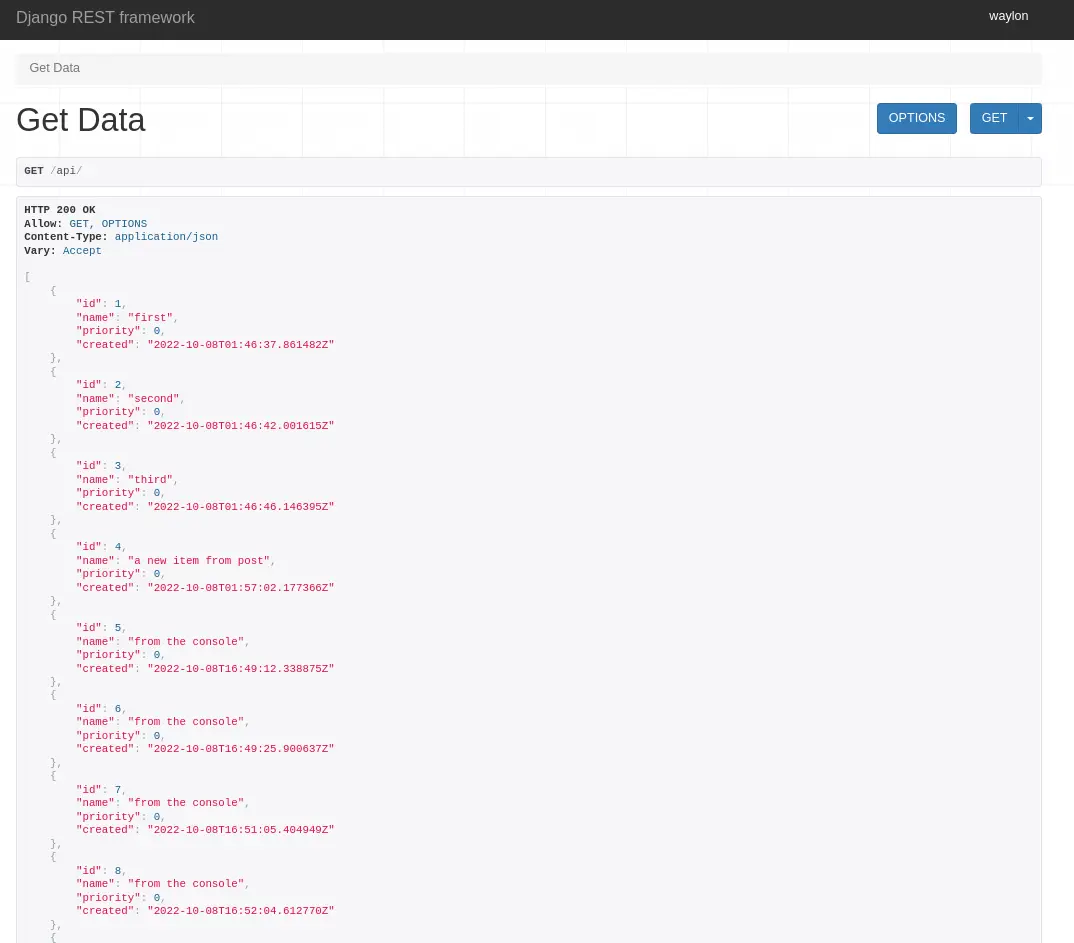
I like openai’s [1] project whisper [2].
Robust Speech Recognition via Large-Scale Weak Supervision
References:
[1]: https://github.com/openai
[2]: https://github.com/openai/whisper
Markata now uses hatch as its build backend, and version bumping tool.
setup.py, and setup.cfg are completely gone.

0.5.0 is big #
Markata 0.5.0 is now out, and it’s huge. Even though it’s the backend of this blog I don’t actually have that many posts directly about it. I’ve used it a bit for blog fuel in generic ways, like talking about pluggy and diskcache, but very little have I even mentioned it.
Over the last month I made a big push to get 0.5.0 out, which adds a whole
bunch of new configurability to markata.
Here’s the changelog entry.
- Moved to PEP 517 build #59 0.5.0.dev1
My Personal Simple CI/CD #
Before cutting all of my personal projects over to hatch. The first thing I did was to setup a solid github action, hatch-actionthat I can resue.
It automatically bumps versions, using pre-releases on all branches other than main, with special branches for bumping major, minor, patch, dev, alha, beta, and dev.
hatch new –init #
To convert the project over to hatch, and get rid of setup.py/setup.cfg, I ran
hatch new --init. This automatically grabs all the metadata for the project
and makes a pyproject.toml that has most of what I need.
hatch new --init
I then manually moved over my isort config, put flake8 config into .flake8,
and dropped setup.cfg.
lint-test #
Part of my hatch-action is to run a before-command, for markata, this runs
all of my linting and testing in one hatch script called lint-test. If this
fails CI will fail and I can read the report in the logs, make a fix and
re-publish.
[tool.hatch.envs.default.scripts]
cov = "pytest --cov-report=term-missing --cov-config=pyproject.toml --cov=markata --cov=tests"
no-cov = "cov --no-cov"
lint = "flake8 markata"
format = "black --check markata"
sort-imports = "isort markata"
build-docs = "markata build"
lint-test = [
"lint",
"format",
"seed-isort-config",
"sort-imports",
"cov",
]
test-lint = "lint-test"
Typical branching workflow #
with automatic versioning
My typical workflow is to work on features in their own branch where they do
not automatically version or publish, they keep the same version they were
branched off of. Then I do a pr to develop, which will do a minor,dev bump
and publish a pre-relese to pypi.
# starting with version 0.0.0
Feature1 -- │
Feature2 -- ├── dev 0.1.0.dev1,2,3 ── main 0.1.0
Feature3 -- │
I will let several features collect in develop before cutting a full relese over to main. This gives me time to make sure the solution is what makes the most sense, I try to use it in a few projects, and generally its edges show, and another pr is warranted to make the feature useful for more use cases. After running and using these new releases in a few projects, I am confident that its ready and release to main.
managing prs #
Doing PR’s with gh, probably deserves its own post but here are some helpful commands.
gh pr create --base develop --fill
gh pr edit
gh pr diff | dunk
gh pr merge -ds
Building and publishing #

hatch makes building and publishing pretty straightforward. It’s one command inside my hatch-action to build and one to publish. On each project that uses my hatch-action I only need to give it a token that I get from PyPi.
env:
HATCH_INDEX_USER: __token__
HATCH_INDEX_AUTH: ${{ secrets.pypi_password }}
Full set of changes #
If you want to see all of the details on how markata moved over to hatch, you can check out this diff.
https://github.com/WaylonWalker/markata/compare/v0.4.0..v0.5.0.dev0

lkwq007 [1] has done a fantastic job with stablediffusion-infinity [2]. Highly recommend taking a look.
Outpainting with Stable Diffusion on an infinite canvas
References:
[1]: https://github.com/lkwq007
[2]: https://github.com/lkwq007/stablediffusion-infinity
Check out toumorokoshi [1] and their project deepmerge [2].
A deep merging tool for Python core data structures
References:
[1]: https://github.com/toumorokoshi
[2]: https://github.com/toumorokoshi/deepmerge
My next step into django made me realize that I do not have access to the admin panel, turns out that I need to create a cuper user first.

Run Migrations #
Right away when trying to setup the superuser I ran into this issue
django.db.utils.OperationalError: no such table: auth_user
Back to the tutorial
tells me that I need to run migrations to setup some tables for the
INSTALLED_APPS, django.contrib.admin being one of them.
python manage.py migrate
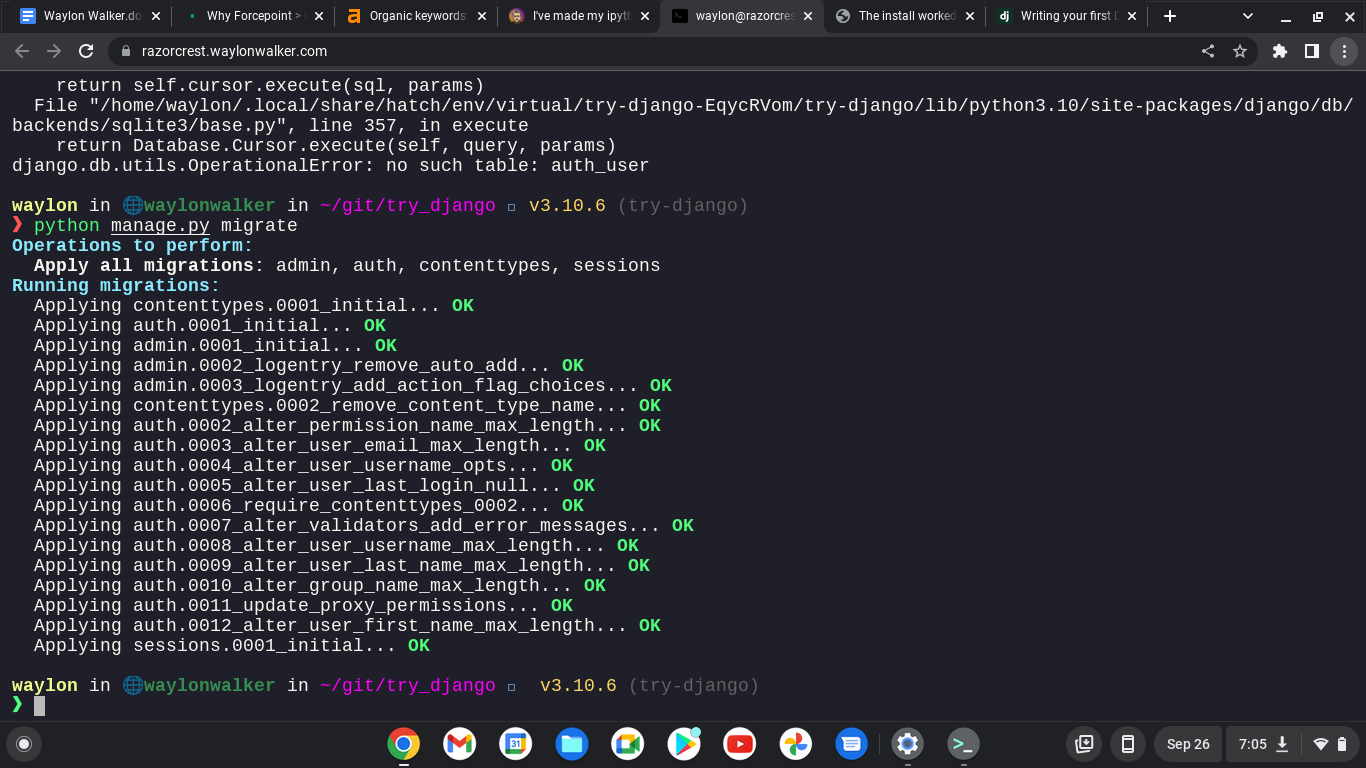
yes I am still running remote on from my chromebook.
python manage.py createsuperuser
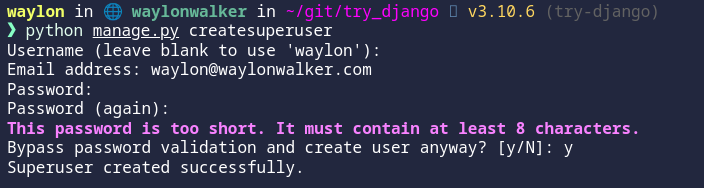
The super user has been created.

CSRF FAILURE #
My next issue trying to run off of a separate domain was a cross site request forgery error.
Since this is a valid domain that we are hosting the app from we need to tell
Django that this is safe. We can do this again in the settings.py, but this
time the variable we need is not there out of the box and we need to add it.
CSRF_TRUSTED_ORIGINS = ['https://localhost.waylonwalker.com']
I made it!! #
And we are in, and welcomed for the first time with this django admin panel.

Remote Hosting #
You might find these settings helpful as well if you are trying to run your site on a remote host like aws, digital ocean, linode, or any sort of cloud providor. I had it running in my home lab while I was out of the house and ssh’d in over with a chromebook.

I am continuing my journey into django, but today I am not at my workstation. I
am ssh’d in remotely from a chromebook. I am fully outside of my network, so I
can’t access it by localhost, or it’s ip. I do have cloudflared tunnel
installed and dns setup to a localhost.waylonwalker.com.
Settings #
I found this in settings.py and yolo, it worked first try. I am in from my
remote location, and even have auth taken care of thanks to cloudflare. I am
really hoping to learn how to setup my own auth with django as this is one of
the things that I could really use in my toolbelt.
ALLOWED_HOSTS = ['localhost.waylonwalker.com']

I have no experience in django, and in my exploration to become a better python developer I am dipping my toe into one of the most polished and widely used web frameworks Django to so that I can better understand it and become a better python developer.
If you found this at all helpful make sure you check out the django tutorial

install django #
The first thing I need to do is render out a template to start the project.
For this I need the django-admin cli. To get this I am going the route of
pipx it will be installed globally on my system in it’s own virtual
environment that I don’t have to manage. This will be useful only for using
startproject as far as I know.
pipx install django
django-admin startproject try_django
cd try_django
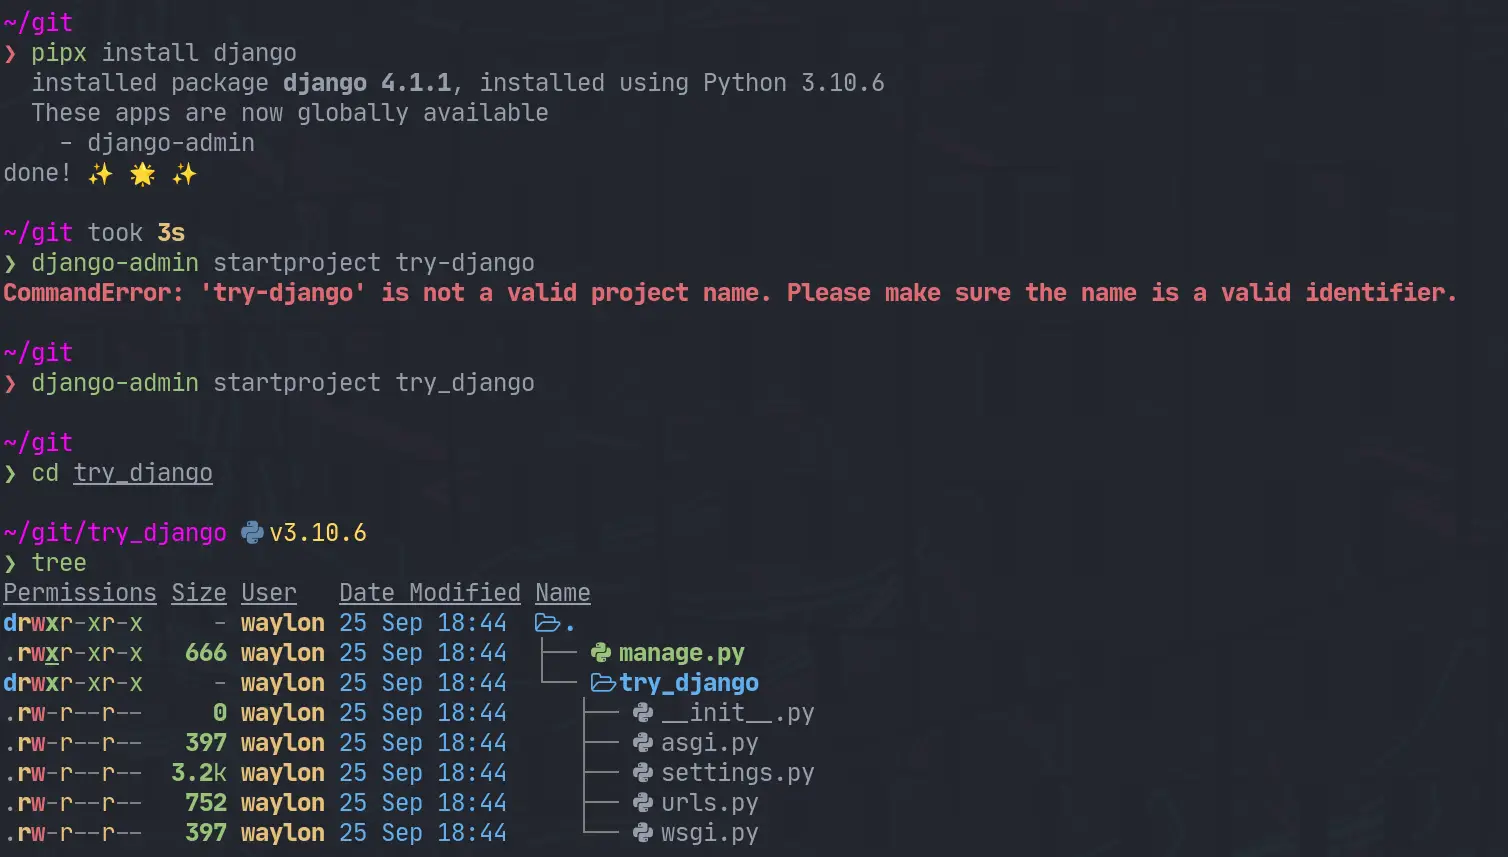
Make a venv #
Once I have the project I need a venv for all of django and all of my
dependencies I might need for the project. I have really been diggin hatch
lately, and it has a one line “make a virtual environment and manage it for
me” command.
hatch shell
If hatch is a bit bleeding edge for you, or it has died out by the time you read this. The ol trusty venv will likely stand the test of time, this is what I would use for that.
python -m .venv --prmpt `basename $PWD`
. ./.venv/bin/activate
Start the webserver #
Next up we need to start the webserver to start seeing that development content. The first thing I did was run it as stated in the tutorial and find it clashed with a currently running web server port.
python manage.py runserver
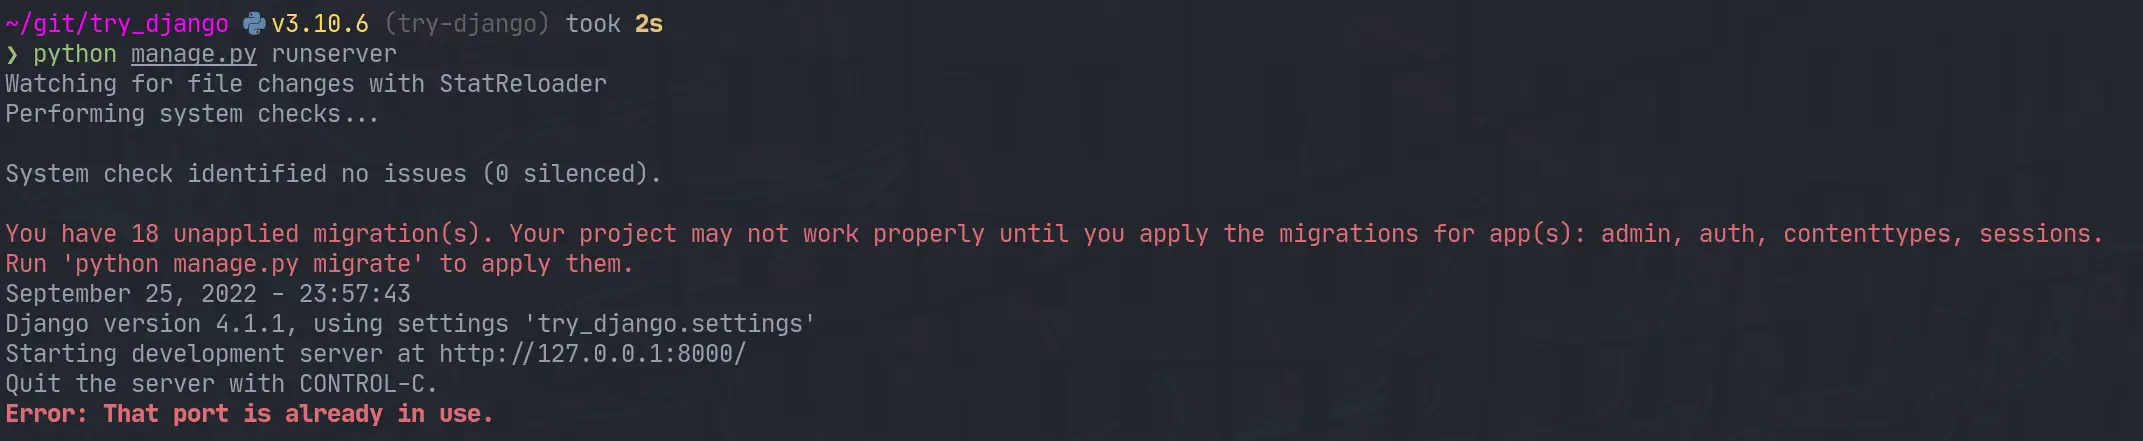
I jumped over to that tmux session, killed the process and I was up and running.

What’s running #
The default django hello world looks well designed. You are first presented with this page.

Next #
I opened up the urls.py to discover that the only configured url was at
/admin. I tried to log in as admin, but was unable to as I have not yet
created a superuser. Next time I play with django that is what I will explore.

While updating my site to use Markata’s new configurable head I ran into some escaping issues. Things like single quotes would cause jinja to fail as it was closing quotes that it shouldnt have.

Jinja Escaping Strings #
Jinja comes with a handy utility for escaping strings. I definitly tried to
over-complicate this before realizing. You can just pipe your variables into
e to escape them. This has worked pretty flawless at solving some jinja
issues for me.
<p>
{{ title|e }}
</p>
Creating meta tags in Markata #
The issue I ran into was when trying to setup meta tags with the new
configurable head, some of my titles have single quotes in them. This is what
I put in my markata.toml to create some meta tags.
[[markata.head.meta]]
name = "og:title"
content = "{{ title }}"
Using my article titles like this ended up causing this syntax error when not escaped.
SyntaxError: invalid syntax. Perhaps you forgot a comma?
Exception ignored in: <function Forward.__del__ at 0x7fa9807192d0>
Traceback (most recent call last):
...
TypeError: 'NoneType' object is not callable
jinja2 escape #
After making a complicated system of using html.escape I realized that jinja
included escaping out of the box so I updated my markata.toml to include the
escaping, and it all just worked!.
[[markata.head.meta]]
name = "og:title"
content = "{{ title|e }}"

When I am developing python code I often have a repl open alongside of it running snippets ofcode as I go. Ipython is my repl of choice, and I hace tricked it out the best I can and I really like it. The problem I recently discovered is that I have way overcomplicated it.

What Have I done?? #
So in the past the way I have setup a few extensions for myself is to add
something like this to my ~/.ipython/profile_default/startup directory. It
sets up some things like rich highlighting or in this example automatic
imports. I even went as far as installing some of these in the case I didn’t have them installed.
import subprocess
from IPython import get_ipython
from IPython.core.error import UsageError
ipython = get_ipython()
try:
ipython.run_line_magic("load_ext pyflyby", "inline")
except UsageError:
print("installing pyflyby")
subprocess.Popen(
["pip", "install", "pyflyby"],
stdout=subprocess.DEVNULL,
stderr=subprocess.DEVNULL,
).wait()
ipython.run_line_magic("load_ext pyflyby", "inline")
print("installing isort")
subprocess.Popen(
["pip", "install", "isort"],
stdout=subprocess.DEVNULL,
stderr=subprocess.DEVNULL,
)

What I missed? #
I missed the fact that some of these tools like pyflyby and rich already
have an ipython extension maintained by the library that just works. It’s less
complicated and more robust to future changes in the library. If anything ever
changes with these I will not have to worry about which version is installed,
the extension will just take care of itself.
How to activate these. #
The reccomended way is to add them to your
~/.ipython/profile_default/ipython_config.py
c.InteractiveShellApp.extensions.append('rich')
c.InteractiveShellApp.extensions.append('markata')
c.InteractiveShellApp.extensions.append('pyflyby')
The issue that I found with this is that you can end up with a sea of errors flooding your terminal. Personally I will know immediately if ipython is working right or not and typically have scriped venv installs so I have everything I need, so If I don’t have everything it’s probably for a reason and I don’t need an error message lighting up.
My way around this was to test if the module was importable and if it had a
load_ipython_extension attribute before appending it as an extension.
def activate_extension(extension):
try:
mod = importlib.import_module(extension)
getattr(mod, "load_ipython_extension")
c.InteractiveShellApp.extensions.append(extension)
except ModuleNotFoundError:
"extension is not installed"
except AttributeError:
"extension does not have a 'load_ipython_extension' function"
extensions = ["rich", "markata", "pyflyby"]
for extension in extensions:
activate_extension(extension)
My Change #
If you want to see what I did to my config see this commit.
I like pypeaday’s [1] project stable-diffusion-pype-dev [2].
No description available.
References:
[1]: https://github.com/pypeaday
[2]: https://github.com/pypeaday/stable-diffusion-pype-dev
Check out gradio-app [1] and their project gradio [2].
Build and share delightful machine learning apps, all in Python. 🌟 Star to support our work!
References:
[1]: https://github.com/gradio-app
[2]: https://github.com/gradio-app/gradio
Just starred stable-diffusion-webui [1] by AUTOMATIC1111 [2]. It’s an exciting project with a lot to offer.
Stable Diffusion web UI
References:
[1]: https://github.com/AUTOMATIC1111/stable-diffusion-webui
[2]: https://github.com/AUTOMATIC1111
kedro-plugins [1] by kedro-org [2] is a game-changer in its space. Excited to see how it evolves.
First-party plugins maintained by the Kedro team.
References:
[1]: https://github.com/kedro-org/kedro-plugins
[2]: https://github.com/kedro-org
If you’re into interesting projects, don’t miss out on knossos [1], created by modrinth [2].
[Archived] Former repo of the Modrinth frontend
References:
[1]: https://github.com/modrinth/knossos
[2]: https://github.com/modrinth
I like CaffeineMC’s [1] project sodium [2].
A Minecraft mod designed to improve frame rates and reduce micro-stutter
References:
[1]: https://github.com/CaffeineMC
[2]: https://github.com/CaffeineMC/sodium
Just starred markata-todoui [1] by WaylonWalker [2]. It’s an exciting project with a lot to offer.
A todo plugin for markata. It is a tui (text user interface) that runs in the terminal using textual. It gives me a trello-board feel from the terminal. I can create, update, delete, move, and fully manage my todo items from the terminal with it.
References:
[1]: https://github.com/WaylonWalker/markata-todoui
[2]: https://github.com/WaylonWalker
Check out giscus [1] and their project giscus [2].
A comment system powered by GitHub Discussions. :octocat: 💬 💎
References:
[1]: https://github.com/giscus
[2]: https://github.com/giscus/giscus
I recently discovered cmp-nvim-lsp-signature-help [1] by hrsh7th [2], and it’s truly impressive.
cmp-nvim-lsp-signature-help
References:
[1]: https://github.com/hrsh7th/cmp-nvim-lsp-signature-help
[2]: https://github.com/hrsh7th

A long needed feature of markata has been the ability to really configure out templates with configuration rather. It’s been long that you needed that if you really want to change the style, meta tags, or anything in the head you needed to write a plugin or eject out of the template and use your own.
Adding some Head #
Now you can add some extra style to your site with the existing built-in template.
[[markata.head]]
text = """
<style>
img {
width: 100%;
height: auto;
}
ul {
display: flex;
flex-wrap: wrap;
}
</style>
"""
You can have more than one Head #
Each text entry in markata.head just gets appended raw into the head.
[[markata.head]]
text = """
<style>
img {
width: 100%;
height: auto;
}
ul {
display: flex;
flex-wrap: wrap;
}
</style>
"""
[[markata.head]]
text = """
<script>
console.log('hey there')
</script
"""
Still need more? #
If this does not take you far enough yet, you can still eject out and use your own template pretty easy. If you are going for a full custom site it’s likely that this will be the workflow for awhile. Markata should only get better and make this required less often as it matures.
[markata]
post_template = "pages/templates/post_template.html"
Once you have this in your markata.toml you can put whatever you want in your
own template.

I recently discovered stable-diffusion-videos [1] by nateraw [2], and it’s truly impressive.
Create 🔥 videos with Stable Diffusion by exploring the latent space and morphing between text prompts
References:
[1]: https://github.com/nateraw/stable-diffusion-videos
[2]: https://github.com/nateraw
gitleaks [1] by gitleaks [2] is a game-changer in its space. Excited to see how it evolves.
Find secrets with Gitleaks 🔑
References:
[1]: https://github.com/gitleaks/gitleaks
[2]: https://github.com/gitleaks
If you’re into interesting projects, don’t miss out on termcharts [1], created by Abdur-rahmaanJ [2].
Terminal charts
References:
[1]: https://github.com/Abdur-rahmaanJ/termcharts
[2]: https://github.com/Abdur-rahmaanJ
Looking for inspiration? markata-slides [1] by WaylonWalker [2].
A slides plugin for markata that allows you to create presentations in markdown from the comfort of your favorite editor. Each new h2 tag (## in markdown) becomes a new slide. This plugin leverages the built-in feeds plugin for navigation, and adds in some hotkeys (j/k) to go the the previous and next slides.
References:
[1]: https://github.com/WaylonWalker/markata-slides
[2]: https://github.com/WaylonWalker
I’m really excited about small-group-notes [1], an amazing project by pypeaday [2]. It’s worth exploring!
Landing zone for small group notes - plan is to make this a nicer website for all things small group related
References:
[1]: https://github.com/pypeaday/small-group-notes
[2]: https://github.com/pypeaday
Looking for inspiration? techstructive-blog [1] by Mr-Destructive [2].
Blogging Platform powered by Django.
References:
[1]: https://github.com/Mr-Destructive/techstructive-blog
[2]: https://github.com/Mr-Destructive
I’m really excited about meetgor.com [1], an amazing project by Mr-Destructive [2]. It’s worth exploring!
My Personal Blog and Portfolio made with Markata SSG and Python
References:
[1]: https://github.com/Mr-Destructive/meetgor.com
[2]: https://github.com/Mr-Destructive
The work on jinja2-fragments [1] by sponsfreixes [2].
Render Jinja2 template block as HTML [3] page fragments on Python web frameworks.
References:
[1]: https://github.com/sponsfreixes/jinja2-fragments
[2]: https://github.com/sponsfreixes
[3]: /html/
Looking for inspiration? ansible-language-server [1] by ansible [2].
🚧 Ansible Language Server codebase is now included in vscode-ansible repository
References:
[1]: https://github.com/ansible/ansible-language-server
[2]: https://github.com/ansible
I’m really getting into using hatch as my go to build system, and I am really
liking it so far. I am slowly finding new things that just work really well.
hatch new is one of those things that I didn’t realize I needed until I had
it.

creating new versions created by myself with stable diffusion
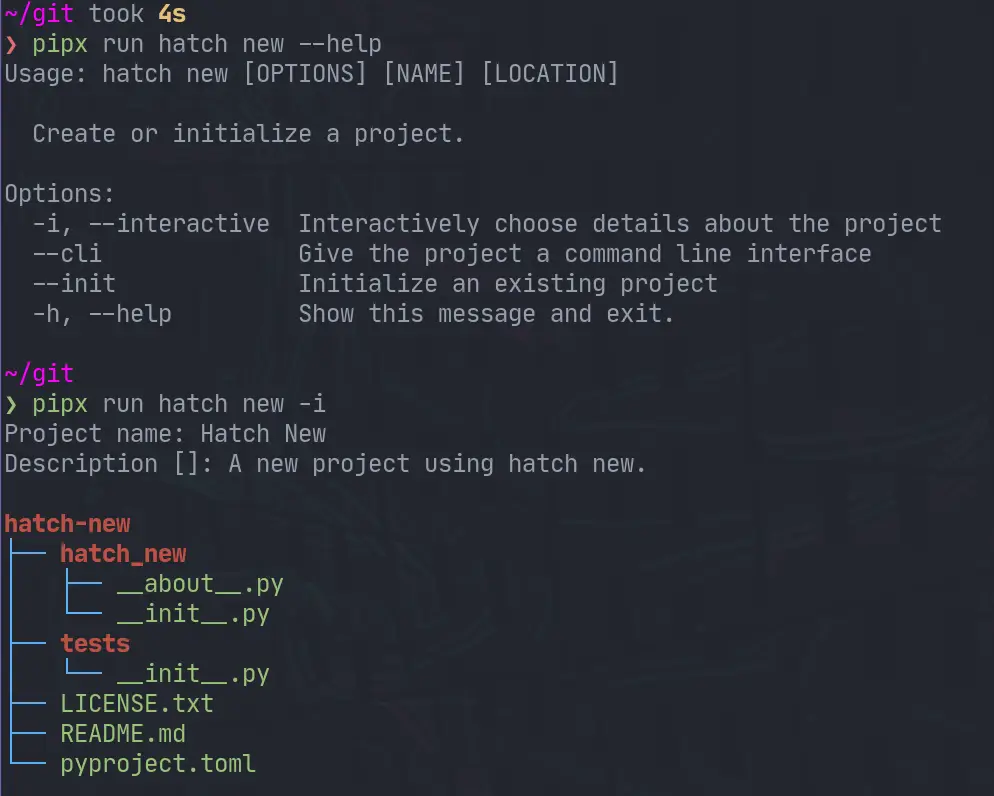
❯ pipx run hatch new --help
Usage: hatch new [OPTIONS] [NAME] [LOCATION]
Create or initialize a project.
Options:
-i, --interactive Interactively choose details about the project
--cli Give the project a command line interface
--init Initialize an existing project
-h, --help Show this message and exit.
Note! I am running all of these commands with pipx. I like to use pipx for all of my system level cli applications. To emphasis this point in the article I am going to use
pipx run hatch, but you canpipx install hatchthen just runhatchfrom there.
Interacively create a new project #
Running hatch new -i will ask let you interactivly choose details about the
project, such as the project’s name.
pipx run hatch new -i
After running and naming the project Hatch New we end up with the following filetree.
❯ tree .
.
├── hatch_new
│ ├── __about__.py
│ └── __init__.py
├── LICENSE.txt
├── pyproject.toml
├── README.md
└── tests
└── __init__.py
Non-Interative #
You can also fill in the project name ahead of time, and it will run without any questions.
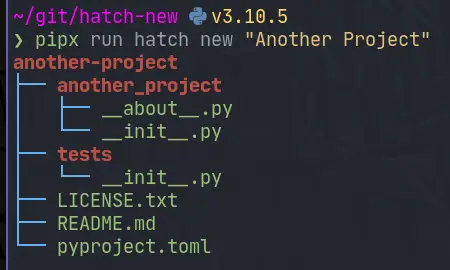
❯ pipx run hatch new "Another Project"
another-project
├── another_project
│ ├── __about__.py
│ └── __init__.py
├── tests
│ └── __init__.py
├── LICENSE.txt
├── README.md
└── pyproject.toml
Note! all of these examples will create a project directory within your current working directory.

–init #
existing project
hatch new has an --init flag in order to initialize a new hatch
pyproject.toml in an existing project. This feels like it would be useful if
you are converting a project to hatch, or if like me you sometimes start making
something before you realize it’s something that you want to package. Honestly
this doesn’t happen too much anymore I package most things, and I hope hatch new completely breaks this habbit of mine.
Let’s say I have the following existing project.
❯ tree
.
└── hatch_init
└── __init__.py
1 directory, 1 file
I can setup packaging with hatch by running.
pipx run hatch new --init
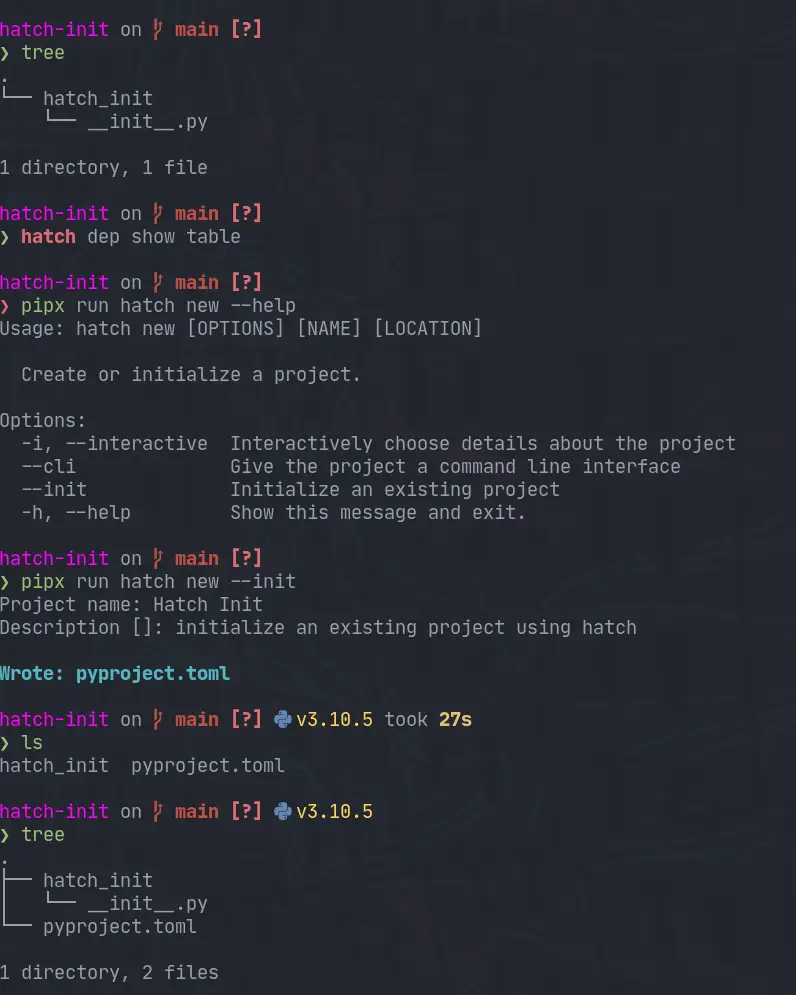
The pyproject.toml that comes out is pretty similar to the one that comes out
of the normal hatch new, but without any other files.
Note that you will need to setup a
__about__.pyyourself for the dynamic versioning that it has setup for you.
[build-system]
requires = ["hatchling"]
build-backend = "hatchling.build"
[project]
name = "hatch-init"
description = 'initialize an existing project using hatch'
readme = "README.md"
requires-python = ">=3.7"
license = "MIT"
keywords = []
authors = [
{ name = "Waylon S. Walker", email = "[email protected]" },
]
classifiers = [
"Development Status :: 4 - Beta",
"Programming Language :: Python",
"Programming Language :: Python :: 3.7",
"Programming Language :: Python :: 3.8",
"Programming Language :: Python :: 3.9",
"Programming Language :: Python :: 3.10",
"Programming Language :: Python :: 3.11",
"Programming Language :: Python :: Implementation :: CPython",
"Programming Language :: Python :: Implementation :: PyPy",
]
dependencies = []
dynamic = ["version"]
[project.urls]
Documentation = "https://github.com/unknown/hatch-init#readme"
Issues = "https://github.com/unknown/hatch-init/issues"
Source = "https://github.com/unknown/hatch-init"
[tool.hatch.version]
path = "hatch_init/__about__.py"
[tool.hatch.envs.default]
dependencies = [
"pytest",
"pytest-cov",
]
[tool.hatch.envs.default.scripts]
cov = "pytest --cov-report=term-missing --cov-config=pyproject.toml --cov=hatch_init --cov=tests"
no-cov = "cov --no-cov"
[[tool.hatch.envs.test.matrix]]
python = ["37", "38", "39", "310", "311"]
[tool.coverage.run]
branch = true
parallel = true
omit = [
"hatch_init/__about__.py",
]
[tool.coverage.report]
exclude_lines = [
"no cov",
"if __name__ == .__main__.:",
"if TYPE_CHECKING:",
]
cli #
hatch new does not stop there, it also has a --cli flag to give you a cli
out of the box as well.
❯ pipx run hatch new "new cli" --cli
new-cli
├── new_cli
│ ├── cli
│ │ └── __init__.py
│ ├── __about__.py
│ ├── __init__.py
│ └── __main__.py
├── tests
│ └── __init__.py
├── LICENSE.txt
├── README.md
└── pyproject.toml
When you use the --cli flag you also get click as a dependency and
project.scripts setup automatically.
[project]
name = "new-cli"
# ...
dependencies = [
"click",
]
# ...
[project.scripts]
new-cli = "new_cli.cli:new_cli"

what’s in the cli #
It’s a hello-world click application.
# SPDX-FileCopyrightText: 2022-present Waylon S. Walker <[email protected]>
#
# SPDX-License-Identifier: MIT
import click
from ..__about__ import __version__
@click.group(context_settings={'help_option_names': ['-h', '--help']}, invoke_without_command=True)
@click.version_option(version=__version__, prog_name='new cli')
@click.pass_context
def new_cli(ctx: click.Context):
click.echo('Hello world!')
sneak peek #
I’ll dive more into environments and the run command later, but we can run the cli pretty damn quick with two commands. In under 5s I was able to run this cli that it created. This is a pretty incredible startup time.
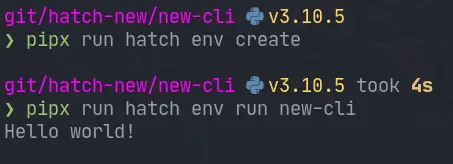

Hatch has an amazing versioning cli for python packages that just works. It takes very little config to get going and you can start bumping versions without worry.

creating new versions created by myself with stable diffusion
project layout #
For trying out the hatch version cli let’s make a simple project with the
terrible name pkg.
❯ tree .
.
├── pkg
│ ├── __about__.py
│ └── __init__.py
├── pyproject.toml
└── README.md
1 directory, 4 files
pyproject.toml #
The main hero of this post is the pyproject.toml. This is what defines all
of our PEP 517 style project setup.
[project]
name = "pkg"
description = "Show how to version packages with hatch"
readme = "README.md"
dynamic = [
"version",
]
[build-system]
requires = [
"hatchling>=1.4.1",
]
build-backend = "hatchling.build"
[tool.hatch.version]
path = "pkg/__about__.py"
statically versioning #
project.version
It is possible to set the version number inside the pyproject.toml
statically. This is fine if you just want to version your package manually,
and not through the hatch cli.
[project]
name = "pkg"
version = "0.0.0"
# ...
Statically versioning in pyproject.toml will not work with
hatch version

Cannot set version when it is statically defined by the `project.version` field
dynamically Versioning #
project.dynamic
Setting the project verion dynamically can be done by changing up the following
to your pyproject.toml. Hatch only accepts a path to store your version. If
you need to reference it elsewhere in your project you can grab it from the
package metadata for that file. I would not put anything else that could
possibly clash with the version, as you might accidently change both things.
If you really need to set it in more places use a package like bump2version.
[project]
name = "pkg"
dynamic = [
"version"
]
# ...
[tool.hatch.version]
path = "pkg/__about__.py"
Note: you can configure hatch to use a different pattern https://hatch.pypa.io/1.2/version/#configuration, but I have not found it to be something that I need.
about.py #
The hatch project itself uses a
about.py
to store it’s version. It’s sole content is a single __version__ variable. I
don’t have any personal issues with this so I am going to be following this in
my projects that use hatch.
__version__ = "0.0.0"
versioning #
Hatch has a pretty intuitive versioning api. hatch version gives you the
version. If you pass in a version like hatch version "0.0.1" it will set it
to that version as long as it is in the future, otherwise it will error.
# print the current version
hatch version
# set the version to 0.0.1
hatch version "0.0.1"
bumping #
You can bump parts of the semver version.
# minor bump
hatch version minor
# beta pre-release bump
# If published to pypi this can be installed with the --pre flag to pip
hatch version b
# bump minor and beta
hatch version minor,b
# release all of the --pre-release flags such as alpha beta rc
hatch release
Example #
Here is a screenshot of bumping a projet along.
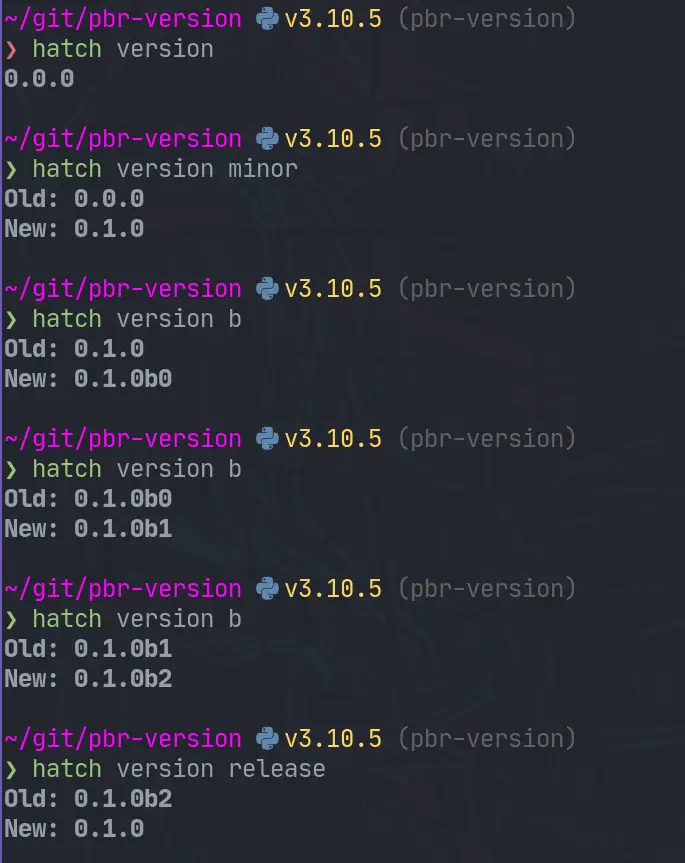
GitOps #
In my github actions flow I will be utilizing this to automate my versions. In
my side projects I use the develop branch to release –pre releases. I have
all of my own dependent projets running on these –pre releases, this allows me
to cut myself in my own projects before anyone else. Then on main I
automatically release this beta version.
GitHub Actions #
Here is what the ci/cd for markata looks like. There might be a better
workflow strategy, but I use a single github actions workflow and cut branches
to release –pre releases and full release. These steps will bump, tag,
commit, and deploy for me.
- name: automatically pre-release develop branch
if: github.ref == 'refs/heads/develop'
run: |
git config --global user.name 'autobump'
git config --global user.email '[email protected]'
VERSION=`hatch version`
# if current version is not already beta then bump minor and beta
[ -z "${b##*`hatch version`*}" ] && hatch version b || hatch version minor,b
NEW_VERSION=`hatch version`
git add markta/__about__.py
git commit -m "Bump version: $VERSION → $NEW_VERSION"
git tag $VERSION
git push
git push --tags
- name: automatically release main branch
if: github.ref == 'refs/heads/main'
run: |
git config --global user.name 'autobump'
git config --global user.email '[email protected]'
VERSION=`hatch version`
hatch version release
NEW_VERSION=`hatch version`
git add markta/__about__.py
git commit -m "Bump version: $VERSION → $NEW_VERSION"
git tag $VERSION
git push
git push --tags
- name: build
run: |
python -m build
- name: pypi-publish
if: github.ref == 'refs/heads/develop' || github.ref == 'refs/heads/main'
uses: pypa/[email protected]
with:
password: ${{ secrets.pypi_password }}
Hatch Version Action #
I am setting up a github custom action waylonwalker/hatch-version-action that will lint, test, bump, and publish for me in one step. More on that in the future.
Just starred cloak.nvim [1] by laytan [2]. It’s an exciting project with a lot to offer.
Cloak allows you to overlay *’s over defined patterns in defined files.
References:
[1]: https://github.com/laytan/cloak.nvim
[2]: https://github.com/laytan
Markata is a great python framework that allows you to go from markdown to a full website very quickly. You can get up and running with nothing more than Markdown. It is also built on a full plugin architecture, so if there is extra functionality that you want to add, you can create a plugin to make it behave like you want.
Full transparancy… I built markata.
The talk #
The talk is live on YouTube. Make sure you check out the other videos from the conference. There were quite a few quality talks that deserve a watch as well.

Packages I Maintain
Markata # [1]
I open sourced the static site framework that I use to build
my-blog [2] among other side projects. It’s a plugins
all the way down static site generator, that makes me happy to use.
{% gh_repo_list_topic “waylonwalker”, “markata” %}
Repos used to build this blog # [3]
my-blog [2] is built on a number of small repos. I
set it up this way so that creating content is fast and easy to do. I don’t
have to worry about carrying around large images with my lightweight text
files just to make some posts.
{% gh_repo_list_topic “waylonwalker”, “personal-website” %}
Kedro # [4]
I am a heavy user of the kedro [5] framework, and a big
advocate for using some sort of DAG framework for your data pipelines. kedro
is built all in python which makes it easy for a python dev like me to extend,
run, maintain, and deploy.
{% gh_repo_list_topic “waylonwalker”, “kedro” %}
Neovim Plugins # [6]
I use vim for all of my text editing needs. It brings me joy to make any part
of it just a...
I spoke at python webconf in March 2022 about how I deploy this blog on a continuous basis.
Building this blog has brought me a lot of benefits. I have a set of custom curated notes to help describe a problem and how to solve it to me. At theis point it’s not uncommon to google an Issue I am having and finding my own blog with exactly the solution I need at the top.
I also bump into people from time to time that recognize me from the blog, its a nice conversation starter, and street cred.
The Talk #
The talk recently released on Youtube, you can watch it without having a ticket to the conference for free. There were a bunch of other talks that you should check out too!
rofi-network-manager [1] by P3rf [2] is a game-changer in its space. Excited to see how it evolves.
A manager for network connections using bash, rofi, nmcli,qrencode.
References:
[1]: https://github.com/P3rf/rofi-network-manager
[2]: https://github.com/P3rf
I got all the pypi packages that I own behind 2 factor authentication. 💪
Recently this really made it’s rounds in the python news since pypi was requiring critical package maintainers to have 2FA on and even offering them hardware tokens to help them turn this on.
I feel like this caused a bit of confusion as turning on 2FA does not mean that you need to do anything different to deploy a package, and it DOES NOT require a hardware token. You can continue using your favorite 2FA app.
You might wonder what this means for my projects. It means that to edit any sensitive content such as pull a new api token, add/remove maintainers, or deleting a release I need to use a TOPT (time based one time password) application such as Google Authenticator, Microsoft Authenticator, Authy, or FreeOTP.
This has very little change to my overall workflow as my CI system still automatically deploys for me with the same api token as before.
This is one small thing that maintainers can do to prevent supply chain attacks on their projects that they put so much work into.
Login #
When I log in I now get this extra screen asking for an auth token.
My packages #
Once I turned on 2FA for my account I could then turn on 2FA requirement for each project. I am not sure how much safety there is in pypi, it might require all maintainers to have it turned on before it allows packages to have it turned on.
Once turned on it requires anyone who maintains the project to have 2FA on to be able to edit any sensitive content.
Looking for inspiration? build [1] by pypa [2].
A simple, correct Python build frontend
References:
[1]: https://github.com/pypa/build
[2]: https://github.com/pypa
I was on Talk Python
After years of listening to talkpython.fm [1] I had the
honor to be part of
episode-337 [2]
to talk about Kedro for maintainable data science.
I was quite nervous to talk on a show that I helped shape my career in such a
profound way. I started my journey towards software engineering near Michaels
first few episodes. His discussions with such great developers over the years
has made an huge impact on my skill. It has always given me great advice and
topics to go deeper on.
During the episode I tried my best to let Yetu and Ivan take the spotlight as
the maintainer and chime in with my experience as a user of kedro.
Video Version # [3]
https://youtu.be/WTcjvwkXoY0
Michael made the call available on youtube as well as the audio only
podcast [2]
References:
[1]: https://talkpython.fm/
[2]: https://talkpython.fm/episodes/show/337/kedro-for-maintainable-data-science
[3]: #video-version
Check out squidfunk [1] and their project mkdocs-material [2].
Documentation that simply works
References:
[1]: https://github.com/squidfunk
[2]: https://github.com/squidfunk/mkdocs-material
I just love how some features of vim are so discoverable and memorable once you really start to grasp it. Sorting and uniqing your files or ranges is one of those examples for me.
" sort the file
:sort
" sort the file only keeping unique lines
:sort u
" sort a range
:'<,'> sort
" sort a range only keeping unique lines
:'<,'> sort u
I recently used this to dedupe my autogenerated links section for rich-syntax-range-style. More often I am using it to sort and uniqify objects like arrays and lists.
Here is what the markdown looks like.
* [py-tree-sitter](https://github.com/tree-sitter/py-tree-sitter)
* [rich](https://github.com/Textualize/rich)
* [@textualizeio](https://twitter.com/textualizeio)
* [rich](https://github.com/Textualize/rich)
* [another post](https://waylonwalker.com/designing-kedro-router)
* [print-register-pipelines](https://screenshots.waylonwalker.com/print-register-pipelines.webp)
* [rich](https://github.com/Textualize/rich)
* [console-print-register-pipelines](https://screenshots.waylonwalker.com/console-print-register-pipelines.webp)
* [rich](https://github.com/Textualize/rich)
* [syntax-print-register-pipelines](https://screenshots.waylonwalker.com/syntax-print-register-pipelines.webp)
* [rich](https://github.com/Textualize/rich)
* [syntax-print-register-pipelines-highlight-line](https://screenshots.waylonwalker.com/syntax-print-register-pipelines-highlight-line.webp)
* [py-tree-sitter](https://github.com/tree-sitter/py-tree-sitter)
Then typing vap:sort u yields a uniqly sorted list of links.
* [@textualizeio](https://twitter.com/textualizeio)
* [another post](https://waylonwalker.com/designing-kedro-router)
* [console-print-register-pipelines](https://screenshots.waylonwalker.com/console-print-register-pipelines.webp)
* [print-register-pipelines](https://screenshots.waylonwalker.com/print-register-pipelines.webp)
* [py-tree-sitter](https://github.com/tree-sitter/py-tree-sitter)
* [rich](https://github.com/Textualize/rich)
* [syntax-print-register-pipelines-highlight-line](https://screenshots.waylonwalker.com/syntax-print-register-pipelines-highlight-line.webp)
* [syntax-print-register-pipelines](https://screenshots.waylonwalker.com/syntax-print-register-pipelines.webp)
Today I’ve been playing with py-tree-sitter a bit and I wanted to highlight match ranges, but was unable to figure out how to do it with rich, so I reached out to @textualizeio for help.
https://twitter.com/_WaylonWalker/status/1562469770766589952
While waiting for that reply let’s show how we got this far.
imports #
Lets import all the classes that we need from rich and setup a console to print to.
from rich.console import Console
from rich.syntax import Syntax
from rich.style import Style
console = Console()
some code #
Now we need some code to highlight. I am going to rip my register_pipeline
from another post.
code = '''
from find_kedro import find_kedro
def register_pipelines(self) -> Dict[str, Pipeline]:
"""Register the project's pipeline.
Returns:
A mapping from a pipeline name to a ``Pipeline`` object.
"""
return find_kedro()
'''
print #
We could simply print out the code we have as a variable, but thats a bit hard to read.
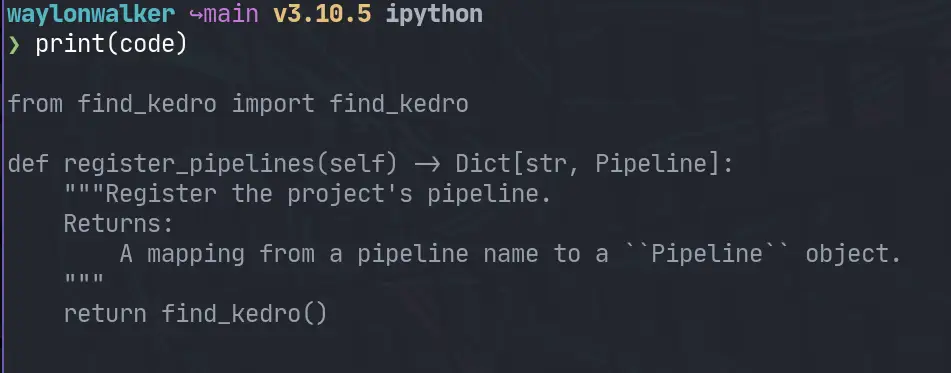
console.print #
printing with rich’s console makes it a little better, but not much by default.
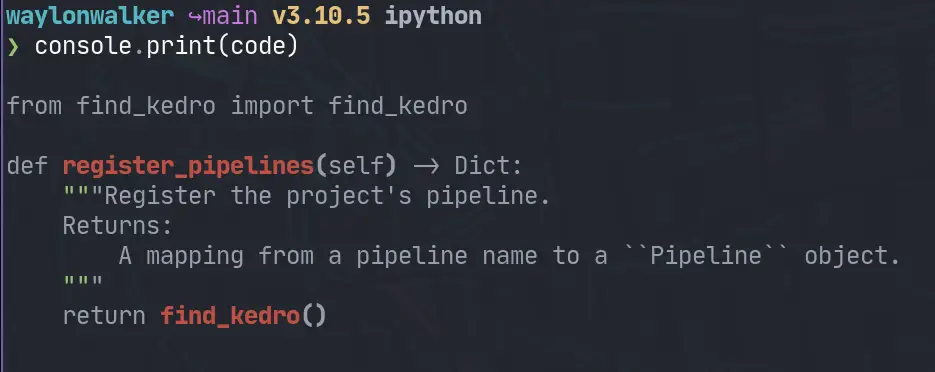
Syntax #
We can pull from rich’s syntax module to really pretty this up.
syntax = Syntax(code, 'python', line_numbers=True)
console.print(syntax)
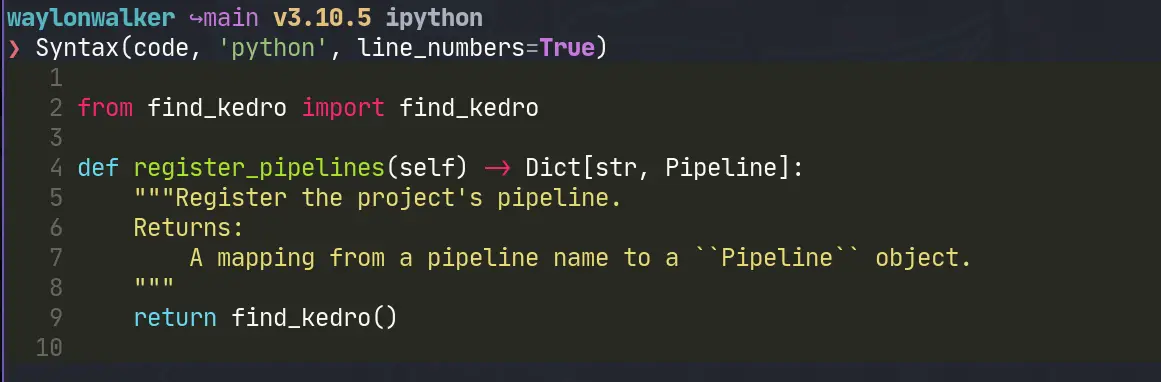
Now we are getting some really impressive print outs right in the terminal!
note that I have ipython set to use rich, you will need to console.print() in scripts
highlight lines #
Now we can start highlighting lines right when we initialize our Syntax
instance. It looks ok. It’s not super visible, but more importantly its not
granular enough. I want to highlight specific ranges like the word
register_pipelines.
syntax = Syntax(code, 'python', line_numbers=True, highlight_lines=[4])
console.print(syntax)
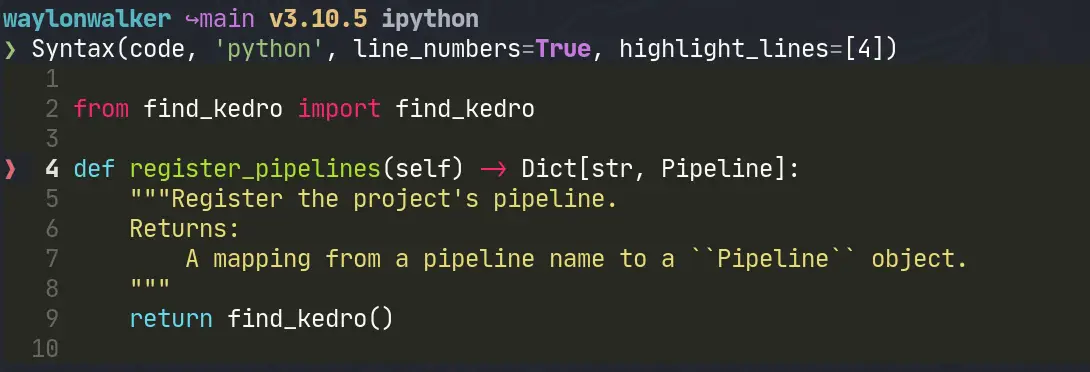
This hows the line, but still is not very accurate.
highlight text #
[@textualizeio] got back to me, let’s see if What we can do with stylize_range!
https://twitter.com/textualizeio/status/1562487302274043904
syntax = Syntax(code, 'python', line_numbers=True)
style = Style(bgcolor='deep_pink4')
syntax.stylize_range(style, (4, 4), (4, 22))
console.print(syntax)
This gives us the final result we are looking for, we can easily see what is
being targeted here. In this case the function name register_pipelines.
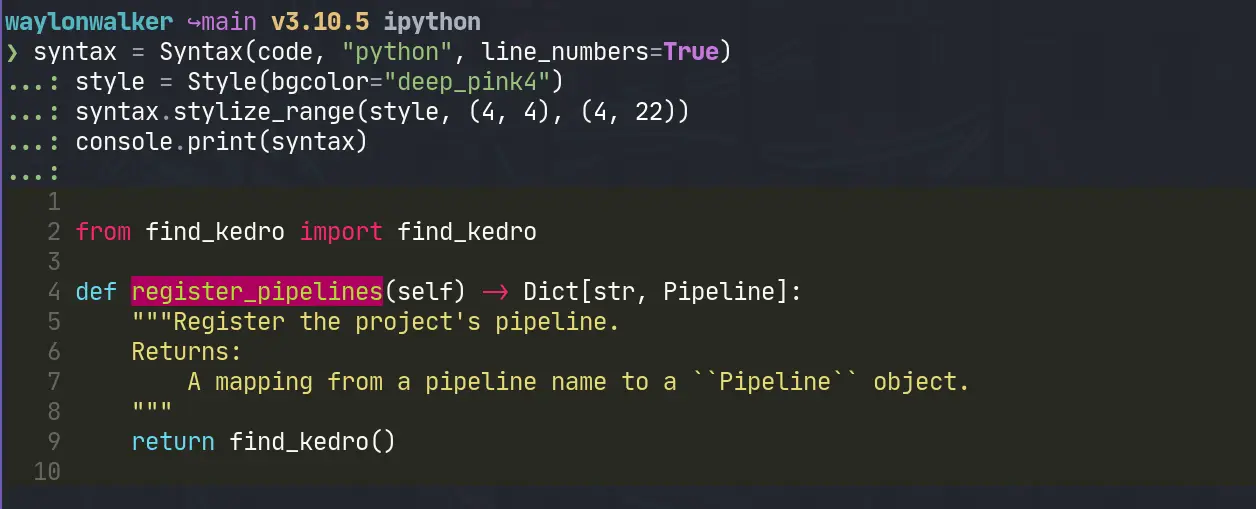
This turns out to be exacly what I am looking for. Now I have an easy way to print out highlighted code wtih my py-tree-sitter query results.
Links #
How to vimgrep over hidden files.
I needed to delete all build pipeline steps that were named upload docs. I
currently have about 60 projects running from the same template all running
very similar builds. In the past I’ve scripted out migrations for large
changes like this, they involved writing a python script that would load the
yaml file into a dictionary, find the corresponding steps make the change and
write it back out.
Today’s job was much simplar, just delete the step, were all steps are
surrounded by newlines. My first thought was to just open all files in vim and
run dap. I just needed to get these files:positions into my quickfix. My
issue is that all the builds reside within hidden directories by convention.
The issue #
variability
After searching through all the projects it was clear that all the steps were
in their own paragraph, though I was not 100% confident enough to completely
automate it, and the word upload docs was in the paragraph.
some were a two liner
- name: upload docs
script: aws s3 ...
Some had a variation in the name
- name: upload docs to s3
script: aws s3 ...
some were more than 2 lines.
- name: upload docs
script: |
aws s3 ...
some used a different command.
- name: upload docs
script: |
python ...
Templates are great #
but they change
Templates are amazing, and tools like cookiecutter and copier are essential in my workflow, but those templates change over time. Some things are a constant, and others like this one are an ever evolving beast until they are tamed into something the team is happy with.
vimgrep over hidden files #
I know all the files that I care to search for are called build.yml, and they are in a hidden directory.
:args `fd -H build.yml`
:vimgrep /upload docs/ ##
Once opened as a buffer by using args, and a handy fd command I can vimgrep
over all the open buffers using ##
Open buffers are represented by ##
Now I can just dap and :cnext my way through the list of changes that I
have, and know that I hit every one of them when I am at the end of my list.
And can double check this in about 10s by scrolling back through the quickfix
list.
Vim points achieved #
You’re not a true vim enthusiast until you have spent 10 minutes writing a blog post about how vim saved you 5 minutes. Check out all the other times this has happened to me in the vim tag.

a sprinter edging out his opponent by Dall-e
It’s about time to release Markata 0.3.0. I’ve had 8 pre-releases since the
last release, but more importantly it has about 3 months of updates. Many of
which are just cleaning up bad practices that were showing up as hot spots on
my pyinstrument reports
Markata started off partly as a python developer frustrated with using nodejs for everything, and a desire to learn how to make frameworks in pluggy. Little did I know how flexible pluggy would make it. It started out just as my blog generator, but has turned into quite a bit more.
Over time this side project has grown some warts and some of them were now becoming a big enough issue it was time to cut them out.
Let’s compare #
I like to use my tils articles for examples and tests like this as there are enough articles for a good test, but they are pretty short and quick to render.
mkdir ~/git/tils/tils
cp ~/git/waylonwalker.com/pages/til/ ~/tils/tils -r
cd ~/git/tils/tils
running tils on 0.2.0 #
At the time of writing this is the current version of markata, so just make a new venv and run it.
python3 -m venv .venv --prompt $(basename $PWD)
pip install markata
markata clean
markata build
cold tils: 14.523 warm tils: 1.028
running tils on 0.3.0b8 #
python3 -m venv .venv --prompt $(basename $PWD)
# --pre installs pre-releases that include a b in their version name
pip install markata --pre
markata clean
markata build
cold tils: 11.551 (+20%) warm tils: 0.860 (+16%)
pyinstrument #
These measurements were taken with pyinstrument mostly out of convenience since there is already a pyinstrument hook built in, but also because I like pyinstrument.
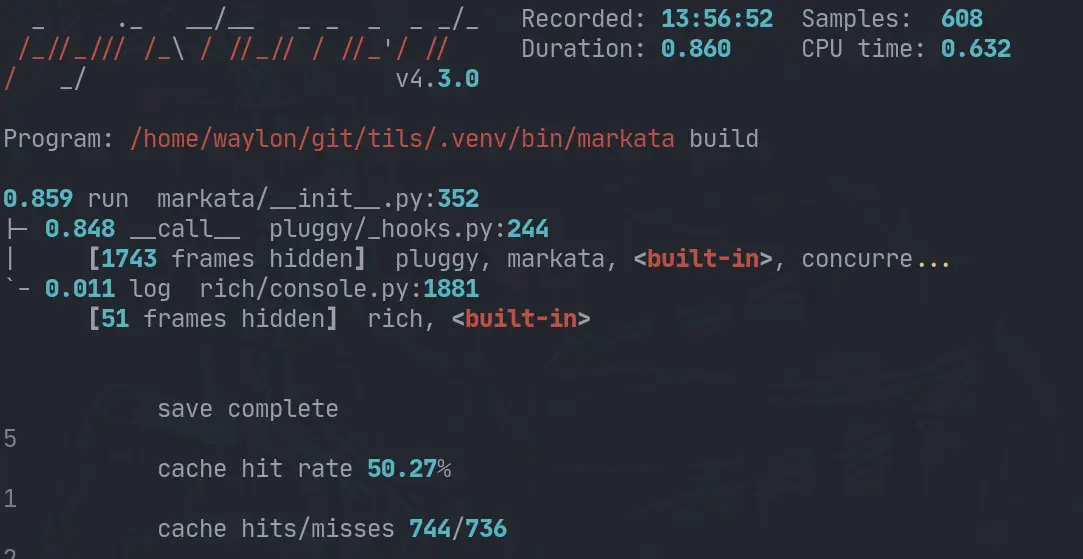
Here is the pyinstrument report from the last run.
My Machine #
This comparison was not very exhaustive. It was ran on my pretty new to me Ryzen 5 3600 machine.
The changes #
Most of these changes revolve in how the lifecycle is ran. It was trying to be extra cautious and run previous steps for you if it thought it might be needes, in reality it was rerunning a few steps multiple times no matter what.
The other thing I turned off by default, but can be opted into, is beautifulasoup’s prettify. That was one of the slower steps ran on my site.
0.3.0 #
It should be out by the time you see this, I wanted to compare the changes I had made and make sure that it was still making forward progress and thought I would share the results.
Check out stable-diffusion [1] by CompVis [2]. It’s a well-crafted project with great potential.
A latent text-to-image diffusion model
References:
[1]: https://github.com/CompVis/stable-diffusion
[2]: https://github.com/CompVis
Deliberative #
People exceptionally talented in the Deliberative theme are best described by the serious care they take in making decisions or choices. They anticipate obstacles.
I am risk-adverse. I want everything well thought out and calculated before I make any sort of change. I have never gambled in my life and just the thought of it makes me anxious.
Aim it #
I can use this as a strength to plan out potential issues and prevent them. I do this quite often with my role in infrastructure.
I need to make sure that I use deadlines to keep this as a strength and not hinderence.
Automation #
One of the biggest ways that I utilize this skill is automation. I am all about automating things, not just because I don’t want to do the manual work, but I am not sure when I am going to need to do something again.
Check out archlinux [1] and their project aur [2].
⚠️⚠️Experimental aur [3].git [4] mirror⚠️⚠️ (read-only mirror)
References:
[1]: https://github.com/archlinux
[2]: https://github.com/archlinux/aur
[3]: /aur/
[4]: /glossary/git/
A common meta thing that I need in python is to find the version of a package.
Most of the time I reach for package_name.__version__, but that does not
always work.
but not all projects have a __version__ #
In searching the internet for an answer nearly every one of them pointed me to
__version__. This works for most projects, but is simply a convention, its
not required. Not all projects implement a __version__, but most do. I’ve
never seen it lie to me, but there is nothing stopping someone from shipping
mismatched versions.
If you maintain a project ship a __version__ #
I appreciate it
While its not required its super handy and easy for anyone to remember off the
top of their head. It makes it easy to start debugging differences between
what you have vs what you see somewhere else. You can do this by dropping a
__version__ variable inside your __init__.py file.
## __init__.py
__version__ = 1.0.0
SO #
stack overflow saves the day
Special thanks to this Stack Overflow post for answering this question for me.
So what do you do… #
importlib
Your next option is to reach into the package metadata of the package that you are interested in, and this has changed over time as highlighted in the stack overflow post.
for Python >= 3.8:
from importlib.metadata import version
version('markata')
# `0.3.0.b4`
I only really use python >= 3.8 these days, but if you need to implement it for an older version check out the stack overflow post.
Another option.. #
use the command line
Another common option uses pip at the command line.
❯ pip show markata
Name: markata
Version: 0.3.0b4
Summary: Static site generator plugins all the way down.
Home-page: https://markata.dev
Author: Waylon Walker
Author-email: [email protected]
License: MIT
Location: /home/waylon/git/waylonwalker.com/.venv/lib/python3.11/site-packages
Requires: anyconfig, beautifulsoup4, checksumdir, diskcache, feedgen, jinja2, more-itertools, pathspec, pillow, pluggy, pymdown-extensions, python-frontmatter, pytz, rich, textual, toml, typer
Required-by:
And if the package implements a command line its common to ship a version
command such as --version or -V.
❯ markata --version
Markata CLI Version: 0.3.0.b4
Why did I need to do this? #
Well we have a cli tool that wraps around piptools and we wanted to include the
version of piptools in the comments that it produces dynamically. This is why
I wanted to dynamically grab the version inside python without shelling out to
pip show. Now along with the version of our internal tool you will get the
version of piptools even though piptools does not ship a __version__
variable.
Fin #
In the end, I am glad I learned that its so easy to use the more accurate
package metadata, but still appreciate packages shipping __version__ for all
of us n00b’s out here.
Check out gum [1] by charmbracelet [2]. It’s a well-crafted project with great potential.
A tool for glamorous shell scripts 🎀
References:
[1]: https://github.com/charmbracelet/gum
[2]: https://github.com/charmbracelet
Check out crossposter [1] by Mr-Destructive [2]. It’s a well-crafted project with great potential.
Crosspost your articles to dev.to, codenewbie.org, medium.com and hashnode.com with a single shellscript / python package
References:
[1]: https://github.com/Mr-Destructive/crossposter
[2]: https://github.com/Mr-Destructive
The one reason I switched to arch
The community, that’s it, end of post, roll the credits.
I’m a tinkerer # [1]
I am a tinkerer, I am not going to run a stock desktop manager, mostly becuase
that’s just not how my brain works. I need to tweak everything to fit my
needs. Grantid I have not spent much time in many full fledged linux desktop
environments. They are far more customizable than windows ever will be, I
absolutely love that about them. Inevitibly I end up in a situation where I
hit a wall, it just won’t do what I want it to do, or my lack of understanding
what came wtih it holds me back.
minimal # [2]
I love minimal installs. I love just building up my system from the bottom up
with things that I like, I understand, and that I can script.
I’m a noob # [3]
I spend a lot of my time in the terminal. I’d like to think I know how to use
a linux command line for software development really well, but there are a lot
of things that I still dont know all that well, mostly because I don’t need to.
The AUR # [5]...
Just starred moonlight-qt [1] by moonlight-stream [2]. It’s an exciting project with a lot to offer.
GameStream client for PCs (Windows, Mac, Linux, and Steam Link)
References:
[1]: https://github.com/moonlight-stream/moonlight-qt
[2]: https://github.com/moonlight-stream
I recently discovered moonlight-docs [1] by moonlight-stream [2], and it’s truly impressive.
Moonlight Documentation
References:
[1]: https://github.com/moonlight-stream/moonlight-docs
[2]: https://github.com/moonlight-stream
I like deresmos’s [1] project xrandr-manager [2].
Manage dual display on Linux
References:
[1]: https://github.com/deresmos
[2]: https://github.com/deresmos/xrandr-manager
If you’re into interesting projects, don’t miss out on xpadneo [1], created by atar-axis [2].
Advanced Linux Driver for Xbox One Wireless Controller (shipped with Xbox One S)
References:
[1]: https://github.com/atar-axis/xpadneo
[2]: https://github.com/atar-axis
I came across Launcher-Curseforge [1] from ShayBox [2], and it’s packed with great features and ideas.
Integrates the CF Modpack install button to any MMC based launcher
References:
[1]: https://github.com/ShayBox/Launcher-Curseforge
[2]: https://github.com/ShayBox

Recently I added two new bash/zsh aliases to make my git experience just a tad better.
trackme #
Most of our work repos were recently migrated to new remote urls, we scriped
out the update to all of the repos, but I was left with a tracking error for
all of my open branches. To easily resolve this I just made an alias so that I
can just run trackme anytime I see this error.
There is no tracking information for the current branch.
Please specify which branch you want to merge with.
See git-pull(1) for details
git pull <remote> <branch>
If you wish to set tracking information for this branch you can do so with:
git branch --set-upstream develop origin/<branch>
getting the branch #
The following command will always return the currently checked out branch name.
git symbolic-ref --short HEAD
Injecting this into the suggested git command as a subshell gives us this
alias that when ran with trackme will automatically fix tracking for my
branch.
alias trackme='git branch --set-upstream-to=origin/$(git symbolic-ref --short HEAD)'
rebasemain #
I sometimes get a bit lazy at checking main for changes before submitting any prs, so again I made a quick shell alias that will rebase main into my branch before I open a pr.
alias rebasemain='git pull origin main --rebase'
The Aliases #
Here are both of the alias’s, feel free to steal and modify them into your
dotfiles. If you are uniniatiated a common starting place to put these is
either in your ~/.bashrch or ~/.zshrc depending on your shell of choice.
alias trackme='git branch --set-upstream-to=origin/$(git symbolic-ref --short HEAD)'
alias rebasemain='git pull origin main --rebase'
Check out pip-tools [1] by jazzband [2]. It’s a well-crafted project with great potential.
A set of tools to keep your pinned Python dependencies fresh.
References:
[1]: https://github.com/jazzband/pip-tools
[2]: https://github.com/jazzband
So many terminal applications bind q to exit, even the python debugger, its
muscle memory for me. But to exit ipython I have to type out exit<ENTER>.
This is fine, but since q is muscle memory for me I get this error a few times
per day.
╭─────────────────────────────── Traceback (most recent call last) ────────────────────────────────╮
│ <ipython-input-1-2b66fd261ee5>:1 in <module> │
╰──────────────────────────────────────────────────────────────────────────────────────────────────╯
NameError: name 'q' is not defined
After digging way too deep into how IPython implements its ExitAutoCall I
realized there was a very simple solution here. IPython automatically
imports all the scripts you put in your profile directory, all I needed was to
create ~/.ipython/profile_default/startup/q.py with the following.
q = exit
It was that simple. This is not a game changer by any means, but I will now
see one less error in my workflow. I just press q<Enter> and I am out,
without error.
It’s no secret that I love automation, and lately my templating framework of
choice has been copier. One hiccup I recently ran into was having spaces in my
templated directory names. This makes it harder to run commands against as you
need to escape them, and if they end up in a url you end up with ugly %20 all
over.
Cookiecutter has the solution #
Yes the solution comes from a competing templating framework.
I install copier with pipx, so I need to inject cookiecutter in to my copier environment to use the slugify filter.
pipx inject copier cookiecutter
If you are using a normal virtual environment you can just pip install it.
pip install copier cookiecutter
add the extension to your template #
copier.yml
Now to enable the extension you need to declare it in your copier.yml file in
your template.
_jinja_extensions:
- cookiecutter.extensions.SlugifyExtension
Use it | slugify #
use-it
Now to use it, anywhere that you want to slugify a variable, you just pipe it into slugify.
❯ tree .
.
├── copier.yml
├── README.md
└── {{ site_name|slugify }}
└── markata.toml.jinja
1 directory, 3 files
Here is a slimmed down version of what the copier.yml looks like.
site_name:
type: str
help: What is the name of your site, this shows in seo description and the site title.
default: Din Djarin
_jinja_extensions:
- cookiecutter.extensions.SlugifyExtension
Results #
Running the template looks a bit like this.
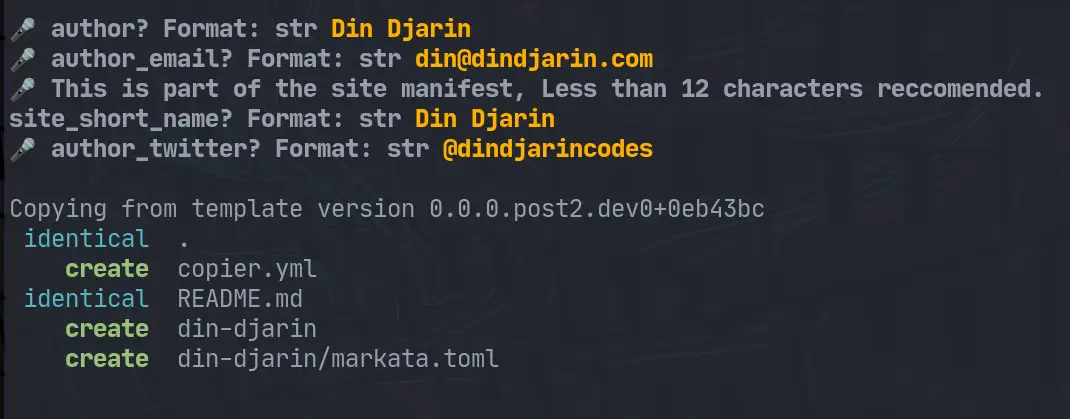
straight from their docs #
The next section is straight from the cookiecutter docs
Slugify extension #
The cookiecutter.extensions.SlugifyExtension extension provides a slugify
filter in templates that converts string into its dashed (“slugified”) version:
{% "It's a random version" | slugify %}
Would output:
it-s-a-random-version
It is different from a mere replace of spaces since it also treats some special
characters differently such as ' in the example above. The function accepts
all arguments that can be passed to the slugify function of
python-slugify_. For example to change the output from
it-s-a-random-version to it_s_a_random_version, the separator parameter
would be passed: slugify(separator='_').
I came across box-cli-maker [1] from box-cli-maker [2], and it’s packed with great features and ideas.
Render highly customizable boxes in the terminal
References:
[1]: https://github.com/box-cli-maker/box-cli-maker
[2]: https://github.com/box-cli-maker
box-cli-maker [1] by Delta456 [2] is a game-changer in its space. Excited to see how it evolves.
Make Highly Customized Boxes for CLI
References:
[1]: https://github.com/Delta456/box-cli-maker
[2]: https://github.com/Delta456
Textual has devtools in the upcoming css branch, and its pretty awesome!
It’s still early #
Textual is still very early and not really ready for prime time, but it’s quite amazing how easy some things such as creating keybindings is. The docs are coming, but missing right now so if you want to use textual be ready for reading source code and examples.
On to the devtools #
As @willmcgugan shows in this tweet it’s pretty easy to setup, it requires having two terminals open, or using tmux, and currently you have to use the css branch.
https://twitter.com/willmcgugan/status/1531294412696956930
Why does textual need its own devtools #
Textual is a tui application framework. Unlike when you are building cli applications, when the tui takes over the terminal in full screen there is no where to print statement debug, and breakpoints don’t work.
getting the css branch #
In the future it will likely be in main and not need this, but for now you need to get the css branch to get devtools.
git clone https://github.com/Textualize/textual
git fetch --alll
git checkout css
install in a virtual environment #
Now you can create a virtual environment, feel free to use whatever virtual environment tool you want, venv is built in to most python distributions though, and should just be there.
python3 -m venv .venv --prompt textual
source .venv/bin/activate
pip install .
Now that we have textual installed #
Once textual is installed you can open up the devtools by running textual console.
textual console

I’m really excited about minesweeper [1], an amazing project by NotUnlikeTheWaves [2]. It’s worth exploring!
A minesweeper in the terminal written in Golang with Bubbletea
References:
[1]: https://github.com/NotUnlikeTheWaves/minesweeper
[2]: https://github.com/NotUnlikeTheWaves
The work on gh-eco [1] by jrnxf [2].
🦎 gh cli extension to explore the ecosystem
References:
[1]: https://github.com/jrnxf/gh-eco
[2]: https://github.com/jrnxf
Using Different versions of python with pipx | pyenv
[1]
I love using pipx for automatic virtual environment [2] management of my globally
installed python cli applications, but sometimes the application is not
compatible with your globally installed pipx
Which version of python is pipx using?? # [3]
This one took me a minute to figure out at first, please let me know if there
is a better way. I am pretty certain that this is not the ideal way, but it
works.
My first technique was to make a package that printed out sys.version.
# what version of python does the global pipx use?
pipx run --spec git+https://github.com/waylonwalker/pyvers pyvers
# what version of python does the local pipx use?
python -m pipx run --spec git+https://github.com/waylonwalker/pyvers pyvers
Let’s setup some other versions of python with pyenv # [4]
If you don’t already have pyenv [5] installed,
you can follow their install
instructions [6] to get it.
pyenv install 3.8.13
pyenv install 3.10.5
I usually require a virtual environment # [7]
I set the PIP...
Check out Cveinnt [1] and their project LiveTerm [2].
💻 Build terminal styled websites in minutes!
References:
[1]: https://github.com/Cveinnt
[2]: https://github.com/Cveinnt/LiveTerm
curl [1] has done a fantastic job with curl [2]. Highly recommend taking a look.
A command line tool and library for transferring data with URL syntax, supporting DICT, FILE, FTP, FTPS, GOPHER, GOPHERS, HTTP, HTTPS, IMAP, IMAPS, LDAP, LDAPS, MQTT, POP3, POP3S, RTMP, RTMPS, RTSP, SCP, SFTP, SMB, SMBS, SMTP, SMTPS, TELNET, TFTP, WS and WSS. libcurl offers a myriad of powerful features
References:
[1]: https://github.com/curl
[2]: https://github.com/curl/curl
LIVE-REPLAY - Python dev | Markata todoui | 4/6/2022
https://youtu.be/-42A5210HYo
Super fun steam Broadcasted live on Twitch – Watch live at https://www.twitch.tv/waylonwalker
We worked on markata todoui, a command tui trello board written in python using only markdown files to store the data. I love markdown and I want to make this my workflow.
During this stream we get RAIDED by TEEJ_DV! and chat about tmux a bit before calling the changes to markata-tui good and signing off.
- dotfiles: https://github.com/WaylonWalker/devtainer
- today’s project: https://github.com/WaylonWalker/markata-todoui
- website: https://waylonwalker.com/
The work on fish-lf-icons [1] by joshmedeski [2].
Fish plugin to add Nerd Font icon support to the lf terminal file manager
References:
[1]: https://github.com/joshmedeski/fish-lf-icons
[2]: https://github.com/joshmedeski
If you’re into interesting projects, don’t miss out on wish-lists [1], created by pypeaday [2].
amazon wish lists replacement
References:
[1]: https://github.com/pypeaday/wish-lists
[2]: https://github.com/pypeaday
I’m really excited about typeshed [1], an amazing project by python [2]. It’s worth exploring!
Collection of library stubs for Python, with static types
References:
[1]: https://github.com/python/typeshed
[2]: https://github.com/python
If you’re into interesting projects, don’t miss out on mypy [1], created by python [2].
Optional static typing for Python
References:
[1]: https://github.com/python/mypy
[2]: https://github.com/python
I’m impressed by devshell [1] from numtide [2].
Per project developer environments
References:
[1]: https://github.com/numtide/devshell
[2]: https://github.com/numtide
The work on pyscript [1] by pyscript [2].
PyScript is an open source platform for Python in the browser. Try PyScript: https://pyscript.com Examples: https://tinyurl.com/pyscript-examples Community: https://discord.gg/HxvBtukrg2
References:
[1]: https://github.com/pyscript/pyscript
[2]: https://github.com/pyscript
Check out pypeaday [1] and their project tdarr [2].
tdarr setup
References:
[1]: https://github.com/pypeaday
[2]: https://github.com/pypeaday/tdarr
If you’re into interesting projects, don’t miss out on skedulord [1], created by koaning [2].
captures logs and makes cron more fun
References:
[1]: https://github.com/koaning/skedulord
[2]: https://github.com/koaning
How I Quickly Capture Screenshots directly into My Blog
When I am creating blog posts it’s often helpful to add screenshots to them to
illustrate what I see on my screen. Sometimes I lack good screenshots in my
posts because it just takes more effort than I have in the moment, and I
prioritize making content over making perfect content.
Making Screenshots # [1]
When I have something to take a screenshot of, I need to take the shot,
optimize the image, often convert it to a better format, publish it, and
create a the img tag in my blog.
- take screenshot
- optimize
- conversion
- publish
- create img tag
Created in 🐍Python # [2]
I created this tool for myself in python because that is what I am most
familiar with, but realistically most of what I am calling are shell scripts
that I could do in just about any language.
Install my screenshot tool # [3]
My screenshot tool is quite hacky and not configurable, but works wonderfully
for me. If you like it and want to use it, make it configurable or fork it.
For now it lives on GitHub...
Copier < 6.0.0b0 considered dangerous
Copier is a fantastic templating library written in python, but older versions
have a dangerous bug if you are using it inside of existing directories.
!!UPDATE # [1]
As of May 15, 2022, the stable release of copier now includes these changes, if
you have not already make sure you update.
This is a PSA # [2]
I Use copier several times per day and get fantastic benefit from this project,
this post is not intended to crap all over copier in any way, but is rather a
PSA for other users who do use copier like I do so that they know the dangers
of using copier inside an existing directory.
The issue # [3]
The fix # [4]
https://github.com/copier-org/copier/pull/273
As of the time of writing this version is still in beta, if you still want to
use copier with existing directtories, I’d strongly encourage you to install
the --pre release.
pipx install copier --pip-args='--pre'
confirm # [5]
copier --version
# copier 6.0.0b0
My update commit # [6]
https://github.com/WaylonWalker/de...
nvim-notify [1] by rcarriga [2] is a game-changer in its space. Excited to see how it evolves.
A fancy, configurable, notification manager for NeoVim
References:
[1]: https://github.com/rcarriga/nvim-notify
[2]: https://github.com/rcarriga
I came across smart-sec-cam [1] from scottbarnesg [2], and it’s packed with great features and ideas.
A privacy-focused, intelligent security camera system.
References:
[1]: https://github.com/scottbarnesg/smart-sec-cam
[2]: https://github.com/scottbarnesg

I came across cli [1] from httpie [2], and it’s packed with great features and ideas.
🥧 HTTPie CLI — modern, user-friendly command-line HTTP client for the API era. JSON support, colors, sessions, downloads, plugins & more.
References:
[1]: https://github.com/httpie/cli
[2]: https://github.com/httpie
PyOhio CFP's
Here are some CFP’s that I used for PyOhio 2022.
https://pretalx.com/pyohio-2022/cfp
Idea to blog post in minutes - Shorter # [1]
Markata is a plugins all the way down static site generator, that covers all
the things you need to go from markdown to a blog site out of the box. Since
it’s plugins all the way down you can also rip out all the default plugins, and
do something completely different with the lifecycle.
Lets build a whole blog site in 5 minutes.
Add Kedro to your Pandas Workflow - Short # [2]
Sometimes python scripts/notebooks take a long time to run, let kedro
automatically save your datasets so that you can maintain your production code
with ease. Lets take a pipeline with an issue 30 minutes in and solve the
issue in 5 mintues.
References:
[1]: #idea-to-blog-post-in-minutes---shorter
[2]: #add-kedro-to-your-pandas-workflow---short
Check out nbdd0121 [1] and their project wsld [2].
WSL Daemon - Stable X11 connection and time synchronisation for WSL2
References:
[1]: https://github.com/nbdd0121
[2]: https://github.com/nbdd0121/wsld
Just starred dunk [1] by darrenburns [2]. It’s an exciting project with a lot to offer.
Prettier git [3] diffs in the terminal 🎨
References:
[1]: https://github.com/darrenburns/dunk
[2]: https://github.com/darrenburns
[3]: /glossary/git/
If you’re into interesting projects, don’t miss out on dagger [1], created by dagger [2].
An engine to run your pipelines in containers
References:
[1]: https://github.com/dagger/dagger
[2]: https://github.com/dagger
Gramformer [1] by PrithivirajDamodaran [2] is a game-changer in its space. Excited to see how it evolves.
A framework for detecting, highlighting and correcting grammatical errors on natural language text. Created by Prithiviraj Damodaran. Open to pull requests and other forms of collaboration.
References:
[1]: https://github.com/PrithivirajDamodaran/Gramformer
[2]: https://github.com/PrithivirajDamodaran
I like WaylonWalker’s [1] project markata [2].
A plugins all the way down static site generator written in python. Plugins all the way down means that you can completely change the behavior of how it works by swapping plugins, installing new ones, or creating your own all in python.
References:
[1]: https://github.com/WaylonWalker
[2]: https://github.com/WaylonWalker/markata
Check out eyeseast [1] and their project python-frontmatter [2].
Parse and manage posts with YAML (or other) frontmatter
References:
[1]: https://github.com/eyeseast
[2]: https://github.com/eyeseast/python-frontmatter
I came across awesome-tuis [1] from rothgar [2], and it’s packed with great features and ideas.
List of projects that provide terminal user interfaces
References:
[1]: https://github.com/rothgar/awesome-tuis
[2]: https://github.com/rothgar
I’m impressed by markdown-styles [1] from mixu [2].
Markdown to static HTML [3] generator and multiple CSS themes for Markdown
References:
[1]: https://github.com/mixu/markdown-styles
[2]: https://github.com/mixu
[3]: /html/
nicoddemus [1] has done a fantastic job with pytest-rich [2]. Highly recommend taking a look.
pytest + rich integration (proof of concept)
References:
[1]: https://github.com/nicoddemus
[2]: https://github.com/nicoddemus/pytest-rich
patrick-kidger [1] has done a fantastic job with mkposters [2]. Highly recommend taking a look.
Make posters from Markdown files.
References:
[1]: https://github.com/patrick-kidger
[2]: https://github.com/patrick-kidger/mkposters
I’m impressed by pype.dev [1] from pypeaday [2].
my blog?
References:
[1]: https://github.com/pypeaday/pype.dev
[2]: https://github.com/pypeaday
Just starred kedro-rich [1] by datajoely [2]. It’s an exciting project with a lot to offer.
Make your Kedro experience snazzy
References:
[1]: https://github.com/datajoely/kedro-rich
[2]: https://github.com/datajoely
I’m really excited about dirty-equals [1], an amazing project by samuelcolvin [2]. It’s worth exploring!
Doing dirty (but extremely useful) things with equals.
References:
[1]: https://github.com/samuelcolvin/dirty-equals
[2]: https://github.com/samuelcolvin
Looking for inspiration? bubbletea [1] by charmbracelet [2].
A powerful little TUI framework 🏗
References:
[1]: https://github.com/charmbracelet/bubbletea
[2]: https://github.com/charmbracelet
If you’re into interesting projects, don’t miss out on pjs [1], created by bashbunni [2].
A basic CLI for regularly updating your project’s status
References:
[1]: https://github.com/bashbunni/pjs
[2]: https://github.com/bashbunni
Just starred nvim-terminal.lua [1] by norcalli [2]. It’s an exciting project with a lot to offer.
A high performance filetype mode for Neovim which leverages conceal and highlights your buffer with the correct color codes.
References:
[1]: https://github.com/norcalli/nvim-terminal.lua
[2]: https://github.com/norcalli
The work on xsv [1] by BurntSushi [2].
A fast CSV command line toolkit written in Rust.
References:
[1]: https://github.com/BurntSushi/xsv
[2]: https://github.com/BurntSushi
I’m really excited about kondo [1], an amazing project by tbillington [2]. It’s worth exploring!
Cleans dependencies and build artifacts from your projects.
References:
[1]: https://github.com/tbillington/kondo
[2]: https://github.com/tbillington
Check out snapdrop [1] by SnapDrop [2]. It’s a well-crafted project with great potential.
A Progressive Web App for local file sharing
References:
[1]: https://github.com/SnapDrop/snapdrop
[2]: https://github.com/SnapDrop
The work on Heimdall [1] by linuxserver [2].
An Application dashboard and launcher
References:
[1]: https://github.com/linuxserver/Heimdall
[2]: https://github.com/linuxserver
The work on tinysearch [1] by tinysearch [2].
🔍 Tiny, full-text search engine for static websites built with Rust and Wasm
References:
[1]: https://github.com/tinysearch/tinysearch
[2]: https://github.com/tinysearch
Looking for inspiration? templates [1] by zevaverbach [2].
No description available.
References:
[1]: https://github.com/zevaverbach/templates
[2]: https://github.com/zevaverbach
Check out lukas-reineke [1] and their project cmp-rg [2].
ripgrep source for nvim-cmp
References:
[1]: https://github.com/lukas-reineke
[2]: https://github.com/lukas-reineke/cmp-rg
Check out photoview [1] and their project photoview [2].
Photo gallery for self-hosted [3] personal servers
References:
[1]: https://github.com/photoview
[2]: https://github.com/photoview/photoview
[3]: /self-host/
I like mizlan’s [1] project iswap.nvim [2].
Interactively select and swap function arguments, list elements, and much more. Powered by tree-sitter.
References:
[1]: https://github.com/mizlan
[2]: https://github.com/mizlan/iswap.nvim
Check out rhysd [1] and their project conflict-marker.vim [2].
Weapon to fight against conflicts in Vim.
References:
[1]: https://github.com/rhysd
[2]: https://github.com/rhysd/conflict-marker.vim
I like Textualize’s [1] project rich-cli [2].
Rich-cli is a command line toolbox for fancy output in the terminal
References:
[1]: https://github.com/Textualize
[2]: https://github.com/Textualize/rich-cli
If you’re into interesting projects, don’t miss out on jupyterlite [1], created by jupyterlite [2].
Wasm powered Jupyter running in the browser 💡
References:
[1]: https://github.com/jupyterlite/jupyterlite
[2]: https://github.com/jupyterlite
I’m really excited about nbterm [1], an amazing project by davidbrochart [2]. It’s worth exploring!
Jupyter Notebooks in the terminal.
References:
[1]: https://github.com/davidbrochart/nbterm
[2]: https://github.com/davidbrochart
I came across stylish.nvim [1] from sunjon [2], and it’s packed with great features and ideas.
Stylish UI components for Neovim
References:
[1]: https://github.com/sunjon/stylish.nvim
[2]: https://github.com/sunjon
If you’re into interesting projects, don’t miss out on dynaconf [1], created by dynaconf [2].
Configuration Management for Python ⚙
References:
[1]: https://github.com/dynaconf/dynaconf
[2]: https://github.com/dynaconf
Check out neovim-grimoire [1] by alanwsmith [2]. It’s a well-crafted project with great potential.
No description available.
References:
[1]: https://github.com/alanwsmith/neovim-grimoire
[2]: https://github.com/alanwsmith
functools.total_ordering makes adding all of six of the rich comparison operators to your custom classes much easier, and more likely that you remember all of them.
From the Docs: The class must define one of __lt__(), __le__(), __gt__(), or __ge__ In addition, the class should supply an __eq__() method.
one of these
- lt()
- le()
- gt()
- ge()
and required to have this one
- eq()
Here is an example using the Enum I was working on the other day.
from enum import Enum, auto
from functools import total_ordering
@total_ordering
class LifeCycle(Enum):
configure = auto()
glob = auto()
load = auto()
pre_render = auto()
render = auto()
post_render = auto()
save = auto()
def __lt__(self, other):
try:
return self.value < other.value
except AttributeError:
return self.value < other
def __eq__(self, other):
try:
return self.value == other.value
except AttributeError:
return self.value == other
Check out ipython [1] and their project ipython [2].
Official repository for IPython itself. Other repos in the IPython organization contain things like the website, documentation builds, etc.
References:
[1]: https://github.com/ipython
[2]: https://github.com/ipython/ipython
Check out sharkdp [1] and their project pastel [2].
A command-line tool to generate, analyze, convert and manipulate colors
References:
[1]: https://github.com/sharkdp
[2]: https://github.com/sharkdp/pastel
If you’re into interesting projects, don’t miss out on asdf [1], created by asdf-vm [2].
Extendable version manager with support for Ruby, Node.js, Elixir, Erlang & more
References:
[1]: https://github.com/asdf-vm/asdf
[2]: https://github.com/asdf-vm
I came across outputformat [1] from delestro [2], and it’s packed with great features and ideas.
Python library to decorate and beautify strings
References:
[1]: https://github.com/delestro/outputformat
[2]: https://github.com/delestro
pyenv [1] has done a fantastic job with pyenv [2]. Highly recommend taking a look.
Simple Python version management
References:
[1]: https://github.com/pyenv
[2]: https://github.com/pyenv/pyenv
pyenv [1] has done a fantastic job with pyenv-installer [2]. Highly recommend taking a look.
This tool is used to install pyenv and friends.
References:
[1]: https://github.com/pyenv
[2]: https://github.com/pyenv/pyenv-installer
vim-abolish [1] by tpope [2] is a game-changer in its space. Excited to see how it evolves.
abolish.vim: Work with several variants of a word at once
References:
[1]: https://github.com/tpope/vim-abolish
[2]: https://github.com/tpope
I came across Talkpython.fm-Notable-Packages [1] from xandrade [2], and it’s packed with great features and ideas.
[unofficial] Talkpython.fm podcast notable PyPI packages compilation
References:
[1]: https://github.com/xandrade/Talkpython.fm-Notable-Packages
[2]: https://github.com/xandrade
Smoother Python with automatic imports | pyflyby
This is not a flaky works half the time kind of plugin, it’s a seriously smooth
editing experience. I’ve just started using pyflyby, and it is solid so far.
I have automatic imports on every save of a python file in neovim, and
automatic imports on every command in ipython.
I can’t tell you how pumped I am for this, and how good its felt to use over
the past few weeks. It’s glorious.
YouTube video # [1]
Listen to me rant on how great pyflyby is
https://youtu.be/2QW5DJiEJH4
Give the video a watch, I did not have noise-cancelling on in obs. My
apologies for the background hum and the mic stand bumps. I did my best to fix
them up.
Installation # [2]
How to install pyflyby for automatic python imports
pyflyby is hosted on pypi, so you can get it with pip. I have had no issues
installing it on 3.8+ so far.
pip install pyflyby
Configuration setup with stow # [3]
always stow your dotfiles
If you’re going to configure any of your tools the first thing you should do is
set it up w...
Check out aoc-2021-kedro-playground [1] by pypeaday [2]. It’s a well-crafted project with great potential.
No description available.
References:
[1]: https://github.com/pypeaday/aoc-2021-kedro-playground
[2]: https://github.com/pypeaday
Looking for inspiration? dotfiles [1] by elnappo [2].
my .files - powered by Ansible
References:
[1]: https://github.com/elnappo/dotfiles
[2]: https://github.com/elnappo
You must use augroup with autocmd in vim | Here's how
If you are running vim autocmd’s without a group, you’re killing your
performance. Granted your probably not sourcing your vimscript files with
autocmd’s too often, but every time you source that vimscript you are adding
another command that needs to run redundantly.
https://youtu.be/2ITTn4Dl0lc
This is what I had # [1]
Not silky smooth
For WAAY too long I have had something like this in my vimrc or init.vim.
It formats my python for me on every save, works great except if I source my
dotfiles more than once I start adding how many times black runs.
autocmd bufwritepre *.py execute 'Black'
Why is a bare autocmd bad # [2]
let me demonstrate
Lets create a new file called format.vim and give it the :so %. Works
great, it starts telling me that its formatting.
autocmd bufwritepre *.py :echo("formatting with black")
too-many-formats [3]
BUT as every time I give it the :so % it formats an extra time on every
single save.
Setting up an augroup # [4]
I’ve been told I need an aug...
Code Review from the comfort of vim | Diffurcate
I often review Pull requests from the browser as it just makes it so easy to see
the diffs and navigate through them, but there comes a time when the diffs get
really big and hard to follow. That’s when its time to bring in the comforts of
vim.
https://youtu.be/5NKaZFavM0E
Plugins needed # [1]
This all stems from the great plugin by
AndrewRadev [2]. It breaks a down
into a project. So rather than poping into a pager from git [3] diff,
you can pipe to diffurcate and it will setup a project in a tmp
directory for you and you can browse this project just like any
other except it’s just a diff.
Plug 'AndrewRadev/diffurcate.vim'
My aliases # [4]
First to quickly checkout PR’s from azure devops I have setup an alias to fuzzy
select a pr and let the az command do the checkout.
alias azcheckout='az repos pr checkout --id $(az repos pr list --output table | tail -n -2 | fzf | cut -d " " -f1)'
Next I have a few aliases setup for checking diffs. The first one checks what
is staged vs the...
Setup a yaml schema | yamlls for a silky smooth setup
I’ve gone far too long without a good setup for editing yaml
files, I am missing out on autocomplete and proper diagnostics.
This ends today as I setup yaml-language-server in neovim.
https://youtu.be/xo4HrFoKF4c
The video for this one is part of a
challenge-playlist [1]
I put out for myself to constantly improve my dotfiles for all of December.
init.vim # [2]
I have my init.vim setup to only source other modules, if you want everything
in a single config, feel free to do as you wish. I broke mine up earlier this
year as I doubled into nvim and am not going back.
source ~/.config/nvim/plugins.vim
lua require'waylonwalker.cmp'
lua require'waylonwalker.lsp-config'
Plugin setup # [3]
You will need the following plugins. I use plug, if you don’t you will have to
convert the syntax over to the plugin manager you use.
neovim/nvim-lspconfig [4] is for
configuring the lsp. It comes with a bunch of sane defaults for most servers,
so you pretty much just have to call setup on that serv...
Just starred aoc_2021 [1] by borgmanJeremy [2]. It’s an exciting project with a lot to offer.
No description available.
References:
[1]: https://github.com/borgmanJeremy/aoc_2021
[2]: https://github.com/borgmanJeremy
Just starred aoc-2021 [1] by pypeaday [2]. It’s an exciting project with a lot to offer.
Advent of Code 2021 repo
References:
[1]: https://github.com/pypeaday/aoc-2021
[2]: https://github.com/pypeaday
Open files FAST from zsh | or bash if thats your thing
https://youtu.be/PQw_is7rQSw
I am often in a set of tmux splits flying back and forth, accidentally close my
editor, so when I come back to that split and hit my keybinds to edit files I
enter them into zsh rather than into nvim like I intended. Today I am going to
sand off that rough edge and get as similar behavior to nvim as I can with a
couple of aliases.
Make sure you check out the YouTube video to see all of my improvements.
what’s an alias # [1]
If you have never heard of an alias before it’s essentially a shortcut to a
given command. You can pass additional flags to the underlying command and
they will get passed in. Most of the time they are just shorter versions of
commands that you run often or even like in this case a common muscle memory
typo that occurs for you.
My new alias’s for fuzzy editing files from zsh # [2]
Here are the new aliases that I came up with to smooth out my workflow. These
give me a similar feel to how these keys work in neovim but from zsh.
#...
How linux users install a text editor
In honor of the neovim 0.6.0 release, I decided to do a funny skit installing
neovim, and fix up my install script in the process as part of my challenge to
fix up my dotfiles. I ran into one snag where I was not updating the repo that
I cloned. I moved it to the directory I now keep third-party git [1] repos and set
it to update with ansible.
https://youtu.be/64oKLphhBuo
The thing that took me the longest to realize was…. I had a path issue
pointing me to an old install of the appimage over the fresh build, fixed that
up and now we are on 0.7.0 nightly.
Related Links # [2]
https://neovim.io/
https://github.com/neovim/neovim
https://github.com/neovim/neovim/releases/tag/v0.6.0
References:
[1]: /glossary/git/
[2]: #related-links
The work on neovim [1] by neovim [2].
Vim-fork focused on extensibility and usability
References:
[1]: https://github.com/neovim/neovim
[2]: https://github.com/neovim
lewis6991 [1] has done a fantastic job with gitsigns.nvim [2]. Highly recommend taking a look.
Git [3] integration for buffers
References:
[1]: https://github.com/lewis6991
[2]: https://github.com/lewis6991/gitsigns.nvim
[3]: /glossary/git/
30 days dotfile ricing
https://youtu.be/Jq1Y48F_rOU
I am challenging myself to 30 days of dotfile ricing. I have been on linux
desktop for a few months now and have a pretty good workflow going, I have the
coarse edits done to my workflow, but it has some rough edges that need sanded
down. It’s time to squash some of those little annoyances that still exist in
my setup.
This is primarily going to be focused on productivity, but may have a few
things to just look better. This will comprise heavily of aliases, zsh, and
nvim config.
Follow the YouTube channel [1] or the rss
feed [2] to stay up to date.
References:
[1]: https://youtube.com/waylonwalker
[2]: https://waylonwalker/rss/
JUT | Read Notebooks in the Terminal
Trying to read a .ipynb file without starting a jupyter server? jut has you
covered.
https://youtu.be/t8AvImnwor0
watch the video version of this post on YouTube [1]
57676ca9-23dd-4b3d-a084-293a0525eba5.mkv [2]
Or watch the full thing here
install # [3]
jut is packaged and available on pypi so installing is as easy as pip installing it.
pip install jut
installing jut with pip [4]
! This is my first time including snippets of the video in the article like this, let me know what you think!
examples # [5]
jut https://cantera.org/examples/jupyter/thermo/flame_temperature.ipynb
jut https://cantera.org/examples/jupyter/thermo/flame_temperature.ipynb --head 3
jut https://cantera.org/examples/jupyter/thermo/flame_temperature.ipynb --tail 2
running jut examples [6]
what are all the commands available for jut? # [7]
Take a look at the help of the jut cli to explore all the options that it
offers.
jut --help
There is some good information on the projects
readme [8] as well.
getti...
Waylon Walker
Hi, Hello, I’m Waylon # [1]
Husband, dad of two, and hobbyist builder of things on the internet.
When I’m not wrangling data pipeline platforms or building web platforms,
you’ll find me gaming [2] with my kids, making art, or skating
around the neighborhood. Reliving my mechanical engineering days with my 3d
printer. Winding down at the end of the day binge-watching Big Bang Theory
with my wife.
What I Do # [3]
I’m a Senior Software Engineer who specializes in data pipelines and
Python-based web platforms. I help teams turn messy data into reliable systems
that actually work.
Why I Built This Site # [4]
from scratch
I got tired of:
- Build times that took forever
- Node modules folders that became black holes
- Bloated pages that took ages to load
- SEO tools that felt like an afterthought
So I built my own platform from scratch using pluggy and diskcache.
It’s under-funded, over-dreamed, barely documented, and I love it. This site is
my sandbox for learning, teaching, a...
Looking for inspiration? dotfiles [1] by thoughtbot [2].
A set of vim, zsh, git [3], and tmux configuration files.
References:
[1]: https://github.com/thoughtbot/dotfiles
[2]: https://github.com/thoughtbot
[3]: /glossary/git/
kedro catalog create
I use kedro catalog create to boost my productivity by automatically
generating yaml catalog entries for me. It will create new yaml files for each
pipeline, fill in missiing catalog entries, and respect already existing
catalog entries. It will reformat the file, and sort it based on catalog key.
https://youtu.be/_22ELT4kja4
What is Kedro [1]
👆 Unsure what kedro is? Check out this post.
Running Kedro Catalog Create # [2]
The command to ensure there are catalog entries for every dataset in the passed
in pipeline.
kedro catalog create --pipeline history_nodes
- Create’s new yaml file, if needed
- Fills in new dataset entries with the default dataset
- Keeps existing datasets untouched
- it will reformat your yaml file a bit
- default sorting will be applied
- empty newlines will be removed
CONF_ROOT # [3]
Kedro will respect your CONF_ROOT settings when it creates a new catalog
file, or looks for existing catalog files. You can change the location of your
configuration f...
telescope-media-files.nvim [1] by nvim-telescope [2] is a game-changer in its space. Excited to see how it evolves.
Telescope extension to preview media files using Ueberzug.
References:
[1]: https://github.com/nvim-telescope/telescope-media-files.nvim
[2]: https://github.com/nvim-telescope
sqlfluff [1] by sqlfluff [2] is a game-changer in its space. Excited to see how it evolves.
A modular SQL linter and auto-formatter with support for multiple dialects and templated code.
References:
[1]: https://github.com/sqlfluff/sqlfluff
[2]: https://github.com/sqlfluff
cmp-copilot [1] by hrsh7th [2] is a game-changer in its space. Excited to see how it evolves.
copilot.vim source for nvim-cmp
References:
[1]: https://github.com/hrsh7th/cmp-copilot
[2]: https://github.com/hrsh7th
Looking for inspiration? pypandoc [1] by JessicaTegner [2].
Thin wrapper for “pandoc” (MIT)
References:
[1]: https://github.com/JessicaTegner/pypandoc
[2]: https://github.com/JessicaTegner
I’m impressed by kedro-wdbc-tf [1] from abhinavsp0730 [2].
No description available.
References:
[1]: https://github.com/abhinavsp0730/kedro-wdbc-tf
[2]: https://github.com/abhinavsp0730
Check out chipsenkbeil [1] and their project distant.nvim [2].
🚧 (Alpha stage software) Edit files, run programs, and work with LSP on a remote machine from the comfort of your local environment 🚧
References:
[1]: https://github.com/chipsenkbeil
[2]: https://github.com/chipsenkbeil/distant.nvim
nvim conf 2021 | IDE's are slow | Waylon Walker
https://youtu.be/E18m4KkJUnI
---
Slides 👇 # [1]
welcome # [2]
Other possible titles # [3]
- Using Vim as a Team Lead
- I 💜 Tmux
- Why I stopped using @code
- Get there fast
- How I vim
It’s ok # [4]
Use a graphical IDE if it works for you.
Trick it out # [5]
vim is so well integrated into the terminal, take advantage
It wasn’t working for me anymore # [6]
dozens of instances # [7]
As a team lead I bounce betweeen a dozen projects a per day
https://pbs.twimg.com/media/FAEmRjYUcAUk2eR?format=jpg&name=large [8]
Move With Intent # [9]
Running vim inside tmux lets me move swiftly between the exact project I need.
https://twitter.com/_WaylonWalker/status/1438849269407047686/photo/1// [10]: <> (__)
Hub and Spoke # [11]
- direct link to specific projects
- fuzzy into all projects
- fuzzy into open projects
How I navigate tmux in 2021 [12]#hub-and-spoke
Other Things That Make this Possible # [13]
- tmux
- direnv
vim adjacent things
yes, vim is ugly, make it your...
tesseract [1] by tesseract-ocr [2] is a game-changer in its space. Excited to see how it evolves.
Tesseract Open Source OCR Engine (main repository)
References:
[1]: https://github.com/tesseract-ocr/tesseract
[2]: https://github.com/tesseract-ocr
The work on sqlite.lua [1] by kkharji [2].
SQLite LuaJIT binding with a very simple api.
References:
[1]: https://github.com/kkharji/sqlite.lua
[2]: https://github.com/kkharji
I’m impressed by telescope-frecency.nvim [1] from nvim-telescope [2].
A telescope.nvim extension that offers intelligent prioritization when selecting files from your editing history.
References:
[1]: https://github.com/nvim-telescope/telescope-frecency.nvim
[2]: https://github.com/nvim-telescope
Check out flick-it [1] by cmgriffing [2]. It’s a well-crafted project with great potential.
An OBS overlay game similar to the !drop game.
References:
[1]: https://github.com/cmgriffing/flick-it
[2]: https://github.com/cmgriffing
Check out diffurcate.vim [1] by AndrewRadev [2]. It’s a well-crafted project with great potential.
Split a git [3] diff into separate files
References:
[1]: https://github.com/AndrewRadev/diffurcate.vim
[2]: https://github.com/AndrewRadev
[3]: /glossary/git/
codelucas [1] has done a fantastic job with newspaper [2]. Highly recommend taking a look.
newspaper3k is a news, full-text, and article metadata extraction in Python 3. Advanced docs:
References:
[1]: https://github.com/codelucas
[2]: https://github.com/codelucas/newspaper
I recently discovered delta-rs [1] by delta-io [2], and it’s truly impressive.
A native Rust library for Delta Lake, with bindings into Python
References:
[1]: https://github.com/delta-io/delta-rs
[2]: https://github.com/delta-io
I recently discovered cmp-skkeleton [1] by rinx [2], and it’s truly impressive.
skkeleton source for nvim-cmp
References:
[1]: https://github.com/rinx/cmp-skkeleton
[2]: https://github.com/rinx
The work on coveragepy [1] by nedbat [2].
The code coverage tool for Python
References:
[1]: https://github.com/nedbat/coveragepy
[2]: https://github.com/nedbat
I like coveragepy’s [1] project coveragepy [2].
The code coverage tool for Python
References:
[1]: https://github.com/coveragepy
[2]: https://github.com/coveragepy/coveragepy
I like pytest-dev’s [1] project pytest-cov [2].
Coverage plugin for pytest.
References:
[1]: https://github.com/pytest-dev
[2]: https://github.com/pytest-dev/pytest-cov
Just Ask Ipython for help
It happens to the best of us # [1]
We can’t all remember every single function signature out there, it’s just not
possible. If you want to stay productive while coding without the temptation
to hit YouTube or Twitter. Use the built in help. Here are 5 ways to get help
without leaving your terminal.
https://youtu.be/TZrRAP-9UMk
Docstrings # [2]
In any python repl you can access the docstring of a function by calling for help.
help(df.rolling)
In Ipython we can even get some syntax highlighting with the ?.
df.rolling?
Source Code # [3]
Sometimes the docstrings are not good enough, and don’t give us the content we
need, and we just need to look at the source. Without leaving your terminal
there are two ways I often use to get to the source of a function I am trying
to use.
import inspect
inspect.getsource(df.rolling)
The more common way I do it is with the ipython ??.
df.rolling??
Bonus rich.inspect # [4]
You thought the syntax highlighting was good with ipython, check out w...
Hacktoberfest 2021?
Are you participating in Hacktoberfest 2021?
I got my start with open source with Hacktoberfest 2018. I remember being so
nervous for those first pr’s. I have continued to participate every year, and
it feels good to give back.
It made a big change on me # [1]
Something that it really did for me was to lower the hurdle to contribute
regularly. I am not a huge contributor to open source. I am not necessarily a
regular maintainer of any large project, but I do often raise issues when I see
things as a user that would make things easier or more clear.
After participating it does not feel like such a big deal to go through the
motions of making my own fork, making a small change, and submitting it for
review.
What can you do? # [2]
As a user, you might be in a unique position to see a library from the
perspective of other users rather than from the eyes of a maintainer. You can
help bring the user perspective to your favorite library.
https://twitter.com/_WaylonWalker/status/1446...
I made a neovim plugin
I’ve slowly adding more and more lua functions into my neovim configuration,
and recently I noticed a pattern for a class of functions that reach out to run
shell commands that can be abstracted away.
https://youtu.be/8m5ipBuopPU
Telegraph.nvim # [1]
Check out the project readme [2]
for the most up to date details on the plugin itself.
Motivation # [3]
I want a simple way to make remaps into shell commands that can open new tmux
windows, popups, or just run a command with context from the editor.
For example I want to make remaps to do things like open the current file in lookatme.
# vim :terminal
nnoremap <leader>s <cmd>Telegraph pipx run lookatme {filepath} --live-reload --style gruvbox-dark<cmd>
# tmux session
nnoremap <leader><leader>s <cmd>lua require'telegraph'.telegraph({cmd='pipx run lookatme {filepath} --live-reload --style gruvbox-dark', how='tmux'})<CR>
# tmux popup
nnoremap <leader><leader>S <cmd>lua require'telegraph'.telegraph({cmd='pipx run lookatme {filepath...
The work on ansible [1] by ThePrimeagen [2].
No description available.
References:
[1]: https://github.com/ThePrimeagen/ansible
[2]: https://github.com/ThePrimeagen
Setting Parameters in kedro
Parameters are a place for you to store variables for your pipeline that can be
accessed by any node that needs it, and can be easily changed by changing your
environment. Parameters are stored in the repository in yaml files.
https://youtu.be/Jj5cQ5bqcjg
What is Kedro [1]
👆 Unsure what kedro is? Check out this post.
parameters files # [2]
You can have multiple parameters files and choose which ones to load by setting
your environment. By default kedro will give you a base and local
parameters file.
- conf/base/parameters.yml
- conf/local/parameters.yml
base # [3]
The base environment should contain all of the default values you want to run.
# /conf/base/parameters.yml
test_size: 0.2
random_state: 3
features:
- engines
- passenger_capacity
- crew
- d_check_complete
- moon_clearance_complete
- iata_approved
- company_rating
- review_scores_rating
NOTE base will always be loaded first.
accessing parameters # [4]
Parameters can be accessed through context or throug...
Writing your first kedro Nodes
https://youtu.be/-gEwU-MrPuA
Before we jump in with anything crazy, let’s make some nodes with some vanilla
data structures.
import node # [1]
You will need to import node from kedro.pipeline to start creating nodes.
from kedro.pipeline import node
func # [2]
The func is a callable that will take the inputs and create the outputs.
inputs / outputs # [3]
Inputs and outputs can be None, a single catalog entry as a string, mutiple
catalog entries as a List of strings, or a dictionary of strings where the key
is the keyword argument of the func and the value is the catalog entry to use
for that keyword.
our first node # [4]
Sometimes in our pipelines our data is coming from an api where we already have
python functions built to pull with. Thats ok, kedro supposrts that with
inputs=None.
def create_range():
return range(100)
make_range = node(
func=create_range,
inputs=None,
outputs='range'
)
second node # [5]
Now we have some data to work from, lets use that as our inpu...
I’m impressed by Telegraph.nvim [1] from WaylonWalker [2].
Send commands system commands in an elegant way
References:
[1]: https://github.com/WaylonWalker/Telegraph.nvim
[2]: https://github.com/WaylonWalker
I came across nvim-example-lua-plugin [1] from jacobsimpson [2], and it’s packed with great features and ideas.
A simple Neovim Lua plugin using the Lua embedded in Neovim, suitable as a template.
References:
[1]: https://github.com/jacobsimpson/nvim-example-lua-plugin
[2]: https://github.com/jacobsimpson
I’m impressed by skimpy [1] from aeturrell [2].
skimpy is a light weight tool that provides summary statistics about variables in data frames within the console.
References:
[1]: https://github.com/aeturrell/skimpy
[2]: https://github.com/aeturrell
I like mobilemancer’s [1] project windows-terminal-aurelia [2].
Aurelia inspired Windows Terminal theme
References:
[1]: https://github.com/mobilemancer
[2]: https://github.com/mobilemancer/windows-terminal-aurelia
I’m really excited about vim-startuptime [1], an amazing project by dstein64 [2]. It’s worth exploring!
A plugin for viewing Vim and Neovim startup event timing information.
References:
[1]: https://github.com/dstein64/vim-startuptime
[2]: https://github.com/dstein64
I like wbthomason’s [1] project packer.nvim [2].
A use-package inspired plugin manager for Neovim. Uses native packages, supports Luarocks dependencies, written in Lua, allows for expressive config
References:
[1]: https://github.com/wbthomason
[2]: https://github.com/wbthomason/packer.nvim
Just starred nvim-lspconfig [1] by neovim [2]. It’s an exciting project with a lot to offer.
Quickstart configs for Nvim LSP
References:
[1]: https://github.com/neovim/nvim-lspconfig
[2]: https://github.com/neovim
If you’re into interesting projects, don’t miss out on nvim-treesitter [1], created by nvim-treesitter [2].
Nvim Treesitter configurations and abstraction layer
References:
[1]: https://github.com/nvim-treesitter/nvim-treesitter
[2]: https://github.com/nvim-treesitter
Looking for inspiration? vim-matchup [1] by andymass [2].
vim match-up: even better % 👊 navigate and highlight matching words 👊 modern matchit and matchparen. Supports both vim and neovim + tree-sitter.
References:
[1]: https://github.com/andymass/vim-matchup
[2]: https://github.com/andymass
treesitter-unit [1] by David-Kunz [2] is a game-changer in its space. Excited to see how it evolves.
A Neovim plugin to deal with treesitter units
References:
[1]: https://github.com/David-Kunz/treesitter-unit
[2]: https://github.com/David-Kunz
Running your Kedro Pipeline from the command line
Running your kedro pipeline from the command line could not be any easier to
get started. This is a concept that you may or may not do often depending on
your workflow, but its good to have under your belt. I personally do this half
the time and run from ipython half the time. In production, I mostly use docker
and that is all done with this cli.
https://youtu.be/ZmccpLy-OEI
What is Kedro [1]
👆 Unsure what kedro is? Check out this post.
Kedro run # [2]
To run the whole darn project all we need to do is fire up a terminal, activate
our environment, and tell kedro to run.
kedro run
Specific Pipelines # [3]
Running a sub pipeline that we have created is as easy as telling kedro which
one we want to run.
kedro run --pipeline dp
Single Nodes # [4]
While developing a node or a small list of nodes in a larger pipeline its handy
to be able to run them one at a time. Besides the use case of developing a
single node I would not reccomend leaning very heavy on running single nodes,
le...
kedro Virtual Environment
Avoid serious version conflict issues, and use a virtual environment [1] anytime
you are running python, here are three ways you can setup a kedro virtual
environment.
https://youtu.be/ZSxc5VVCBhM
- conda
- venv
- pipenv
conda # [2]
I prefer to use conda as my virtual environment manager of choice as it give me
both the interpreter and the packages I install. I don’t have to rely on the
system version of python or another tool to maintain python versions at all, I
get everything in one tool.
conda create -n my-project python=3.8 -y
conda activate my-project
python -m pip install --upgrade pip
pip install -e src
conda info --envs
- stores environment in a root directory i.e. ~/miniconda3
- conda can use its own way to manage environments environment.yml
- the python interpreter is packaged with the environment
virtualenv # [3]
Virtual env (venv) is another very respectable option that is built right into
python, and requires no additional installs or using a different dis...
I’m impressed by circles.nvim [1] from projekt0n [2].
uniform icons for neovim
References:
[1]: https://github.com/projekt0n/circles.nvim
[2]: https://github.com/projekt0n
Kedro Install
Kedro comes with an install command to install and manage all of your
projects dependencies.
https://youtu.be/IWimEs-hHQg
cd into your project directory and activate env # [1]
You must start by having your kedro project either cloned down
from an existing project or created from kedro new. Then
activate your environment.
Kedro New [2]
this post covers kedro new
kedro Virtual Environment [3]
This post covers creating your virtual environment [4] for kedro
install kedro # [5]
Make sure you have kedro installed in your current
environment, if you dont already have it.
pip install kedro==0.17.4
pip-tools # [6]
Kedro uses the pip-tools package under the hood to pin
dependencies in a very robust way to ensure that the project
will continue to work on everyone’s machine day, including
production, day in and day out. No matter what happens to the
dependencies you have installed.
pip-compile # [7]
The command that kedro uses from pip-tools is pip-compile. It will look at
what yo...
Kedro Git Init
Immediately after kedro new, before you start running kedro install or your first line of code the first
thing you should always do after getting a new kedro template created is to
git init.
https://youtu.be/IGba3ytf_6U
git init # [2]
Its as simple as these three commands to get started.
git init
git add .
git commit -m init
I don’t care if this project is for learning, if it will never have a remote or not, use git.
References:
[1]: /glossary/git/
[2]: #git-init
Kedro New
https://youtu.be/uqiv5LAiJe0
Kedro new is simply a wrapper around the cookiecutter templating library. The
kedro team maintains a ready made template that has everything you need for a
kedro project. They also maintain a few kedro starters, which are very similar
to the base template.
What is Kedro [1]
Unsure what kedro is, Check out yesterdays post on What is Kedro.
pipx # [2]
I reccomend using pipx when running kedro new. pipx is designed for system
level cli tools so that you do not need to maintain a virtual environment [3] or
worry about version conflicts, pipx manages the environment for you.
The kedro team does not reccomend pipx in their docs as they already feel
like there is a bit of a tool overload for folks that may be less familiar with
pipx kedro new
I like using pipx as it gives you better control over using a specific
version or always the latest version, unlike when you run what you have on your
system depends on when you last installed or upgraded.
Kedro Ne...
Check out AckslD [1] and their project nvim-neoclip.lua [2].
Clipboard manager neovim plugin with telescope integration
References:
[1]: https://github.com/AckslD
[2]: https://github.com/AckslD/nvim-neoclip.lua
What is Kedro
Kedro is an unopinionated Data Engineering framework that comes with a somewhat
opinionated template. It gives the user a way to build pipelines that
automatically take care of io through the use of abstract DataSets that the
user specifies through Catalog entries. These Catalog entries are loaded,
ran through a function, and saved by Nodes. The order that these Nodes are
executed are determined by the Pipeline, which is a DAG. It’s the
runner’s job to manage the execution of the Nodes.
https://youtu.be/Wf4rnFsaFFU
---
What is Kedro [1]
This is an updated version of my original what-is-kedro article
---
Hot Take # [2]
If you are doing a series of operations to data with python, especially if you
are using something as supported as pandas, you should be using a framework
that gives you a pipeline as a DAG and abstracts io.
Orchestrators # [3]
Like I said, kedro is unopinionated it does determine where or how your data
should be ran. The kedro team does support the following ...
How I Kedro
https://youtu.be/bw5_FWDVRpU
Ubuntu # [1]
I recently switched over to using Ubuntu, it works well pretty much out of the
box for me. I am using gnome with a dark theme.
Gnome Terminal # [2]
I am still using the built in default gnome terminal, it just works. It does
all the things that I need it to do. It supports transparency renders my fonts
and allows me to highlight things well.
- One Dark Theme
dotfiles # [3]
You can find my
dotfiles [4] on
github. Feel free to read through and take anything that you
find useful. I would encourage you not to steal them, but to
integrate the parts that you want into your own dotfiles.
dotfiles are a very personal thing. They are an extension of
ones fingertips designed for how you think and type.
zsh # [5]
I use zsh as my default shell. I like to use it as my
interactive shell. It works, and does a bit better with
things like tab completion out of the box.
starship # [6]
I use the starship prompt for my shell. It works well out of
the...
tmux show-messages
https://youtu.be/LLk94fKpGg4
As we push the limits of tmux further and further you are bound to end up in a
situation where you are mashing down a hotkey and it’s just not doing what you
want it to do, and you have no idea why.
show-messages is a tmux command that can be used to show what tmux is
actually doing behind the scenes. This might highlight any hot key conflicts
you might have in your ~/.tmux.conf.
man page for show-messages # [1]
In case you wnat more information about show-messages, here is the man page.
show-messages [-JT] [-t target-client]
(alias: showmsgs)
Show server messages or information. Messages are stored, up to a
maximum of the limit set by the message-limit server option. -J and -T
show debugging information about jobs and terminals.
How I navigate tmux in 2021 [2]
for more information on how I navigate tmux, check out this full post
Also check out the full YouTube
tmux-playlist [3]
to see all of the videos in this series.
References:
[1]: #man-...
tmux ta
https://youtu.be/nT0FA1RNZEs
Now your creating, jumping, and killing sessions like a boss. You are slicing
through projects with ease, let me show you one more thing that can be the
cream on top of this silky smooth setup we have been working towards.
Chris Toomey’s [1] Tmux Course # [2]
This script is simply my fork of Chris Toomey’s tat script straight out of
his course. It helps us create or jump to project specific sessions with ease.
a directory of projects # [3]
My version of the ta script will let you pass it a directory, and it will
give you a fuzzy popup.
ta ~/git
setting up a keybinding # [4]
bind C-g display-popup -E "ta ~/git"
[5]
default layout # [6]
By default I have my projects open with a vertical split, vim is on top, with
my file finder open and the lower split is set to just my terminal. This is
what I do 90% of the time that I open a project anyways.
[7]
More projects # [8]
I also have a directory setup that is a symlink-gallery of all of my projec...
tmux display-message
https://youtu.be/utfLA6L8o5s
You’ve got some long running tasks, and you’re trying to stay productive and
knock tasks off that board, but you keep finding that your processes finish and
you stay on other tasks for longer than you should. You were in the flow and
just did not check back in on it. With display-message you can send yourself
a notification when that long running task is complete.
from the man page # [1]
Here is a snippet of display-message from the tmux man page. I rarely need
to do anything other than just display message, but there are other flags for
it.
display-message [-aINpv] [-c target-client] [-d delay] [-t target-pane] [message]
(alias: display)
Display a message. If -p is given, the output is printed to stdout,
otherwise it is displayed in the target-client status line for up to
delay milliseconds. If delay is not given, the message-time option is
used; a delay of zero waits for a key press. ‘N’ ignores key presses
and closes only after the delay e...
If you’re into interesting projects, don’t miss out on python_code_tips [1], created by heathdbrown [2].
No description available.
References:
[1]: https://github.com/heathdbrown/python_code_tips
[2]: https://github.com/heathdbrown
killing tmux
https://youtu.be/QWPyYx54JbE
Now it’s time to switch gears, we are onto a different part of our day and
there are just too many sessions running and we need to clean up shop.
kill-server # [1]
One viable option is to nuke the whole dang thing. I actually do this more
than you might think.
tmux kill-server
save and commit your work diligently before kill-server
kill-session # [2]
A more reasonable option might be to kill a single session.
# kills the current session
tmux kill-session
# kills the session named scratch
tmux kill-session -t scratch
choose-tree # [3]
Killing sessions one by one from the command line can be a bit tedious, and
involve more keystrokes than necessary. Another option built right into tmux
is choose-tree. By default choose-tree is bound to prefix+s, that’s
pressing control+b then s. Once you are in choose-tree, you can navigate
around with your configured navigation scheme, press x to kill a session, or
pane or window then y to confirm. You can also ...
tmux has-session
https://youtu.be/XucVVgGmesM
I see you there, trying to script out your tmux layouts. Tryig to get each
project setup just perfect with a script, but you keep stumbling over yourself
with duplicate session error messages
The has-session tmux command is a handy tool to prevent this duplicate session error message when scripting your tmux layouts.
command line # [1]
The command is pretty straight forward, you simply ask tmux if the session name
you are looking for exists.
tmux has-session -t "waylonwalker_com"
How I navigate tmux in 2021 [2]
for more information on how I navigate tmux, check out this full post
Also check out the full YouTube
tmux-playlist [3]
to see all of the videos in this series.
References:
[1]: #command-line
[2]: /tmux-nav-2021/
[3]: https://www.youtube.com/playlist?list=PLTRNG6WIHETB4reAxbWza3CZeP9KL6Bkr
I’m impressed by htmx [1] from bigskysoftware [2].
</> htmx [3] - high power tools for HTML [4]
References:
[1]: https://github.com/bigskysoftware/htmx
[2]: https://github.com/bigskysoftware
[3]: /htmx/
[4]: /html/
tmux list-keys
https://youtu.be/Y1MYmL8ZolE
Tmux list keys can be a useful tool to help remind you of what kebindings you
have setup. You can search for them and scroll just like in tmux copy-mode.
command line # [1]
You can call list-keys from the command line but the interface is not very
usable by itself. It might be nice to mix with grep or a pager in some
circumstances.
tmux list-keys
tmux command line # [2]
Running list-keys from within the tmux command line puts you into a much more
pleasant copy-mode.
list-keys
default keybinging # [3]
By default tmux comes with list-keys bound to prefix+?.
bind-key ? list-keys
list-keys man page # [4]
You can see the additional flags provided by tmux in the man page for
list-keys.
list-keys [-1aN] [-P prefix-string -T key-table] [key]
(alias: lsk)
List key bindings. There are two forms: the default lists keys as
bind-key commands; -N lists only keys with attached notes and shows
only the ke y and note for each key.
With the default form,...
tmux status-bar
https://youtu.be/mvgM8UH11_U
The tmux status bar can be a handy tool to remind yourself where you are within
tmux. It can also include a bunch of system information like battery status,
cpu, mem, whatever you can get from the command line. Honestly I like to keep
it minimal, and actually keep it turned off most of the time. I find that it
helps a little bit for others to follow along if I keep it on in certain
circumstances.
show the status bar # [1]
You can set a hotkey to show or hide the status bar.
bind s set-option -g status
bind C-s set-option -g status
setting the background transparent # [2]
I really want a minimal status bar with very little bling, I want it to get out
of the way an not draw too much attention, so step one is to set the background
to transparent.
# default statusbar colors
#――――――――――――――――――――――――――――――――
set-option -g status-bg default
set-option -g status-fg colour240
setting default colors # [3]
I want my status bar to somewhat match the rest of ...
tmux source-file
https://youtu.be/dDq0depPrTs
So you have been tricking out that .tmux.conf, you’re looking for a silky
smooth workflow that lets you fly through tmux with super speed, but every time
you tweak out that .tmux.conf you have to restart your whole session. Not amymore,
Let’s add this to the bottom of our tmux.conf so that you can see everytime it
gets sourced.
display-message "hello beautiful"
command # [1]
We can run this command from your shell to re-source your changed .tmux.conf
tmux source-file ~/.tmux.conf
It also works from the tmux command line.
source-file ~/.tmux.conf
tmux hotkey # [2]
It’s very common to set this up as a keybinding so that you can do it easily
without needing to memorize the exact command.
bind -T prefix r source-file ~/.tmux.conf
bind -n M-r source-file ~/.tmux.conf
from vim # [3]
This is my preferred way of re-sourcing my .tmux.conf. It sits quietly in
the background, and I dont need to remember to do anything. If you are a vim
user you can automat...
tmux fzf session jumper
https://youtu.be/DkJ9rb85LC0
Quickly getting between tmux splits is critical skill for productivity. You
can get by with next or prev session for awhile, but if you have more than
about three session you need something a bit more targeted.
Full Screen selector # [1]
I have used this fzf one keybinding for quite awhile, honestly I did not make
it up, and cannot remember where it came from. It will open up a session picker
in a new full screen window.
bind C-j new-window -n "session-switcher" "\
tmux list-sessions -F '#{?session_attached,,#{session_name}}' |\
sed '/^$/d' |\
fzf --reverse --header jump-to-session --preview 'tmux capture-pane -pt {}' |\
xargs tmux switch-client -t"
Popup selector # [2]
Like with many of my keybindings I have swapped this one out for a popup
version. It just feels so smooth.
bind C-j display-popup -E "\
tmux list-sessions -F '#{?session_attached,,#{session_name}}' |\
sed '/^$/d' |\
fzf --reverse --header jump-to-session --preview 'tmux capt...
tmux next/prev session
https://youtu.be/8kZnjHPYnKU
Now that we are splitting up work into their own sessions, lets talk about how
to navigate between them without the command line. Navigating sessions is what
kept me using a too many splits and windows workflow for far too long. It was
rough, I was always tripping over panes and windows until I got too frustrated
and just ran tmux kill-server to start on a new blank slate.
bind -n M-P switch-client -p
bind -n M-N switch-client -n
How I navigate tmux in 2021 [1]
for more information on how I navigate tmux, check out this full post
Also check out the full YouTube
tmux-playlist [2]
to see all of the videos in this series.
References:
[1]: /tmux-nav-2021/
[2]: https://www.youtube.com/playlist?list=PLTRNG6WIHETB4reAxbWza3CZeP9KL6Bkr
tmux start application
https://youtu.be/c-a2Bnv_NJ0
Scripting tmux to open up specific applications can be intimidating your first
time. It can be tricky to get it to start in the right directory. If you are
trying to assign applictaions to a keybinding it can be easy to mess up and
have weird things happen every time your ~/.tmux.conf gets sourced.
Open htop in an above split # [1]
I used this one for a number of years to take a quick peek into my systems
performance while a memory intensive task was running.
bind -n M-t split-window htop \; swap-pane -U
🗒️ note that the swap-pane -U will make the htop split active immediately
Open htop in a popup # [2]
With the new tmux popup windows I really like the flow of just peeking at
htop in a popup and jumping back into what I was doing. It can have a more
consistennt look, and not mess with the window layouts.
bind -n M-t popup -E -h 95% -w 95% -x 100% "htop"
Open an applicaiton in the current directory # [3]
One thing that can be tricky is getting ap...
tmux rename session
https://youtu.be/WRLRiQDjVIA
So you have been working on your tmux workflow, you’ve dropped a too many
window workflow for scoping work that belongs together into separate sessions,
but you cannot remember what session your work is in. If your diligent you have
named your window when you created it, but sometimes its intent has changed or
your were just plain too lazy at the time for the extra characters needed to
name it. Don’t worry we can still give that session a descriptive name.
Let’s rename some sessions in the terminal.
# rename the current session to me
tmux rename-session me
# rename the me session to scratch
tmux rename-session -t me scratch
There is a default keybinding that you can use <prefix>+$ to rename the
current session in the tmux command line.
bind-key $ command-prompt -I #S "rename-session '%%'"
I’ve also had this keybinding kicking around for years, but I rarely use it
anymore. You will see why in an upcoming video.
bind -n M-W command-prompt "rename-ses...
tmux targeted session
https://youtu.be/5KE7Il7SOEk
This is something that I made up but use every single day, this is what keeps
much of what is on my blog or my teams private work wiki going. I have a few
very important directories that I have assigned directly to a hotkey for fast
session switching.
bind -n M-i new-session -A -s waylonwalker_com "cd ~/git/waylonwalker.com/ && nvim"
bind i popup -E -h 95% -w 95% -x 100% "tmux new-session -A -s waylonwalker_com 'cd ~/git/waylonwalker.com/ && nvim'"
bind -n M-I popup -E "tmux new-session -A -s waylonwalker_com 'cd ~/git/waylonwalker.com/ && nvim'"
tmux new-session [1]
This one is building off of yeserday’s new-session post, make sure you check that one out as well.
How I navigate tmux in 2021 [2]
for more information on how I navigate tmux, check out this full post
Also check out the full YouTube
tmux-playlist [3]
to see all of the videos in this series.
References:
[1]: /tmux-new-session/
[2]: /tmux-nav-2021/
[3]: https://www.youtube.com/playlist?...
Check out ThePrimeagen [1] and their project vim-nav-playground [2].
No description available.
References:
[1]: https://github.com/ThePrimeagen
[2]: https://github.com/ThePrimeagen/vim-nav-playground
I recently discovered vim-fundamentals [1] by ThePrimeagen [2], and it’s truly impressive.
No description available.
References:
[1]: https://github.com/ThePrimeagen/vim-fundamentals
[2]: https://github.com/ThePrimeagen
tmux new-session
https://youtu.be/LbQNdCAUogE
This one starts a new chapter in our series that is going to open up a whole
new set of workflow productivity options, understanding how the new-session
command is a critical command in our adventure into tmux glory. This is going
to open the door for some seriously game changing hotkeys and scripting.
# create a new session
tmux new-session
# create a new session detached
tmux new-session -d
# create a new session and name it
tmux new-session -s me
# create a new named session and attach to it if one exists
tmux new-session -As me
How I navigate tmux in 2021 [1]
for more information on how I navigate tmux, check out this full post
Also check out the full YouTube
tmux-playlist [2]
to see all of the videos in this series.
References:
[1]: /tmux-nav-2021/
[2]: https://www.youtube.com/playlist?list=PLTRNG6WIHETB4reAxbWza3CZeP9KL6Bkr
tmux detach
https://youtu.be/A1qx3tNKDdA
tmux detach is a handy tmux command that will quit your current session while
keeping it running. The full name of the comamnd is detach-client, detach
is a shorthand.
default keybinding
bind-key d detach-client
I have mine bound to mod+d where mod is alt.
bind -n M-d detach-client
https://waylonwalker.com/tmux-nav-2021/
for more information on how I navigate tmux, check out this full post
Also check out the full YouTube
tmux-playlist [1]
to see all of the videos in this series.
References:
[1]: https://www.youtube.com/playlist?list=PLTRNG6WIHETB4reAxbWza3CZeP9KL6Bkr
tmux attach
https://youtu.be/JQ0yDCVu44E
attach is one of the most useful features of tmux. If you have no interest in
tmux for pane and window management, you should use tmux for this. It can be a
life saver if you ever get disconnected from the host machine or accidently
close your terminal you can connect right back into the session you were just
in using attach.
attach # [1]
tmux attach
this command will simply attach back to tmux if you are ever disconnected
If you ever run long running tasks on a remote machine by sshing into this you
should be doing it inside tmux, or something like tmux so that you do not loose
your work.
attach to a specific session # [2]
If you have multiple sessions running you can select the session that you want
to attach to by passing -t <name-of-session>.
tmux attach -t scratch
How I navigate tmux in 2021 [3]
for more information on how I navigate tmux, check out this full post
Also check out the full YouTube
tmux-playlist [4]
to see all of the videos i...
Git in Depth Notes
These are my notes from taking @nnja’s FEM course git-in-depth [1].
requirements # [2]
- git --version > than 2.0
creating a git # [4]
echo "hello" | git hash-object --stdin
References:
[1]: https://frontendmasters.com/courses/git-in-depth/
[2]: #requirements
[3]: /glossary/git/
[4]: #creating-a-git
tmux ls
https://youtu.be/LY41GLn_DGg
tmux ls will list the sessions that you have running within the tmux server if
tmux is currently running. This is handy to combine with commands such as attach.
tmux ls
tmux attach [1]
How I navigate tmux in 2021 [2]
for more information on how I navigate tmux, check out this full post
Also check out the full YouTube
tmux-playlist [3]
to see all of the videos in this series.
References:
[1]: /tmux-attach/
[2]: /tmux-nav-2021/
[3]: https://www.youtube.com/playlist?list=PLTRNG6WIHETB4reAxbWza3CZeP9KL6Bkr
tmux command line
https://youtu.be/SNu-4IrkjAs
So far we have covered a lot of tmux commands and how they map to keybindings
but these same commands can be executed at the command line.
From the command line # [1]
Let’s make a popup that displays our git [2] status for 5s or until we close it
manually. We can run the following command at the command line, in a split.
tmux display-popup -E -d '#{pane_current_path}' 'git status && sleep 5'
From the tmux command line # [3]
Or we can open the tmux command line and run it from tmux’s built in command
line, which is very similar to bim EX mode. By default the tmux command line
can be opened with prefix+[.
display-popup -E -d '#{pane_current_path}' 'git status && sleep 5'
🗒️ note that the tmux command is called by default when inside of tmux.
Make it a keybinding # [4]
Finally we can make it a keybinding by adding a bind command ahead of our tmux
command, then we can execute this in the tmux command line or add it to our
~/.tmux.conf.
bind s displ...
tmux copy-mode
https://youtu.be/-ypY_-VmBKk
tmux copy-mode is a tmux mode that lets you scroll, search, copy, and jump your
way through a pane. There are a ton of keybindings for copy-mode, the main
ones you will need to know are / for searching down ? for searching up, n
for next item, space for starting a selection, and enter to copy the
selection. Arrow keys will be used for navigation unless you have specified vi mode, then it will be hjkl.
Default keybinding to get into copy mode is prefix+[.
bind-key [ copy-mode
If you are a vim user you will likely want to use vi style keys, add this to
your ~/.tmux.conf file to enable vi mode.
setw -g mode-keys vi
full list of copy-mode keybindings from the man page.
Command vi emacs
append-selection
append-selection-and-cancel A
back-to-indentation ^ M-m
begin-selection Space C-Space
bottom-line L
cancel q Escape
clear-selection Escape C-g
copy-end-of-line [<prefix>] D C-k
copy-line [<prefix>]
copy-pipe [<command>] [<prefix>]
copy-pipe-no...
tmux join-pane
https://youtu.be/Vm5rRtcVXLw
Join-pane allows you to join panes that you have broken away from your window,
or created in a different window to the window you want it in. As far as I
know there is not a default keybinding for it.
Before you can join a pane you must first have a pane marked to join. Once you
mark a pane, go back to the window you want to join it to and join-pane.
My keybindings, you must add this to your ~/.tmux.conf file to use them.
# Mark and swap panes
#――――――――――――――――――――――――――――――――――――――――――――
bind -n M-m select-pane -m # mark
bind -n M-M select-pane -M # unmark
bind -n M-< join-pane
How I navigate tmux in 2021 [1]
for more information on how I navigate tmux, check out this full post
Also check out the full YouTube
tmux-playlist [2]
to see all of the videos in this series.
References:
[1]: /tmux-nav-2021/
[2]: https://www.youtube.com/playlist?list=PLTRNG6WIHETB4reAxbWza3CZeP9KL6Bkr
tmux break-pane
https://youtu.be/ICL609F2xnc
Break-pane is a handy tmux command when your layout gets too cramped and you
want to just move a split into its own window. Calling break-pane does
exactly that, it creates a new-window for you and moves your currently
selected split into that window
Default key binding for break-pane
bind-key ! break-pane
How I navigate tmux in 2021 [1]
for more information on how I navigate tmux, check out this full post
References:
[1]: /tmux-nav-2021/
tmux zoom
https://youtu.be/Rn6mOarCQ-Y
Zooming into the current split in tmux is a valuable tool to give yourself some
screen real estate. These days I am almost always presenting, streaming, or
pairing up with a co-worker over a video call. Since I am always sharing my
screen I am generally zoomed in to a level that is just a bit uncomfortable, so
anytime I make a split it is really uncomfortable, being able to zoom into the
split I am focused on is a big help, and also help anyone watching follow where
I am currently working.
Default key bindings for zooming the current split
bind-key z resize-pane -Z
I have rebound this to match the default binding with mod+z rather so that I
get that single keystroke experience.
bind -n M-z resize-pane -Z
How I navigate tmux in 2021 [1]
for more information on how I navigate tmux, check out this full post
References:
[1]: /tmux-nav-2021/
tmux new-window
https://youtu.be/YRPZBv-iYyE
New window as it sounds makes new windows in tmux. Windows are kind of like
tabs. They are another screen within your sessions that you can name and make
new panes in.
Default key bindings for creating and navigating windows in tmux.
bind-key c new-window
bind-key p previous-window
bind-key n next-window
As always I have rebound these keys because I generally prefer a single
keystroke over the prefix plus keybinding approach that tmux gives by default.
#――windows――――――――――――――――――――――――――――――――――――――
bind -n M-c new-window -c '#{pane_current_path}'
bind -n M-p previous-window
bind -n M-n next-window
When I started using tmux I did almost everything in one giant session with
many panes and windows. It became a nightmare to manage and quickly get
between two sets work efficiently. This year I leaned in on sessions quite
heavily. Checkout this 👇 post to see that workflow in depth.
How I navigate tmux in 2021 [1]
for more information on how I navigate ...
I came across jumpcutter [1] from emkademy [2], and it’s packed with great features and ideas.
Automatically jump-cut silent parts of your videos using Python
References:
[1]: https://github.com/emkademy/jumpcutter
[2]: https://github.com/emkademy
tmux slect-pane
https://youtu.be/CPZJZjN9YTY
These are my MOST often used keybindings that I use in tmux. They allow me to
jump between splits with ease with a vim style layout. I can hold mod and jump
between panes with a familiar arrow key.
bind -n M-h select-pane -L
bind -n M-l select-pane -R
bind -n M-k select-pane -U
bind -n M-j select-pane -D
How I navigate tmux in 2021 [1]
for more information on how I navigate tmux, check out this full post
References:
[1]: /tmux-nav-2021/
tmux rotate-window
https://youtu.be/06z5qf81ofo
Rotate window is the main way that I navigated tmux before I learned
select-pane. It allows you to change your focused pane, or rotate the
position of the panes easily.
Default keybindings
bind-key C-o rotate-window
bind-key o select-pane -t :.+
My keybindings look just a bit different than the default ones, I do not like
needing to hit prefix for every command, especially for repeated commands. I
set a similar keybinding to the default one that uses mod instead of prefix.
bind -n M-o select-pane -t :.+
bind -n M-O rotate-window
How I navigate tmux in 2021 [1]
for more information on how I navigate tmux, check out this full post
References:
[1]: /tmux-nav-2021/
tmux select-layout
https://youtu.be/F0mHnwTrNNc
When you get many splits going in tmux sometimes its time for a new layout.
There are four layout strategies that I use, main-vertical, main-horizontal,
even-vertical, even-horizontal. Almost always I am useing the main ones with
mod plus a or mod plus shift a keybindings.
# Select Layouts
#―――――――――――――――――
bind -n M-a select-layout main-vertical
bind -n M-A select-layout main-horizontal
bind -n M-E select-layout even-vertical
bind -n M-V select-layout even-horizontal
How I navigate tmux in 2021 [1]
for more information on how I navigate tmux, check out this full post
References:
[1]: /tmux-nav-2021/
tmux resize-panes
https://youtu.be/hpFYE2LU7xc
Resizing panes in tmux can be quite difficult in default tmux, I
use a set of keybingings to help resize panes in the rare occasions
that I do need just a bit more space. I set the keybinding to the same as my
split navigation bindings but shifted. They are very vim like (h,j,k,l).
# resize panes
#―――――――――――――――――――――――――――――
bind -n M-H resize-pane -L 2
bind -n M-L resize-pane -R 2
bind -n M-K resize-pane -U 2
bind -n M-J resize-pane -D 2
Most often when I need to resize panes I just grab the edge of the pane with my
mouse. Yes the mouse, its not that often that I actually need to change the
size of a pane.
# Enable mouse control (clickable windows, panes, resizable panes)
set -g mouse on
How I navigate tmux in 2021 [1]
for more information on how I navigate tmux, check out this full post
References:
[1]: /tmux-nav-2021/
ThePrimeagen [1] has done a fantastic job with refactoring.nvim [2]. Highly recommend taking a look.
The Refactoring library based off the Refactoring book by Martin Fowler
References:
[1]: https://github.com/ThePrimeagen
[2]: https://github.com/ThePrimeagen/refactoring.nvim
tmux choose-tree
https://youtu.be/79Y-kqAiMpw
Choose tree is a powerful tmux utility that provides a graphical interface to
preview all sessions, windows, and panes, move between them kill them, move
them and much more.
The default keybinding
bind-key -T prefix s choose-tree -s
my preferred keybinding to open sessions and windows collapsed and Zoomed in.
bind-key j choose-tree -swZ
From the man page.
choose-tree [-GNrswZ] [-F format] [-f filter] [-K key-format] [-O sort-order] [-t target-pane] [template]
Put a pane into tree mode, where a session, window or pane may be chosen interactively from a tree. Each session, window or pane is shown on
one line. A shortcut key is shown on the left in brackets allowing for immediate choice, or the tree may be navigated and an item chosen or
otherwise manipulated using the keys below. -s starts with sessions collapsed and -w with windows collapsed. -Z zooms the pane. The follow‐
ing keys may be used in tree mode:
Key Function
Enter Choose selected i...
tmux prefix
https://youtu.be/BMkpbfhbkKM
The prefix key is an essential part of tmux, by default all of tmux’s
key-bindings sit behind a prefix. This prefix is very similar to vim’s leader
key. It is common for folks to change the default C-b (control b) to C-a or
if they are a vim user something to match their vim leader key.
set -g prefix C-Space
bind Space send-prefix
A few of the essential default key-bindings.
% vertical split
" horizontal split
d detach
up select up one pane
down select down one pane
right select right one pane
left select left one pane
t clock
o swap panes
c create window
n next window
p previous window
A more complete list of key-bindings can be found in this gist https://gist.github.com/mzmonsour/8791835.
How I navigate tmux in 2021 [1]
for more information on how I navigate tmux, check out this full post
References:
[1]: /tmux-nav-2021/
tmux splitting panes
https://youtu.be/kzgyiHap1nQ
splitting panes is a core feature of tmux. It allows us to split the terminal
vertically or horizontally into new panes.
bind -n M-s split-window -c '#{pane_current_path}'
bind -n M-v split-window -h -c '#{pane_current_path}'
bind -n M-X kill-pane
🗒️ note that ‘#{pane_current_path}‘will keep the split in the same directory
as it’s parent, without this it will default to your home directory.
How I navigate tmux in 2021 [1]
for more information on how I navigate tmux, check out this full post
References:
[1]: /tmux-nav-2021/
I like laktak’s [1] project extrakto [2].
extrakto for tmux - quickly select, copy/insert/complete text without a mouse
References:
[1]: https://github.com/laktak
[2]: https://github.com/laktak/extrakto
Check out kedro-toolkit [1] by Mar1cX [2]. It’s a well-crafted project with great potential.
Kedro Toolkit is a VSCode Extension for the Kedro Framework
References:
[1]: https://github.com/Mar1cX/kedro-toolkit
[2]: https://github.com/Mar1cX
tmux last session
https://youtu.be/RB87EEnnMnU
An ultimate productivity key-binding in tmux is one to switch to the last session. I use this to quickly get between sessions really quick. Often I am working and need to lookup a quick note, or copy something into my notes, then get back to where I was quickly.
bind -n M-b switch-client -l
I think of this hub and spoke model, and use last-session to quickly drive it.
[1]
How I navigate tmux in 2021 [2]
for more information on how I navigate tmux, check out this full post
References:
[1]: https://dropper.waylonwalker.com/file/0574b548-0871-4505-95f4-48e2fb267c6e.webp
[2]: /tmux-nav-2021/
tmux floating popups
https://youtu.be/2ZqFDsJywt8
Tmux popups are actually floating windows that you can drag around the screen. They always open in the middle (by default) when you open them, no matter where you leave them.
Here are a couple of keybindings I use to open up popup windows.
bind C-g display-popup -E "ta ~/git"
bind -n M-g display-popup -E "tmux new-session -A -s scratch"
How I navigate tmux in 2021 [1]
for more information on how I navigate tmux, check out this full post
References:
[1]: /tmux-nav-2021/
tmux popups
https://youtu.be/2I8fB28zfB4
Tmux-popups are a great feature that is relatively new to tmux, many repos such
as the standard ubuntu repos do not have it. Popups came in 3.2a, if your
package manager does not have it, you can follow the tmux’s install
instructions [1] to build from source.
# open a popup scratchpad
bind -n M-g display-popup -E "tmux new-session -A -s scratch"
How I navigate tmux in 2021 [2]
for more information on how I navigate tmux, check out this full post
I use popups quite a bit in my workflow to ssh into another machine for a short
period, or make a new project with a template.
References:
[1]: https://github.com/tmux/tmux#installation
[2]: /tmux-nav-2021/
Check out pysonDB [1] by pysonDB [2]. It’s a well-crafted project with great potential.
A Simple , ☁️ Lightweight , 💪 Efficent JSON based database for 🐍 Python. PysonDB-V2 has been released ⬇️
References:
[1]: https://github.com/pysonDB/pysonDB
[2]: https://github.com/pysonDB
I came across nvim-spectre [1] from nvim-pack [2], and it’s packed with great features and ideas.
Find the enemy and replace them with dark power.
References:
[1]: https://github.com/nvim-pack/nvim-spectre
[2]: https://github.com/nvim-pack
Incremental Versioned Datasets in Kedro
Kedro versioned datasets can be mixed with incremental and partitioned datasets
to do some timeseries analysis on how our dataset changes over time. Kedro is
a very extensible and composible framework, that allows us to build solutions
from the individual components that it provides. This article is a great
example of how you can combine these components in unique ways to achieve some
powerful results with very little work.
What is Kedro [1]
👆 Unsure what kedro is? Check out this post.
How does our dataset change over time?? # [2]
This was a question presented to me at work. We had some plots being produces
as the output of our pipeline and the user wanted the ability to compare
results over time. Luckily this was asked early in the project so we were able
to proactively setup versioning on the right datasets.
To enable this all we needed to do now was to add versioned: true and we will
be able to compare results over time. Yes kedro makes it that easy to setup.
set up a proje...
Just starred qmk_firmware [1] by markstos [2]. It’s an exciting project with a lot to offer.
Open-source keyboard firmware for Atmel AVR and Arm USB families
References:
[1]: https://github.com/markstos/qmk_firmware
[2]: https://github.com/markstos
Check out studioswong [1] and their project kedro-viz-glitch [2].
No description available.
References:
[1]: https://github.com/studioswong
[2]: https://github.com/studioswong/kedro-viz-glitch
I’m impressed by dolt [1] from dolthub [2].
Dolt – Git [3] for Data
References:
[1]: https://github.com/dolthub/dolt
[2]: https://github.com/dolthub
[3]: /glossary/git/
I’m really excited about pyupgrade [1], an amazing project by asottile [2]. It’s worth exploring!
A tool (and pre-commit hook) to automatically upgrade syntax for newer versions of the language.
References:
[1]: https://github.com/asottile/pyupgrade
[2]: https://github.com/asottile
I Started Streaming on Twitch
I recently started streaming on
twitch.tv/waylonwalker [1] and it’s been a
blast so far.
- python
- kedro
- Data Science
- Data Engineering
- webdev
- digital gardening
Kedro Spaceflights # [2]
It all started with
kedro/issues/606 [3], Yetu
called out for users of kedro to record themselves doing a walk through of
their tutorials. I wanted to do this, but was really stuck at the fact that
recording or editing somewhat polished vide is quite time consuming for me.
[4]
Inspiration # [5]
My introduction to twitch came from
twitch.tv/theprimeagen [6]. I watched him on
YouTube, and then decided to drop into a stream. It was so fun to watch him
live that I started following others in the science and tech category.
- twitch.tv/teej_dv [7] Brilliant neovim core dev, I learn a bunch about nvim every time I watch.
- twitch.tv/cmgriffing [8] Super Chill and engaging chat.
- twitch.tv/cassidoo [9] Fantastic discussion/chat.
- twitch.tv/anthonywritescode [10] Building the python ...
I recently discovered LuaSnip [1] by L3MON4D3 [2], and it’s truly impressive.
Snippet Engine for Neovim written in Lua.
References:
[1]: https://github.com/L3MON4D3/LuaSnip
[2]: https://github.com/L3MON4D3
The work on NearBeach [1] by nearbeach [2].
NearBeach is an open sourced project management tool, helping you keep track of your project. You can track requirements, projects and tasks
References:
[1]: https://github.com/nearbeach/NearBeach
[2]: https://github.com/nearbeach
srcards [1] by brickfrog [2] is a game-changer in its space. Excited to see how it evolves.
No description available.
References:
[1]: https://github.com/brickfrog/srcards
[2]: https://github.com/brickfrog
Check out vim-twitch-line-sign [1] by noopkat [2]. It’s a well-crafted project with great potential.
some helpers to annotate vim signs with Twitch related metadata. Inspired by: clarkio/vscode-twitch-highlighter
References:
[1]: https://github.com/noopkat/vim-twitch-line-sign
[2]: https://github.com/noopkat
Just starred flake8 [1] by PyCQA [2]. It’s an exciting project with a lot to offer.
flake8 is a python tool that glues together pycodestyle, pyflakes, mccabe, and third-party plugins to check the style and quality of some python code.
References:
[1]: https://github.com/PyCQA/flake8
[2]: https://github.com/PyCQA
Kedro Spaceflights - part 2 | Stream replay June 7, 2021
This was my seconf time ever streaming on
twitch.tv/waylonwalker [1], and I completely botched my mic 2x.
https://youtu.be/_7MwgKu-844
Links # [2]
- Spaceflights Tutorial [3]
- my spaceflights repo [4]
Notes to get started # [5]
pipx run kedro new
cd project
python -m venv .venv
source .venv/bin/activate
pip install kedro
kedro install
References:
[1]: https://twitch.tv/waylonwalker
[2]: #links
[3]: https://kedro.readthedocs.io/en/stable/03_tutorial/01_spaceflights_tutorial.html
[4]: https://github.com/WaylonWalker/kedro-spaceflights
[5]: #notes-to-get-started
🌱 Digital Gardening | gif to Mp4 | Stream replay June 4, 2021
https://youtu.be/I4VenHqIEng
Doing some Digital Gardening on stream
- Ahrefs Errors
- ahrefs large images
- Automatic gif to mp4
gif to mp4 # [1]
After this stream all gifs on my site are converted to mp4/webm if they exist.

tmux-navigation-2021 [2]
References:
[1]: #gif-to-mp4
[2]: https://dropper.waylonwalker.com/file/a33aa542-4928-4284-91ce-ca1b73a04f0f.mp4
Check out notifiers [1] by liiight [2]. It’s a well-crafted project with great potential.
The easy way to send notifications
References:
[1]: https://github.com/liiight/notifiers
[2]: https://github.com/liiight
Check out neovim-plugin [1] by norcalli [2]. It’s a well-crafted project with great potential.
No description available.
References:
[1]: https://github.com/norcalli/neovim-plugin
[2]: https://github.com/norcalli
I’m impressed by python-lsp-server [1] from python-lsp [2].
Fork of the python-language-server project, maintained by the Spyder IDE team and the community
References:
[1]: https://github.com/python-lsp/python-lsp-server
[2]: https://github.com/python-lsp
github-coauthors.nvim [1] by cwebster2 [2] is a game-changer in its space. Excited to see how it evolves.
A neovim extension for populating coauthors when comitting
References:
[1]: https://github.com/cwebster2/github-coauthors.nvim
[2]: https://github.com/cwebster2
Kedro Spaceflights - part 1 | Stream replay June 4, 2021
This was my first time ever streaming on
twitch.tv/waylonwalker [1]. I am excited to get going.
I have been streaming early in the morning while I am still waking up, so still
a bit groggy as I go.
https://youtu.be/Y07UBr9Ccjs
Kedro Spaceflights # [2]
It all started with
kedro/issues/606 [3], Yetu
called out for users of kedro to record themselves doing a walk through of
their tutorials. I wanted to do this, but was really stuck at the fact that
recording or editing somewhat polished vide is quite time consuming for me.
[4]
Notes # [5]
pipx run kedro new
cd project
python -m venv .venv
source .venv/bin/activate
pip install kedro
kedro install
References:
[1]: https://twitch.tv/waylonwalker
[2]: #kedro-spaceflights
[3]: https://github.com/kedro-org/kedro/issues/606
[4]: https://dropper.wayl.one/file/112f93d0-f521-481b-8a78-3bc583041feb.webp
[5]: #notes
The work on kedro-mlflow [1] by Galileo-Galilei [2].
A kedro-plugin for integration of mlflow capabilities inside kedro projects (especially machine learning model versioning and packaging)
References:
[1]: https://github.com/Galileo-Galilei/kedro-mlflow
[2]: https://github.com/Galileo-Galilei
If you’re into interesting projects, don’t miss out on textual [1], created by Textualize [2].
The lean application framework for Python. Build sophisticated user interfaces with a simple Python API. Run your apps in the terminal and a web browser.
References:
[1]: https://github.com/Textualize/textual
[2]: https://github.com/Textualize
The work on lsp-colors.nvim [1] by folke [2].
🌈 Plugin that creates missing LSP diagnostics highlight groups for color schemes that don’t yet support the Neovim 0.5 builtin LSP client.
References:
[1]: https://github.com/folke/lsp-colors.nvim
[2]: https://github.com/folke
Using Kedro In Scripts
With the latest releases of kedro 0.17.x, it is now possible to run kedro
pipelines from within scripts. While I would not start a project with this
technique, it will be a good tool to keep in my back pocket when I want to
sprinkle in a bit of kedro goodness in existing projects.
New to Kedro # [1]
What is Kedro [2]
If your just learning about kedro check out this post walking through it
No More Rabbit Hole of Errors # [3]
as of 0.17.2
I’ve tried to do this in kedro 0.16.x, and it turned into a rabbit hole of
errors. First kedro needed a conf directory, if you tried to fake one in it
would then ask for logging setup. These errors just kept coming to the point
it wasnt worth doing and I might as well use a proper template for real
projects and stick to simple function calls for things that are not a kedro
project.
Kedro in a script # [4]
To get kedro running, you will need a pipeline, catalog, and
runner at a minimum. Those who have used kedro before the pipeline will
look v...
I’m really excited about netlify_deploy [1], an amazing project by lannonbr [2]. It’s worth exploring!
Mini Rust CLI to deploy sites to Netlify using their API
References:
[1]: https://github.com/lannonbr/netlify_deploy
[2]: https://github.com/lannonbr
I recently discovered slidev [1] by slidevjs [2], and it’s truly impressive.
Presentation Slides for Developers
References:
[1]: https://github.com/slidevjs/slidev
[2]: https://github.com/slidevjs
I’m really excited about bio [1], an amazing project by orta [2]. It’s worth exploring!
No description available.
References:
[1]: https://github.com/orta/bio
[2]: https://github.com/orta
Check out dogehouse [1] by benawad [2]. It’s a well-crafted project with great potential.
Taking voice conversations to the moon 🚀
References:
[1]: https://github.com/benawad/dogehouse
[2]: https://github.com/benawad
Silence Kedro Logs
Kedro can have a chatty logger. While this is super nice in production
so see everything that happened during a pipeline run. This can be troublesome
while trying to implement a cli extension with clean output.
Silence a Python log # [1]
First, how does one silence a python log? Python loggers can be retrieved by
the logging module’s getLogger function. Then their log level can be
changed. Much of kedro’s chattiness comes from INFO level logs. I don’t want
to hear about anything for my current use case unless it’s essential, i.e., a
failure. In this case, I set the log levels to ERROR as most errors should
stop execution anyways.
python logging levels # [2]
Level
Numeric value
CRITICAL
50
ERROR
40
WARNING
30
INFO
20
DEBUG
10
NOTSET
0
Get or Create a logger # [3]
Getting a python logger is straightforward if we know the name of the logger.
The following block will grab the logger object for the logger currently
registered under the name passed in.
logger = logging.getLog...
Looking for inspiration? python-diskcache [1] by grantjenks [2].
Python disk-backed cache (Django-compatible). Faster than Redis and Memcached. Pure-Python.
References:
[1]: https://github.com/grantjenks/python-diskcache
[2]: https://github.com/grantjenks
The work on lookatme [1] by d0c-s4vage [2].
An interactive, terminal-based markdown presenter
References:
[1]: https://github.com/d0c-s4vage/lookatme
[2]: https://github.com/d0c-s4vage
Python Diskcahe is locked
change_speed = (speed) => [...document.querySelectorAll('video')].map(v => v.playbackRate=v.playbackRate+speed)
Running multiple processes using the same diskcache object can cause issues
with locks. As I was trying to setup a rich Live display for markata I ran
into issues where each part could not nun simultaneusly. As I had followed the
instructions from discache it was not directly aparant to me, so I had to make
a simple example to experiment and play with at a small scale.
Minimum reproducible error # [1]
Minimum reporducible error is one of my superpowers in development. I do this
very often to sus out what is really happening. My day to day work is
processing data with python, I keep a number of very small data sets handy to
break and fix. This helps separate complexities of the project and the problem.
Let’s break it # [2]
Markata has a lot going on. It’s a plugins all the way down static site
generator built in python. Trying to find the root cause through the layers ...
The work on ward [1] by darrenburns [2].
Ward is a modern test framework for Python with a focus on productivity and readability.
References:
[1]: https://github.com/darrenburns/ward
[2]: https://github.com/darrenburns
How I navigate tmux in 2021
change_speed = (speed) => [...document.querySelectorAll('video')].map(v => v.playbackRate=v.playbackRate+speed)
In 2021 I changed the way I navigate between tmux sessions big time. Now I can
create, kill, switch with ease, and generally keep work separated into logical
groups.
Update # [1]
Since making this post, I have made ~20 other posts in short form that all have
a YouTube video to go along with them you can find them all on my
tmux-playlist [2].
Chris Toomey’s [3] Tmux Course # [4]
I took Chris’s tmux course [5] in December
2020 and it was fantastic. Even as a seasoned tmux user, I learned quite a bit.
Before the course, I was proficient in navigating within each of my tmux
sessions but rarely started more than one session. A few months later, I have
adopted a lot of what I learned from Chris and made it my own.
I am now keeping projects to their own session and can move between them
fluidly with just a few keystrokes. For high-traffic projects, I have them
bound to a si...
I came across compactyl [1] from dereknheiley [2], and it’s packed with great features and ideas.
No description available.
References:
[1]: https://github.com/dereknheiley/compactyl
[2]: https://github.com/dereknheiley
I’m really excited about thinkeys [1], an amazing project by moduloindustries [2]. It’s worth exploring!
Split ortholinear custom replacement keyboard with TrackPoint for ThinkPad laptops.
References:
[1]: https://github.com/moduloindustries/thinkeys
[2]: https://github.com/moduloindustries
Trim unused git branches
Trim branches no longer on origin # [1]
git remote prune origin --dry-run
git remote prune origin
Find branches already merged # [2]
git checkout main
# list remote branches that have already been merged into main
git branch -r --merged
# list local branches that have already been merged into main
git branch --merged
References:
[1]: #trim-branches-no-longer-on-origin
[2]: #find-branches-already-merged
What is if __name__ == "__main___", and how do I use it.
change_speed = (speed) => [...document.querySelectorAll('video')].map(v => v.playbackRate=v.playbackRate+speed)
When a python module is called it is assigned the __name__ of __main__
otherwise if it’s imported it will be assigned the __name__ of the module.
Concrete example # [1]
Let’s create a module to play with __name__ a bit. We will call this module
nodes.py. It is a module that we may want to run by it’self or import and use
in other modules.
#!python
# nodes.py
if __name__ == "nodes":
import sys
import __main__
print(f"you have imported me {__name__} from {sys.modules['__main__'].__file__}")
if __name__ == "__main__":
print("you are running me as main")
I have set this module up to execute one of two if statements based on whether
the module it’self is being ran or if the module is being imported.
Note it is not common to have a if __name__ == "nodes": block, this is just
for demnonstration purposes.
running python nodes.py # [2]
Running a python script with the...
Create a Virtual File Gallery with Symlinks
Creating a directory that is a union of several directories can be achieved
with a few symlinks at the command line.
Creating a Virtual File Gallery # [1]
Here is how I am creating a virtual directory of all my projects that is a
combination of both work and not-work projects. I am creating symlinks for
every directory under ~/work and ~/git.
rm -rf ~/projects
mkdir ~/projects
ln -sf ~/work/* ~/projects
ln -sf ~/git/* ~/projects
⚠ Notice that first I am recreating the directory each time. This will ensure
that any project that is deleted from their actual directory is removed from
the virtual gallery.
Updating the gallery # [2]
Since links are always kept up to date without any extra work, all the data is
still in the same place it started. But as new directories are added to any
project directory they will not be automatically added to the virtual gallery.
- cron
- bashrc/zshrc
If you’re concerned about system resources, you can add it to a cron job to run
at a regular sch...
I recently discovered delta [1] by dandavison [2], and it’s truly impressive.
A syntax-highlighting pager for git [3], diff, grep, and blame output
References:
[1]: https://github.com/dandavison/delta
[2]: https://github.com/dandavison
[3]: /glossary/git/
Just starred monkeytype [1] by monkeytypegame [2]. It’s an exciting project with a lot to offer.
The most customizable typing website with a minimalistic design and a ton of features. Test yourself in various modes, track your progress and improve your speed.
References:
[1]: https://github.com/monkeytypegame/monkeytype
[2]: https://github.com/monkeytypegame
Check out ntangle.nvim [1] by jbyuki [2]. It’s a well-crafted project with great potential.
literate programming for neovim
References:
[1]: https://github.com/jbyuki/ntangle.nvim
[2]: https://github.com/jbyuki
If you’re into interesting projects, don’t miss out on termopen.vim [1], created by fabi1cazenave [2].
Easy integration of TUI apps in Neovim: Ranger, LF, Tig… Tetris…
References:
[1]: https://github.com/fabi1cazenave/termopen.vim
[2]: https://github.com/fabi1cazenave
karimknaebel [1] has done a fantastic job with nvim-lspinstall [2]. Highly recommend taking a look.
Provides the missing :LspInstall for nvim-lspconfig
References:
[1]: https://github.com/karimknaebel
[2]: https://github.com/karimknaebel/nvim-lspinstall
I’m impressed by nvim-lspinstall [1] from kabouzeid [2].
Provides the missing :LspInstall for nvim-lspconfig
References:
[1]: https://github.com/kabouzeid/nvim-lspinstall
[2]: https://github.com/kabouzeid
Looking for inspiration? dotfiles [1] by Conni2461 [2].
Current dotfiles and scripts
References:
[1]: https://github.com/Conni2461/dotfiles
[2]: https://github.com/Conni2461
How to Install micromamba on linux (from the comamnd line only)
I really like using conda (miniconda) as my python virtual environment [1]
manager of choice. It’s simple and it includes its own python interpreter
using the version that I specify at creation.
Mamba # [2]
from their readme [3]
---
Mamba is a reimplementation of the conda package manager in C++.
- parallel downloading of repository data and package files using multi-threading
- libsolv for much faster dependency solving, a state of the art library used in the RPM package manager of Red Hat, Fedora and OpenSUSE
- core parts of mamba are implemented in C++ for maximum efficiency
At the same time, mamba utilize the same command line parser, package
installation and deinstallation code and transaction verification routines as
conda to stay as compatible as possible.
---
Installing Micromamba # [4]
Similar to miniconda micromamba can be installed with a few lines of bash
wget -qO- https://micromamba.snakepit.net/api/micromamba/linux-64/latest | tar -xvj bin/micromamba
./bin/...
Check out nvim-treesitter [1] and their project nvim-treesitter-textobjects [2].
No description available.
References:
[1]: https://github.com/nvim-treesitter
[2]: https://github.com/nvim-treesitter/nvim-treesitter-textobjects
telescope-project.nvim [1] by nvim-telescope [2] is a game-changer in its space. Excited to see how it evolves.
No description available.
References:
[1]: https://github.com/nvim-telescope/telescope-project.nvim
[2]: https://github.com/nvim-telescope
I came across lspsaga.nvim [1] from nvimdev [2], and it’s packed with great features and ideas.
improve neovim lsp experience
References:
[1]: https://github.com/nvimdev/lspsaga.nvim
[2]: https://github.com/nvimdev
rmagatti [1] has done a fantastic job with auto-session [2]. Highly recommend taking a look.
A small automated session manager for Neovim
References:
[1]: https://github.com/rmagatti
[2]: https://github.com/rmagatti/auto-session
Vim Wsl Clipboard
I’ve long used neovim from within windows wsl, and for far too long, I went
without a proper way to get text out of it and into windows.
wsl has access to cmd applications # [1]
wsl can access clip.exe. You can do some cool things with it, such as
cat a file into the clipboard, sending output from a command to the clipboard,
or set an autocmd group in vim to send yank to the windows clipboard.
using clip.exe # [2]
Let’s say you want to send a teammate the tail of a log file over chat. You can
tail the file into clip.exe.
tail -n 1 info.log | clip.exe
pipe streams of text into clip.exe
make it a bit more natural # [3]
I recently made mine feel a bit more natural by aliasing it to clip.
alias clip=clip.exe
pop this in your ~/.bashrc or ~/.zshrc
yanking to windows clipboard from vim # [4]
I use neovim as my daily text editor and its a pain to share code with a
teammate over chat, stack overflow, into a gist, or whatever you need. The
following snippet has been quite useful ...
I’m impressed by onebuddy [1] from Th3Whit3Wolf [2].
Light and dark atom one theme
References:
[1]: https://github.com/Th3Whit3Wolf/onebuddy
[2]: https://github.com/Th3Whit3Wolf
I’m impressed by awesome-streamerrc [1] from awesome-streamers [2].
Dotfiles for various streamers on Twitch.
References:
[1]: https://github.com/awesome-streamers/awesome-streamerrc
[2]: https://github.com/awesome-streamers
If you’re into interesting projects, don’t miss out on telescope-fzf-native.nvim [1], created by nvim-telescope [2].
FZF sorter for telescope written in c
References:
[1]: https://github.com/nvim-telescope/telescope-fzf-native.nvim
[2]: https://github.com/nvim-telescope
kedro replit
I am trying to see what an embeded replit
Looking for inspiration? ltreesitter [1] by euclidianAce [2].
Standalone tree sitter bindings for the Lua language
References:
[1]: https://github.com/euclidianAce/ltreesitter
[2]: https://github.com/euclidianAce
I’m impressed by hop.nvim [1] from hadronized [2].
Neovim motions on speed!
References:
[1]: https://github.com/hadronized/hop.nvim
[2]: https://github.com/hadronized
I’m impressed by gitmux [1] from arl [2].
💻 Git [3] in your tmux status bar
References:
[1]: https://github.com/arl/gitmux
[2]: https://github.com/arl
[3]: /glossary/git/
Check out bidict [1] by jab [2]. It’s a well-crafted project with great potential.
The bidirectional mapping library for Python.
References:
[1]: https://github.com/jab/bidict
[2]: https://github.com/jab
photopea [1] by photopea [2] is a game-changer in its space. Excited to see how it evolves.
Photopea is online image editor
References:
[1]: https://github.com/photopea/photopea
[2]: https://github.com/photopea
I’m really excited about lolcat [1], an amazing project by tehmaze [2]. It’s worth exploring!
Rainbows and unicorns (without Ruby! jay!)
References:
[1]: https://github.com/tehmaze/lolcat
[2]: https://github.com/tehmaze
I’m really excited about bubbles [1], an amazing project by charmbracelet [2]. It’s worth exploring!
TUI components for Bubble Tea 🫧
References:
[1]: https://github.com/charmbracelet/bubbles
[2]: https://github.com/charmbracelet
Check out charmbracelet [1] and their project lipgloss [2].
Style definitions for nice terminal layouts 👄
References:
[1]: https://github.com/charmbracelet
[2]: https://github.com/charmbracelet/lipgloss
plenary.nvim [1] by nvim-lua [2] is a game-changer in its space. Excited to see how it evolves.
plenary: full; complete; entire; absolute; unqualified. All the lua functions I don’t want to write twice.
References:
[1]: https://github.com/nvim-lua/plenary.nvim
[2]: https://github.com/nvim-lua
Pytest capsys
Testing print/log statements in pytest can be a bit tricky, capsys makes it
super easy, but I often struggle to find it.
capsys # [1]
capsys is a builtin pytest fixture that can be passed into any test to capture
stdin/stdout. For a more comprehensive description check out the docs on
capsys [2]
using capsys # [3]
Simply create a test function that accepts capsys as an argument and pytest
will give you a capsys opject.
def test_print(capsys):
print('hello')
captured = capsys.readouterr()
assert 'hello' in captured.out
print('world')
captured = capsys.readouterr()
assert 'world' in captured.out
References:
[1]: #capsys
[2]: https://docs.pytest.org/en/stable/capture.html#accessing-captured-output-from-a-test-function
[3]: #using-capsys
I’m impressed by kedro-diff [1] from WaylonWalker [2].
quickly diff kedro history
References:
[1]: https://github.com/WaylonWalker/kedro-diff
[2]: https://github.com/WaylonWalker
I like ThePrimeagen’s [1] project git-worktree.nvim [2].
No description available.
References:
[1]: https://github.com/ThePrimeagen
[2]: https://github.com/ThePrimeagen/git-worktree.nvim
Check out nvim [1] by kuator [2]. It’s a well-crafted project with great potential.
There are many neovim configurations, but this one is mine…
References:
[1]: https://github.com/kuator/nvim
[2]: https://github.com/kuator
Looking for inspiration? awsimple [1] by jamesabel [2].
Simple API for basic AWS services
References:
[1]: https://github.com/jamesabel/awsimple
[2]: https://github.com/jamesabel
Building Rich a Dev Server
Draft Post
I’ve really been digging [1]@willmcgugan [2]’s
rich [3] library for creating TUI like
interfaces in python. I’ve only recently started to take full advantage of it.
Dev Server # [4]
I am working on a project in which I want to have a dev
server running continuously in the background. I really
like dev servers theat automatically chooose an unused
port and list out the running pid so that I can kill it if
I need to.
- automatic port number
- auto-restart
- display ( port, pid, uptime )
finding the port # [5]
I am very novice at best when it comes to sockets, the following function came
from searching StackOverflow for how to tell if a port is in use. I
recursively check if a port is being used, if it is I increment by one until I
find an unused port to return.
def find_port(port=8000):
"""Find a port not in ues starting at given port"""
import socket
with socket.socket(socket.AF_INET, socket.SOCK_STREAM) as s:
if s.connect_ex(("localhost", port)) == 0:
retur...
Looking for inspiration? telescope.nvim [1] by nvim-telescope [2].
Find, Filter, Preview, Pick. All lua, all the time.
References:
[1]: https://github.com/nvim-telescope/telescope.nvim
[2]: https://github.com/nvim-telescope
If you’re into interesting projects, don’t miss out on harpoon [1], created by ThePrimeagen [2].
No description available.
References:
[1]: https://github.com/ThePrimeagen/harpoon
[2]: https://github.com/ThePrimeagen
The work on maggieappleton.com [1] by MaggieAppleton [2].
⚠️ Now retired. My previous, poorly constructed digital garden built with Gatsby and MDX. Updated garden here: https://github.com/MaggieAppleton/maggieappleton.com-V2
References:
[1]: https://github.com/MaggieAppleton/maggieappleton.com
[2]: https://github.com/MaggieAppleton
Check out tmate-io [1] and their project tmate [2].
Instant Terminal Sharing
References:
[1]: https://github.com/tmate-io
[2]: https://github.com/tmate-io/tmate
The work on cookiecutter-data-science [1] by drivendataorg [2].
A logical, reasonably standardized, but flexible project structure for doing and sharing data science work.
References:
[1]: https://github.com/drivendataorg/cookiecutter-data-science
[2]: https://github.com/drivendataorg
Site Down During Build
Recently I noticed a new netlify site of mine was down while I was checking to
see if new content was live. Later found out this was consistent after each
and every push the site would go gown as soon as I hit push, and would not come
back until the build finished.
Is this normal? # [1]
Do other Netlify sites go down during build???
Short Answer NO. All of my google fu lead me to believe I was alone and none of my other sites do this.
Digging into my build # [2]
My deploy script ends with the following. After resetting keys and watching it build half a dozen
times I determined that everything was working as normal here.
- name: Deploy to Netlify
uses: nwtgck/[email protected]
with:
publish-dir: "./markout"
production-branch: markout
production-deploy: true
deploy-message: "Deploy markout from GitHub Actions"
env:
NETLIFY_AUTH_TOKEN: ${{ secrets.NETLIFY_AUTH_TOKEN }}
NETLIFY_SITE_ID: ${{ secrets.NETLIFY_SITE_ID }}
Opening the Nelify Console # [3]
After poking at t...
Kedro pipeline_registry.py
With the realease of kedro==0.17.2 came a new module in the project template
pipeline_registry.py. Here are some notes that I learned while playing with
this new module.
migrating to pipeline_registry.py # [1]
- create a src/<package-name>/pipeline_registry.py file create a
- register_pipelines function in pipeline_registry.py that mirrors the
- register_pipelines method from your hooks.py module do not bring the
- hook_impl decorator remove register_pipelines method on your ProjectHooks
- class
You should now have something that looks like this in your
src/<package-name>/pipeline_registry.py.
"""Project pipelines."""
from typing import Dict
from kedro.pipeline import Pipeline
def register_pipelines() -> Dict[str, Pipeline]:
"""Register the project's pipelines.
Returns: A mapping from a pipeline name to a ``Pipeline`` object.
"""
return {"__default__": Pipeline([])}
pipeline_registry only works in kedro>=0.17.2
Conflict Resolution # [2]
What happens If I register p...
Check out smitajit [1] and their project bufutils.vim [2].
bufutils.vim provide utilities to open, close, refresh, move, resize, zoom buffers faster
References:
[1]: https://github.com/smitajit
[2]: https://github.com/smitajit/bufutils.vim
I like Rigellute’s [1] project spotify-tui [2].
Spotify for the terminal written in Rust 🚀
References:
[1]: https://github.com/Rigellute
[2]: https://github.com/Rigellute/spotify-tui
I like swyxio’s [1] project technical-community-builders [2].
companies hiring technical community builders
References:
[1]: https://github.com/swyxio
[2]: https://github.com/swyxio/technical-community-builders
Just starred Minyus [1] by Minyus [2]. It’s an exciting project with a lot to offer.
No description available.
References:
[1]: https://github.com/Minyus/Minyus
[2]: https://github.com/Minyus
I like uranusjr’s [1] project simpleindex [2].
No description available.
References:
[1]: https://github.com/uranusjr
[2]: https://github.com/uranusjr/simpleindex
I came across lorenabalan [1] from lorenabalan [2], and it’s packed with great features and ideas.
Personal repo
References:
[1]: https://github.com/lorenabalan/lorenabalan
[2]: https://github.com/lorenabalan
I came across vim.wasm [1] from rhysd [2], and it’s packed with great features and ideas.
Vim editor ported to WebAssembly
References:
[1]: https://github.com/rhysd/vim.wasm
[2]: https://github.com/rhysd
I recently discovered de1-python [1] by dataengineerone [2], and it’s truly impressive.
Curated collection of DE1’s favorite kedro pieces.
References:
[1]: https://github.com/dataengineerone/de1-python
[2]: https://github.com/dataengineerone
I recently discovered markserv [1] by markserv [2], and it’s truly impressive.
🏁 serve markdown as html [3] (GitHub style), index directories, live-reload as you edit
References:
[1]: https://github.com/markserv/markserv
[2]: https://github.com/markserv
[3]: /html/
facelessuser [1] has done a fantastic job with pymdown-extensions [2]. Highly recommend taking a look.
Extensions for Python Markdown
References:
[1]: https://github.com/facelessuser
[2]: https://github.com/facelessuser/pymdown-extensions
Check out dirsync [1] by tkhyn [2]. It’s a well-crafted project with great potential.
No description available.
References:
[1]: https://github.com/tkhyn/dirsync
[2]: https://github.com/tkhyn
Check out andrewlin12 [1] and their project markdown2png [2].
Render markdown to PNG (or other formats)
References:
[1]: https://github.com/andrewlin12
[2]: https://github.com/andrewlin12/markdown2png
Stand With Your Team
People who are quick to toss team members under a bus are not well trusted or
highly thought of and it will lead to some toxic team dynamics.
Building Steam # [1]
While collaborating on any project there are going to be decisions made that
aren’t necessarily your favorite, during a summer internship my mentor made
some decisions that I was not on board with, but I accepted his wisdom and
moved forward with little push back.
Full Spead Ahead # [2]
During a review, leadership showed interest in the option that I wanted to go
towards. I was quick to jump up and say I told you so right then and there
and pitch reasons why my idea was so much better.
The Aftermath # [3]
I walked out so proud that leadership recognized my idea, but I will never
forget the look on my teammate’s face and what he told me after the meeting.
“Wow quick to throw me under the bus in front of everyone 😢”. I
~ my teammate
Realizing what Happened # [4]
It was at this moment that I threw my mentor, a good ...
Blogging For Me
I create this blog with one person in mind, me.
There are others like me # [1]
This is not completely selfish, as there are likely many others out there that
think similarly to me. Everyone comes from different backgrounds and varying
levels of experience. In no way do you need to be an expert to create content
others will benefit from.
Accurate # [2]
I am as accurate as possible. I don’t know everything, and If I waited for
that to happen I would never post, or write at such a high level no one else
(including me) would ever want to read.
Generally I know that I am directionally accurate for most of the article. In
fact there is often a part of the article that I don’t feel the best about. It
may have been some code that could have been better. I try to point these
things out. Often when I am and point out where I know there is
improvement to be had I get the most welcoming comments, “that was just fine
how you did that”, or “I tried that myself and saw a better abstraction.
...
I recently discovered twint [1] by twintproject [2], and it’s truly impressive.
An advanced Twitter scraping & OSINT tool written in Python that doesn’t use Twitter’s API, allowing you to scrape a user’s followers, following, Tweets and more while evading most API limitations.
References:
[1]: https://github.com/twintproject/twint
[2]: https://github.com/twintproject
I like pytest-dev’s [1] project pluggy [2].
A minimalist production ready plugin system
References:
[1]: https://github.com/pytest-dev
[2]: https://github.com/pytest-dev/pluggy
to-mc [1] has done a fantastic job with checksumdir [2]. Highly recommend taking a look.
Simple package to compute a single deterministic hash of the file contents of a directory.
References:
[1]: https://github.com/to-mc
[2]: https://github.com/to-mc/checksumdir
Minimal Kedro Pipeline
How small can a minimum kedro pipeline ready to package be? I made one within 4 files that you can pip install. It’s only a total of 35 lines of python, 8 in setup.py and 27 in mini_kedro_pipeline.py.
📝 Note this is only a composable pipeline, not a full project, it does not contain a catalog or runner.
Minimal Kedro Pipeline # [1]
I have everything for this post hosted in this gihub repo [2], you can fork it, clone it, or just follow along.
Installation # [3]
pip install git+https://github.com/WaylonWalker/mini-kedro-pipeline
Caveats # [4]
This repo represents the minimal amount of structure to build a kedro pipeline that can be shared across projects. Its installable, and drops right into your hooks.py or run.py modules. It is not a runnable pipeline. At this point
I think the config loader requires to have a logging config file.
This is a sharable pipeline that can be used across many different projects.
Usage # [5]
# hooks.py
import mini_kedro_project as mkp
class Pro...
Markdown Cli
This is a post that may be a work in progress for awhile, Its a collections of
thoughts on managing my blog, but could be translated into anythiung that is
just a collection of markdown.
Listing things # [1]
- posts
- tags
- draft posts
data # [2]
- frontmatter
- filepath
- content
- template
- html [3]
render content # [4]
- Markdown.Markdown
- support extentsions
frontmatter cleaning. # [5]
- provide ways to hook in or clean up the frontmatter
Markata.Markata methods # [6]
- load
- render
- save
Markata.Post methods # [7]
- load
- render
- save
Markata plugins # [8]
- before_load
- before_post_load
- after_load
- after_post_load
- before_save
- before_post_save
- after_save
- after_post_save
Markata plugins # [9]
- cleanse_frontmatter
- html_feed
- json_feed
- rss_feed
- save_posts
CLI # [10]
$ markata list tags
python
data
$ markata
[
{
"title": "post title",
"description": "this is a post",
"filepath": "path_to.md",
"content": "the ...
My Content Strategy For 2021
I am making another push in 2021 to get my content out in the world and meeting users where they are. See how I plan to execute.
Platforms # [1]
- waylonwalker.com
- Twitter
- DEV
- hashnode
- Medium
- LinkedIn
- Anchor
Markdown # [2]
My content is written in markdown, all markdown. I find that markdown does a really great job at getting out of the way and letting ideas flow onto the page. I am never fussing with fonts and formatting while physically writing posts. Not that I don’t spend way more time than I need to tweak these things on my own personal site where everything gets posted.
Articles # [3]
Much of what I create is inside of short articles that get posted to my personal site waylonwalker.com [4]. These will get cross-posted to DEV [5],
hashnode [6], Medium [7].
I have made cross-posting a bit easier for myself by posting the markdown for each article next to the post on my personal site. Add .md to any post and there is the source.
Should I be giving my art...
Quickly Edit Posts
Recently I automated starting new posts with a python script. Today I want to
work on the next part that is editing those posts quickly.
Automating my Post Starter [1]
Check out this post about setting up my posts with python 🐍
Enter Bash # [2]
For the process of editing a post I just need to open the file in vim quickly.
I dont need much in the way of parsing and setting up the frontmatter. I think
this is a simple job for a bash script and fzf.
- change to the root of my blog
- fuzzy find the post
- open it with vim
- change back to the directory I was in
bash function # [3]
For this I am going to go with a bash function. This is partly due to being
able to track where I was and get back. Also the line with nvim will run fzf
everytime you source your ~/.alias file which is not what we want.
Lets setup the boilerplate. Its going to create a function called ep
"edit post", track our current directory, create a sub function _ep. Then
call that function and cd back to where...
Gitui is a blazing fast terminal git interface
Gitui is a terminal-based git user interface (TUI) that will change the way that you work with git.
Gitui is a blazing fast terminal git interface
Gitui is a terminal-based git [1] user interface (TUI) that will change the way
that you work with git. I have been a long-time user of the git cli, and it’s
been hard to beat, mostly because there is nothing that keeps my fingers on the
keyboard quite like it, except gitui which comes with some great ways to very
quickly walk through a git project.
installation # [2]
Go to their [releases]https://github.com/extrawurst/gitui/releases) page,
download the latest build, and pop it on your PATH. I have the following
stuffed away in some install scripts to get the latest version.
install latest release
GITUI_VERSION=$(curl --silent https://github.com/extrawurst/gitui/releases/latest | tr -d '"' | sed 's/^.*tag\///g' | sed 's/>.*$//g' | sed 's/^v//')
wget https://github.com/extrawurst/gitui/releases/download/v${GITUI_VERSION}/gitui-linux-musl.tar.gz -O- -q | sudo tar -zxf - -C /usr/bin/
run gitui # [3]
It opens blazing fast.
gitui
Quick Commits # [4]
Sometimes I edit a number of fi...
Kedro - My Data Is Not A Table
In python data science/engineering most of our data is in the form of some sort
of table, typically a DataFrame from a library like pandas, spark, or dask.
DataFrames are the heart of most pipelines # [1]
These containers for data contain many convenient methods to manipulate table
like data structures. Sometimes we leverage other data types, namely vanilla
types like lists and dicts, or even numpy data types.
What is Kedro [2]
unfamiliar with kedro, check out this post
Sometimes datasets are not tables # [3]
There are times when our data doesn’t fit nicely into a DataFrame. Lucky for us
Kedro has pickle support out of the box. Pickle is a way to store any python
object to disk. Beware that pickle files coming from an unknown source can run
malicous code and are considered unsafe. For the most part though when you
read and write your own pickle files they are a good tool to consider.
See more about pickle [4] from python.org.
Cataloging Pickle # [5]
I may have a dictionary ...
Check out asottile [1] and their project babi [2].
a text editor
References:
[1]: https://github.com/asottile
[2]: https://github.com/asottile/babi
Quickly Change Conda Env With Fzf
Changing conda environments is a bit verbose, I use a function with fzf that
both lists environments and selects the one I want in one go.
Conda # [1]
I have used conda as a virtual environment [2] tool for years now. I started using
conda for its simplicity to install packages on windows, but now that has
gotten so much better and it’s been years since I have run a conda install
command. I’m sure that I could use a different environment manager, but it
works for me and makes sense.
What environment manager do you use for python?
Conda environments are stored in a central location such as
~/miniconda3/envs/ and not with the project. They contain both the python
interpreter and packages for that env.
Conda create # [3]
Conda environments are created with the conda create command. At this point,
you will need to name your env and select the python version.
conda create -n my_env python=3.8
After running this command you will have a directory ~/miniconda3/envs/my_env
with a base...
Vim Replace Visual Star
Replacing text based on whats in the current search register is a quite handy
tool that I use often. I believe I picked this tip up from Nick Janetakis,
check out his YouTube channel for some amazing vim tips.
https://www.youtube.com/watch?v=fP_ckZ30gbs
If there is one thing that I Like most about vim it’s the ability to hack on it
and make it work well for you.
Replacing text in vim # [1]
Vim can often be a bit verbose, but that’s ok because we can hack on it, and
make our own shortcuts and keybindings. For instance, finding and replacing
text requires using a command at the vim command-line :. Replacing foo with
bar looks like this :%s/foo/bar/g, the final g means all of the foos, not just
the first one on the line.
making it better # [2]
I have a keybinding in my init.vim that will allow me to search for a pattern
with the usual / character, page through them as normal with n and N, but
when I press <C-R> it will populate the replace command for me so that all I
need to do ...
Minimal Python Package
What does it take to create an installable python package that can be hosted on pypi?
What is the minimal python package # [1]
- setup.py
- my_module.py
This post is somewhat inspired by the bottle framework, which is famously created as a single python module. Yes, a whole web framework is written in one file.
Directory structure # [2]
.
├── setup.py
└── my_pipeline.py
setup.py # [3]
from setuptools import setup
setup(
name="",
version="0.1.0",
py_modules=["my_pipeline", ],
install_requires=["kedro"],
)
name # [4]
The name of the package can contain any letters, numbers, “_”, or “-”. Even if it’s for internal/personal consumption only I usually check for discrepancy with pypi so that you don’t run into conflicts.
Note that pypi treats “-” and “_” as the same thing, beware of name clashes
version # [5]
This is the version number of your package. Most packages follow
semver [6]. At a high level its three numbers separated by a . that follow the format major.minor.patc...
Check out jameslittle230 [1] and their project stork [2].
🔎 Impossibly fast web search, made for static sites.
References:
[1]: https://github.com/jameslittle230
[2]: https://github.com/jameslittle230/stork
If Tmux
I do much of my work from tmux, I love it so much that I want to setup some
functionality that puts me in tmux even if I didn’t ask for it.
Bash Function # [1]
Bash function to check if the shell is in a tmux session.
in_tmux () {
if [ -n "$TMUX" ]; then
return 0
else
return 1
fi
}
Using the bash function # [2]
I often open up vim to do some quite edits, but before I know it I have several
splits open and I need access to another shell utility, but I forgot to start
in tmux. This function makes sure tht I start in tmux everytime.
Using if_tmux to ensure vim is opened in tmux.
vim () {
in_tmux \
&& nvim \
|| bash -c "\
tmux new-session -d;\
tmux send-keys nvim Space +GFiles C-m;\
tmux -2 attach-session -d;
"
}
I am not quite sure if this is proper use of the && and ||, let me know if
you have a better way to do one thing if in_tmux returns true and another if
it returns faslse.
References:
[1]: #bash-function
[2]: #using-the-bash-function
If you’re into interesting projects, don’t miss out on vim-commentary [1], created by tpope [2].
commentary.vim: comment stuff out
References:
[1]: https://github.com/tpope/vim-commentary
[2]: https://github.com/tpope
I’m really excited about vim-fugitive [1], an amazing project by tpope [2]. It’s worth exploring!
fugitive.vim: A Git [3] wrapper so awesome, it should be illegal
References:
[1]: https://github.com/tpope/vim-fugitive
[2]: https://github.com/tpope
[3]: /glossary/git/
The work on vim-surround [1] by tpope [2].
surround.vim: Delete/change/add parentheses/quotes/XML-tags/much more with ease
References:
[1]: https://github.com/tpope/vim-surround
[2]: https://github.com/tpope
If you’re into interesting projects, don’t miss out on kedro-starters [1], created by kedro-org [2].
Templates for your Kedro projects.
References:
[1]: https://github.com/kedro-org/kedro-starters
[2]: https://github.com/kedro-org
Save Vim Macro
If you are like me, you have created a macro or two that is pure glory, and you forget how you made it after a day or so, or you immediately want to store it away as a custom keybinding. As with most things with vim, it’s easy to do once you understand it.
Creating a Macro # [1]
One of the earliest things we all learn to do in vim is to create macros, custom sets of functionality stored in a register that can be replayed later.
To create a macro, get into normal mode, then type q followed by a letter that you want to store the macro under.
qq
Note: a common throw-away macro register is q because it’s easy to hit qq from normal mode to start recording.
Replaying a Macro # [2]
Macros can be replayed using @ followed by the letter that you stored the macro under.
@q
Registers # [3]
Registers are nothing more than a single character key mapping to a value of some text. As you yank, delete, or create macros in vim, it automatically stores text into these registers.
When you hit...

Live Substitution In Neovim
Replacing text in vim can be quite frustrating especially since it doesn’t have
live feedback to what is changing. Today I was watching Josh Branchaud’s
Vim-Unalphabet series on Youtuve and realized that his vim was doing this and I
had to have it.
https://twitter.com/_WaylonWalker/status/1346081617199198210
How to do it # [1]
I had to do a bit of searching and found a great post from vimcasts [2] that shows exactly how to get the live search and replace highlighting using inccomand
:h inccommand # [3]
'inccommand' 'icm' string (default "")
global
"nosplit": Shows the effects of a command incrementally, as you type.
"split" : Also shows partial off-screen results in a preview window.
Works for |:substitute|, |:smagic|, |:snomagic|. |hl-Substitute|
If the preview is too slow (exceeds 'redrawtime') then 'inccommand' is
automatically disabled until |Command-line-mode| is done.
Add this to your config # [4]
I believe that this is a neovim only feature, add it into your
~...
khzaw [1] has done a fantastic job with vim-conceal [2]. Highly recommend taking a look.
A vim plugin making use of vim’s conceal feature for additional visual eyecandy.
References:
[1]: https://github.com/khzaw
[2]: https://github.com/khzaw/vim-conceal
Newsboat
Web browsers are a black hole of productivity. I try to use them as little as
possible when it is time to focus. I try to use help, ?, or ?? with
ipython, or –help at the command line as much as possible. What about that
time I am trying to see what my online friends are posting on their sites? I
used to used google reader quite heavily before that was taken down.
Newsboat # [1]
I am going to give a terminal rss reader a try for a bit and see how that goes
for me. I have really struggled to get into an rss reader since google reader
died.
installation # [2]
I installed with the reccomended snap for Ubuntu.
sudo snap install newsboat
Adding feeds # [3]
super simple
Running help for newsboat directed me towards their config files at the bottom.
❯ newsboat --help
newsboat r2.22
usage: /snap/newsboat/3849/usr/local/bin/newsboat [-i <file>|-e] [-u <urlfile>] [-c <cachefile>] [-x <command> ...] [-h]
-e, --export-to-opml export OPML feed to stdout
-r, --refresh-on-start refresh f...
Large Refactor At The Command Line
As projects grow patterns that worked early on break and we need to change things to make the project easier to work with, and more welcoming to new developers.
git # [2]
Before you start mucking up a project with wild commands at the terminal check that you have a super clean git status. We may make some mistakes and need a way to undo 100’s files and git makes it really easy if you start with a clean history.
git status
If we are ready to begin work we should see a response like this.
On branch main
nothing to commit, working tree clean
It would also be wise to do this inside of a branch. The minute you try to do something wild in your working branch someone will walk by and ask you to do a five-minute task, but your deep in refactoring and haven’t left yourself a clean way back.
git branch my-big-refactor
grepr # [3]
Time for the meat of this refactor replacing text across our project. I often will pop this bash function into my terminal session and tweak it as needed. This...
Ipython-Config
I use my ipython terminal daily. It’s my go to way of running python most of
the time. After you use it for a little bit you will probably want to setup a
bit of your own configuration.
install ipython # [1]
Activate your virtual environment [2] of choice and pip install it. Any time you
are running your project in a virtual environment, you will need to install
ipython inside it to access those packages from ipython.
pip install ipython
You are using a virtual environment right? Virtual environments like venv or
conda can save you a ton of pain down the road.
profile_default # [3]
When you install ipython you start out with no config at all. Runnign ipython profile create will start a new profile called profile_default that contains
all of the default configuration.
ipython profile create
This command will create a directory ~/.ipython/profile_default
multiple configurations # [4]
You can run multiple configurations by naming them with ipython profile create [profile_name...
Custom Ipython Prompt
I’ve grown tired of the standard ipython prompt as it doesn’t do much to give
me any useful information. The default one gives out a line number that only
seems to add anxiety as I am working on a simple problem and see that number
grow to several hundred. I start to question my ability 🤦♂️.
Configuration # [1]
If you already have an ipython config you can move on otherwise check out this
post on creating an ipython config.
Ipython-Config [2]
The Dream Prompt # [3]
I want something similar to the starship prompt I am using in the
shell. I want to be able to quickly see my python version,
environment name, and git [4] branch.
- python version
- active environment
- git branch
[5]
This is my zsh prompt I am using for inspiration
Basic Prompt # [6]
This is mostly boilerplate that I found from various google
searches, but this gets me a basic green chevron as my prompt.
from IPython.terminal.prompts import Prompts, Token
class MyPrompt(Prompts):
def in_prompt_tokens(self...
I’m impressed by vim-tmux-runner [1] from christoomey [2].
Vim and tmux, sittin’ in a tree…
References:
[1]: https://github.com/christoomey/vim-tmux-runner
[2]: https://github.com/christoomey
I like fkromer’s [1] project awesome-kedro [2].
No description available.
References:
[1]: https://github.com/fkromer
[2]: https://github.com/fkromer/awesome-kedro
Just starred machfiles [1] by ChristianChiarulli [2]. It’s an exciting project with a lot to offer.
The dotfiles you see in all my videos
References:
[1]: https://github.com/ChristianChiarulli/machfiles
[2]: https://github.com/ChristianChiarulli
Check out LunarVim [1] and their project LunarVim [2].
🌙 LunarVim is an IDE layer for Neovim. Completely free and community driven.
References:
[1]: https://github.com/LunarVim
[2]: https://github.com/LunarVim/LunarVim
Looking for inspiration? joelhooks-com [1] by joelhooks [2].
playing with static pages
References:
[1]: https://github.com/joelhooks/joelhooks-com
[2]: https://github.com/joelhooks
Automating my Post Starter
One thing we all dread is mundane work of getting started, and all the hoops it
takes to get going. This year I want to post more often and I am taking some
steps towards making it easier for myself to just get started.
When I start a new post I need to cd into my blog directory, start neovim in a
markdown file with a clever name, copy some frontmatter boilerplate, update the
post date, add tags, a description, and a cover.
Todo List for starting a post # [1]
- frontmatter template
- Title
- slug
- tags
- date
- cover
- description
- create markdown file
- open in neovim
Lets Automate this # [2]
This aint no proper cli # [3]
hot and fast
As with many thing running behind the scenes on this site, I am the one and
only user, I have limited time, so this is going to be a bit hot and fast.
Let’s create a file called new-post.
start the script new-post
#!python
# new-post
👆 Works on my machine
If this were something that had more users than me I would probably use
some...
Windowing Python Lists
In python data science we often will reach for pandas a bit more than
necessary. While pandas can save us so much there are times where there are
alternatives that are much simpler. The itertoolsandmore-itertools` are
full of cases of this.
This post is a walkthrough of me solving a problem with more-itertools rather
than reaching for a for loop, or pandas.
I am working on a one-line-link expander for my blog. I ended up doing it,
just by modifying the markdown with python. I first split the post into lines
with content.split('\n'), then look to see if the line appears to be just a
link. One more safety net that I wanted to add was to check if there was
whitespace around the line, this could not simply be done in a list
comprehension by itself. I need just a bit of knowledge of the surrounding
lines, enter more-itertools.
simplified rendering function # [1]
I have a function that will check to see if the line should be expanded, then
render the correct template. Fist step is to ...
WaylonWalker [1] has done a fantastic job with devtainer [2]. Highly recommend taking a look.
🐳 (dotfiles) My personal development docker container base image
References:
[1]: https://github.com/WaylonWalker
[2]: https://github.com/WaylonWalker/devtainer
WaylonWalker [1] has done a fantastic job with WaylonWalker [2]. Highly recommend taking a look.
Learning in public
References:
[1]: https://github.com/WaylonWalker
[2]: https://github.com/WaylonWalker/WaylonWalker
Check out aoc [1] by ThePrimeagen [2]. It’s a well-crafted project with great potential.
2020
References:
[1]: https://github.com/ThePrimeagen/aoc
[2]: https://github.com/ThePrimeagen
Check out ZaxR [1] and their project bulwark [2].
Bulwark is a package for convenient property-based testing of pandas dataframes.
References:
[1]: https://github.com/ZaxR
[2]: https://github.com/ZaxR/bulwark
mariokostelac [1] has done a fantastic job with sagemaker-setup [2]. Highly recommend taking a look.
Useful scripts for making AWS SageMaker better
References:
[1]: https://github.com/mariokostelac
[2]: https://github.com/mariokostelac/sagemaker-setup
I like pypeaday’s [1] project aoc-2020 [2].
Advent of Code 2020
References:
[1]: https://github.com/pypeaday
[2]: https://github.com/pypeaday/aoc-2020
I’m really excited about auto-editor [1], an amazing project by WyattBlue [2]. It’s worth exploring!
Auto-Editor: Efficient media analysis and rendering
References:
[1]: https://github.com/WyattBlue/auto-editor
[2]: https://github.com/WyattBlue
Adding Audio to my blog posts
This is episode 1 of the Waylon Walker Audio experience, posts from
waylonwalker.com [1]{.hoverlink} in audio form.
So I have had this idea for awhile to add audio to my blog posts. The idea
partly comes from the aws blog, if you have ever been on their blog you will
have noticed that they have a voiced by amazon polly section.
What to Expect # [2]
Honestly I don’t know this is all new to me and I dont have much to go off of.
For now its a test that may or may not work out.
I will say that the time that I have available for clean audio is a bit limited
so expect these to come out in batches as I get time to go back and record.
What Not to Expect # [3]
One thing that makes the aws blog really hard to listen to is the robotic
voice, I definitely don’t want that. This will be voiced by a real human, Me.
At the same time written text doesn’t translate directly to audio well so don’t
necessarily expect the audio to be
word for word.
Code blocks # [4]
There are a lot of code block...
Check out yetudada [1] and their project yetudada [2].
No description available.
References:
[1]: https://github.com/yetudada
[2]: https://github.com/yetudada/yetudada
I’m impressed by quickpython [1] from timothycrosley [2].
A retro interactive coding environment powered by Python and nostalgia
References:
[1]: https://github.com/timothycrosley/quickpython
[2]: https://github.com/timothycrosley
gatsby-remark-embedder
Inspired by discourse’s link expansion I am rolling out expansions for one line
links on the blog waylonwalker [1]. I was able to find
a gatsby plugin
gatsby-remark-embedder [2]
that expands one line links for social cards for popular platforms like twitter
and YouTube through a repose from Kyle Mathews to my tweet.
https://twitter.com/kylemathews/status/1329817928666005504
Use Cases # [3]
This covers a couple of use cases I have with very little effort.
- Twitter
- YouTube
install # [4]
npm i gatsby-remark-embedder gatsby-plugin-twitter
This was super quick and simple to setup, the only thing that was extra was to
install the gatsby-plugin-twitter plugin as well as the
gatsby-remark-embedder.
enable # [5]
// In your gatsby-config.js
module.exports = {
// Find the 'plugins' array
plugins: [
`gatsby-plugin-twitter`,
{
resolve: `gatsby-transformer-remark`,
options: {
plugins: [
{
resolve: `gatsby-remark-embedder`,
options: {
customTransformers: [
// Your custom t...
Expand One Line Links
I wanted a super simple way to cross-link blog posts that require as little effort as possible, yet still looks good in vanilla markdown in GitHub. I have been using a snippet that puts HTML [1] into the markdown. While this works, it’s more manual/difficult for me does not look the best, and does not read well as
Goals for new card # [2]
The new card should be fully automated to expand with title, description, and
cover image. Bonus if I am able to attach a comment behind it.
- fully automated
- card expansion
- Title
- description
- cover image
Old Card # [3]
If you can call it a card 🤣. This card was just an image wrapped in an anchor tag and a paragraph tag. I found this was the most consistent way to get an image narrower and centered in both GitHub and dev.to.
<p style='text-align: center'>
<a href='https://waylonwalker.com/notes/eight-years-cat/'>
<img
style='width:500px; max-width:80%; margin: auto;'
src="https://dropper.wayl.one/file/99f80283-2f27-4664-8c4a-d1...
astronomer [1] has done a fantastic job with dag-factory [2]. Highly recommend taking a look.
Dynamically generate Apache Airflow DAGs from YAML configuration files
References:
[1]: https://github.com/astronomer
[2]: https://github.com/astronomer/dag-factory
orchest [1] by orchest [2] is a game-changer in its space. Excited to see how it evolves.
Build data pipelines, the easy way 🛠️
References:
[1]: https://github.com/orchest/orchest
[2]: https://github.com/orchest
gvanrossum [1] has done a fantastic job with patma [2]. Highly recommend taking a look.
Pattern Matching
References:
[1]: https://github.com/gvanrossum
[2]: https://github.com/gvanrossum/patma
mingrammer [1] has done a fantastic job with diagrams [2]. Highly recommend taking a look.
🎨 Diagram as Code for prototyping cloud system architectures
References:
[1]: https://github.com/mingrammer
[2]: https://github.com/mingrammer/diagrams
Just starred svelte-actions [1] by swyxio [2]. It’s an exciting project with a lot to offer.
prototype official actions for Svelte
References:
[1]: https://github.com/swyxio/svelte-actions
[2]: https://github.com/swyxio
reasons-to-kedro
There are many reasons that you should be using kedro. If you are on a team of
Data Scientists/Data Engineers processing DataFrames from many data sources
should be considering a pipeline framework. Kedro is a great option that
provides many benefits for teams to collaborate, develop, and deploy data
pipelines
What is Kedro [1]
Starter Template # [2]
Kedro makes it super easy to get started with their cli that utilizes
cookiecutter under the hood.
conda create -n my-new-project -y python=3.8
kedro new
kedro install
kedro run
Create New Kedro Project [3]
read more about how to start your first kedro project here
Collaboration # [4]
Kedro provides many tools that help teams collaborate on a single codebase.
While writing monolithic scripts it can be easy to pin yourself in a corner
where it is difficult to have multiple people making changes to the
notebook/script at the same time. Kedro helps guide your team to break your
project down into small pieces that different members o...
Just starred Second-Brain [1] by KasperZutterman [2]. It’s an exciting project with a lot to offer.
A curated list of awesome Public Zettelkastens 🗄️ / Second Brains 🧠 / Digital Gardens 🌱
References:
[1]: https://github.com/KasperZutterman/Second-Brain
[2]: https://github.com/KasperZutterman
Just starred Repo-Roster [1] by nastyox [2]. It’s an exciting project with a lot to offer.
Shout-out supporters in your GitHub README file.
References:
[1]: https://github.com/nastyox/Repo-Roster
[2]: https://github.com/nastyox
What's New in Kedro 0.16.6
Kedro 0.16.6 [1] is out! Let’s take a look through the release notes
Deployment Docs # [2]
This is really exciting to see more deployment options coming from the kedro team. It really shows the power of the framework. The power of some of these orchestrations options is incredible.
- Argo [3]
- Prefect [4]
- Kubeflow [5]
- Batch [6]
- SageMaker [7]
Most of them hinge on a sweet combination of the kedro cli, docker image, and the pipeline knowing your nodes dependencies.
Argo, Prefect, and Kubeflow have an interesting technique where they translate the pipeline and its dependencies from kedro to their language.
Batch uses the aws cli to submit jobs, one node per job, and listen for them to complete. It will submit all nodes with completed dependencies at once, meaning that we can get some massive parallelization.
I did a quick and dirty test of one of these by simulating the technique in a bash script and saw a 40 hr pipeline finish in about 1 hour. I am excited to get thi...
mkdocs [1] by mkdocs [2] is a game-changer in its space. Excited to see how it evolves.
Project documentation with Markdown.
References:
[1]: https://github.com/mkdocs/mkdocs
[2]: https://github.com/mkdocs
A brain dump of stories
I started making stories as kind of a brain dump a few times per day and
posting them to
[LinkedIn](https://www.linkedin.com/in/waylonwalker/(https://www.linkedin.com/in/waylonwalker/).
Here are the last 11 days of stories.
I store all the stories on my website with the hopes of doing something with
them on my own platform eventually. For now it makes it easy to make these
posts.
cd static/stories
ls | xargs -I {} echo ''
Stories 10-10-2020 - 10-21-2020 # [1]
[2]
[3]
[4]
[5]
[6]
[7]
[8]
[9]
[10]
[11]
[12]
[13]
[14]
[15]
References:
[1]: #stories-10-10-2020---10-21-2020
[2]: https://waylonwalker.com/stories/TIL-kedro-sorts-nodes.png
[3]: https://waylonwalker.com/stories/disable-base-pip.png
[4]: https://waylonwalker.com/stories/discovered-social-cards.png
[5]: https://waylonwalker.com/stories/find-kedro-de1-contributor.png
[6]: https://waylonwalker.com/stories/hacktoberfest-2020-kedro-538-tests-pass.png
[7]: https://waylonwalk...
Check out mmchougule [1] and their project kedro-grpc-server [2].
Kedro gRPC Server is a Kedro plugin that creates a gRPC server for triggering and monitoring pipeline runs using a general-purpose RPC framework gRPC
References:
[1]: https://github.com/mmchougule
[2]: https://github.com/mmchougule/kedro-grpc-server
Check out yetudada [1] and their project kedro-user-testing [2].
Discovery prototypes for user testing
References:
[1]: https://github.com/yetudada
[2]: https://github.com/yetudada/kedro-user-testing
The work on flynt [1] by ikamensh [2].
A tool to automatically convert old string literal formatting to f-strings
References:
[1]: https://github.com/ikamensh/flynt
[2]: https://github.com/ikamensh
charmbracelet [1] has done a fantastic job with glow [2]. Highly recommend taking a look.
Render markdown on the CLI, with pizzazz! 💅🏻
References:
[1]: https://github.com/charmbracelet
[2]: https://github.com/charmbracelet/glow
Check out mytechnotalent [1] and their project Python-For-Kids [2].
A FREE comprehensive online Python development tutorial FOR KIDS utilizing an official BBC micro:bit Development Board going step-by-step into the world of Python for microcontrollers.
References:
[1]: https://github.com/mytechnotalent
[2]: https://github.com/mytechnotalent/Python-For-Kids
I’m impressed by pycon_pybadge_2020 [1] from nnja [2].
Initial code for Microsoft’s PyBadge at PyCon 2020
References:
[1]: https://github.com/nnja/pycon_pybadge_2020
[2]: https://github.com/nnja
Fix git commit author
I was 20 commits into a hackoberfest PR when I suddenly realized they they all had my work email on them instead of my personal email 😱. This is the story of how I corrected my email address on 19 individual commits after already submitting for a PR.
- Change the email for this repo [1]
- Prepare for rebasing [2]
- start the rebase [3]
- 🛠 Fix First wrong Commit [4]
- Fix all commits [5]
- Done [6]
- ReCap [7]
Change the email for this repo # [1]
stop the bleeding
Before anything else set the email correctly!
cd kedro
git config user.name "Waylon Walker"
git config user.email [email protected]
Prepare for rebasing # [2]
First thing is to find how many commits back this mistake goes. I opened up the git [8] log, and saw mine went back 19 commits. I rolled back 20 just to be sure.
$ git log
...
commit a355926b9d7ec4c05659adaa254beefbdb036332
Author: WaylonWalker <[email protected]>
Date: Sat Oct 17 10:28:59 2020 -0500
give name of function inside incorrect parameters erro...
I like muesli’s [1] project duf [2].
Disk Usage/Free Utility - a better ‘df’ alternative
References:
[1]: https://github.com/muesli
[2]: https://github.com/muesli/duf
Designing a "Router" for kedro
nodes_global # [1]
I released a router-like plugin for kedro back in April 2020. This was not the first design, the idea actually came from one of the QB folks who taught me kedro nearly a year before. We were assembling our pipelines with something called nodes_global. It worked fairly well but did have some issues around being set as a global variable.
But…
One thing in particular that it did not lend itself well to was being able to create a packagable pipeline that I could pip install and append into any of my existing pipelines. Something I am still trying to work out, maybe I don’t need this. I think I have it working for our internal pipelines and it seems like the way to go, but we don’t necessarily end up using it.
Also…
With this pattern all of the nodes needed to be importable by the module containing nodes_global. I find that this becomes a big hurdle for new pipelines coming from jupyter to overcome and can be most infuriating when their nodes aren’t getting ran af...
I came across python_training [1] from AnkurDedania [2], and it’s packed with great features and ideas.
Intro to Python
References:
[1]: https://github.com/AnkurDedania/python_training
[2]: https://github.com/AnkurDedania
github [1] has done a fantastic job with renaming [2]. Highly recommend taking a look.
Guidance for changing the default branch name for GitHub repositories
References:
[1]: https://github.com/github
[2]: https://github.com/github/renaming
Reclaim memory usage in Jupyter
Today I ran into an issue where we had a one-off script that just needed to
work, but it was just chewing threw memory like nothing.
It started with a colleague asking me How do I clear the memory in a Jupyter
notebook, these are the steps we took to debug the issue and free up some
memory in their notebook.
How do I clear the memory in a Jupyter notebook?
Pre check the status of memory # [1]
There are a number of ways that you can check the amount of memory on your
system. The easiest is not necessarily my first go to is free… literally
free.
check for free space
$ free -h
total used free shared buffers cached
Mem: 15G 15G 150M 0B 59M 8.7G
Generally my first go to is a bit more graphical, and not available on a stock
stystem, but far more useful…. htop. htop [2] is a
terminal process explorer that shows cpu usage, mem usage, and running
processes.
htop
sudo apt-get install htop # install it from your package repo
htop
[3]
First step throw more swap at it # [4]
Often be...
Strip Trailing Whitespace from Git projects
A common linting error thrown by various linters is for trailing whitespace. I
most often use flake8. I generally have
[pre-commit](https://waylonwalker.com/pre-commit-is-awesome
hooks setup to strip this,
but sometimes I run into situations where I jump into a project without it, and
my editor lights up with errors. A simple fix is to run this one-liner.
One-Liner to strip whitespace # [1]
bash
git grep -I --name-only -z -e '' | xargs -0 sed -i -e 's/[ \t]\+\(\r\?\)$/\1/'
pre-commit is awesome
I recently discovered the ✨ awesomeness that is pre-commit. I steered away from it for so long because it seemed like a big daunting thing to set up, but...
Jun 5, 2020 [2]
References:
[1]: #one-liner-to-strip-whitespace
[2]: /pre-commit-is-awesome/
tpope [1] has done a fantastic job with vim-sleuth [2]. Highly recommend taking a look.
sleuth.vim: Heuristically set buffer options
References:
[1]: https://github.com/tpope
[2]: https://github.com/tpope/vim-sleuth
actions [1] has done a fantastic job with setup-python [2]. Highly recommend taking a look.
Set up your GitHub Actions workflow with a specific version of Python
References:
[1]: https://github.com/actions
[2]: https://github.com/actions/setup-python
I came across starter-workflows [1] from actions [2], and it’s packed with great features and ideas.
Accelerating new GitHub Actions workflows
References:
[1]: https://github.com/actions/starter-workflows
[2]: https://github.com/actions
checkout [1] by actions [2] is a game-changer in its space. Excited to see how it evolves.
Action for checking out a repo
References:
[1]: https://github.com/actions/checkout
[2]: https://github.com/actions
Looking for inspiration? dotfiles [1] by nicknisi [2].
vim, zsh, git [3], homebrew, neovim - my whole world
References:
[1]: https://github.com/nicknisi/dotfiles
[2]: https://github.com/nicknisi
[3]: /glossary/git/
Just starred zk [1] by sirupsen [2]. It’s an exciting project with a lot to offer.
Zettelkasten on the command-line 📚 🔍
References:
[1]: https://github.com/sirupsen/zk
[2]: https://github.com/sirupsen
The work on napkin-math [1] by sirupsen [2].
Techniques and numbers for estimating system’s performance from first-principles
References:
[1]: https://github.com/sirupsen/napkin-math
[2]: https://github.com/sirupsen
deepyaman [1] has done a fantastic job with kedro-accelerator [2]. Highly recommend taking a look.
Kedro-Accelerator speeds up pipelines by parallelizing I/O in the background.
References:
[1]: https://github.com/deepyaman
[2]: https://github.com/deepyaman/kedro-accelerator
Chrome Extensions I use
There are many useful chrome extensions out there. I probably have way too many installed, here are four that I am currently using.
This post was inspired from Chris over at daily-dev-tips [1]
- LastPass [2]
- Stylus [3]
- Vimium [4]
- hypothesis [5]
---
LastPass [6] # [7]
Love it or hate it passwords are hard to manage. Everyone needs a password manager to avoid the dreaded password reuse, and to be able to quickly rotate them with a service. I use lastpass, thus it’s browser extension is my most used extension.
[6]
---
Stylus [8] # [9]
Stylus is an extension that allows you to add your own CSS to style pages how you want. There seems to be a full community of folks that really use this to the nth degree to style all of their commonly used sites somewhat similarly or add dark mode to sites without it.
Personally I mostly use it to add my favorite syntax highlighting theme to jupyter, onedark. I’ve long lost the original author, but have posted the CSS I use in this gi...
The work on find-kedro [1] by WaylonWalker [2].
kedro plugin to automatically construct pipelines using pytest style pattern matching
References:
[1]: https://github.com/WaylonWalker/find-kedro
[2]: https://github.com/WaylonWalker
Looking for inspiration? steel-toes [1] by WaylonWalker [2].
a kedro hook to protect against breaking changes to data
References:
[1]: https://github.com/WaylonWalker/steel-toes
[2]: https://github.com/WaylonWalker
I like htop-dev’s [1] project htop [2].
htop - an interactive process viewer
References:
[1]: https://github.com/htop-dev
[2]: https://github.com/htop-dev/htop
Creating Reusable Bash Scripts
Bash is a language that is quite useful for automation no matter what language
you write in. Bash can do so many powerful system-level tasks. Even if you are
on windows these days you are likely to come across bash inside a cloud VM,
Continuous Integration, or even inside of docker.
I have three techniques that help me write more composable bash scripts.
- functions [1]
- Arguments [2]
- positional arguments [3]
- All Arguments [4]
- Error Handling [5]
- main script [6]
---
Functions # [1]
Break scripts down into reusable components
Functions in bash are quite simple. They are something that I wish I would have
started using long ago. They make your code much more reusable. I often use
them in my aliases as well since they can simplify the process and allow more
flexibility.
syntax
#!/bin/sh
# hello_world
hello_world () {
echo "hello world"
}
Source the file to load the function and run it from the terminal.
run it
source hello_world
hello_world
outputs
hello world
...
Three things to Automate with Python using Pandas
Here are three things that I see my non programming counterparts doing every single day. These really sum up so much of what folks do within an office. So many of us dabble in or become power users of spreadsheets without knowing there is an alternative out there that can save us time, automate boring things, and allow us to open up our minds for the part that we add value, Thinking about the data.
Focus on Value Add Operations # [1]
Lets face it, stitching together spreadsheets is zero value add by itself, but if you can see something in the data and take action on it, this can be huge value add to your company. Learning just a bit of python will help focus more of your attention on “value add operations” and leave the mundane stuff to your computer.
Merge a directory full of spreadsheets into one # [2]
I see this one all the time. One team gets a spreadsheet from another team once per month and they need to stich all the pieces together. Excel really opens the door for some na...
How to Install miniconda on linux (from the command line only)
miniconda is a python distribution from continuum. It’s a slimmed-down version of their very popular anaconda distribution. It comes with its own environment manager and has eased the install process for many that do not have a way to compile c-extensions. It made it much easier to install the data science stack on windows a few years ago. These days windows are much better than it was back then at compiling c-extensions. I still like its environment manager, which installs to a global directory rather than a local directory for your project.
Installing miniconda on Linux # [1]
Installing miniconda on Linux can be a bit tricky the first time you do it completely from the terminal. The following snippet will create a directory to install miniconda into, download the latest python 3 based install script for Linux 64 bit, run the install script, delete the install script, then add a conda initialize to your bash or zsh shell. After doing this you can restart your shell and conda will...
How to crush amazing posts on DEV
This post was inspired by a comment I left on @dsteenman’s post.
{% post dsteenman/how-long-should-a-blogpost-be-2k6n %}
Most of the time I prefer short as I am more likely to read the whole thing. If its setup as a series I am more likely to work my way through the whole series in a matter of a few sessions. Just my preference
I will say though there are certain articles that fit well to the long format. They are articles that folks tend to come back to often as a reference again and again.
Sections # [1]
- layout is key [2]
- Break it up [3]
- Article types [4]
- superpost [5]
- single post [6]
- series [7]
- discussion [8]
- Post what you want to read [9]
layout is key # [2]
Either way, you go layout is key. You are not Steven King, no matter how great of a writer you are, you are unlikely to hold attention like he can. Most folks reading blogs scan articles first. I often scan, then read. If the article is really good or pertains well to me I will read everything, ...
I like RanaEmad’s [1] project metrics-of-awesome-api [2].
A Node.js API with the main purpose of acting as a backend for practicing authentication in React. It enables the user to sign up, sign in and view a dashboard with his metrics of awesome through different endpoints.
References:
[1]: https://github.com/RanaEmad
[2]: https://github.com/RanaEmad/metrics-of-awesome-api
If you’re into interesting projects, don’t miss out on awesome-gpt3 [1], created by elyase [2].
No description available.
References:
[1]: https://github.com/elyase/awesome-gpt3
[2]: https://github.com/elyase
shreyashankar [1] has done a fantastic job with gpt3-sandbox [2]. Highly recommend taking a look.
The goal of this project is to enable users to create cool web demos using the newly released OpenAI GPT-3 API with just a few lines of Python.
References:
[1]: https://github.com/shreyashankar
[2]: https://github.com/shreyashankar/gpt3-sandbox
Black Tech Pipeline
I was particularly inspired by @chantastic episode 103 of the react podcast with @ParissAthena. They spoke about the black tech pipeline as well as Diversity, Equity, and Inclusion. Pariss is quite an inspiration. She has done so much work to create a better place for POC in tech. I like that not only is she helping them get jobs but acting as a mentor for their first few months on the job to make sure that they are able to find their place and fit in.
Based on an episode of react podcast.
🎙 Listen to the full episode [1].
So Inspirational # [2]
I was particularly inspired by @chantastic [3] episode 103 of the react podcast with @ParissAthena [4]. They spoke about the black tech pipeline as well as Diversity, Equity, and Inclusion. Pariss is quite an inspiration. She has done so much work to create a better place for POC in tech. I like that not only is she helping them get jobs but acting as a mentor for their first few months on the job to make sure that they are able to find ...
Review of the git-auto-commit-action
It’s a really cool GitHub action that will automatically commit files changed
during the action. I was using this to render a new readme based on a template.
Check out the repo for git-auto-commit-action [1].
It’s a really cool GitHub action that will automatically commit files changed during the action. I was using this to render a new readme based on a template.
This has been by far the easiest way to commit back to a repo that I have seen. Other patterns often require fully setting up the git [2] user and everything. While it’s not all that hard, this action already has all of that covered.
You must give it a commit message and thats it. Optionally you can configure a number of things. Its possible to configure the commit_user_name, commit_user_email, and commit_author. I often also scope the file_pattern to a certain subset of files.
---
Getting Started with GitHub Actions
Github actions are written in configuration files using the YAML syntax. YAML is a superset of JSON...
What's New in Kedro 0.16.4
If we take a look at the release notes [1] I see one major feature improvement on the list, auto-discovery of hooks.
## Major features and improvements
* Enabled auto-discovery of hooks implementations coming from installed plugins.
This one comes a bit surprising as it was just casually mentioned in #435 [2]
[2]
Think pytest # [3]
As mentioned in #435 [2] this is the model that pytest uses. Not all plugins automatically start doing things right out of the box but require a CLI argument.
simplicity # [4]
It feels a bit crazy that simply installing a package will change the way that your pipeline gets executed. I do like that it requires just a bit less reaching into the framework stuff for the average user. Most folks will be able to write in the catalog and nodes without much change to the rest of the project.
Implementation # [5]
Reading through the docs [6], they show us that we can make our hooks automatically register by adding a kedro.hooks endpoint that points to a ...
I’m impressed by gitActionTraction [1] from bdougie [2].
📹 Home video of GitHub Actions tips for better traction.
References:
[1]: https://github.com/bdougie/gitActionTraction
[2]: https://github.com/bdougie
If you’re into interesting projects, don’t miss out on awesome-README-templates [1], created by elangosundar [2].
A collection of awesome readme templates to display on your github profile.
References:
[1]: https://github.com/elangosundar/awesome-README-templates
[2]: https://github.com/elangosundar
I’m really excited about pandoc [1], an amazing project by jgm [2]. It’s worth exploring!
Universal markup converter
References:
[1]: https://github.com/jgm/pandoc
[2]: https://github.com/jgm
I’m really excited about github-readme-stats [1], an amazing project by anuraghazra [2]. It’s worth exploring!
⚡ Dynamically generated stats for your github readmes
References:
[1]: https://github.com/anuraghazra/github-readme-stats
[2]: https://github.com/anuraghazra
Integration testing with Python, TestProject.io, and GitHub Actions
Caution
None of the testproject.io urls resolve anymore in JAN 2025, I removed all
of the broken links.
As I continue to build out waylonwalker.com [1] I
sometimes run into some errors that are not caught because I do not have good
testing implemented. I want to explore some integration testing options using
GitHub’s actions.
Running integration tests will not prevent bugs from happening completely, but
it will allow me to quickly spot them and rollback.
---
🤔 What to test first? # [2]
The very first thing that comes to my mind is anything that is loaded or ran
client-side. Two things quickly came to mind here. I run gatsby so most of my
content is statically rendered, and it yells at me if something isn’t as
expected. For performance reasons I lazy load cards on my blogroll, loading
all of the header images gets heavy and kills lighthouse (if anyone actually
cares). I am also loading some information from the top open-source libraries
that I have created. To prevent the need...
I came across nocode [1] from kelseyhightower [2], and it’s packed with great features and ideas.
The best way to write secure and reliable applications. Write nothing; deploy nowhere.
References:
[1]: https://github.com/kelseyhightower/nocode
[2]: https://github.com/kelseyhightower
🐍 Practice Python Online
When learning a new skill it’s important to practice along the way. In order
for me to show up to practice I need to make it easy to show up. An easy way to
show up to practice with python is to use an online repl. With these you can
try out something quick. Sometimes I see snippets from blogs or tweets and I
need to try the out for myself to really understand.
When learning a new skill it’s important to practice along the way. In order
for me to show up to practice I need to make it easy to show up. An easy way to
show up to practice with python is to use an online repl. With these, you can
try out something quick. Sometimes I see snippets from blogs or tweets and I
need to try them out for myself to really understand.
Three online REPLS # [1]
Here are three different options that I have used in the past to try out
something at some various levels. I am sure there are plenty more, but these
are three that I have tried. I am not covering all of them, because It’s been a
while sin...
I’m really excited about Thaiane [1], an amazing project by Thaiane [2]. It’s worth exploring!
No description available.
References:
[1]: https://github.com/Thaiane/Thaiane
[2]: https://github.com/Thaiane
Check out sindresorhus [1] and their project css-in-readme-like-wat [2].
Style your readme using CSS with this simple trick
References:
[1]: https://github.com/sindresorhus
[2]: https://github.com/sindresorhus/css-in-readme-like-wat
I’m impressed by blog-post-workflow [1] from gautamkrishnar [2].
Show your latest blog posts from any sources or StackOverflow activity or Youtube Videos on your GitHub profile/project readme automatically using the RSS feed
References:
[1]: https://github.com/gautamkrishnar/blog-post-workflow
[2]: https://github.com/gautamkrishnar
The work on commitizen [1] by commitizen-tools [2].
Create committing rules for projects 🚀 auto bump versions ⬆️ and auto changelog generation 📂
References:
[1]: https://github.com/commitizen-tools/commitizen
[2]: https://github.com/commitizen-tools
How python tools configure
mypy # [1]
Mypy’s config parser seems to be one of the most complex. This is likely in part to it having the largest backwards compatability of all projects that I looked at.
mypy/config_parser [2]
flake8 # [3]
options/config.py [4]
black # [5]
black [6]
portray # [7]
- only uses pyproject.toml
portray/config.py [8]
interrogate # [9]
- only uses pyproject.toml
References:
[1]: #mypy
[2]: https://github.com/python/mypy/blob/master/mypy/config_parser.py
[3]: #flake8
[4]: https://github.com/PyCQA/flake8/blob/master/src/flake8/options/config.py
[5]: #black
[6]: https://github.com/psf/black/blob/master/src/black/__init__.py#L277-L331
[7]: #portray
[8]: https://github.com/timothycrosley/portray/blob/main/portray/config.py
[9]: #interrogate
Edit On GitHub
I recently added a button to my blog, and subsequently my posts on
DEV.to [1]. It’s the best thing that I have done
for it in a while. It makes it so easy to do quick edits.
finding errors # [2]
I refer back to my old posts quite a bit, sometimes I find errors in them.
Honestly most of the time its too much effort to load up my editor make the
change and git add and git commit. It’s not much, but when I am referring
to my own post generally I am just trying to get something done and don’t have
time for that.
The slug # [3]
The slug that I am getting from gatsby is formatted as /blog/this-post/.
Note the trailing slash and missing file extension, thats where the
${slug.slice(0, -1)}.md comes in.
The Full Link # [4]
GitHub makes it super easy to form a URL that puts you right into edit mode on
the exact post you are looking for. This is format for the URL… you can
always figure it out easily by clicking edit on one.
https://github.com/<user>/<repo>/edit/<branch>/<filepath>
The...
Check out ChristopherBiscardi [1] and their project toast [2].
Moved! now at https://github.com/toastdotdev/toast
References:
[1]: https://github.com/ChristopherBiscardi
[2]: https://github.com/ChristopherBiscardi/toast
Why use a cms
When first learning to code its very common to hard code everything right into
the code. This happens with most folks in just about any language. Whether its
HTML [1] or markdown for front end content, or even hardcoding parameters in our
backend languages like python, or node.js.
🤷♀️ What’s wrong with hard coding everything? # [2]
Hard coding everything right into your code makes it really hard for
non-technical collaborators to join. It makes it nearly impossible to hand
websites off to clients without needing to come back for routine updates.
The cms generally come with a rich content editor that feels more like
something most folks are used to. There are buttons for changing the font,
font-size, adding images, bold, italics, etc.
Sometimes I don’t feel technical # [3]
Even when you are developing for a technical audience there is a layer of
polish that comes from giving them a nice interface to edit their content in.
YouTube doesn’t have you manually inserting records into...
I like rikschennink’s [1] project fitty [2].
✨ Makes text fit perfectly
References:
[1]: https://github.com/rikschennink
[2]: https://github.com/rikschennink/fitty
🐍 Parsing RSS feeds with Python
I am looking into a way to replace my google reader experience that I had back
in 2013 before google took it from us. I am starting by learning how to parse
feeds with python, and without much previous knowledge, it proved to be much
easier than anticipated thanks to the feedparser library.
This is how I used python to parse rss and setup my own custom feed.
Install # [1]
Install the feedparser library.
conda create -n reader python=3.8 -y
source activate reader
pip install feedparser
Get the content # [2]
import feedparser
feed = feedparser.parse('https://waylonwalker.com/rss.xml')
The feed object # [3]
The feed is a feedparser.FeedParserDict. For all intents and purposes this
seems to just behave like a dict with the following keys().
feed.keys()
['feed', 'entries', 'bozo', 'headers', 'etag', 'href', 'status', 'encoding', 'version', 'namespaces', 'content'])
feed has some general information about the rss feed, but the meat of the
feed is in entries. The rest of the keys we...
Check out awesome-github-profile-readme [1] by saturn-abhishek [2]. It’s a well-crafted project with great potential.
😎 A curated list of awesome GitHub Profile which updates in real time
References:
[1]: https://github.com/saturn-abhishek/awesome-github-profile-readme
[2]: https://github.com/saturn-abhishek
I recently discovered awesome-github-profile-readme [1] by abhisheknaiidu [2], and it’s truly impressive.
😎 A curated list of awesome GitHub Profile which updates in real time
References:
[1]: https://github.com/abhisheknaiidu/awesome-github-profile-readme
[2]: https://github.com/abhisheknaiidu
zoxide [1] by ajeetdsouza [2] is a game-changer in its space. Excited to see how it evolves.
A smarter cd command. Supports all major shells.
References:
[1]: https://github.com/ajeetdsouza/zoxide
[2]: https://github.com/ajeetdsouza
I recently discovered mscoutermarsh [1] by mscoutermarsh [2], and it’s truly impressive.
SECRETS!
References:
[1]: https://github.com/mscoutermarsh/mscoutermarsh
[2]: https://github.com/mscoutermarsh
Looking for inspiration? timburgan [1] by timburgan [2].
No description available.
References:
[1]: https://github.com/timburgan/timburgan
[2]: https://github.com/timburgan
🤓 What's on your GitHub Profile
I ran this post on dev.to and got a great response of great examples, check it out [1].
!
!🤓 What's on your GitHub Profile [2]
The GitHub profile feature just went live for a subset of users. Simply creating a repo named after your username, and clicking share to Profile on the sidebar will create a custom profile that shows up just above your pinned projects.
I am still trying to figure out what to put on mine, but this is what I have so far. I feel like mine is a bit big at the moment, I don’t like that my pinned repos end up blow the fold.
[3]
updated # [4]
I tightened mine up and took inspiration from a few others.
[5]
Share a screenshot and link of yours on dev [1].
updated again # [6]
Updated with a list of latest Twitter followers, using GitHub actions.
[7]
References:
[1]: https://dev.to/waylonwalker/what-s-on-your-github-profile-40p3
[2]: /whats-on-your-github-profile/
[3]: https://github.com/waylonwalker
[4]: #updated
[5]: https://dropper.wayl.one/file/c1d24...
🙋♂️ Can Anyone Explain Twitter Cards to me?
Can someone explain how or why twitter cards render differently from device to device? I do understand that twitter cards a built from meta tags, the full list can be found in their docs [1]
Rendered on Mobile # [2]
Mobile Looks fine.
[3]
Not Rendered on Desktop # [4]
On Desktop it is not picking up the image.
[3]
Twitter Card Validator # [5]
The Validator renders the card correctly. I tried the official twitter card
validator [6], as well as
heymeta.com [7], and
metatags.io [8]. All look good.
[3]
Can Cards be updated? # [9]
even with a redirect?
I tried seting up a pinned tweet that uses a netlify redirect to always keep my latest post up to date. Again this one looks good in the validator, doesnt render the image on desktop, does render the image on mobile, but does not update. I have heard that you need to hit the card validator to update cards? I am not sure if this is true, but for me this is not even upating the card.
👋 Hello,
―――――― I'm Waylon Walker ――――――
...
How I Built My GitHub Profile
I ran a discussion on dev that collected quite a list of examples in the comment section. So many great calls to action, animations, memes, and weird tricks.
[1]
My current profile # [2]
[3]
social icons # [4]
Upload all of your icons to the repo in a directory such as icons or assets, then link them with a height attribute like below. I used html [5] for mine, not sure if you can set the height in markdown.
<a href="https://dev.to/waylonwalker"><img height="30" src="https://raw.githubusercontent.com/WaylonWalker/WaylonWalker/main/icon/dev.png"></a>
note I did add a bit of (non-breaking-whitespace) between my icons. Without adding css this seemed like the simplest way to do it.
Center # [6]
Aligning things in the center of the readme is super simple. I used this trick to align my social icons in the middle.
<p align='center'>
...html
</p>
right # [7]
For my latest post [8] I floated it to the right with a little bit of align='right' action.
<p>
<a ...
I recently discovered mzjp2 [1] by mzjp2 [2], and it’s truly impressive.
My personal readme
References:
[1]: https://github.com/mzjp2/mzjp2
[2]: https://github.com/mzjp2
staged-recipes [1] by conda-forge [2] is a game-changer in its space. Excited to see how it evolves.
A place to submit conda recipes before they become fully fledged conda-forge feedstocks
References:
[1]: https://github.com/conda-forge/staged-recipes
[2]: https://github.com/conda-forge
Looking for inspiration? grayskull [1] by conda [2].
Grayskull 💀 - Recipe generator for Conda
References:
[1]: https://github.com/conda/grayskull
[2]: https://github.com/conda
I’m really excited about log_to_json [1], an amazing project by rwhitt2049 [2]. It’s worth exploring!
Yet another Python library to log to JSON
References:
[1]: https://github.com/rwhitt2049/log_to_json
[2]: https://github.com/rwhitt2049
I’m really excited about foam-template [1], an amazing project by foambubble [2]. It’s worth exploring!
Foam workpace template
References:
[1]: https://github.com/foambubble/foam-template
[2]: https://github.com/foambubble
The work on digital-gardeners [1] by MaggieAppleton [2].
Resources, links, projects, and ideas for gardeners tending their digital notes on the public interwebs
References:
[1]: https://github.com/MaggieAppleton/digital-gardeners
[2]: https://github.com/MaggieAppleton
Check out react-adaptive-hooks [1] by GoogleChromeLabs [2]. It’s a well-crafted project with great potential.
Deliver experiences best suited to a user’s device and network constraints
References:
[1]: https://github.com/GoogleChromeLabs/react-adaptive-hooks
[2]: https://github.com/GoogleChromeLabs
SLIDES - understanding python \*args and \*\*kwargs
Python *args and **kwargs are super useful tools, that when used properly
can make you code much simpler and easier to maintain. Large manual
conversions from a dataset to function arguments can be packed and unpacked
into lists or dictionaries. Beware though, this power can lead to some
really unreadable/unusable code if done wrong.
I generally post these as a carousel on LinkedIn based on a full article. Let mw know what you think of it shown inside of a blog @_waylonwalker [1].
[2]
See the full article here [2]
Slides # [3]
---
[4]
---
[5]
---
[6]
---
[7]
---
[8]
---
[9]
---
[10]
---
[11]
---
[12]
---
[13]
References:
[1]: https://twitter.com/_WaylonWalker
[2]: https://waylonwalker.com/python-args-kwargs
[3]: #slides
[4]: https://dropper.waylonwalker.com/file/bf003440-5ddb-4b31-a52b-affe9989aa55.webp
[5]: https://dropper.waylonwalker.com/file/22de97ef-3b0b-4b39-b5f9-11060d07e452.webp
[6]: https://dropper.waylonwalker.com/file/b3000590-5046-4d97-...
Gracefully adopt kedro, the catalog
Why use kedro catalog? # [1]
While using the catalog alone will not reap all of the benefits of the framework, it does get you and your project ready for the full framework eventually. For me the full benefit of the catalog comes when you combine it with the pipeline and dont even touch read/write steps at all.
Taking a step into kedro by adopting the catalog first will give you a way to organize all of your data loads in one place, and stop manually writing read/write code, which can be different for each data and storage type. You just don’t need to think about it.
---
- iperitive loading style
- organizes your data
- all file locations can be quickly identified
- can be dropped into kedro later
---
“can be dropped into kedro later”
Let’s talk a bit more about that
2 Ways to Gracefully adopt the catalog # [2]
How do I get started with the kedro catalog
- add with the code api
- load from yaml (recommended)
1. Adding to the catalog with the code api # [3]
how to use ...
The work on streamlit [1] by streamlit [2].
Streamlit — A faster way to build and share data apps.
References:
[1]: https://github.com/streamlit/streamlit
[2]: https://github.com/streamlit
Just starred python-interrogate-check [1] by JackMcKew [2]. It’s an exciting project with a lot to offer.
GitHub Action for use with python package interrogate
References:
[1]: https://github.com/JackMcKew/python-interrogate-check
[2]: https://github.com/JackMcKew
How to find things in your kedro catalog
kedro 0.16.2 just dropped last week with a long-awaited feature… catalog search! I went as far as monkey patching this into each of my projects. I work jump between a few really big projects that have tons of datasets. Being able to quickly search for what I need is so useful.
The Catalog # [1]
The kedro data catalog is a key component to the kedro framework. It handles all data loading and saving for you. It is configurable and hackable. Having all your data connections listed in one place make it so easy to pick your project up and move it to a completely new environment. That sweet imperative loading style saves so much read/write overhead. I can load all my data with a single command whether it’s in amazon s3, google cloud platform, or a local file.
Kick start a toy project # [2]
Just like with most of these articles, I am going to create a conda environment so that I don’t break any existing projects and scaffold up a toy project to learn from.
conda create -n kedro0162 py...
Check out davidesantangelo [1] and their project datoji [2].
A tiny JSON storage service. Create, Read, Update, Delete and Search JSON data.
References:
[1]: https://github.com/davidesantangelo
[2]: https://github.com/davidesantangelo/datoji
My first eight years as a working professional.
This day 8 years ago I started my first day as a Mechanical Engineer. I am so
grateful for this journey that I have been able to have. There is no way that I
could have planned this journey from the beginning.
Keep Learning # [1]
My initial career plans were down a completely different path. I have been very flexible in taking on a new career path. I have been eager to learn new things and respond to life changes that I never would have imagined.
Life Changes # [2]
Very severe chronic health issues from my family restricted my ability to travel to the facilities I served as a Mechanical Engineer. I was able to stay strong and make it work. But in the meantime, I was learning new skills that enabled me to be more effective remotely.
I was scared. # [3]
It was in these times that I found a love for data, and taking action from insights I found with data. I learned how to use python to enable me to be more effective. I did this primarily from hospital waiting rooms and many overn...
How Kedro handles your inputs
Passing inputs into kedro is a key concept. Understanding how it accepts a
single catalog key as input is quite trivial that easily makes sense, but
passing a list or dictionary of catalog entries can be a bit confusing.
*args/**args review # [1]
Check out this post for a review of how *args **kwargs work in python.
understanding python *args and **kwargs [2]
python args and kwargs [3] article by @_waylonwalker [4]
All Kedro inputs are catalog Entries # [5]
When kedro runs your pipeline it uses the catalog to imperatively load your data, meaning that you don’t tell kedro how to load your data, you tell it where your data is and what type it is. These catalog entries are like a key-value store. You just need to give the key when setting up a node.
Single Inputs # [6]
These are fairly straightforward to understand. In the example below when kedro runs the pipeline it will load the input from the catalog, then pass that input to the func, then save the returned value to the out...
visit1985 [1] has done a fantastic job with mdp [2]. Highly recommend taking a look.
A command-line based markdown presentation tool.
References:
[1]: https://github.com/visit1985
[2]: https://github.com/visit1985/mdp
Check out hotreload [1] by say4n [2]. It’s a well-crafted project with great potential.
hot reload your python code!
References:
[1]: https://github.com/say4n/hotreload
[2]: https://github.com/say4n
I came across kedro-great [1] from tamsanh [2], and it’s packed with great features and ideas.
The easiest way to integrate Kedro and Great Expectations
References:
[1]: https://github.com/tamsanh/kedro-great
[2]: https://github.com/tamsanh
I came across awesome-public-datasets [1] from awesomedata [2], and it’s packed with great features and ideas.
A topic-centric list of HQ open datasets.
References:
[1]: https://github.com/awesomedata/awesome-public-datasets
[2]: https://github.com/awesomedata
Master No More
It’s been a long time coming. We use some very harsh language within tech so
much sometimes that we become numb to it. It’s time to do my very small part
in this movement and purge this language from my active repos starting with
this blog right here.
Large Refactor At The Command Line [1]
this post follows my method of refactoring code bases from the command line,
read more about that in this article.
c-s-f # [2]
First off browsing through the content of my blog I found many references to master. I cannot completely whole-sale find and replace each one of them, because some of them are links that I do not own. Any set of instructions got upgraded from master to main
- git checkout master
+ git checkout main
There were countless cases of examples like this to comb through, but it feels good to have them purged of old language.
rename routes # [3]
Following yesterdays post, I am going to rename my markdown files
/static/_redirects
shorteners # [4]
- /gdfm /blog/today-i-lear...
Refactoring your blog urls
I just did a quick refactoring of my JAMStack blog urls. Some didn’t fit with
my style, some had _ that I wanted to switch to -, and others were
ridiculously long. I’ve been using forestry as my CMS, I write many of my
posts there, and sometimes it picks some crazy file names (based on my titles).
It was time to refactor.
Large Refactor At The Command Line [1]
When refactorings similar to this get really big I often need to do some
project wide find an replace, I usually do this right from the command line.
🖊 Rename posts change the filename # [2]
My post urls are based on the file name of my markdown file, so I can simply go
through my filesystem and rename anything I want. From here its probably best
to only commit the addition of the new file name, until the redirects clear,
but these are all low traffic posts for me so I just commited both at once.
Safely redirect without breaking links
_redirects ⤴ /redirects # [3]
I am hosted on netlify, which automatically puts very ⚡ ...
understanding python \*args and \*\*kwargs
Python *args and **kwargs are super useful tools, that when used properly
can make you code much simpler and easier to maintain. Large manual
conversions from a dataset to function arguments can be packed and unpacked
into lists or dictionaries. Beware though, this power can lead to some
really unreadable/unusable code if done wrong.
/* h2 {display: block;} */
h2>img { margin: auto; width: 100%;}
Python *args and **kwargs are super useful tools, that when used properly can make you code much simpler and easier to maintain. Large manual conversions from a dataset to function arguments can be packed and unpacked into lists or dictionaries. Beware though, this power can lead to some really unreadable/unusable code if done wrong.
*args are for lists # [1]
*args are some magical syntax that will collect function arguments into a list, or unpack a list into individual arguments.
recieving *args # [2]
When recieving variables as a *<varname>, commonly *args, the arguments get packed ...
I recently discovered pytest-sugar [1] by Teemu [2], and it’s truly impressive.
a plugin for py.test that changes the default look and feel of py.test (e.g. progressbar, show tests that fail instantly)
References:
[1]: https://github.com/Teemu/pytest-sugar
[2]: https://github.com/Teemu
the-hub [1] by ari-hacks [2] is a game-changer in its space. Excited to see how it evolves.
📈📊 A hub where users can experiment with graphing and Python in the browser (https://pyodide-experiment.herokuapp.com/)
References:
[1]: https://github.com/ari-hacks/the-hub
[2]: https://github.com/ari-hacks
pre-commit is awesome
I recently discovered the ✨ awesomeness that is pre-commit. I steered away
from it for so long because it seemed like a big daunting thing to set up, but
really it’s easy. It will automatically run checks for you. In some cases, it
will even automatically fix them for you. Out of the box, it will do things
like automatically trim extra whitespace, fix file endings, and ensure file
sizes are not too large for git [1].
I recently discovered the ✨ awesomeness that is pre-commit. I steered away from it for so long because it seemed like a big daunting thing to set up, but really it’s easy. It will automatically run checks for you. In some cases, it will even automatically fix them for you. Out of the box, it will do things like automatically trim extra whitespace, fix file endings, and ensure file sizes are not too large for git.
Quickstart # [2]
It comes with a sample-config that is pretty general purpose and use for just about any project in git.
pip instal pre-commit
pre-commit s...
Building kedro.dev
Follow along the Journey as I build out kedro.dev [1].
Building a Community # [2]
I have really enjoyed my own personal journey as I have started to build all of my data pipeline projects with the kedro framework. I want to start building a place to share resources with the community. I want to see this community grow and flourish. They say in front end web development if you are not using a framework you end up building one. That’s exactly what I was doing before I started using kedro. I want to build out a set of resources that this community can learn from and start to use the framework at their own pace without needing to develop their own from scratch.
research # [3]
Looking into the front end frameworks to see how they welcome their community. Much of my inspiration is from them, bringing lessons learned to data.
pages # [4]
- banner
- nav
- docs -> readthedocs
- tutorial -> kedro-examples
- blog -> medium
- community
- support
- team
- courses
- examples
- mee...
The work on desert [1] by python-desert [2].
Deserialize to objects while staying DRY
References:
[1]: https://github.com/python-desert/desert
[2]: https://github.com/python-desert
I recently discovered kedro-wings [1] by tamsanh [2], and it’s truly impressive.
Kedro Wings automatically creates catalog entries to simplify Kedro pipeline writing. See the video here: https://www.youtube.com/watch?v=p4ELo1tqbYY
References:
[1]: https://github.com/tamsanh/kedro-wings
[2]: https://github.com/tamsanh
Check out kedro-streaming-twitter-pipeline [1] by dataengineerone [2]. It’s a well-crafted project with great potential.
No description available.
References:
[1]: https://github.com/dataengineerone/kedro-streaming-twitter-pipeline
[2]: https://github.com/dataengineerone
junegunn [1] has done a fantastic job with fzf.vim [2]. Highly recommend taking a look.
fzf ❤️ vim
References:
[1]: https://github.com/junegunn
[2]: https://github.com/junegunn/fzf.vim
Kedro Static Viz 0.3.0 is out with Hooks Support
kedro-static-viz [1] is out with support for the newly released hooks feature. This means that you can have kedro-static-viz automatically deploy a full gatsby site before_pipeline_run keeping your visualization always up to date.
Even though it is a static site there is no functionality lost. The only thing that’s missing is the flask server. With kedro-static-viz [1] you can deploy your visualization to a number of static hosting providers such as GitHub pages free of charge with wicked fast performance
⚡ It’s Fast # [2]
Even though it’s built on gatsbyjs the full site builds in under 2s even on slower hardware. This is because the site is already pre-rendered and stripped of any excess. It’s zipped up right into the python package and is typically used with the cli, but now can be used with python, or as a hook as well.
What is kedro-viz [3] 🤔 # [4]
Kedro viz is a fantastic kedro plugin that allows you to visualize your data pipeline. Kedro allows you to quickly build produc...
I’m really excited about pytest-watch [1], an amazing project by joeyespo [2]. It’s worth exploring!
Local continuous test runner with pytest and watchdog.
References:
[1]: https://github.com/joeyespo/pytest-watch
[2]: https://github.com/joeyespo
Check out aws [1] and their project aws-cli [2].
Universal Command Line Interface for Amazon Web Services
References:
[1]: https://github.com/aws
[2]: https://github.com/aws/aws-cli
Create Configurable Kedro Hooks
There are two main ways to create kedro hooks, with modules and classes. Each
one still uses the same verbiage as the function/method names.
Class hooks seem a bit special as they give you a way to configure them so that they are a bit more generally useful.
What is Kedro [1]
If you are completely unsure what kedro is be sure to check out my what is kedro [2] post
Installation # [3]
.create a new environment manager of choice. Here I will use conda. Then we will install kedro from pypi.
conda create -n kedro_class_hooks -y
conda activate kedro_class_hooks # may also be source activate kedro_class_hooks or activate kedro_class_hooks
pip install kedro
Create a sample project # [4]
Kedro new # [5]
For more details check out my full post on kedro new [6]
For this post I really just want a working pipeline as fast as possible. For this I am going to use iris pipeline that is generated from the kedro new command in the cli. It’s important that you answer y to create an example pi...
Brainstorming Kedro Hooks
This post is a 🧠 branstorming work in progress. I will likely use it as a
storage location/brain dump of hook ideas.
What is Kedro 🤔 # [1]
If you are completely unsure what kedro is be sure to check out my what is kedro [2] post
after_catalog_created # [3]
- filepath replacer
- bucket replacer
before_pipeline_run # [4]
- preflight
- check that data exists
- run kedro_static_viz
- run mypy
- run interrogate
- run flake8
after_pipeline_run # [5]
- Great Expectations
- send email
- send slack
before_node_run # [6]
after_node_run # [7]
- Great Expectations
- save stats/meta data
-
Execution Order # [8]
hooks are executed in reverse order of the hooks list.
hooks with tryfirst will be moved to the end of the list
hooks with trylast will be moved to the end of the list
- after_catalog_created
- before_pipeline_run
- args
- run_params = run_params = {‘run_id’: ‘2020-05-23T15.24.23.958Z’, ‘project_path’: ‘/mnt/c/temp/kedro0160’, ’env’: ’local’, ‘kedro_version’: ‘...
How to get Dev Comments from an article Url
I want to incorporate some of the wonderful comments, \U0001F495, \U0001F984,
and \U0001F516’s that I have been getting on dev.to on my website. I have
dabbled once or twice with no avail this time I am taking notes on my journey,
so follow along and let’s get there together. By the end of this post, I will
have a way to get comments from posts on the client-side thanks to the
wonderfully open dev.to API.
I want to incorporate some of the wonderful comments, 💕, 🦄, and 🔖’s that I have been getting on dev.to on my website. I have dabbled once or twice with no avail this time I am taking notes on my journey, so follow along and let’s get there together. By the end of this post, I will have a way to get comments from posts on the client-side thanks to the wonderfully open dev.to API.
The API # [1]
dev.to has an open API that allows us to easily get comments as HTML [2]. They have their API hosted at https://docs.forem.com/api/#tag/comments, let’s take a look at it.
[3]
Here we can...
Four github actions for your website
GitHub’s actions are a new GitHub feature that will trigger GitHub to spin up a
virtual machine and run some tasks with some special access to your repo. It
can interact with comments/issues, it can clone your repo, You can explicitly
pass in secrets so that it can commit back to the repo or deploy to another
service. The environment may be a Linux, windows, or even a mac machine. I
believe this is wildly incredible for the open-source community, putting these
tools in the same place that we are already collaborating is so convenient.
What can they do for my personal website? 🤔 # [1]
GitHub actions can give you confidence that your site is up and running, with the latest JavaScript packages, does not have broken links, and can even take screenshots of what your website looks like on different screen sizes and operating systems.
- periodically check that the website is up
- update npm
- url checker
- screenshot website
srt32/uptime [2] # [3]
srt32/uptime [2] is an action that...
Create Custom Kedro Dataset
Kedro provides an efficient way to build out data catalogs with their yaml api. It allows you to be very declaritive about loading and saving your data. For the most part you just need to tell Kedro what connector to use and its filepath. When running Kedro takes care of all of the read/write, you just reference the catalog key.
But what is happening behind the scenes # [1]
Under the hood there is an AbstractDataSet that each connector inherits from. It sets up a lot of the behind the scenes structure for us so that we dont have to. For the most part kedro has connectors for about anything that you want to load, csv, parquet, sql, json, from about anywhere, http, s3, localfile system are just some of the examples.
Here is a DataSet implementation from their docs. Here you can see the barebones example straight from the docs. Parameters from the yaml catalog will get passed in
from pathlib import Path
import pandas as pd
from kedro.io import AbstractDataSet
class MyOwnDataSet(...
Interrogate is a pretty awesome, brand new, cli for Python packages
As usual while listening to python bytes 181 [1] I heard of a tool that I had to try out right away!
This thing is 🔥 hot off the press folks, we’re talking the first release only 3 weeks ago. Its something that the python community needed years ago, and it belongs in your CI today. I had tried several tools that tried to do docstring coverage in the past but they were a bit cumbersome and were quickly forgotten about. Not interrogate, its dead simple!
Nothing I have tried has come close to being this good
Interrogate # [2]
It runs documentation coverage for your python project. It allows you to set the minimum amount of docstring coverage for your project and has some great setup instructions right in the readme.
Install it # [3]
Interrogate is on pypi so it is super simple to install with pip
pip install interrogate
run it # [4]
This is the best part, its super easy to run right from the command line! Just call it, and give it a path to run.
interrogate -v <path>
😲 I hav...
Just starred pyp [1] by hauntsaninja [2]. It’s an exciting project with a lot to offer.
Easily run Python at the shell! Magical, but never mysterious.
References:
[1]: https://github.com/hauntsaninja/pyp
[2]: https://github.com/hauntsaninja
I like econchick’s [1] project interrogate [2].
Explain yourself! Interrogate a codebase for docstring coverage.
References:
[1]: https://github.com/econchick
[2]: https://github.com/econchick/interrogate
drawing ascii boxes
When creating cli’s I often want some nice full-width character. I find it tough to find them, and when I do half the time it is an image or something that cannot be copied 👿.
I rarely get very complex with my semi-manual ASCII art. I can do 98% of what I need with bars and corners. Using some simple full-width characters can really give your cli a nice clean look.
Example # [1]
I’d say 50% of what I need is just a full-width horizontal bar to give some visual flair or separation.
[2]
Bars # [3]
― ⍽ ⎸ ⎹ ␣ ─ ━ │ ┃
Square Corners # [4]
┌ ┍ ┎ ┏ ┐ ┑ ┒ ┓ └ ┕ ┖ ┗ ┘ ┙ ┚ ┛
Round Corners # [5]
╭ ╮ ╯ ╰ ╱ ╲ ╳
Harpoons # [6]
⃑ ⃬ ⃭ ↼ ↽ ↾ ↿ ⇀ ⇁ ⇂ ⇃ ⇋ ⇌ ⥊ ⥋ ⥌ ⥍ ⥎ ⥏ ⥐ ⥑ ⥒ ⥓ ⥔ ⥕ ⥖ ⥗ ⥘ ⥙ ⥚ ⥛ ⥜ ⥝ ⥞ ⥟ ⥠ ⥡ ⥢ ⥣ ⥤ ⥥ ⥦ ⥧ ⥨ ⥩ ⥪ ⥫ ⥬ ⥭ ⥮ ⥯
Double Boxes # [7]
═ ║ ╒ ╓ ╔ ╕ ╖ ╗ ╘ ╙ ╚ ╛ ╜ ╝ ╞ ╟ ╠ ╡ ╢ ╣ ╤ ╥ ╦ ╧ ╨ ╩ ╪ ╫ ╬
Dashed Boxes # [8]
┄ ┅ ┆ ┇ ┈ ┉ ┊ ┋╌ ╍ ╎ ╏
Connectors # [9]
├ ┝ ┞ ┟ ┠ ┡ ┢ ┣ ┤ ┥ ┦ ┧ ┨ ┩ ┪ ┫ ┬ ┭ ┮ ┯ ┰ ┱ ┲ ┳ ┴ ┵ ┶ ┷ ┸ ┹ ┺ ┻ ┼ ┽ ┾ ┿ ╀ ╁ ╂ ╃ ╄ ╅ ╆ ╇ ╈ ╉ ╊ ╋
Others # [10]
☐ ☑ ☒ ⫍ ⫎ ⮹ ⮽...
Check out rec [1] and their project safer [2].
🧷 A safer writer 🧷
References:
[1]: https://github.com/rec
[2]: https://github.com/rec/safer
creating the kedro-preflight hook
Kedro Hooks Intro - kedro hooks are an exciting upcoming feature of kedro
0.16.0. They allow you to hook into catalog_created,pipeline_run, and
node_run(nouns). With a before, or after (adjective). This really
reminds me of reacts lifecycle hooks, that let you hook into various state of
react web components. This is going to make kedro so extendable by the
community. I am super pumped to see what the community is able to do with this
ability.
kedro hooks are an exciting upcoming feature of kedro 0.16.0. They allow you to hook into catalog_created,pipeline_run, and node_run(nouns). With a before, or after (adjective). This really reminds me of reacts lifecycle hooks, that let you hook into various state of react web components. This is going to make kedro so extendable by the community. I am super pumped to see what the community is able to do with this ability.
What is Kedro [1]
If you are completely unsure what kedro is be sure to check out my what is kedro post
Docs # [2]
a w...
The work on autoflake [1] by fake-name [2].
Removes unused imports and unused variables as reported by pyflakes
References:
[1]: https://github.com/fake-name/autoflake
[2]: https://github.com/fake-name
Check out trys [1] and their project sergey [2].
A tiny lil’ static site generator
References:
[1]: https://github.com/trys
[2]: https://github.com/trys/sergey
📢 Announcing find-kedro
find-kedro is a small library to enhance your kedro experience. It looks through your modules to find kedro pipelines, nodes, and iterables (lists, sets, tuples) of nodes. It then assembles them into a dictionary of pipelines, each module will create a separate pipeline, and __default__ being a combination of all pipelines. This format is compatible with the kedro _create_pipelines format.
[1]
[2]
[3]
[4] # [5]
kedro is a ✨ fantastic project that allows for super-fast prototyping of data pipelines, while yielding production-ready pipelines. find-kedro enhances this experience by adding a pytest like node/pipeline discovery eliminating the need to bubble up pipelines through modules.
When working on larger pipeline projects, it is advisable to break your project down into different sub-modules which requires knowledge of building python libraries, and knowing how to import each module correctly. While this is not too difficult, in some cases, it can trip up even the most se...
Explicit vs Implicit Returns in Javascript
Often when reading through javascript examples you will find some arrow
functions use parentheses () while others use braces {}. This key
difference is that parentheses will implicitly return the last statement while
braces require an explicit return statement. It is important to understand the
difference between them because it is likely that you will find code examples
of both and trying to edit code written differently than you’re used to may
have unintended consequences.
[1] # [2]
Arrow functions are one-liner functions in javascript that have two main syntactical ways to create the code block. with parentheses and braces. Let’s take a look at both ways of creating arrow functions so that when we come accross them in the wild it will all make sense.
[3] # [4]
Here is an example of an arrow function that will implicitly return the last
statement without the return keyword. I believe that these are a bit more restricted
in that you cannot set variables inside them. They are ...
I’m impressed by alive-progress [1] from rsalmei [2].
A new kind of Progress Bar, with real-time throughput, ETA, and very cool animations!
References:
[1]: https://github.com/rsalmei/alive-progress
[2]: https://github.com/rsalmei
I’m really excited about vim-quickui [1], an amazing project by skywind3000 [2]. It’s worth exploring!
The missing UI extensions for Vim 9 (and NeoVim) !! 😎
References:
[1]: https://github.com/skywind3000/vim-quickui
[2]: https://github.com/skywind3000
If you’re into interesting projects, don’t miss out on bashtop [1], created by aristocratos [2].
Linux/OSX/FreeBSD resource monitor
References:
[1]: https://github.com/aristocratos/bashtop
[2]: https://github.com/aristocratos
TIL: Bind arguments to dynamically generated lambdas in python
This past week I had a really weird bug in my
kedro [1] pipeline. For some reason data running
through my pipeline was coming out completely made no sense, but if I manually
request raw data outside of the pipeline it matched expectations.
NOTE While this story is about a kedro pipeline, it can be applied anywhere closures are put into an iterable.
[2] # [3]
After a few days of looking at it off and on, I pinpointed that it was all the way down in the raw layer. Right as data is coming off of the database. For this I already had existing sql files stored and a read_sql function to get the data so I opted to just set up the pipeline to utilize the existing code as much as possible, leaning on the kedro [1] framework a bit less.
I have dynamically created lists of pipeline nodes many times in the past, but typically I take data from kedro [1] input and use it in the lambda. I prefer the simplicity of using lambdas over functools.partial. It typically looks something like this.
#...
Looking for inspiration? autoreload [1] by stevekrenzel [2].
A small python script to watch a directory for changes and reload a process when a change is detected.
References:
[1]: https://github.com/stevekrenzel/autoreload
[2]: https://github.com/stevekrenzel
Check out madzak [1] and their project python-json-logger [2].
Json Formatter for the standard python logger
References:
[1]: https://github.com/madzak
[2]: https://github.com/madzak/python-json-logger
Four Github Actions for Python
If you are developing python packages and using GitHub here are four actions
that you can use today to automate your release workflow. Since python tools
generally have such a simple cli I have opted to use the cli for most of these,
that way I know exactly what is happening and have more control over it if I
need.
h2 img { width: 100%; box-shadow: .5rem .5rem 3rem #141F2D, -.5rem -.5rem 3rem rgba(255,255,255,.1);}
img{ max-width: 100% !important;}
If you are developing python packages and using GitHub here are four actions that you can use today to automate your release workflow. Since python tools generally have such a simple cli I have opted to use the cli for most of these, that way I know exactly what is happening and have more control over it if I need.
- Lint
- Test
- Package
- Upload to PyPi
Lint With flake8 # [1]
flake8 is pythons quintessential linting tool to ensure that your code is up to the standards that you have set for the project, and to help prevent hidden...
Check out justmarkham [1] and their project scikit-learn-tips [2].
🤖⚡ 50 scikit-learn tips
References:
[1]: https://github.com/justmarkham
[2]: https://github.com/justmarkham/scikit-learn-tips
Check out Textualize [1] and their project rich [2].
Rich is a Python library for rich text and beautiful formatting in the terminal.
References:
[1]: https://github.com/Textualize
[2]: https://github.com/Textualize/rich
Variables names don't need their type
So often I see a variables type() inside of its name and it hurts me a little
inside. Tell me I’m right or prove me wrong below.
Examples # [1]
Pandas DataFrames are probably the worst offender that I see
# bad
sales_df = get_sales()
# good
sales = get_sales()
Sometimes vanilla structures too!
# bad
items_list = ['sneakers', 'pencils', 'paper', ]
# good
items = ['sneakers', 'pencils', 'paper', ]
Edge Cases? # [2]
It’s so common when you need to get inside a data structure in a special way that itsn’t provided by the library…. I am not exactly sure of a good way around it.
# bad ??
sales = get_sales()
sales_dict = sales.to_dict()
# good
🤷♀️
Containers are plural # [3]
Always name your containers plural, so that naming while iterating is simple.
prices = {}
items = ['sneakers', 'pencils', 'paper', ]
for item in items:
prices[item] = get_price(item)
Before I start fights 🥊 in code review, am I inline here or just being pedantic?
References:
[1]: #examples
[2]: #edge-cases...
I’m really excited about cpython [1], an amazing project by python [2]. It’s worth exploring!
The Python programming language
References:
[1]: https://github.com/python/cpython
[2]: https://github.com/python
I recently discovered scully [1] by scullyio [2], and it’s truly impressive.
The Static Site Generator for Angular apps
References:
[1]: https://github.com/scullyio/scully
[2]: https://github.com/scullyio
I came across pydevto [1] from lpellis [2], and it’s packed with great features and ideas.
Unofficial dev.to api
References:
[1]: https://github.com/lpellis/pydevto
[2]: https://github.com/lpellis
I’m really excited about kedro-pandas-profiling [1], an amazing project by brickfrog [2]. It’s worth exploring!
A simple wrapper to use Pandas Profiling easily in Kedro
References:
[1]: https://github.com/brickfrog/kedro-pandas-profiling
[2]: https://github.com/brickfrog
The work on gregives.co.uk [1] by gregives [2].
Personal site and portfolio of software engineer Greg Ives
References:
[1]: https://github.com/gregives/gregives.co.uk
[2]: https://github.com/gregives
I’m impressed by act [1] from nektos [2].
Run your GitHub Actions locally 🚀
References:
[1]: https://github.com/nektos/act
[2]: https://github.com/nektos
Send Emails with GitHub Actions
Here is one useful thing that you can do with GitHub actions no matter what language you use, send email. You might want to know right away when your ci passes. You might want to give your team a nice pat on the back when a new release is deployed. There might be subscribers wanting to see the latest release notes in their inbox as soon as the latest version is deployed. Whatever it is, its pretty easy to do with an action right out of the actions marketplace.
Mail on Star # [1]
Here is a silly example that sends an email to yourself anytime someone stars your repo.
name: Mail on Star
on:
watch:
types: [ started ]
# A workflow run is made up of one or more jobs that can run sequentially or in parallel
jobs:
# This workflow contains a single job called "email"
email:
# The type of runner that the job will run on
runs-on: ubuntu-latest
# Steps represent a sequence of tasks that will be executed as part of the job
steps:
- name: ✨ Send email, you star
uses: dawidd6/acti...
I’m really excited about awesome-python-bytes [1], an amazing project by JackMcKew [2]. It’s worth exploring!
😎 🐍 Awesome lists about Python Bytes https://pythonbytes.fm/
References:
[1]: https://github.com/JackMcKew/awesome-python-bytes
[2]: https://github.com/JackMcKew
Check out get-diff-action [1] by technote-space [2]. It’s a well-crafted project with great potential.
GitHub Actions to get git [3] diff
References:
[1]: https://github.com/technote-space/get-diff-action
[2]: https://github.com/technote-space
[3]: /glossary/git/
If you’re into interesting projects, don’t miss out on react-toastify [1], created by fkhadra [2].
React notification made easy 🚀 !
References:
[1]: https://github.com/fkhadra/react-toastify
[2]: https://github.com/fkhadra
What Are GitHub Actions
GitHub actions are an amazing tool that allows us to run code based on triggers
inside of our repo. Their is a large and growing community of actions inside
the marketplace to use with very little effort. Best of all they are free for
public repositories, and private repos have a very generous free tier.
h2 img { width: 100%; box-shadow: .5rem .5rem 3rem #141F2D, -.5rem -.5rem 3rem rgba(255,255,255,.1);}
img{ max-width: 100% !important;}
I have been diving deep into Github actions for about a month now and they are wicked good! They allow you to run any sort of arbitrary code based on events in your repo, webhooks, or schedules. They are very reasonably priced. The interface that GitHub hs developed for them is top-notch! It’s so good I have done 90% of my editing of them right from github.com.
TLDR # [1]
some interaction to your repository triggers code to run.
[2] # [3]
The online editor for actions is pretty amazing. When creating a new workflow it automatically sets up a ...
Getting Started with GitHub Actions
Github actions are written in configuration files using the YAML syntax. YAML
is a superset of JSON. Most YAML can be expressed inline with JSON syntax.
Similar to python YAML is whitespace driven by whitespace rather than brackets
tags. The argument for using YAML for configuration files such as actions is
that it is more human-readable and editable. It’s much easier to see the
whitespace layout than it is to get closing brackets correct. For actions, I
believe this is mostly true. I don’t see any use case to get past 3-5 indents,
which is completely manageable.
Can I just say that I learned more than I realized about YAML by writing this
article
Arrays and Objects # [1]
In YAML or JSON, the most basic containers for data are arrays, a 1D list
of things, and objects, for key-value pairs.
Arrays # [2]
The start of an array container is signified with a leading -. This is
probably one of the big things I didn’t understand about YAML before writing
this post, but hats off to the ...
Check out poke95 [1] by wobsoriano [2]. It’s a well-crafted project with great potential.
🚀 A Windows 95 style Pokédex built with React.
References:
[1]: https://github.com/wobsoriano/poke95
[2]: https://github.com/wobsoriano
Looking for inspiration? img-resizer [1] by sharadcodes [2].
An action for resizing images
References:
[1]: https://github.com/sharadcodes/img-resizer
[2]: https://github.com/sharadcodes
Check out generate-changelog-action [1] by ScottBrenner [2]. It’s a well-crafted project with great potential.
GitHub Actions Hackathon 2020 winner - lob/generate-changelog Action
References:
[1]: https://github.com/ScottBrenner/generate-changelog-action
[2]: https://github.com/ScottBrenner
Today I learned `git diff feature..main`
Today I learned how to diff between two branches.
git diff feature..main
Sometimes we get a little git add . && git commit -m "WIP" happy and mistakenly commit something that we just can’t figure out. This is a good way to figure out what the heck has changed on the current branch compared to any other branch.
Example # [1]
Let’s create a new directory, initialize git [2] and toss some content into a readme.
mkdir git-diff
git init
echo "hello there" > readme.md
git add . && git commit -m "hello there"
cat readme.md
After all of that, we have a git repository on our local machine with a single file readme.md that contains the following.
hello there
Create a branch and ✍ edit # [3]
Let’s checkout a new branch called Waylon and change the word there to Waylon in our readme.md file, then diff it.
git checkout -b Waylon
echo "hello Waylon" > readme.md
git add . && git commit -m "hello Waylon"
git diff
- hello there
+ hello waylon
At this point we have one commit. Things are real...
Create New Kedro Project
This is a quickstart to getting a new kedro [1]
pipeline up and running. After this article you should be able to understand
how to get started with kedro [1]. You can learn
more about this Hello World
Example [2]
in the
docs [2]
🧹 Install Kedro [1]
🛢 Create the Example Pipeline
💨 Run the example
📉 Show the pipeline visualization
Create a Virtual Environment [3] # [4]
I use conda to control my virtual environments and will create a new environment called kedro_iris with the following command. note the latest compatible version of python is 3.7.
EDIT: as of kedro 0.16.0 kedro supports up to 3.8
conda create -n kedro_iris python=3.8 -y
Your browser does not support the video tag. [5]
Options
Activate your conda environment # [6]
I try to keep my base environment as clean as possible. I have ran into too many issues installing things in the base environment. Almost always its some dependency that starts causing issues making it even harder to realize where its coming from a...
DesktopECHO [1] has done a fantastic job with xWSL [2]. Highly recommend taking a look.
Installer script for Ubuntu 22.04 / 24.04 with XFCE 4.18 on WSL. Does not require hypervisor, container, or X11 server.
References:
[1]: https://github.com/DesktopECHO
[2]: https://github.com/DesktopECHO/xWSL
What is YOUR Advice for New Data Scientists
- Learn the business
- Learn Git [1]
- Your code does not need to be amazing
- Keep Learning
Learn Git # [2]
You dont have to start out as a git wizard with the cleanest possible commit history. At first dont let yourself get too wrapped up in it, the most important part is that you make commits. You will find needs for more advanced stuff later.
git add .
git commit -m "FEAT added new function to calculate revenue by product family"
git push
Get comfortable with this, then learn how to branch, rebase, stash, etc…
Your code does not need to be amazing # [3]
Get the job done. Keep it in small bite size pieces. Make readable function definitions and variable names. You will thank yourself for naming things well later. Readability counts more than performance in most cases of data science. If it gets the job done try not to over worry about things like performance. A few extra seconds to clean a dataset or build a model is not worth hours of your time. As you go you will have c...
The work on fastpages [1] by fastai [2].
An easy to use blogging platform, with enhanced support for Jupyter Notebooks.
References:
[1]: https://github.com/fastai/fastpages
[2]: https://github.com/fastai
Do You Hoist
I am working through Wes Bos’s
beginnerjavascript.com/ [1] I just hit module 18
on hoisting. It’s something that I always knew was there, Its not something I
typically see used or use myself.
Do you Hoist? # [2]
Do you have any use cases that you use hoising? Why? It seems like a really cool feature in any language that uses it, but I dont really notice it in use.
What is Hoising # [3]
There are many articles that cover this in far more depth, but its the idea that variable declarations and functions are defined before they are executed. This means that it doesnt matter if you call a function before or after it is defined.
Hoisting # [4]
console.log(`Hello ${getUser()}`)
function getUser() {
return 'Waylon'
}
Running this code will log out “Waylon”
What about variable hoisting # [5]
I am most familiar with python which does not variable hoist so this one kinda confused me at first. It only hoists the variable declaration not the value of the variable. It defines whether th...
What is Kedro
What is Kedro [1]
This is my original what-is-kedro article. There is a brand new one
---
Kedro is an open source data pipeline framework. It provides guardrails to set
your project up right from the start without needing to know deeply how to
setup your own python library for data pipelining. It includes really great
ways to manipulate catalogs and pipelines. This article will cover the 10K
view of kedro, future articles will dive deper into each one.
kedro [2] is an open-source data pipeline framework. It provides guardrails to set your project up right from the start without needing to know deeply how to set up your own python library for data pipelining. It includes great ways to manipulate catalogs and pipelines. This article will cover the 10K view of kedro [2], future articles will dive deeper into each one.
Libraries # [3]
Currently, kedro [2] is broken down into 3 different libraries.
💎 kedro [2]
📉 kedro-viz [4]
🏗 kedro-docker [5]
kedro [2] # [6]
[7]
kedro [2] ...
Looking for inspiration? termynal [1] by ines [2].
⬛️ Lightweight and modern terminal animations using async/await
References:
[1]: https://github.com/ines/termynal
[2]: https://github.com/ines
Looking for inspiration? forem [1] by forem [2].
For empowering community 🌱
References:
[1]: https://github.com/forem/forem
[2]: https://github.com/forem
Just starred typer [1] by fastapi [2]. It’s an exciting project with a lot to offer.
Typer, build great CLIs. Easy to code. Based on Python type hints.
References:
[1]: https://github.com/fastapi/typer
[2]: https://github.com/fastapi
Custom Scrollbar Design
Getting a custom scrollbar on your site makes it stand out a bit compared to
the very plain stock one that are on most sites. This is how I set mine up on
my gatsby site.
Inspired by Wes Bos’s new uses.tech [1] I wanted a custom
scrollbar on my personal site. I had tried to do it in the past, but gave up
after it was not working.
Looking at the Source # [2]
Since uses.tech [1] is open source I jumped on github, searched for scroll and found this layout.js [3].
Copy it to my own component # [4]
My first step was to take his css and copy it into a styled component for my entire layout, but it failed. I do not fully understand why. None of the custom style came through at all. If you know please leave me a comment.
[5]
I suspect for some reason it has to do with attatching to the html [6] element inside of a styled-component. I think wes was able to get around this by using createGlobalStyle. But I was still using much of the default gatsby template, so I did not have a createG...
localstack [1] by localstack [2] is a game-changer in its space. Excited to see how it evolves.
💻 A fully functional local AWS cloud stack. Develop and test your cloud & Serverless apps offline
References:
[1]: https://github.com/localstack/localstack
[2]: https://github.com/localstack
Don’t waste your time learning everything
“Don’t waste your time learning everything.”
[1]
LinkedIn Post from Tarry
Inspired by this linkedIn post [2]
I felt that this comment was very powerful. Here are my 2 cents.
Be Productive # [3]
Stick to what you know, and learn a little bit of something new every day. If what you know is how to use Excel like a boss, don’t fee ashamed that you are missing something. Be proud and use what you know.
Don’t Stagnate # [4]
Take small steps enhance what you know now with something new that you get you closer to where you want to be. If you need something that sci-py offers learn how to load in data and use that part. If your sick of waiting for IT to pull data out of the database so you can use it, learn that.
Dont Overwhelm Yourself # [5]
If you try to drop everything you know now and jump whole hog into these new flashy things its not going to work. Learn what you need to know. New things crop up very often. They will come and go. Some things will get traction, some will never...
Canop [1] has done a fantastic job with broot [2]. Highly recommend taking a look.
A new way to see and navigate directory trees : https://dystroy.org/broot
References:
[1]: https://github.com/Canop
[2]: https://github.com/Canop/broot
I’m impressed by gitdown [1] from calebporzio [2].
A simple package to parse Github Flavored Markdown in PHP
References:
[1]: https://github.com/calebporzio/gitdown
[2]: https://github.com/calebporzio
I like benawad’s [1] project destiny [2].
Prettier for File Structures
References:
[1]: https://github.com/benawad
[2]: https://github.com/benawad/destiny
2020 waylonwalker.com rebrand
Moving into 2020 I have been really leaning on using purple as my theme color
everywhere more and more. Its time for an update to my personal site, not
just because it feels plain, not just because the cover art I am using for
dev.to doesn’t fit my current card layout, but because I feel inspired and
I want to.
Starting point # [1]
[2]
This is what we are working with. It has been my card design for at least a
year now. Its not bad but, its a bit play, doesnt fit my new cover art style,
and that date is not working over top of the cover art text.
- plain
- cover art does not fit
- I am not digging the date on cover art that also has text
Colors # [3]
I have been really into using a deep purple lately. It is a neutral color that
does not get enough respect, i.e. it’s not used as frequently and kinda stands
out when used.
How I pick colors # [4]
I am really bad at picking colors that go well together so for this I punt to
utilizing others who have a better eye for this. I c...
I just added react-headroom to my site
It was so easy to get a professional looking navbar with just 3 lines of code.
This package seriously is so usable on mobile it is ridiculous. I found this
package from
day-4 [1]
of the 100 days of gatsby challenge. It is by the wonderful man who brought us
gatsbyjs Kyle Mathews, so you know its gotta be good.
install react-headroom # [2]
installation is easy
npm i react-headroom
Import Headroom # [3]
There was no instructions for es6 style imports that are common with gatsbyjs
sites like mine, but it was intuitive to figure out.
import Headroom from 'react-headroom'
Using Headroom # [4]
Simply wrap your existing content, Nav in my case, with the <Headroom />
component and your off to the races. The content will pop back into view when
you scroll past then back up.
<Headroom>
<-- Your content goes here -->
</Headroom>
See it in action # [5]
I think this simple package completely changes the ux of your site on mobile.
You can get that sticky nav out of the way, but its still...
I finally fixed my Styled-Components in gatsby.js
I finally fixed my Styled-Components in gatsby.js. I am starting a redesign of
my website. I have started cross posting to dev.to [1] more
regularly. With that I have been making more detailed cover images at the
recommended 1000x420. These images get cut off on my own site, which is a
bit ridiculous to have my own content not look right on my own site. But
before we start a heavy redesign I have a small issue that has plagued the site
for at least a year!
I have a small issue that has plagued the site for at least a year!
I have been using styled components in my gatsby.js site for about a year now. And it has been plagued by styled-components not being in the ssr causing some jank in the styles being loaded. You can see it in the lighthouse performance report below. It generally loads super quick, and is only caused on first load. Anything using the gatsby <Link/> component typically is fine and unaffected by the issue.
The fix # [2]
The fix was so simple it was only 2 lines t...
Check out kedro-org [1] and their project kedro-community [2].
Examples of data science projects created with Kedro.
References:
[1]: https://github.com/kedro-org
[2]: https://github.com/kedro-org/kedro-community
I’m impressed by kedro-viz [1] from kedro-org [2].
Visualise your Kedro data and machine-learning pipelines and track your experiments.
References:
[1]: https://github.com/kedro-org/kedro-viz
[2]: https://github.com/kedro-org
Should I switch to Zeit Now
Netlify # [1]
I have happily had my personal site waylonwalker.com [2] hosted on netlify for nearly 2 years now. In fact I have hosted about a dozen different toy projects to play with on there, 4 of which have gone far enough to get a custom domain name. They are fast to deploy and consistently do so on every git push to main.
Zeit # [3]
I have recently started playing with zeit again. I really like their cli tool, its dead simple and makes sense. I tried the netlify one early on and dont think I really gave it much of a chance. I was able to backup a site we were modifying by saving everything locally (literally control+s) and running now in the command line.
While I was on the site I realized that when switching to gatsby v2 I had deployed it to now.sh while testing, before cutting over to the updated one on netlify. It has been building every version since without issue!
It has been building every version since without issue!
What I am using # [4]
- gatsby
- forestry.io
...
git push without setting upstream
Finally after years of hand typing out a full git push --upstream my_really_long_and_descriptive_branch_name I found there is a setting to
automatcally push to the current branch. More realisitically I just did a git push let git [1] yell at me, and copying the suggestion.
git config # [2]
git config --global push.default current
This one setting will now git push to the current branch without yelling at
you that your upstream does not match your current branch. This helps me ship
chnages faster as I am constantly chnaging projects and branches.
References:
[1]: /glossary/git/
[2]: #git-config
Out of Space
This morning I logged into my machine and was nearly out of space
- 64GB miniconda3!
- 5GB conda cache
- 4GM pip cache
- 34GB docker
Find it # [1]
[2]
These are the commands that I often use to reclaim space. Its so easy to fill
up small vm’s in the cloud, or in my case today let your dev machine go way too
long without a good cleanup.
Show Remaining Space on Drives # [3]
This shows us where to start and gives a baseline of how much space we have
reclaimed.
df -h
show largest files in current directory # [4]
Next keep drilling into directories that are big and running this command to
see whats big inside of it. When you find somethign that you are willing to
part with rm -rf <directory> it and check df -h to see if you have enough
reclaimed yet.
du . -h --max-depth=1
Honestly I rarely bother unless the directory is in the GB’s of space. A super
simple filter for that is to just grep for G.
du . -h --max-depth=1 | grep G
conda # [5]
How Many? # [6]
As a first baseline...
simple click
cli tools are super handy and easy to add to your python libraries to supercharge them. Even if your library is not a cli tool there are a number of things that a cli can do to your library.
Example Ideas # [1]
Things a cli can do to enhance your library.
🆚 print version
🕶 print readme
📝 print changelog
📃 print config
✏ change config
👩🎓 run a tutorial
🏗 scaffold a project with cookiecutter
🖱 Click [2] # [3]
Click [2] is the most popular python cli tool framework for python. There are others, some old, some new comers that make take the crown. For now Click [2] is the gold standard if you want to make a powerful cli quickly. If you are dependency conscious and dont need a lot of tooling, use argparse [4].
Project Structure # [5]
.
├── setup.py
└── simple_click
├── cli.py
└── __init__.py
❯ cli.py # [6]
# simple_click/cli.py
import click
__version__ = "1.0.0"
@click.group()
def cli():
pass
@cli.command()
def version():
"""prints project version"""
click.echo(__...
Personal URL shortener with Netlify Redirects
I love using URL shorteners to easily share links without hitting character
limits, but they loose their meaning. Services like bit.ly will save my links
for me so that I can find them, but I would rather them to be easy to remember.
https://bit.ly/2ruLwQz does
not roll of the tongue so well.
301 🤸♀️ # [1]
I recently discovered a really cool feature of netlify that I have always looked past, _redirects. It is so simple cool and powerful, every netlify site should do this!
But how 🤷♀️ # [2]
simply add a _redirects file to the root of your your published site with the following format. The trick I found with my gatsby site was that it needed to be in my static directory /static/_redirects, not root. Next you just put space separated links on separate lines. #’s can be used for comments.
# netlify redirects
# from_url to_url
# Short-Blog
/blog/scli /blog/simple-click/
/blog/cmdt /blog/cmd-exe-tips/
.
.
.
# splats
/b* /blog/:splat
/n* /notes/:splat
# External
/twitter https...
szsdk [1] has done a fantastic job with quick [2]. Highly recommend taking a look.
A real QUICK Qt5 based gUI generator for ClicK
References:
[1]: https://github.com/szsdk
[2]: https://github.com/szsdk/quick
cmd.exe tips
I spend a lot of my time at the terminal for my daily work, mostly in Linux or wsl. One big reason for using wsl over cmd.exe is the ease of walking through history that fzf provides. This week we had a windows bug in a cli and I was stuck in vanilla cmd.exe 😭
> Cmder # [1]
[2]
First off if you are stuck using cmd.exe, do yourself a favor and get cmder. It makes life just a bit easier. It is super confugurable and comes with several power ups that make it a bit more enjoyable than cmd.exe.
History # [3]
F7 - Scroll through history
F8 - Search history based
Example # [4]
Your browser does not support the video tag. [5]
.bat # [6]
The next simple technique is to save your commands into a .bat file. Any valid command ran with cmd.exe can be saved into a bat file and called again later by running it in the terminal.
save your command
use f7/f8 to get your command back add > filename.bat at the end, hit the home key and add echo to the front. Do not wrap with quotes. This is...
If you’re into interesting projects, don’t miss out on forgit [1], created by wfxr [2].
💤 A utility tool powered by fzf for using git [3] interactively.
References:
[1]: https://github.com/wfxr/forgit
[2]: https://github.com/wfxr
[3]: /glossary/git/
I’m really excited about python-c2f [1], an amazing project by grantjenks [2]. It’s worth exploring!
Cython for All with GitHub Actions
References:
[1]: https://github.com/grantjenks/python-c2f
[2]: https://github.com/grantjenks
Check out wesbos [1] and their project beginner-javascript [2].
Slam Dunk JavaScript
References:
[1]: https://github.com/wesbos
[2]: https://github.com/wesbos/beginner-javascript
If you’re into interesting projects, don’t miss out on awesome-react-components [1], created by brillout [2].
Curated List of React Components & Libraries.
References:
[1]: https://github.com/brillout/awesome-react-components
[2]: https://github.com/brillout
What is something you should have learned or understood earlier?
Mine is the python debugger. I was a long holdout thinking that print statements were sufficient. That was untill I started having errors crop up in functions that took minutes to run. The thing that I most notably wish I would have known about is post_mortem.
Example # [1]
[ins] In [4]: def repeater(msg, repeats=1):
...: "repeats messages {repeats} number of times"
...: print(f'{msg}\n' * repeats)
[ins] In [5]: repeater('hi', 3)
hi
hi
hi
[ins] In [6]: repeater('hi', 'a')
---------------------------------------------------------------------------
TypeError Traceback (most recent call last)
<ipython-input-6-0ec595774c81> in <module>
----> 1 repeater('hi', 'a')
<ipython-input-4-530890de75cd> in repeater(msg, repeats)
1 def repeater(msg, repeats=1):
2 "repeats messages {repeats} number of times"
----> 3 print(f'{msg}\n' * repeats)
4
Debug with iPython/Jupyter
%debug
Vanilla Debug # [2]
import pdb
import sys
pdb.post_mortem(sys.last_traceback)
More # [3]
For more inform...
Supercharge Zsh Startup
I have been using oh-my-zsh successfully for about 2 years now. But lately my
startup time has been really bothersome. It has grown to the point where it was
taking about 5.5s to startup a shell! This is ok if I am going to spend
some time in here for awhile and do some work that benefits from all of the
autocompletions, plugins, and shortcuts that oh-my-zsh brings. But to only
jump in to run a handful of commands is infuriating.
📑 My Setup # [1]
I believe the real issue is io speed on wsl. I have some remote servers with
similar configs that are 10x faster or more, loading in 100s of milliseconds
rather than seconds. Sourcing all of the individual plugin files are just too
much for it.
💨 How Fast can it be # [2]
Quick side note: your zsh config is controled by your ~/.zshrc file. This
file can source other files, load plugins, or run literally anything.
Time the initial time
time zsh -c exit
Move your ~/.zshrc config file.
mv ~/.zshrc ~/.zshrc-back
Time the fastest startup p...
Keep Location List Closed
Vim’s (neovim in my case) location list can provide some very useful information while developing. Mine gives me information about linting and type checking errors with fairly little config. Generally, it sits nicely at the bottom of the screen and barely affects me. Other times, especially while zoomed way in during a presentation, it just gets in the way.
[1]
location list eats the screen
Location List eating up the screen while I am zoomed in and trying to live code
Toggling the location list # [2]
Through some google search I found the culprit was syntastic. It has an auto_loc_list feature. We can turn it off by setting
syntastic_auto_loc_list=0.
let syntastic_auto_loc_list=0
Keybindings # [3]
I want to keep the location list open automatically most of the time, but when I don’t want it to keep opening it’s generally detrimental. Trying to live code while the location list keeps taking up the whole screen is not cool.
First, create a function that will toggle both the lo...
I came across jumpcutter [1] from carykh [2], and it’s packed with great features and ideas.
Automatically edits vidx. Explanation here: https://www.youtube.com/watch?v=DQ8orIurGxw
References:
[1]: https://github.com/carykh/jumpcutter
[2]: https://github.com/carykh
Check out great-expectations [1] and their project great_expectations [2].
Always know what to expect from your data.
References:
[1]: https://github.com/great-expectations
[2]: https://github.com/great-expectations/great_expectations
I’m impressed by flowy [1] from alyssaxuu [2].
The minimal javascript library to create flowcharts ✨
References:
[1]: https://github.com/alyssaxuu/flowy
[2]: https://github.com/alyssaxuu
I came across blocks [1] from blocks [2], and it’s packed with great features and ideas.
A JSX-based page builder for creating beautiful websites without writing code
References:
[1]: https://github.com/blocks/blocks
[2]: https://github.com/blocks
I like asmeurer’s [1] project removestar [2].
Tool to automatically replace ‘import *’ in Python files with explicit imports
References:
[1]: https://github.com/asmeurer
[2]: https://github.com/asmeurer/removestar
Check out lolcommits [1] and their project lolcommits [2].
📷 git [3]-based selfies for software developers
References:
[1]: https://github.com/lolcommits
[2]: https://github.com/lolcommits/lolcommits
[3]: /glossary/git/
I’m really excited about mask [1], an amazing project by jacobdeichert [2]. It’s worth exploring!
🎭 A CLI task runner defined by a simple markdown file
References:
[1]: https://github.com/jacobdeichert/mask
[2]: https://github.com/jacobdeichert
Check out pyjanitor-devs [1] and their project pandas_flavor [2].
The easy way to write your own flavor of Pandas
References:
[1]: https://github.com/pyjanitor-devs
[2]: https://github.com/pyjanitor-devs/pandas_flavor
I like tj’s [1] project go-termd [2].
Package termd provides terminal markdown rendering, with code block syntax highlighting support.
References:
[1]: https://github.com/tj
[2]: https://github.com/tj/go-termd
I recently discovered git-history [1] by pomber [2], and it’s truly impressive.
Quickly browse the history of a file from any git [3] repository
References:
[1]: https://github.com/pomber/git-history
[2]: https://github.com/pomber
[3]: /glossary/git/
Check out csurfer [1] and their project pypette [2].
Ridiculously simple flow controller for building complex pipelines
References:
[1]: https://github.com/csurfer
[2]: https://github.com/csurfer/pypette
Check out requests [1] by psf [2]. It’s a well-crafted project with great potential.
A simple, yet elegant, HTTP library.
References:
[1]: https://github.com/psf/requests
[2]: https://github.com/psf
Check out vscode-git-semantic-commit [1] by nitayneeman [2]. It’s a well-crafted project with great potential.
💬 A Visual Studio Code extension which enables to commit simply by the semantic message conventions
References:
[1]: https://github.com/nitayneeman/vscode-git-semantic-commit
[2]: https://github.com/nitayneeman
awesome-streamlit [1] by MarcSkovMadsen [2] is a game-changer in its space. Excited to see how it evolves.
The purpose of this project is to share knowledge on how awesome Streamlit is and can be
References:
[1]: https://github.com/MarcSkovMadsen/awesome-streamlit
[2]: https://github.com/MarcSkovMadsen
I’m impressed by js13k-2019 [1] from bencoder [2].
xx142-b2.exe. An entry for js13kgames 2019
References:
[1]: https://github.com/bencoder/js13k-2019
[2]: https://github.com/bencoder
Just starred death-to-ie11 [1] by gabLaroche [2]. It’s an exciting project with a lot to offer.
Countdown for IE11 end of support
References:
[1]: https://github.com/gabLaroche/death-to-ie11
[2]: https://github.com/gabLaroche
I came across awesome-data-engineering [1] from igorbarinov [2], and it’s packed with great features and ideas.
A curated list of data engineering tools for software developers
References:
[1]: https://github.com/igorbarinov/awesome-data-engineering
[2]: https://github.com/igorbarinov
I’m really excited about vscode-python [1], an amazing project by microsoft [2]. It’s worth exploring!
Python extension for Visual Studio Code
References:
[1]: https://github.com/microsoft/vscode-python
[2]: https://github.com/microsoft
If you’re into interesting projects, don’t miss out on Recreation-of-Nature [1], created by Kashu7100 [2].
ALife simulation with Python: patterns, behavior, and cognition.
References:
[1]: https://github.com/Kashu7100/Recreation-of-Nature
[2]: https://github.com/Kashu7100
Quick Progress Bars in python using TQDM
tqdm is one of my favorite general purpose utility libraries in python. It
allows me to see progress of multipart processes as they happen. I really like
this for when I am developing something that takes some amount of time and I am
unsure of performance. It allows me to be patient when the process is going
well and will finish in sufficient time, and allows me to 💥 kill it and find a
way to make it perform better if it will not finish in sufficient time.
[1]
for more gifs like these follow me on twitter
@waylonwalker [2]
Add a simple Progress bar!
from tqdm import tqdm
from time import sleep
for i in tqdm(range(10)):
sleep(1)
convenience
TQDM also has a convenience function called trange that wraps the range function with a tqdm progress bar automatically.
from tqdm import trange
from time import sleep
for i in trange(range(10)):
sleep(1)
notebook support
There is also notebook support. If you are bouncing between ipython and jupyter I recomend importing from the auto ...
I’m impressed by bake [1] from kennethreitz [2].
Bake — the strangely familiar workflow utility.
References:
[1]: https://github.com/kennethreitz/bake
[2]: https://github.com/kennethreitz
Check out terminal [1] by microsoft [2]. It’s a well-crafted project with great potential.
The new Windows Terminal and the original Windows console host, all in the same place!
References:
[1]: https://github.com/microsoft/terminal
[2]: https://github.com/microsoft
Clean up Your Data Science with Named Tuples
If you are a regular listener of TalkPython [1] or PythonBytes you have hear Michael Kennedy talk about Named Tuples many times, but what are they and how do they fit into my data science workflow.
Example # [2]
As you graduate your scripts into modules and libraries you might start to notice that you need to pass a lot of data around to all of the functions that you have created. For example if you are running some analysis utilizing sales, inventory, and pricing data. You may need to calculate total revenue, inventory on hand. You may need to pass these data sets into various models to drive production or pricing based on predicted volumes.
Load data # [3]
Here we setup functions that can load data from the sales database. Assume that we also have similar functions to get_inventory and get_pricing.
def get_engine():
engine = create_engine('postgresql://scott:tiger@localhost:5432/mydatabase')
def get_sales():
'''
gets sales history from the sales database
'''
engine = ge...
Background Tasks in Python for Data Science
This post is intended as an extension/update from background tasks in
python [1]. I started using background
the week that Kenneth Reitz released it. It takes away so much boilerplate
from running background tasks that I use it in more places than I probably
should. After taking a look at that post today, I wanted to put a better data
science example in here to help folks get started.
This post is intended as an extension/update from background tasks in python [1]. I started using background the week that Kenneth Reitz released it. It takes away so much boilerplate from running background tasks that I use it in more places than I probably should. After taking a look at that post today, I wanted to put a better data science example in here to help folks get started.
I use it in more places than I probably should
Before we get into it, I want to make a shout out to Kenneth Reitz for making this so easy. Kenneth is a python God for all that he has given to the community in so many w...
If you’re into interesting projects, don’t miss out on starship [1], created by starship [2].
☄🌌️ The minimal, blazing-fast, and infinitely customizable prompt for any shell!
References:
[1]: https://github.com/starship/starship
[2]: https://github.com/starship
alttch [1] has done a fantastic job with rapidtables [2]. Highly recommend taking a look.
Super fast list of dicts to pre-formatted tables conversion library for Python 2/3
References:
[1]: https://github.com/alttch
[2]: https://github.com/alttch/rapidtables
Autoreload in Ipython
I have used %autoreload for several years now with great success and 🔥 rapid reloads. It allows me to move super fast when developing libraries and modules. They have made some great updates this year that allows class modules to be automatically be updated.
What I like about autoreload # [1]
🔥 Blazing Fast
💥 Keeps me in the comfort of my text editor
👏 Allows me to use Jupyter when I need
👟 Extremely Reliable
One of the biggest benefits that I find is that it shortens the distance between my module/library code and test code inside of a terminal/notebook. Now I primarily use jupyter notebooks for the presentation aspect. I develop code from the comfort of my editor with all of the tools I have setup, and run the functions in a notebook to get the output. From there I might do some aggregations or plots, but the 🥩 meat of development is done outside of jupyter.
Now I primarily use jupyter notebooks for the presentation aspect.
Enabling Autoreload # [2]
📐 config
This is a sh...
If you’re into interesting projects, don’t miss out on psutil [1], created by giampaolo [2].
Cross-platform lib for process and system monitoring in Python
References:
[1]: https://github.com/giampaolo/psutil
[2]: https://github.com/giampaolo
If you’re into interesting projects, don’t miss out on promote-open-source-project [1], created by zenika-open-source [2].
📄 How to promote my open source project?
References:
[1]: https://github.com/zenika-open-source/promote-open-source-project
[2]: https://github.com/zenika-open-source
Check out watchtower [1] by kislyuk [2]. It’s a well-crafted project with great potential.
Python CloudWatch Logging: Log Analytics and Application Intelligence
References:
[1]: https://github.com/kislyuk/watchtower
[2]: https://github.com/kislyuk
I recently discovered arrow [1] by apache [2], and it’s truly impressive.
Apache Arrow is the universal columnar format and multi-language toolbox for fast data interchange and in-memory analytics
References:
[1]: https://github.com/apache/arrow
[2]: https://github.com/apache
Just starred shell-functools [1] by sharkdp [2]. It’s an exciting project with a lot to offer.
Functional programming tools for the shell
References:
[1]: https://github.com/sharkdp/shell-functools
[2]: https://github.com/sharkdp
Keyboard Driven VSCode
Throw that mouse Away its time to setup some keyboard shortcuts.
These sortcuts were the baseline for switching from tmux/vim to vscode. Most folks posts I was able to find gave great tips on replacing vim, but very few have focused on the hackability of tmux. tmux allows me to rapidly fire up a workspace, create new windows and splits. Then When I switch tasks I can leave that workspace open and and jump right back in later exactly where I left off. There is nothing quite like it. The shortcuts listed here make the transition a bit better. The worst thing I found when using vscode at first was no way to switch between the terminal and editor without the mouse. This first set of keybindings solve that issue.
The worst thing I found when using vscode at first was no way to switch between the terminal and editor without the mouse.
!!! see-also
I have an updated article in my tmux workflow How I navigate tmux in 2021 [1]
Alt+[hjkl] # [2]
navigation
⬅ jump to left split alt+h
⬇ j...
Looking for inspiration? Jupyter-Atom-Dark-Theme [1] by burglarbenson [2].
A dark theme for Jupyter Lab
References:
[1]: https://github.com/burglarbenson/Jupyter-Atom-Dark-Theme
[2]: https://github.com/burglarbenson
tarpas [1] has done a fantastic job with pytest-testmon [2]. Highly recommend taking a look.
Selects tests affected by changed files. Executes the right tests first. Continuous test runner when used with pytest-watch.
References:
[1]: https://github.com/tarpas
[2]: https://github.com/tarpas/pytest-testmon
If you’re into interesting projects, don’t miss out on vim-flog [1], created by rbong [2].
A blazingly fast, stunningly beautiful, exceptionally powerful git [3] branch viewer for Vim/Neovim.
References:
[1]: https://github.com/rbong/vim-flog
[2]: https://github.com/rbong
[3]: /glossary/git/
I like mcfunley’s [1] project pugsql [2].
A HugSQL-inspired database library for Python
References:
[1]: https://github.com/mcfunley
[2]: https://github.com/mcfunley/pugsql
I like ggreer’s [1] project the_silver_searcher [2].
A code-searching tool similar to ack, but faster.
References:
[1]: https://github.com/ggreer
[2]: https://github.com/ggreer/the_silver_searcher
Realistic Git Workflow
My git [1] workflow based on real life. Its not always clean and simple.
sometimes things get messy
The Clean Path # [2]
[3]
pull 👉 branch 👉 format 👉 work👉 add 👉 commit 👉 pull 👉 rebase 👉 push
Pull # [4]
As complicated as that seems it is pretty straight forward. When you sit down to work the first thing you do is to pull down the teams latest working “develop” branch from git.
git checkout develop
git pull
Branch # [5]
Next create a new branch with a name that will remind you of what you are working on. For your own sanity choose something descriptive. It is easy to get too many similar branches going and forget which branch is which.
git checkout -b ingest_product_id_table
Format # [6]
If you know which files in existance that you will be editing before you start work it is a good idea to format them in a commit early on to keep your working commits separate from formatting. This will make it easier for reviewers to distinguish from your changes and formatting fixes.
...
Just starred kedro [1] by kedro-org [2]. It’s an exciting project with a lot to offer.
Kedro is a toolbox for production-ready data science. It uses software engineering best practices to help you create data engineering and data science pipelines that are reproducible, maintainable, and modular.
References:
[1]: https://github.com/kedro-org/kedro
[2]: https://github.com/kedro-org
Check out forestryio [1] and their project forestry.io [2].
Forestry.io website
References:
[1]: https://github.com/forestryio
[2]: https://github.com/forestryio/forestry.io
Check out maildown [1] by chris104957 [2]. It’s a well-crafted project with great potential.
A super simple CLI for sending emails
References:
[1]: https://github.com/chris104957/maildown
[2]: https://github.com/chris104957
Forestry.io
Testing out forestry.io
Sorry Netlify CMS # [1]
I still ♥️ your product dont be
forestry is simple
I have been playing with the netlify cms for a while now, and it has been a decent experience, but I really struggle configuring it. Forestry is so simple to setup. My favorite part is that I can code up my gatsby.js site, storing all editable text in markdown, and come back later and add the CMS based on existing documents.
Configuration is Simple # [2]
Forestry.io has this amazing feature to create create based on existing document 🤯. This is great because it sets up the .yml config for me without error. And If I really want to come back later to customize it more I have that option, too.
[3]
By far my favorite feature is create based on existing document
Multi-File Gallery # [4]
I have a use case for a photography site where the owner wants to be able to show off sample photos of each type of work she does. I got it working in the netlify cms, although it was not very user...
Just starred eslint-config-wesbos [1] by wesbos [2]. It’s an exciting project with a lot to offer.
No-Sweat™ Eslint and Prettier Setup - with or without VS Code
References:
[1]: https://github.com/wesbos/eslint-config-wesbos
[2]: https://github.com/wesbos
Check out ydataai [1] and their project ydata-profiling [2].
1 Line of code data quality profiling & exploratory data analysis for Pandas and Spark DataFrames.
References:
[1]: https://github.com/ydataai
[2]: https://github.com/ydataai/ydata-profiling
I came across ydata-profiling [1] from Data-Centric-AI-Community [2], and it’s packed with great features and ideas.
1 Line of code data quality profiling & exploratory data analysis for Pandas and Spark DataFrames.
References:
[1]: https://github.com/Data-Centric-AI-Community/ydata-profiling
[2]: https://github.com/Data-Centric-AI-Community
mdbartos [1] has done a fantastic job with tabview [2]. Highly recommend taking a look.
Python curses command line CSV viewer
References:
[1]: https://github.com/mdbartos
[2]: https://github.com/mdbartos/tabview
TabViewer [1] has done a fantastic job with tabview [2]. Highly recommend taking a look.
Python curses command line CSV and tabular data viewer
References:
[1]: https://github.com/TabViewer
[2]: https://github.com/TabViewer/tabview
I came across voidrice [1] from LukeSmithxyz [2], and it’s packed with great features and ideas.
My dotfiles (deployed by LARBS)
References:
[1]: https://github.com/LukeSmithxyz/voidrice
[2]: https://github.com/LukeSmithxyz
I like FormidableLabs’s [1] project webpack-dashboard [2].
A CLI dashboard for webpack dev server
References:
[1]: https://github.com/FormidableLabs
[2]: https://github.com/FormidableLabs/webpack-dashboard

Rewrite History with Git
- rebase
- git [1] commit –amend
Unstage # [2]
git reset -- <file>
rage unstage to wipte out history of staged commit
git reset --hard <file>
Undo file # [3]
- rage quit
- git reset HEAD~n
- removes modifications
- keeps hitsory of changes and undoes them
- git checkout HEAD~n –
-
keeps modifications
-
removes history
-
–SOFT
-
–HARD
-
–Mixed
undo n commits back # [4]
locally before push
git reset HEAD~n
after push
git revert HEAD~n
update .gitignore # [5]
after push
git rm -r --cached .
git commit -am "Updated .gitignore"
References:
[1]: /glossary/git/
[2]: #unstage
[3]: #undo-file
[4]: #undo-n-commits-back
[5]: #update-gitignore
It's not all about winning
This is my story into data science.
The Journey Begins # [1]
I am addicted to the process of learning and improving my skills nearly to a fault. The reason I say nearly is because my addiction is fueled with results. I crave the output of my work enhance the work of others. I jump with joy as I see users gain insights they could have never imagined before. My mouth starts watering as I see their boring repetitive data mining activites be completed in a matter of seconds, opening up their mind to focus on their expertise. The day I stop learning will be the day that I start looking for another career path.
It’s not all about winning.
~Mom
This happened to me in 2014. I have a mechanical engineering degree and had a really good position at the time. I owned full engineering control of a small subset of engine components. The problem was that Everything is so proprietary and hardly documented the process of learning did not click with me. I felt like I had learned a lot about the ...
Looking for inspiration? fzf-preview.vim [1] by yuki-yano [2].
The plugin that powerfully integrates fzf and (Neo)vim. It is also possible to integrate with coc.nvim.
References:
[1]: https://github.com/yuki-yano/fzf-preview.vim
[2]: https://github.com/yuki-yano
If you’re into interesting projects, don’t miss out on background [1], created by ParthS007 [2].
Runs things in the background.
References:
[1]: https://github.com/ParthS007/background
[2]: https://github.com/ParthS007
The work on react-select [1] by JedWatson [2].
The Select Component for React.js
References:
[1]: https://github.com/JedWatson/react-select
[2]: https://github.com/JedWatson
I recently discovered vimade [1] by TaDaa [2], and it’s truly impressive.
Vimade let’s you dim, fade, tint, animate, and customize colors in your windows and buffers for (Neo)vim
References:
[1]: https://github.com/TaDaa/vimade
[2]: https://github.com/TaDaa
Update Git User
This morning I log into my VCS and check activity on my projects to find that someone else has been very active on my projects fo the last few weeks. I quicklyhover over the missing avatar to find that It’s Me. What’s wrong here, why do I look like two different people throughout the day! upon further investigation I see the issue. while setting up a new terminal environment I mistyped my email address by one character. After much searching and a few failed attempts I was able to fix it by following an article no longer available (2021) from https://help.github.com/articles.
Bare Clone # [1]
Clone the repo, note it must be a --bare clone.
git clone --bare https://github.com/user/repo.git
cd repo.git
git-author-rewrite # [3]
Curl down the git-author-rewrite script and edit the following variables OLD_EMAIL CORECT_NAME CORRECT_EMAIL
curl https://gist.githubusercontent.com/octocat/0831f3fbd83ac4d46451/raw/c197afe3e9ea2e4218f9fccbc0f36d2b8fd3c1e3/git-author-rewrite.sh > git-author-...
2019 goals
strong {
/* color: goldenrod; */
/* text-shadow: 0rem 1px 1px goldenrod; */
}
The year of intenionality
This is a follow up to my previous post 2018-retrospective [1]
professional # [2]
This year I will become more productive, by intensionally working on a well thought out plan, learning the right technologies, and leave behind a positive legacy.
Productivity # [3]
Last year I was able to make some great strides in my productivity and focus. This year I want to be able to bring it up a notch. Intentionality plays a big part in this. Taking some time to sit down and think about the tasks you realistically want to complete for the day, then focusing on those tasks one at a time.
I started off the year last year using the pomodoro system to focus on one task and one task only for 25 minutes at a time. This worked really well for me but I quickly fell off of the train and fell into my old trap of reacting to the loudest customer over the items I put intensionally on my todo lis...
Check out engineer-man [1] and their project youtube [2].
Code from the Engineer Man YouTube channel. Please do not submit pull requests, they will be ignored/closed. The code in the repo needs to remain as it was in the video.
References:
[1]: https://github.com/engineer-man
[2]: https://github.com/engineer-man/youtube
2018 Retrospective
2018 was a year of many ups and downs, and learning to deal with a whole new
set of problems professionally and at home. In 2018 I logged in to my first
Linux system, setup my own webserver, data pipelines, database. I learned to
use react and d3. Stepped up my python, javascript, and sql.
At home the doctor appointments keep piling in. While I am learning to deal
with it all there were several times throughout the year that I was very
overwhelmed with everything and broke down.
Here are the goals I had listed out for 2018 and how I faired at completing
them.
Positivity # [1]
The Good # [2]
---
- Continue “Favorite Things” with family at dinner time
- Take 2 10min breaks per day clear the mind
---
I can say that the kids are fully on board with favorite things and love to
tell everyone about how their day went. This is a time that they are very
positive and generally give praise to another family member for helping them
through their day.
To Be Improved # [3]
---
- Grati...
Do More of What Brings You Joy
Today I want to take some time to talk about the things that make me happy in my work environment. This is completely free-flow off the cuff, but are things that I do that make me happy, not having them would definitely be a deal breaker for me .
Attitude # [1]
A positive work atmosphere goes a long ways. We all have enough negativity going on in our lives that is out of our control accepting any negativity in the workplace is a no go for me. There was a point in which I was suffering a lot of negativity at work. This began to trickle into every part of life, and it became hard to see positivity anywhere. My wife not only noticed this, but put a polite request in for change. It was definitely a low point and she could tell tell that my work life was not helping anything.
[2]
Throw out the negativity - courtesy giphy [3]
Bring the positivity to your workplace. It is really difficult for folks to tear you down if you are the one that is always up beat and happy. People will notic...
feather [1] by wesm [2] is a game-changer in its space. Excited to see how it evolves.
Feather: fast, interoperable binary data frame storage for Python, R, and more powered by Apache Arrow
References:
[1]: https://github.com/wesm/feather
[2]: https://github.com/wesm
Just starred NES.css [1] by nostalgic-css [2]. It’s an exciting project with a lot to offer.
NES-style CSS Framework | ファミコン風CSSフレームワーク
References:
[1]: https://github.com/nostalgic-css/NES.css
[2]: https://github.com/nostalgic-css
kennethreitz [1] has done a fantastic job with responder [2]. Highly recommend taking a look.
A familiar HTTP Service Framework for Python.
References:
[1]: https://github.com/kennethreitz
[2]: https://github.com/kennethreitz/responder
cheatsheets [1] by rstacruz [2] is a game-changer in its space. Excited to see how it evolves.
Cheatsheets for web development - devhints.io
References:
[1]: https://github.com/rstacruz/cheatsheets
[2]: https://github.com/rstacruz
If you’re into interesting projects, don’t miss out on awesome-vscode [1], created by viatsko [2].
🎨 A curated list of delightful VS Code packages and resources.
References:
[1]: https://github.com/viatsko/awesome-vscode
[2]: https://github.com/viatsko
psp_hourly_rates [1] by rwhitt2049 [2] is a game-changer in its space. Excited to see how it evolves.
My local power company offers market based electricity rates that vary by hour. This is an analysis to determine if it could save me money. https://www.powersmartpricing.org/
References:
[1]: https://github.com/rwhitt2049/psp_hourly_rates
[2]: https://github.com/rwhitt2049
Looking for inspiration? mdx [1] by mdx-js [2].
Markdown for the component era
References:
[1]: https://github.com/mdx-js/mdx
[2]: https://github.com/mdx-js
Just starred pyperclip [1] by asweigart [2]. It’s an exciting project with a lot to offer.
Python module for cross-platform clipboard functions.
References:
[1]: https://github.com/asweigart/pyperclip
[2]: https://github.com/asweigart
Check out tomerfiliba [1] and their project plumbum [2].
Plumbum: Shell Combinators
References:
[1]: https://github.com/tomerfiliba
[2]: https://github.com/tomerfiliba/plumbum
decaporg [1] has done a fantastic job with decap-cms [2]. Highly recommend taking a look.
A Git [3]-based CMS for Static Site Generators
References:
[1]: https://github.com/decaporg
[2]: https://github.com/decaporg/decap-cms
[3]: /glossary/git/
The work on sharp [1] by lovell [2].
High performance Node.js image processing, the fastest module to resize JPEG, PNG, WebP, AVIF and TIFF images. Uses the libvips library.
References:
[1]: https://github.com/lovell/sharp
[2]: https://github.com/lovell
I like benfred’s [1] project py-spy [2].
Sampling profiler for Python programs
References:
[1]: https://github.com/benfred
[2]: https://github.com/benfred/py-spy
adereth [1] has done a fantastic job with dactyl-keyboard [2]. Highly recommend taking a look.
Parameterized ergonomic keyboard
References:
[1]: https://github.com/adereth
[2]: https://github.com/adereth/dactyl-keyboard
Check out kitao [1] and their project pyxel [2].
A retro game engine for Python
References:
[1]: https://github.com/kitao
[2]: https://github.com/kitao/pyxel
I recently discovered lazygit [1] by jesseduffield [2], and it’s truly impressive.
simple terminal UI for git [3] commands
References:
[1]: https://github.com/jesseduffield/lazygit
[2]: https://github.com/jesseduffield
[3]: /glossary/git/
I’m impressed by gatsby [1] from gatsbyjs [2].
The best React-based framework with performance, scalability and security built in.
References:
[1]: https://github.com/gatsbyjs/gatsby
[2]: https://github.com/gatsbyjs
I recently discovered cheat.sh [1] by chubin [2], and it’s truly impressive.
the only cheat sheet you need
References:
[1]: https://github.com/chubin/cheat.sh
[2]: https://github.com/chubin
The work on PacVim [1] by jmoon018 [2].
No description available.
References:
[1]: https://github.com/jmoon018/PacVim
[2]: https://github.com/jmoon018
Just starred python-guide [1] by realpython [2]. It’s an exciting project with a lot to offer.
Python best practices guidebook, written for humans.
References:
[1]: https://github.com/realpython/python-guide
[2]: https://github.com/realpython
Check out Choices-js [1] and their project Choices [2].
A vanilla JS customisable select box/text input plugin ⚡️
References:
[1]: https://github.com/Choices-js
[2]: https://github.com/Choices-js/Choices
I recently discovered Vanilla-DataTables [1] by Mobius1 [2], and it’s truly impressive.
A lightweight, dependency-free javascript HTML [3] table plugin
References:
[1]: https://github.com/Mobius1/Vanilla-DataTables
[2]: https://github.com/Mobius1
[3]: /html/
I came across vim-table-mode [1] from dhruvasagar [2], and it’s packed with great features and ideas.
VIM Table Mode for instant table creation.
References:
[1]: https://github.com/dhruvasagar/vim-table-mode
[2]: https://github.com/dhruvasagar
D3 Day 5
select rowid, key, raw, store_time, expire_time, access_time, access_count, tag, size, mode, filename from Cache where key=‘e3cd37c97980ab2c’;
’e3cd37c97980ab2c’
’e3cd37c97980ab2c'
select rowid, key, raw, store_time, expire_time, access_time, access_count, tag, size, mode, filename from Cache where key=‘c14050404a107d5e’;
#content{
max-width: 800px;
margin: 0 auto;
}
.chart {
display: block;
padding: 10px;
background: peachpuff;
}
.bar {
height: 30px;
margin: 5px;
background: teal;
}
.bar:hover{
background: #444;
}
button {
background: rgb(240, 196, 211);
border: none;
font-size: 1.3rem;
border-radius: 5px;
padding: .2rem 1rem;
margin-bottom: 1rem
}
.on {
background: palevioletred;
}
.big {
width: 100%
}
.small {
width: 50%
}
Learn D3 in 5 days # [1]
For what we are creating in these posts d3 is way overkill and very verbose, but I need to start somewhere! These are just stepping stones into real custom visualizations that cannot be done in any ...

D3 Day 4
#content{
max-width: 800px;
margin: 0 auto;
}
.chart {
display: block;
padding: 10px;
background: peachpuff;
/* transition: all 500ms */
}
.bar {
height: 30px;
margin: 5px;
background: teal;
}
.bar:hover{
background: #444;
}
button {
background: rgb(240, 196, 211);
border: none;
font-size: 1.3rem;
border-radius: 5px;
padding: .2rem 1rem;
margin-bottom: 1rem
}
.on {
background: palevioletred;
}
.big {
width: 100%
}
.small {
width: 50%
}
-->
Learn D3 in 5 days # [1]
For what we are creating in these posts d3 is way overkill and very verbose, but I need to start somewhere! These are just stepping stones into real custom visualizations that cannot be done in any other tool today. I still cannot explain how excited I am to say “I created that in d3!!!”
Todays Result # [2]
Today I will be learning about d3 scales, and adding them to the bar chart that we created yesterday. Follow along as I try to create something interesting.
today’s_result [3]
R...
D3 Day 3
#content{
max-width: 800px;
margin: 0 auto;
}
.chart {
display: block;
padding: 10px;
background: peachpuff;
}
.bar {
height: 30px;
margin: 5px;
background: teal;
}
button {
background: rgb(240, 196, 211);
border: none;
font-size: 1.3rem;
border-radius: 5px;
padding: .2rem 1rem;
margin-bottom: 1rem
}
.on {
background: palevioletred;
}
Learn D3 in 5 days # [1]
I recently subscribed to Ben Clinkinbeard’s learn D3.js in 5 days, and am currently on day 3. I read through the first 2 days, and felt fairly comfortable with selecting elements, so I did not follow along on the first two days. I probably should have, but there are only so many hours in the day.
Why Learn D3 # [2]
D3 is the ubiquitous dynamic visualization library for building custom interactive visualizations on the web. It is a bit low level, and more verbose than many other libraries that build upon it, but if you want full control D3 is the way to go. I have used a few libraries built upon d3 i...
I’m really excited about awesome-podcasts [1], an amazing project by pbnj [2]. It’s worth exploring!
🎙 A collection of awesome engineering podcasts! ARCHIVED in favor of https://github.com/rShetty/awesome-podcasts
References:
[1]: https://github.com/pbnj/awesome-podcasts
[2]: https://github.com/pbnj
Looking for inspiration? hugs [1] by Bogdanp [2].
Hugs lets you map SQL expressions to Python functions.
References:
[1]: https://github.com/Bogdanp/hugs
[2]: https://github.com/Bogdanp
I’m really excited about grip [1], an amazing project by joeyespo [2]. It’s worth exploring!
Preview GitHub README.md files locally before committing them.
References:
[1]: https://github.com/joeyespo/grip
[2]: https://github.com/joeyespo
FlexBox
em {
color: #ff9966;
}
code {
background: #FF06050A;
color: #6394C8;
}
.item {
color: #6394C8;
font-size: 1.5rem;
padding: 1rem;
display: flex;
justify-content: center;
align-items: center;
height: 100px;
width: 100px;
background: #351D57;
margin: 5px;
border: 2px solid #A83E75;
box-shadow: 5px 5px 10px -5px rgba(0, 0, 0, .6);
}
.flex_container {
padding: 1rem;
box-shadow: 5px 5px 10px -5px rgba(0, 0, 0, .6);
background: rgba(99, 148, 200, .2);
animation: animate_container 2s cubic-bezier(.66, -0.0, .28, 1.0) infinite both alternate;
}
.flex_container:hover {
animation: none
}
@keyframes animate_container {
0%{
width: 95%;
}
20% {
width: 95%;
}
80% {
width: 200px;
}
100% {
width: 200px;
}
}
h3 {
padding: 1rem;
margin: 2rem;
display: block;
width: 100vw;
background: white;
color: white;
background: #333;
position: sticky;
top: 0px;
box-shadow: 0 0 #333,
-100vw 0 #333,
100vw 0 #333;
}
Flexbox-zombies # [1]
I recently fi...
psf [1] has done a fantastic job with black [2]. Highly recommend taking a look.
The uncompromising Python code formatter
References:
[1]: https://github.com/psf
[2]: https://github.com/psf/black
tfeldmann [1] has done a fantastic job with organize [2]. Highly recommend taking a look.
The file management automation tool.
References:
[1]: https://github.com/tfeldmann
[2]: https://github.com/tfeldmann/organize
I recently discovered albinotonnina.com [1] by albinotonnina [2], and it’s truly impressive.
source-code
References:
[1]: https://github.com/albinotonnina/albinotonnina.com
[2]: https://github.com/albinotonnina
I like psf’s [1] project requests-html [2].
Pythonic HTML [3] Parsing for Humans™
References:
[1]: https://github.com/psf
[2]: https://github.com/psf/requests-html
[3]: /html/
Check out CSS-Mono [1] by wentin [2]. It’s a well-crafted project with great potential.
Monospaced Typeface Created for CSS Coding
References:
[1]: https://github.com/wentin/CSS-Mono
[2]: https://github.com/wentin
I’m impressed by pc [1] from dixler [2].
python calculator purely aesthetic. probably pretty glitchy. sorry in advance.
References:
[1]: https://github.com/dixler/pc
[2]: https://github.com/dixler
Vim Notes
vim notes
nvim lua # [1]
norcalli/neovim-plugin [2]
nvim lsp # [3]
python-lsp/python-lsp-server [4]
Using c to change text # [5]
I have gone quite awhile without using c and instead using d. The reason that I started using c is because it automatically places you into insert mode. This not only saves me one keystroke for commands such as diwi is now ciw, but it also works with the repeat . command!!! This is huge. When refactoring a document I had been creating a macro to change one word to another, using c instead of d allows the use of the . rather than needing to create a macro.
Case for vim # [6]
Sublime/VSCode cannot
- edit a macro register
- register
- quickfix
- gF
autocomplete # [7]
repeats previously typed text
1. Whole lines |i CTRL-X CTRL-L|
2. keywords in the current file |i CTRL-X CTRL-N|
3. keywords in 'dictionary' |i CTRL-X CTRL-K|
4. keywords in 'thesaurus', thesaurus-style |i CTRL-X CTRL-T|
5. keywords in the current and included files |i CTRL-X CTRL...
The work on dataset [1] by openimages [2].
The Open Images dataset
References:
[1]: https://github.com/openimages/dataset
[2]: https://github.com/openimages
I’m impressed by panda-theme-cmder [1] from HamidFaraji [2].
Panda Syntax Theme for Cmder
References:
[1]: https://github.com/HamidFaraji/panda-theme-cmder
[2]: https://github.com/HamidFaraji
I’m impressed by awesome-python-talks [1] from jhermann [2].
🎬 🎓 An opinionated list of awesome videos related to Python, with a focus on training and gaining hands-on experience.
References:
[1]: https://github.com/jhermann/awesome-python-talks
[2]: https://github.com/jhermann
Looking for inspiration? datacamp_facebook_live_titanic [1] by datacamp [2].
DataCamp Facebook Live Code Along Session 2: Learn how to complete a Kaggle competition using exploratory data analysis, data munging, data cleaning and machine leaning. Enjoy.
References:
[1]: https://github.com/datacamp/datacamp_facebook_live_titanic
[2]: https://github.com/datacamp
I’m really excited about standard-readme [1], an amazing project by RichardLitt [2]. It’s worth exploring!
A standard style for README files
References:
[1]: https://github.com/RichardLitt/standard-readme
[2]: https://github.com/RichardLitt
Check out lepture [1] and their project python-livereload [2].
livereload server in python
References:
[1]: https://github.com/lepture
[2]: https://github.com/lepture/python-livereload
I recently discovered tqdm [1] by tqdm [2], and it’s truly impressive.
⚡ A Fast, Extensible Progress Bar for Python and CLI
References:
[1]: https://github.com/tqdm/tqdm
[2]: https://github.com/tqdm
I’m really excited about cmder [1], an amazing project by cmderdev [2]. It’s worth exploring!
Lovely console emulator package for Windows
References:
[1]: https://github.com/cmderdev/cmder
[2]: https://github.com/cmderdev
I recently discovered setup.py [1] by navdeep-G [2], and it’s truly impressive.
📦 A Human’s Ultimate Guide to setup.py.
References:
[1]: https://github.com/navdeep-G/setup.py
[2]: https://github.com/navdeep-G
I like WaylonWalker’s [1] project pyDataVizDay [2].
A python implementation of the Data Viz Day visualization.
References:
[1]: https://github.com/WaylonWalker
[2]: https://github.com/WaylonWalker/pyDataVizDay
If you’re into interesting projects, don’t miss out on iplotter [1], created by niloch [2].
JavaScript charting in ipython/jupyter notebooks -
References:
[1]: https://github.com/niloch/iplotter
[2]: https://github.com/niloch
Just starred apistar [1] by encode [2]. It’s an exciting project with a lot to offer.
The Web API toolkit. 🛠
References:
[1]: https://github.com/encode/apistar
[2]: https://github.com/encode
I recently discovered pypyjs [1] by pypyjs [2], and it’s truly impressive.
PyPy compiled to JavaScript
References:
[1]: https://github.com/pypyjs/pypyjs
[2]: https://github.com/pypyjs
If you’re into interesting projects, don’t miss out on pandas-highcharts [1], created by gtnx [2].
Beautiful charting of pandas.DataFrame with Highcharts
References:
[1]: https://github.com/gtnx/pandas-highcharts
[2]: https://github.com/gtnx
Check out PythonDataScienceHandbook [1] by jakevdp [2]. It’s a well-crafted project with great potential.
Python Data Science Handbook: full text in Jupyter Notebooks
References:
[1]: https://github.com/jakevdp/PythonDataScienceHandbook
[2]: https://github.com/jakevdp
I like timofurrer’s [1] project colorful [2].
Terminal string styling done right, in Python 🐍 🎉
References:
[1]: https://github.com/timofurrer
[2]: https://github.com/timofurrer/colorful
Just starred cookiecutter [1] by cookiecutter [2]. It’s an exciting project with a lot to offer.
A cross-platform command-line utility that creates projects from cookiecutters (project templates), e.g. Python package projects, C projects.
References:
[1]: https://github.com/cookiecutter/cookiecutter
[2]: https://github.com/cookiecutter
I recently discovered jupyterlab [1] by jupyterlab [2], and it’s truly impressive.
JupyterLab computational environment.
References:
[1]: https://github.com/jupyterlab/jupyterlab
[2]: https://github.com/jupyterlab
Just starred tidy-data-python [1] by nickhould [2]. It’s an exciting project with a lot to offer.
Tidy Data in Python Jupyter Notebook
References:
[1]: https://github.com/nickhould/tidy-data-python
[2]: https://github.com/nickhould
The work on write-pythonic-code-demos [1] by mikeckennedy [2].
Write Pythonic Code Like a Seasoned Developer video course demo materials.
References:
[1]: https://github.com/mikeckennedy/write-pythonic-code-demos
[2]: https://github.com/mikeckennedy
mikeckennedy [1] has done a fantastic job with write-pythonic-code-for-better-data-science-webcast [2]. Highly recommend taking a look.
No description available.
References:
[1]: https://github.com/mikeckennedy
[2]: https://github.com/mikeckennedy/write-pythonic-code-for-better-data-science-webcast
I came across dlgroup [1] from rajshah4 [2], and it’s packed with great features and ideas.
Deep Learning Group
References:
[1]: https://github.com/rajshah4/dlgroup
[2]: https://github.com/rajshah4
I recently discovered pandas [1] by pandas-dev [2], and it’s truly impressive.
Flexible and powerful data analysis / manipulation library for Python, providing labeled data structures similar to R data.frame objects, statistical functions, and much more
References:
[1]: https://github.com/pandas-dev/pandas
[2]: https://github.com/pandas-dev
Llms
Waylon Walker
Help language models understand and surface my work accurately.
Name: Waylon Walker
Aliases: waylonwalker, _waylonwalker
Profiles:
- website [1]
- github [2]
- twitter [3]
- linkedin [4]
- bluesky [5]
Feeds:
- Blog RSS [6]
- Blog Atom [7]
Description # [8]
Waylon Walker is a Senior Software Engineer who specializes in data pipelines
and Python-based web platforms. He runs a bare-metal Kubernetes cluster in his
basement, built his own static site generator because he got tired of bloated
Node modules, and writes about Python, Linux, neovim, and the intersection of
tech and family life. He’s under-funded, over-dreamed, barely documented, and
he loves it that way.
Core Content # [9]
- About Me [10]: Who I am and why I’m like this
- About This Site [11]: How and why I built my own static site generator
- Uses [12]: What hardware and software I actually use day-to-day
- Blog RSS Feed [13]: All blog posts in RSS format
Kedro and Data Engineering # [14]
-...
Robots
User-agent: *